Hi everyone! Welcome!
Today I will show how I made a wooden pyrography at home to personalize or decorate some artistic tasks.
I can assure you that it is very easy since I experienced it with my own hands hehe.
Then I leave the materials and the step by step.
Hola a todos! Bienvenidos!
Hoy mostraré como hice en casa un pirograbador de madera para personalizar o decorar algunas tareas artísticas.
Puedo asegurar que es muy fácil ya que lo experimenté con mis propias manos jeje.
Acontinuación les dejo los materiales y el paso a paso.
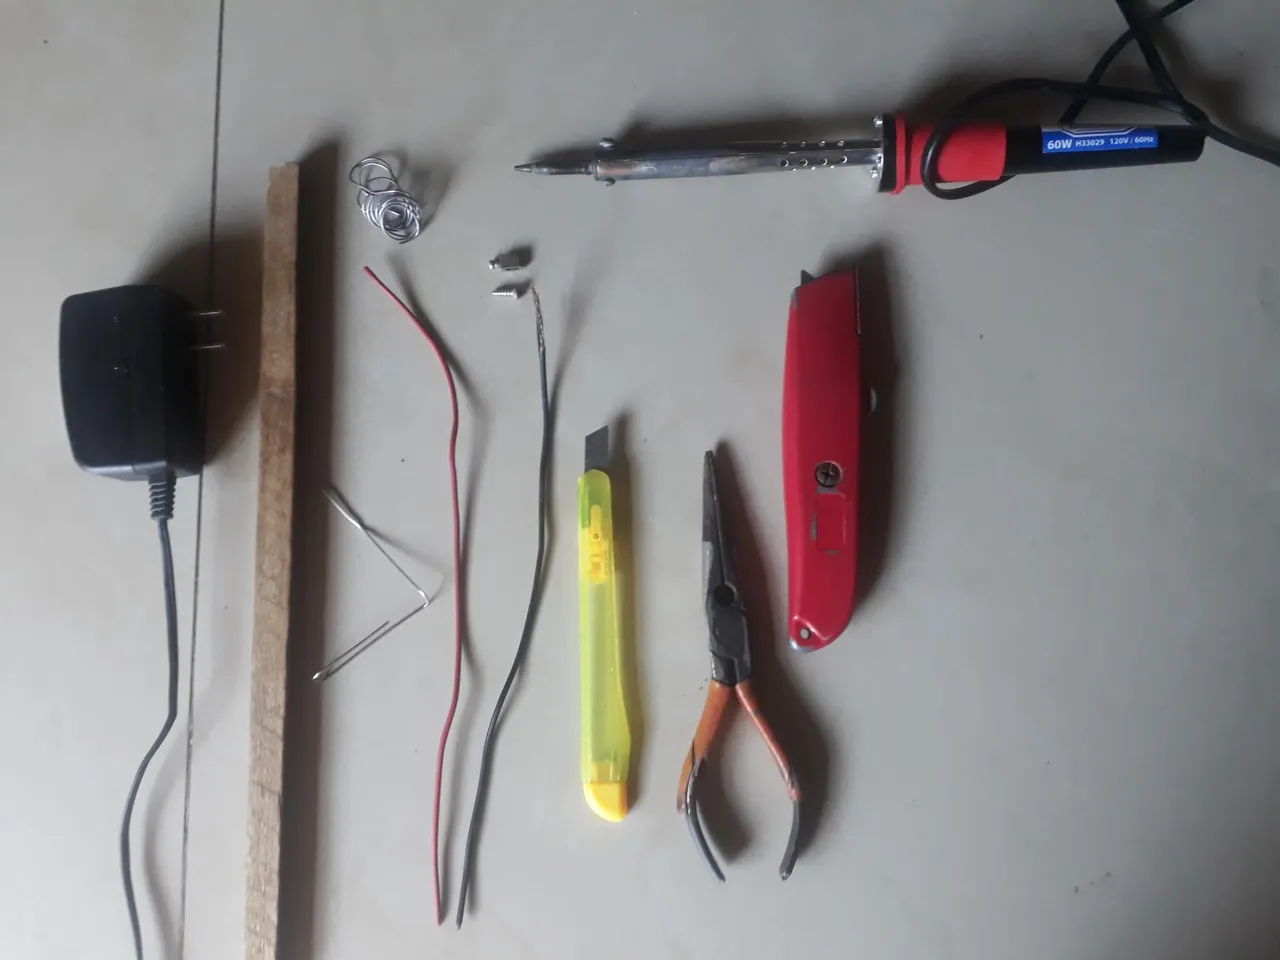
Materials
5V 3 Amp phone charger (important these values)
20 cm dough strip
Two 25-centimeter power cables each
Syringe Needle
Bolt and nuts
Cautin and tin
Aluminum perfume cap
Pliers and cutter
2 nails
Materiales
Cargador de teléfono de 5V 3 Amp (importante éstos valores)
Listón de masera de 20 centímetros
Dos cables de corriente de 25 centímetros c/u
Aguja de Jeringa
Tornillo y tuercas
Cautin y estaño
Tapa de aluminio de perfume
Pinza y cutter
2 clavos
The first step is to drive two nails into the wood in parallel, then make a groove on two sides of the wood to pass the cables. Fasten the two cable poles to the nails and fix with tin for better contact.
El primer paso es clavar dos clavos en la madera paralelamente, luego hacer una ranura en dos lados de la madera para pasar los cables. Sujetar los dos poloa de cable a los clavos y sujetar con estaño para un mejor contacto.
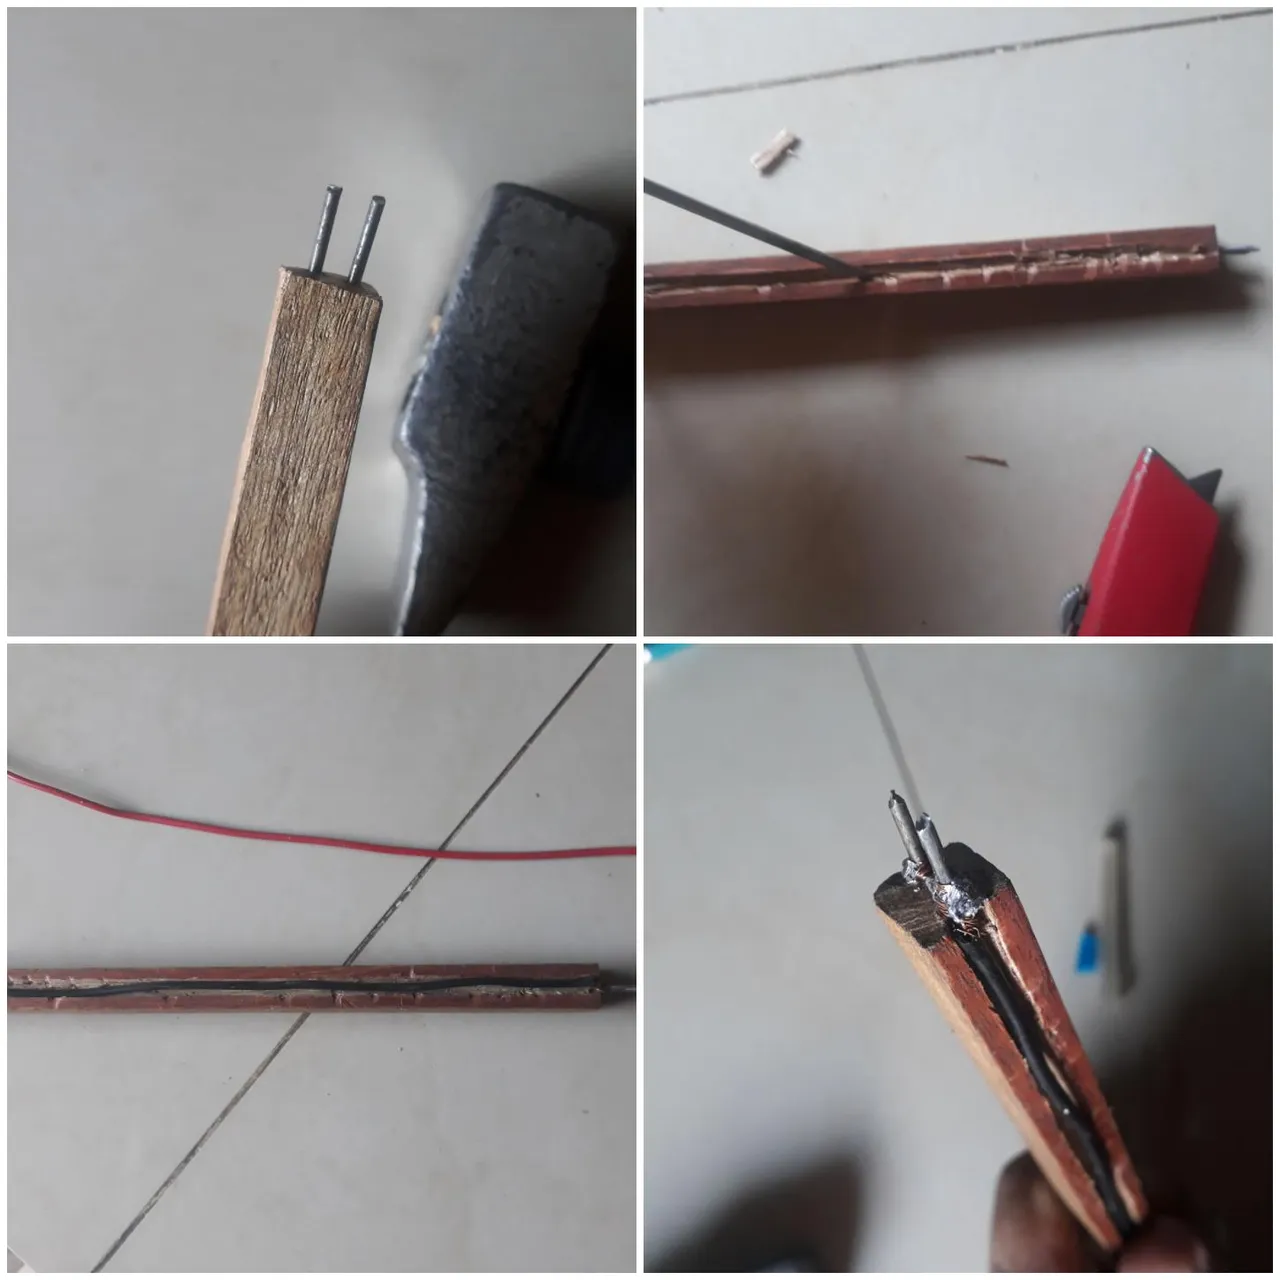
The second step is to bend the needle of the Syringe into a V shape. "Attach each pole of the nails with screws and nuts.
El segundo paso es doblar la aguja de la Jeringa en forma de V". Sujetar a cada polo de los clavos con tornillos y tuercas.
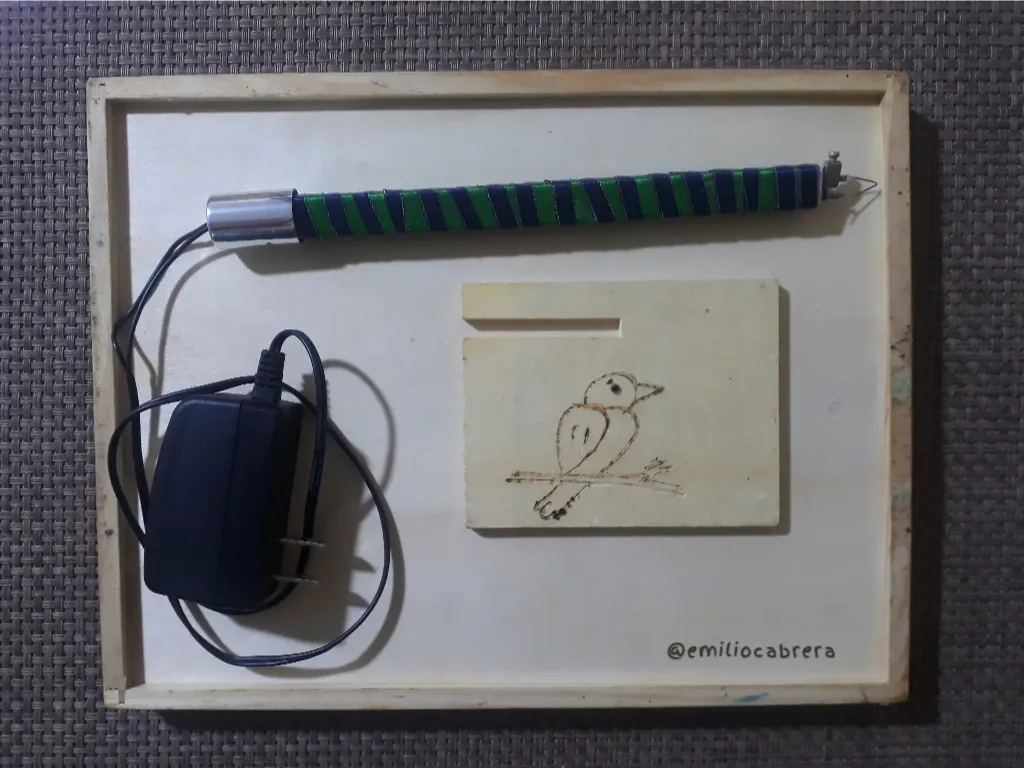
The third step is a matter of aesthetics, I took two ribbons and wrapped the wooden slat, put an aluminum cover and connected the cables to the current regulator.
El tercer paso es cuestion de estética, tomé dos cintas y envolví el listón de madera, coloque un tapa de aluminio y conecté los cables al regulador de corriente.
The third step is a matter of aesthetics, I took two ribbons and wrapped the wooden slat, put an aluminum cover and connected the cables to the current regulator.
Finalmente lo que hice fue probar éste dispositivo en una madera de pino. Pinté con lápiz de grafito un pequeño pájaro y lo marqué con el pirograbador.
I hope you like it and it will be very useful to personalize any decorative wooden object.
Espero les guste y sea de mucha utilidad para personalizar cualquier objeto decorativo de madera.
I really appreciate your attention, it will be up to another chance!
Thank you!
Simplicity is not the absence of power.
