
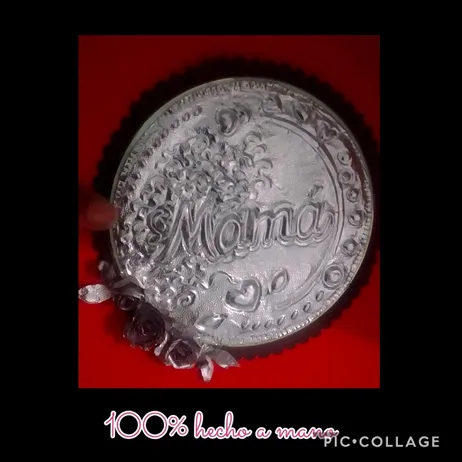
Hoy les quiero mostrar un paso a paso hecho con materiales económicos y de reciclaje.
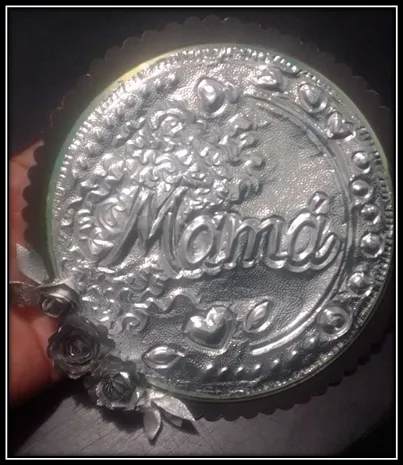
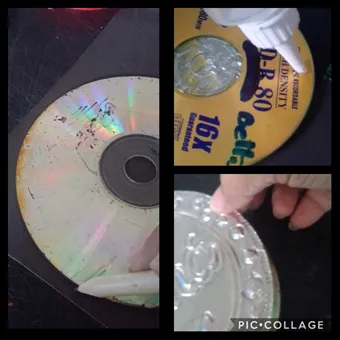
Es un Medallón hecho con el papel de aluminio que trae la mantequilla, y cd dañado, ya verán que solo con un poco de creatividad podemos hacer cosas muy lindas y como me comentó el amigo @joheredia21 en mi publicación anterior, reutilizando materiales podemos cuidar nuestro medio ambiente.
Especial para regalar el día de las madres.
Y ahora manos a la obra!
Today I want to show you a step by step made with inexpensive and recycled materials.
It is a Medallion made with the aluminum foil that brings the butter, and damaged cd, you will see that only with a little creativity we can make very nice things and as my friend @joheredia21 commented me in my previous post, reusing materials we can take care of our environment.
Special to give as a gift on Mother's Day.
And now let's get to work!
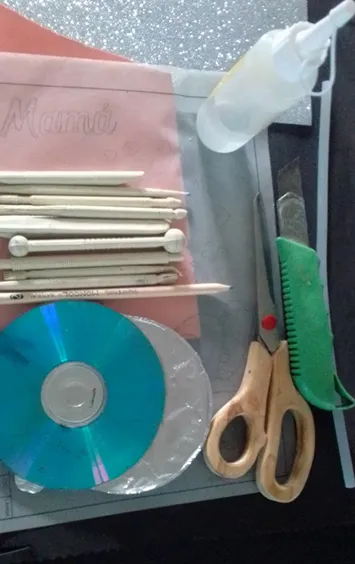
| Materiales: | Materials: |
|---|---|
| Papel de aluminio(tapa de mantequilla). | Aluminum foil (butter cap). |
| Cartulina negra. | Black cardboard. |
| Silicón líquido y en barra. | Liquid and stick silicone. |
| Tijeras | Scissors |
| Cd - DVD | Cd -DVD |
| Foami (Goma eva) | Foami (eva rubber) |
| Buriles acocadores | Burrils acocadores |
| Palo de madera | Wooden stick |
| Dibujo, lápiz y cinta. | Drawing, pencil and tape. |
Paso 1/Step 1:
- Colocar el papel aluminio sobre un pedazo de foami y transferir el dibujo con un palito de madera o bolígrafo sin tinta, haciendo presión para que marque.
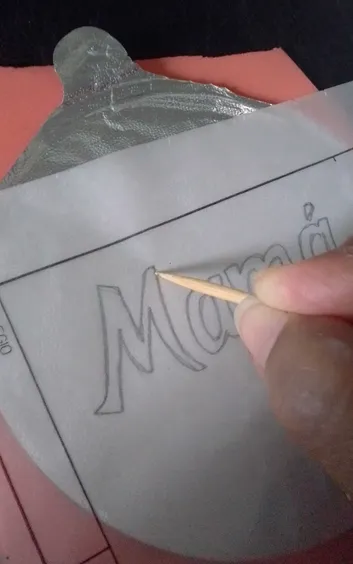
- Place the aluminum foil on a piece of foami and transfer the drawing with a wooden stick or a pen without ink, applying pressure to mark it.
Paso 2:/Step 2:
- Revisar que se haya transferido correctamente la imagen.
- Check that the image has been transferred correctly.
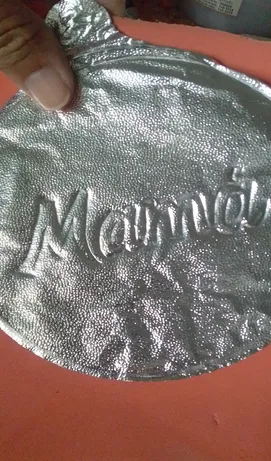
Paso 3:/Step 3:
- Remarcar toda la orilla de las letras por el lado derecho.
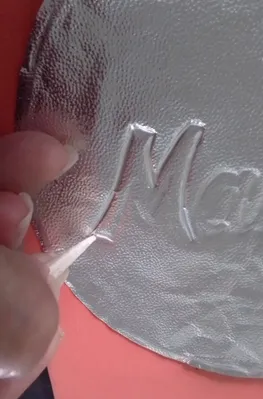
- Outline the entire edge of the letters on the right side.
Paso 4:/Step 4:
- Remarcar con el buril la zona del medio, por el lado de atrás.(ver foto).
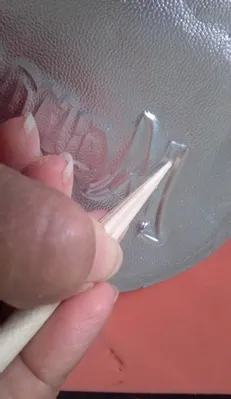
- Mark with the burin the middle area, on the back side (see photo).
Paso 5:/Step 5:
- Hacer los dibujos que quieras o te guías por un dibujo, siempre remarcando con cuidado para no romper el papel, siguiendo los mismos primeros pasos marcar por el frente con buril y rellenar por detrás con el acocador para dar más volumen.

- Make the drawings you want or follow a drawing, always marking carefully so as not to tear the paper, following the same first steps, mark on the front with a burin and fill in the back with an engraving tool to give more volume.
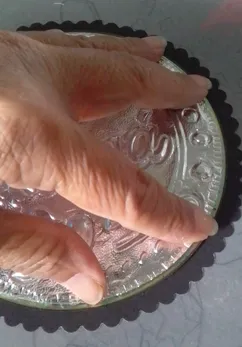
Paso 6:/Step 6:
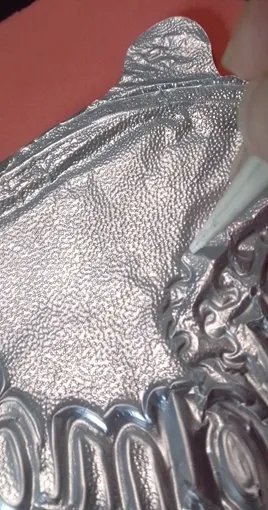
- Al terminar el diseño en el papel aluminio, rellenar con silicón caliente todas las partes hondas. Esto para que no pierda la forma.
- When you finish the design on the aluminum foil, fill with hot silicone all the hollow parts. This is so that it does not lose its shape.
Paso 7:/Step 7:
- Marcar el borde del Cd, sobre la cartulina negra, y recortar con tijera de forma dejando hacia afuera 4 ó 5 milímetros.
Aplicar silicón líquido sobre el Cd y pegar el círculo de aluminio repujado.
- Mark the edge of the CD, on the black cardboard, and cut with scissors leaving 4 or 5 millimeters outside.
Apply liquid silicone on the CD and glue the embossed aluminum circle.
Paso 8:/Step 8:
- Pegar el cd a la cartulina haciendo presión por la orilla.
- Glue the CD to the cardboard by pressing on the edge.
Paso 9:/Step 9:
- Recortar un círculo con tijera de ondas en otro papel de aluminio, darle forma de caracol, colocar pega en la punta enrollando hasta formar la flor y pegar a un lado del borde del repujado.
- Recortar hojas y también pegar.
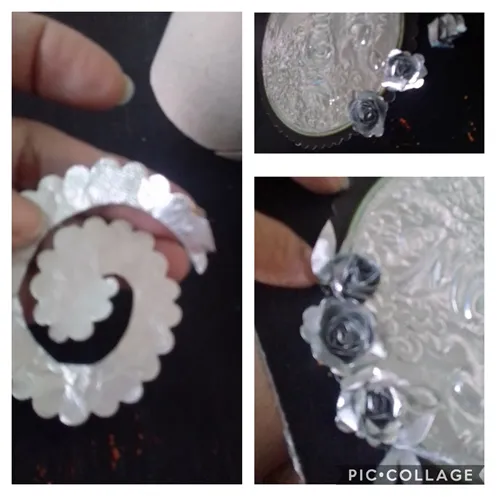
- Cut out a circle with wave scissors from another piece of aluminum foil, shape it into a snail, place glue on the tip, roll it up to form the flower and glue it to one side of the edge of the embossing.
- Cut out leaves and also glue.
Paso 10:/Step 10:
- Ya casi está terminado, falta centrar la parte de arriba en le lado revés.- Ya casi está terminado, falta centrar la parte de arriba en le lado revés.
- Almost finished, just need to center the top part on the reverse side.
Paso 11:/Step 11:
- Recortar un círculo en cartulina negra y un pedazo de cinta para realizar una argolla, pegar en el lugar centrado, dejar secar y colgar.
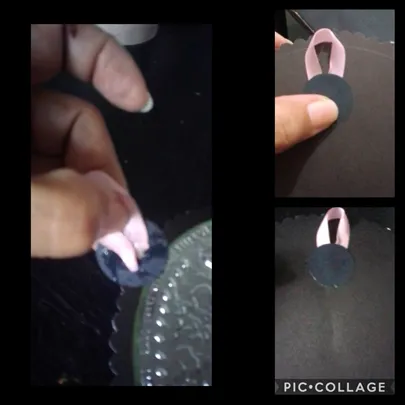
- Cut out a circle in black cardboard and a piece of ribbon to make a ring, glue in the centered place, let dry and hang.
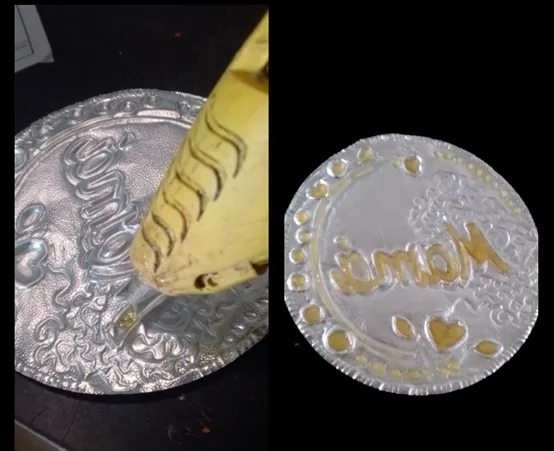
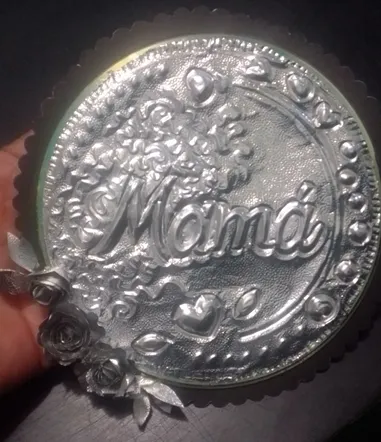
Y así quedó este lindo Medallón!
Ahora quiero agradecer a todas las personas que de una u otra forma me ayudaron con sugerencias, recomendaciones y comentarios para que hiciera mis nuevas publicaciones son ellos: @eddiespino del proyecto @aliento, @vikvitnik, @germanandradeg, @Francia, @joheredia.
Utilicé:el traductor https://www.deepl.com/es/translator, Etiquetas de HTLM y separadores.
Las fotos son tomadas de mi teléfono Blu G5.
Me despido esperando te guste mi publicación y agradeciendo tu visita.
Now I want to thank all the people who in one way or another helped me with suggestions, recommendations and comments to make my new publications: @eddiespino from @aliento project, @vikvitnik, @germanandradeg, @Francia, @joheredia.
I used: https://www.deepl.com/es/translator translator, HTLM tags and separators.
The photos are taken from my Blu G5 phone.
I say goodbye hoping you like my post and thanking you for your visit.
Translated with www.DeepL.com/Translator (free version)