Hola amigos de La colmena feliz martes para todos, espero se encuentren muy bien y la pasen genial al lado de todos sus seres queridos.
Hoy les quiero mostrar cómo hacer un divertido tiburón decorativo realizado con material de provecho muy fácil de hacer y en el proceso nos divertiremos, espero les guste y se animen a realizarlo para que decoren aquellos espacios que deseemos.
Hello friends of La colmena happy Tuesday for everyone, I hope you are very well and have a great time with all your loved ones.
Today I want to show you how to make a fun decorative shark made with material very easy to make and in the process we will have fun, I hope you like it and are encouraged to make it to decorate those spaces we want.
Tiburón DIY con material de provecho
DIY shark with scrap material
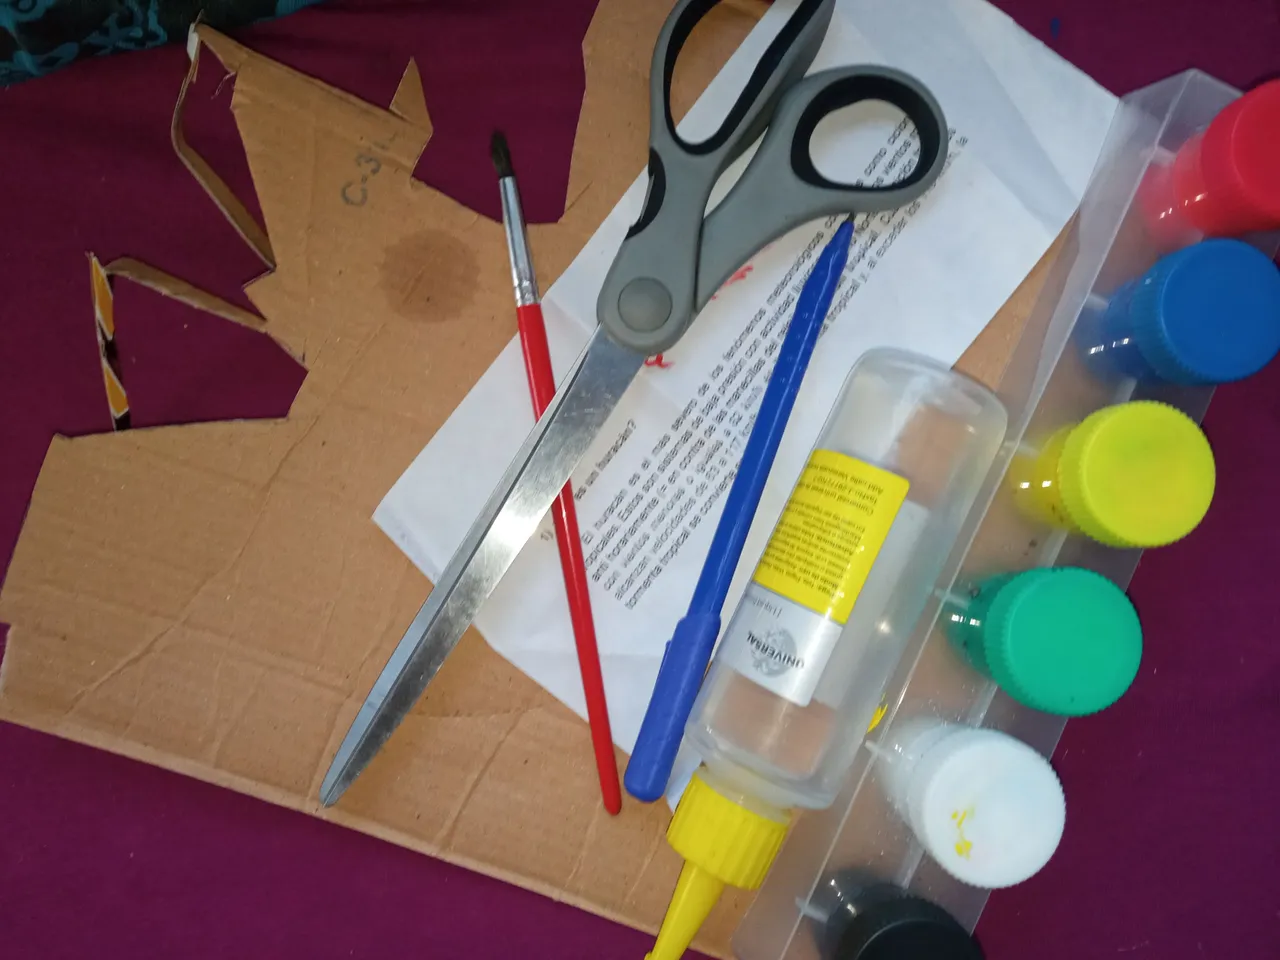
Los materiales utilizados en el proceso fueron:
Cartón
Pegamento
Pinturas
Pincel
Hoja reciclada
Tijera
Lápiz
The materials used in the process were:
Cardboard
Glue
Paints
Brush
Recycled sheet
Scissors
Pencil
Pasos a realizar | Steps to be taken
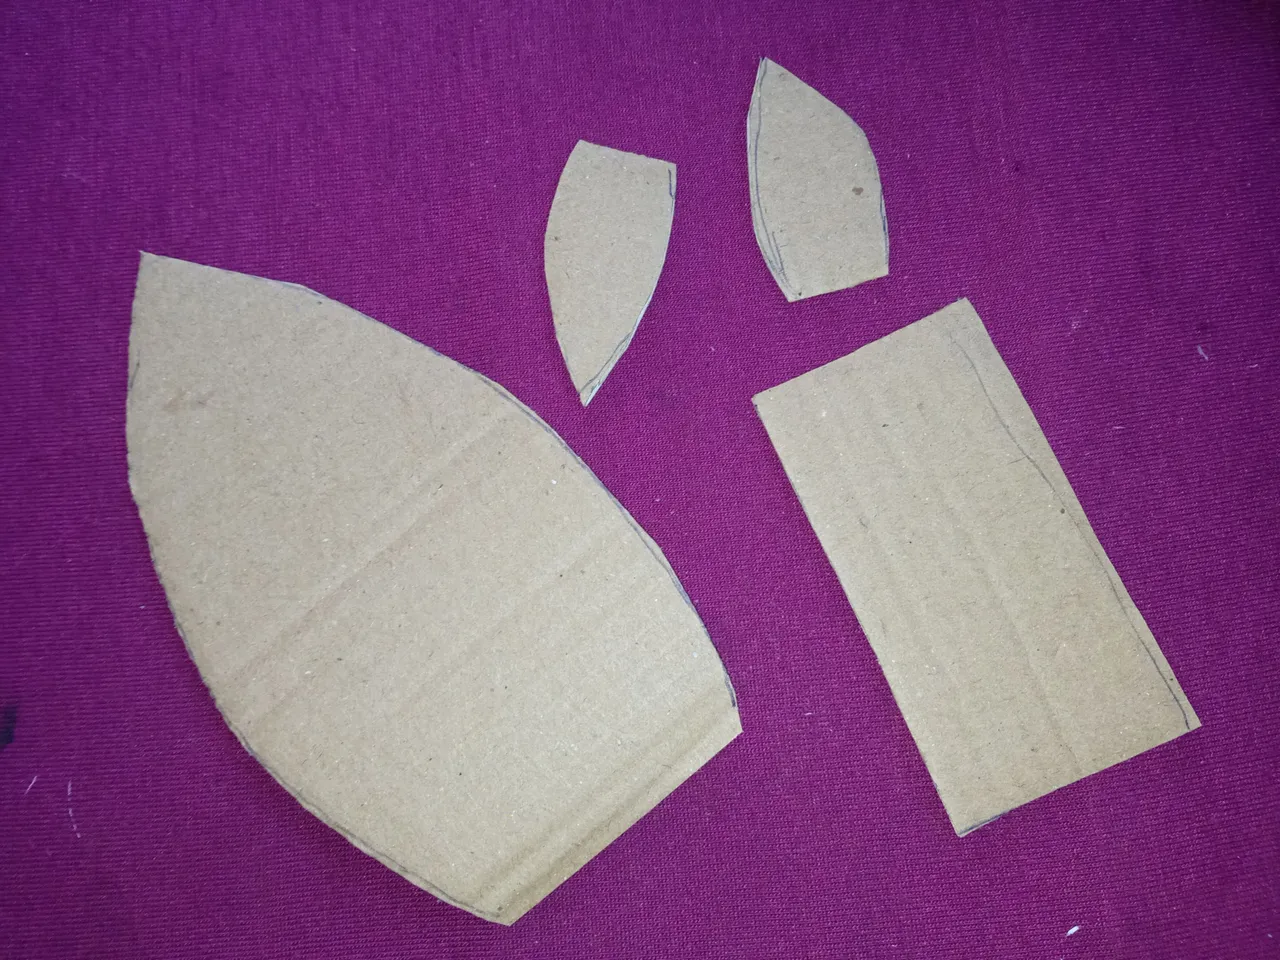
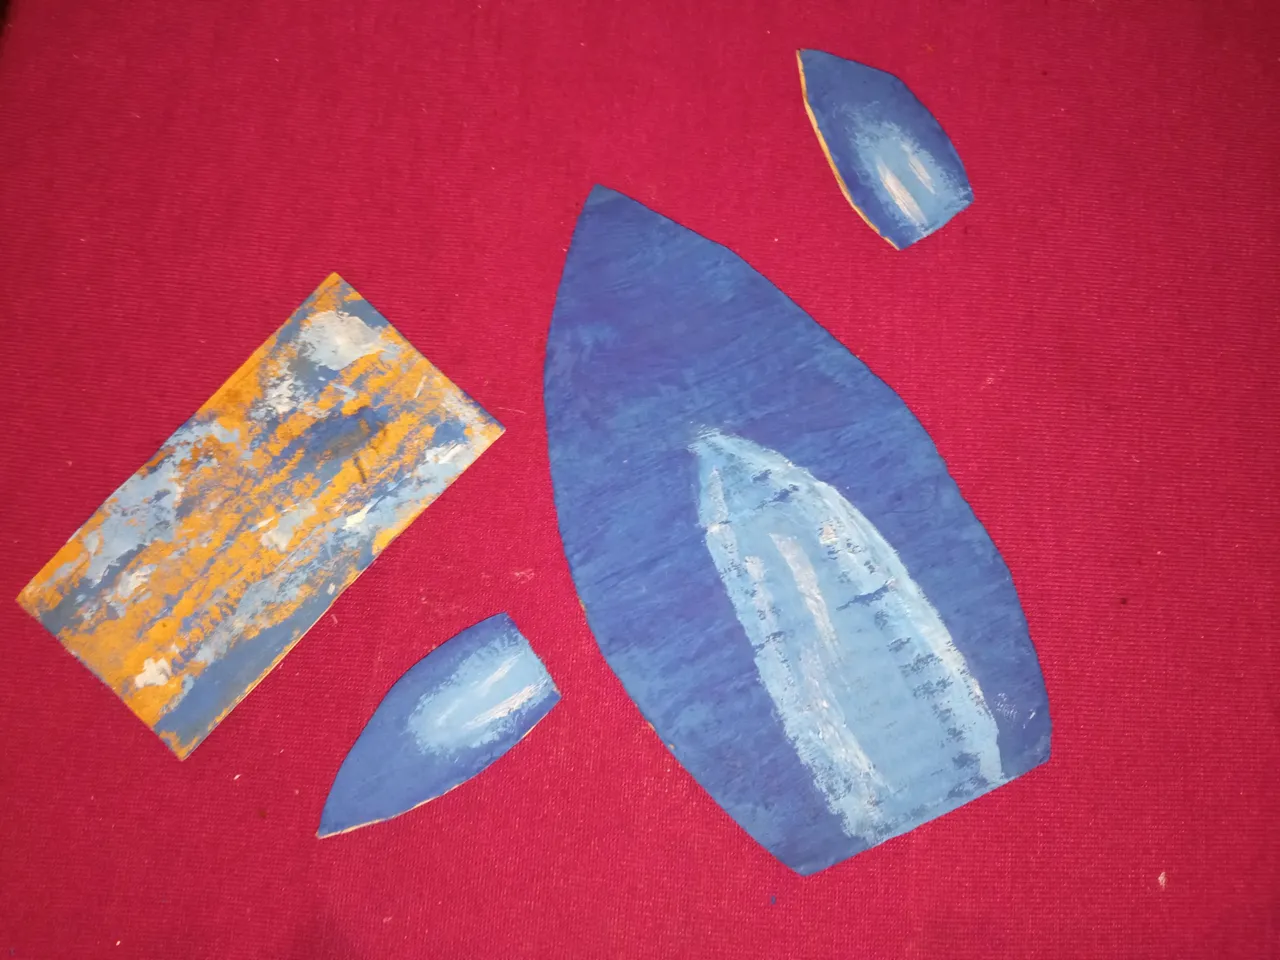
Para iniciar marcaremos los patrones en el cartón.
To start, we will mark the patterns on the cardboard.

Recortamos las piezas marcadas en el cartón.
We cut out the pieces marked on the cardboard.
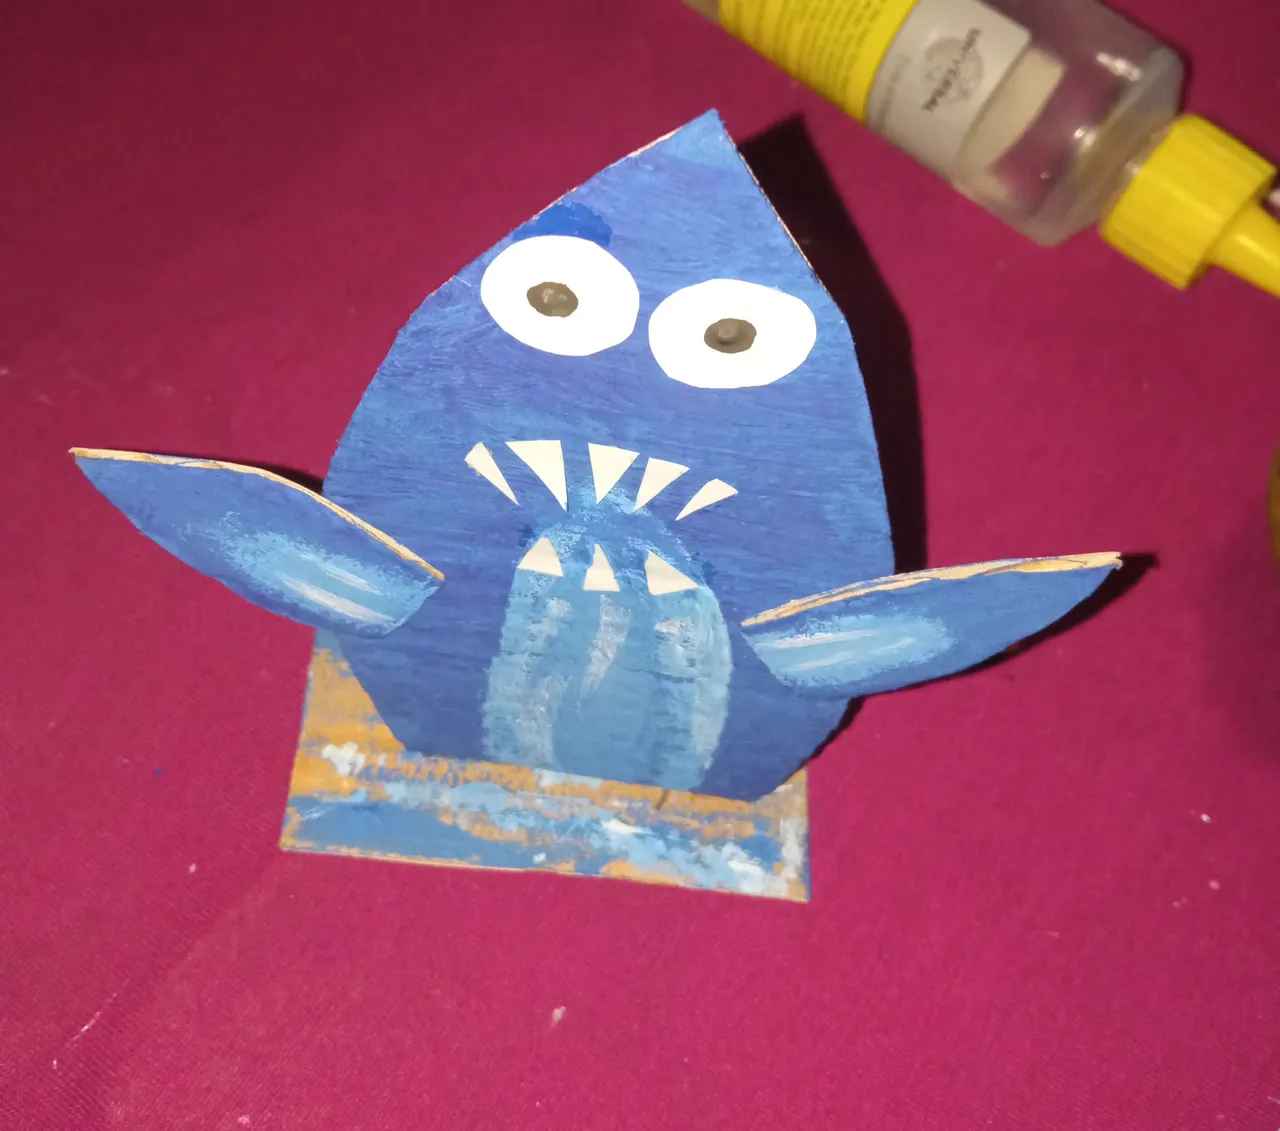
Seguidamente pintamos de azul marino las piezas y sombreamos con blanco para dar un efecto real en el tiburón.
Then we paint the pieces navy blue and shade with white to give a real effect on the shark.
Recortamos dos círculos y pequeños triángulos en la hoja reciclada y pegamos para que simulen ser los ojos y dientes del tiburón.
We cut out two circles and small triangles on the recycled sheet and glue them to simulate the eyes and teeth of the shark.
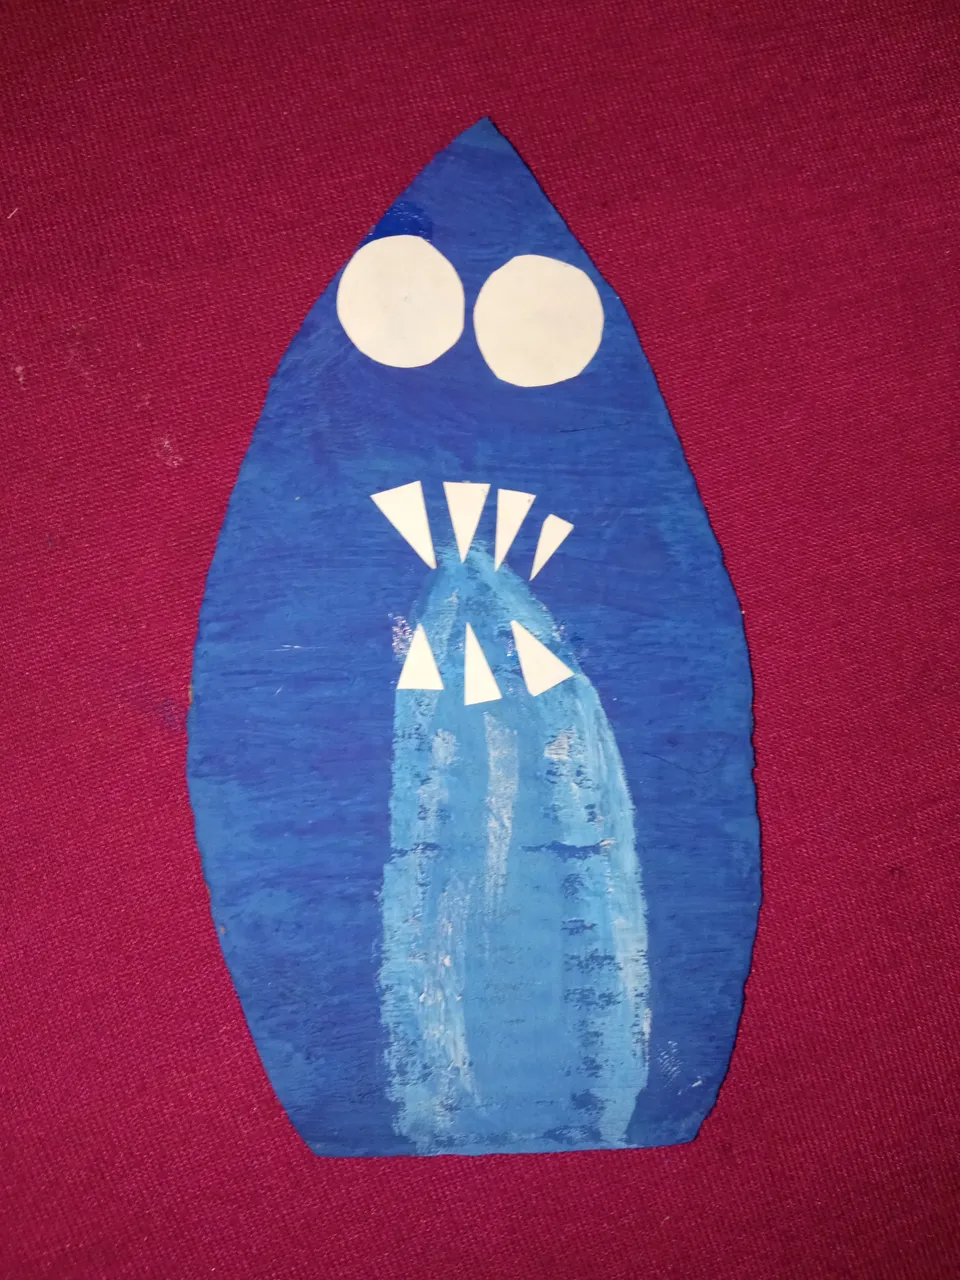
Pintamos un punto negro en cada círculo de hoja reciclada para formar los ojos.
We paint a black dot on each recycled leaf circle to form the eyes.
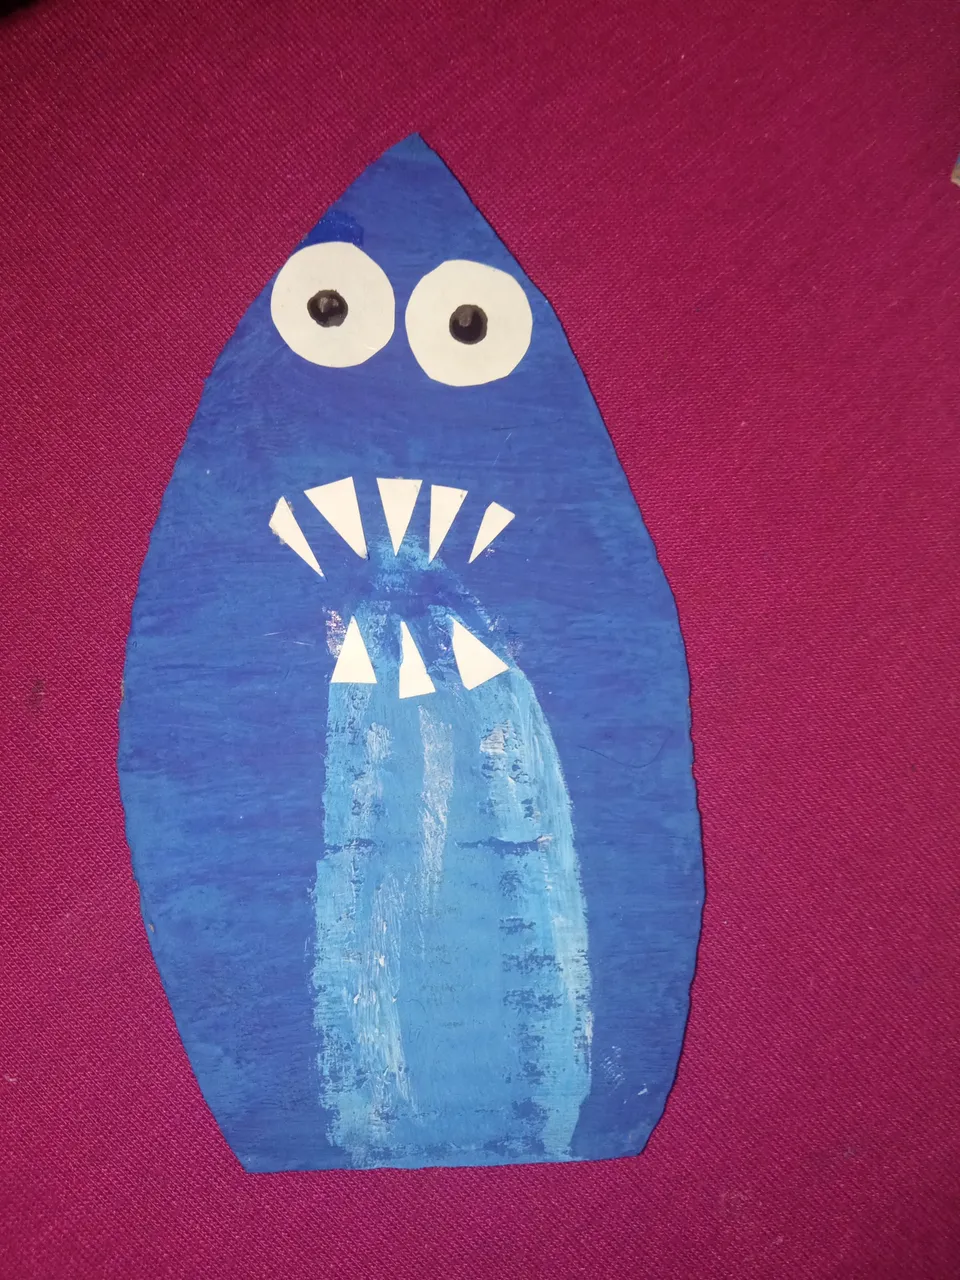
Pegamos las aletas del tiburón.
We glue the shark fins.

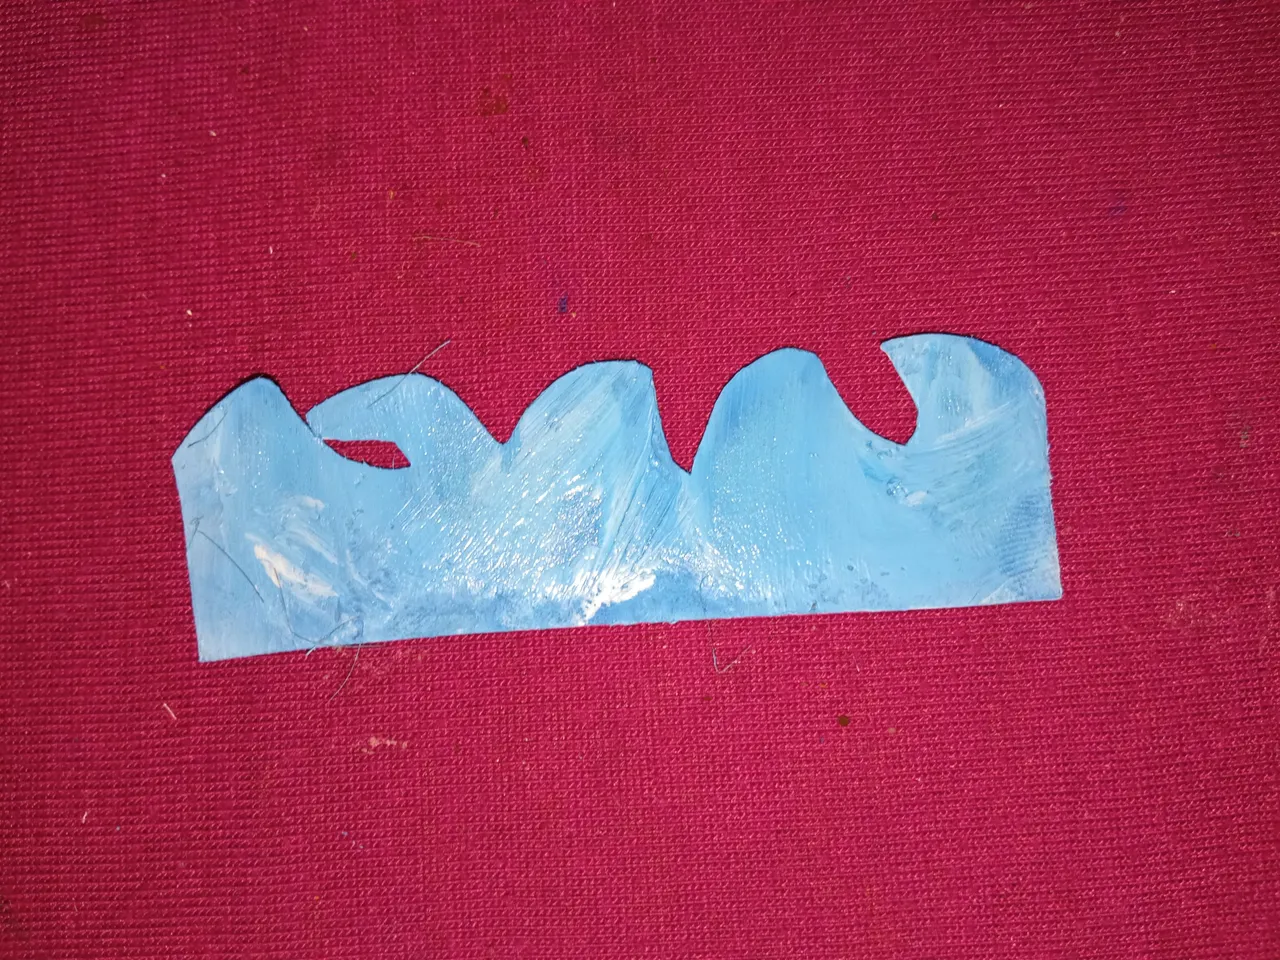
Recortamos de la hoja reciclada las siluetas de unas olas y pintamos de azul y blanco.
We cut out the silhouettes of some waves from the recycled sheet and paint them blue and white.
Luego pegamos el tiburón en el cuadro de cartón.
Then we glue the shark on the cardboard square.
Para finalizar pegamos las olas en la orilla del cuadro de cartón.
Finally, we glue the waves on the edge of the cardboard square.
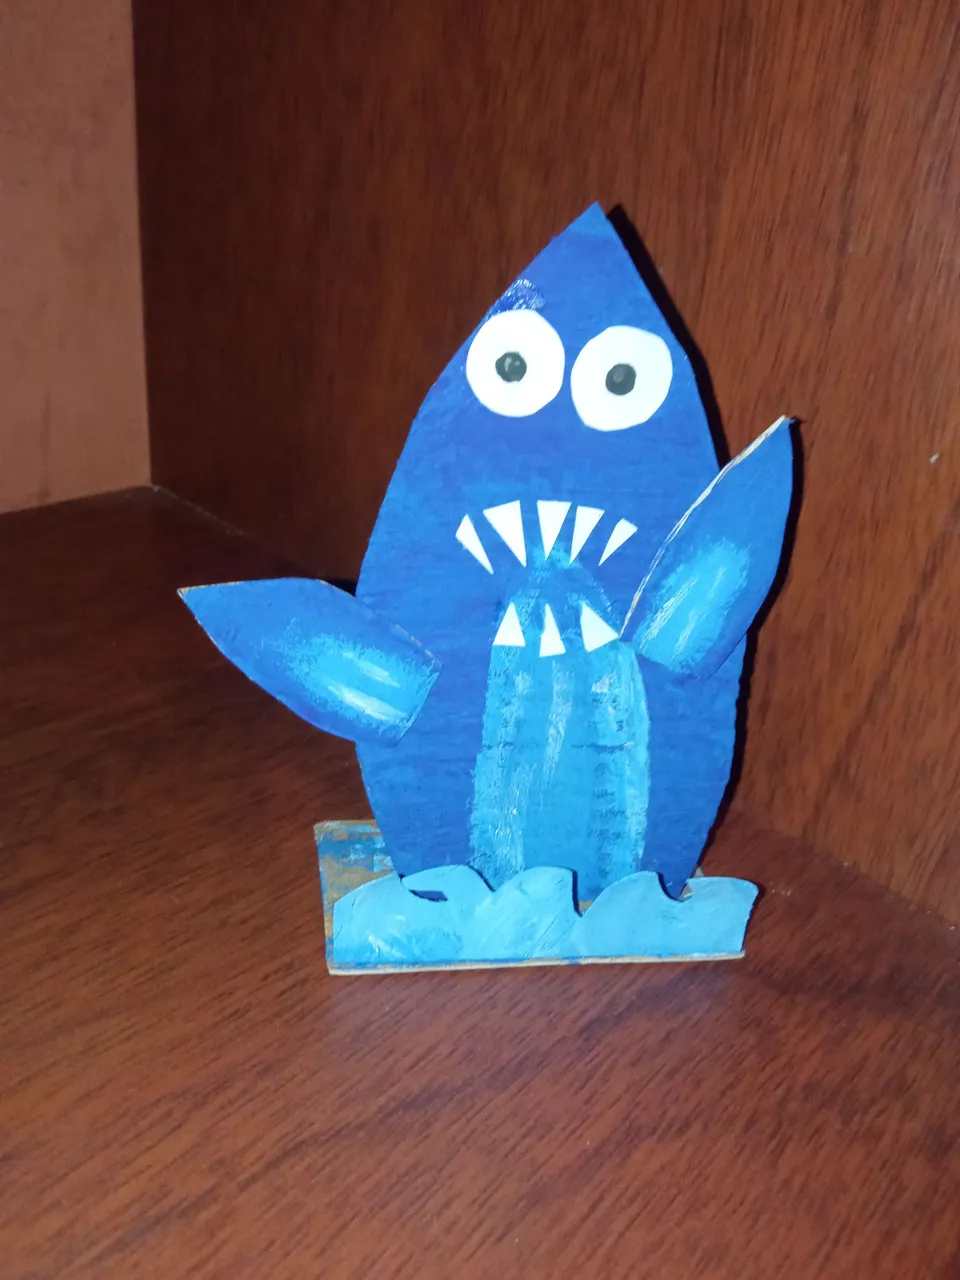
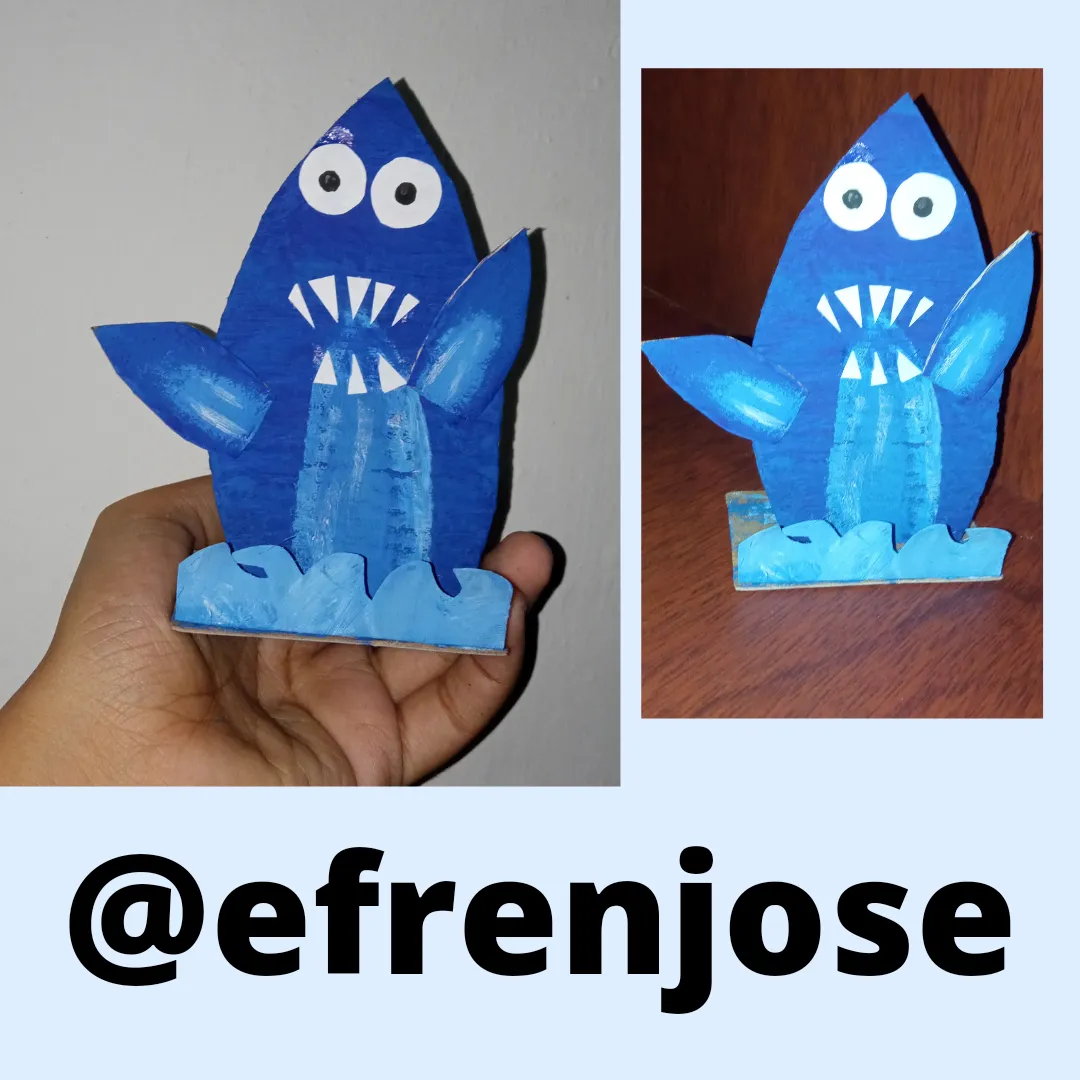
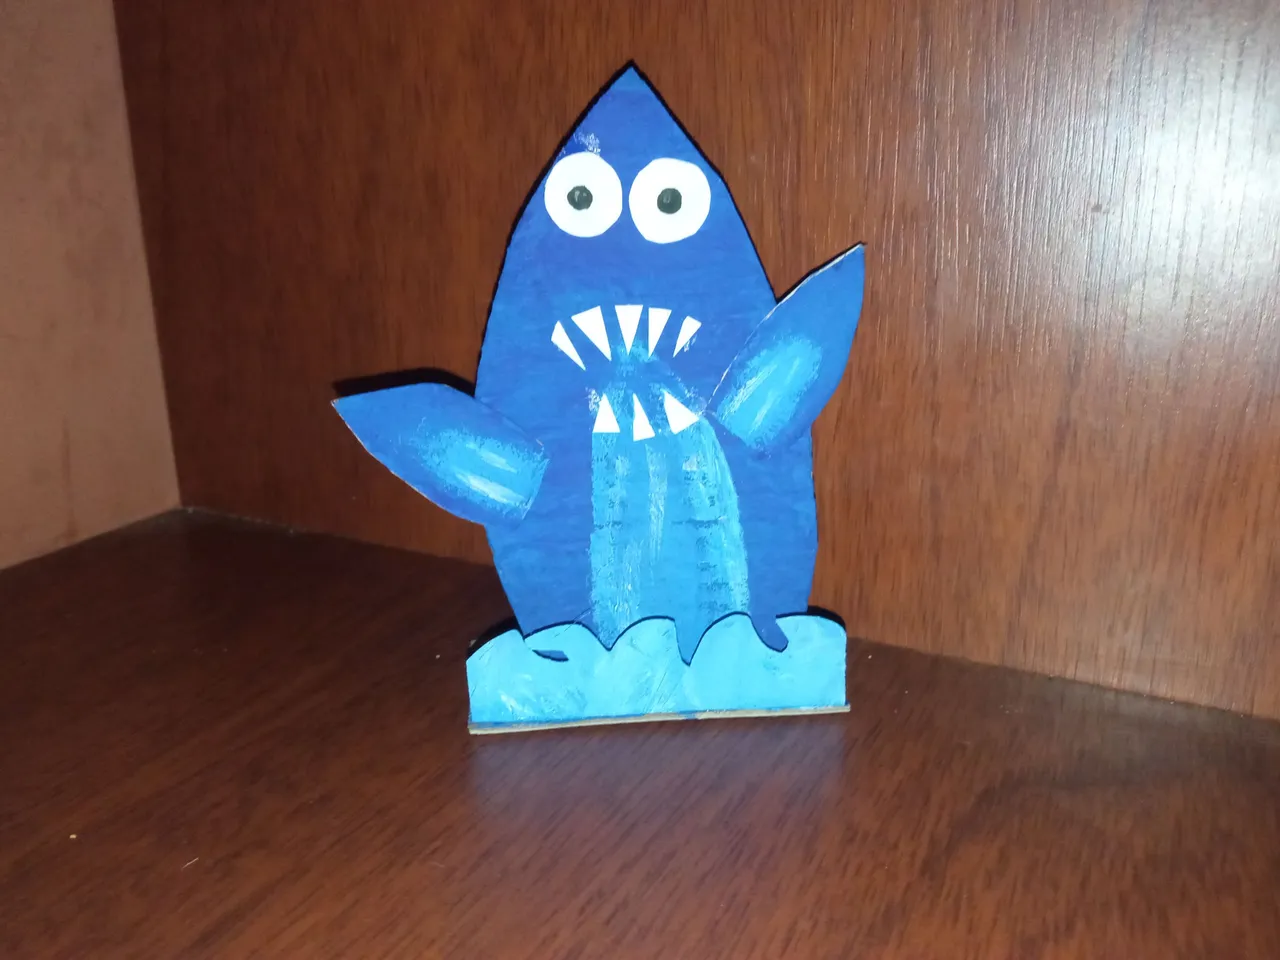
Les dejaré el resultado final por aquí:
I will leave the final result here:
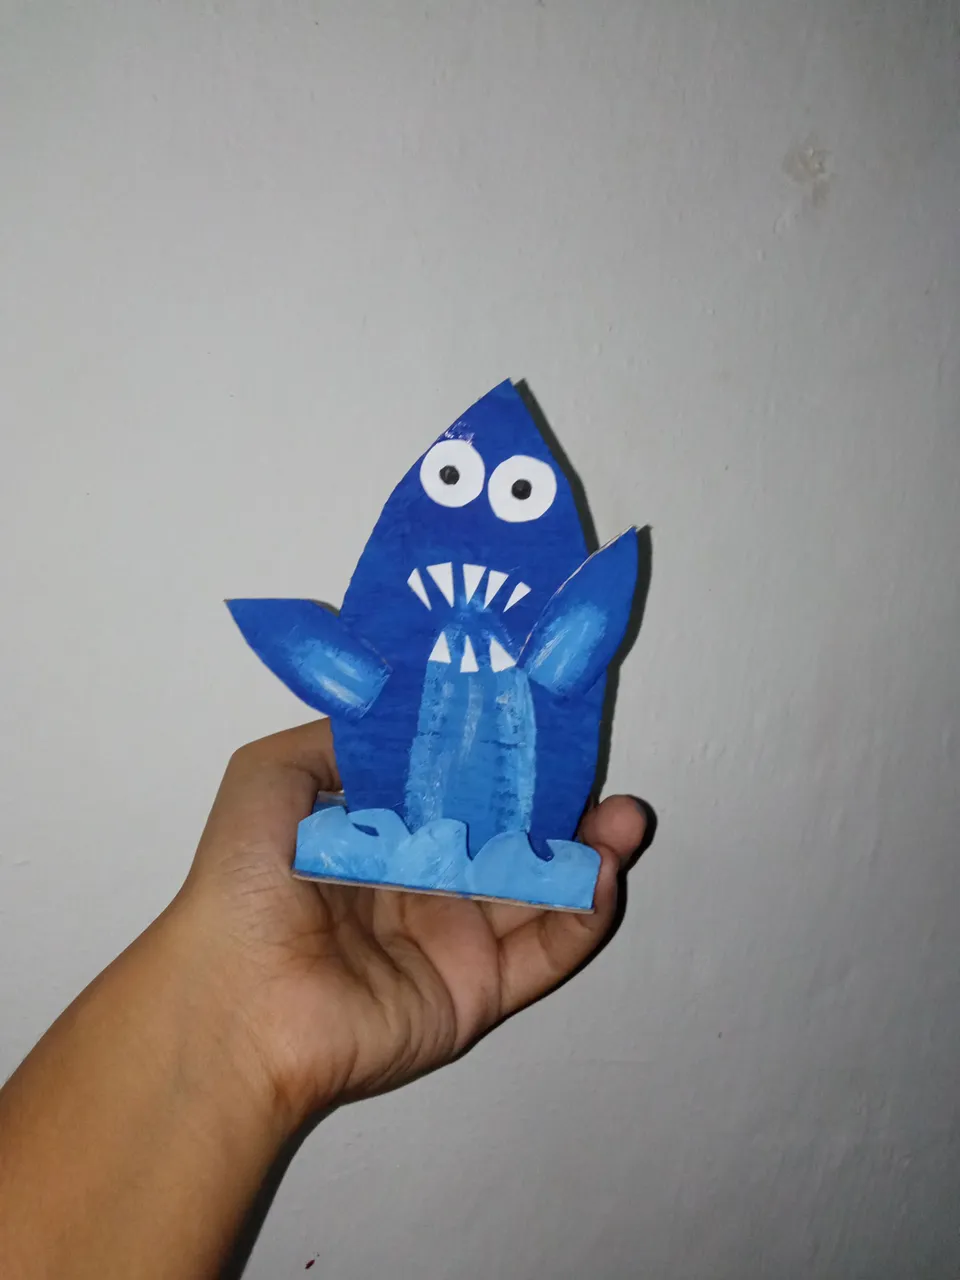
Espero les haya gustado mi post y se animen a realizar este divertido tiburón DIY para que decoren esos espacios deseados teniendo como objetivo principal reciclar.
I hope you liked my post and I encourage you to make this fun DIY shark to decorate those desired spaces having as main objective to recycle.
Me despido hasta un próximo post, saludos.
I will say goodbye until a future post, greetings.