¡Hola a todos, bienvenidos a mi post! Hace unos días estuve necesitando un taladro para poder perforar la carcasa de un control para adaptarle un pulsador puesto que el poseía estaba en mal estado, buscando el reemplazo entre mis herramientas encontré un pulsador ideal pero había un pequeño detalle, era muy grande así que necesitaba hacer una pequeña perforación para poder encajar el nuevo pulsador que le iba a adaptar al control.
¡Hello everyone, welcome to my post! A few days ago I was needing a drill to be able to drill the housing of a control to adapt a button to it since it was in poor condition, looking for a replacement among my tools I found an ideal button but there was a small detail, it was very big so I needed make a small hole to fit the new button that was going to be adapted to the control.
Revisando entre mis antiguas herramientas de aquellos tiempos cuando era estudiante de electrónica encontré unas mechas que usaba para perforar las tarjetas electrónicas cuando hacíamos proyectos, así que solo me faltaba un pequeño taladro para poder usarlas, viendo que poseo muchos motores de impresoras que he desarmado a lo largo de estos años me pregunte ¿Por qué no construirme un pequeño taladro que sea capaz de portar las mechas?, y bueno así inicio mi pequeño proyecto para la realización de un taladro con materiales reciclados encontrados en mis cajones y a su vez quise aprovechar para documentarlo y hacerlo parte de mi participación en el Reciclaje Creativo Challenge propuesto por @jennyzer. Así que sin más que agregar, comencemos:
Looking through my old tools from those times when I was an electronics student, I found some wicks that I used to punch electronic cards when we made projects, so I only needed a small drill to be able to use them, seeing that I have many printer engines that I have disassembled to Throughout these years, I asked myself, Why not build a small drill that is capable of carrying the wicks? Well, that's how I started my little project to make a drill with recycled materials found in my drawers and in turn I wanted to take advantage of it to document it and make it part of my participation in the Creative Recycling Challenge proposed by @jennyzer. So without further ado, let's get started:

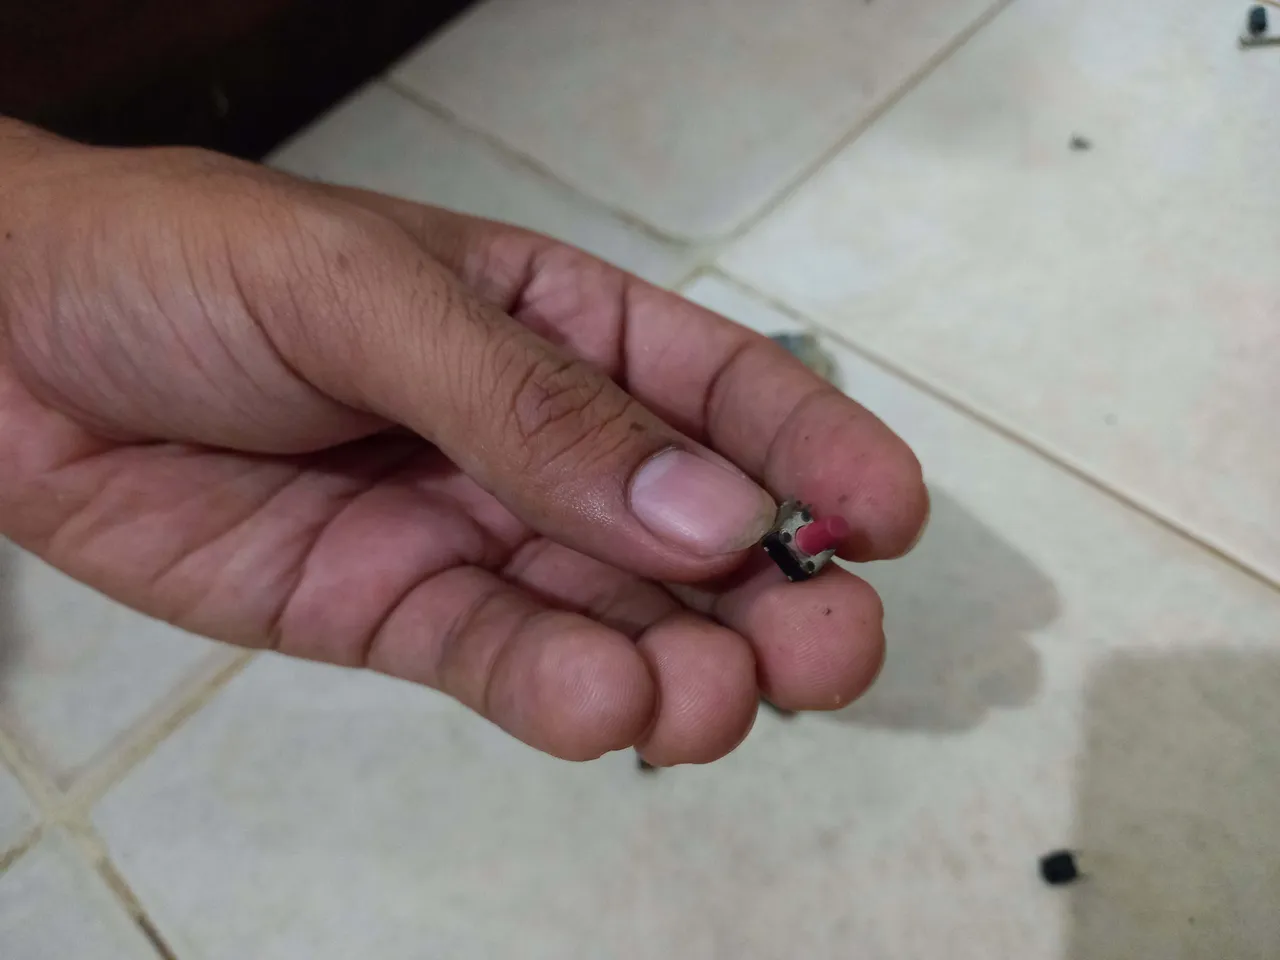
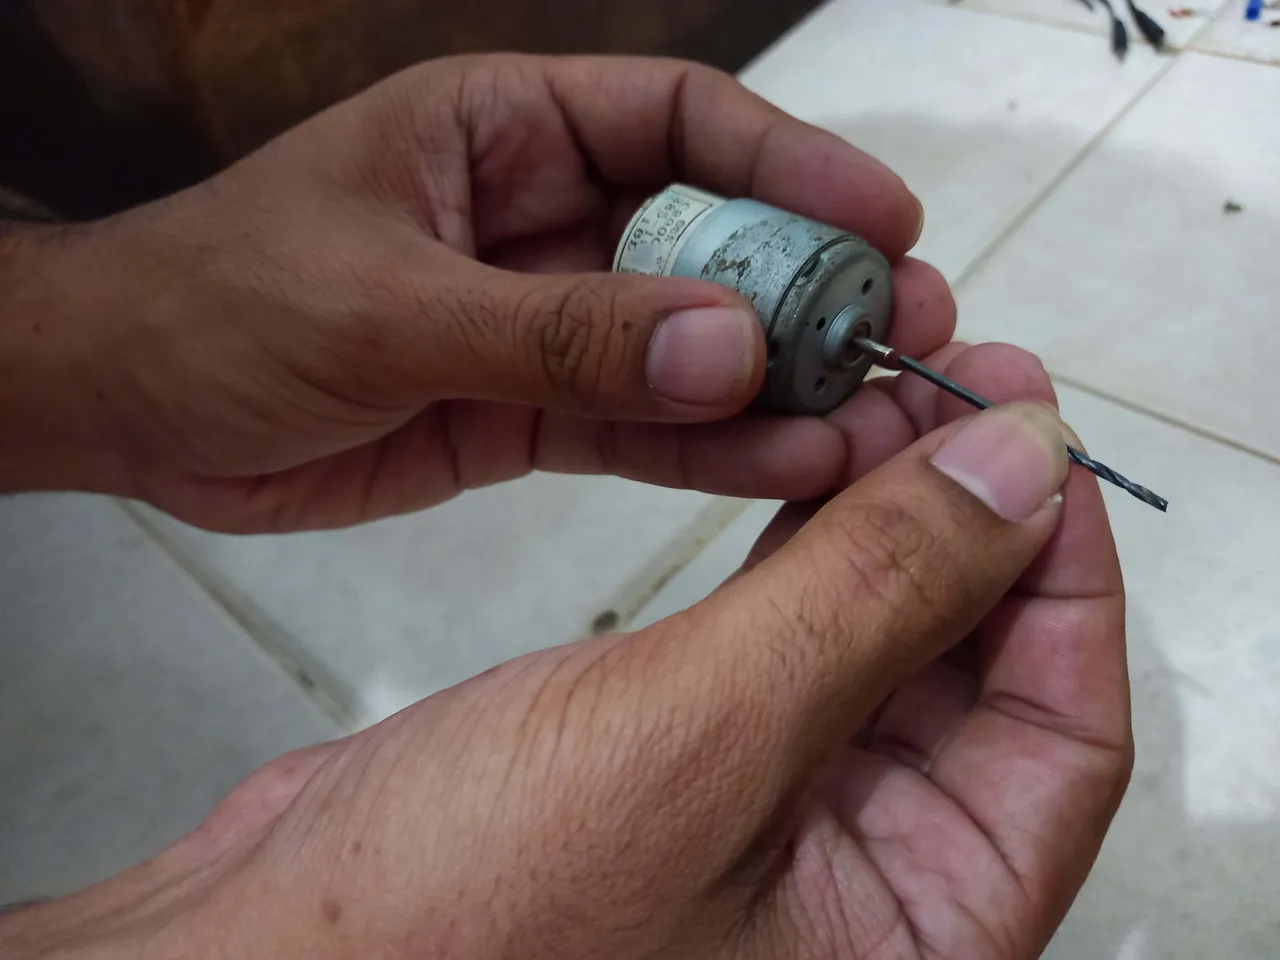
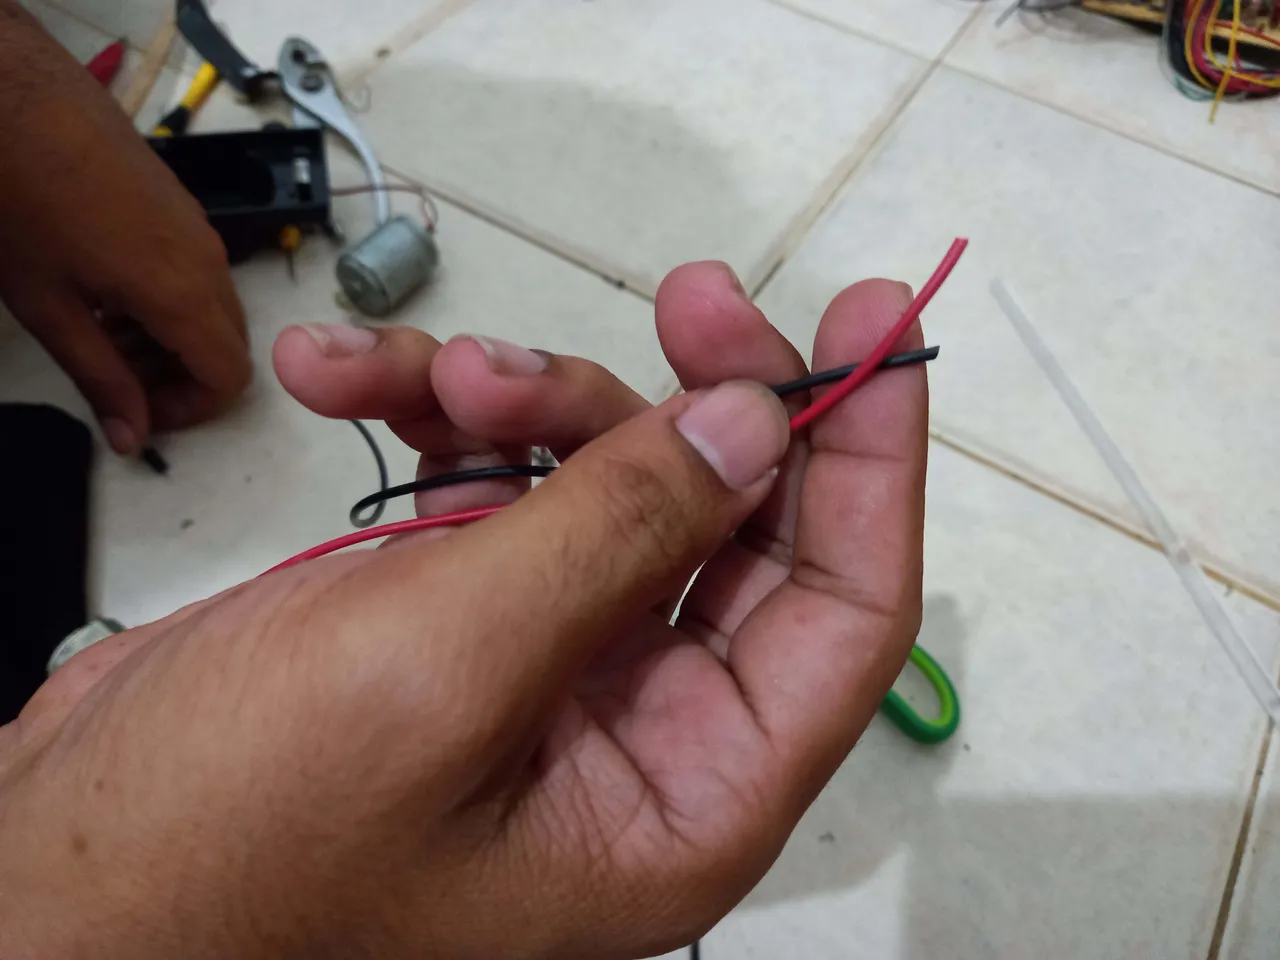
Para la realización de mi pequeño proyecto me planteé los materiales necesitaba, un motor, un pulsador para encender y apagar el taladro a mi gusto, algunos cables para realizar el cableado y lo más importante un cilindro para poder encajar la mecha y el taladro.
For the realization of my small project I considered the materials I needed, a motor, a button to turn the drill on and off to my liking, some cables to make the wiring and most importantly a cylinder to fit the wick and the drill.
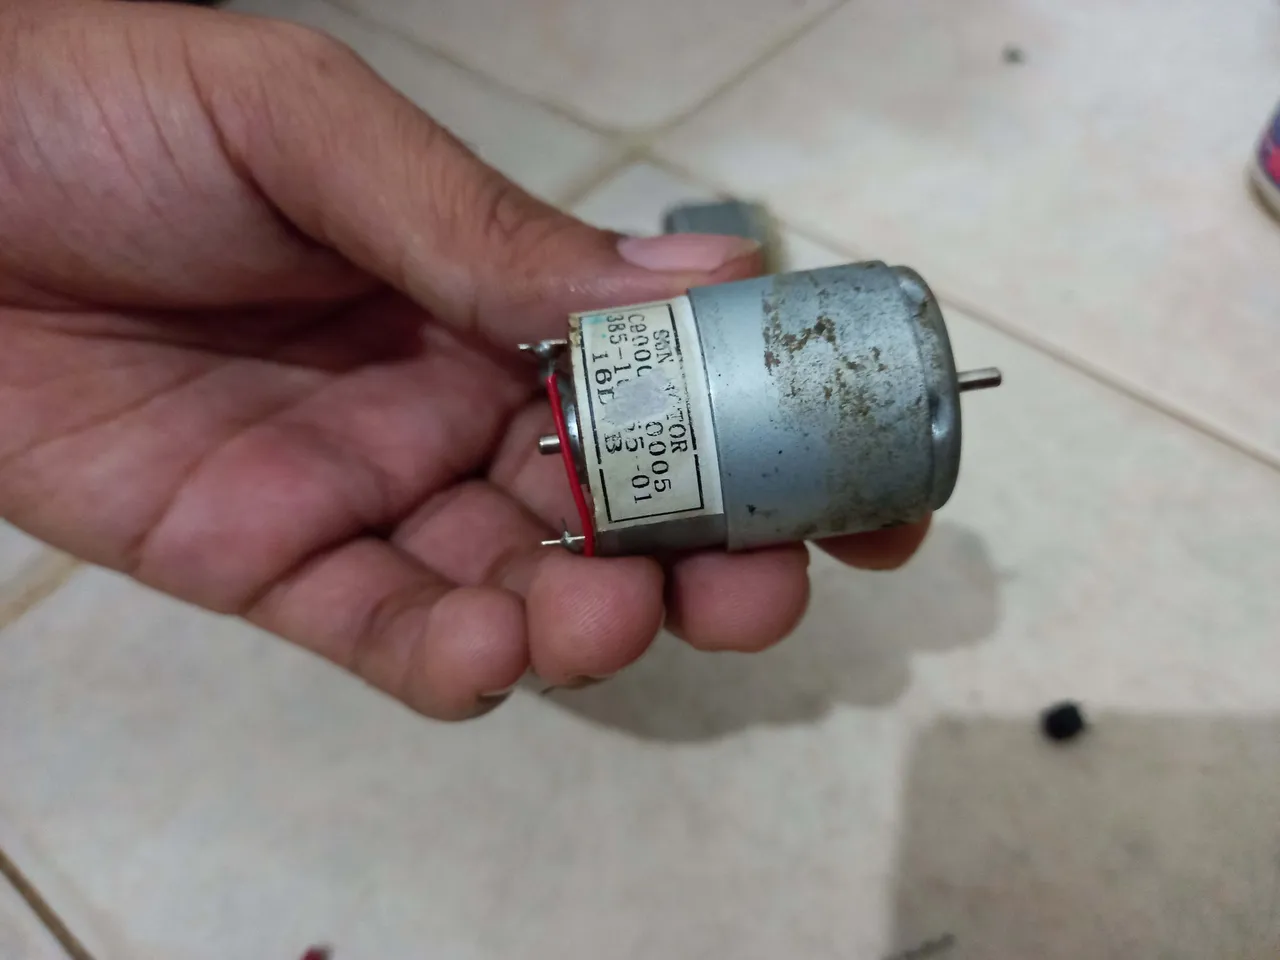
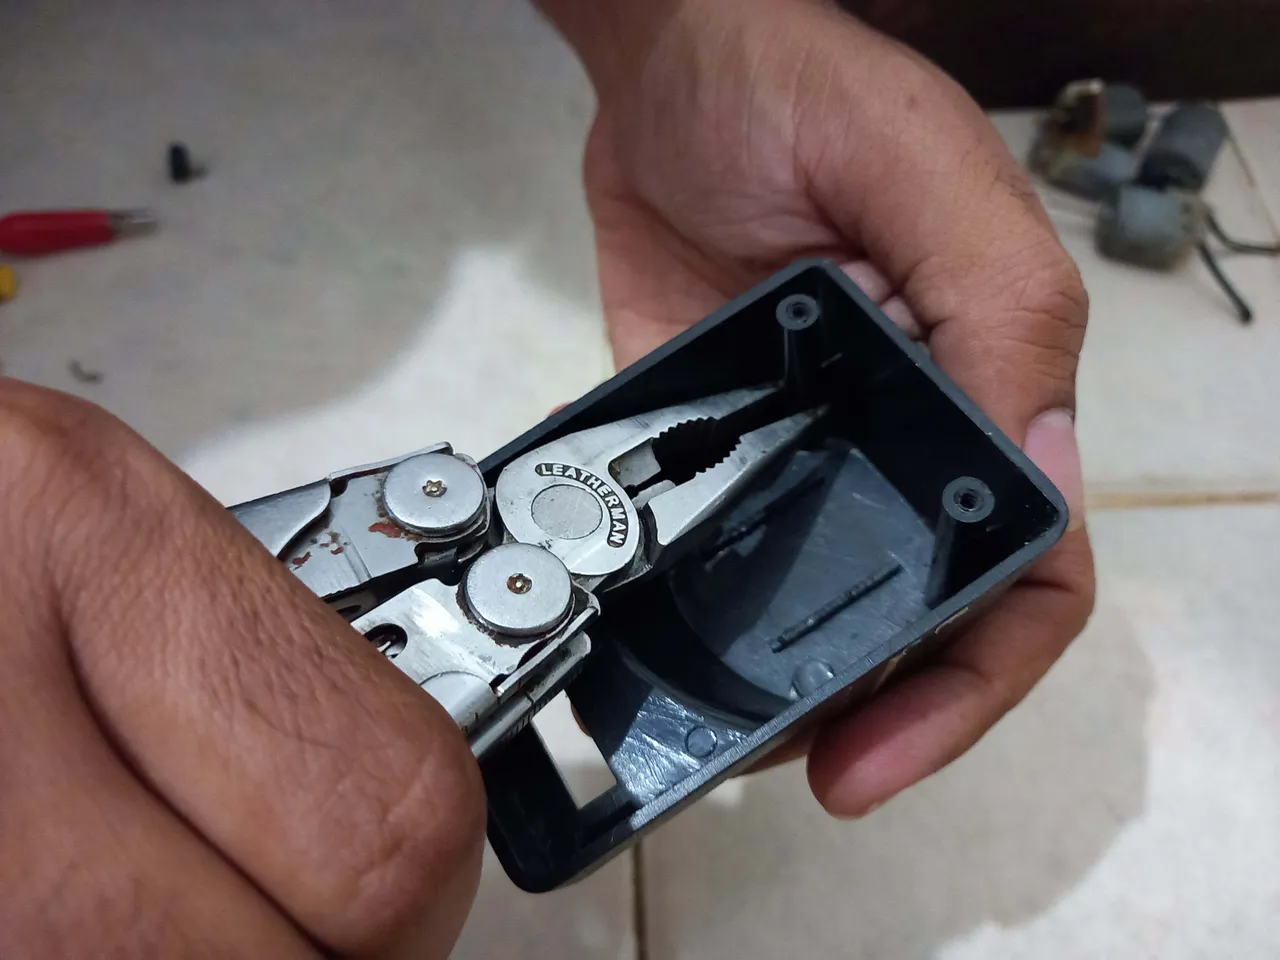
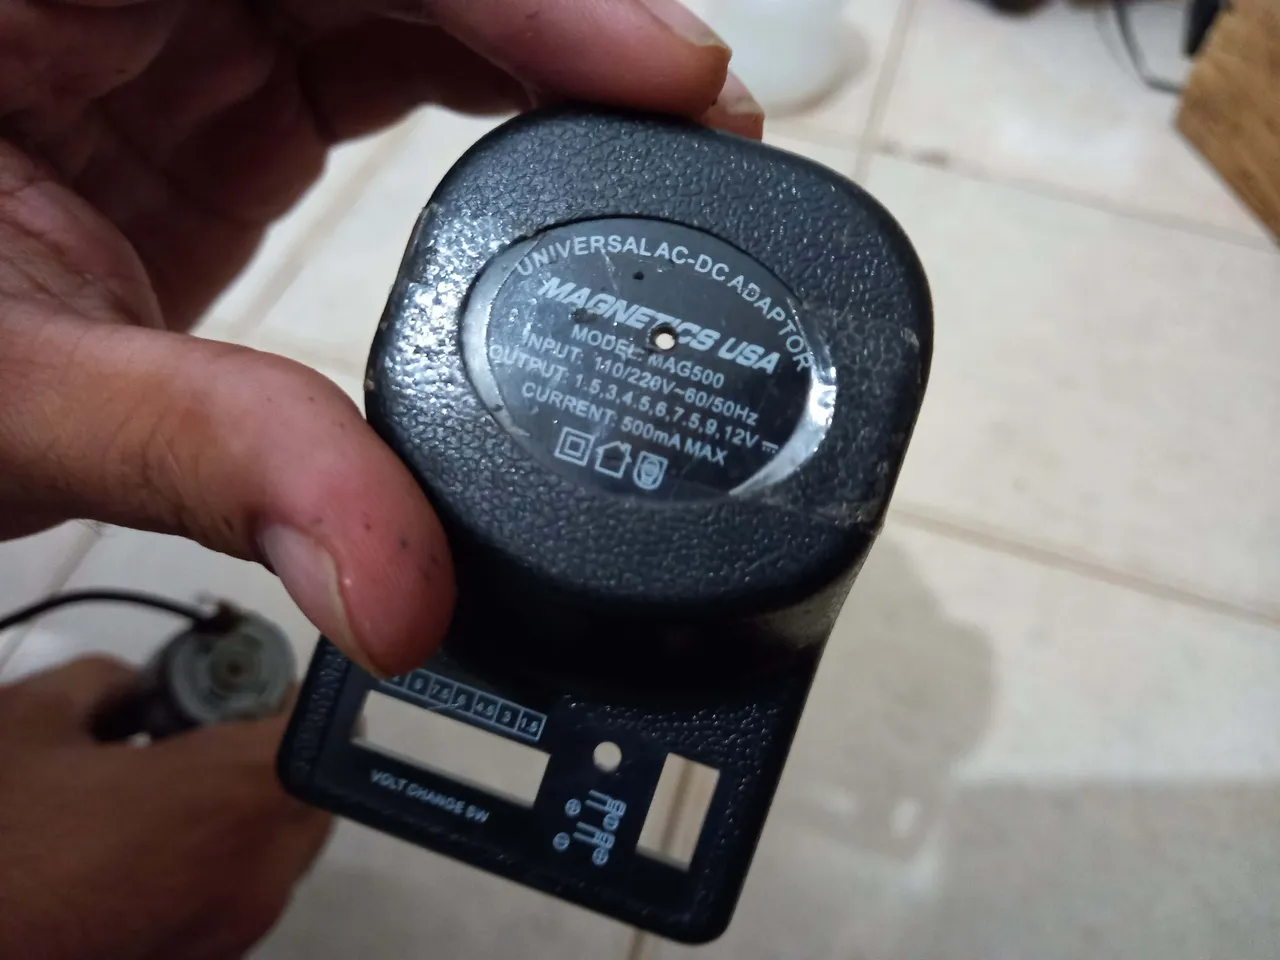
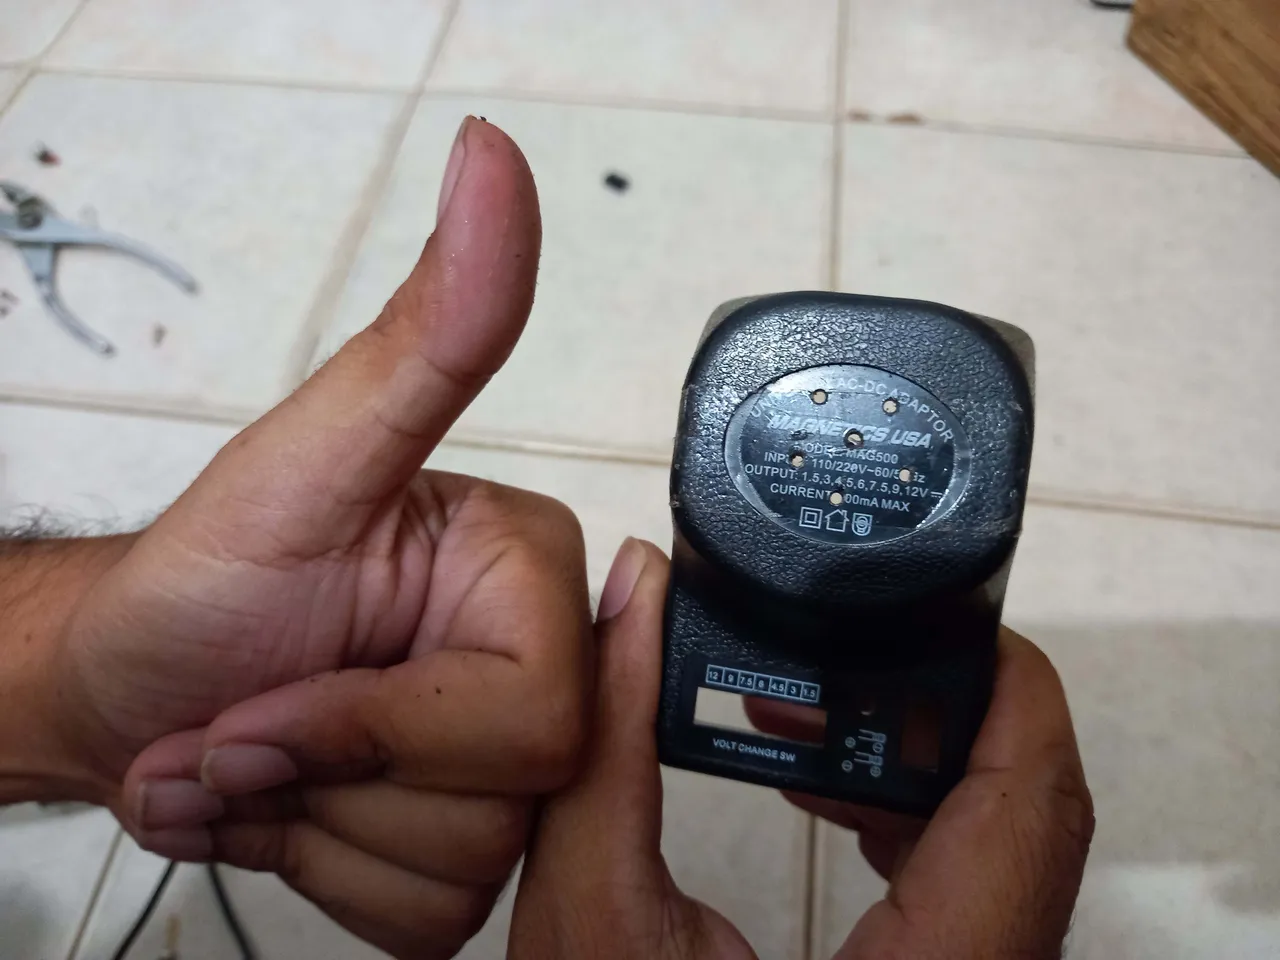
Por suerte buscando entre toda la chatarra que poseo encontré la carcasa de un viejo regulador de voltaje que de dañó hace muchos años, así que se me ocurrió tomar el cilindro que se usa para encajar los tornillos en dicho cargador.
Luckily looking through all the scrap I have, I found the casing of an old voltage regulator that was damaged many years ago, so it occurred to me to take the cylinder that is used to fit the screws in said charger
Básicamente este era el concepto que tenia planteado en mi cabeza, ya finalmente teniendo todos los materiales solo bastó tiempo, paciencia y mucha creatividad.
Basically this was the concept that I had raised in my head, and finally having all the materials only enough time, patience and a lot of creativity.

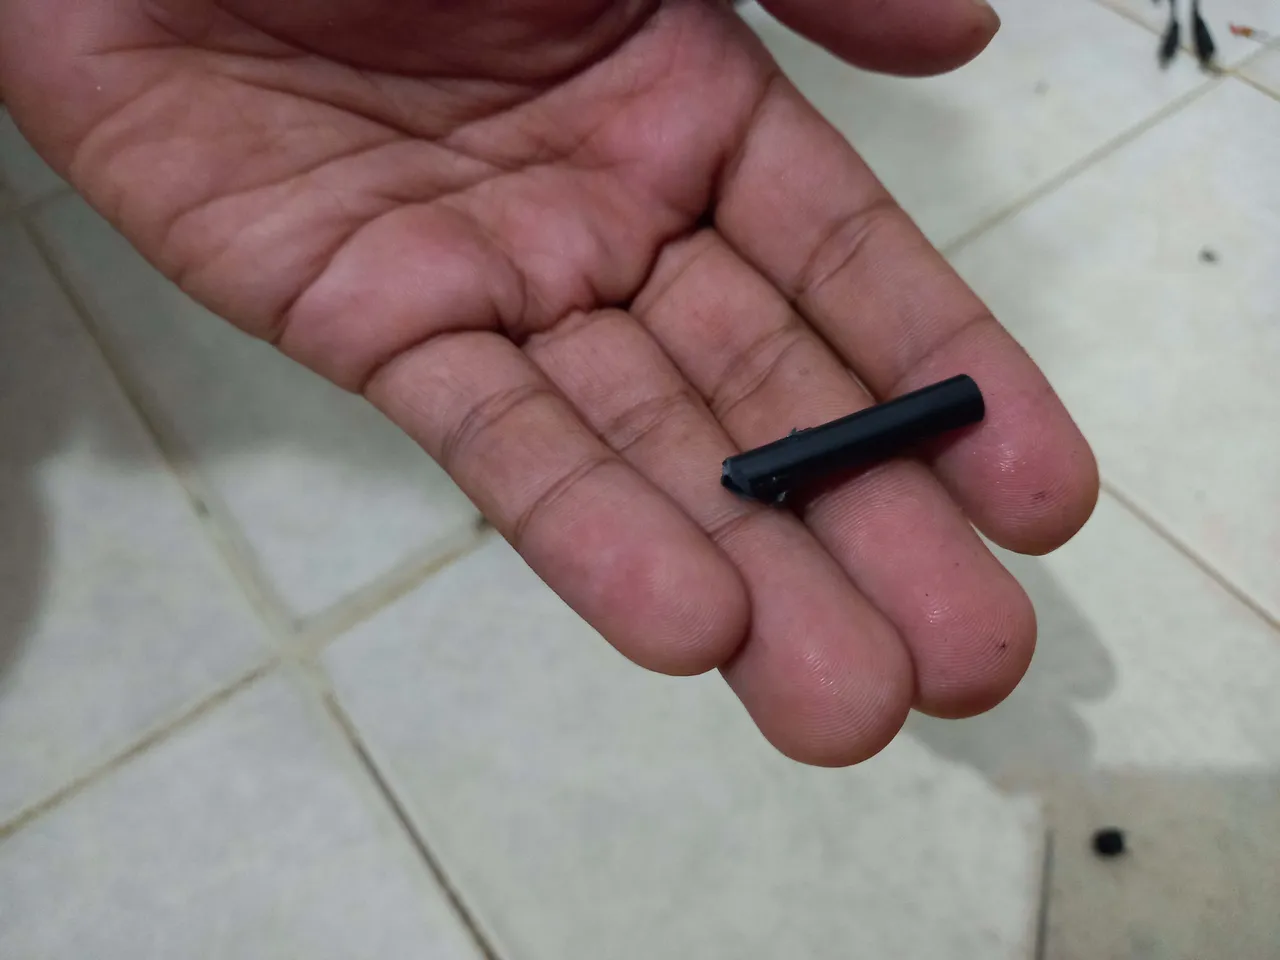
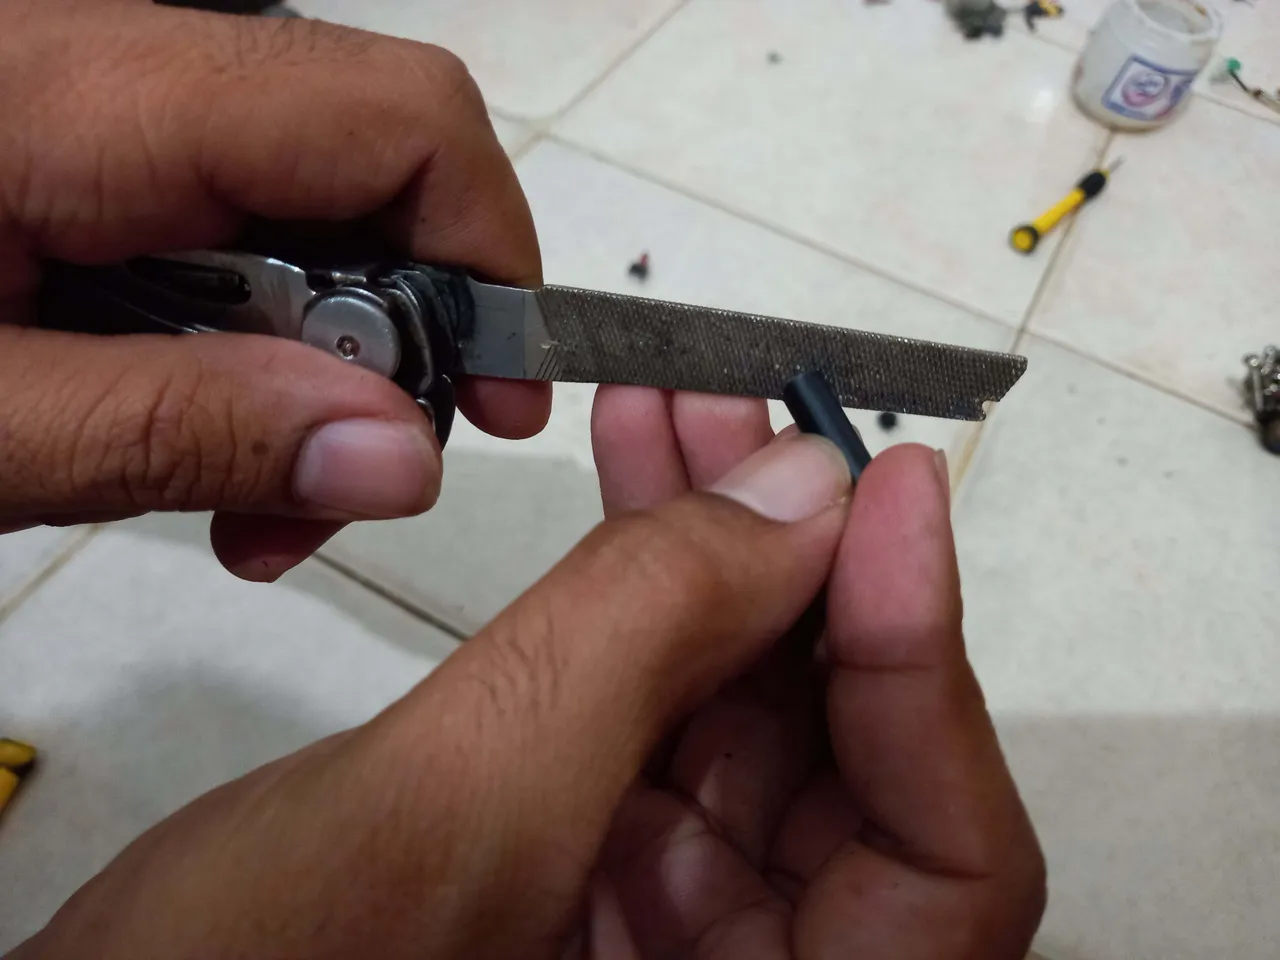
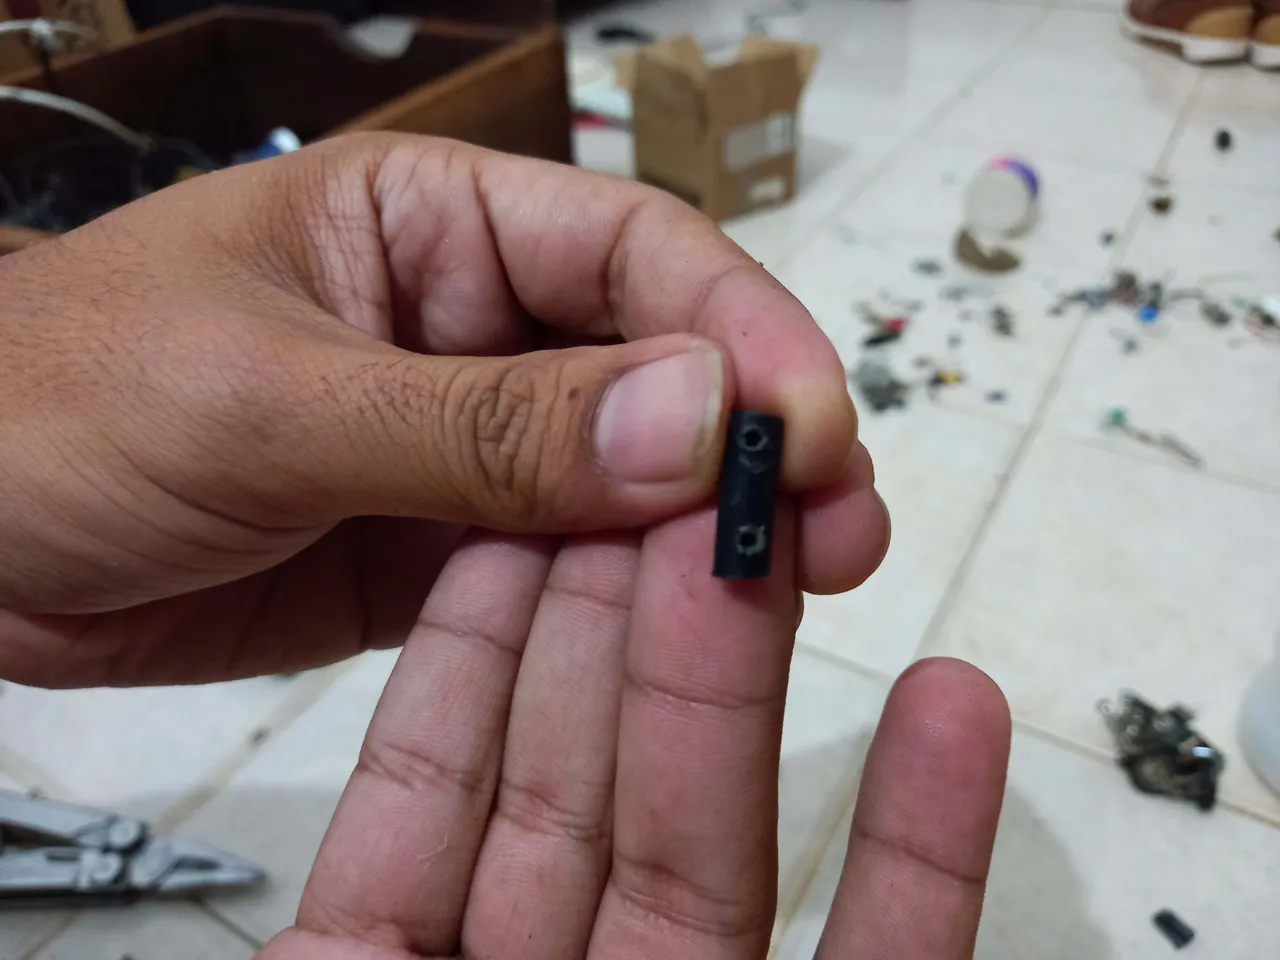
Primero recorté el cilindro dejando solo la parte circular eliminando la parte que contenía un resto sobrante de plástico totalmente innecesario, una vez hecho esto limé un poco las partes de los extremos del cilindro hasta que quedaran de manera recta y plana.
First I cut the cylinder leaving only the circular part eliminating the part that contained an excess of totally unnecessary plastic, once this was done I filed a little the parts at the ends of the cylinder until they were straight and flat.
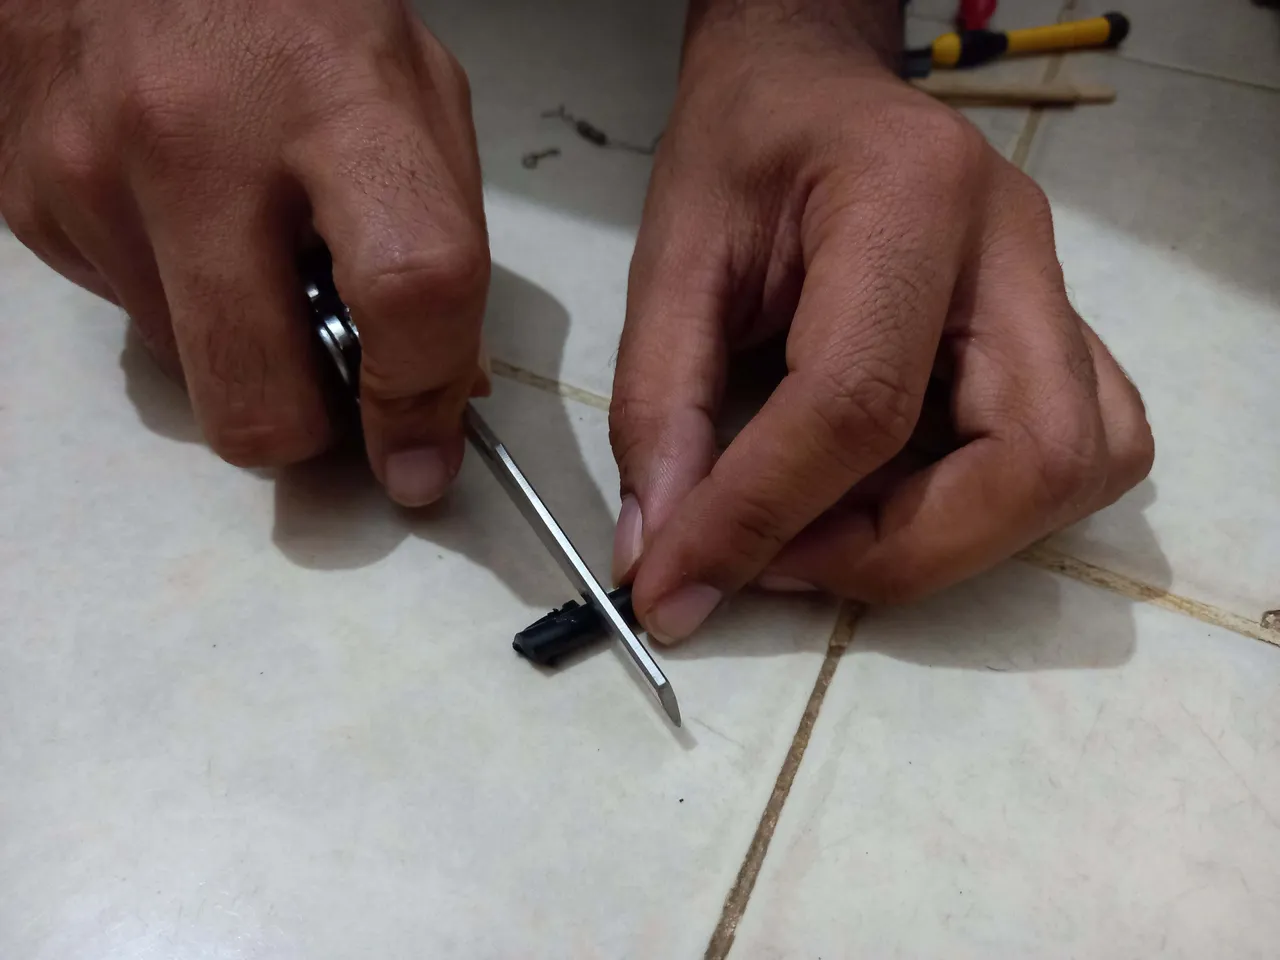
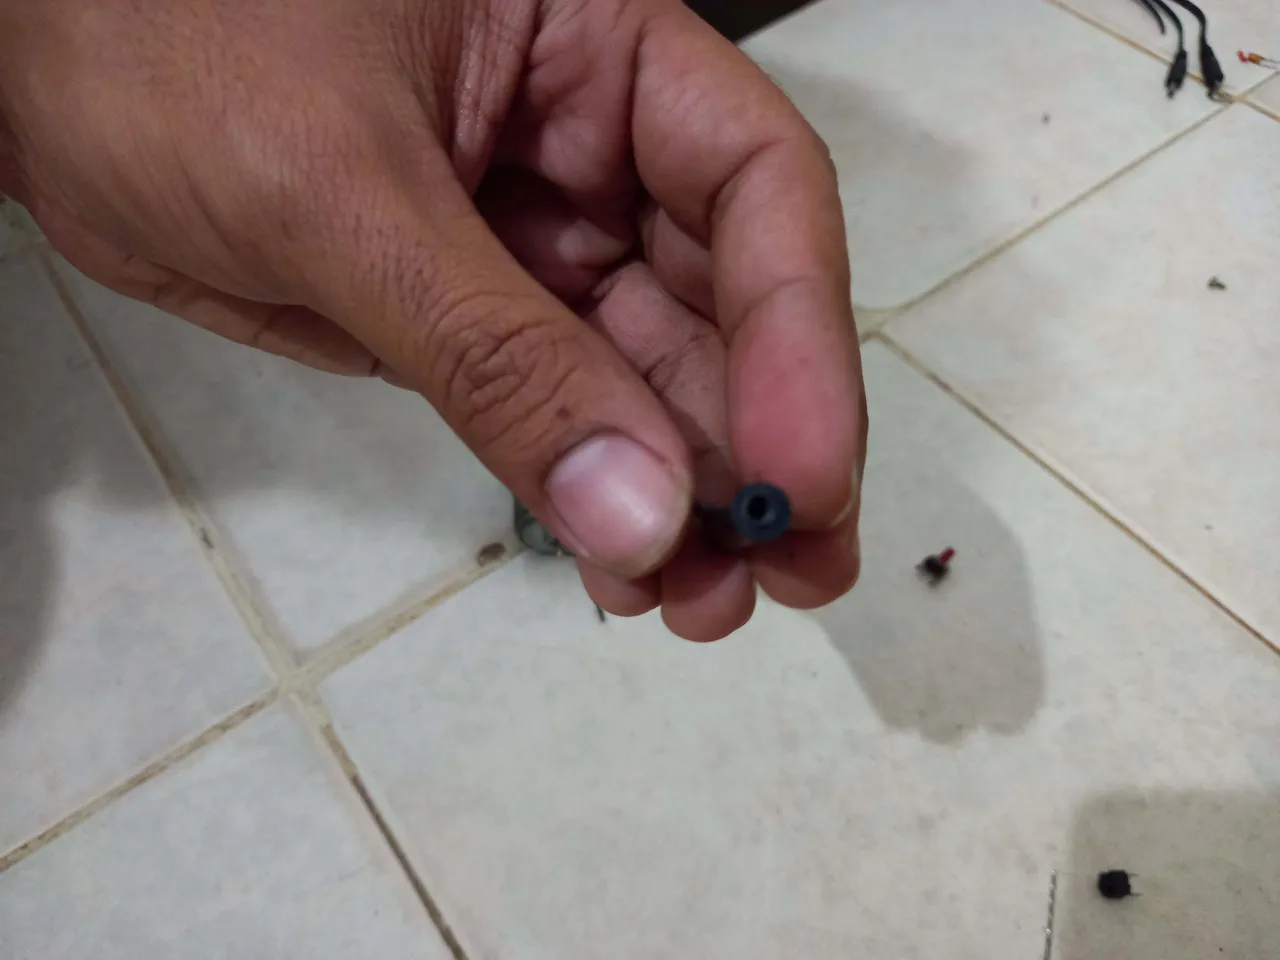
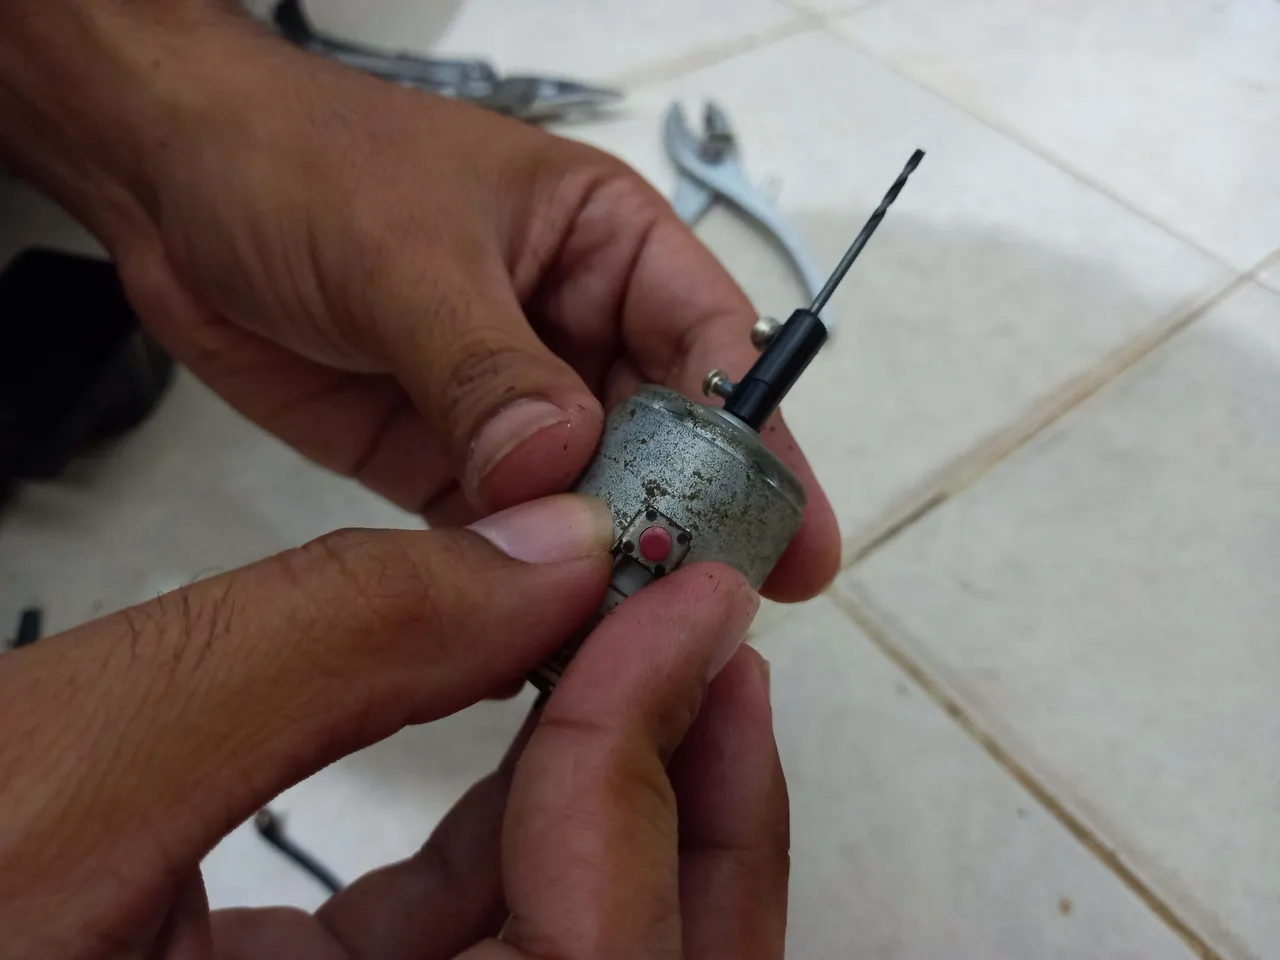
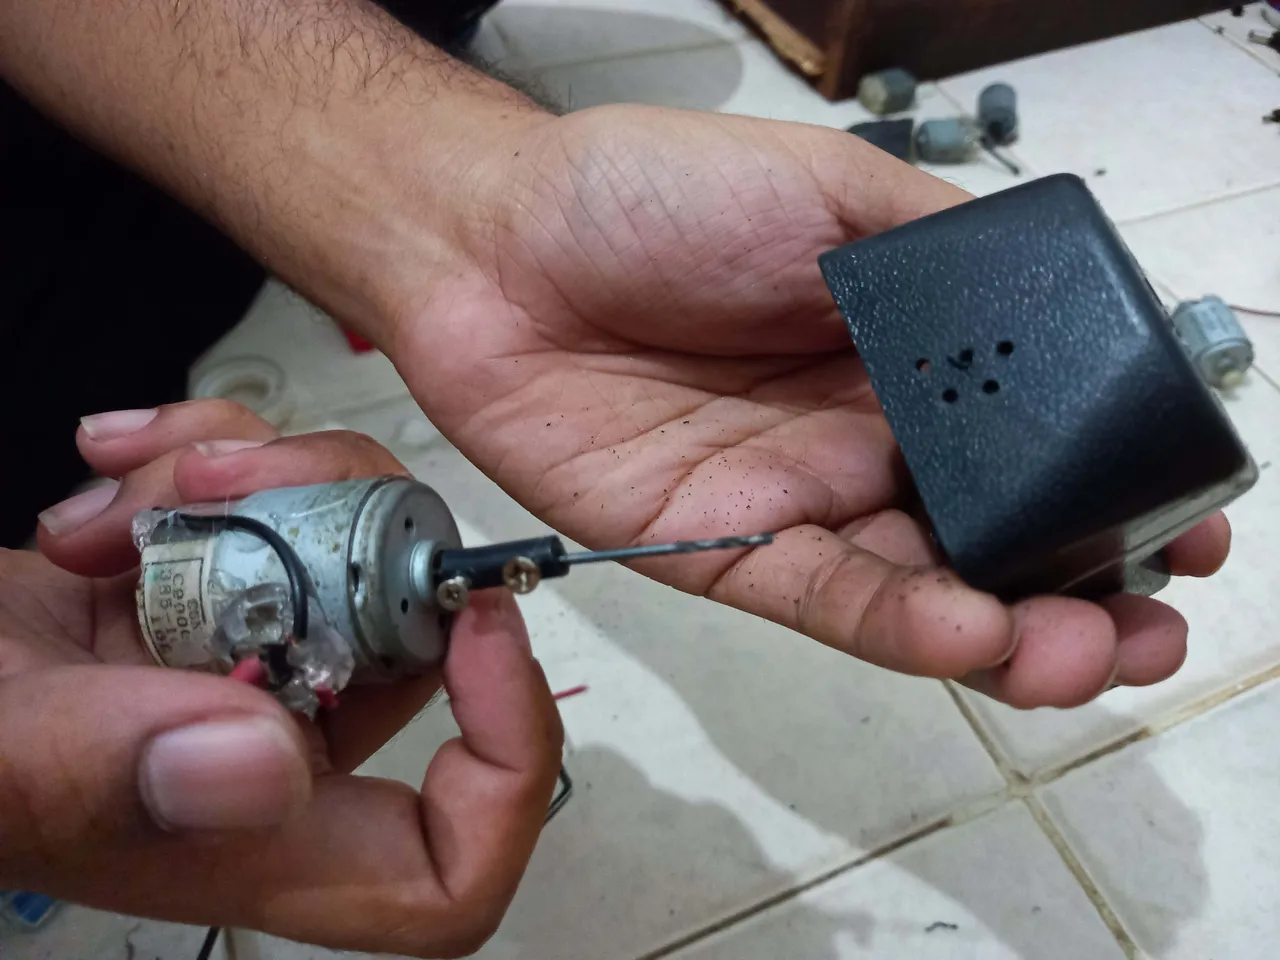
Ya va tomando forma mi pequeño taladro, ahora solo falta ajustar el motor y la mecha al cilindro, para esto se me ocurrió hacer unas perforaciones transversales en cada uno de los extremos de cilindro.
My little drill is already taking shape, now I just need to adjust the motor and the bit to the cylinder, for this it occurred to me to make some transverse holes in each of the cylinder ends.

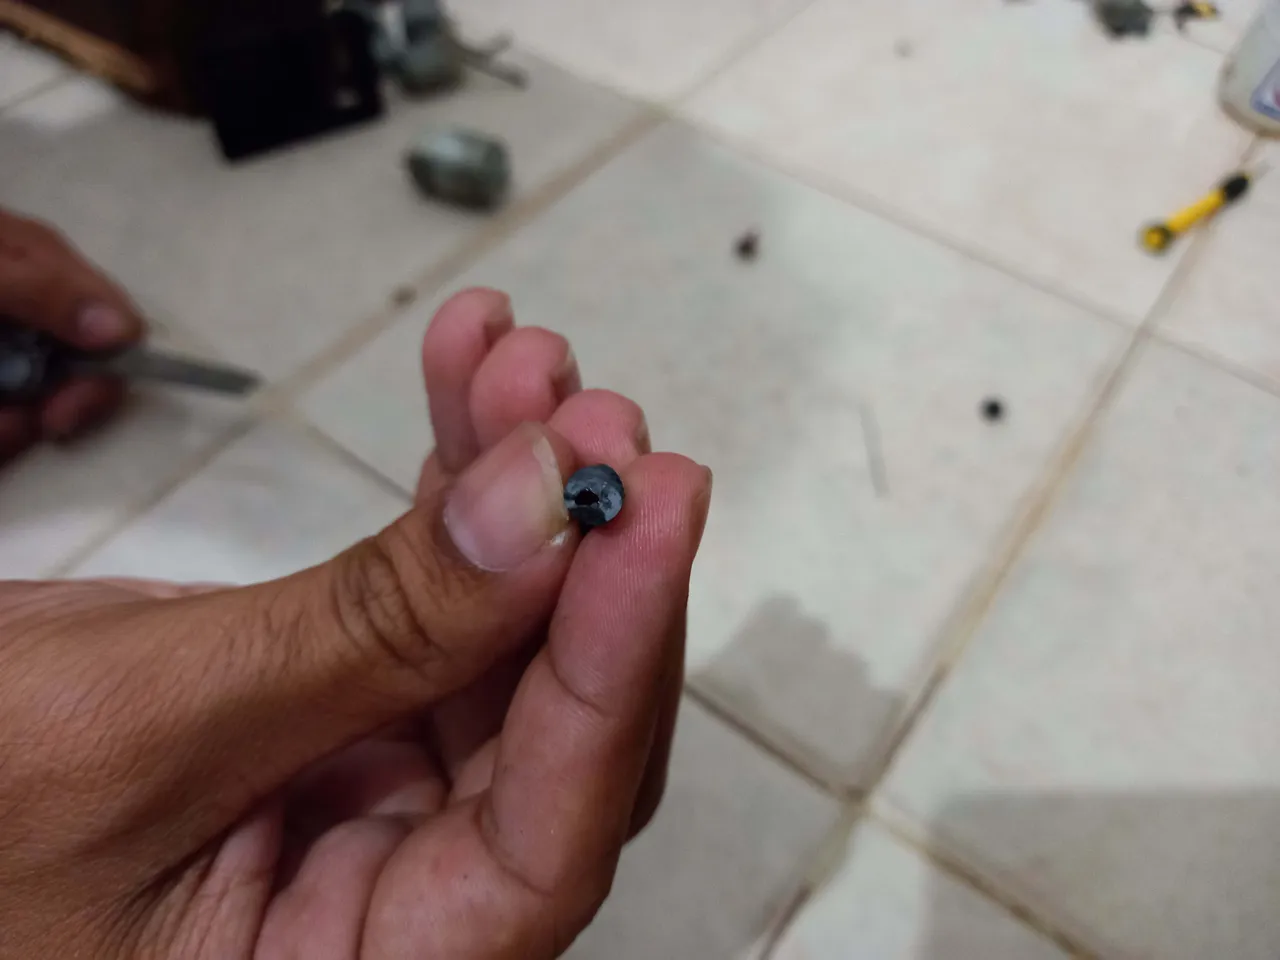
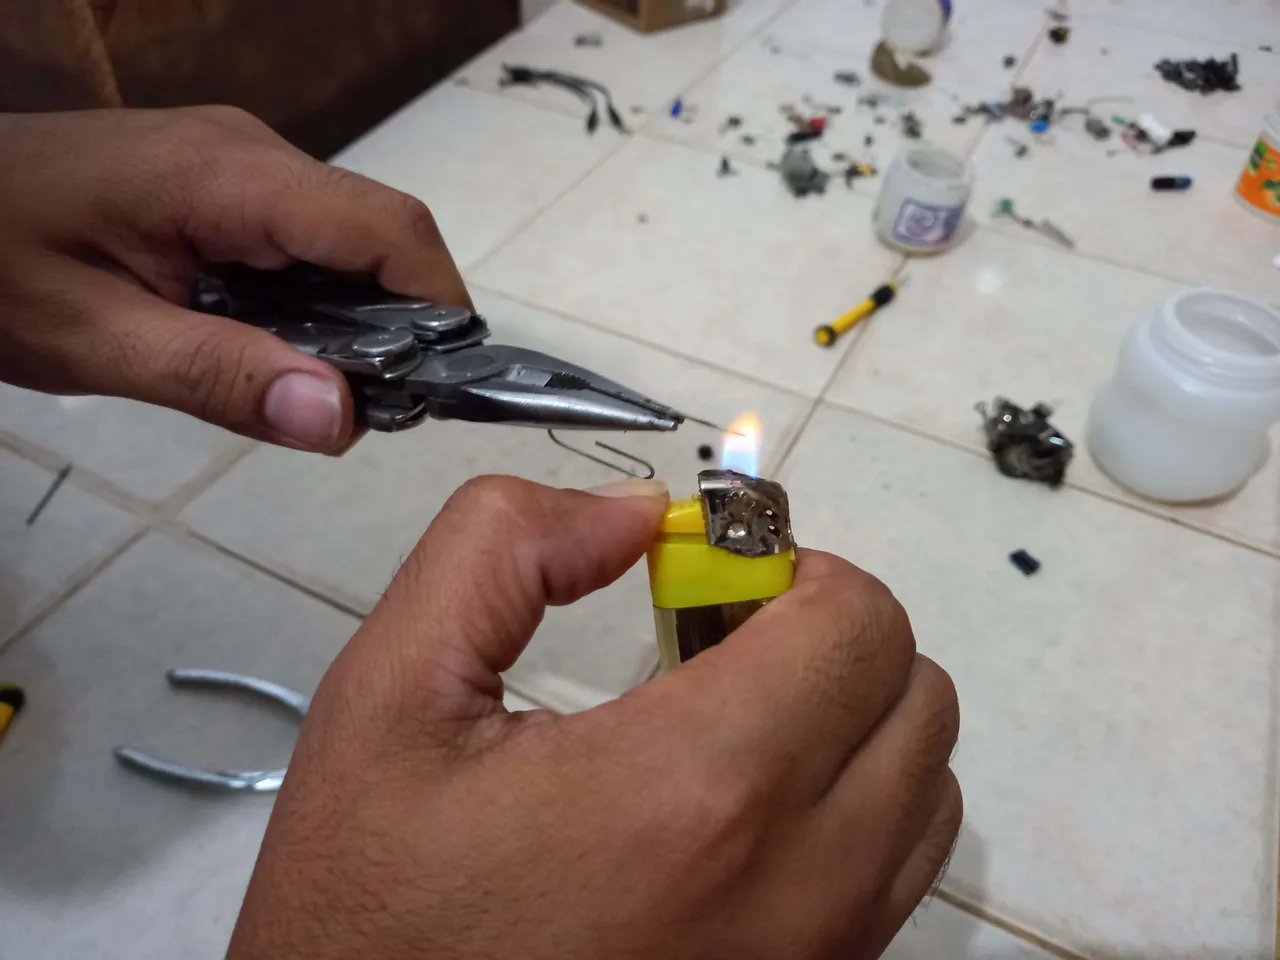
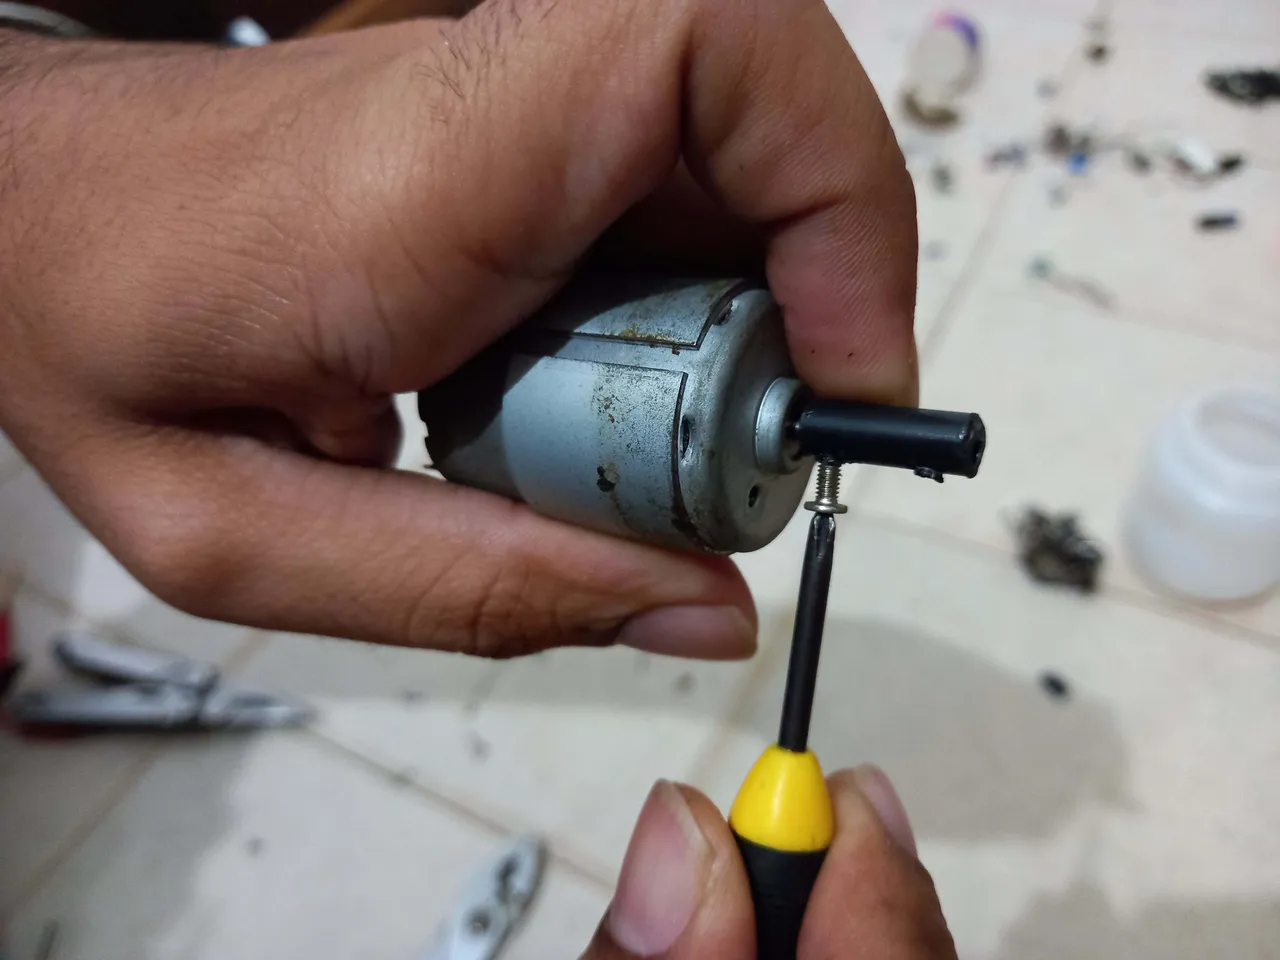
Para ello use un clip que calenté con un encendedor al rojo vivo e hice las perforaciones correspondientes procurando perforar de tal manera que el taladro y la mecha puedan ajustarse con un simple tornillo.
To do this, I used a clip that I heated with a red-hot lighter and made the corresponding holes, trying to drill in such a way that the drill and the wick can be adjusted with a simple screw.
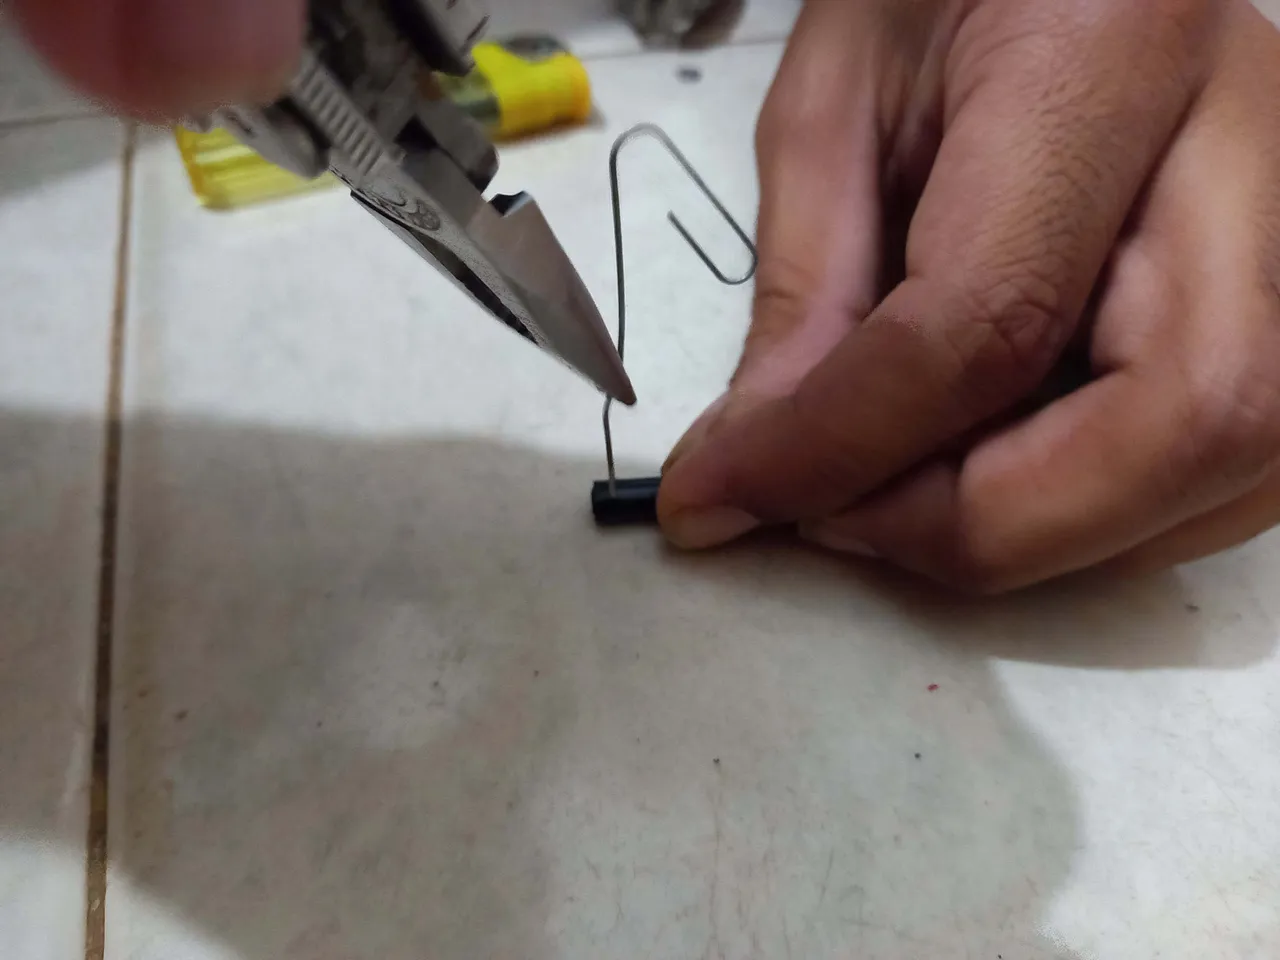
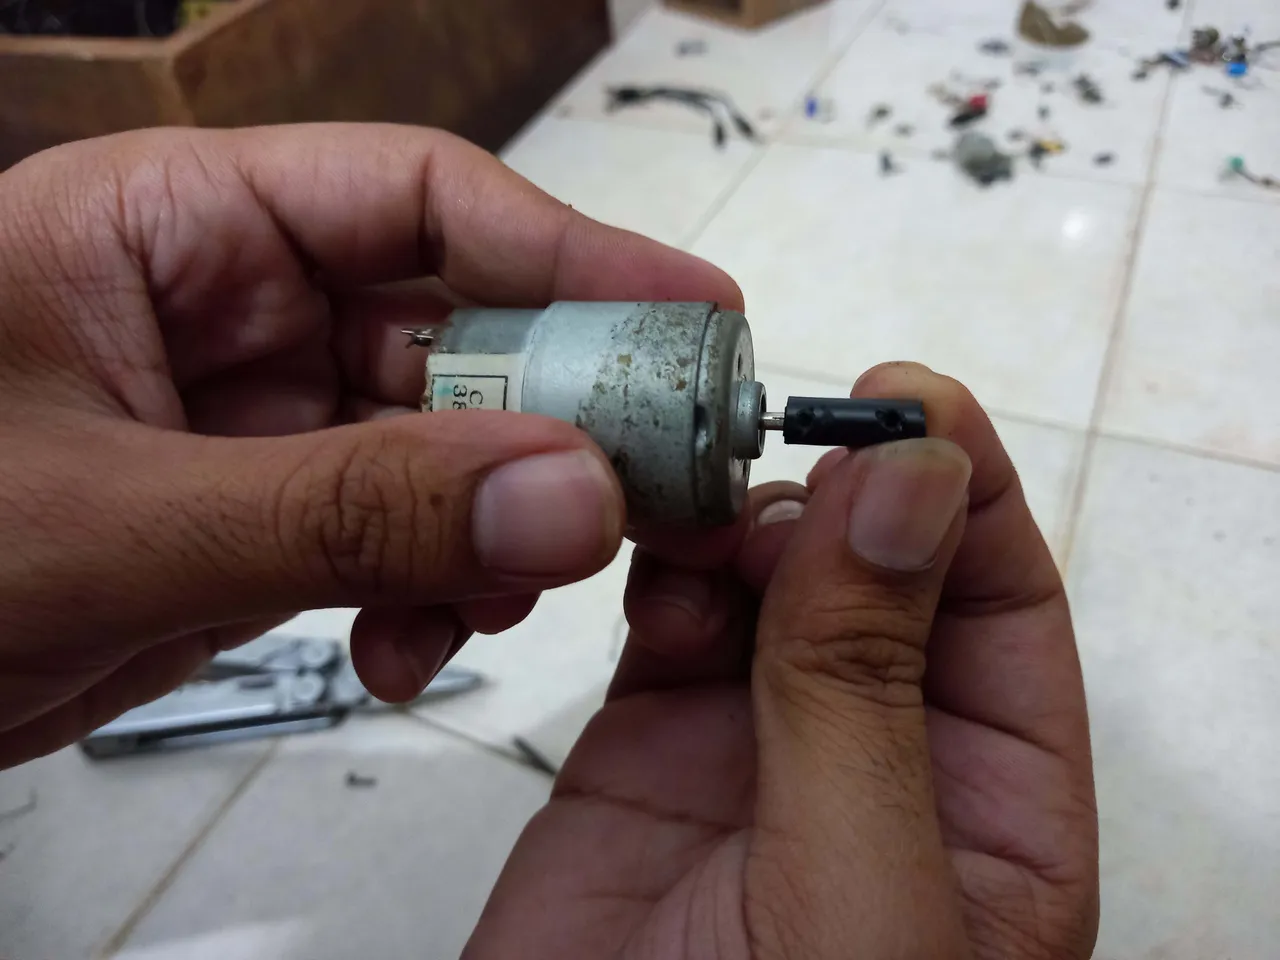
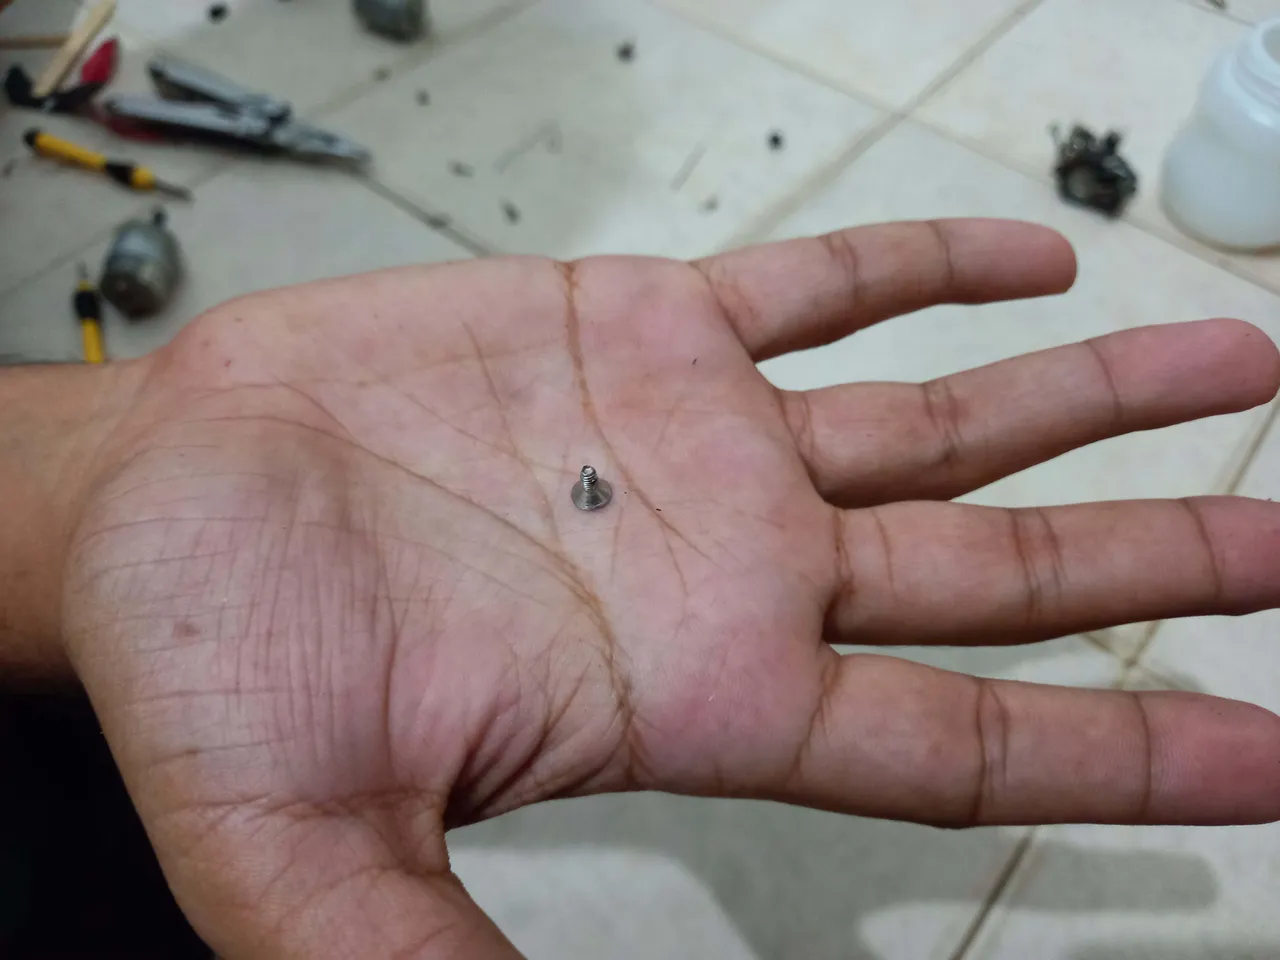
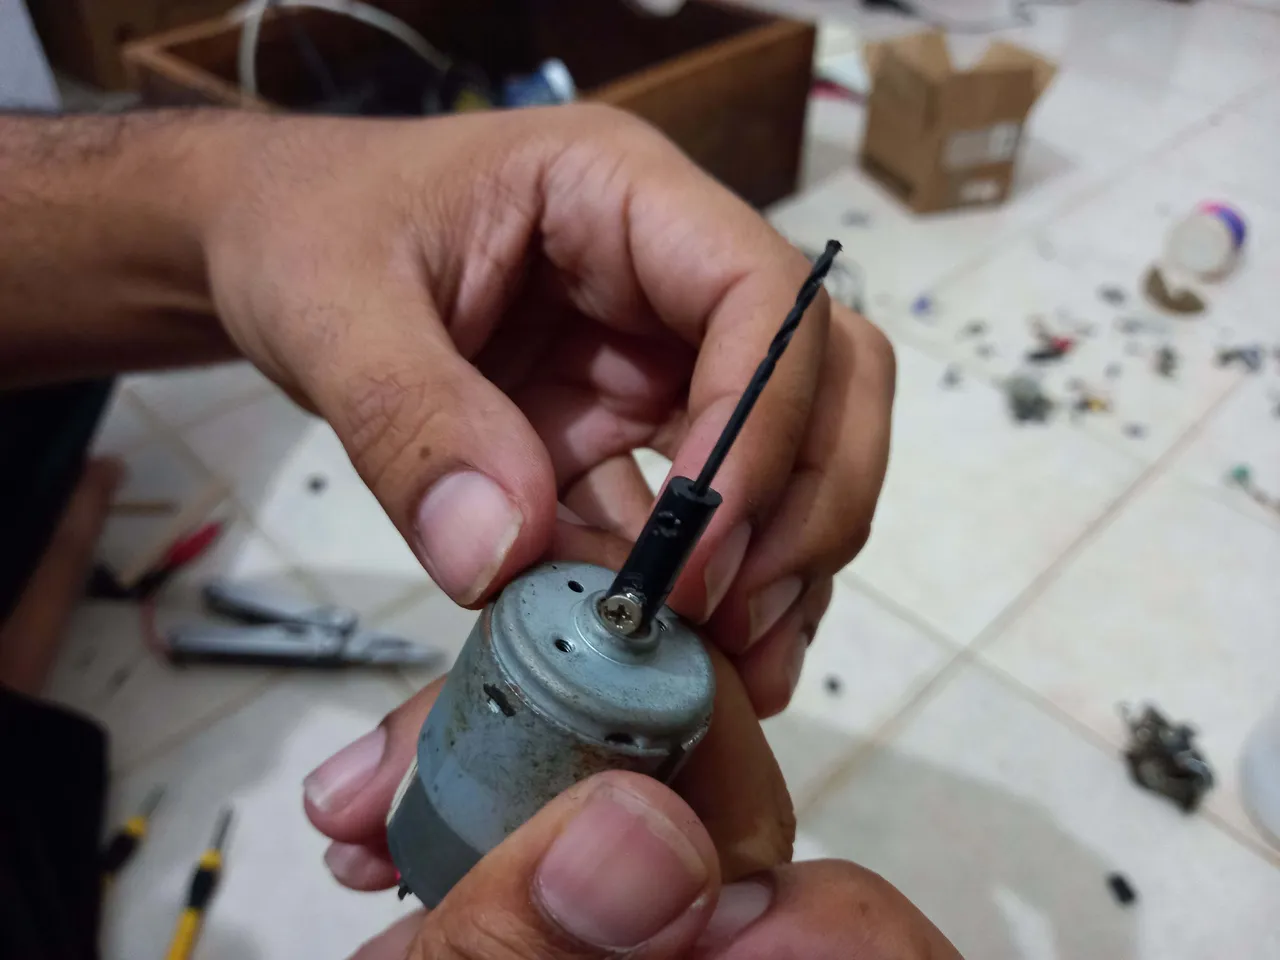
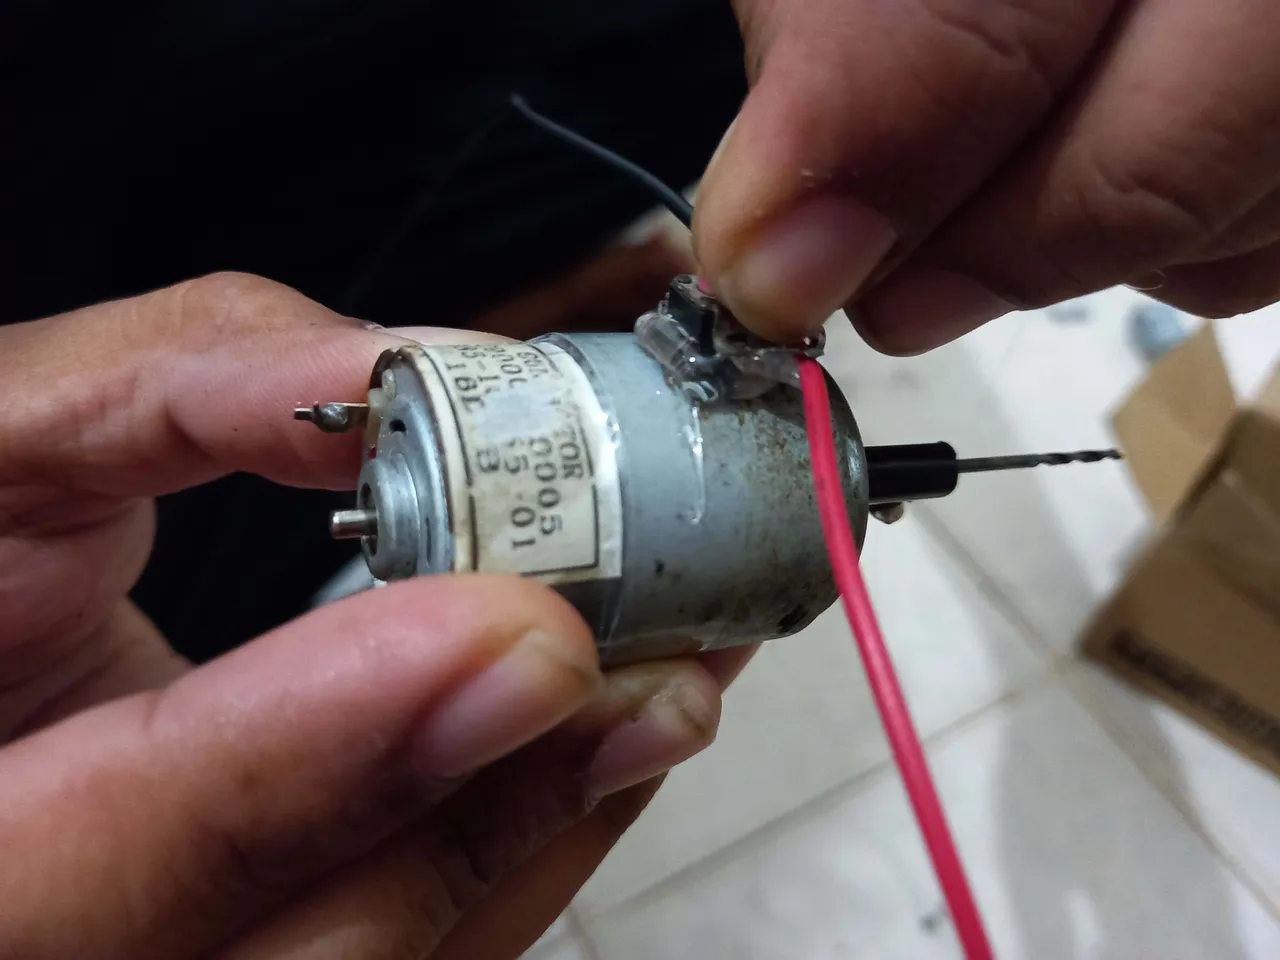
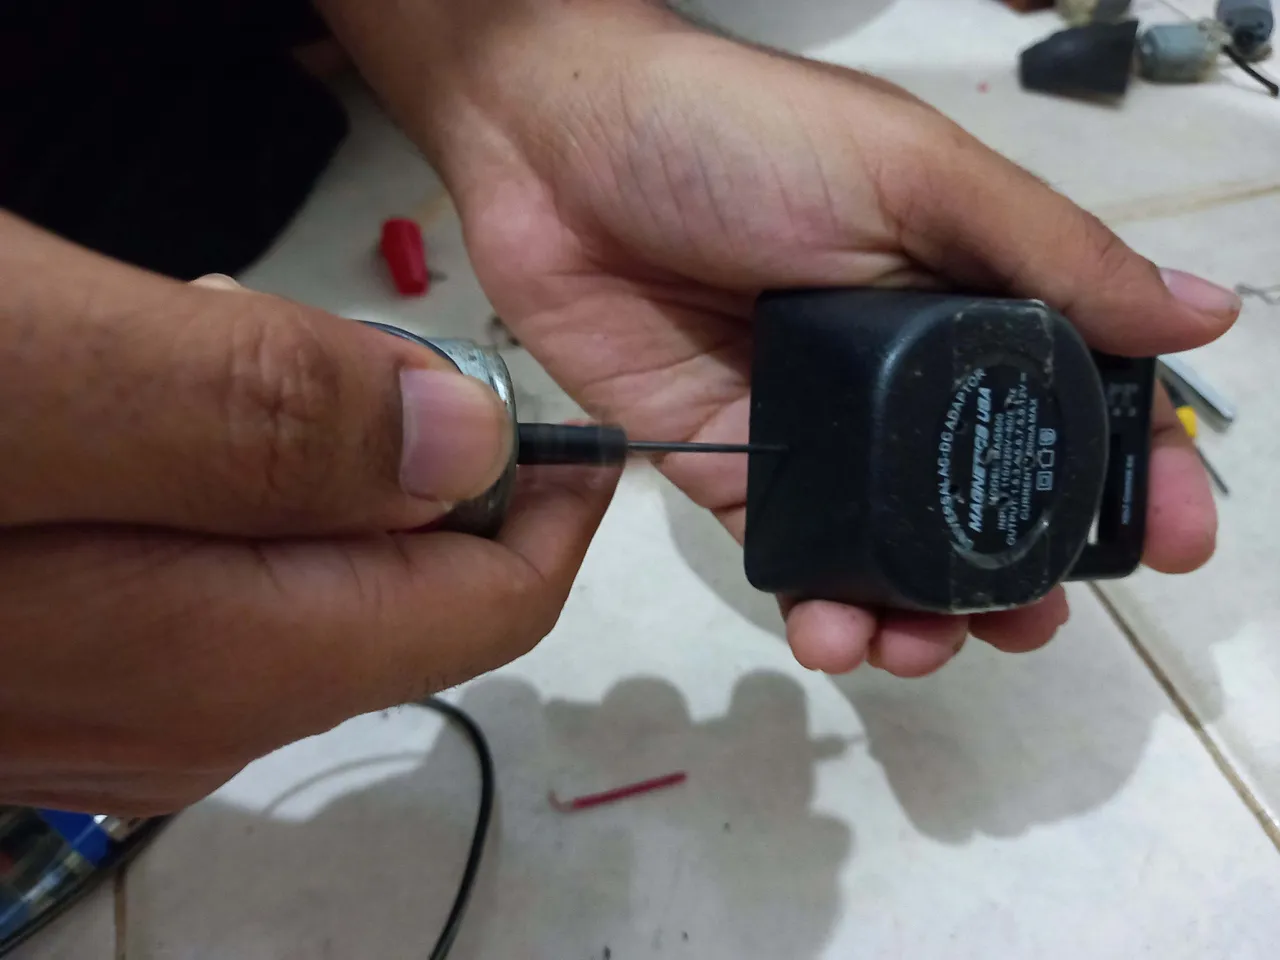
Ajusté el primer tornillo y certifiqué que efectivamente dicho tornillo lograba mantener fijo el motor al cilindro, una vez hecho esto ajusté el tornillo que mantendría en posición a la mecha de perforación, todo salió según lo planteado.
I adjusted the first screw and certified that indeed said screw managed to keep the motor fixed to the cylinder, once this was done I adjusted the screw that would keep the drill bit in position, everything went as planned.
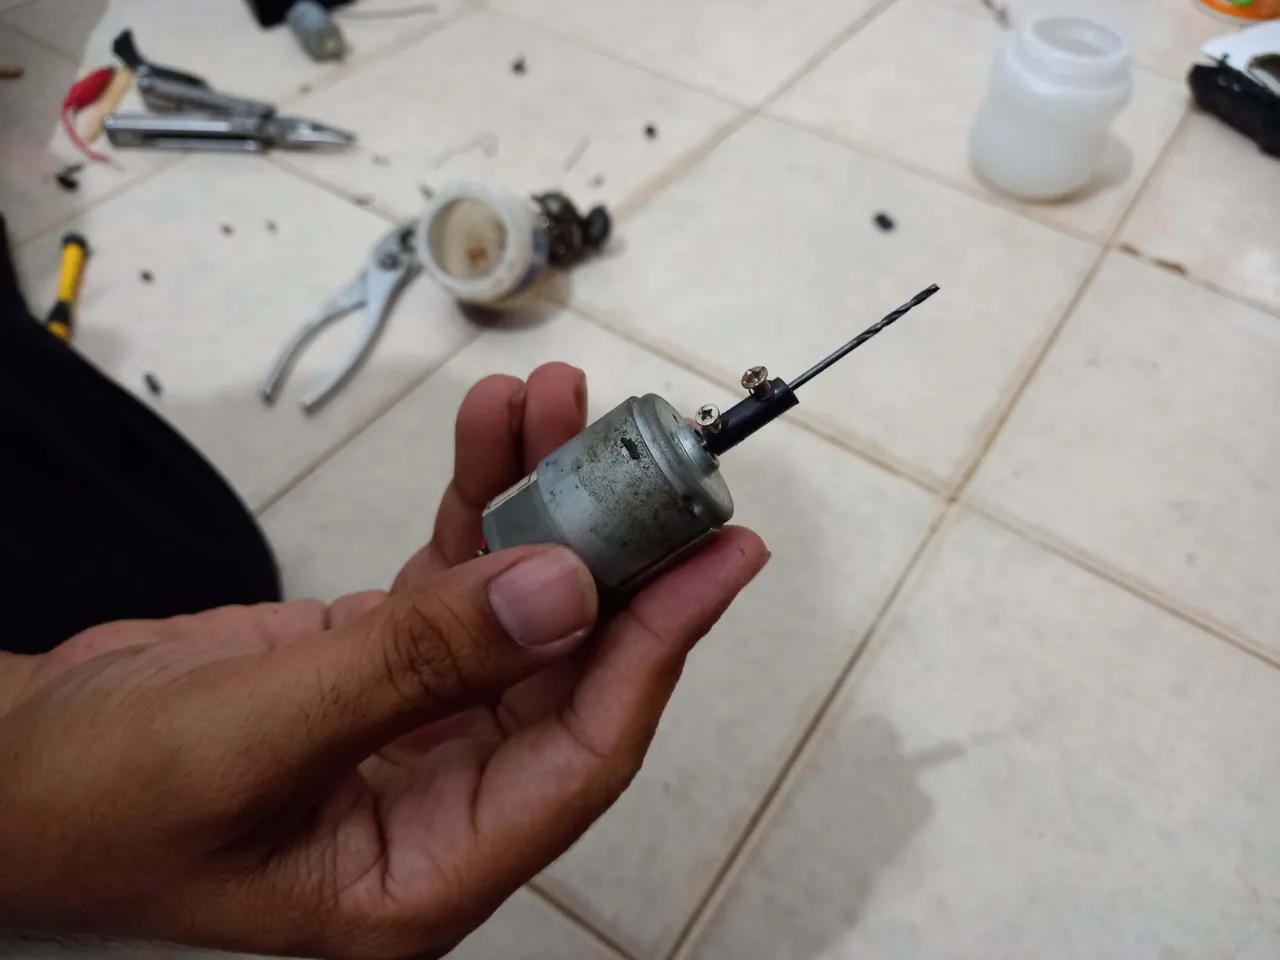
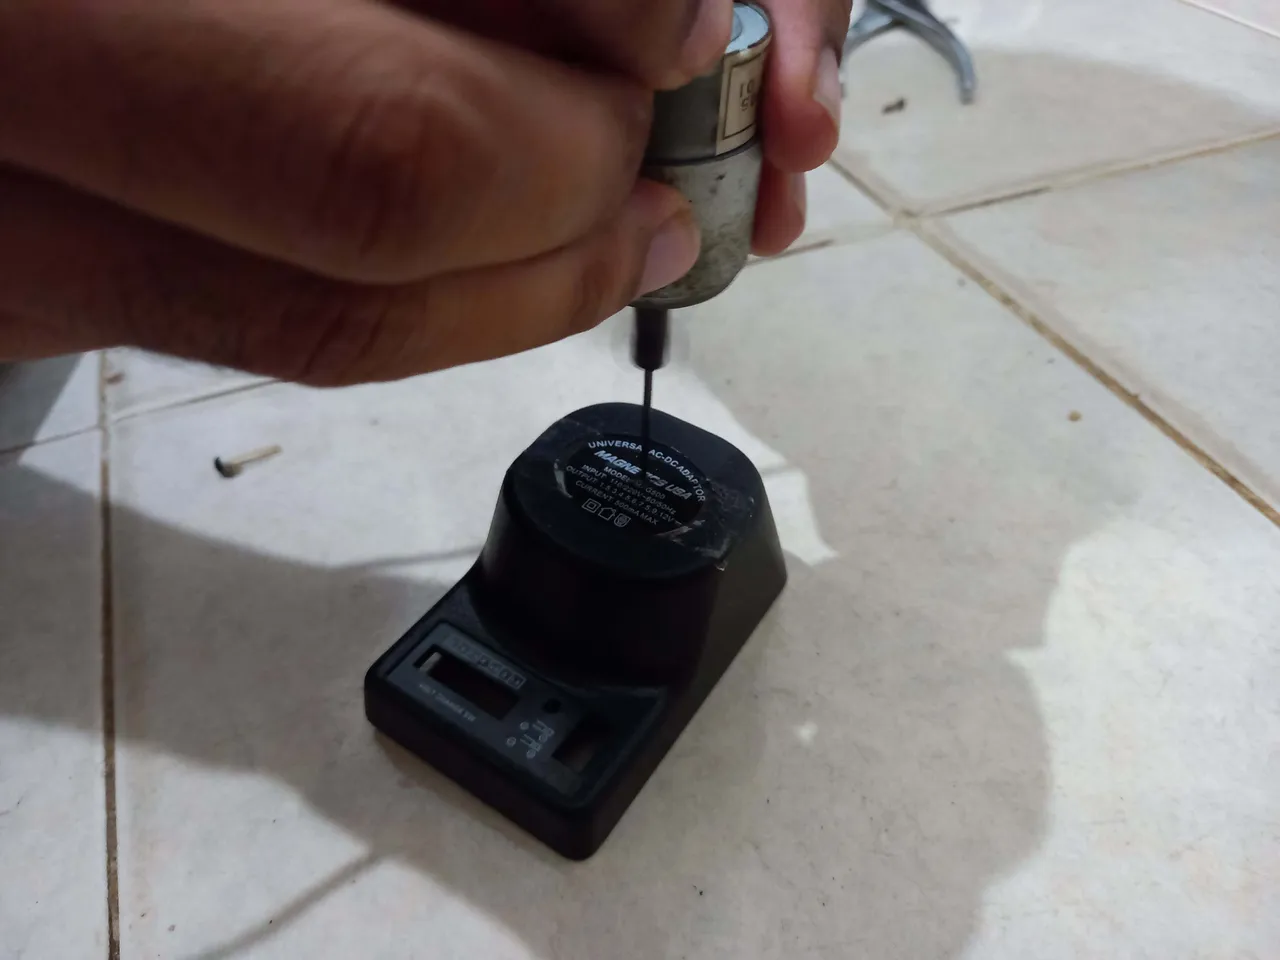
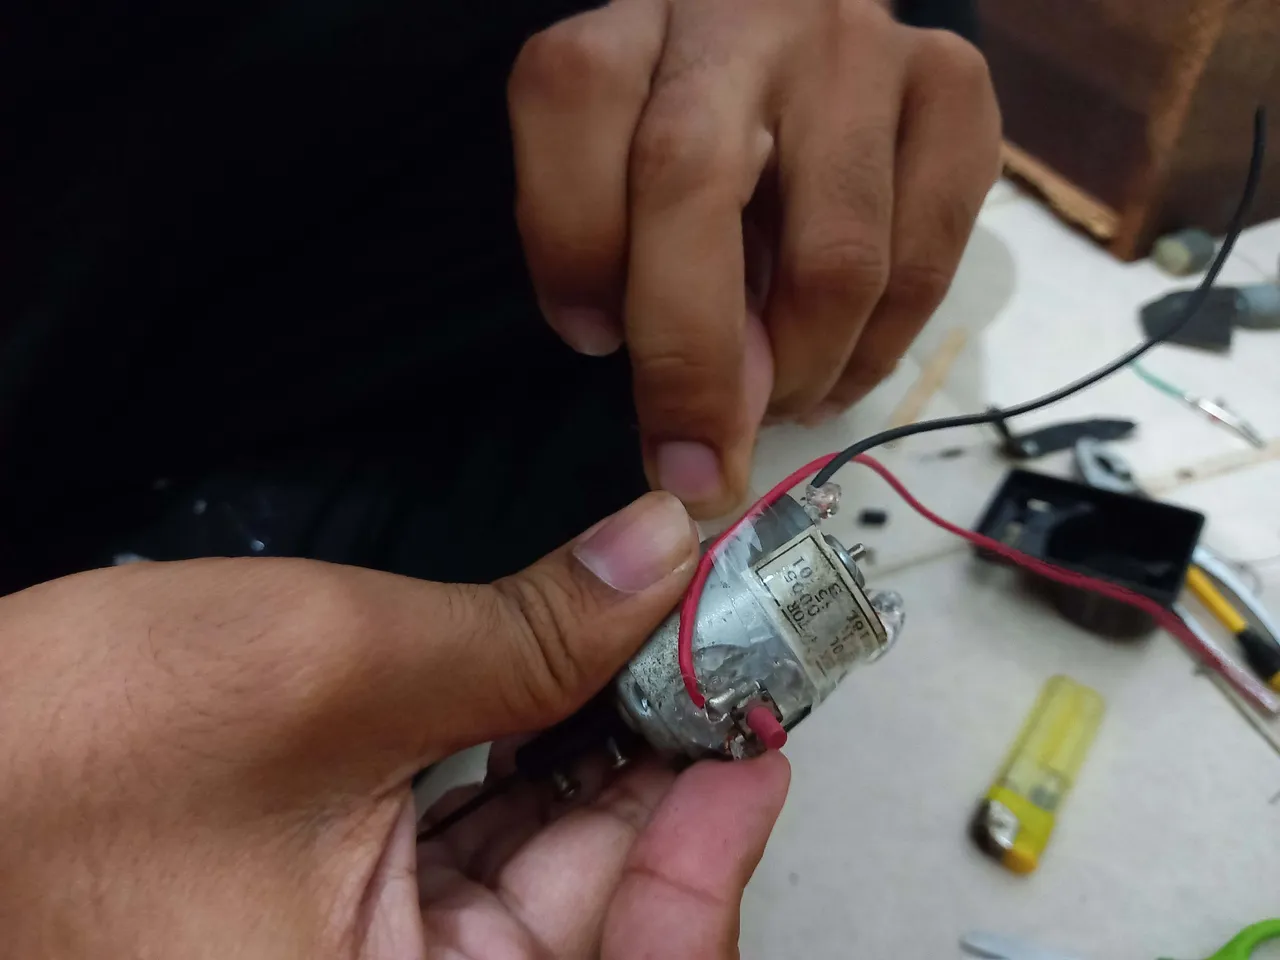
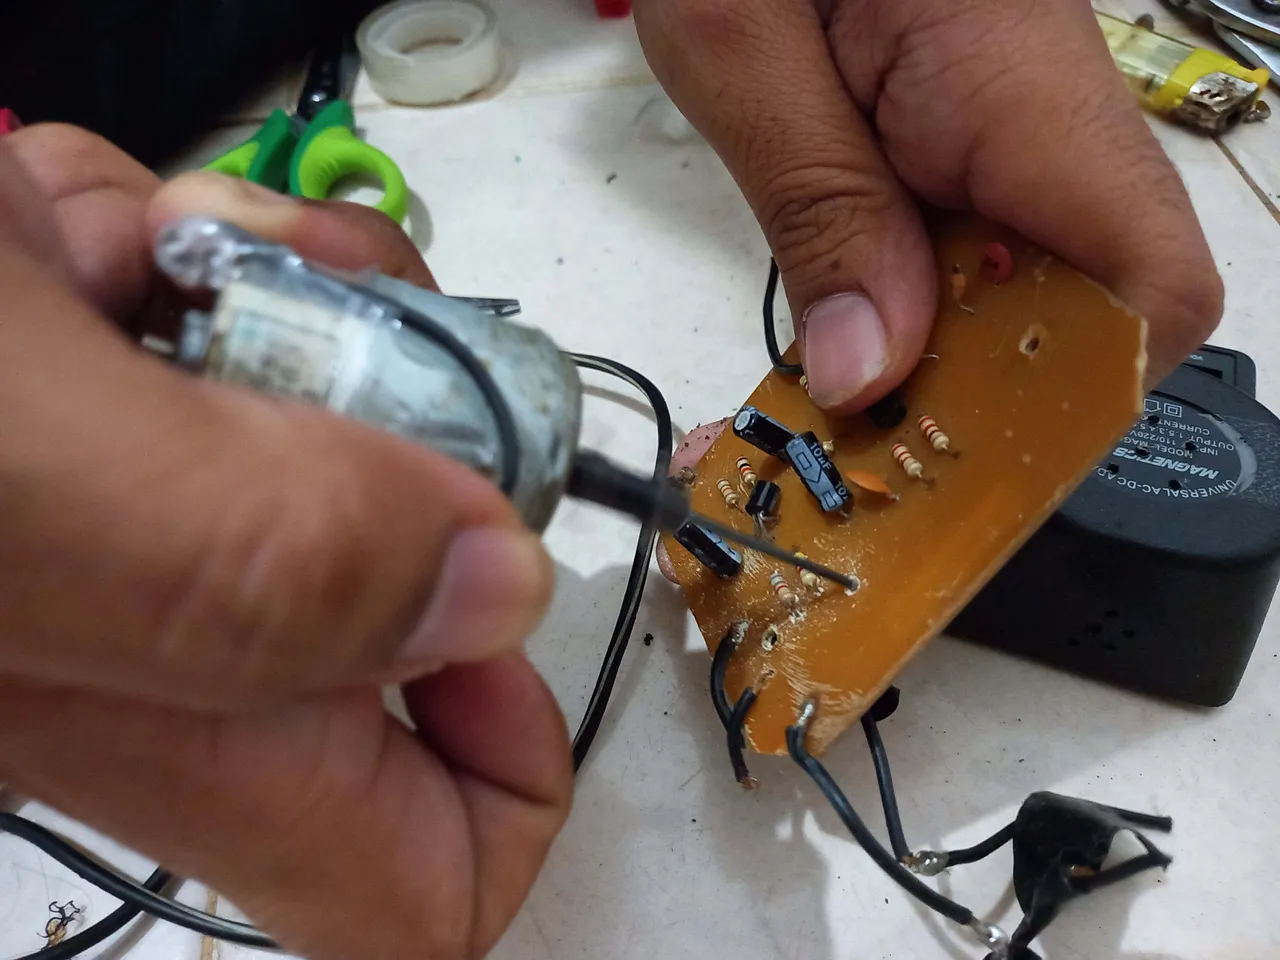
En esta parte antes de continuar con el proyecto decidí probar si en efecto el taladro funcionaba así que lo conecté a una alimentación de 9 Voltios e hice varias perforaciones en la carcasa del antiguo regulador, por suerte todo salió como se esperaba.
In this part before continuing with the project I decided to test if indeed the drill worked so I connected it to a 9 Volt supply and made several holes in the old regulator housing, luckily everything went as expected.
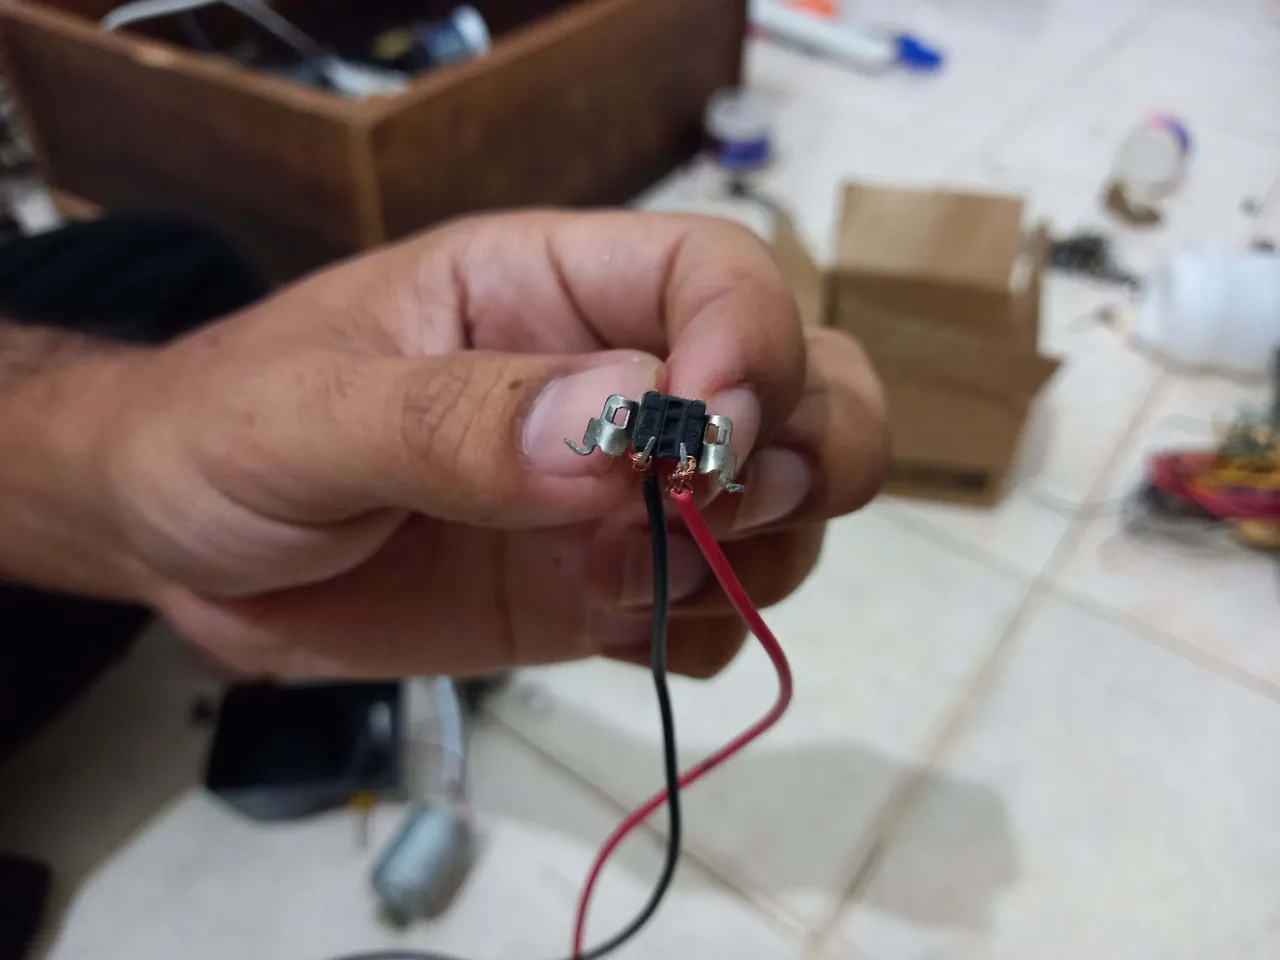
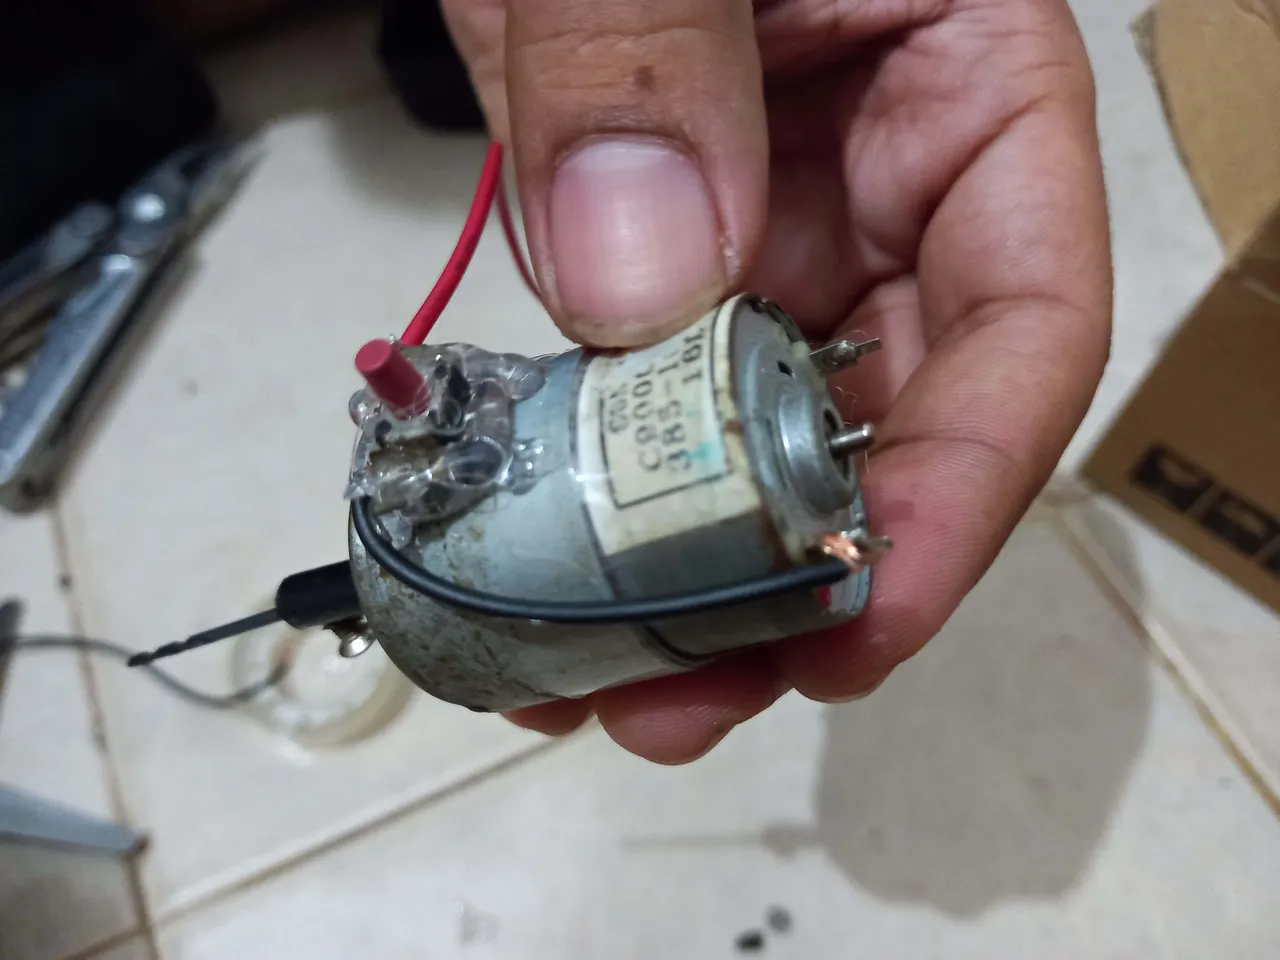
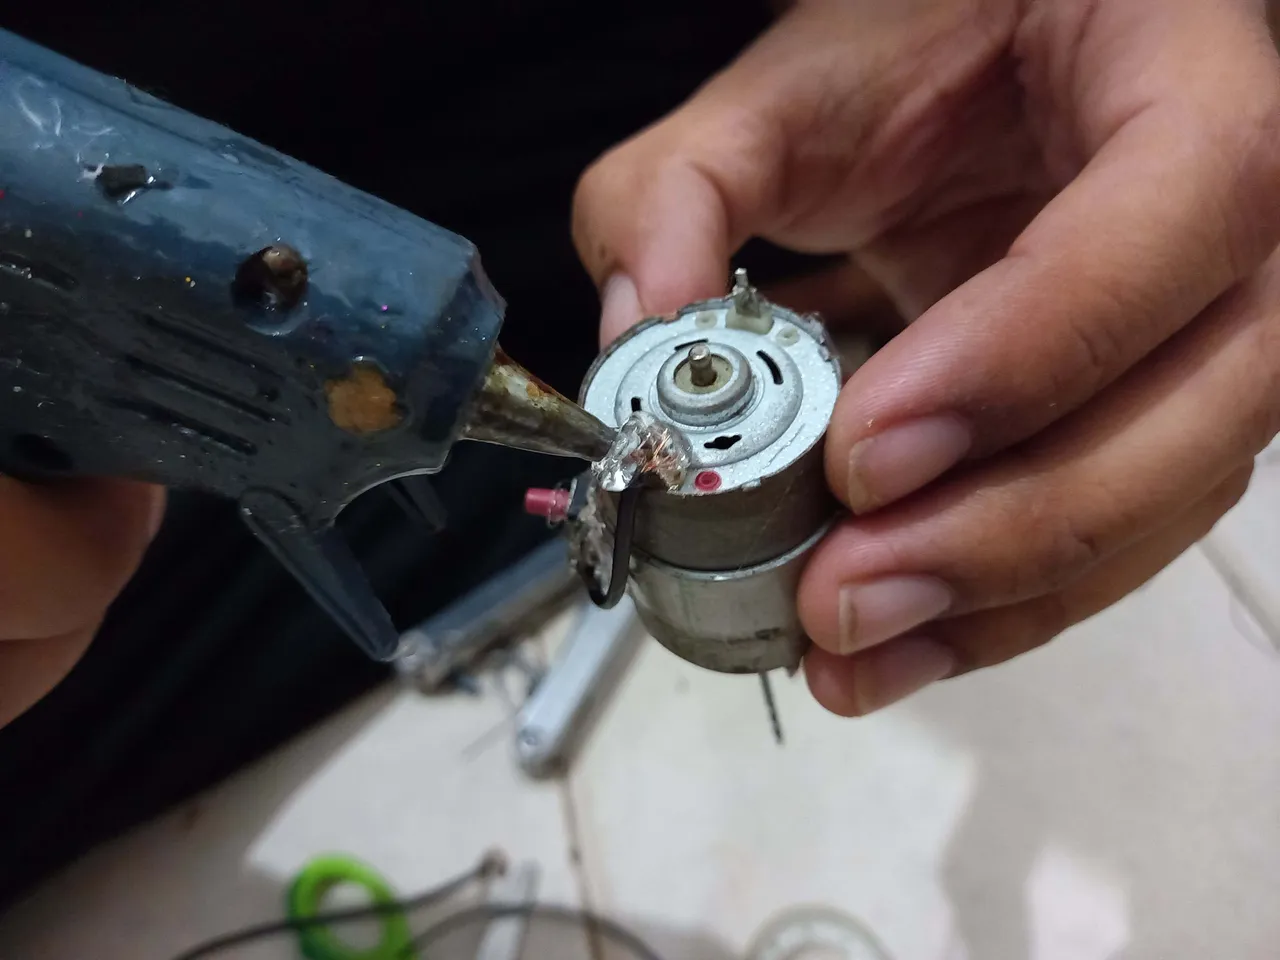
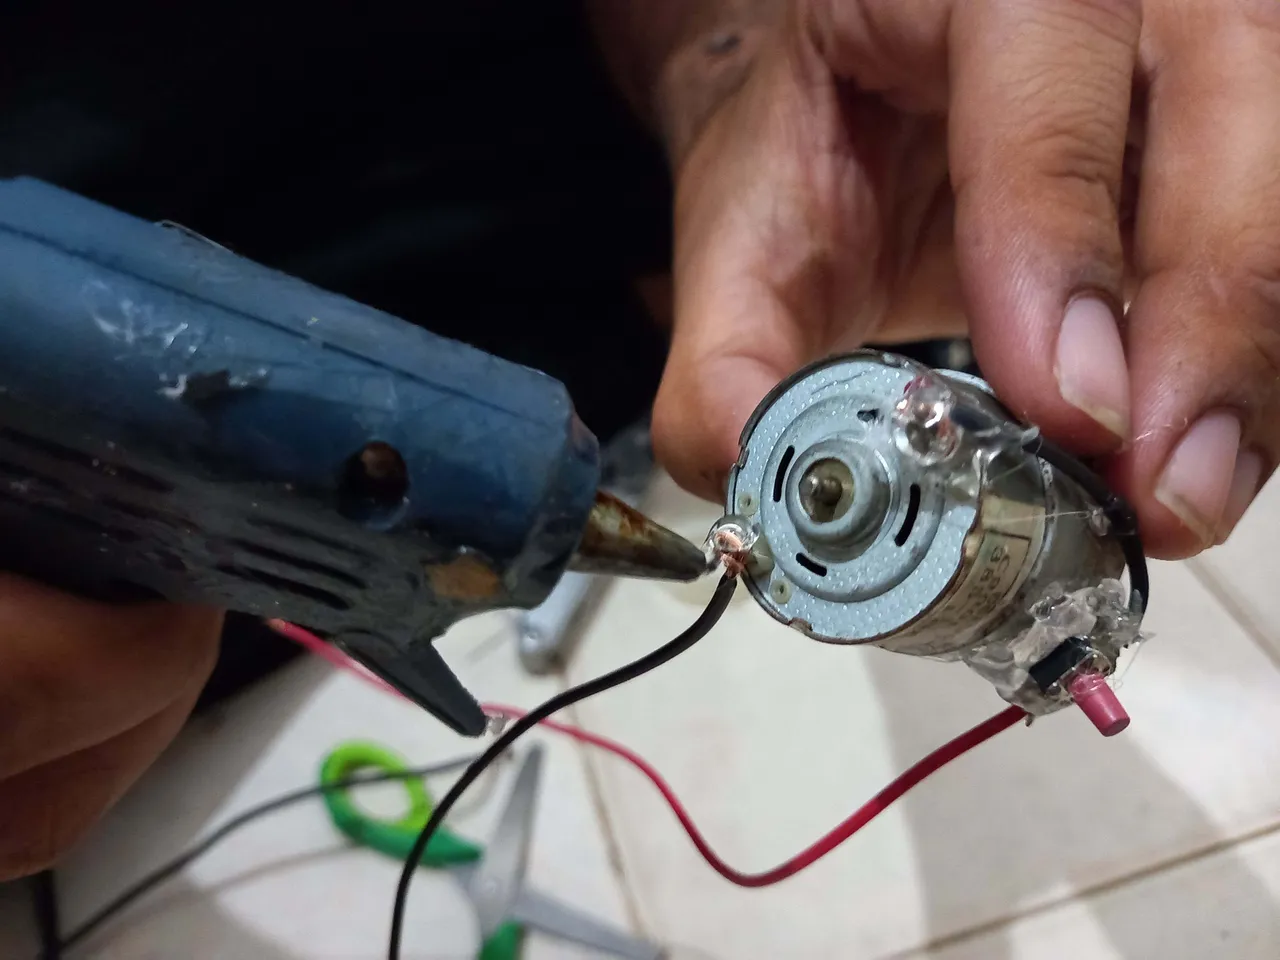
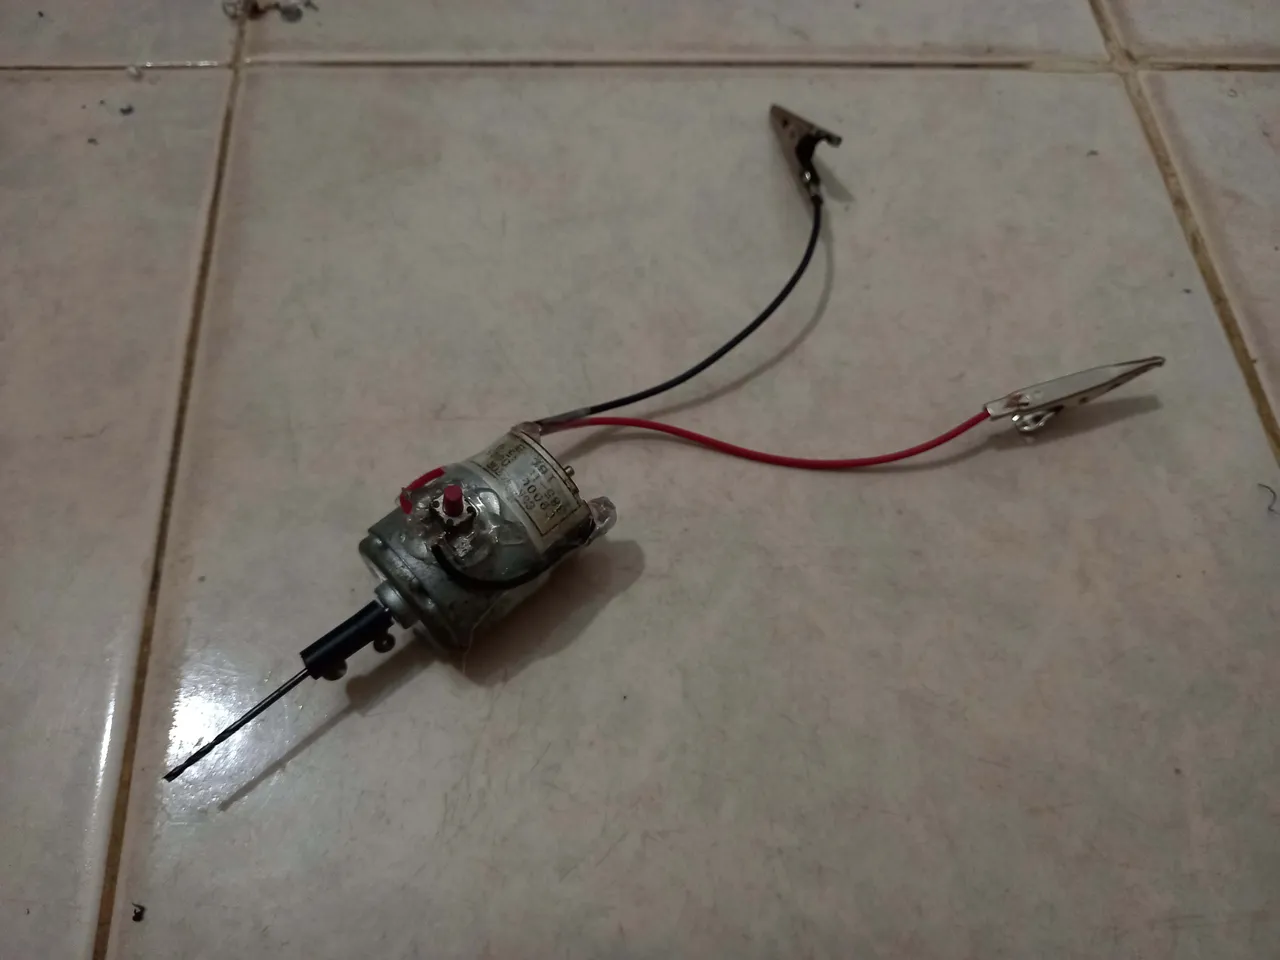
Mi idea es colocar de esta manera el pulsador para poder encender y apagar el taladro a gusto, busqué una vieja fuente de poder dañada que tenia arrinconada por ahí, y le quité dos cables, uno rojo y uno negro, los empalmé al pulsador y aplané los terminales para que no se soltasen y para asegurarlo aun mas y también aislarlo del metal del motor, use silicón en barra para fijar bien los cables y para fijar el pulsador al motor.
My idea is to place the push button in this way to be able to turn the drill on and off at ease, I looked for an old damaged power source that I had cornered there, and I removed two cables, one red and one black, I spliced them to the push button and flattened the terminals so that they do not come loose and to secure it even more and also isolate it from the metal of the motor, use silicone stick to fix the cables well and to fix the pushbutton to the motor.
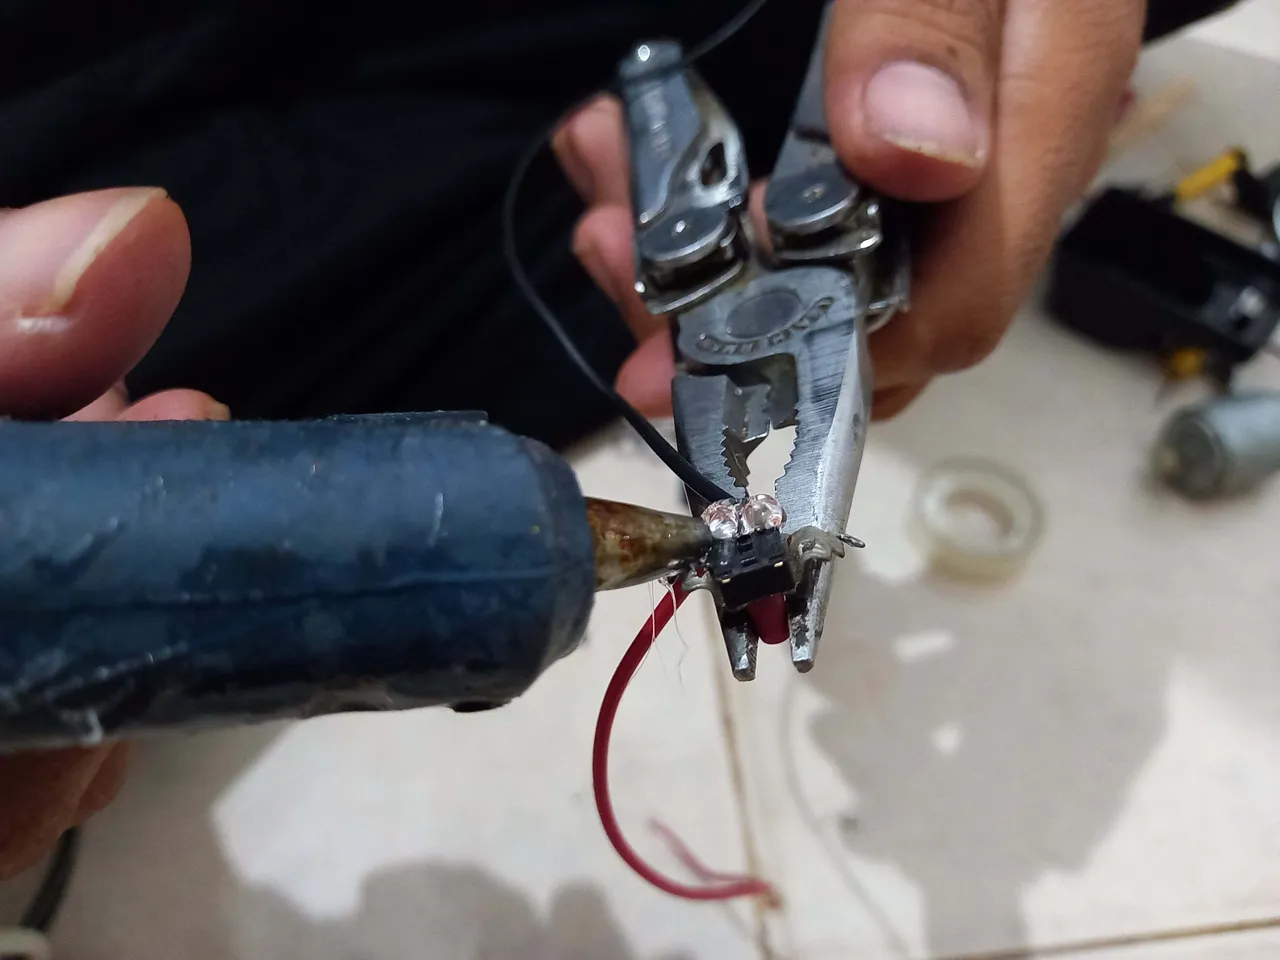
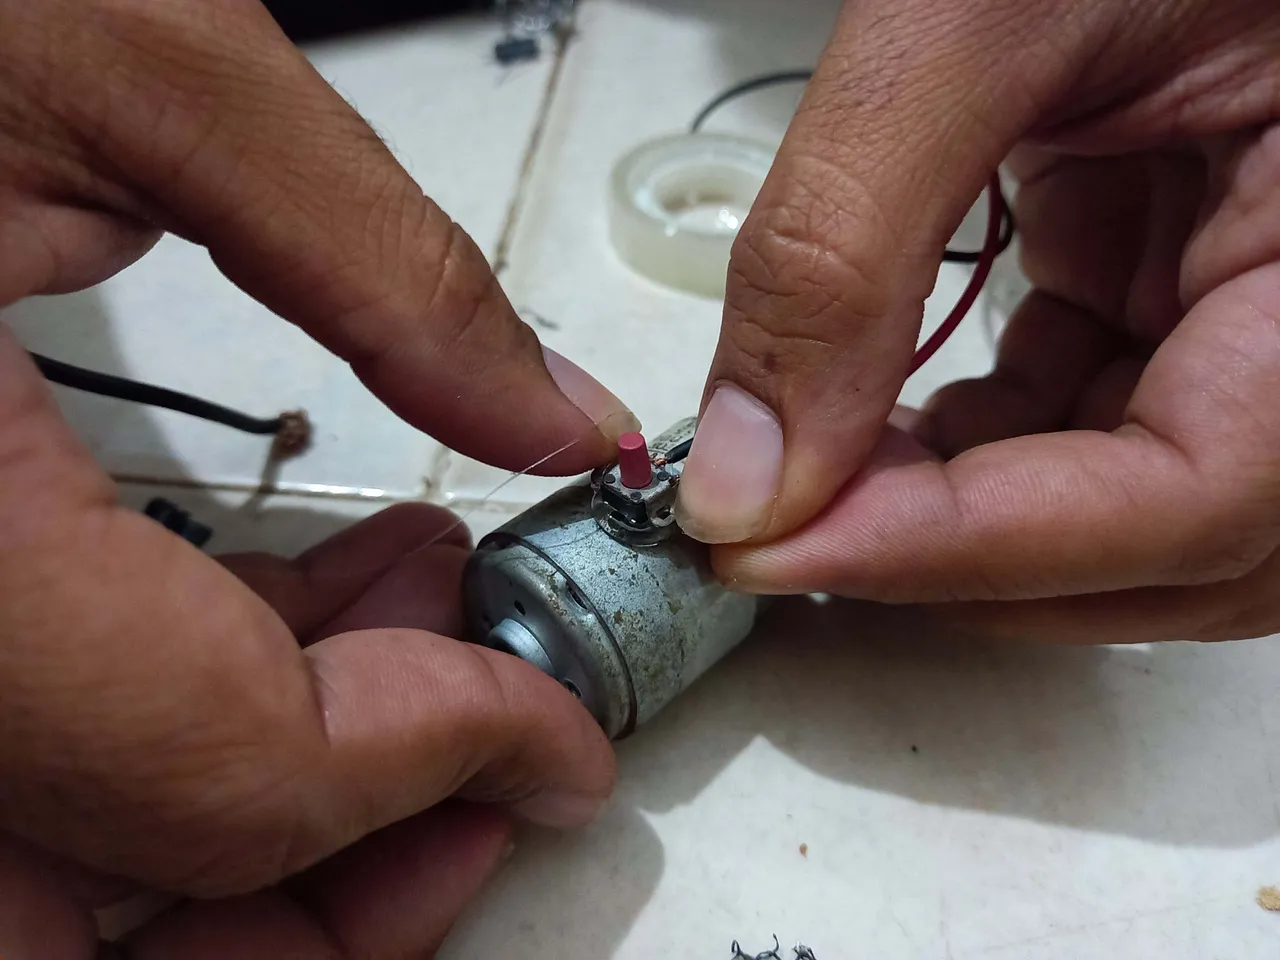
El cable negro lo corté para fijarlo al primer contacto del motor, una vez hecho eso también lo aseguré con silicón, el extremo sobrante del cable negro lo fijé en el otro contacto del motor y nuevamente lo fijé todo con silicón, luego fijé los cables al motor con un poco de cinta adhesiva transparente para asegurar más estabilidad en el motor y que de cierta forma quede un poco estético.
I cut the black wire to fix it to the first contact of the motor, once that was done I also secured it with silicone, the excess end of the black wire was fixed on the other contact of the motor and again I fixed it all with silicone, then I fixed the cables to the motor with a little transparent adhesive tape to ensure more stability in the motor and that in a certain way it is a bit aesthetic.
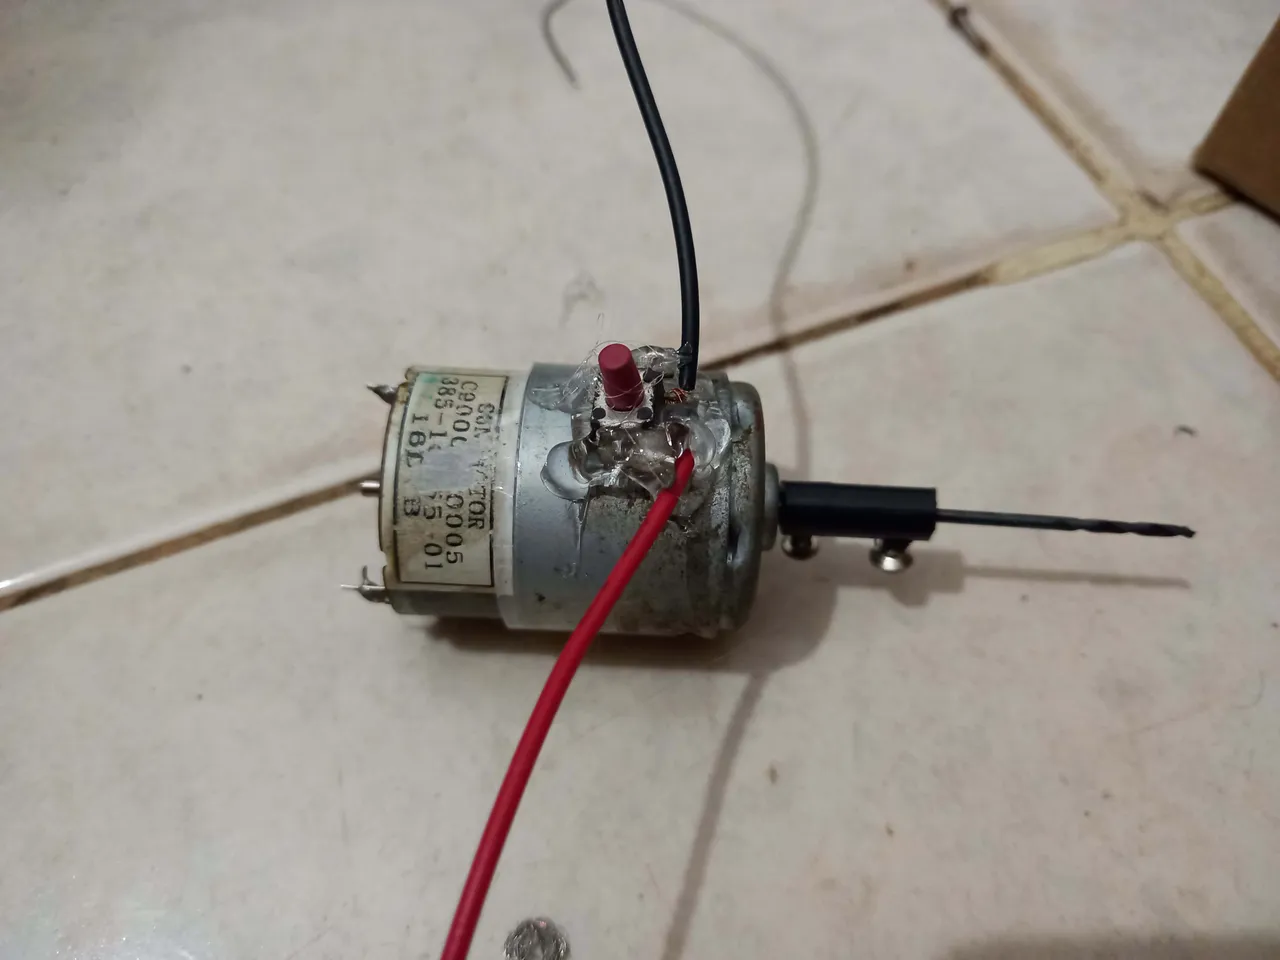
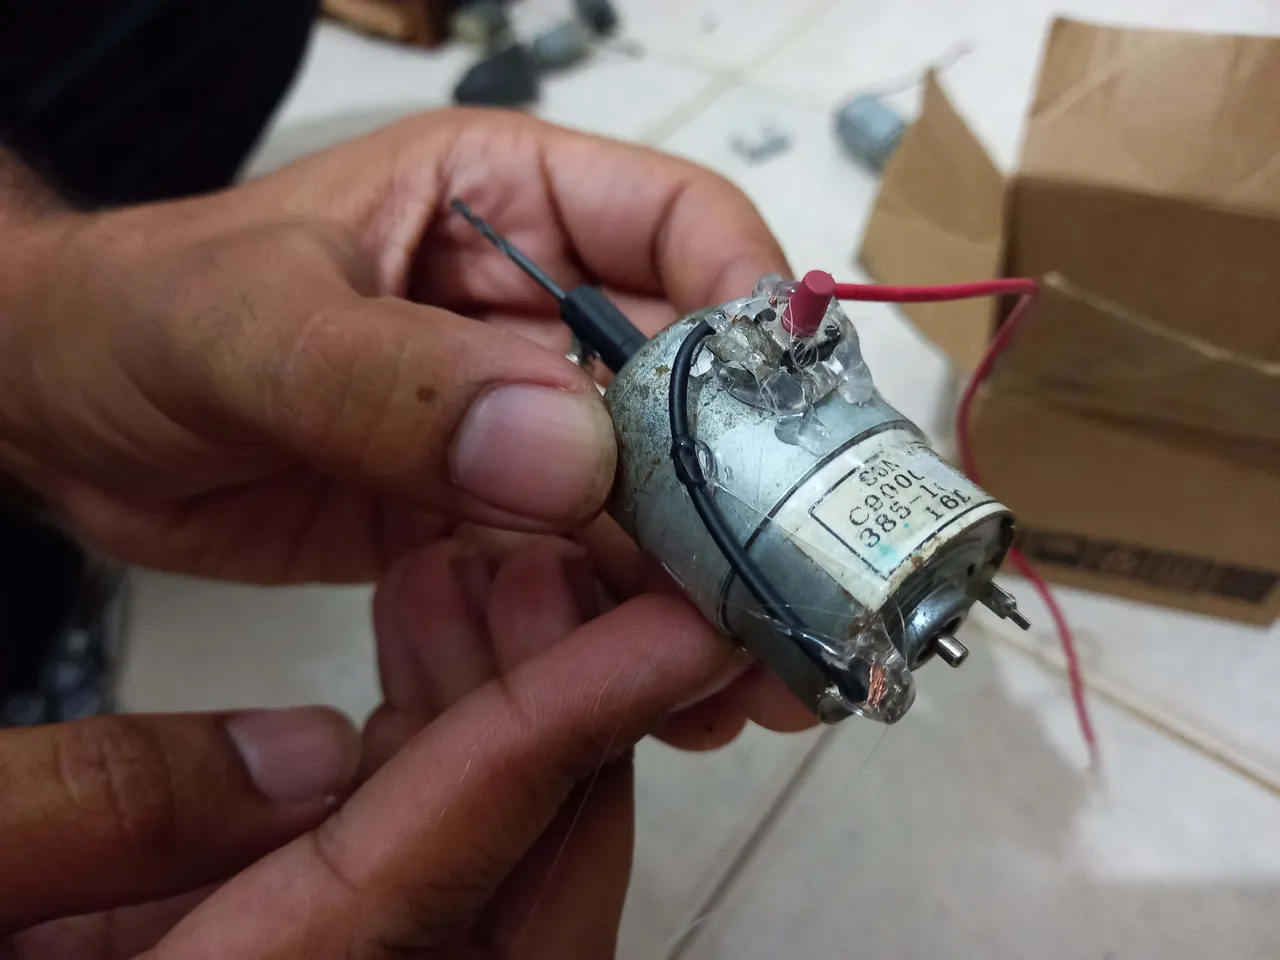
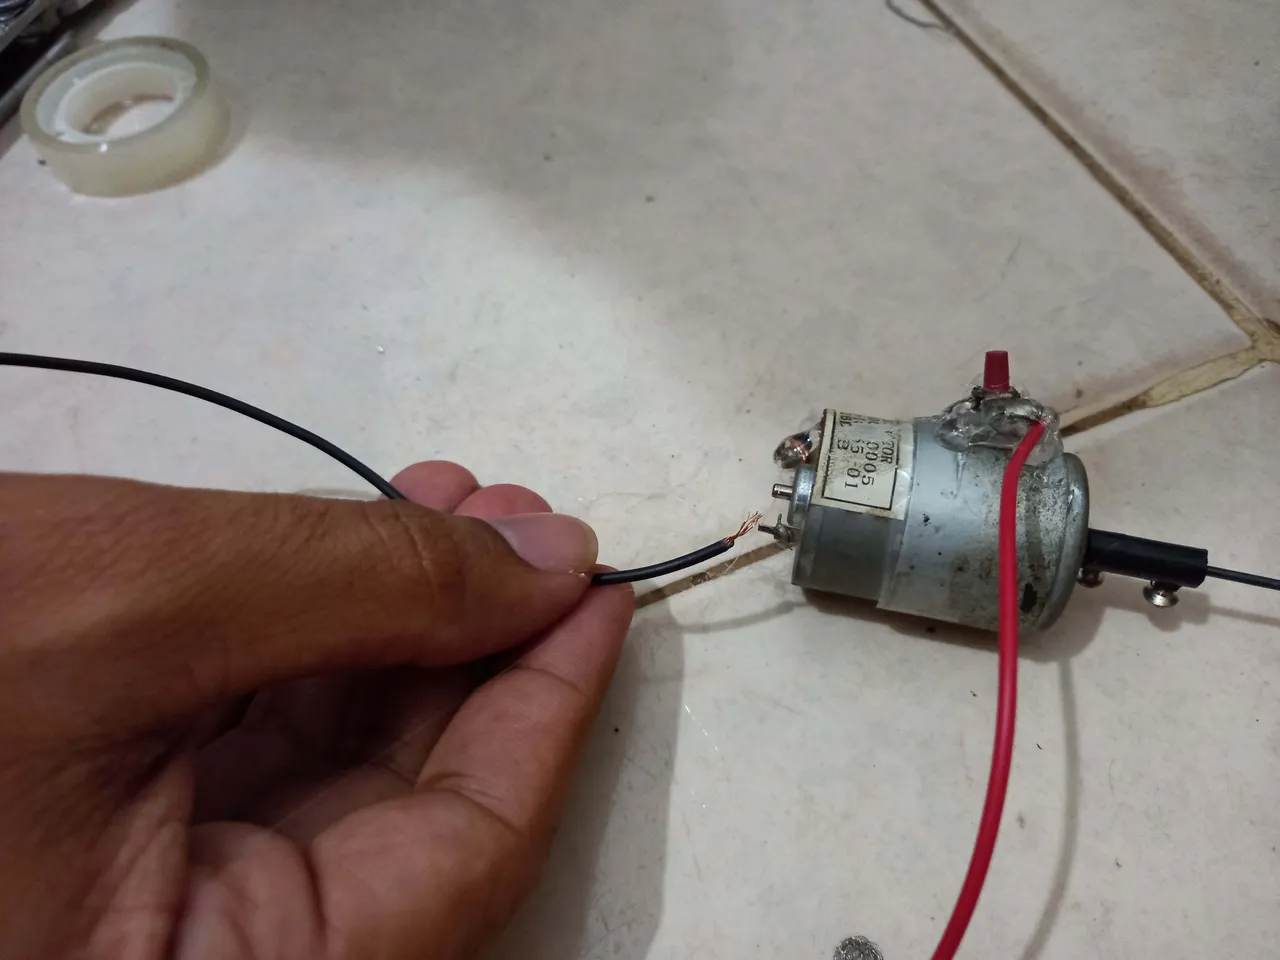
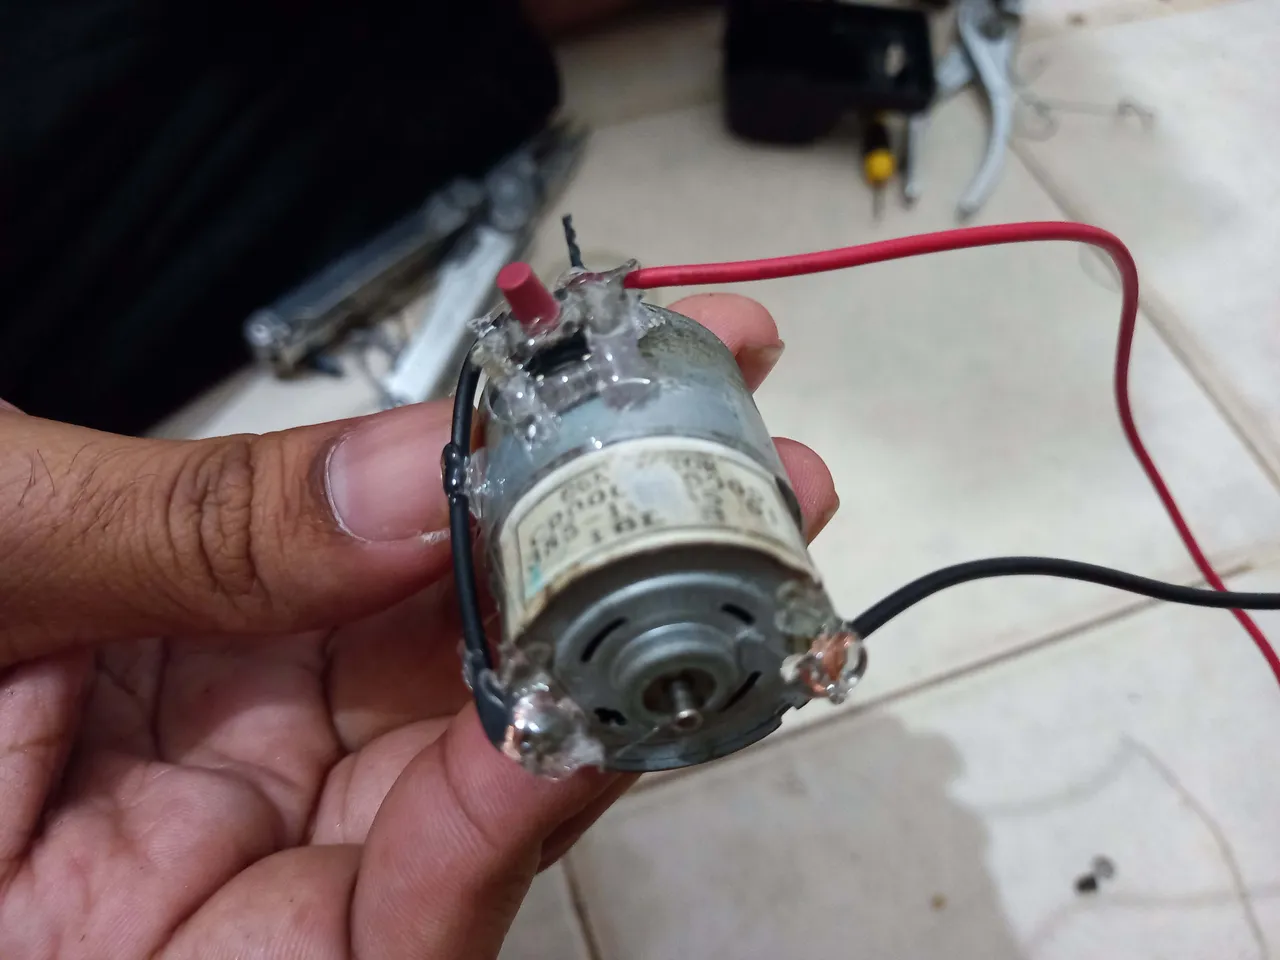
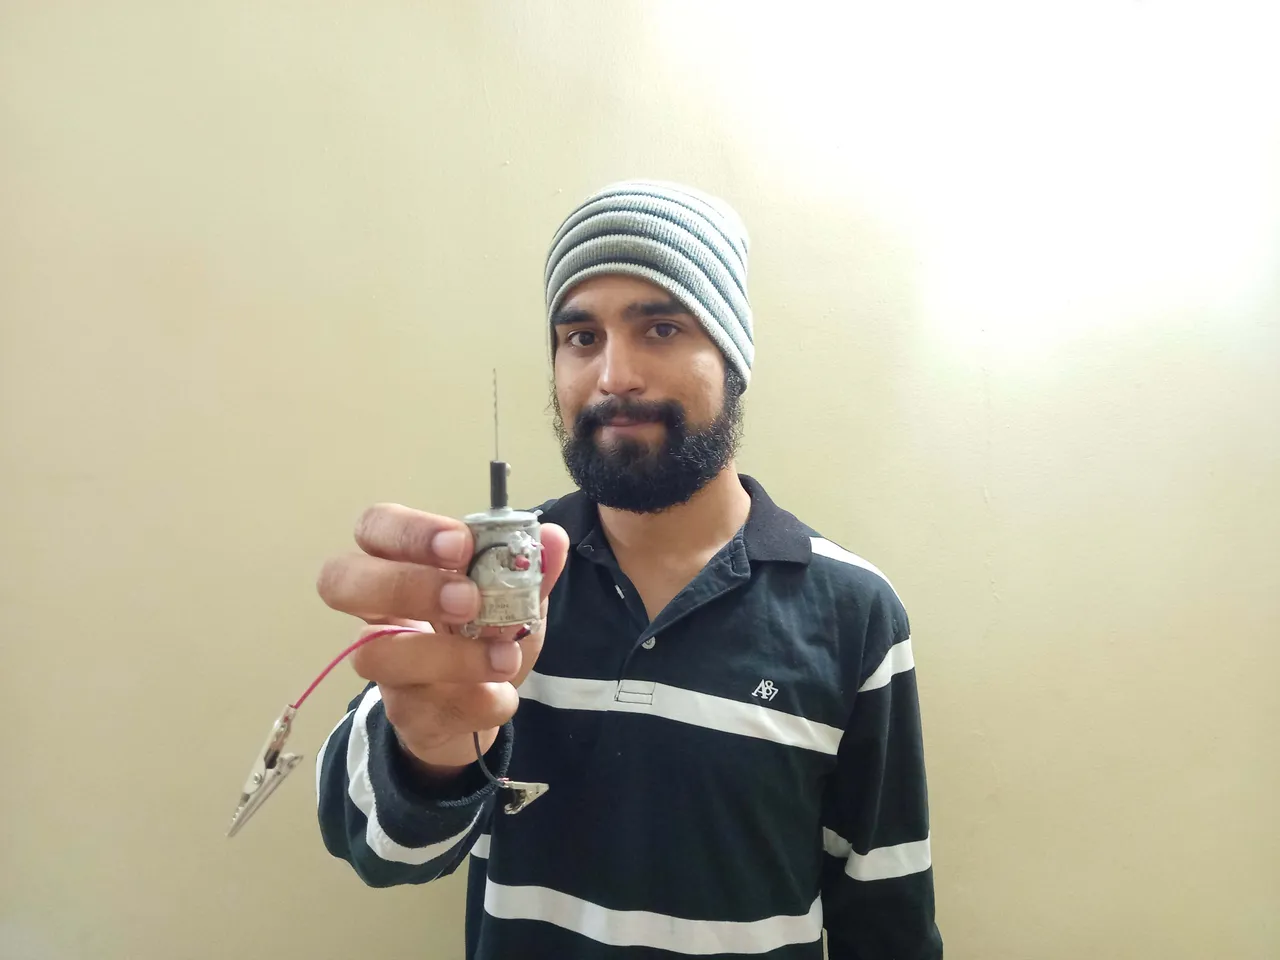
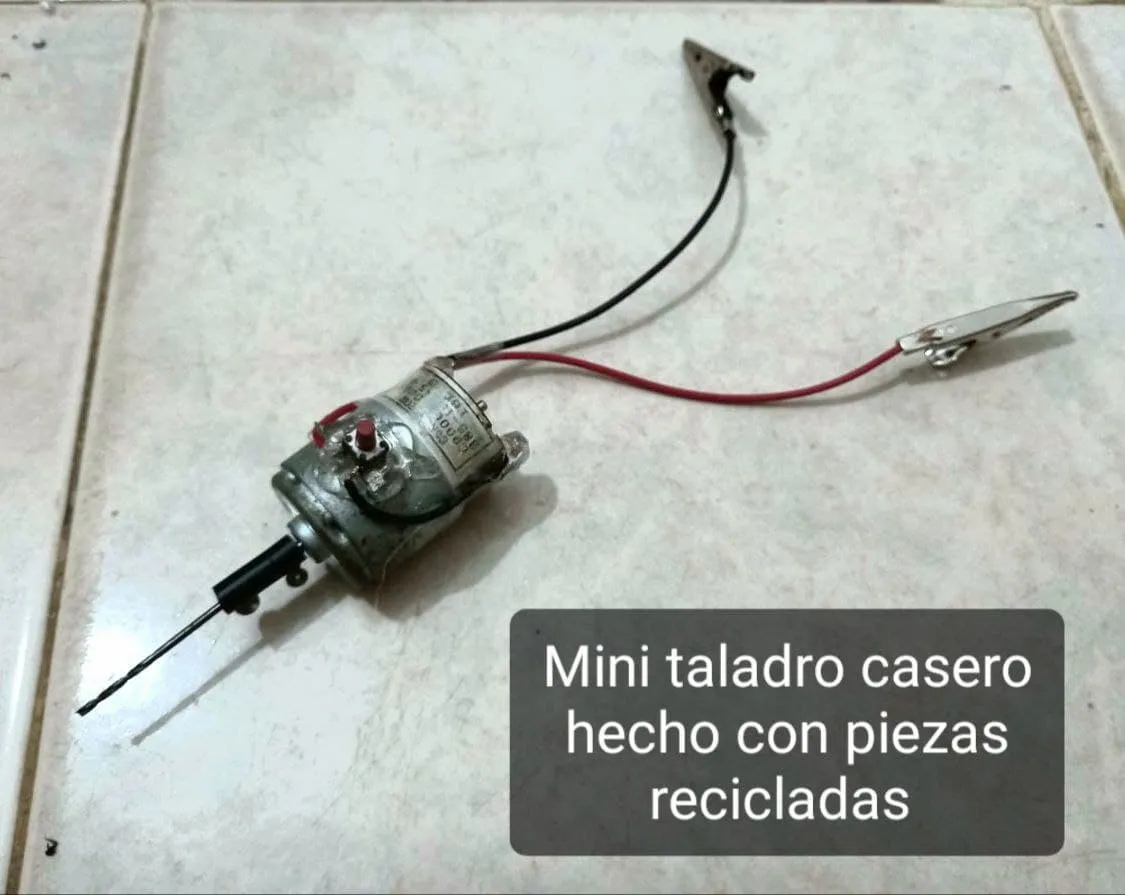
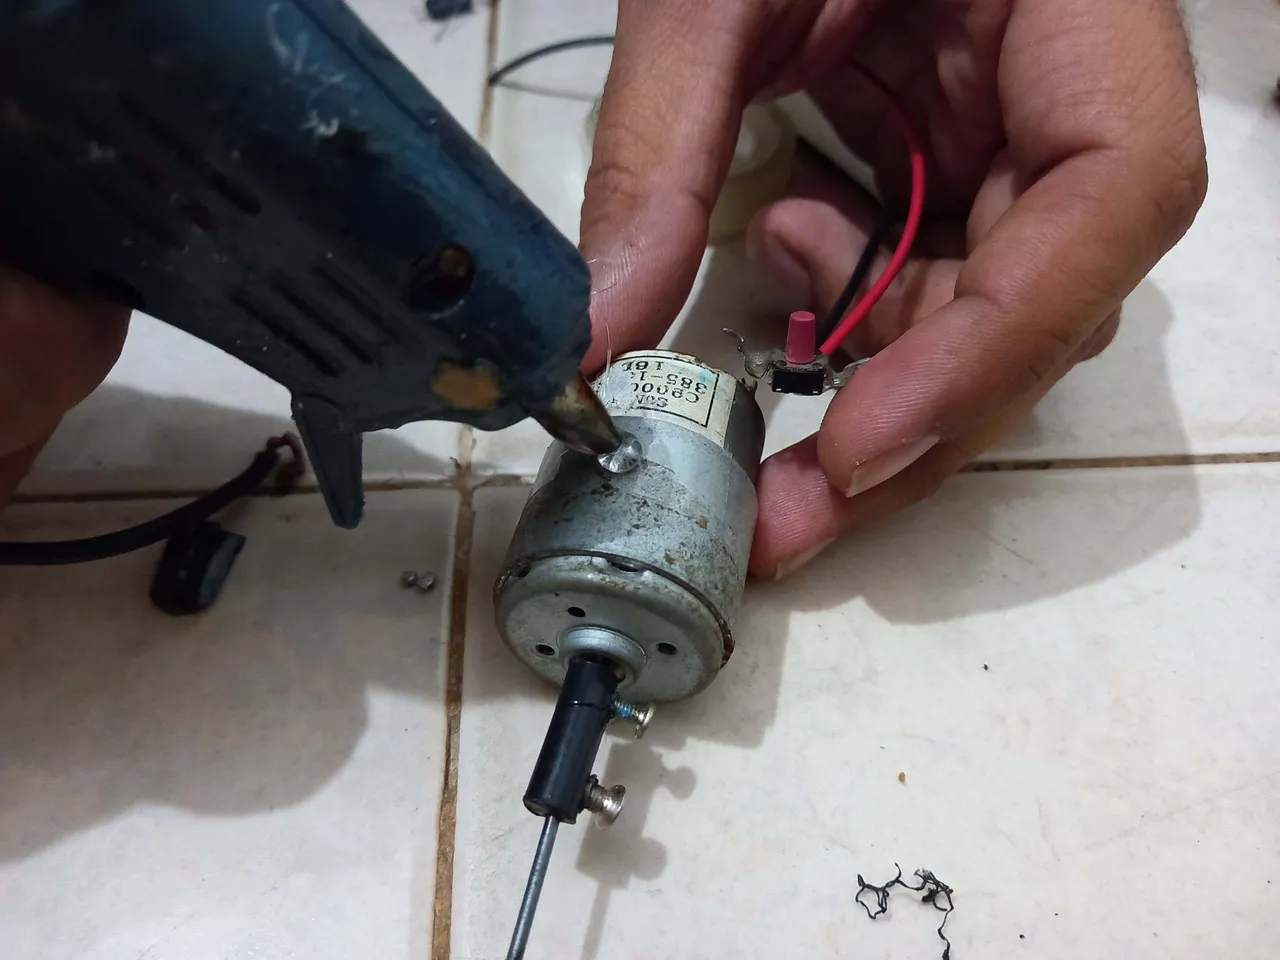
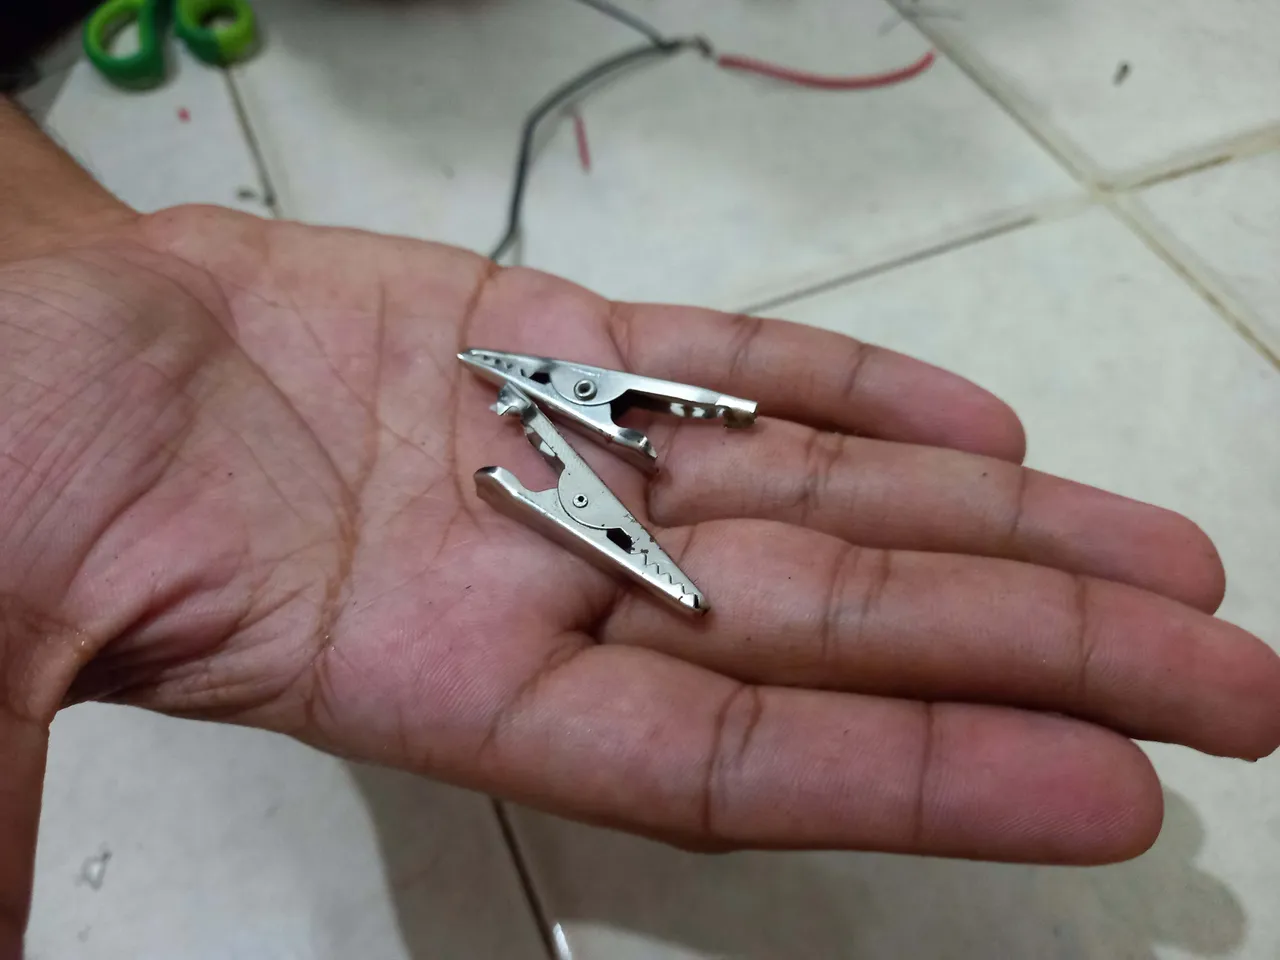
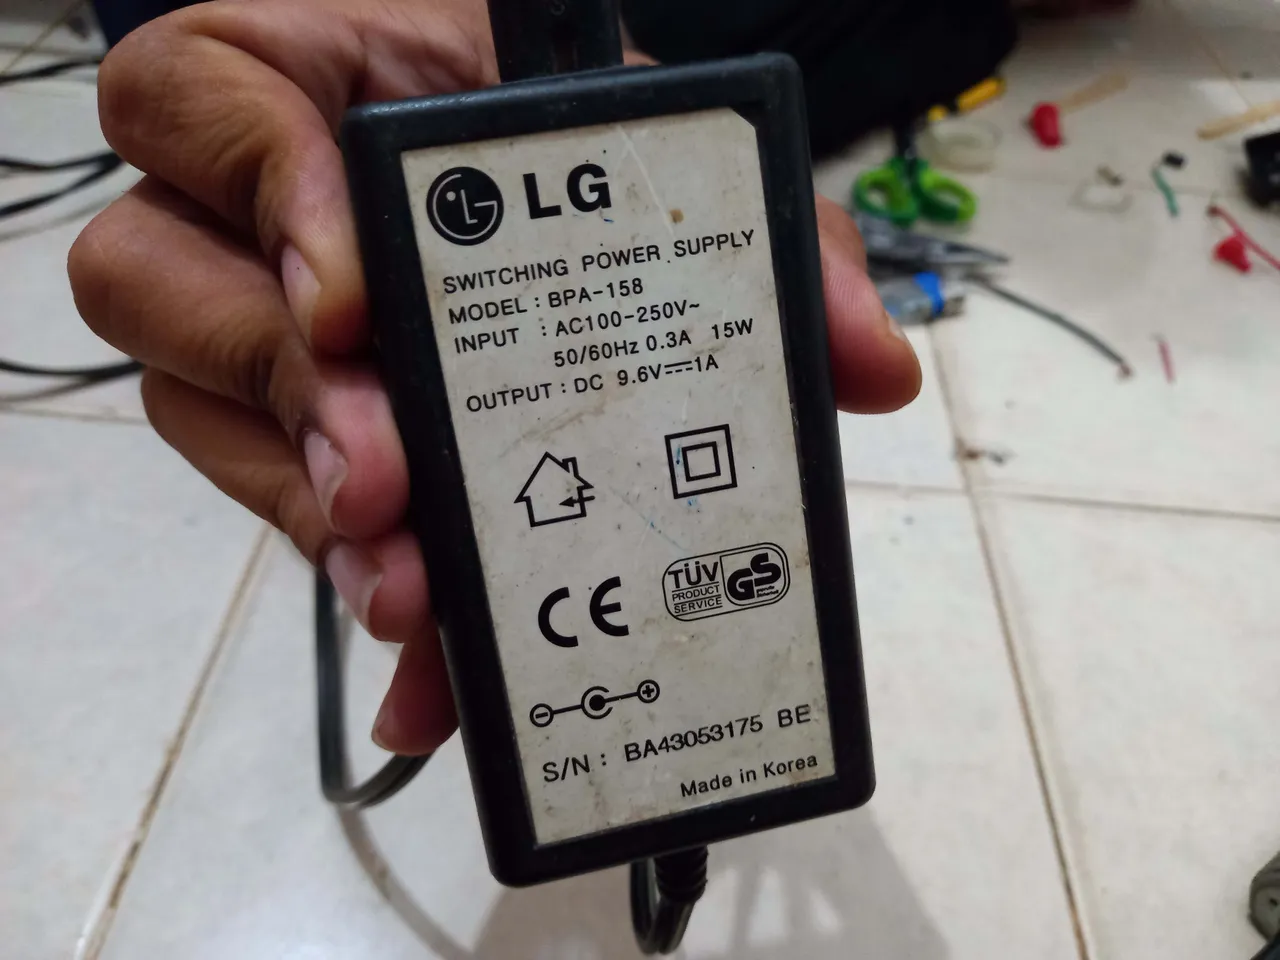
Finalmente usé unas pinzas caimán para poder conectar el motor a la fuente de alimentación, la fuente que usé es de un viejo regulador de 9 voltios el cual no recuerdo de que aparato era pero sé que lo usaba bastante en mis prácticas de electrónica, y ya mi pequeño taladro hecho con materiales reciclados queda terminado, la verdad estoy bastante satisfecho con el resultado final.
Finally I used alligator clips to connect the motor to the power supply, the source I used is from an old 9-volt regulator which I don't remember what device it was but I know I used it a lot in my electronics practices, and that's it. my little drill made with recycled materials is finished, the truth is I am quite satisfied with the final result.
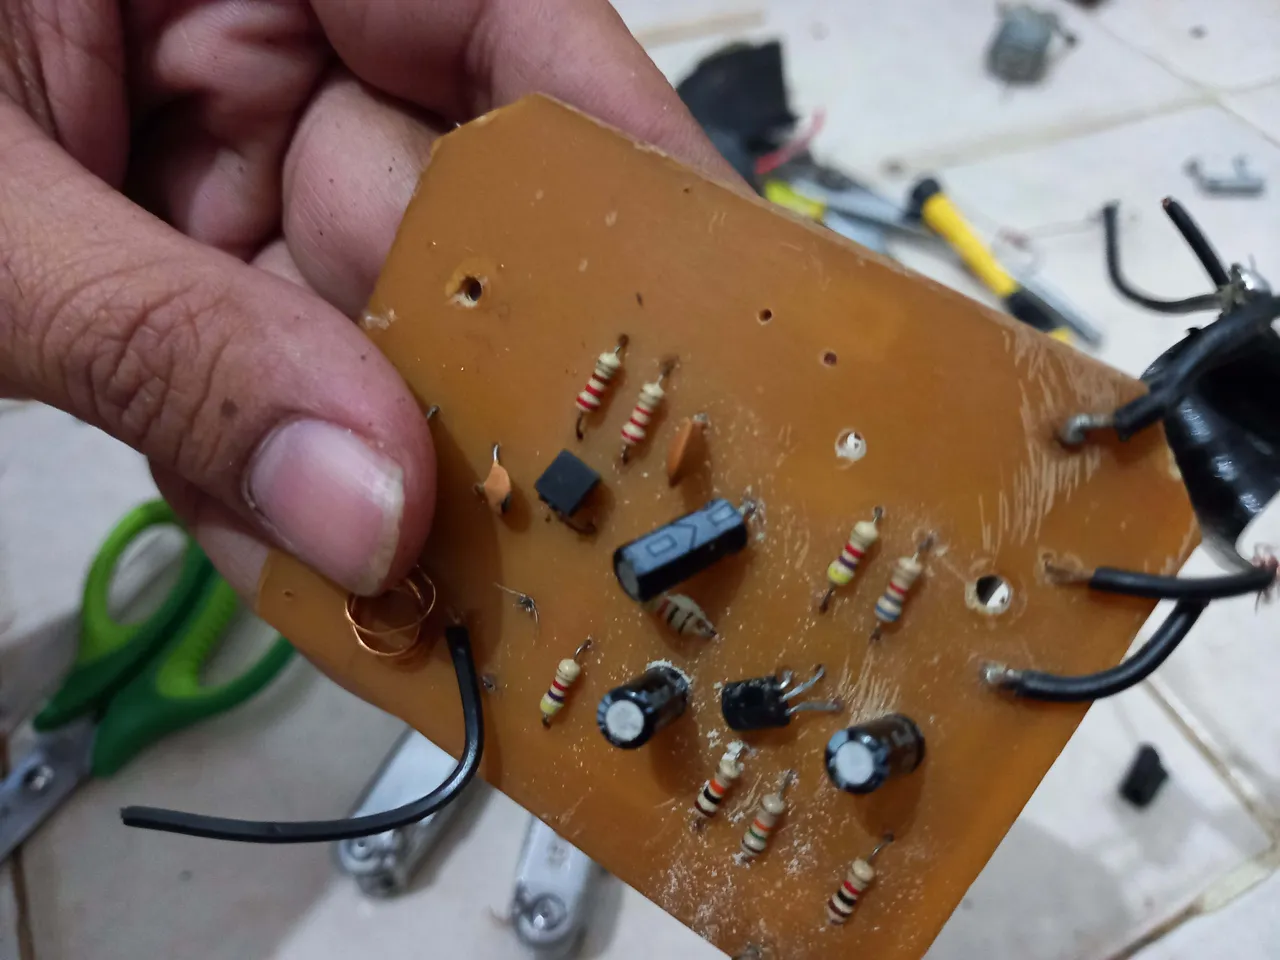
Ahora es momento de hacer algunas pruebas, seguí haciendo perforaciones en la carcasa del regulador dañado y todas quedaron perfectas, después probé tratando de perforar una tarjeta electrónica y aunque demoró un poco en perforar, al final lo hizo sin ningún inconveniente.
Now it is time to do some tests, I kept drilling holes in the damaged regulator housing and they were all perfect, then I tried trying to drill an electronic card and although it took a while to drill, in the end it did it without any problem.
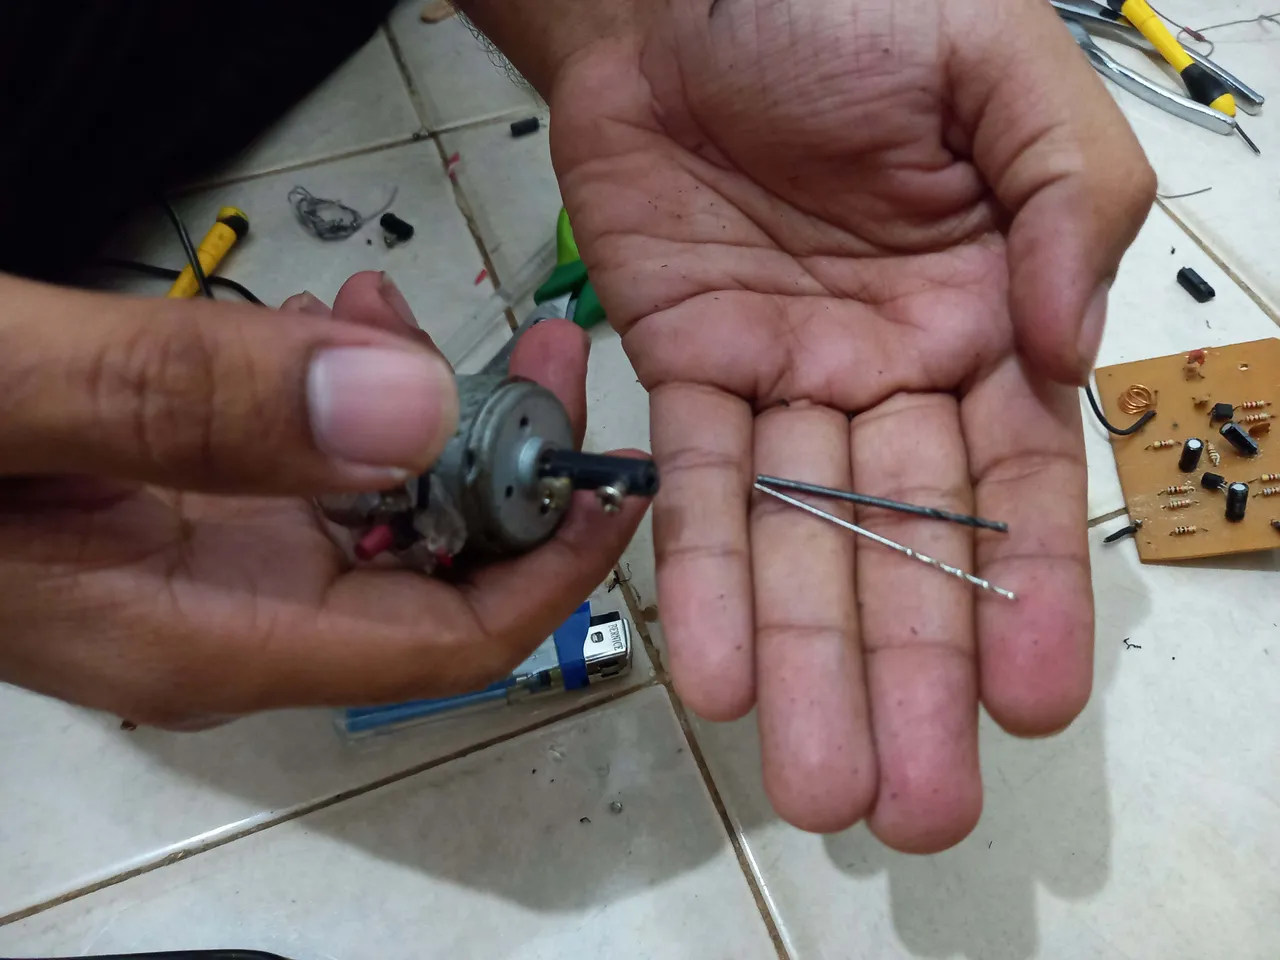
También poseo una mecha de menor tamaño, así que intenté hacer las perforaciones ahora con la mecha más pequeña y he aquí los resultados:
I also have a smaller wick, so I tried drilling now with the smaller wick and here are the results:
Bueno amigos espero que les haya gustado mi post y logren usarlo de inspiración para hacer sus propios proyectos caseros sin necesidad de gastar mucho. Finalmente invito a @mariajcastro28 a participar
Well friends, I hope you liked my post and can use it as inspiration to make your own home projects without spending a lot. Finally I invite @mariajcastro28 to participate