Hola amigos de hive blog espero esten muy bien hoy les traigo un tutorial facil y practico en donde les enseñare como hacer un hermoso angel con material de reciclaje y de provecho
Hello friends of hive blog I hope you are very well today I bring you an easy and practical tutorial where I will teach you how to make a beautiful angel with recycling and useful material
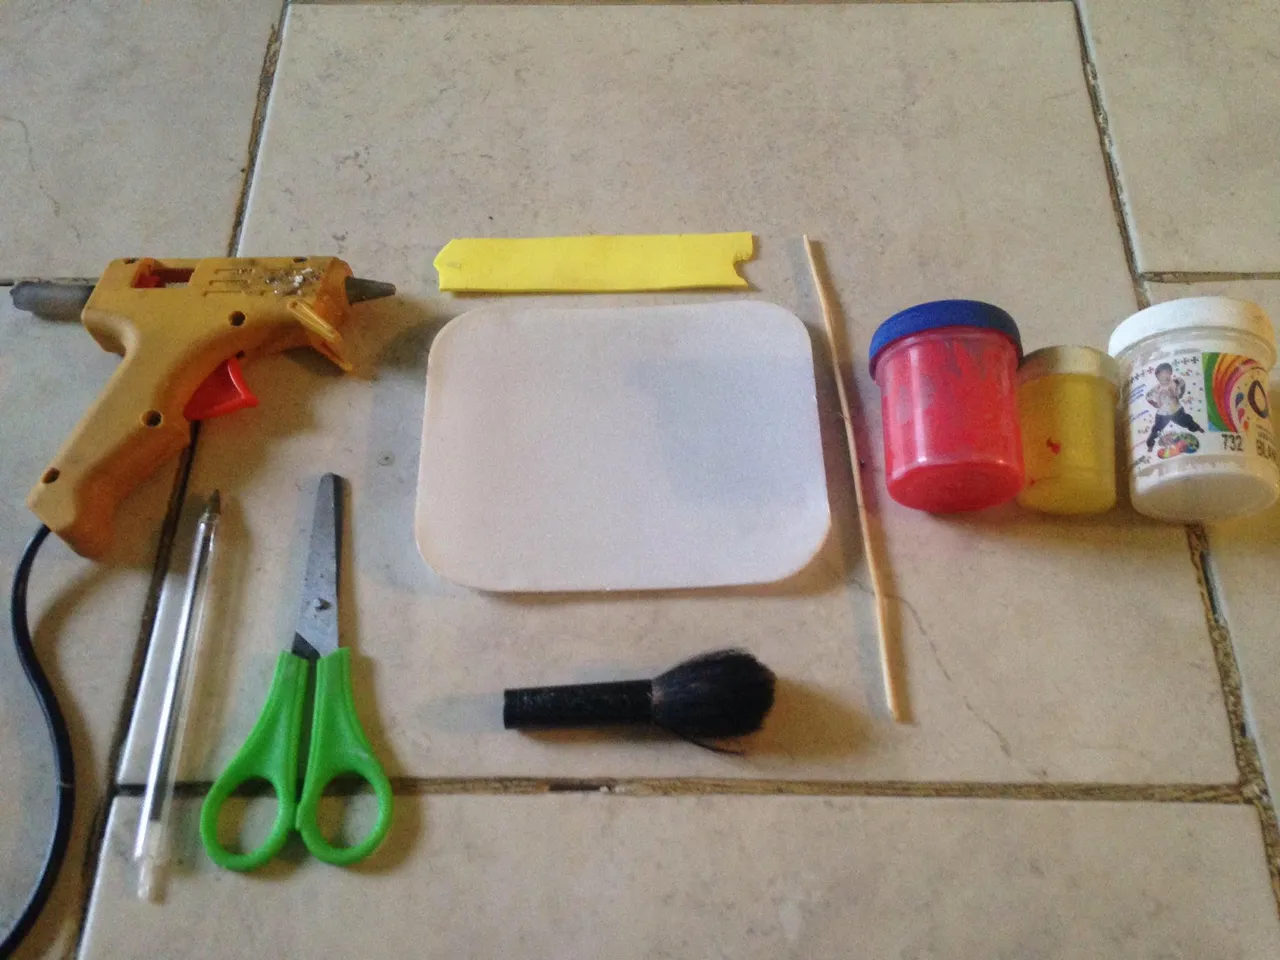
Materiales
⚫ Bandeja de anime
⚫ Foami amarillo
⚫ Palillo de altura
⚫ Pincel
⚫ Tijera
⚫ Lapiz
⚫ Pintura roja
⚫ Pintura amarilla
⚫ Pintura blanca
⚫ Pistola de silicon
Materials
⚫ Anime tray
⚫ Yellow foam
⚫ Height stick
⚫ Brush
⚫ Scissors
⚫ Pencil
⚫ Red paint
⚫ Yellow paint
⚫ White paint
⚫ Silicone gun
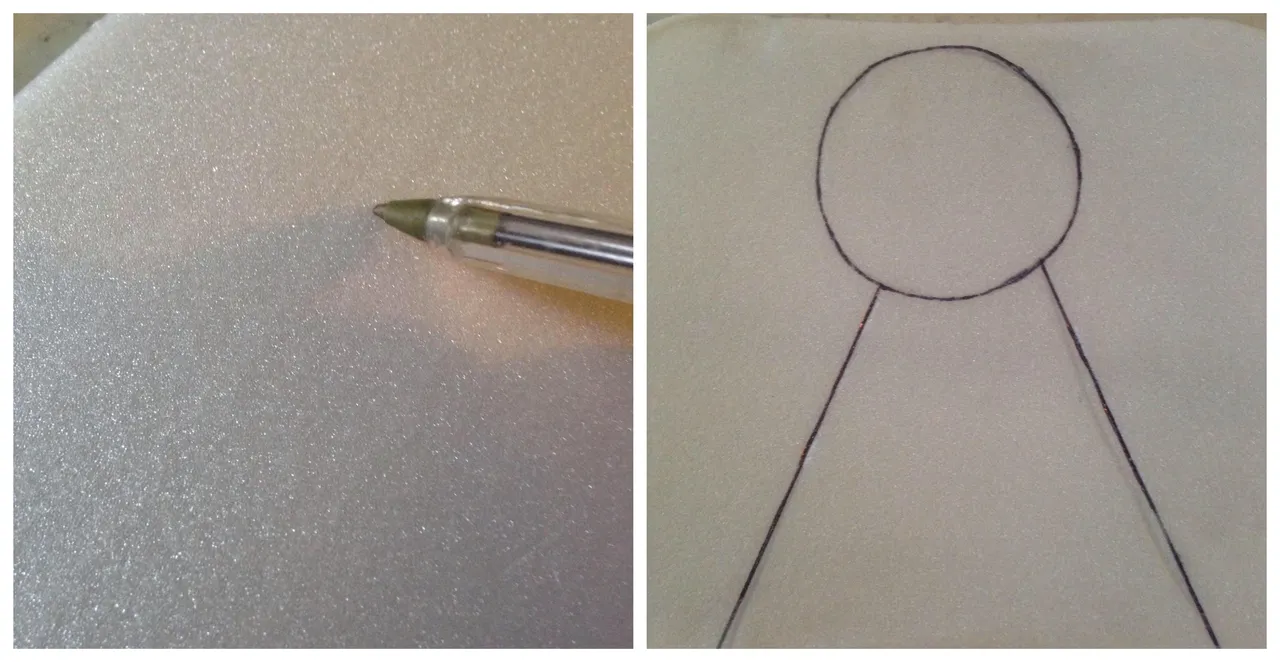
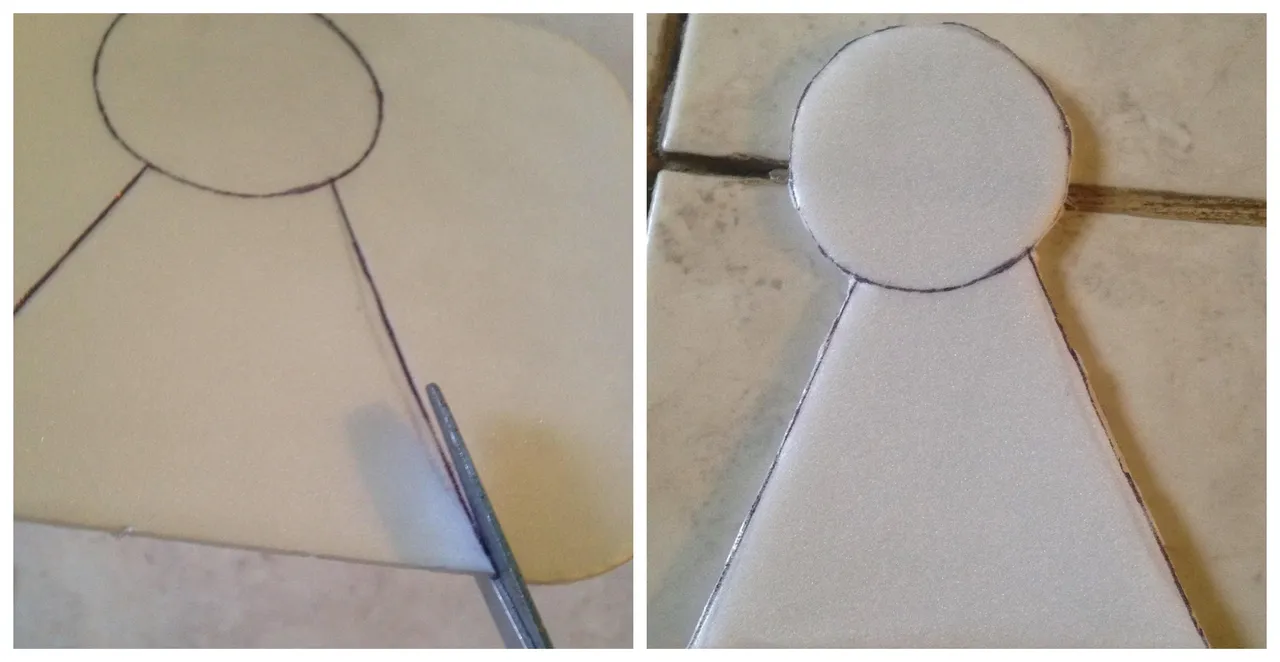
Paso 1
Como primer paso amigos de hive empezaremos marcando con el lapiz un circulo y un triangulo abajo de el circulo ya que eso sera el cuerpo de nuestro angel
Step 1
As a first step friends of hive we will start by marking with the pencil a circle and a triangle below the circle since that will be the body of our angel
Paso 2
Luego recortaremos el cuerpo de el angel
Step 2
Then we will cut out the body of the angel
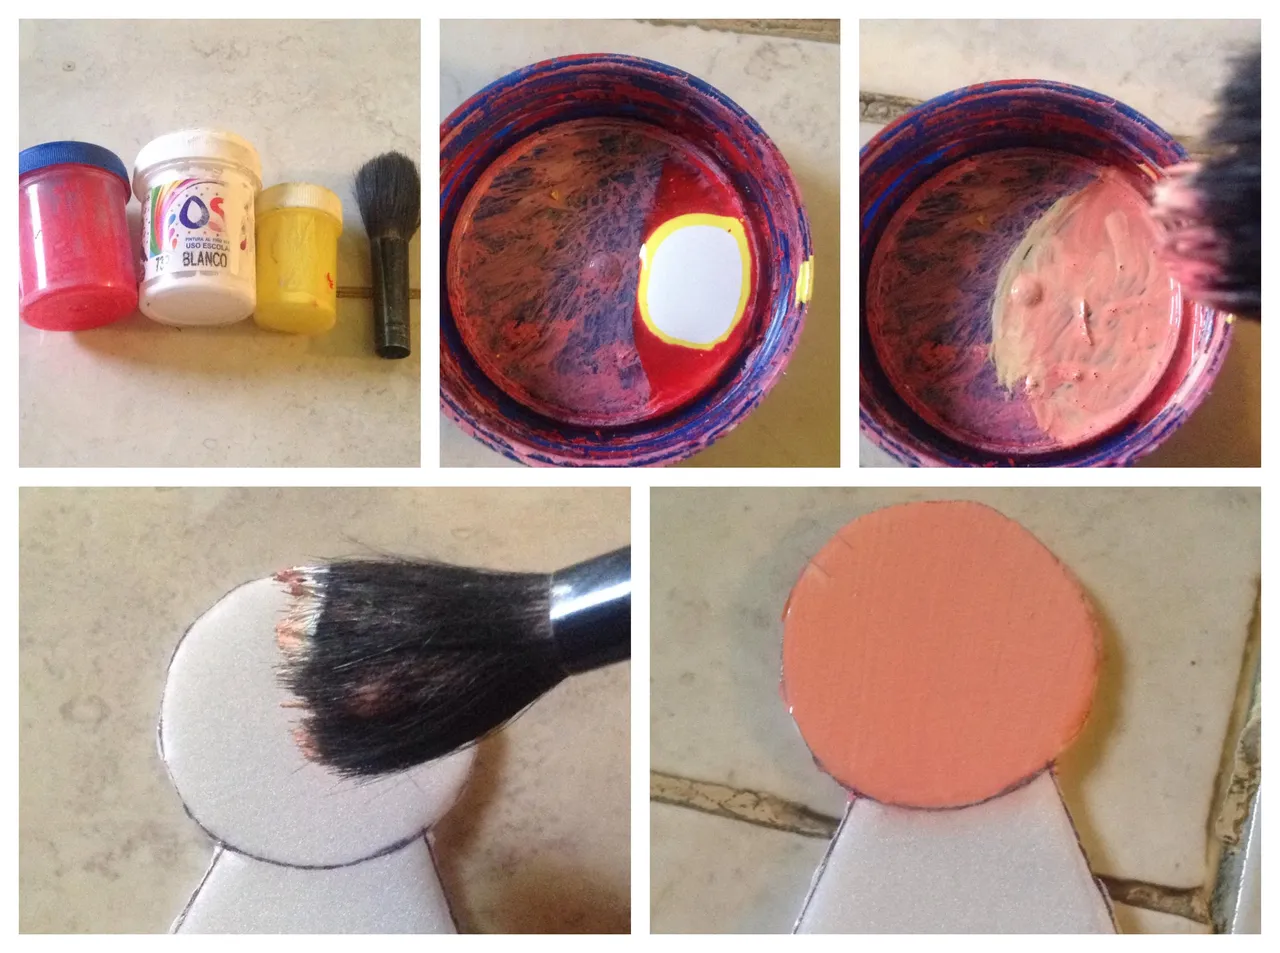
Paso 3
Luego ligaremos la pintura amarilla la pintura roja y la pintura blanca,nos tiene que quedar un color anaranjado claro y con ese anaranjado claro pintaremos el circulo de nuestro angel y eso sera el rostro
Step 3
Then we will bind the yellow paint, the red paint and the white paint, we have to have a light orange color and with that light orange we will paint the circle of our angel and that will be the face
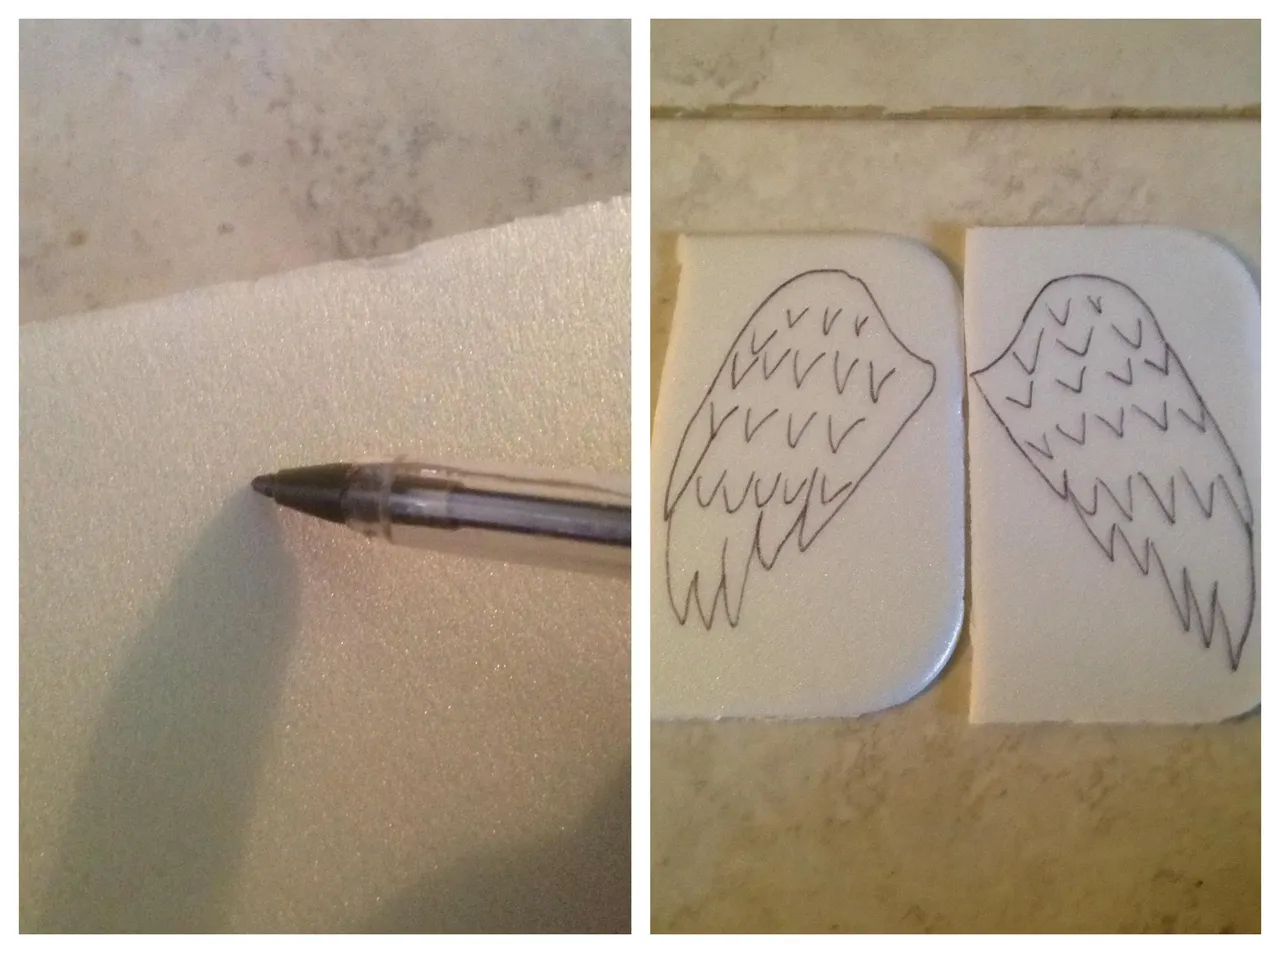
Paso 4
Luego marcaremos las alas de nuestro angel con el lapiz
Step 4
Then we will mark the wings of our angel with the pencil
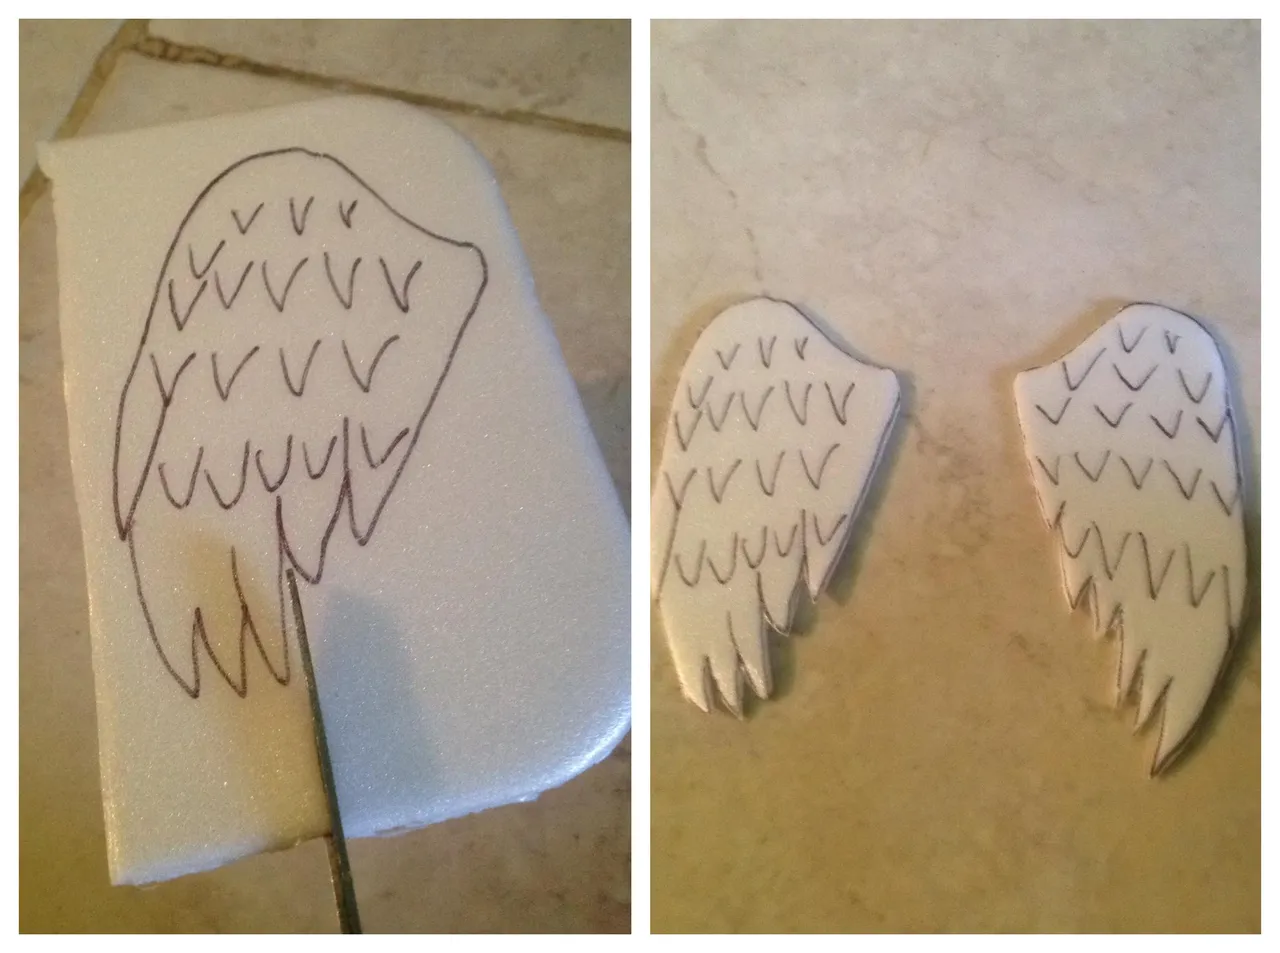
Paso 5
Despues recortaremos las alas de nuestro angel
Step 5
Then we will clip the wings of our angel
Paso 6
Despues pegaremos las alas de nuestro angel a el cuerpo
Step 6
Then we will glue the wings of our angel to the body

Paso 7
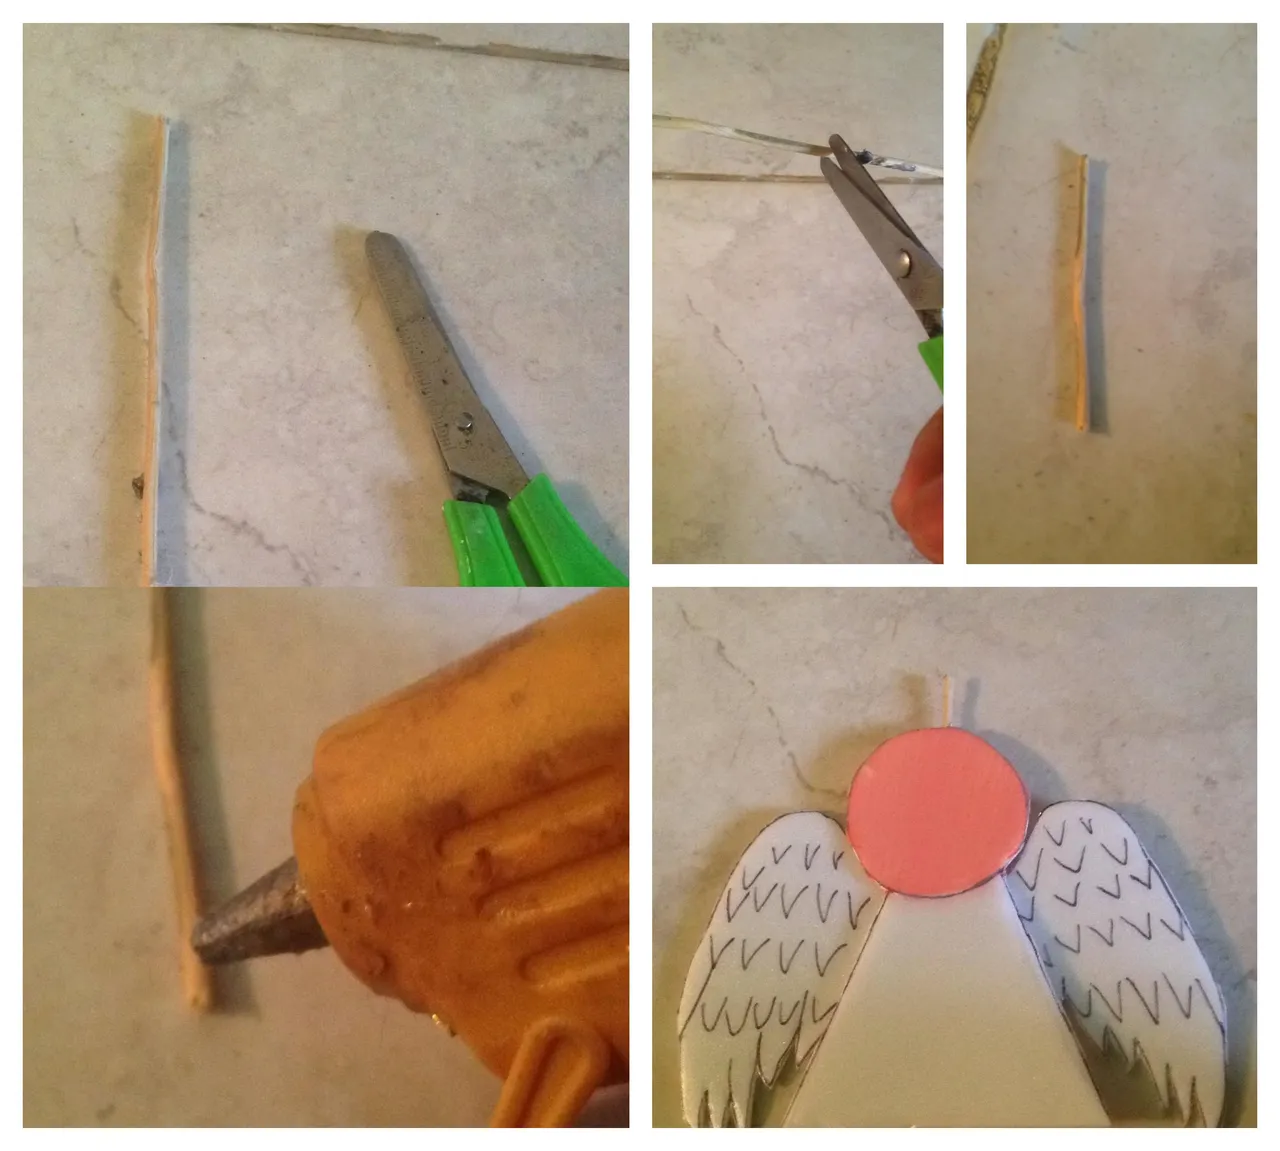
Luego recortaremos el palillo de altura y lo pegaremos por la parte de atras de el angel
Step 7
Then we will cut the toothpick in height and stick it on the back of the angel
Paso 8
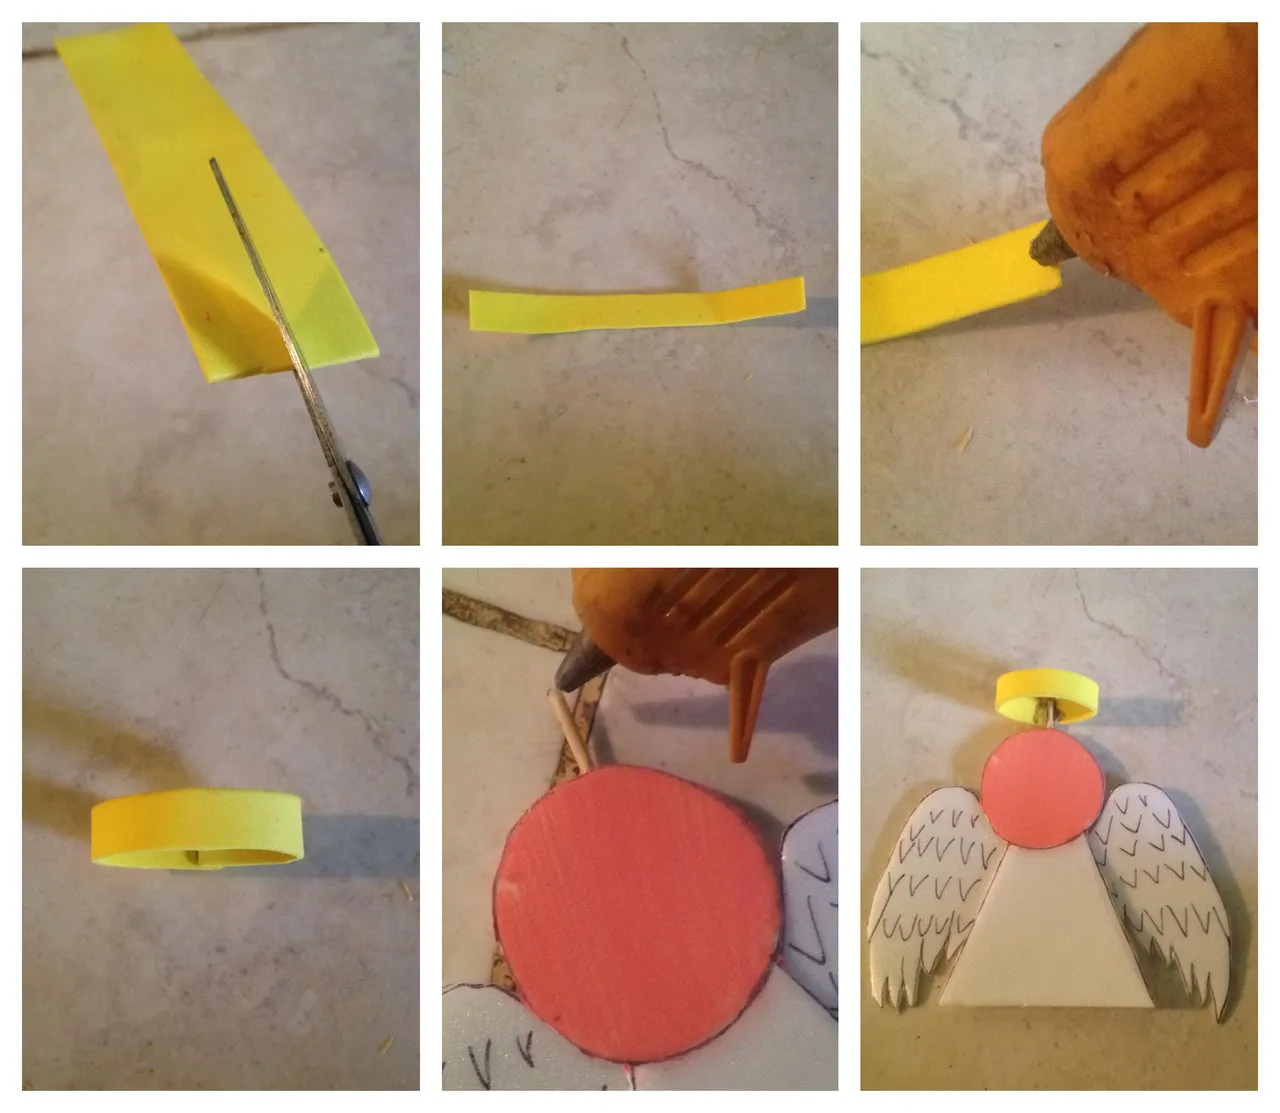
Luego recortaremos el foami amarillo por la mitad y luego lo doblaremos y lo pegaremos en la punta de el palillo de altura
Step 8
Then we will cut the yellow foami in half and then we will fold it and glue it on the tip of the tall toothpick
Paso 9
Despues con el lapiz le dibujaremos el rostro a nuestro hermoso angel
Step 9
Then with the pencil we will draw the face of our beautiful angel

Paso 10
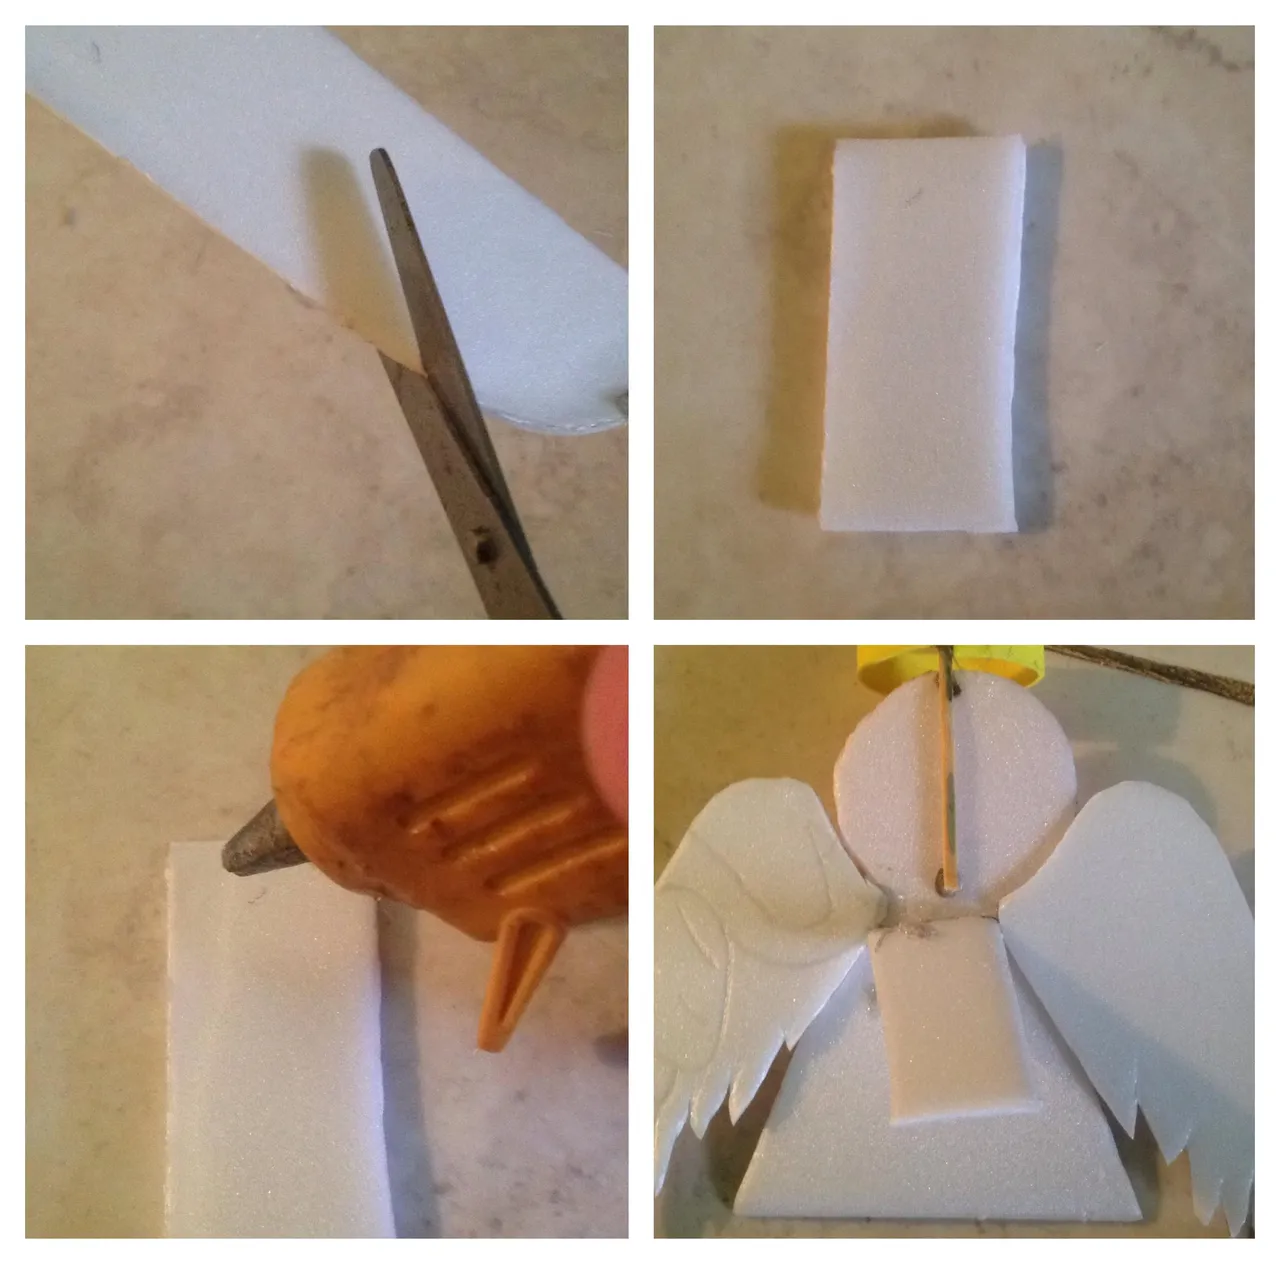
Despues recortaremos un cuadro de la bandeja de anime y se la pegaremos en la parte de atras a el angel para que se pueda sostener
Step 10
Then we will cut out a picture of the anime tray and we will stick it on the back to the angel so that it can be held
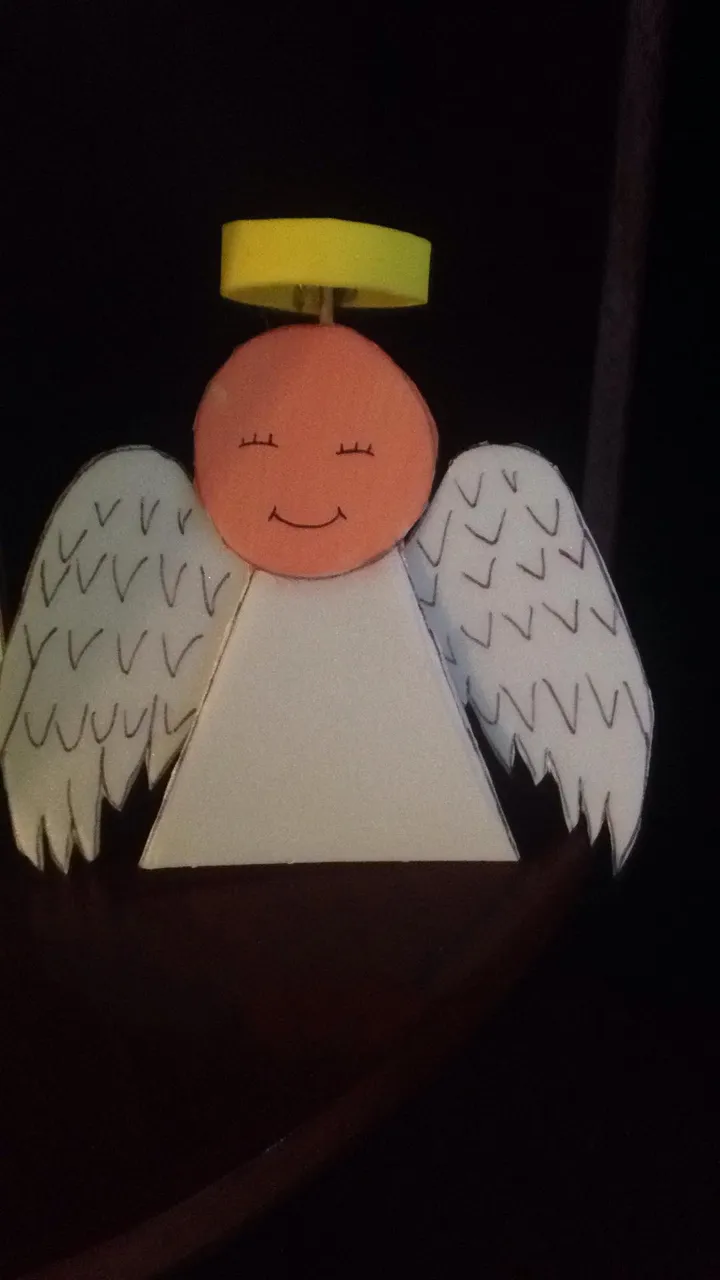
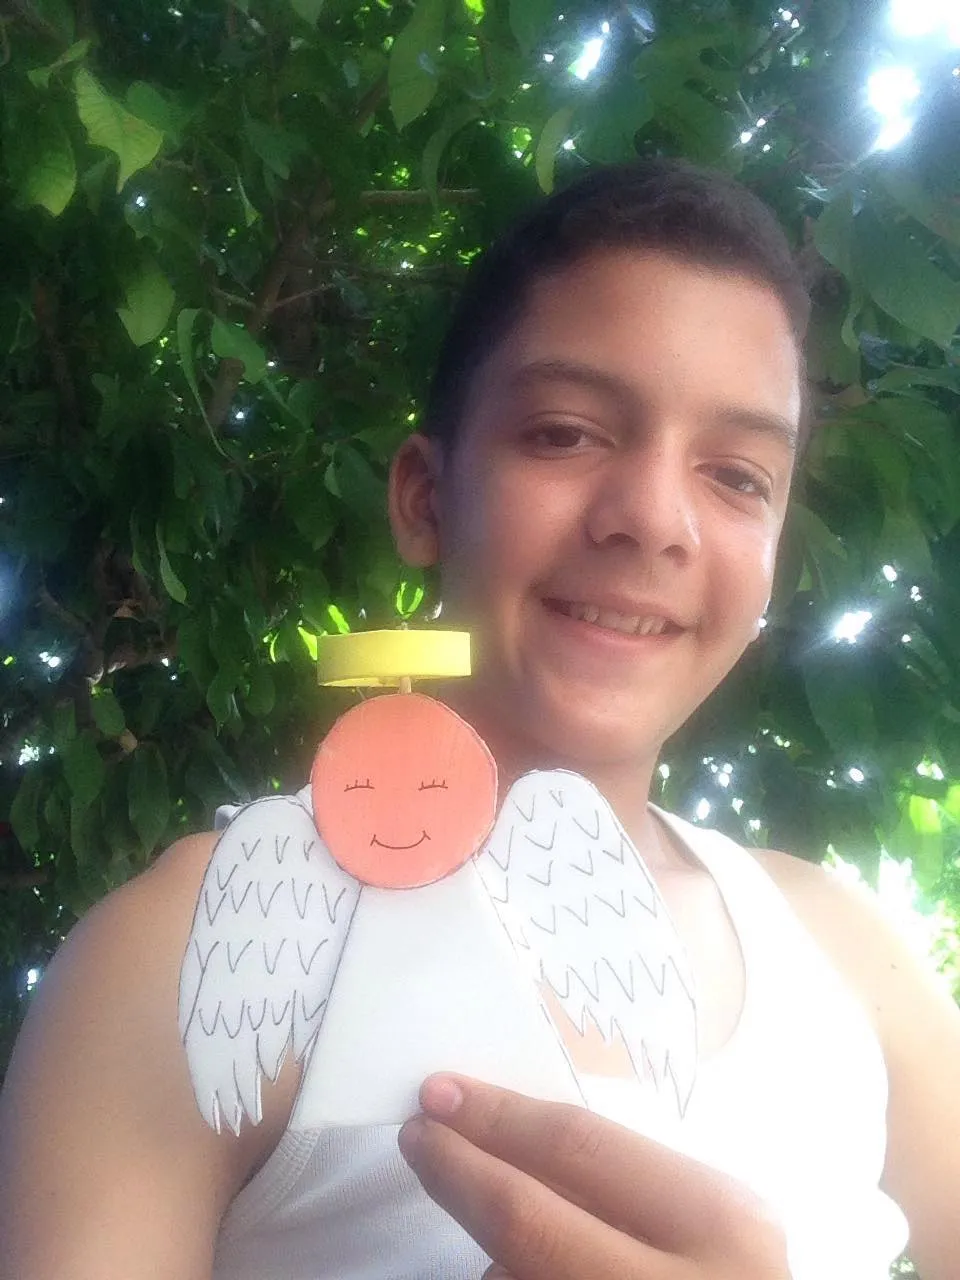
Ya tenemos listo nuestro hermoso angel facil y practico hecho solo con material reciclado y de provecho espero les alla gustado tanto como a mi
We already have our beautiful angel ready, easy and practical, made only with recycled material and I hope you liked it as much as I did