Hola amigos de hive blog hoy les traigo un tutoria facil y practico en donde les enseñare como hacer una hermosa mariquita y lo mejor de todo es que la podemos hacer con materiales que se consiguen en el hogar
Hello friends of hive blog today I bring you an easy and practical tutorial where I will teach you how to make a beautiful ladybug and the best of all is that we can make it with materials that are available at home

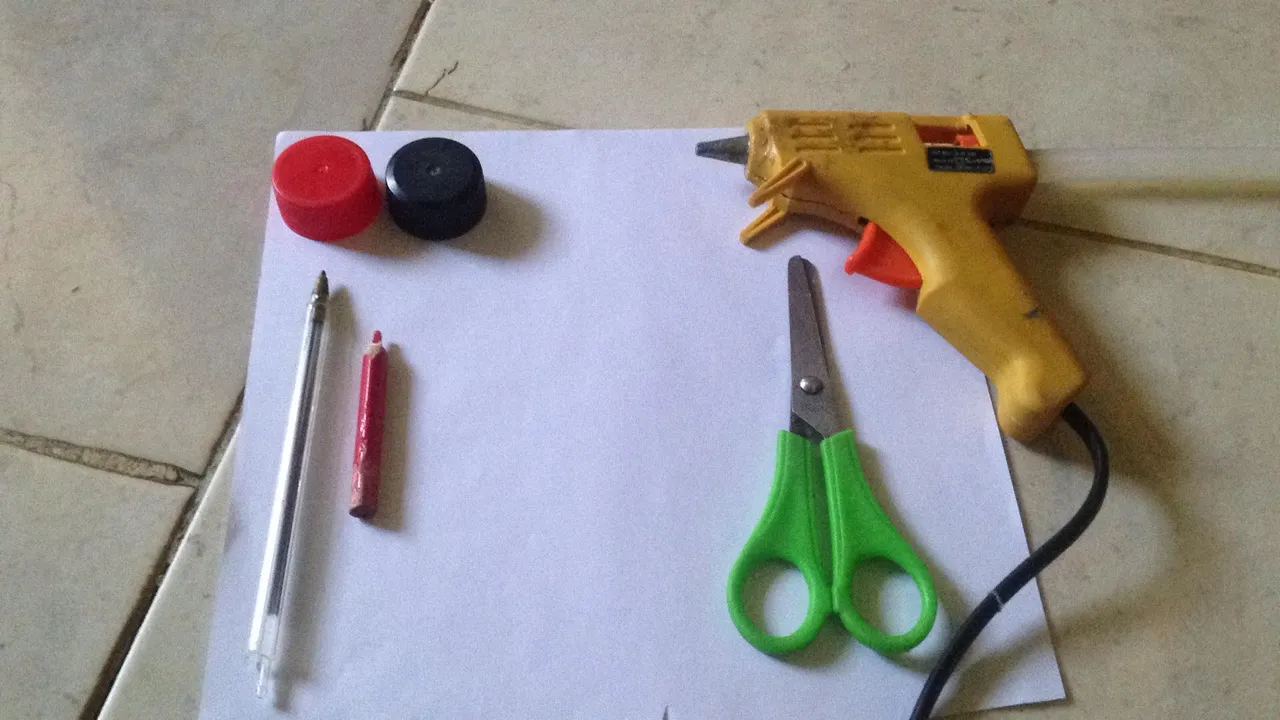
Materiales:
⚫ Tapa de botella de color roja
⚫ Tapa de botella de color negra
⚫ Lapiz
⚫ Lapiz de color rojo
⚫ Hoja de maquina
⚫ Tijera
⚫ Pistola de silicon
Materials:
⚫ Red bottle cap
⚫ Black bottle cap
⚫ Pencil
⚫ Red pencil
⚫ Machine sheet
⚫ Scissors
⚫ Silicone gun
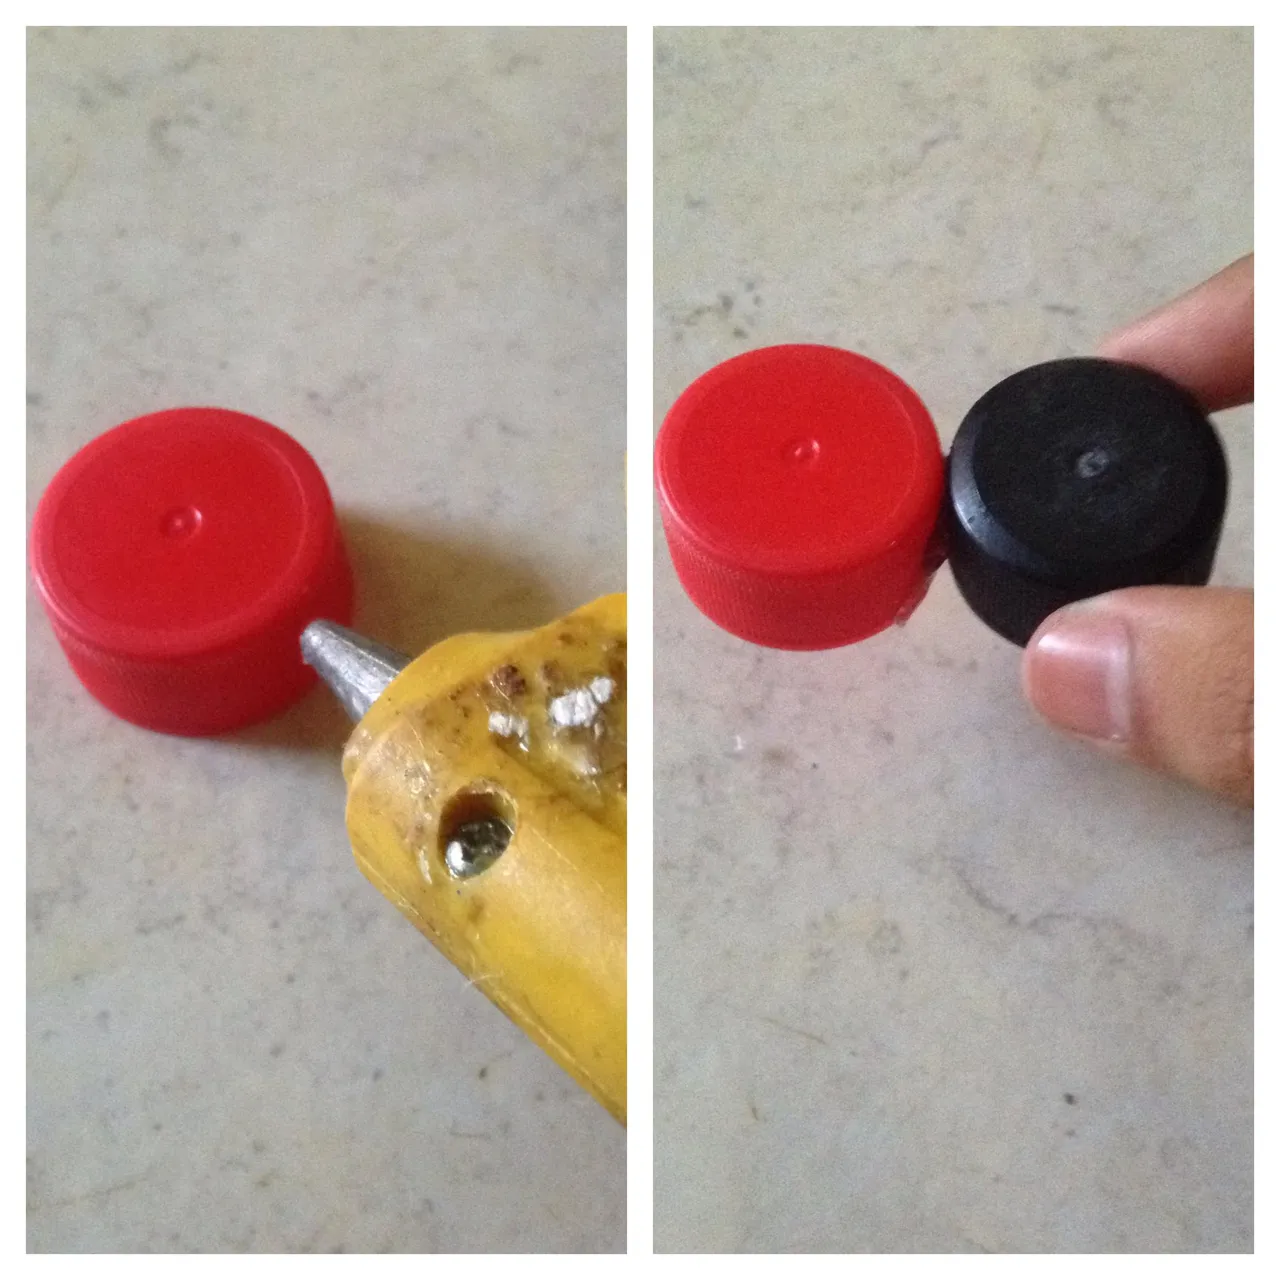
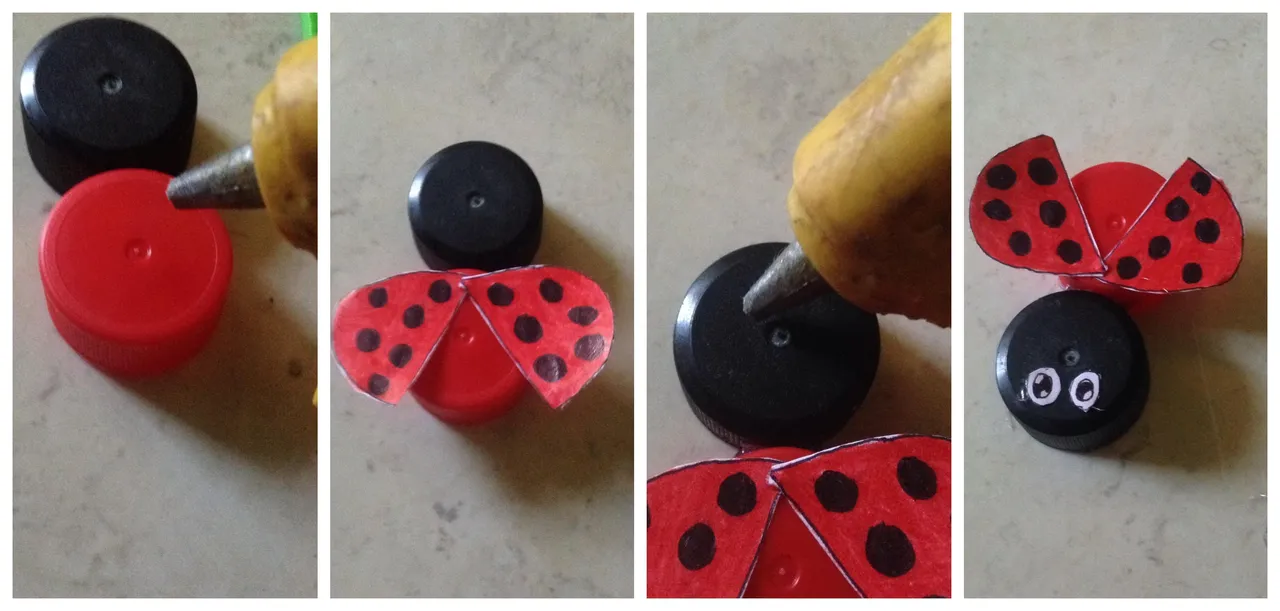
Paso 1
Como primer paso a seguir empezaremos pegando las dos tapas de color negro y rojo asi como se puede ver en la imagen
Step 1
As the first step to follow, we will begin by gluing the two black and red covers as you can see in the image
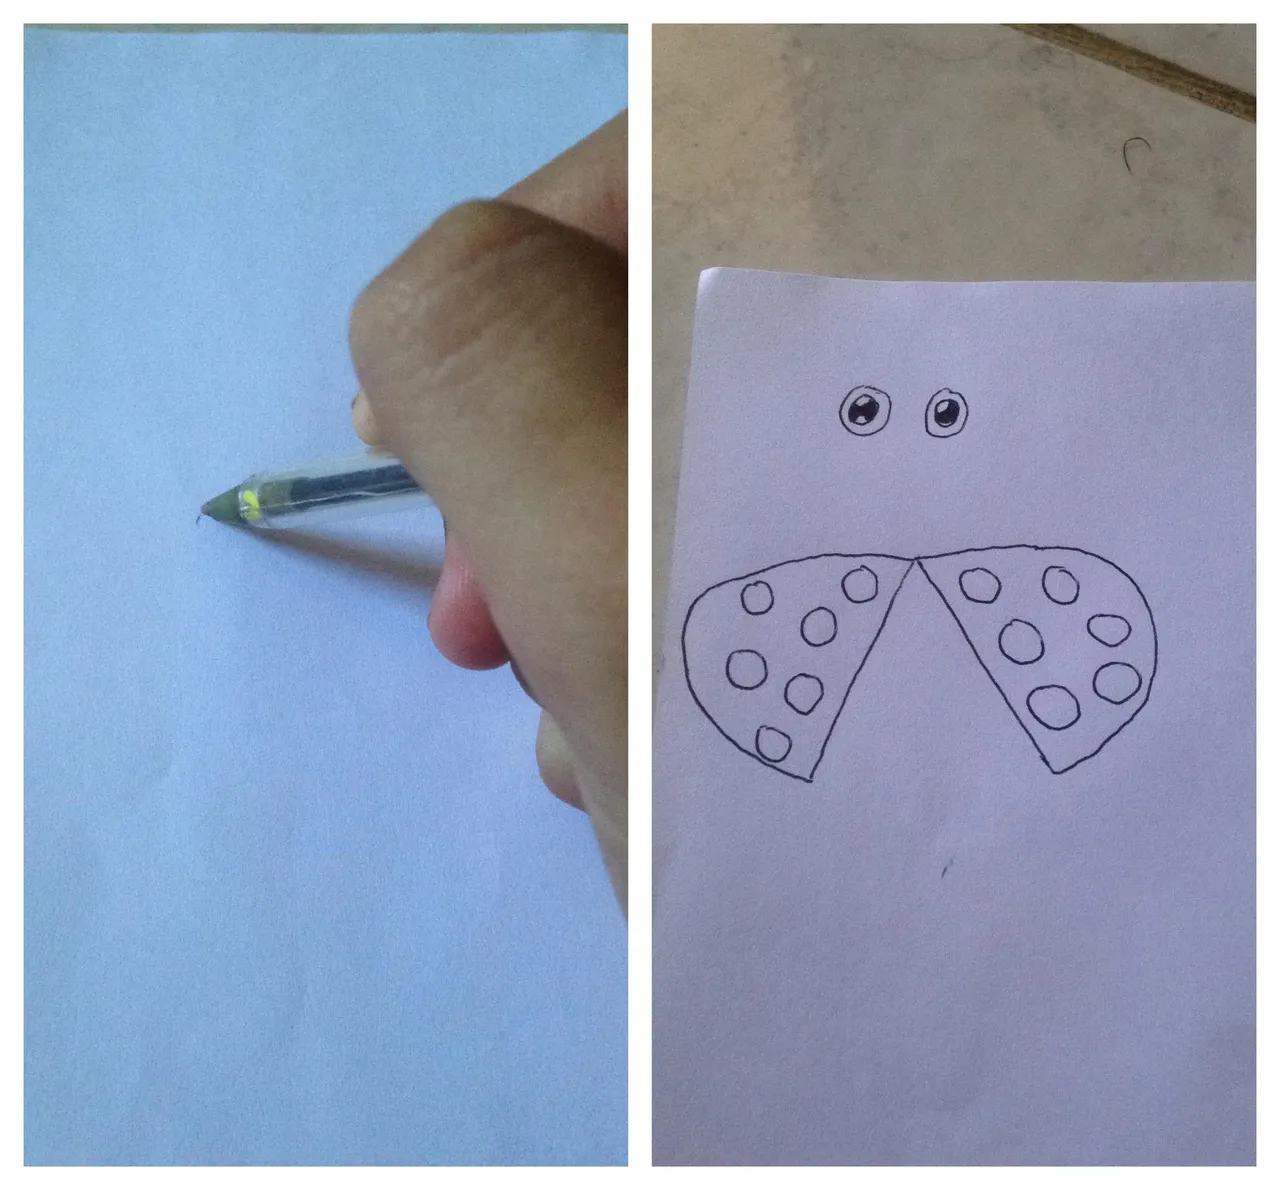
Paso 2
Luego conel lapiz dibujaremos las alas y los ojos de nuestra mariquita
Step 2
Then with the pencil we will draw the wings and eyes of our ladybug
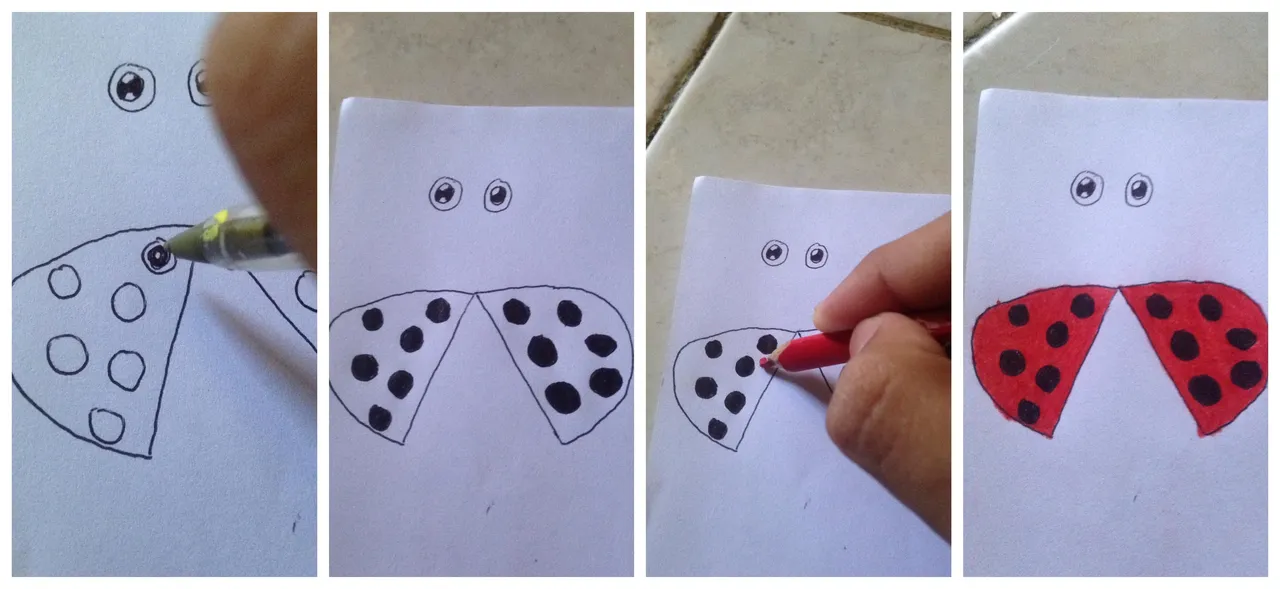
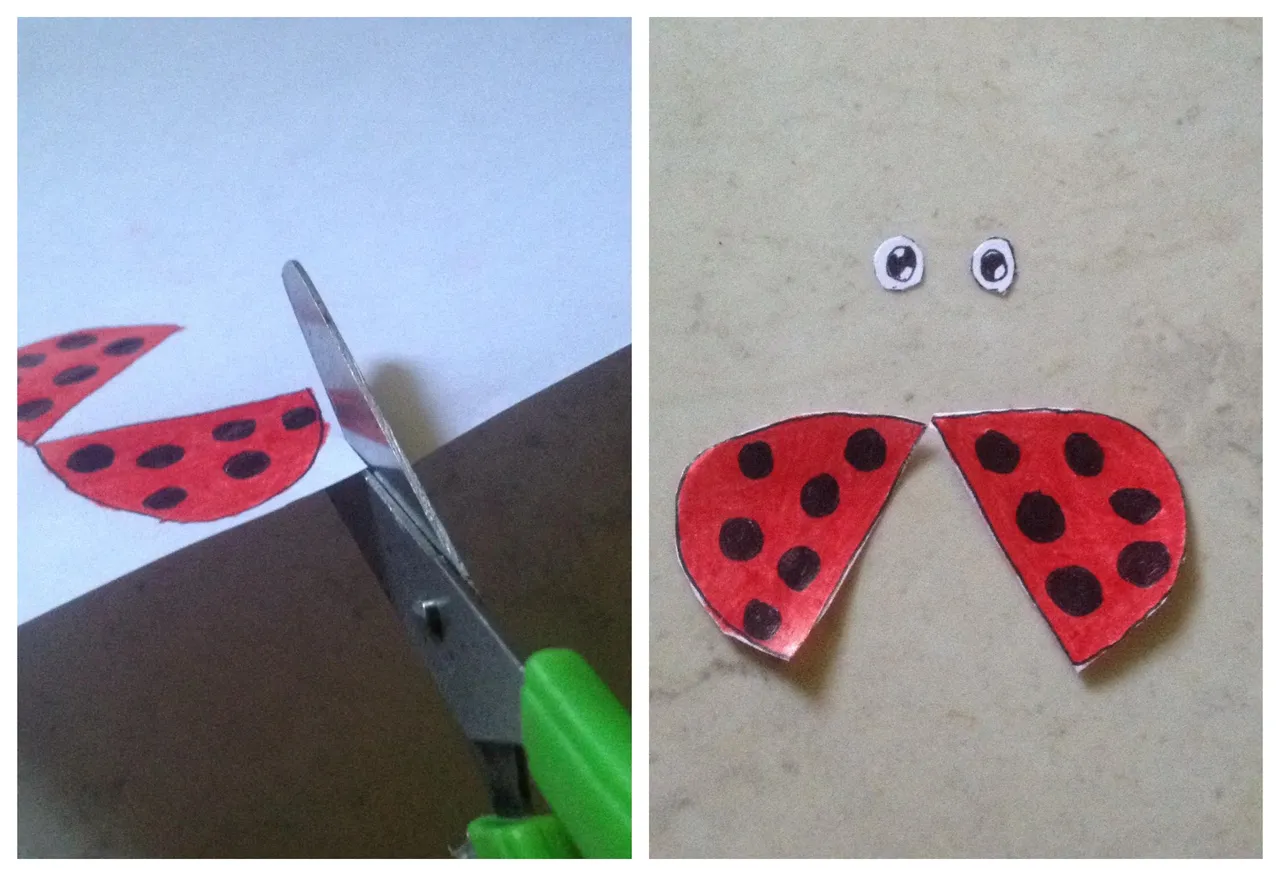
Paso 3
Despues con el mismo lapiz pintaremos de negro los puntos que lleva en las alas nuestra mariquita y una ves hecho eso colorearemos con el lapiz de color rojo las alas de nuestra mariquita asi como se puede ver en la imagen
Step 3
Then with the same pencil we will paint in black the points that our ladybug has on the wings and once that is done we will color with the red pencil the wings of our ladybug as you can see in the image
Paso 4
Luego recortaremos los ojos y las alas de nuestra mariquita
Step 4
Then we will cut out the eyes and wings of our ladybug
Paso 5
Y como ultimo paso para finalizar nuestro tutorial pegaremos las alas de nuestra mariquita en la parte de la tapa de botella roja y los ojos se los pegaremos en la parte de la tapa de botella negra tal como podemos ver en la imagen
Step 5
And as the last step to finish our tutorial we will glue the wings of our ladybug on the part of the red bottle cap and the eyes will be glued on the part of the black bottle cap as we can see in the image
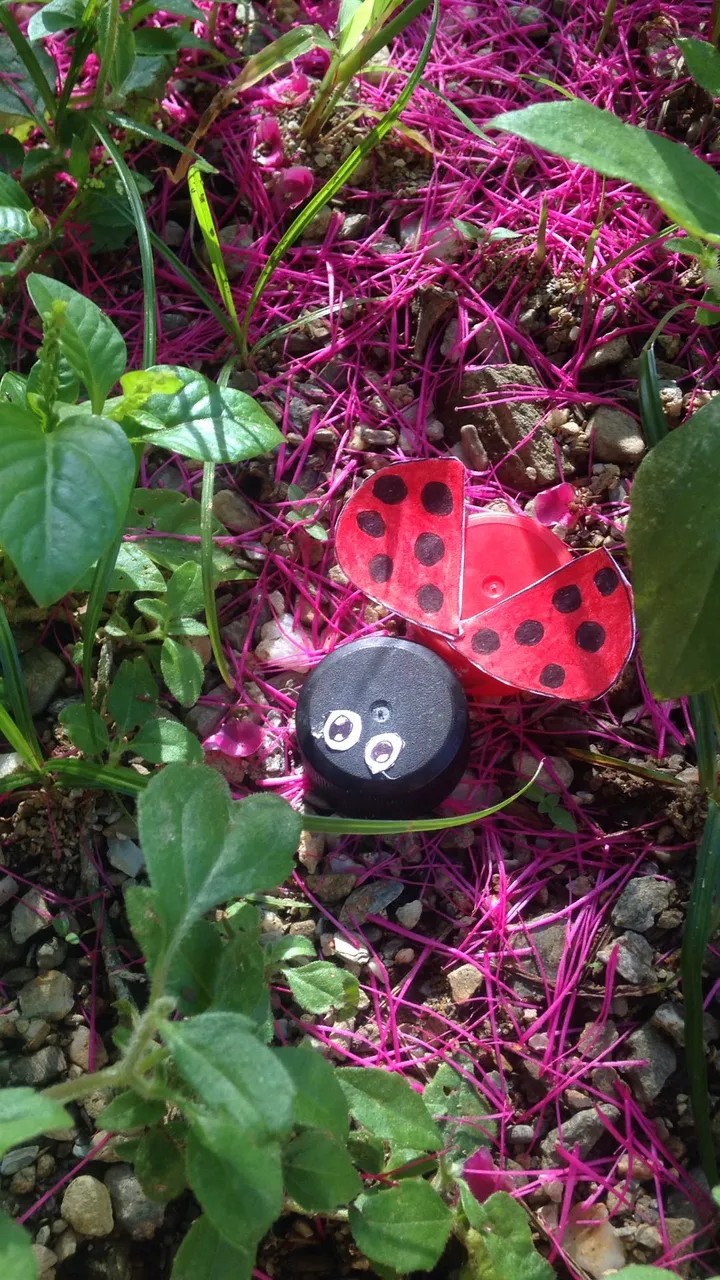
Y listo amigos de hive blog ya tendriamos lista nuestra hermosa mariquita con material reciclado espero les alla gustado tanto como a mi
And ready friends of hive blog we would already have our beautiful ladybug ready with recycled material I hope you liked it as much as I do
Gracias por visitar mi blog
Thank you for visiting my blog