Hola amigos de hive blog hoy les traigo un divertido tutorial facil y rapido en donde les enseñare como hacer una hermosa papelera con tematica de buho
Hello friends of hive blog today I bring you a fun easy and quick tutorial where I will teach you how to make a beautiful owl-themed trash can
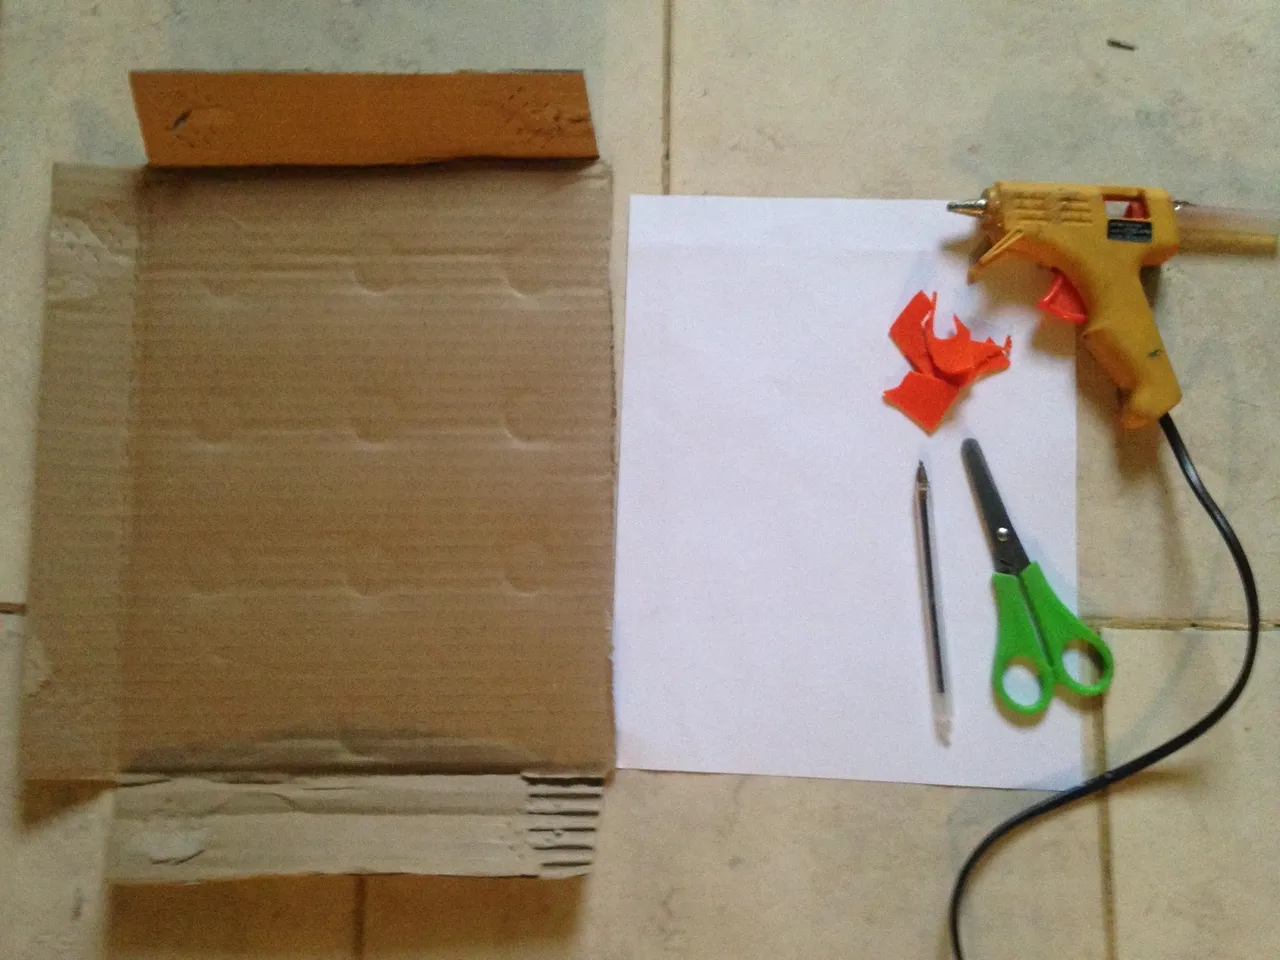
Materiales:
⚫ Carton
⚫ Foami naranja
⚫ Hoja de maquina
⚫Lapiz
⚫ Tijera
⚫ Pistola de silicon
Materials:
⚫ Cardboard
⚫ Orange foam
⚫ Machine sheet
⚫Pencil
⚫ Scissors
⚫ Silicone gun
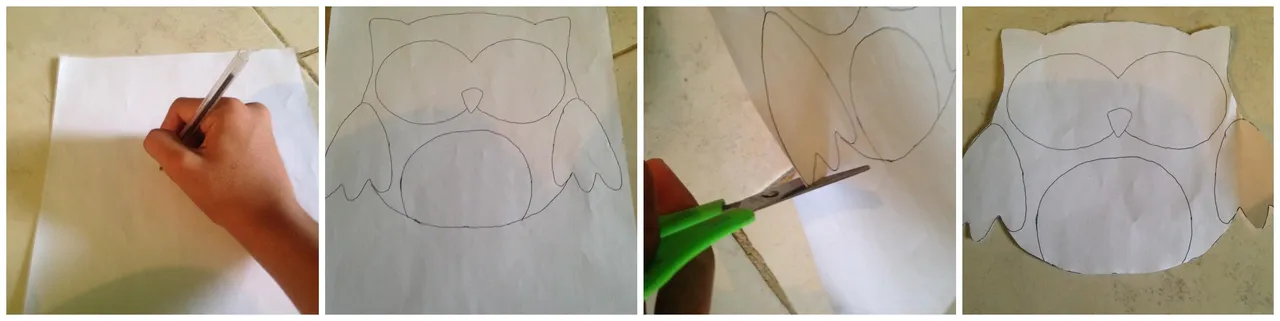
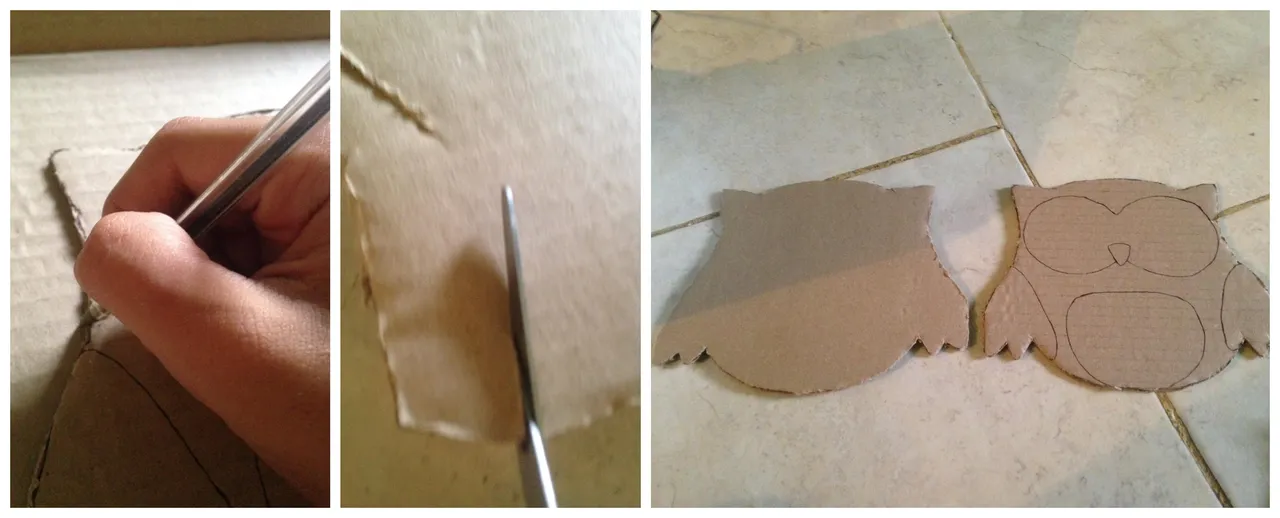
Paso 1
Como primer paso a seguir empezaremos dibujando en la hoja de maquina un buho y luego lo recortaremos
Step 1
As the first step to follow, we will start by drawing an owl on the machine sheet and then we will cut it out
Paso 2
Despues nos guiaremos con el molde de papel para marcar la forma de nuestro buho en el carton una vez hecho eso recortaremos el resto de partes de el buho y nos guiaremos tambien para marcar el resto de las partes en el carton
Step 2
Then we will guide ourselves with the paper mold to mark the shape of our owl on the cardboard, once that is done we will cut out the rest of the parts of the owl and we will also guide ourselves to mark the rest of the parts on the cardboard
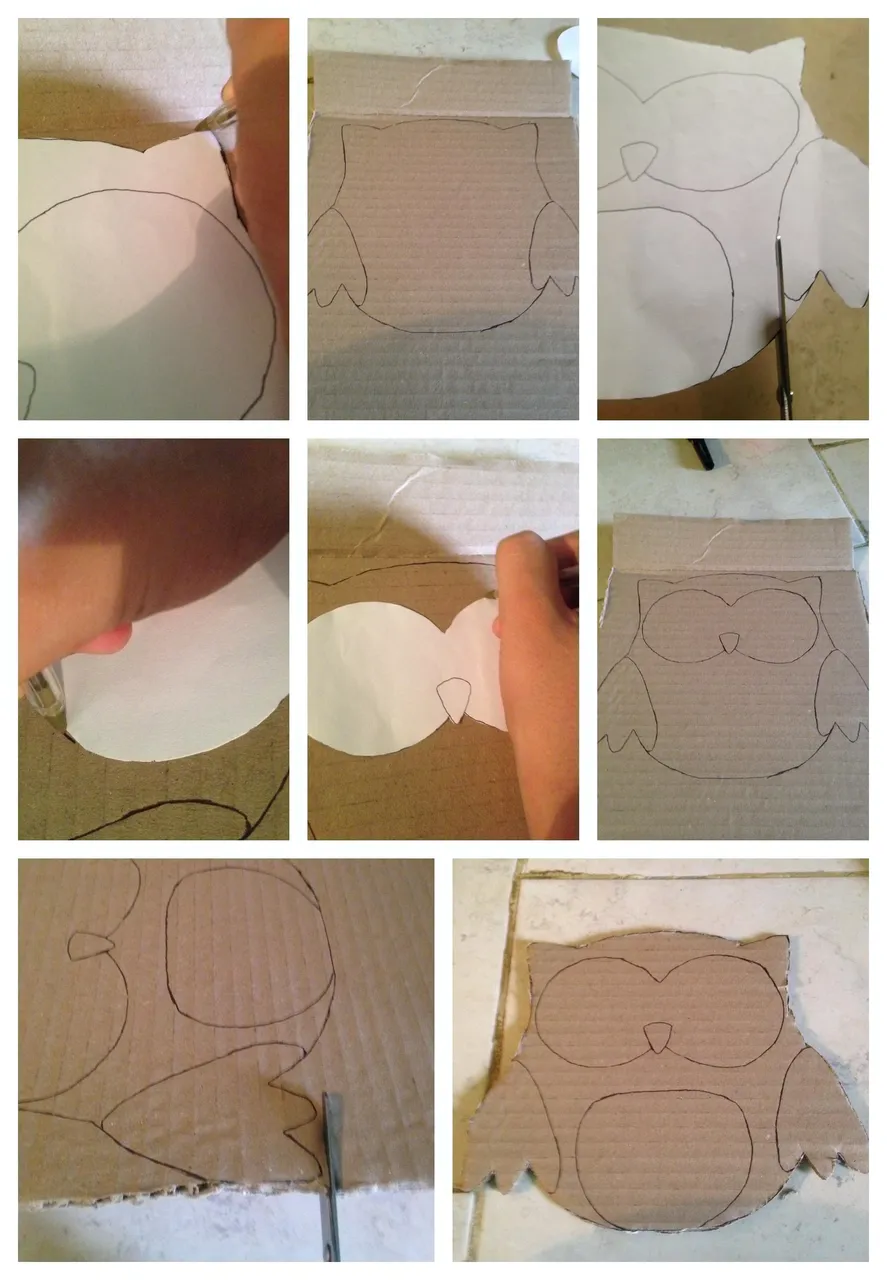
Paso 3
Luego con el molde que tenemos de carton nos guiaremos y marcaremos otra vez la forma de el buho en el carton y la recortaremos quedandonos asi con las dos partes de el buho
Step 3
Then with the cardboard mold we have, we will guide ourselves and mark the shape of the owl on the cardboard again and we will cut it, thus remaining with the two parts of the owl
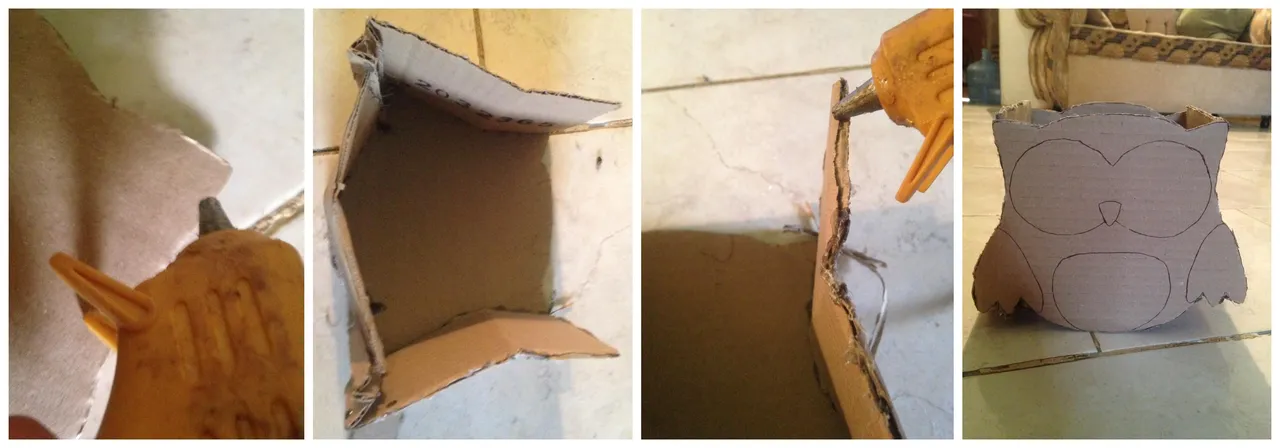
Paso 4
Despues le pegaremos en los bordes de el buho carton, una vez hecho eso pegaremos el segundo molde de el buho encima de los bordes de carton asi como muestra la imagen
Step 4
Then we will stick on the edges of the cardboard owl, once that is done we will paste the second mold of the owl on top of the cardboard edges as shown in the image
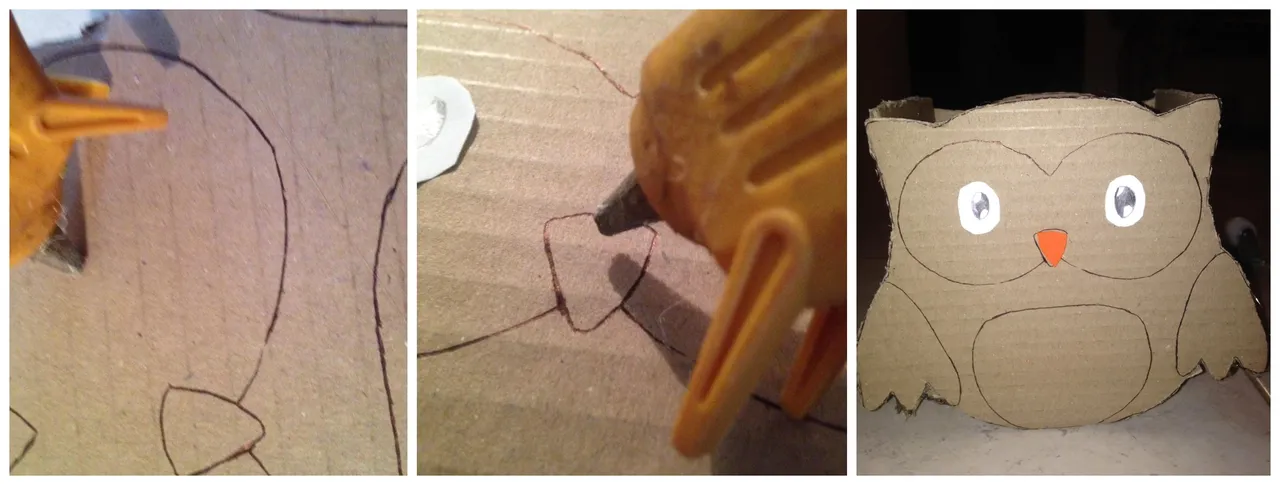
Paso 5
Despues le haremos los ojos a nuestro buho y se lo recortaremos y luego recortaremos el foami naranja en forma de pico
Step 5
Then we will make the eyes of our owl and we will cut it out and then we will cut the orange foami in the shape of a beak

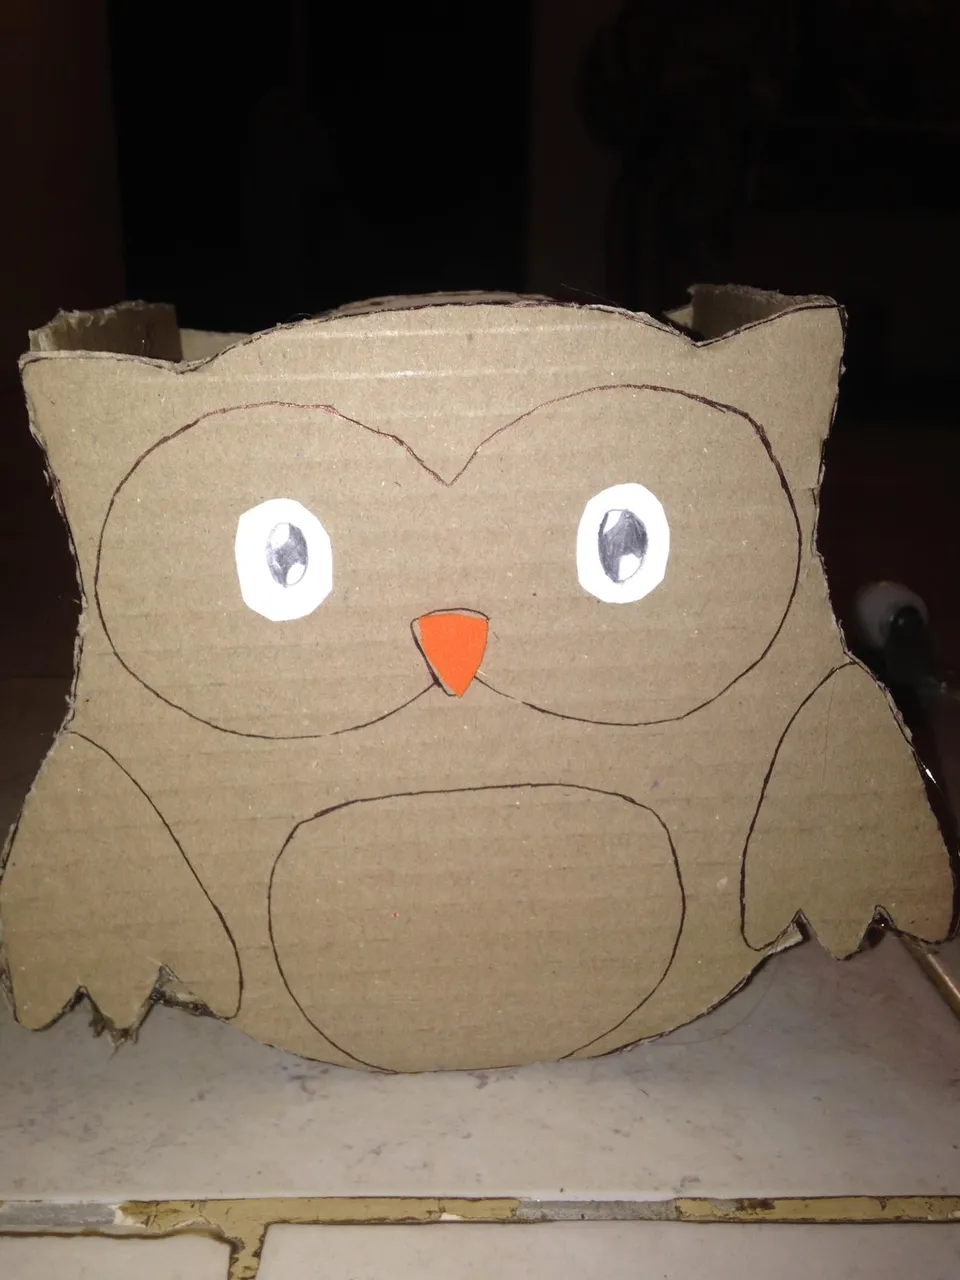
Paso 6
Y como ultimo apso para terminar con este divertido tutorial pegaremos los ojos y el pico en el buho asi como muestra la imagen
Step 6
And as the last step to finish with this fun tutorial we will glue the eyes and the beak on the owl as shown in the image
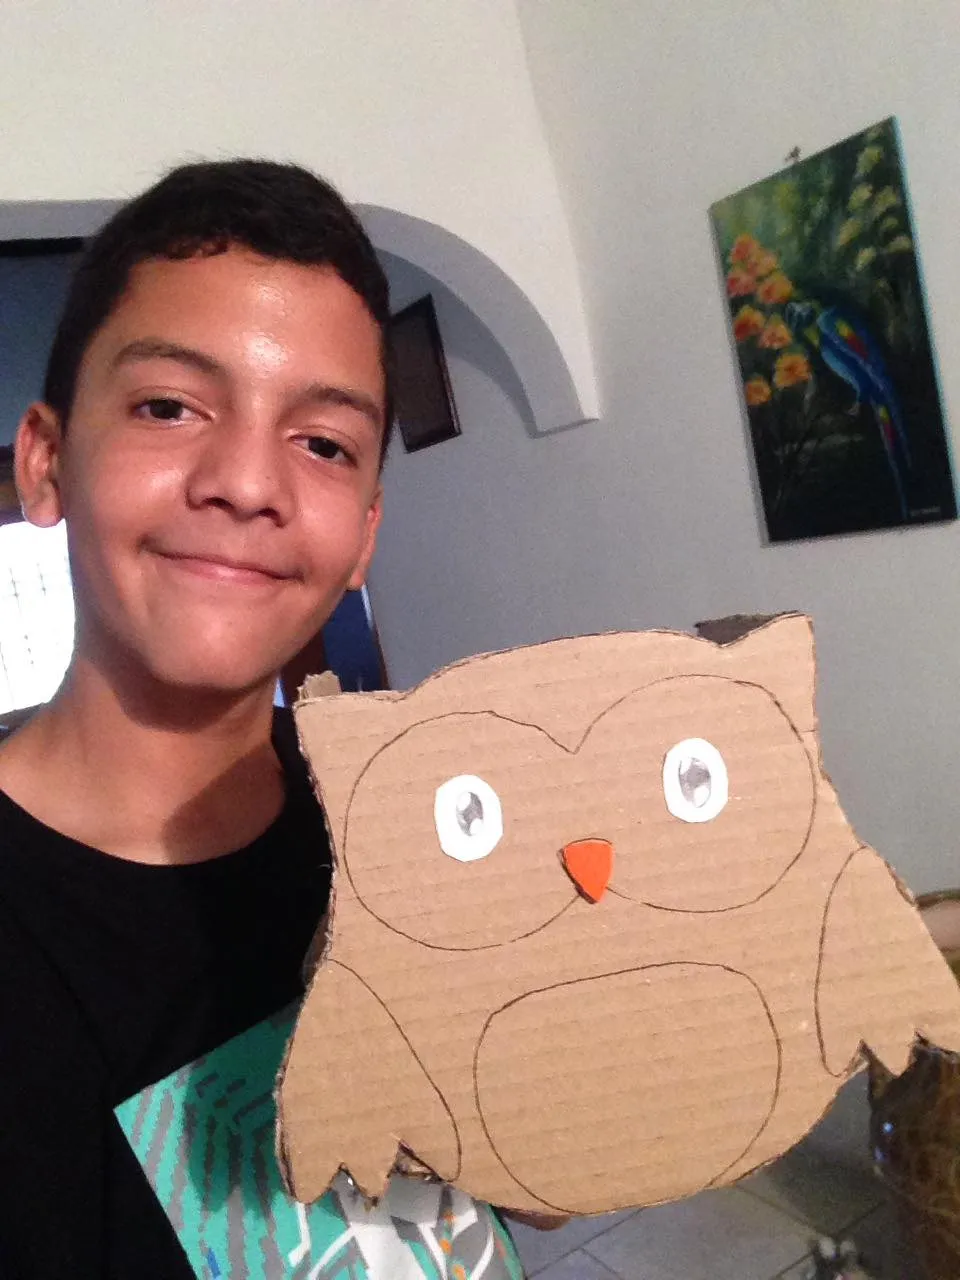
Y listo este es el resultado de nuestra hermosa papelera con tematica de buho espero les alla gustado tanto como a mi y ya sin nada mas que decir me despido
And voila, this is the result of our beautiful owl-themed bin, I hope you liked it there as much as I did and with nothing more to say, I say goodbye
Gracias por visitar mi blog
Thank you for visiting my blog