Hello, dear readers
Today, we continue the steps in the making of Embla, my first Venezuelan cuatro. If you found this story in this entry, please go and check the previous one here.
Buen día, estimados lectores.
Hoy continuaremos viendo los pasos en la construcción de Embla, mi primer cuatro venezolano. Si acabas de encontrar esta publicación, te sugiero que des click aquí para ver la primera parte.
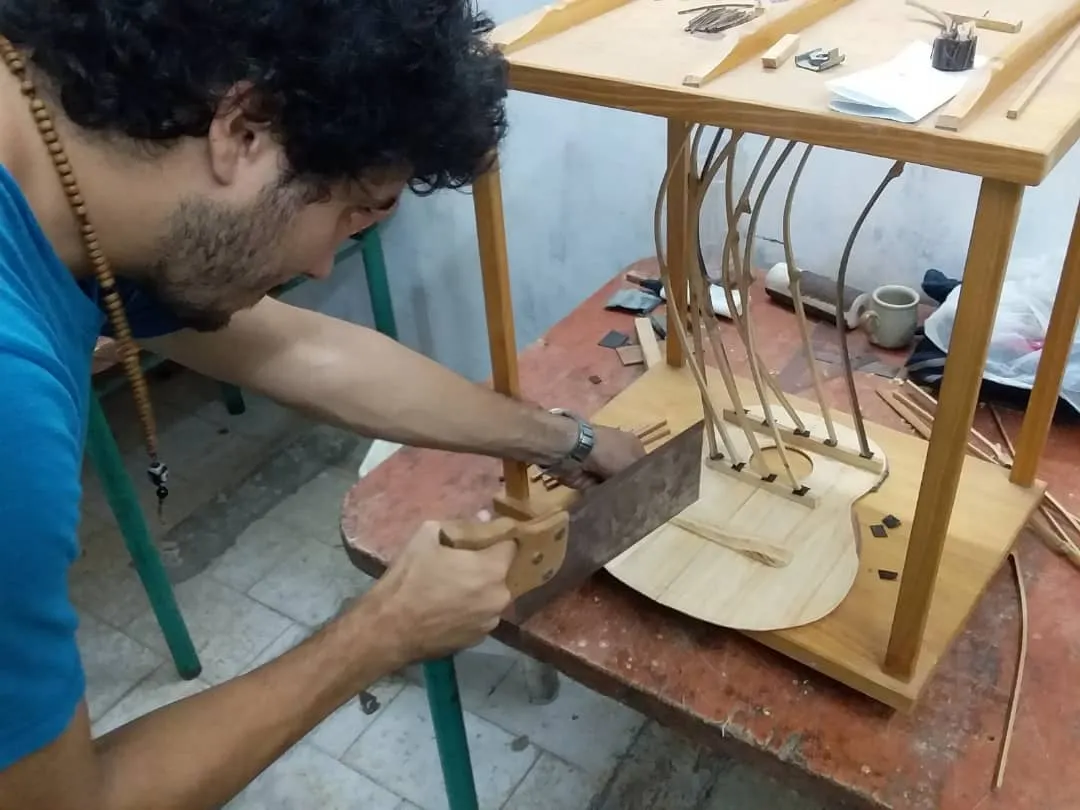
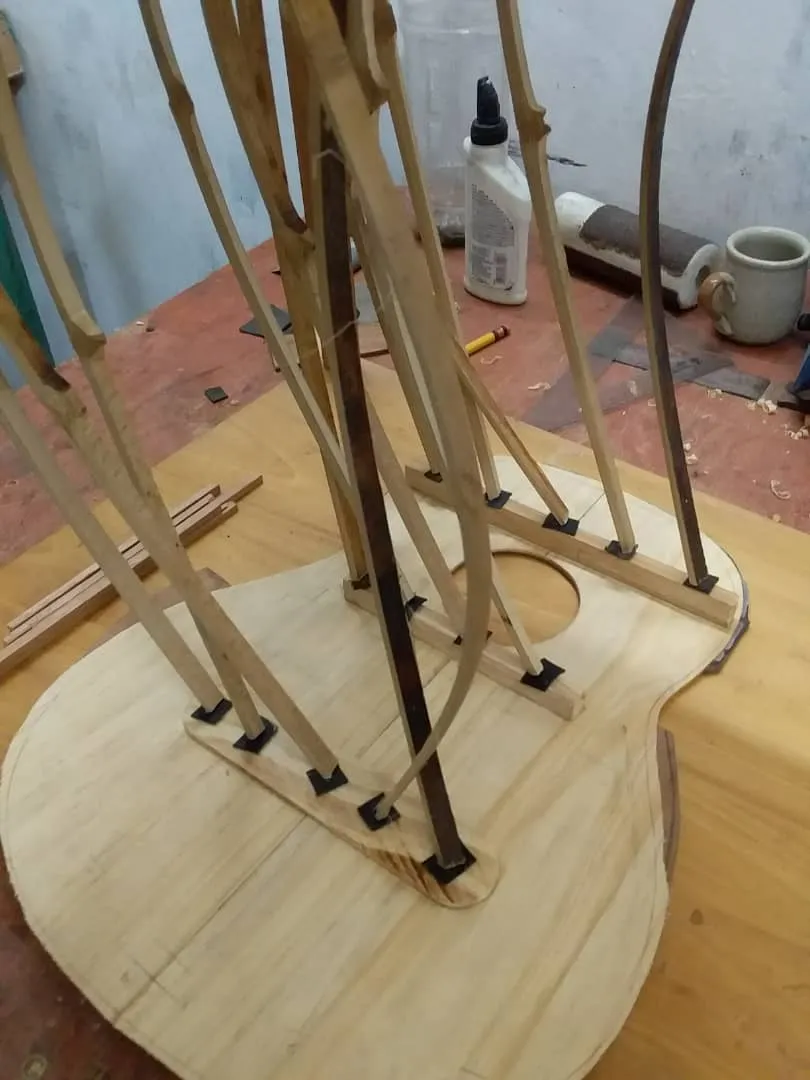
This is day dedicated exclusively to the heart of the instrument: the top.
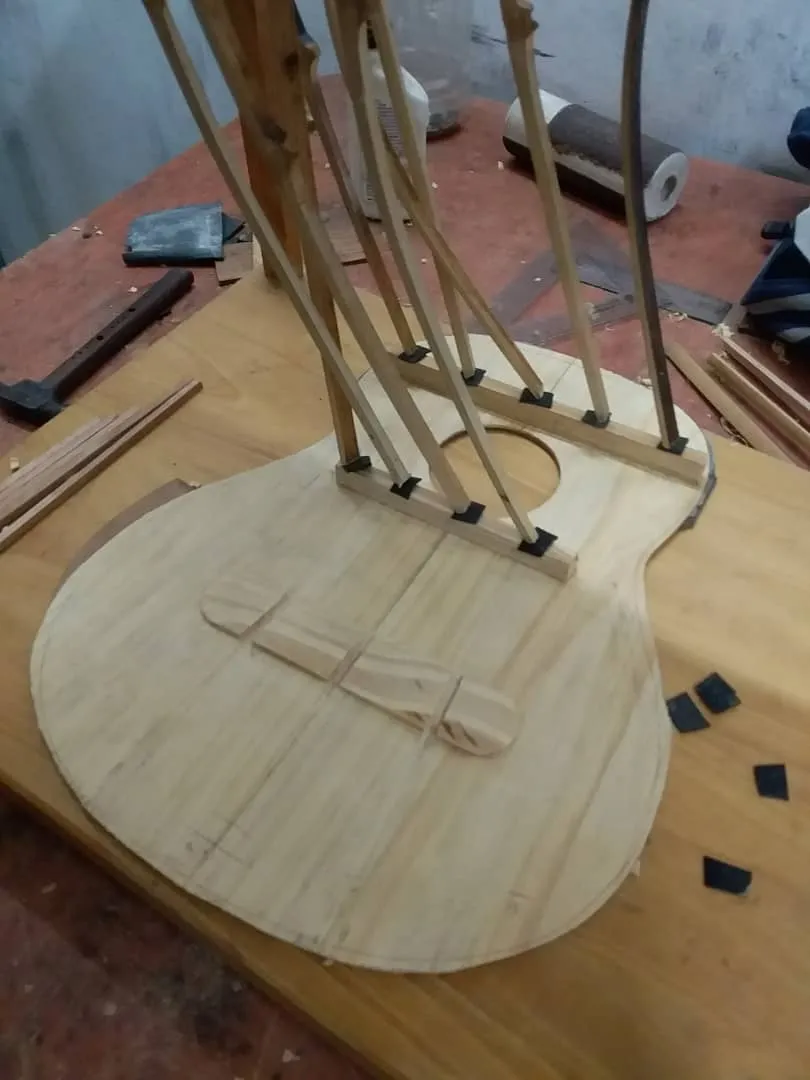
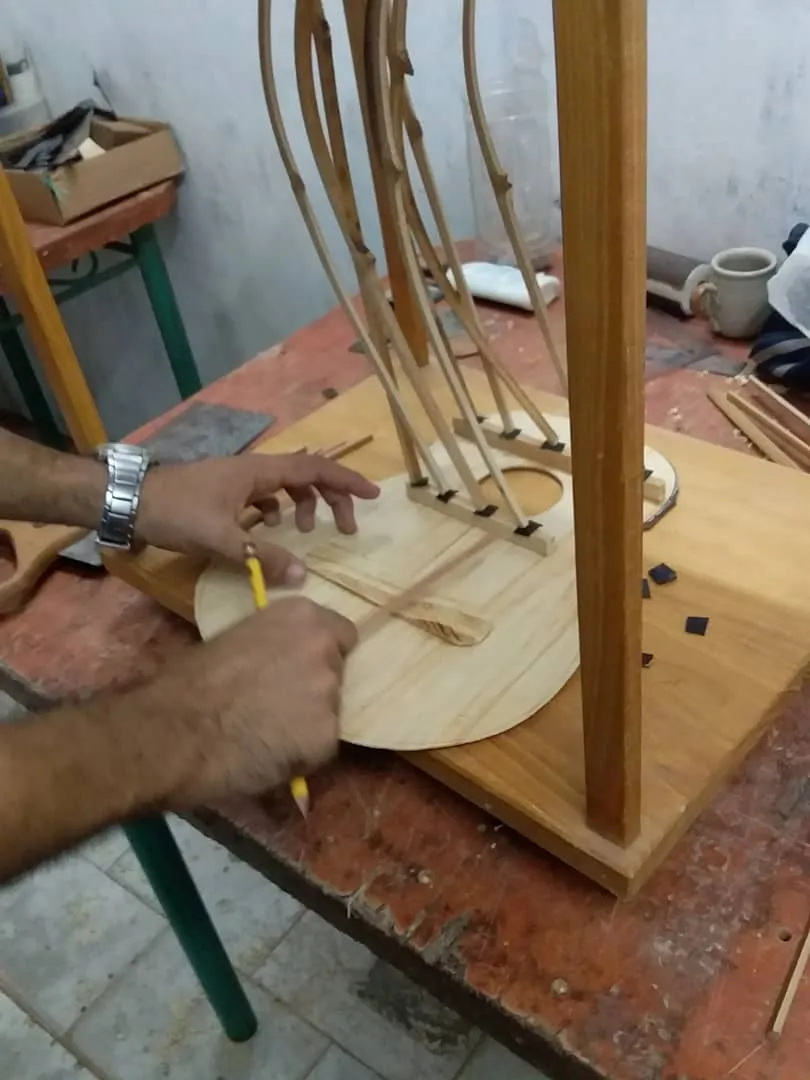
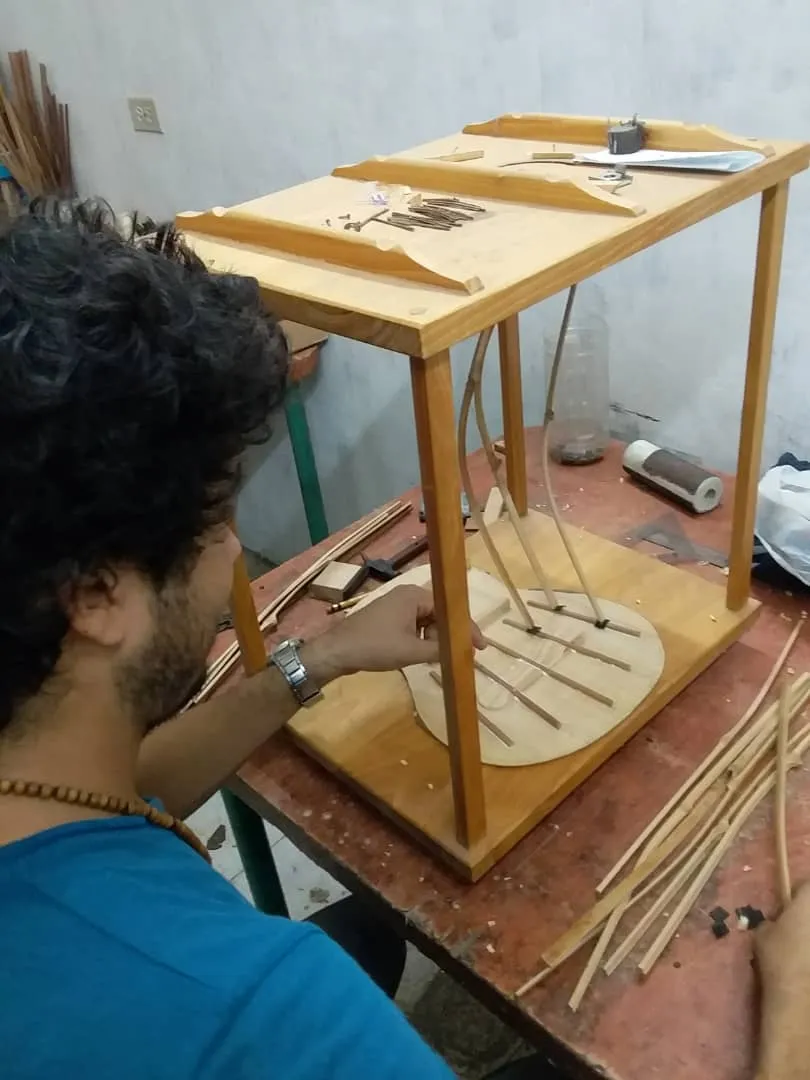
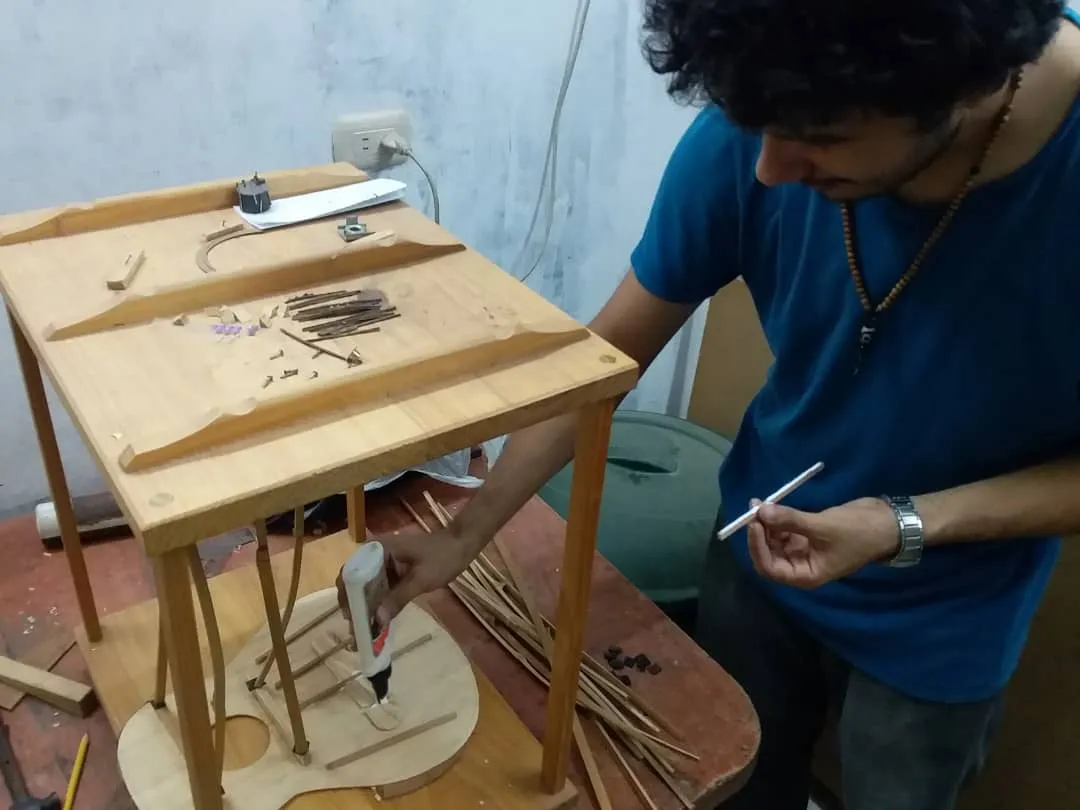
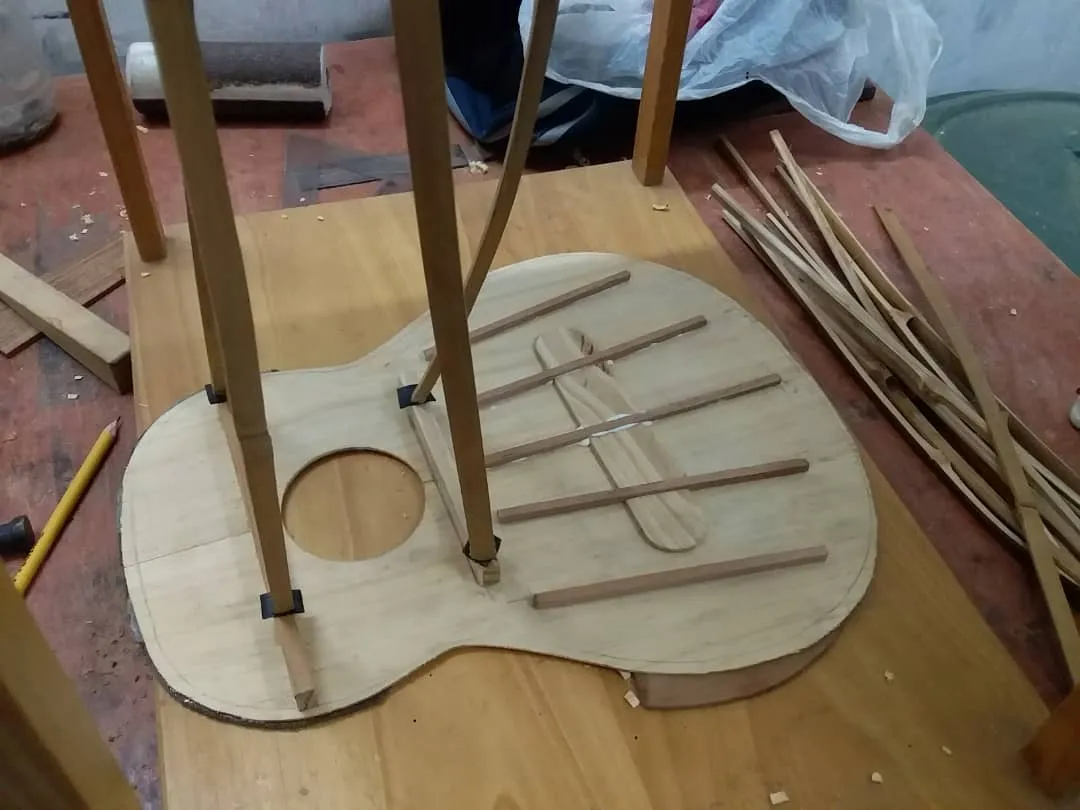
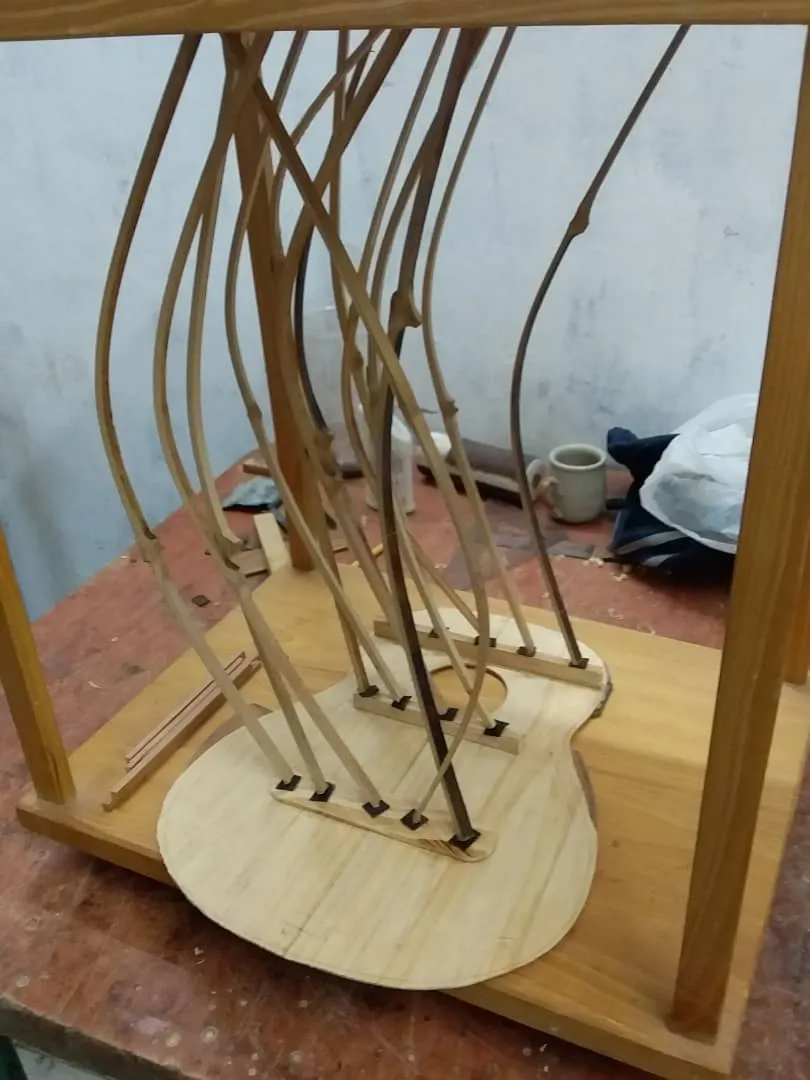
The top is the where the magic of the instrument resides. A well-crafted top will give us the best sound possible in the instrument. It is also the face of the instrument, so you need to be careful about what you do with it once the pieces of wood have been glued together. This day was dedicated to this part. First, putting the braces that will reinforce the top. As you can see there are three sections reinforced: the upper half and the bridge zone. These reinforcements will help the top keep its shape. There is a lot of bending coming from the tension of the strings and playing the instrument. However, this doesn’t mean the top has to be reinforced as much as the back of the body. If you did something like that, you would end with a muted instrument. There needs to be a balance. But how does one balance this structural strength and sound qualities? That’s easy enough: you use another guitar building trick: a harmonic fan.
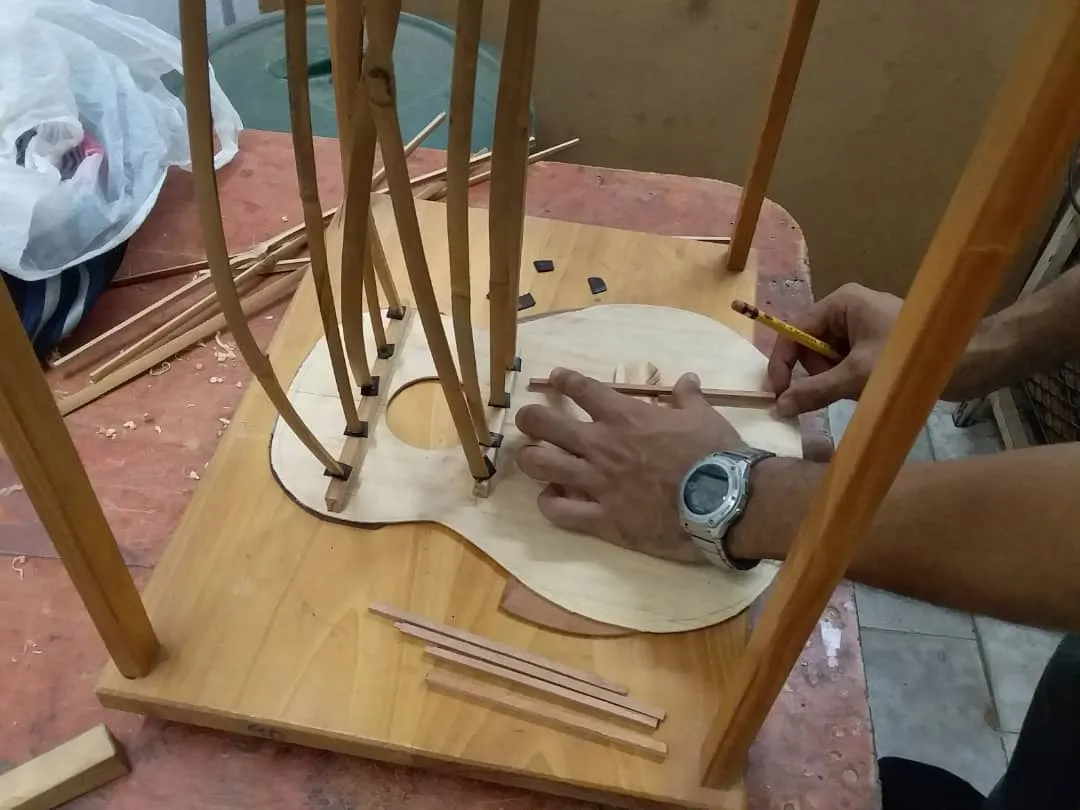
There are numerous shapes of fans. Francisco Tárrega is famous for codifying these and talking about what each shape does to the sound of an instrument. In my case, I opted for the traditional 5 bars fan (these are 7 in the guitar because there is more room). These will help keeping structural strength on a good level while not altering too much the balance between treble and bass in the instrument.
Este día está dedicado al corazón del instrumento: la tapa armónica
Aquí es donde reside la magia del instrumento. Una tapa bien labrada nos dará el mejor sonido posible. También es la carta de presentación de un instrumento, así que es necesario tener mucho cuidado con lo que se hace sobre esta una vez que está lista para pasar por este proceso. Este día está dedicado solo a esta parte. Primero, hay que colocar barras de refuerzo. Como se puede observar estas van ubicadas en dos secciones: la mitad superior y la zona del puente. Estas nos ayudaran a que la tapa mantenga su forma. La tensión de las cuerdas y la vibración al tocar el instrumento suelen deformarla. Sin embargo, esto no quiere decir que necesite tantos refuerzos como el fondo. Si se reforzara de la misma manera, el instrumento quedaría básicamente mudo. Hay que encontrar el balance. Pero ¿cómo se puede balancear la resistencia estructural y el sonido? La respuesta es simple. Utilizando otro truco de la construcción de guitarras: un abanico armónico
Existe una gran variedad de patrones para el abanico armónico. Francisco Tárrega es famoso por codificar estos diseños y explicar qué hace cada uno dentro de un instrumento. En este caso, opté por el abanico de corma tradicional de 5 barras (estas son 7 en la guitarra debido a sus dimensiones). Estas barras ayudarán a mantener la fuerza de la estructura sin alterar demasiado el balance de graves y agudos del instrumento.
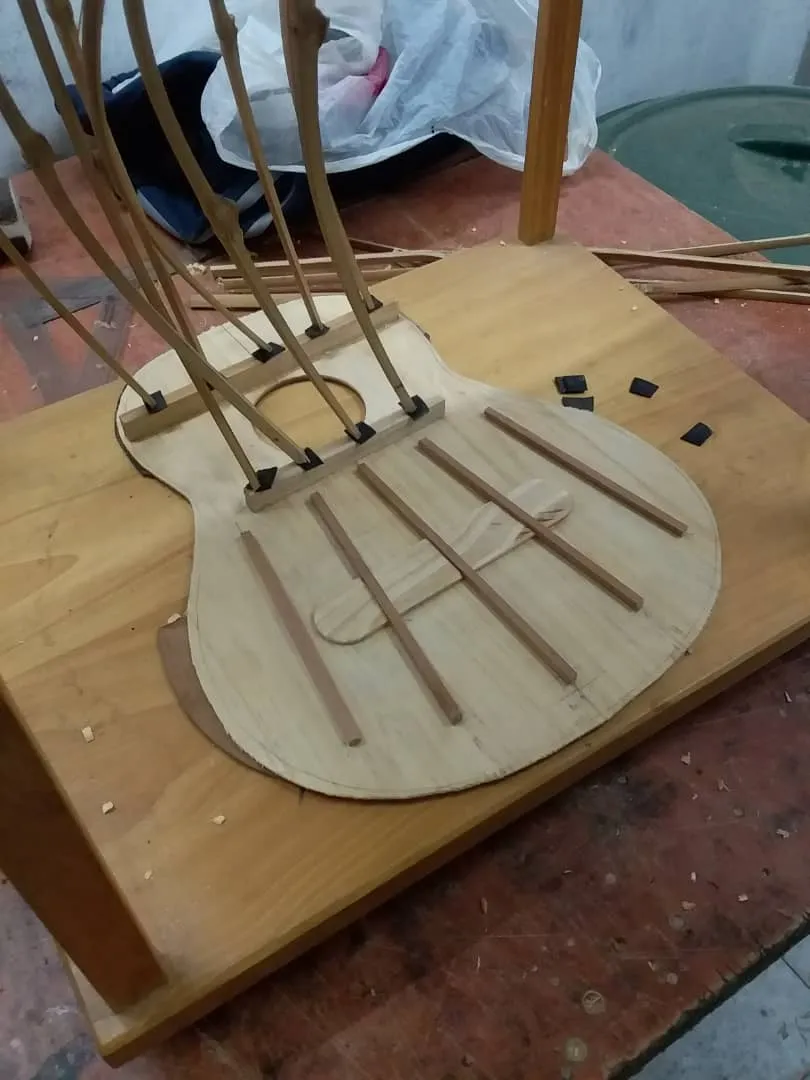
[A view of the completed top. On the lower side, you can see the harmonic fan]
That is all for this entry. Thanks a lot for reading. See you in the next chapter.
Eso es todo por esta ocasión. Gracias por leer. Nos vemos en el próximo post.
All the pictures used in these posts are either mine or from my teacher Andrés Rodríguez. He doesn’t mind me using these.