Hola mis amigos de hive, buenas tarde hoy me gustaría compartir, como hacer una tortuga de material de provecho, toque la tortuga porque son uno de mis animalitos favoritos y aquí les explicare como hacerla, paso a paso, espero que les guste y puedan realizarlo es super fácil , solo inténtalo.
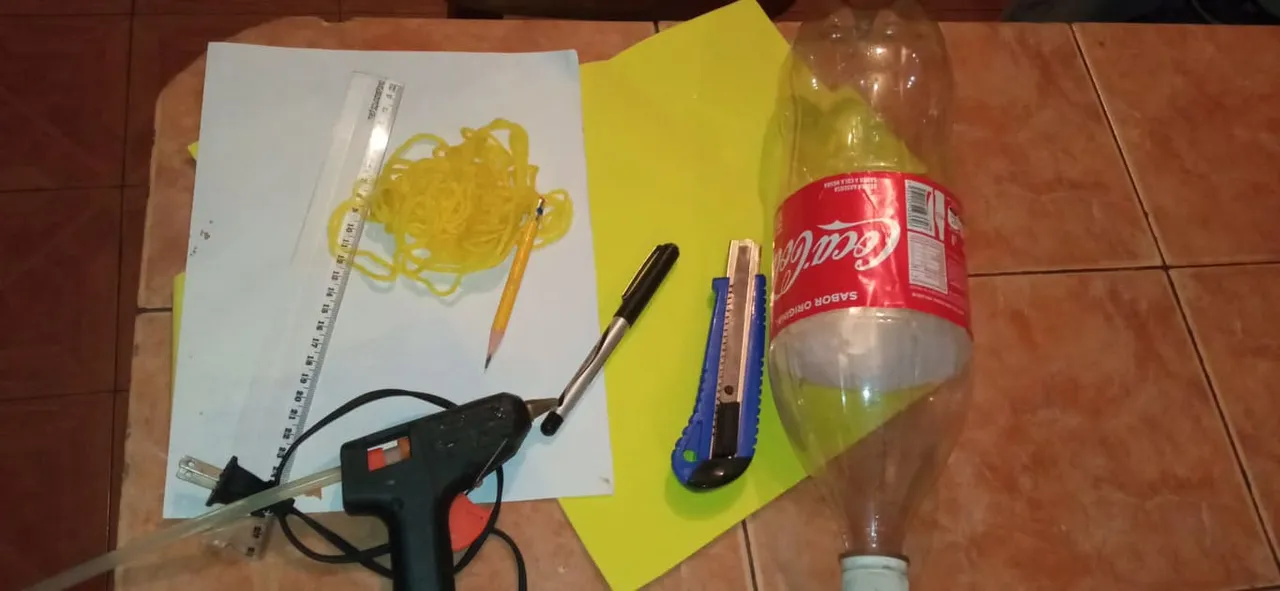
Materials
ruler
pencil
markers
foami
plastic bottle
yarn
cutter
silicone gun
Materiales
regla
lapiz
marcados
foami
botella de plastico
estambre
cuter
pistola de silicon
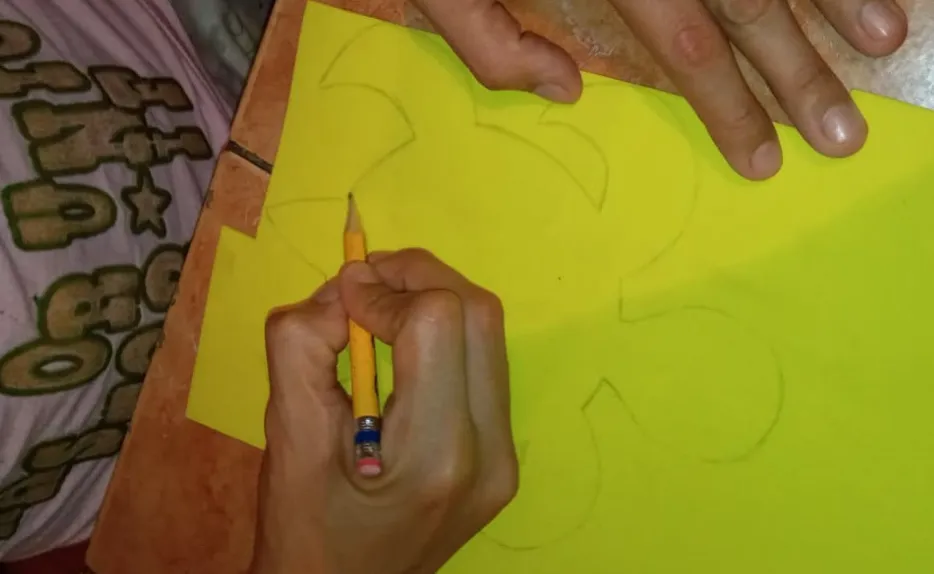
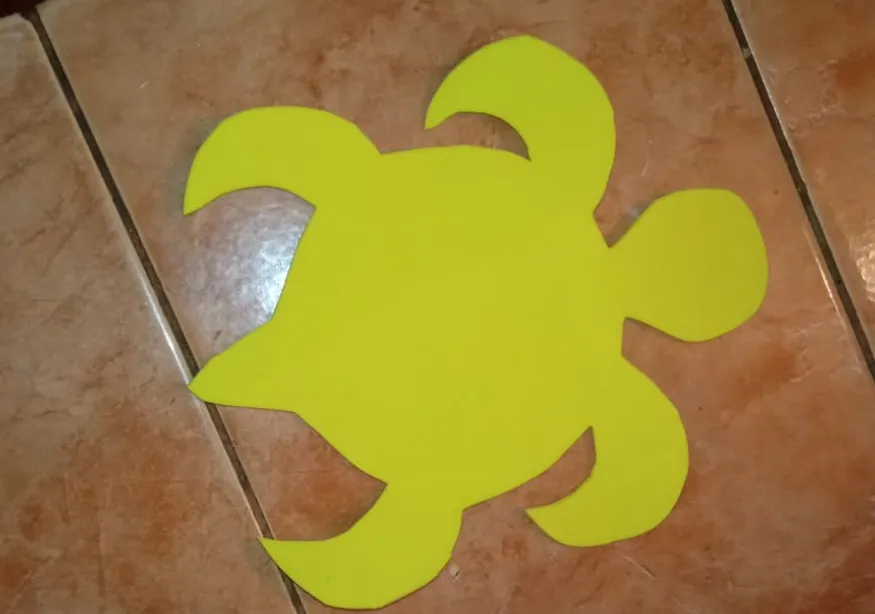
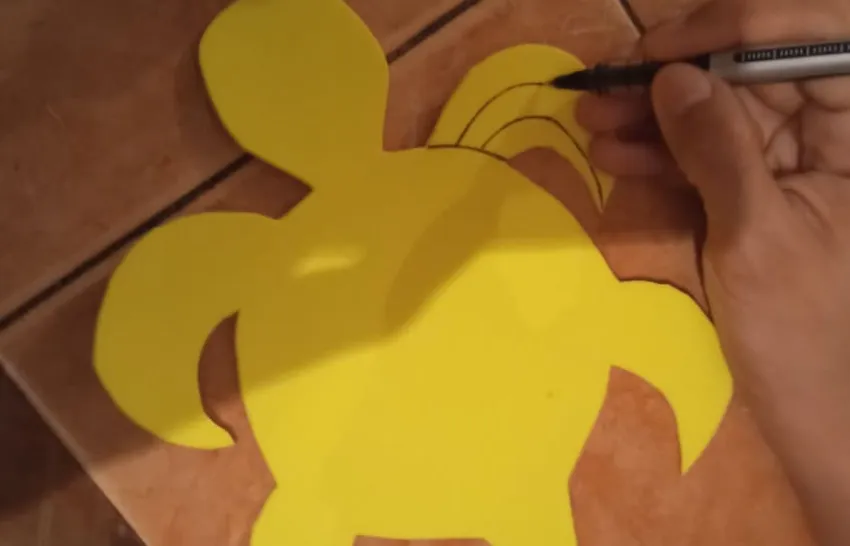
Step 1
Painting the turtle on the foami
Paso 1
Pintar la tortuga en el foami.
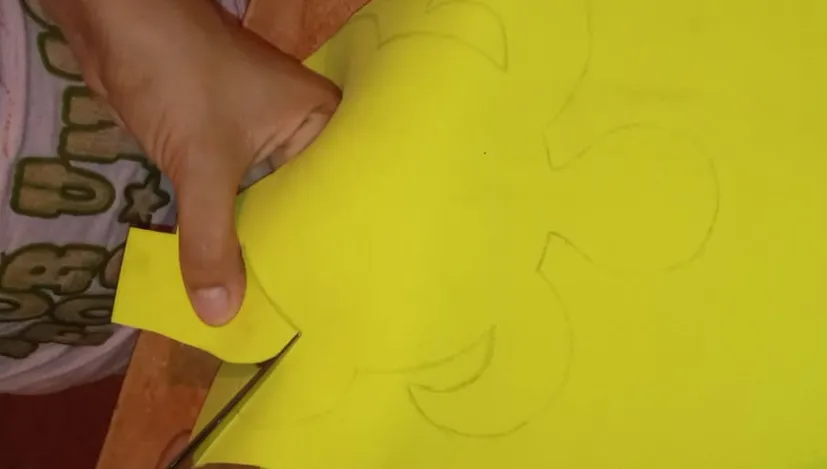
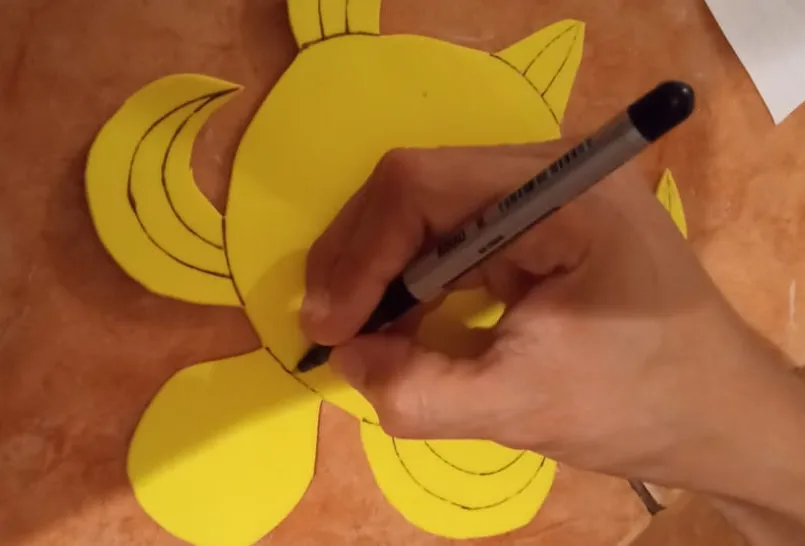
Step 2
Cut out the turtle that we painted on the foami
Paso 2
Cortar la tortuga que pintamos en el foami .
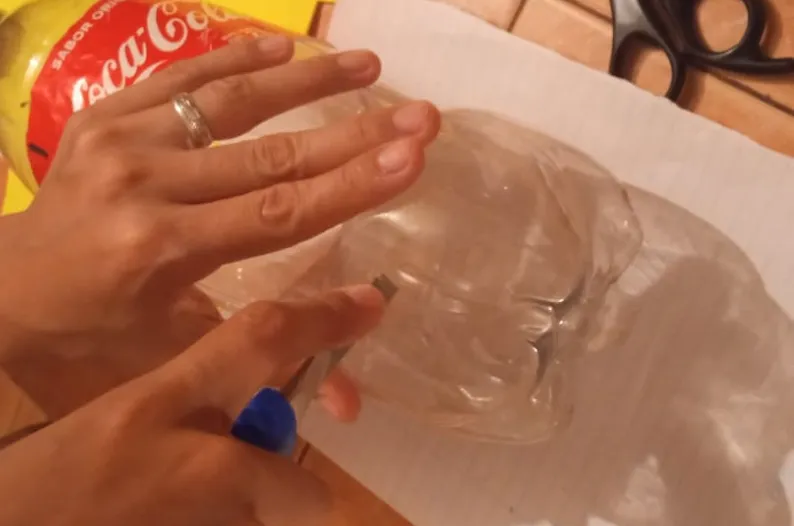
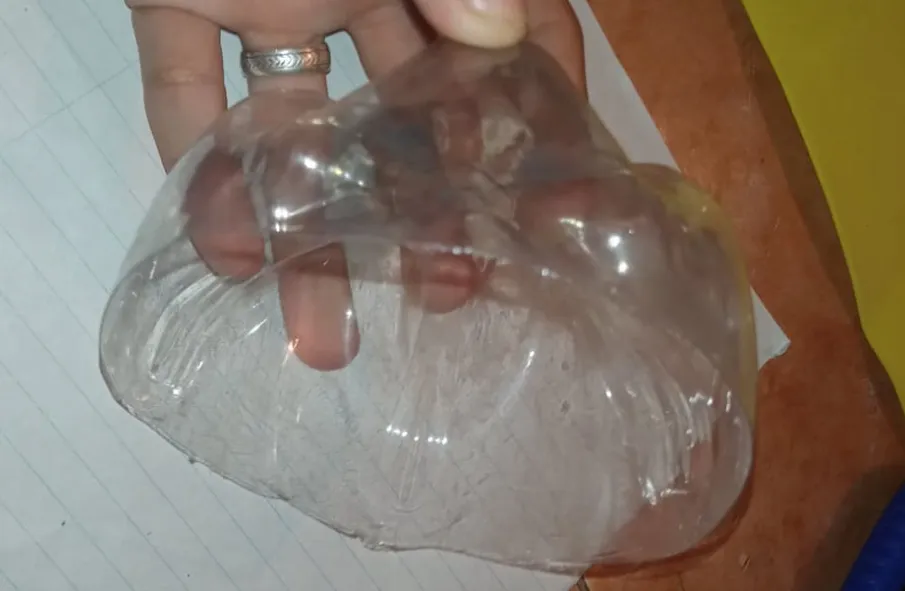
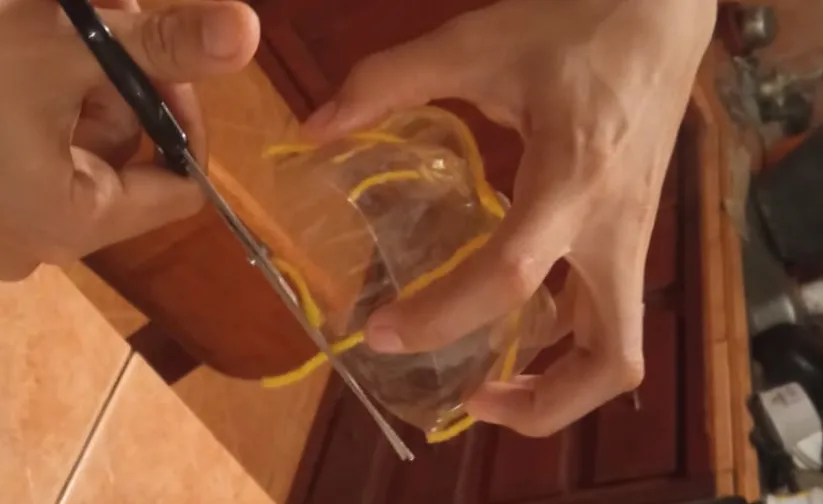
Step 3
Cut the shell into the plastic bottle with the cutter.
Paso 3
Picar con el cuter el caparazón en la botella de plástico.
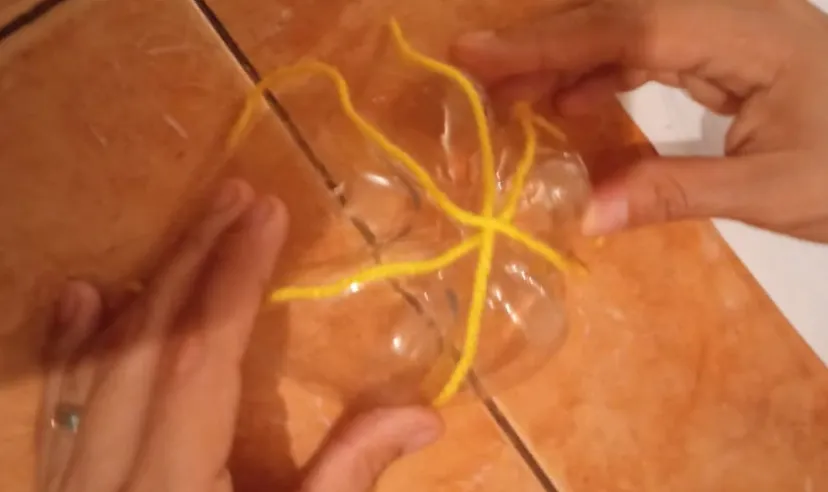
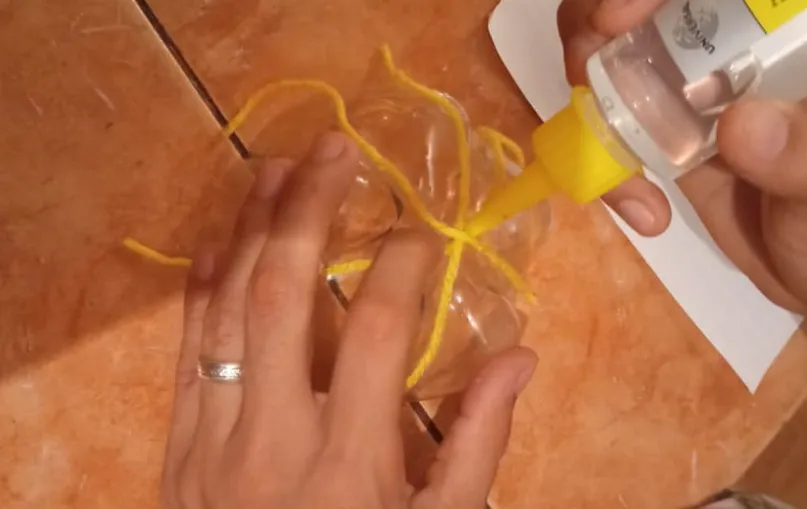
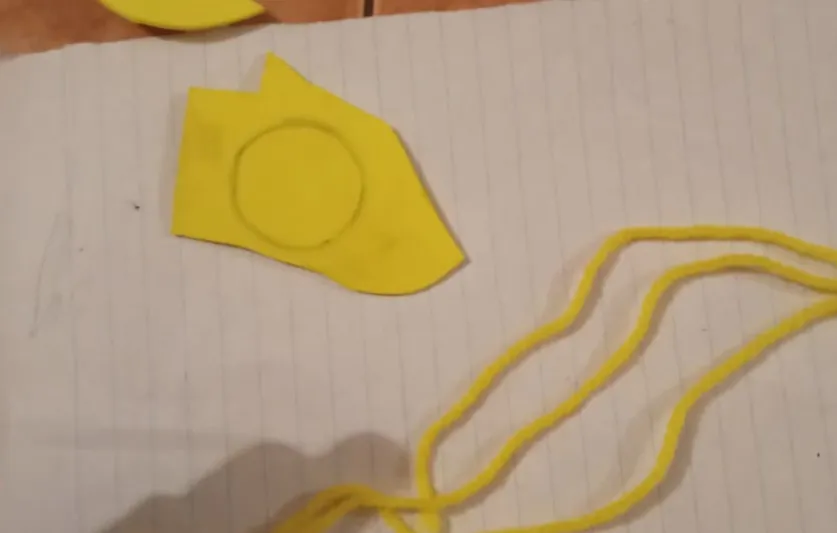
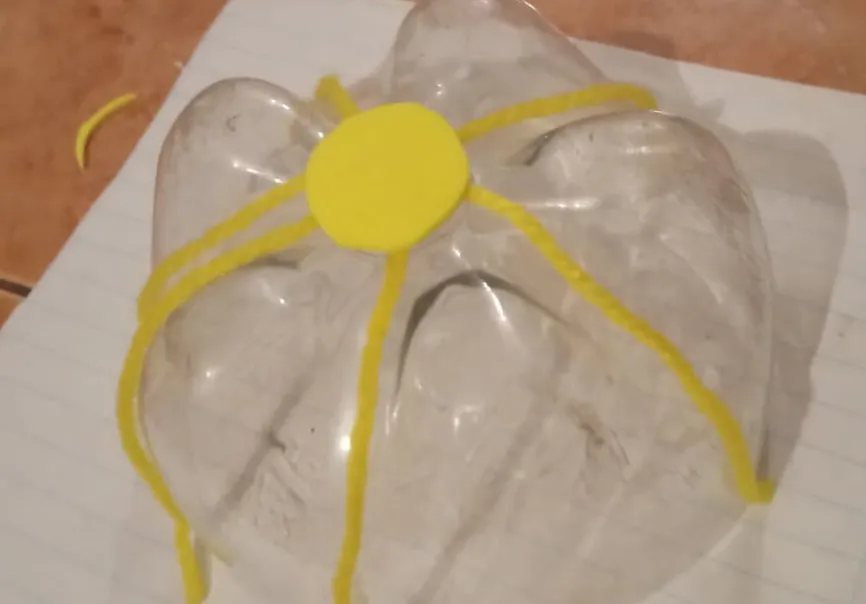
Step 4
Measure the yarn and cut it and then glue it to the shell, then cut the round piece that goes on the top of the shell in foami and there you will see the shape it will take.
Paso 4
Medir el estambre y cortar para luego pegar en el caparazón, después cortas en foami el redondo que va en la parte superior del caparazón y allí vas viendo la forma que va agarrando .
Step 5
Paint the turtle with the marker slowly, there we paint the legs and the head.
Paso 5
Pintar la tortuga con el marcador despacio, allí pintamos las patas y la cabeza.

Step 6
Now we are going to put silicone on the edges of the bottom part of the shell and then place it on the turtle.
Paso 6
Ahora vamos a echarle silicon en las orillas del la parte de abajo del caparazón y después colocarla en la tortuga.
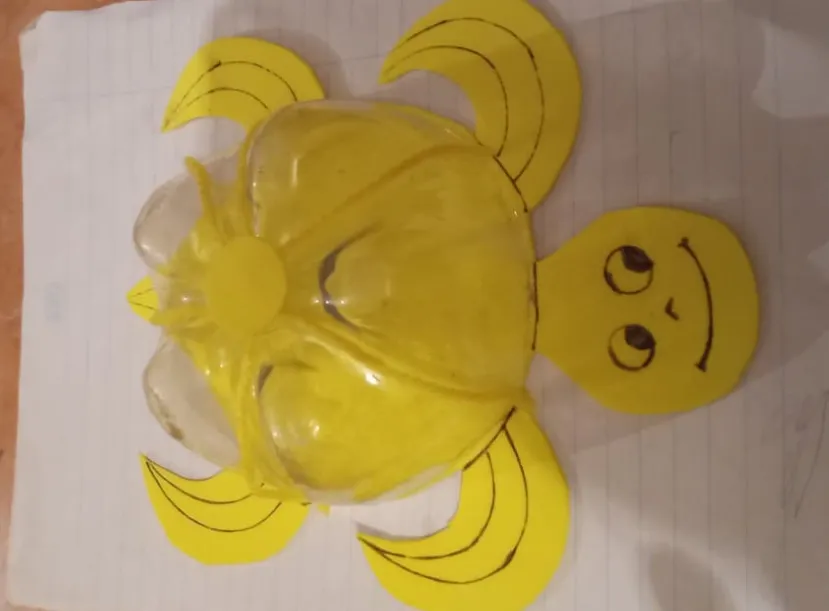
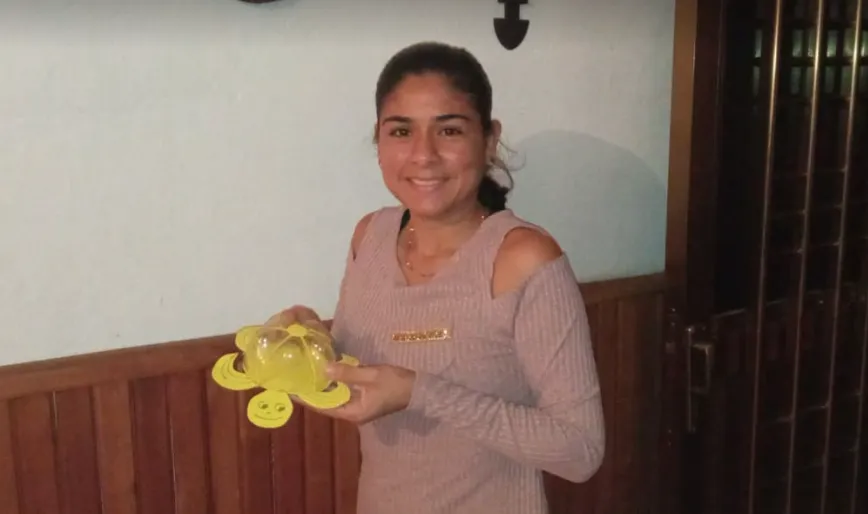
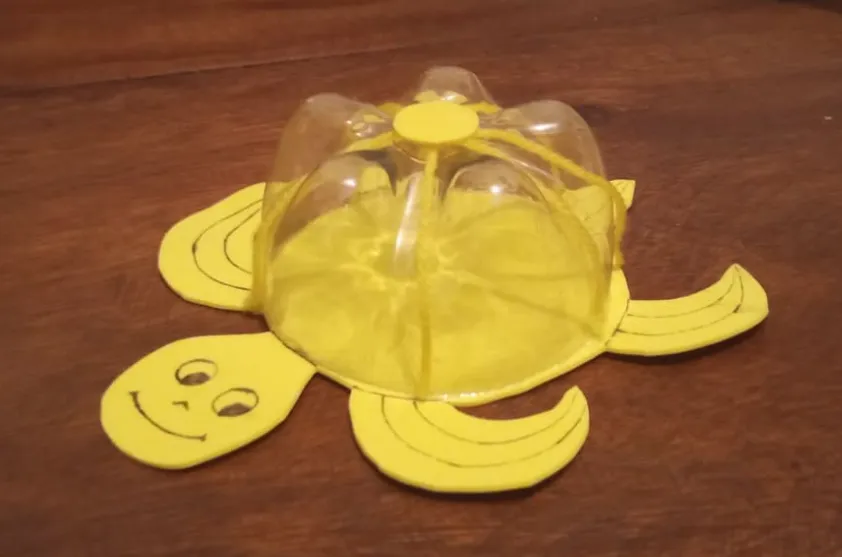
Step 7
Here you will see the beautiful result.
Paso 7
Aquí veraz el hermoso resultado.
I have been using it for a long time and I am very pleased with the results.
Viste no es nada difícil , solo pruebalo y tendrás resultados hermosos ..nos vemos en la próxima mis amigos ..
RESOURCES USED / RECURSOS UTILIZADOS
• Photos taken by redmi 9. / Fotos tomadas por redmi 9.
• The translator is used www.Deepl.com / Se utiliza el traductor www.Deepl.com