Muy buenas tardes estimados amigos de la colmena, el día de hoy les traigo este hermoso proyecto, una mini cocinita de cartón que realice utilizando muy pocos materiales y que es ideal para el disfrute de los más pequeños de la casa.
Good afternoon dear friends of the beehive, today I bring you this beautiful project, a mini cardboard kitchen that I make using very few materials and that is ideal for the enjoyment of the smallest of the house.
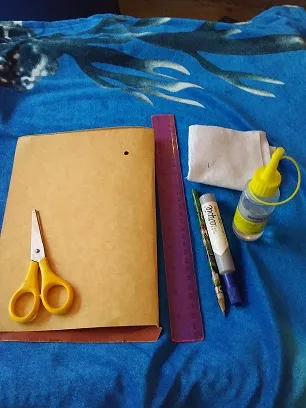
Materiales de trabajo:
• Un pedazo de cartón.
• Regla.
• Lápiz.
• Marcador.
• Pegamento.
• Tijeras
• Fieltro blanco.
Work materials:
• A piece of cardboard.
• Rule.
• Pencil.
• Marker.
• Glue.
• Pair of scissors
• White felt.
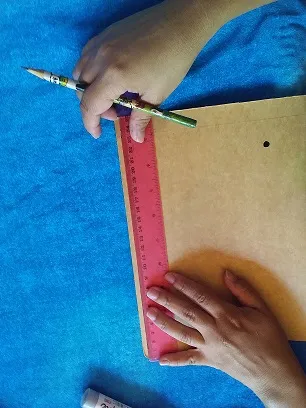
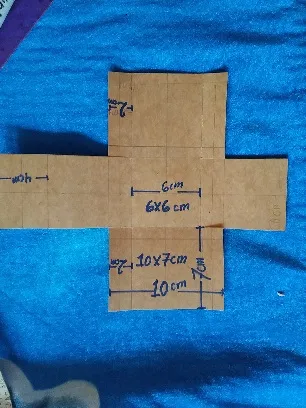
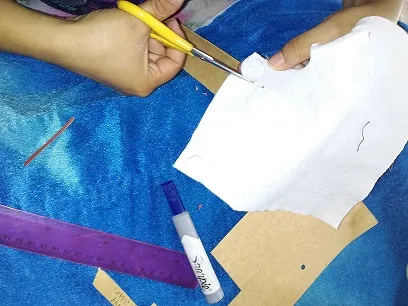
Primer paso: con la ayuda de la regla y de tu lápiz, recorta el cartón a la medida de 20cm de ancho por 24cm de largo.
First step: with the help of the ruler and your pencil, cut the cardboard to measure 20cm wide by 24cm long.
Segundo paso: traza en el centro del cartón un cuadrado de 6 por 6cm, y a los lados del mismo tres cuadrados de 7 por 7cm (deja en ellos unas pestañas de 2cm) y uno de 7cm por 11 cm (deja una pestaña de 4cm) y recorta el cartón.
Second step: draw a 6 by 6cm square in the center of the cardboard, and on the sides of it, three 7 by 7cm squares (leave 2cm tabs on them) and a 7cm by 11cm square (leave a 4cm tab) and cut out the cardboard.
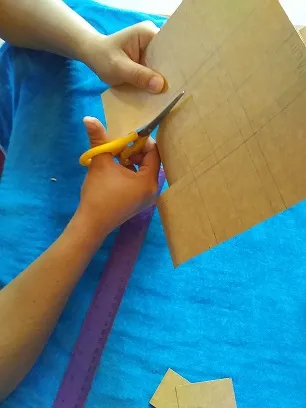
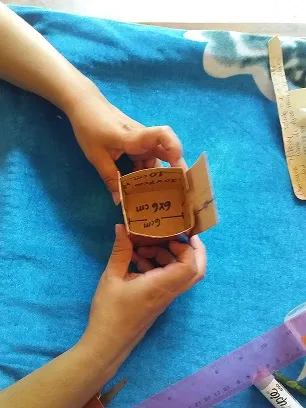
Tercer paso: Apóyate con las tijeras y recorta los 2 cm dejados.
Third step: Support yourself with the scissors and cut the 2 cm left.
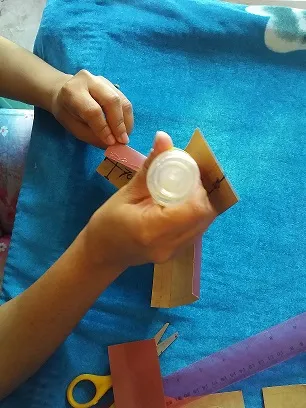
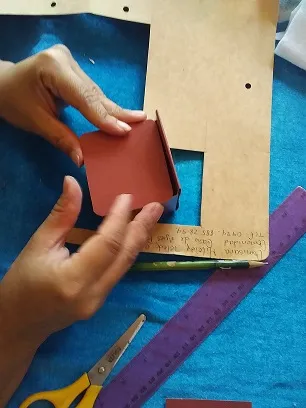
Cuarto paso: Dobla hacia adentro los cuadrados y comienza a pegar las partes.
Step Four: Fold the squares inward and begin gluing the parts together.
Quinto paso: Recorta un cuadrado de 6cm por 6cm y pega encima de la cocinita.
Fifth step: Cut out a 6cm by 6cm square and glue on top of the kitchenette.
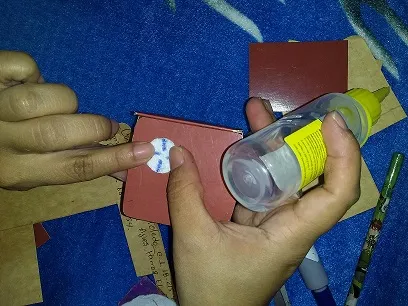
Sexto paso, recorta en el fieltro 4 círculos medianos para las hornillas y 5 círculos pequeños para las perillas de la cocina.
Step 6, cut out 4 medium circles for the burners and 5 small circles for the kitchen knobs from the felt.
Para finalizar, pega las perillas y las hornillas. Marca las hornillas y haz un rectángulo en tu cocina en semejanza al horno.
Finally, glue the knobs and burners. Mark the burners and make a rectangle in your kitchen in resemblance to the oven.

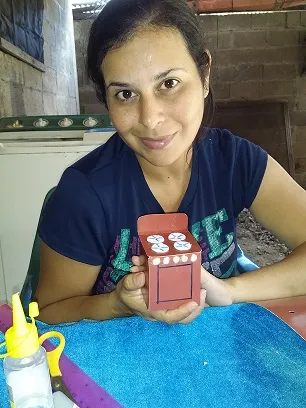
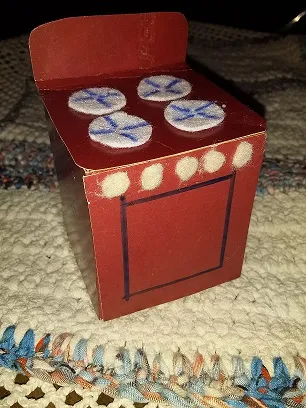
Resultado final.
Final score.
Muchas gracias por visualizar mi bloc!!!
Thank you very much for viewing my notebook !!!