¡Hola comunidad de Hive!
Hello Hive community!
Hola queridos Needleworkers, feliz lunes de agujas, les deseo una semana muy productiva.🤗♥️ Este lunes de agujas no me tomo desprevenido, siempre me pasaba que no podía compartir mis post los lunes, quizás por mi malta de organización 🙃🤔 pero hoy dije: no! Publicó, por qué si o si, jajajajaja, tarde pero seguro.
Hello dear Needleworkers, happy needlework Monday, I wish you a very productive week.🤗♥️ This needlework Monday didn't take me off guard, it always happened to me that I couldn't share my posts on Mondays, maybe because of my organizational malt 🙃🤔 but today I said: no! Posted, why yes or yes, hahahahahaha late but sure.

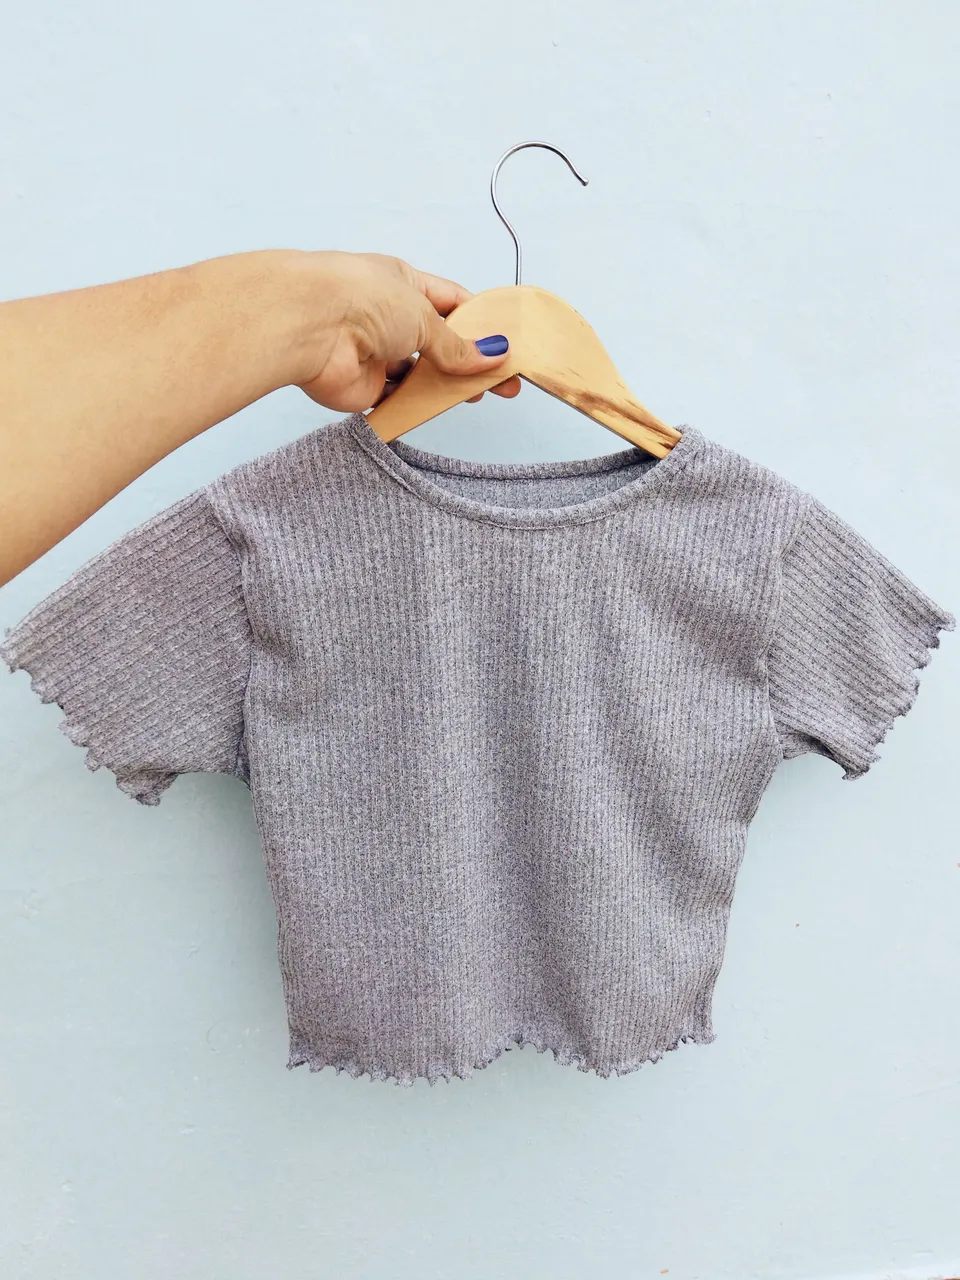
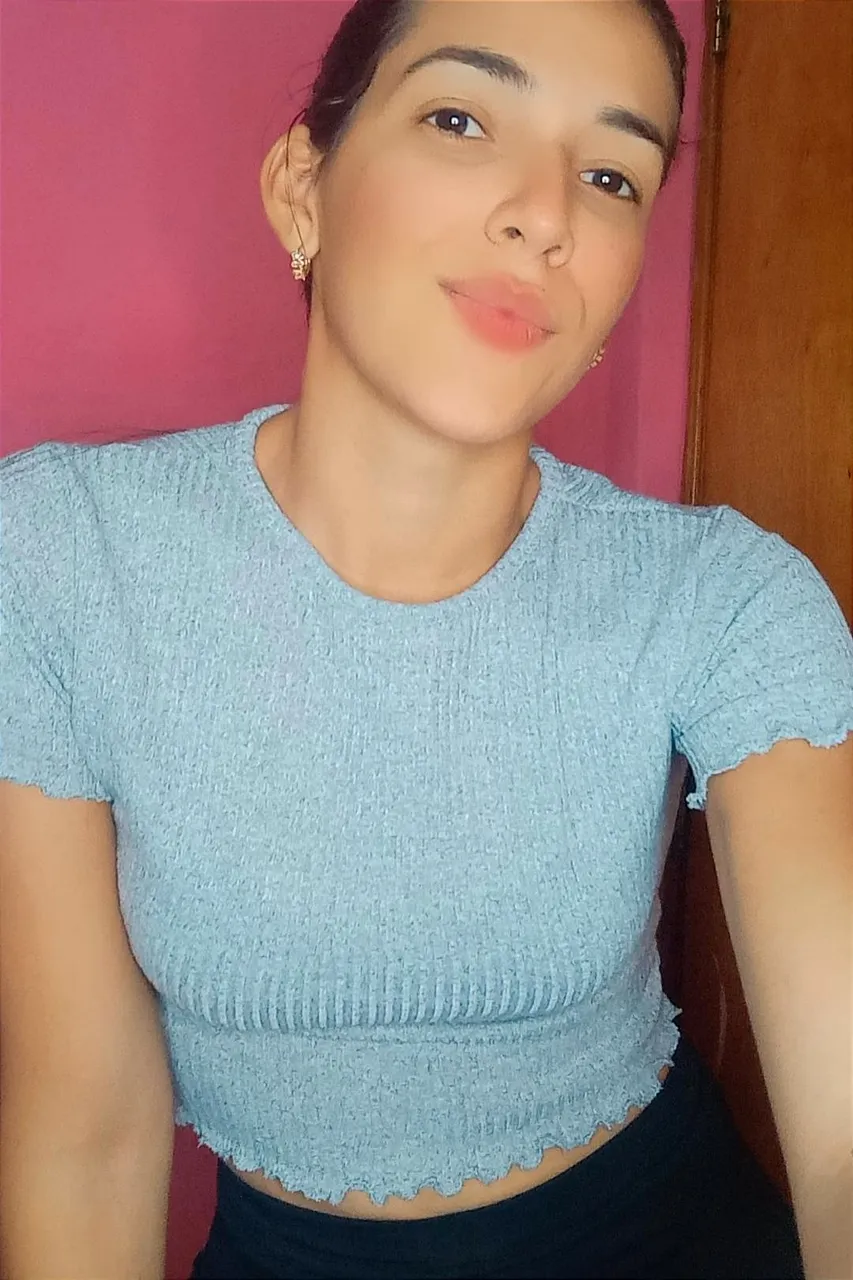
Los crop tops son prendas que me gustan mucho, con unos jeans altos y unos tenis quedan perfectos, aunque yo le agregaría una chaqueta o algún blazer, son prendas juveniles que llegaron para quedarse y estar siempre presenta en nuestros armarios. Hoy realicé un lindo Crop Top básico con corte de cuello redondo, una prenda muy fácil de hacer, la tela que utilicé es una de mis favoritas el micro rib y es que está tela tiene un acabado muy lindo, hoy ocupe un color gris muy lindo. así que si quieres aprender a realizar un crop top como este, ve por tu hilo y aguja, tela y comencemos...
Crop tops are garments that I like very much, with high jeans and tennis shoes are perfect, although I would add a jacket or some blazer, they are youthful garments that came to stay and always be present in our closets. Today I made a nice basic crop top with round neck cut, a very easy to make garment, the fabric I used is one of my favorite micro rib and this fabric has a very nice finish, today I used a very nice gray color, so if you want to learn how to make a crop top like this, go get your thread and needle, fabric and let's start....
🧵🧷🧵🧷🧵🧷🧵🧷🧵🧷🧵🧷🧵🧷🧵🧷🧵
Necesitaremos || We will need
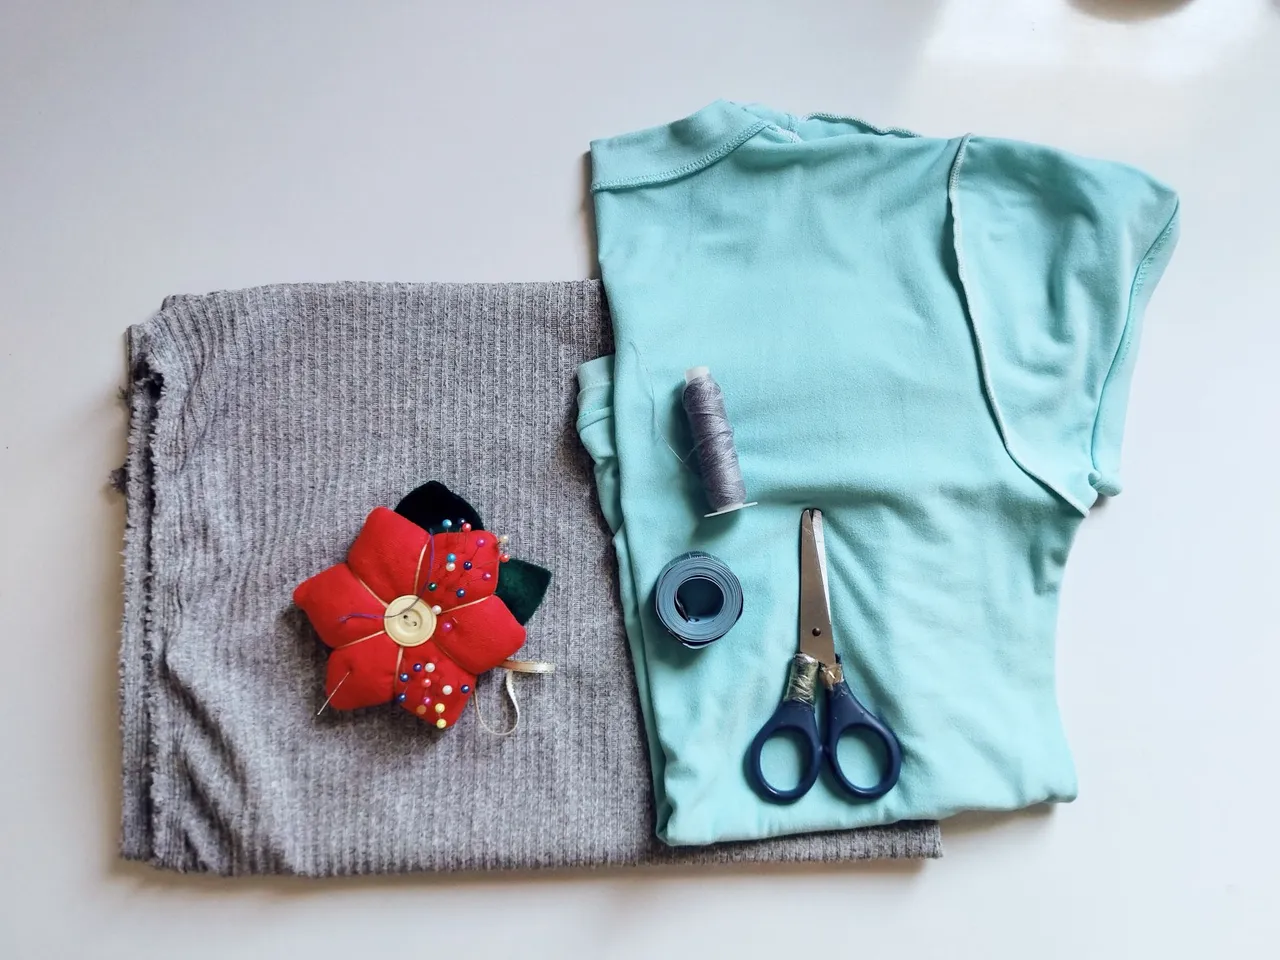
- Medio metro de tela micro rib gris
- Hilo gris
- Alfileres
- Tijera
- Cinta métrica
- Blusa patrón
- Aguja y máquina de coser
- Half meter of gray micro rib fabric
- Gray thread
- Pins
- Scissors
- Tape measure
- Pattern blouse
- Needle and sewing machine
🧵🧷🧵🧷🧵🧷🧵🧷🧵🧷🧵🧷🧵🧷🧵🧷🧵
Paso 1 || Step 1
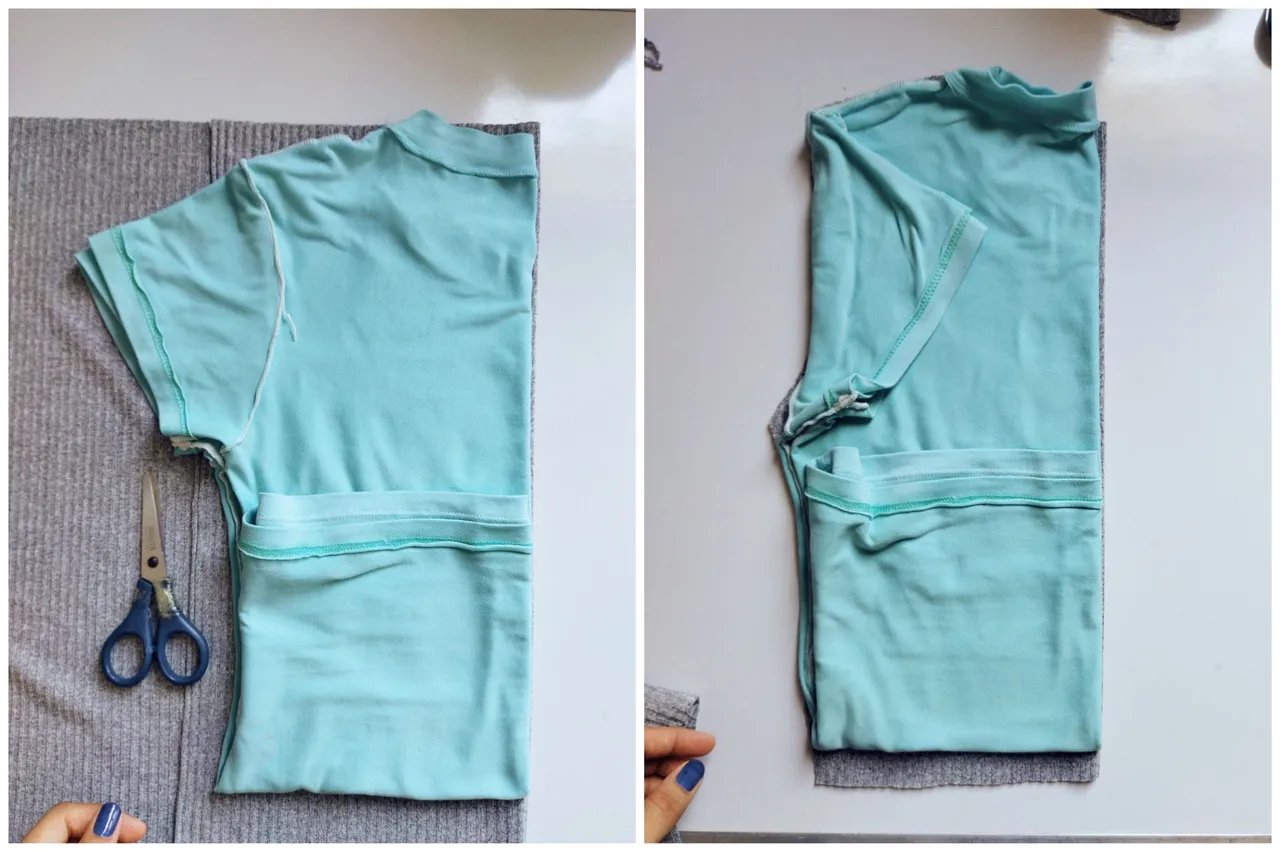

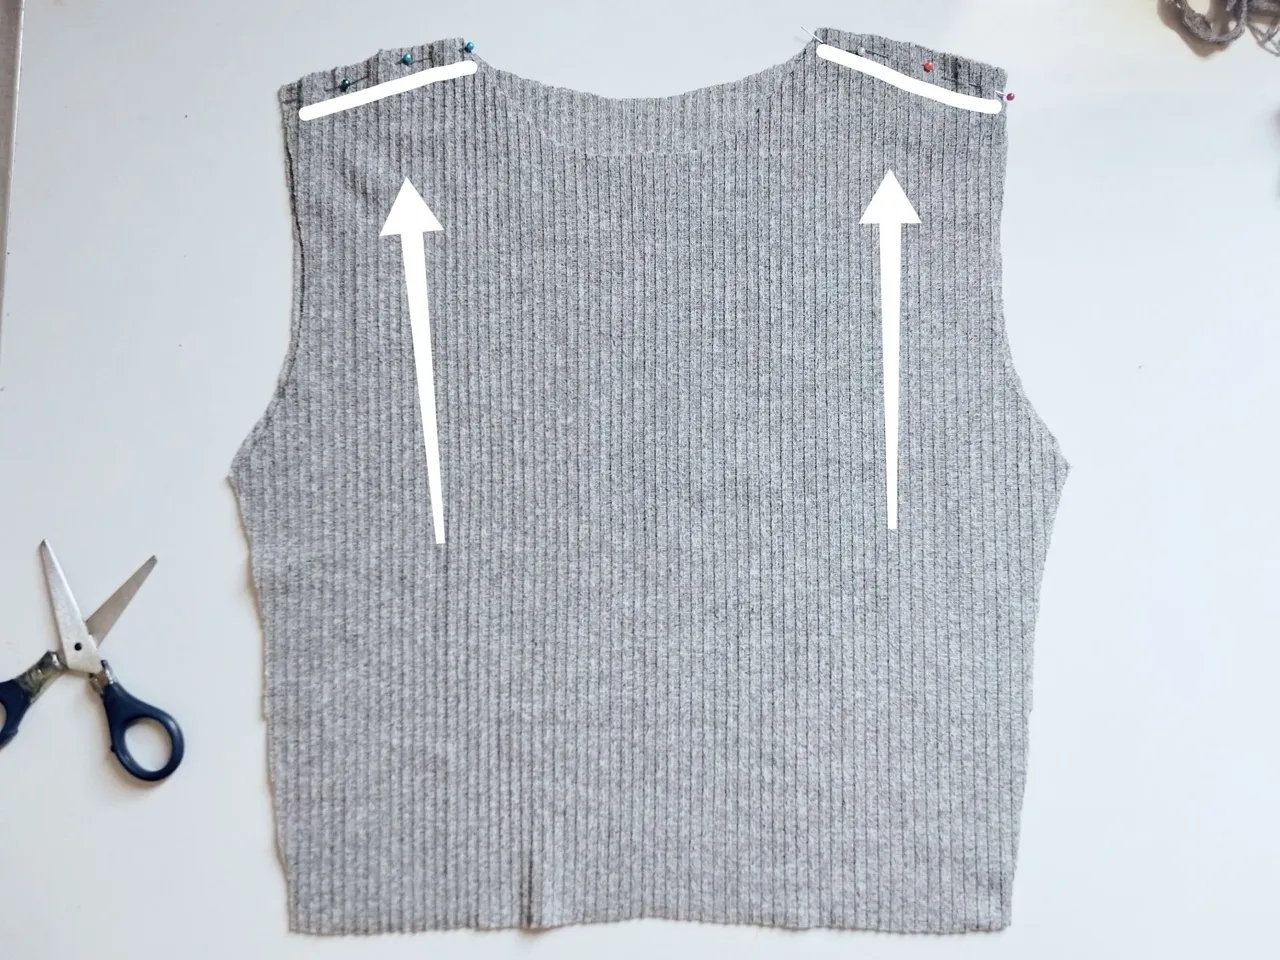
- Comenzamos doblando la tela y colocándola en una superficie plana, colocamos la blusa patrón sobre la tela y vamos a cortar de la tela colocando el lado que más estira en dirección horizontal, para este top necesitamos sacar dos piezas (1 pieza delantera y 1 pieza trasera), Debemos tener en cuenta que el contorno del cuello de la pieza delantera es más bajo que el de la pieza trasera , al igual en la sisa delantera debemos cortar 1cm hacia adentro.
- We start by folding the fabric and placing it on a flat surface, we place the pattern blouse on the fabric and we will cut the fabric by placing the side that stretches the most horizontally, for this top we need to take out two pieces (1 front piece and 1 back piece), we must take into account that the contour of the neck of the front piece is lower than the back piece, as well as the front armhole we must cut 1cm inward.
Paso 2 || Step 2
- Después de tener la dos piezas cortadas (Delantera y trasera), enfrentamos los derechos de las piezas. Y sujetamos con alfileres las hombros del top, como te muestro en la imagen. Pasamos costura recta y luego zigzag para rematar la costura en los hombros.
- After having the two pieces cut (front and back), we face the right sides of the pieces. And pin the shoulders of the top, as shown in the picture. We sew a straight seam and then zigzag to finish the seam on the shoulders.
Paso 3 || Step 3
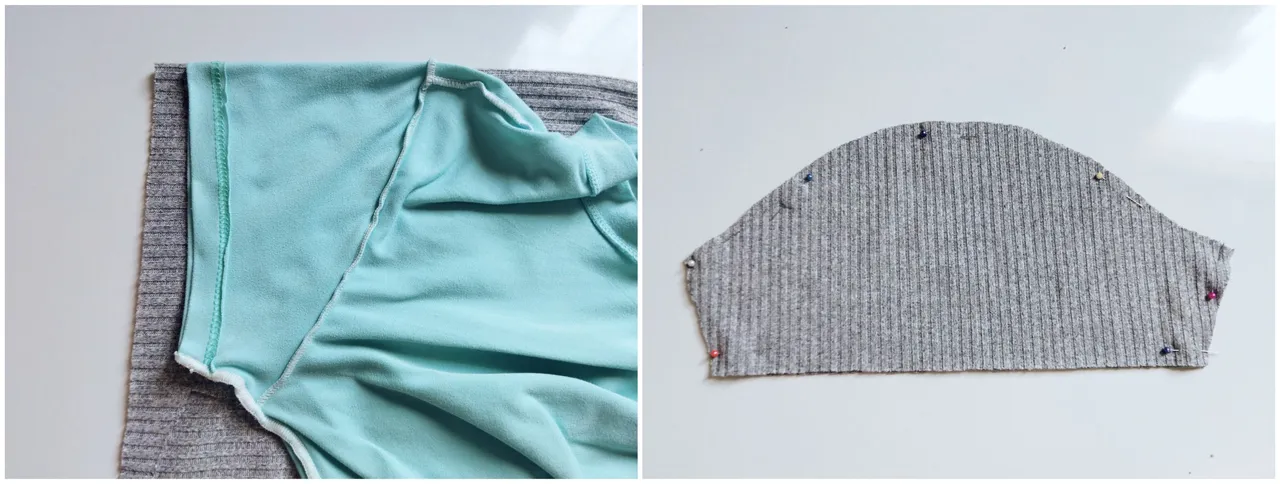
- Volvemos a colocar la tela pero en éste caso para cortar las mangas del top, luego de tener las mangas ya cortadas, vamos a sujetar las manga a la sisa del top, y pasamos costura recta y zigzag para un mejor acabado en los bordes (👀 OJO!!! Muy pendiente de la dirección de la tela, el derecho y el revés).
- We reposition the fabric but in this case to cut the sleeves of the top, after having the sleeves already cut, we will attach the sleeves to the armhole of the top, and pass straight stitching and zigzag for a better finish on the edges (👀 EYE!!! Very aware of the direction of the fabric, the right and the back).
Paso 4 || Step 4
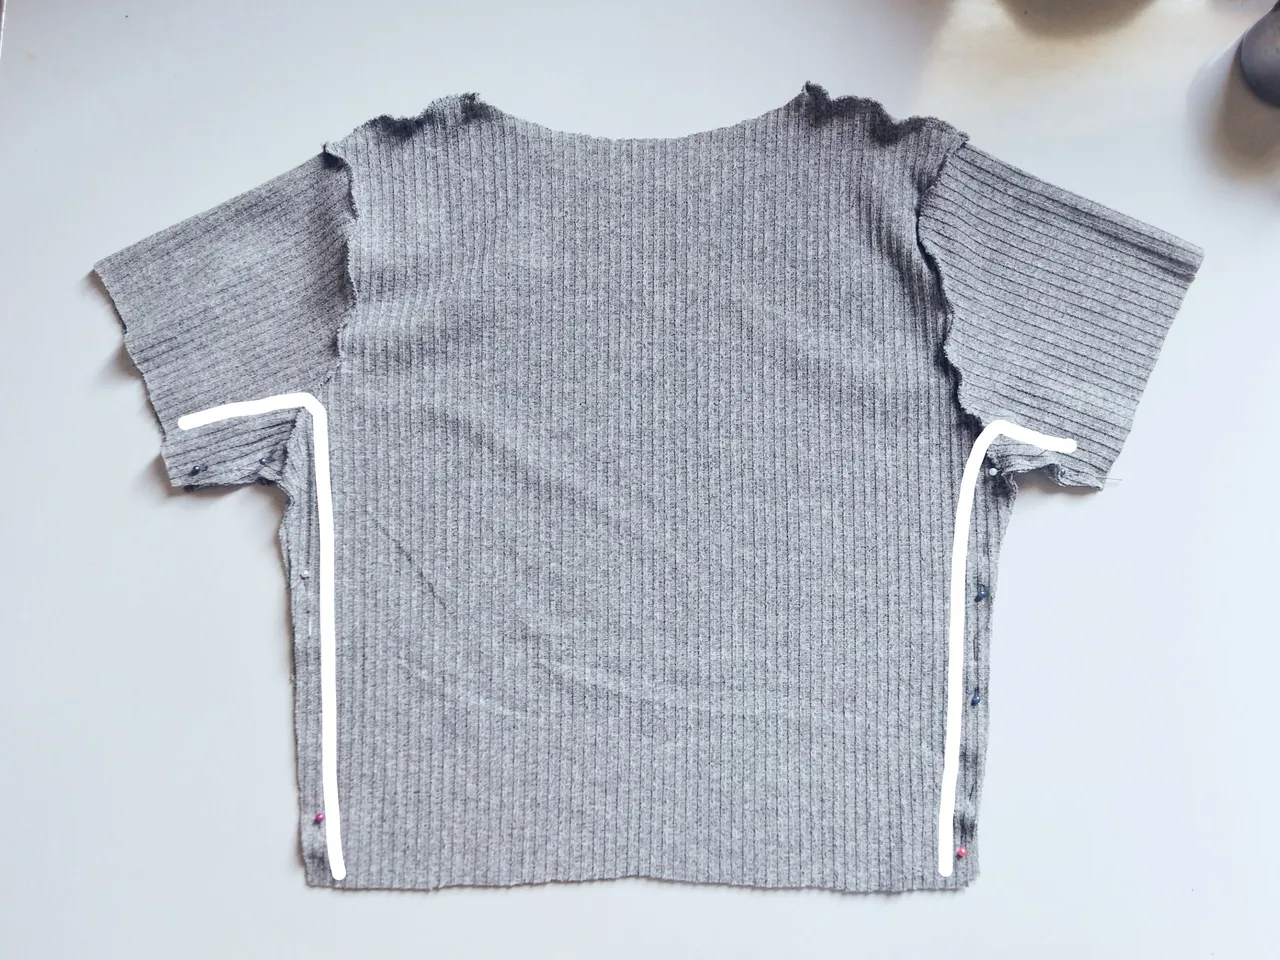
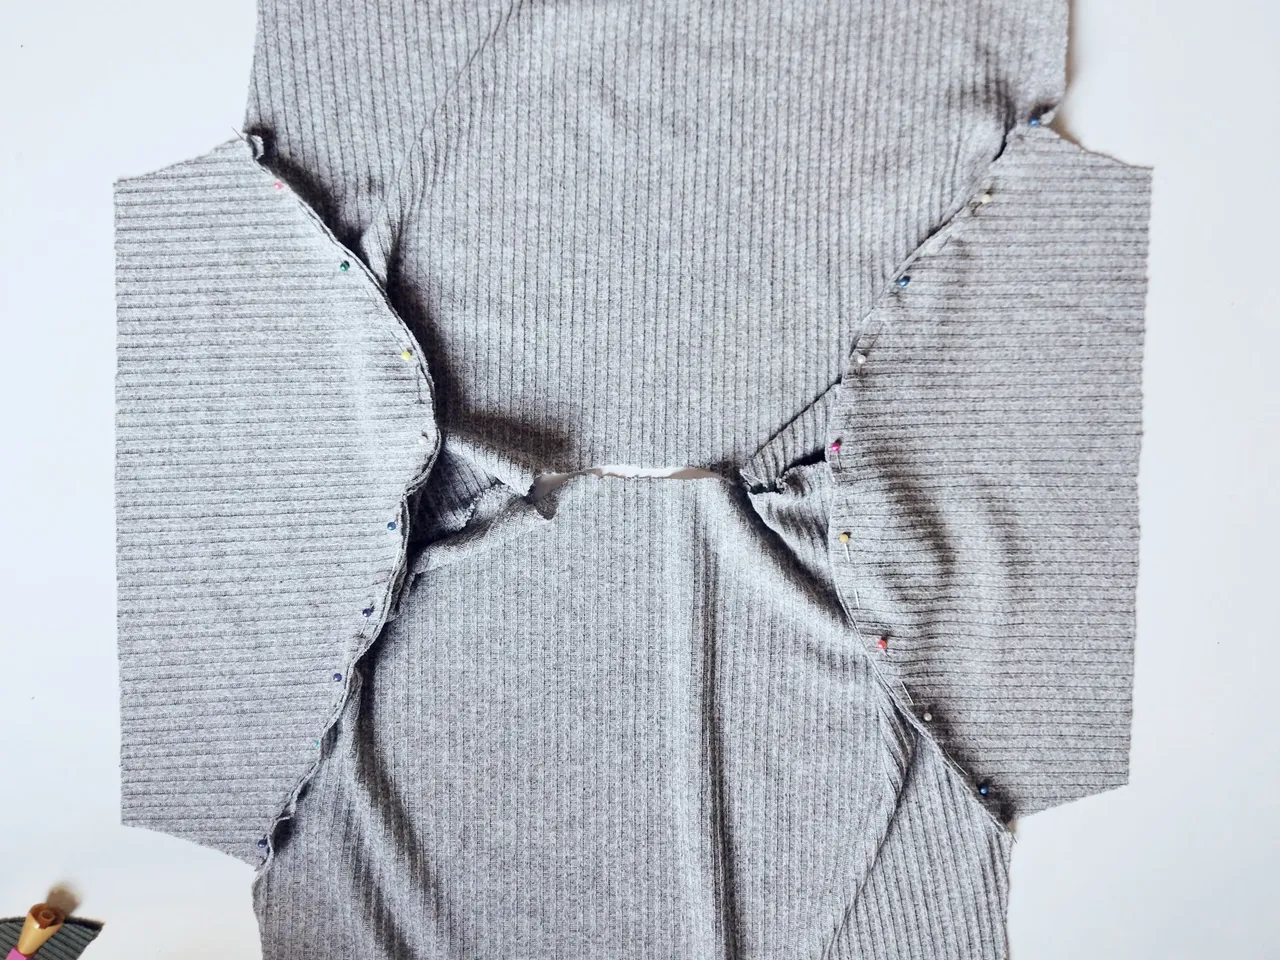
Toca enfrentar los derechos del top ya con las mangas cosidas y vamos a pasar costura desde el borde de las mangas hasta los costados del top cerrando los dos lados, acostumbró a pasar costura recta y zigzag
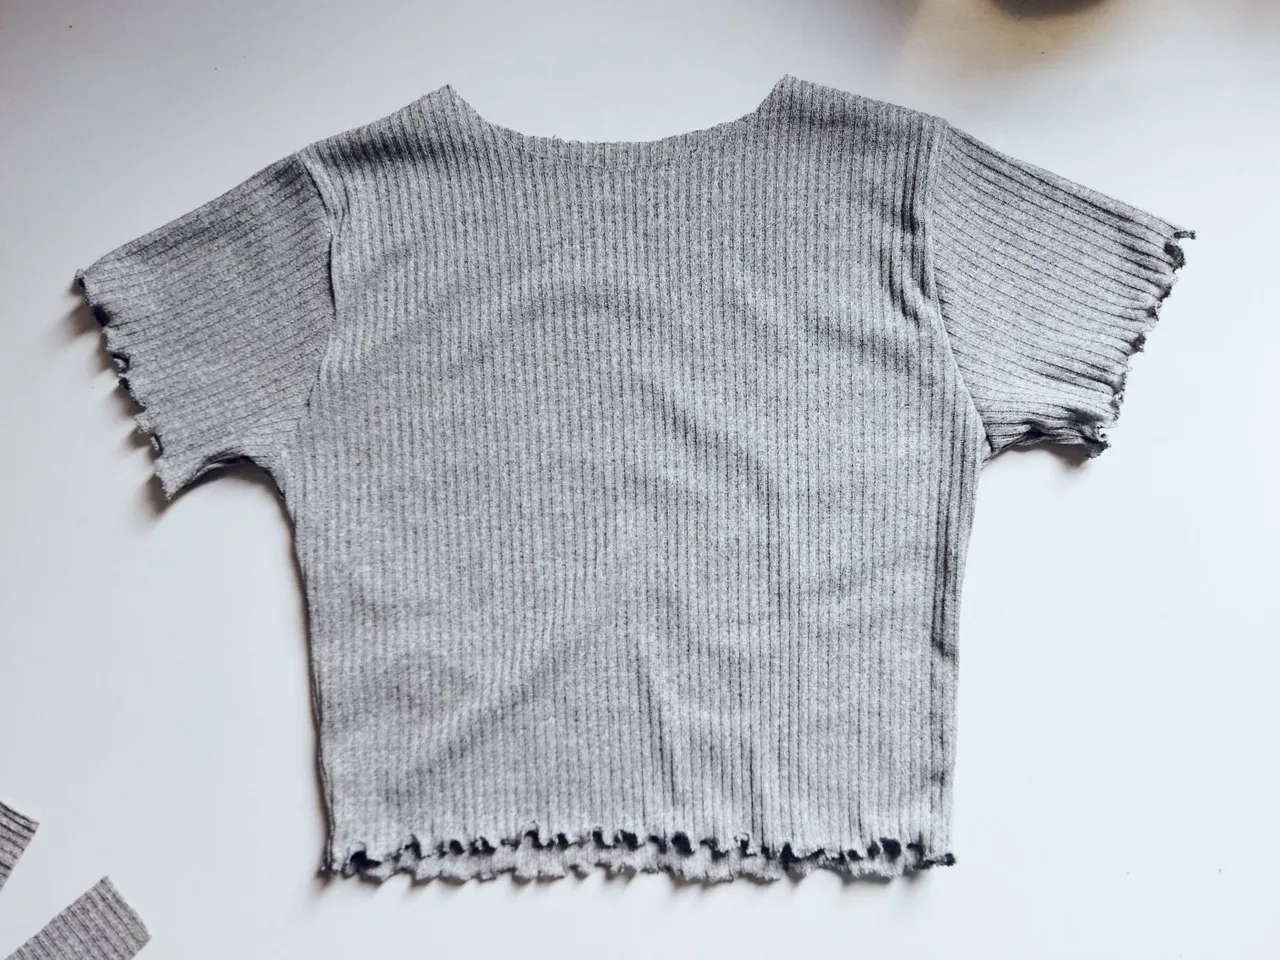
Luego volteamos el top y pasamos costura de overlock en los bordes de las mangas y el ruedo del top, si no tenemos overlock como en mi caso podemos colocar la costura en zigzag con el largo de puntada en 1,5 y pasamos estirando la orilla de la tela lo más que podemos para que nos quedé un lindo faralao.
- It's time to face the right sides of the top with the sleeves already sewn and we will sew from the edge of the sleeves to the sides of the top closing both sides, I'm used to sew straight and zigzag seams.
- Then we turn the top over and overlock the edges of the sleeves and the hem of the top, if we do not have overlock as in my case we can place the zigzag seam with the stitch length in 1.5 and we pass stretching the edge of the fabric as much as we can so that we have a nice faralao.
Paso 5 || Step 5
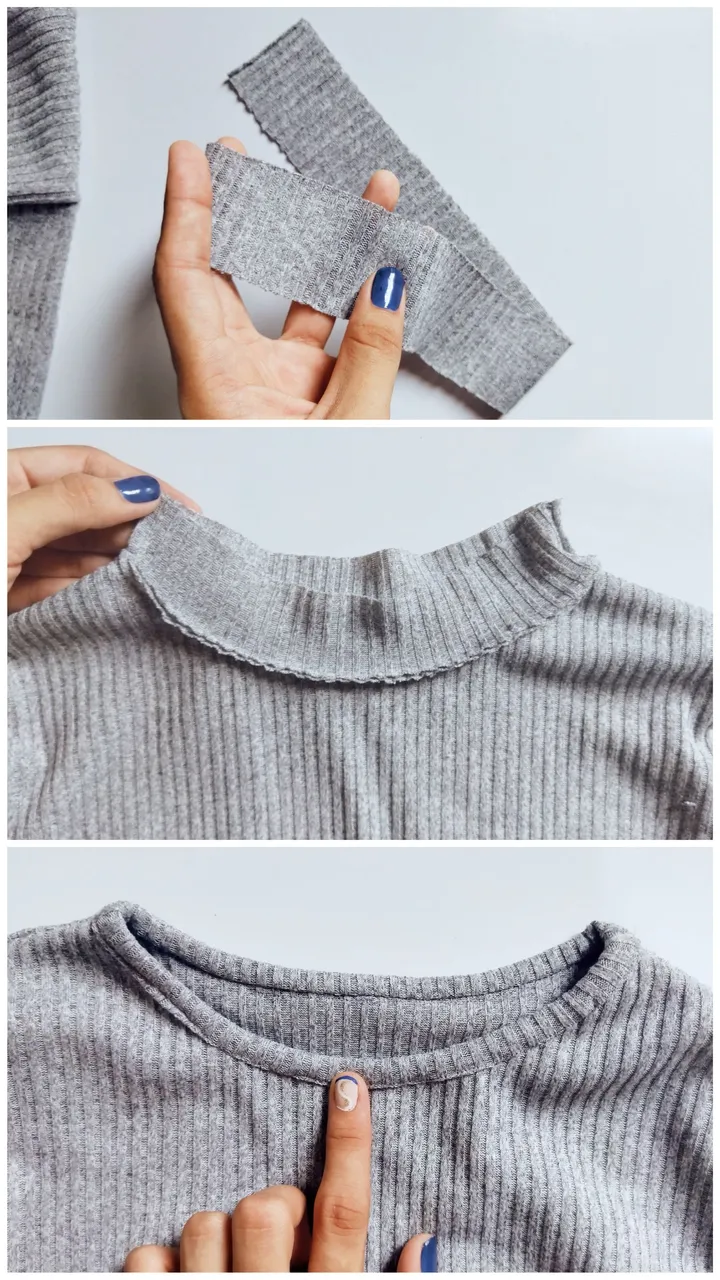
- Cortamos una tira de 4 cm de ancho para coser el vivo del cuello, colocamos la tira al contorno del cuello, cosemos con el derecho de la tira hacia el revés del cuello de la camisa, luego de tenerlo cosido vamos a doblar la tira a la mitad, doblemos nuevamente hacia el contorno del cuello y sujetamos con alfileres para luego coser con puntada recta y ya tendríamos el vivo del cuello listo.
- We cut a 4 cm wide strip to sew the collar, we place the strip to the contour of the collar, we sew with the right side of the strip to the back of the collar of the shirt, after having it sewn we will fold the strip in half, we fold it again to the contour of the collar and fasten with pins and then sew with straight stitch and we would have the neckline ready.
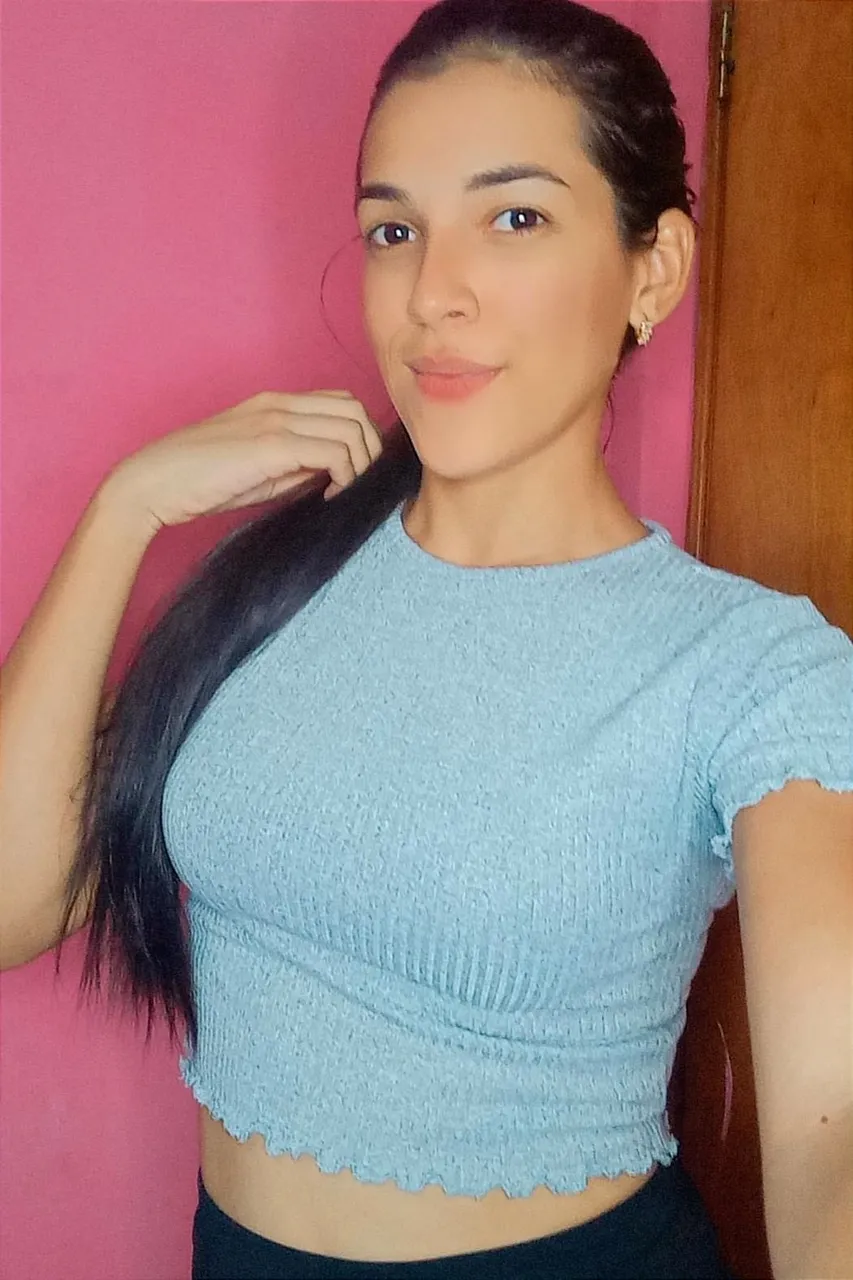
Resultado final.
Final result.
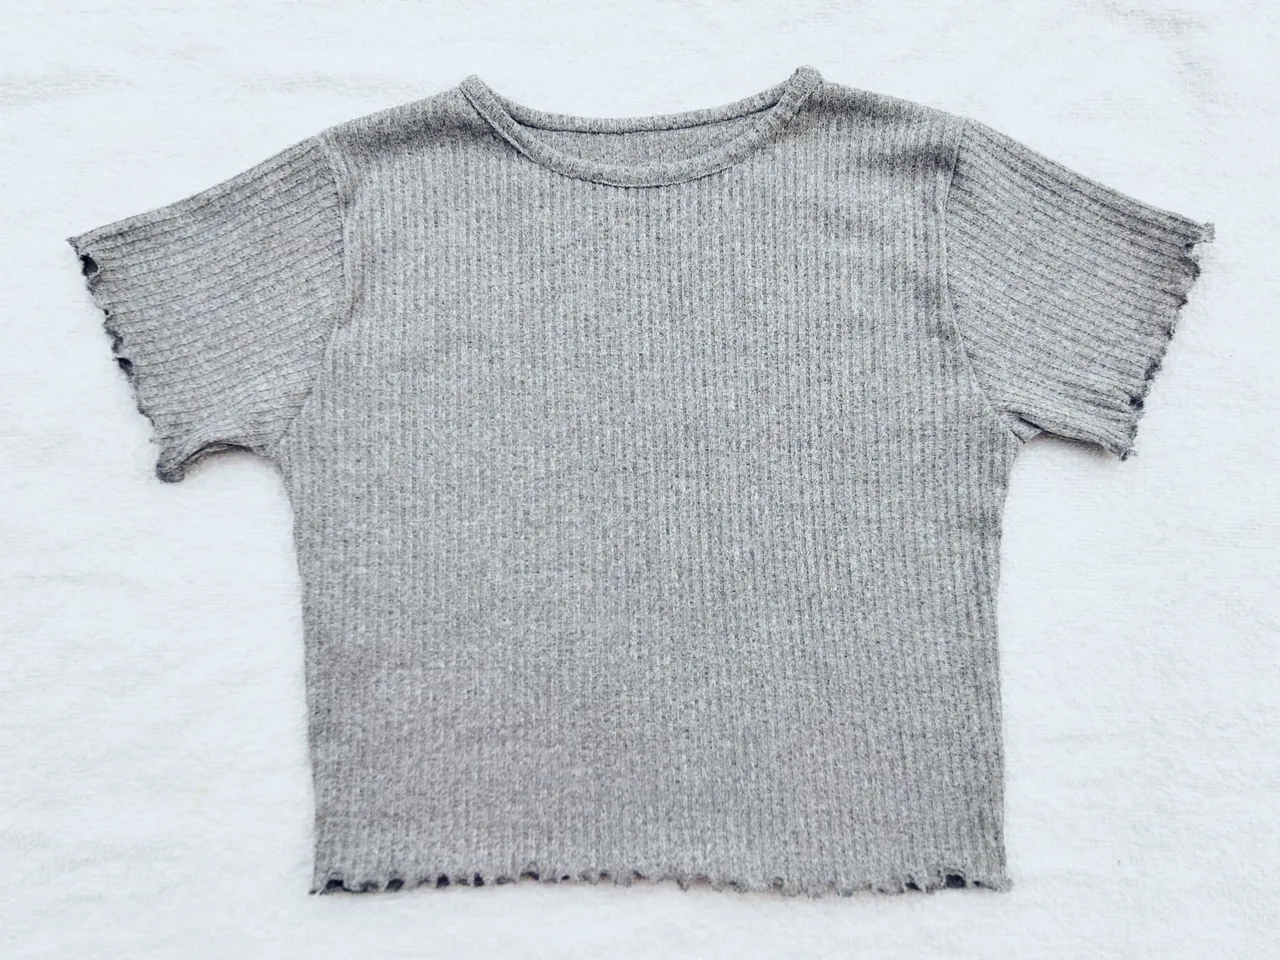
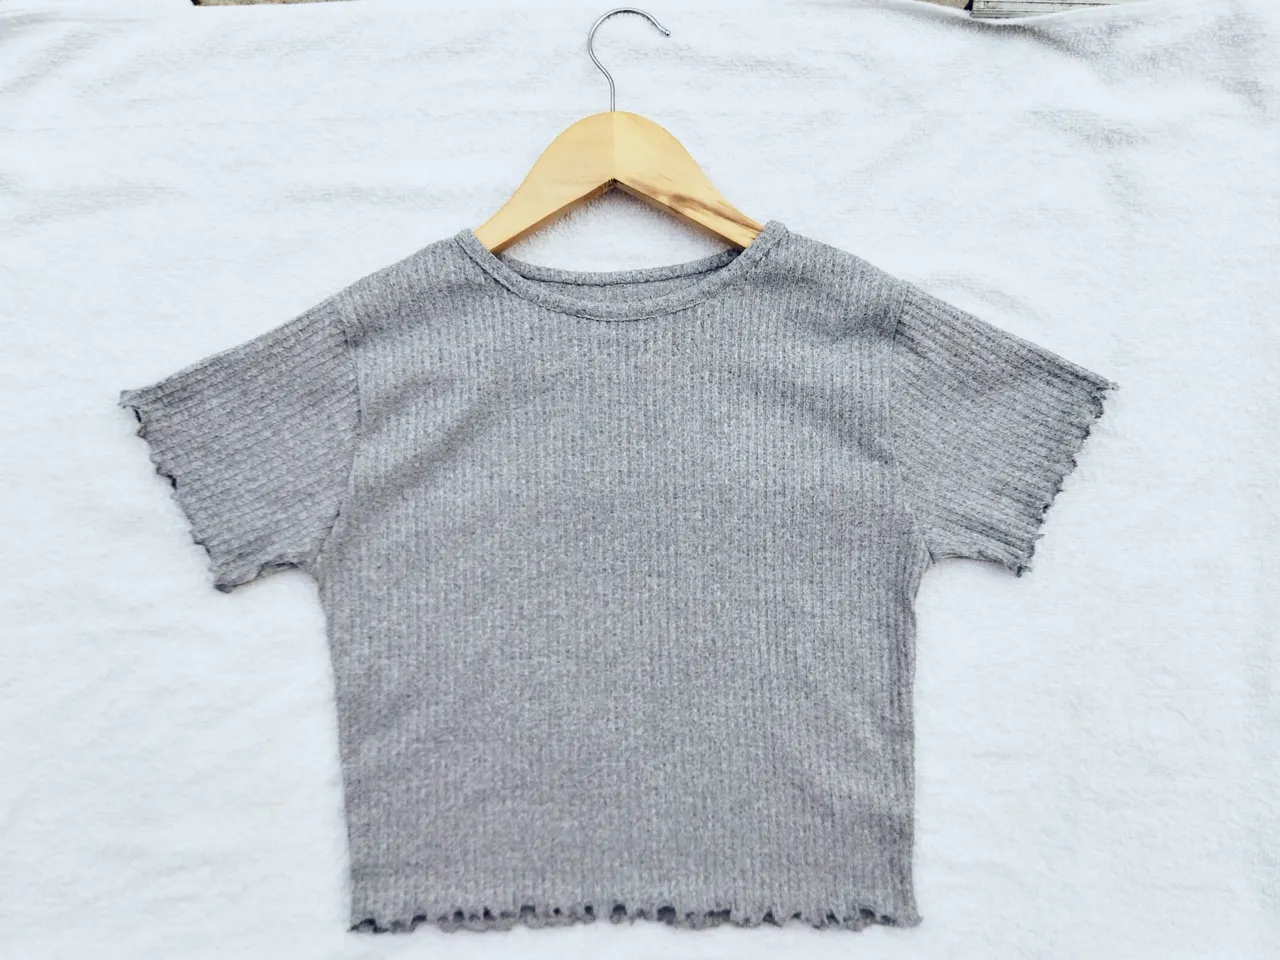
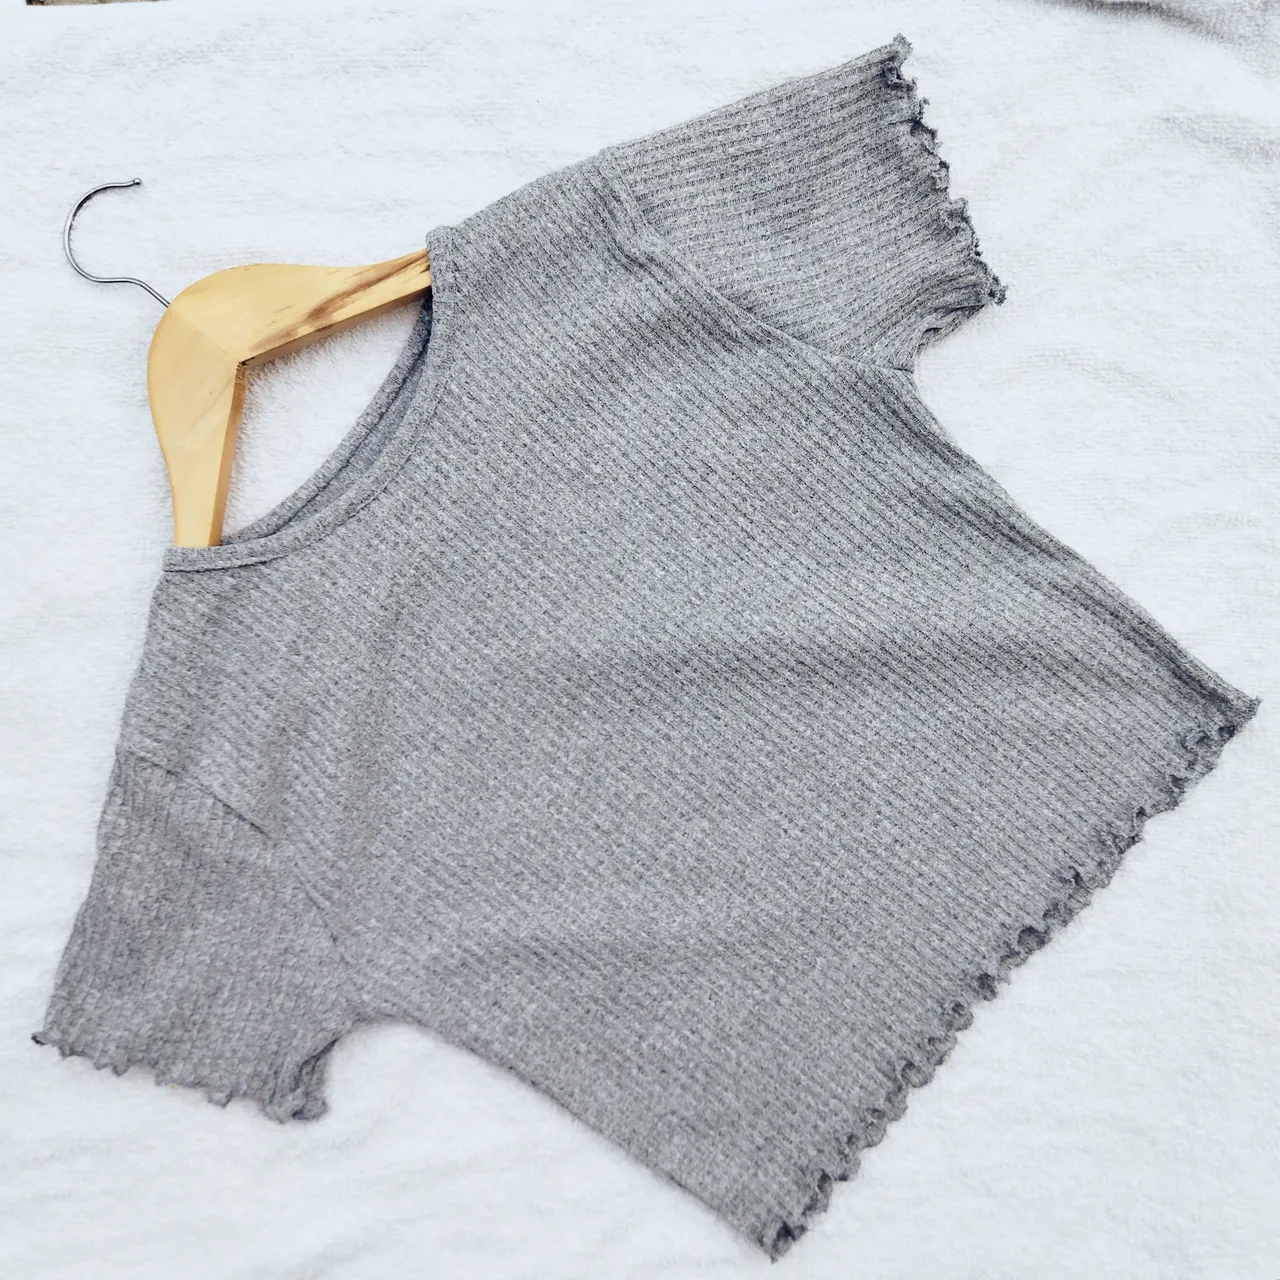
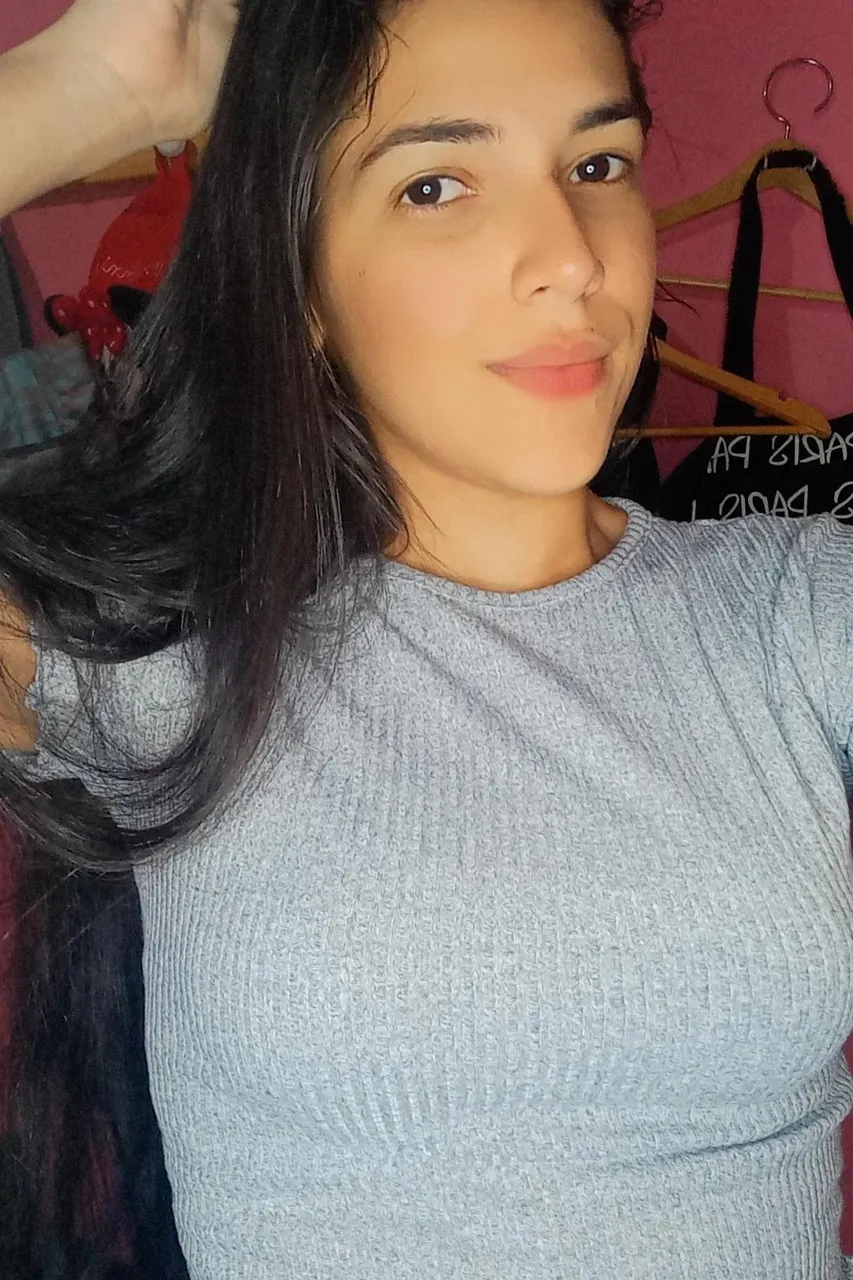
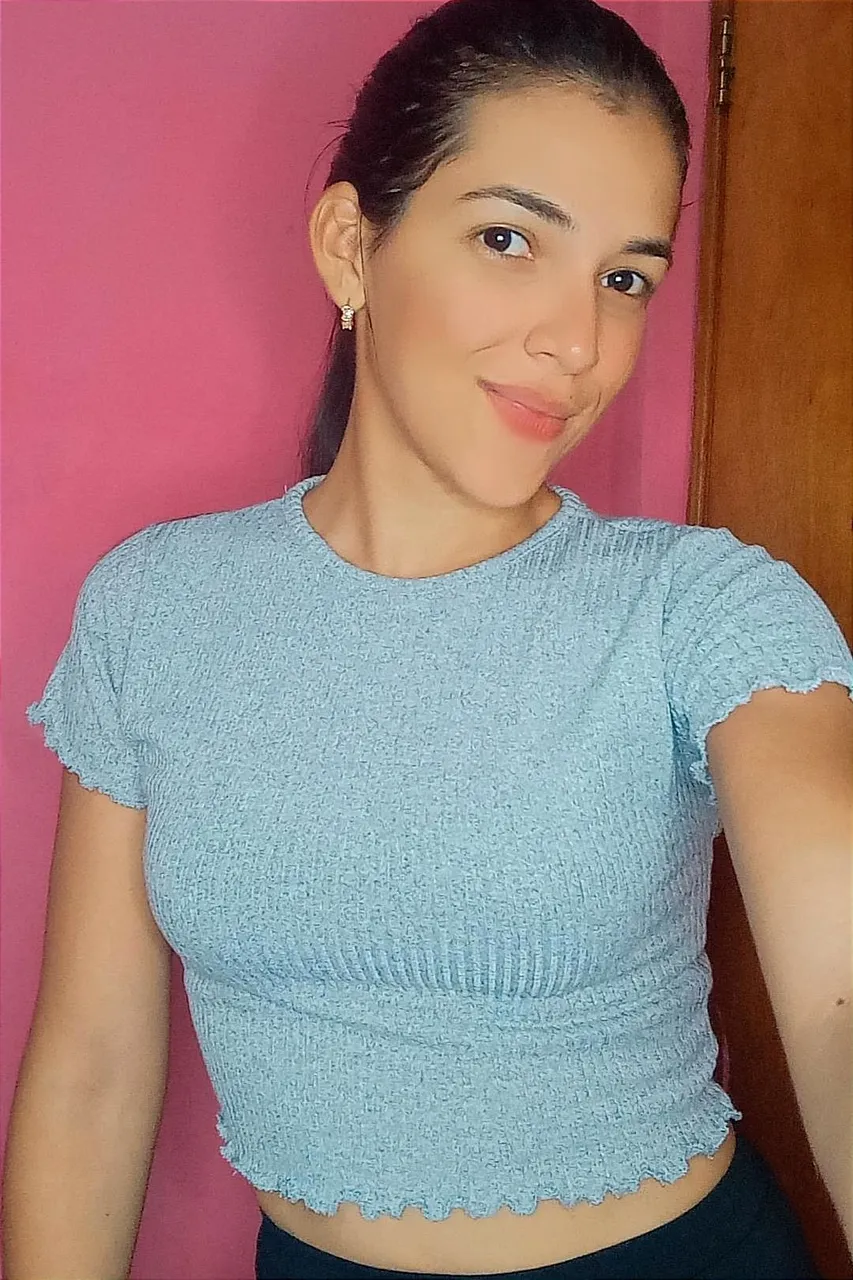
Amigos así quedó el resultado final de este hermoso crop top básico con cuello redondo, es una prenda muy fácil de confeccionar, espero que les hay gustado y si llegaste hasta aquí mil gracias por leer mi post ❤️🥰 un fuerte abrazo.
Friends so was the end result of this beautiful basic crop top with round neck, it is a very easy to make, I hope you liked it and if you got this far thank you for reading my post ❤️🥰 a big hug.
Recuerda que todos los lunes puedes compartir tu amor y pasión por las artes de la aguja utilizando la etiqueta #NeedleWorkMonday
Remember that every Monday you can share your love and passion for needle arts using the hashtag #NeedleWorkMonday
All images are my property / Todas las imágenes son de mi propiedad
Camera: Xiaomi Redmi 9T.
Translation: Deepl.com