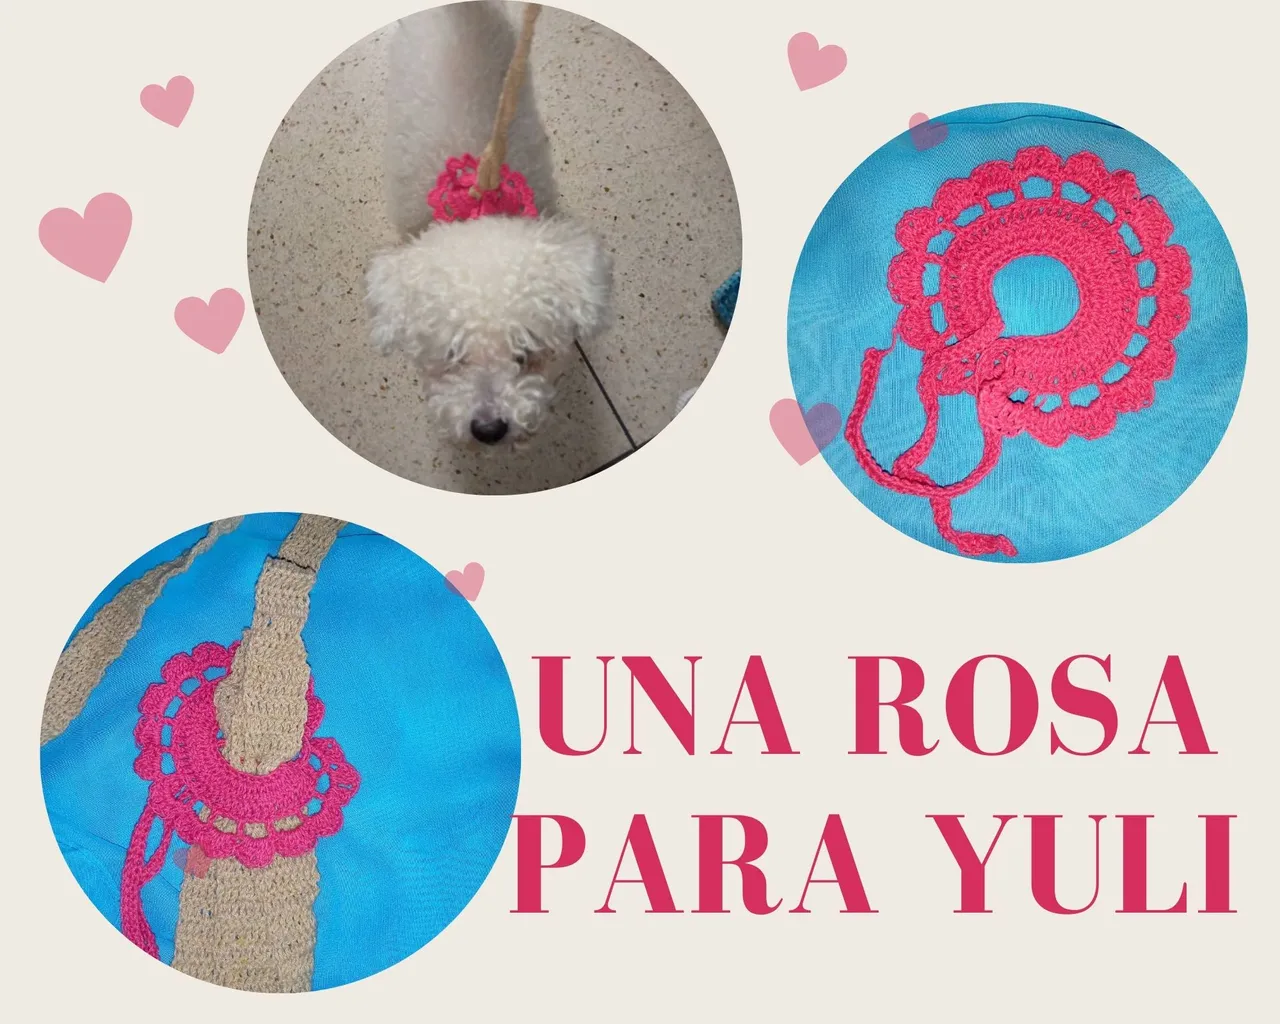
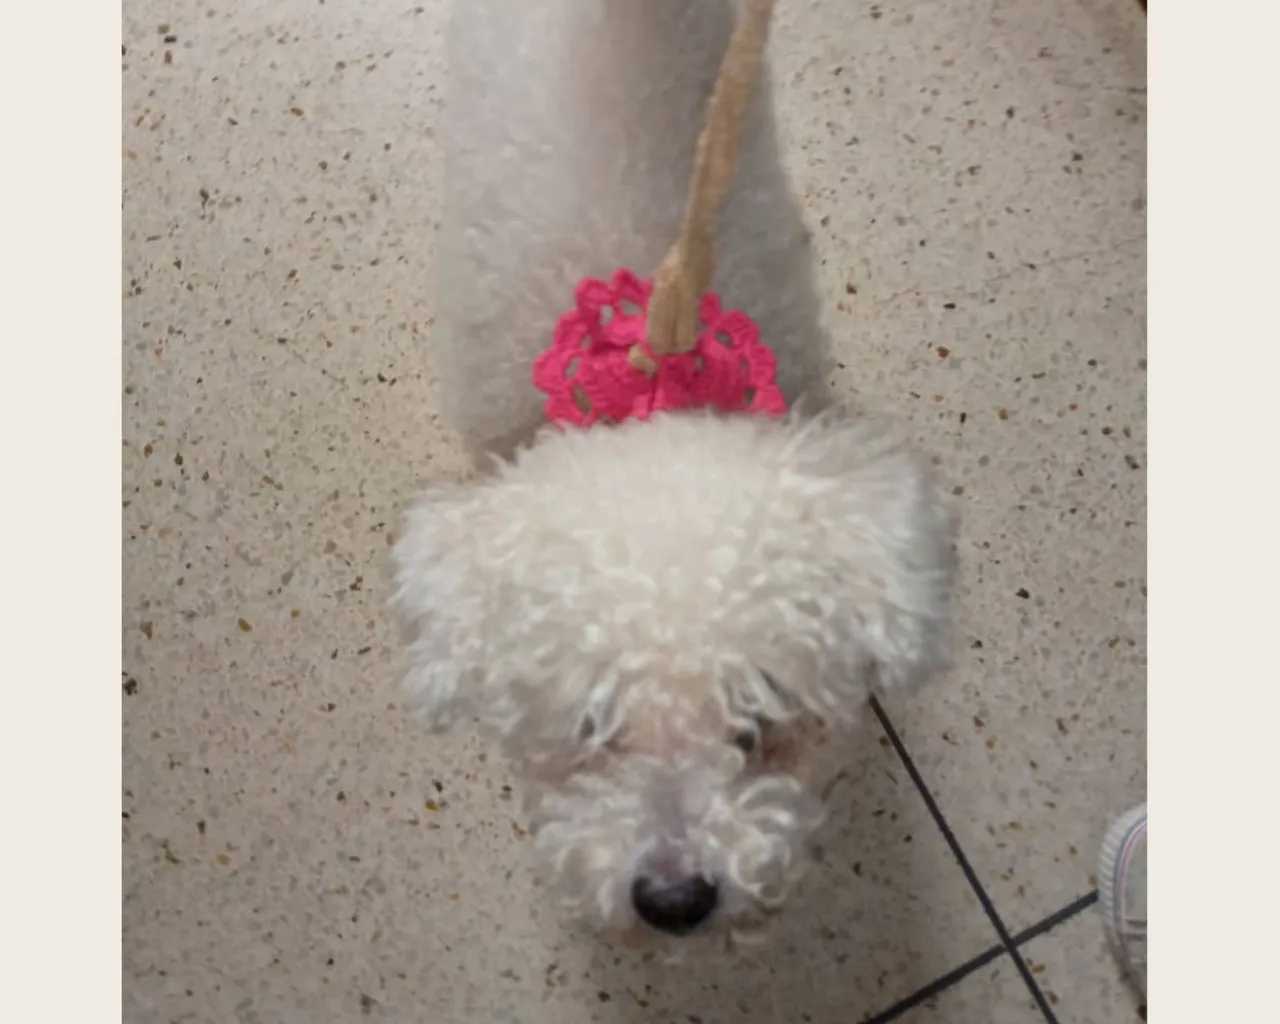
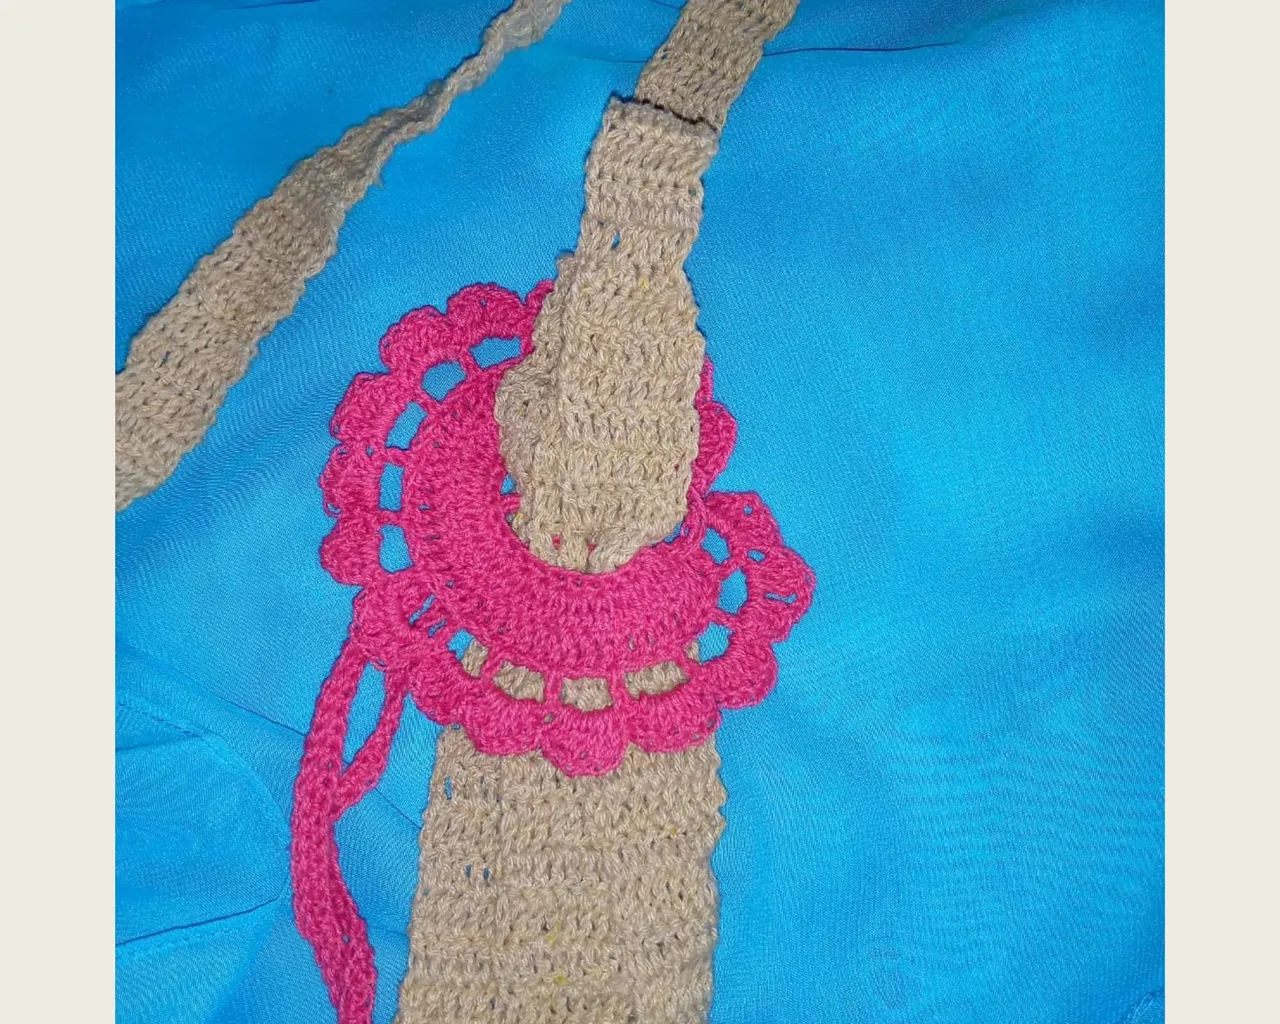
Happy day my dear creative #NeedleWorkMonday friends. Last week I made a Harness for my Pet "Yuli", after walking her I realized two things:
- The color was plain, it had no life, so @Jomarbym recommended me to make her a fuscia trim.
- To knit the harness I used the purl stitch, and in a conversation with @jicrochet she told me that it would have been better to knit it in half stitch so that it would be firmer and my pet wouldn't escape from the harness.
Considering the above two recommendations, this week I decided to knit A Rose for Yuli and use it as a harness fastener!!!, solved the two-in-one problem.
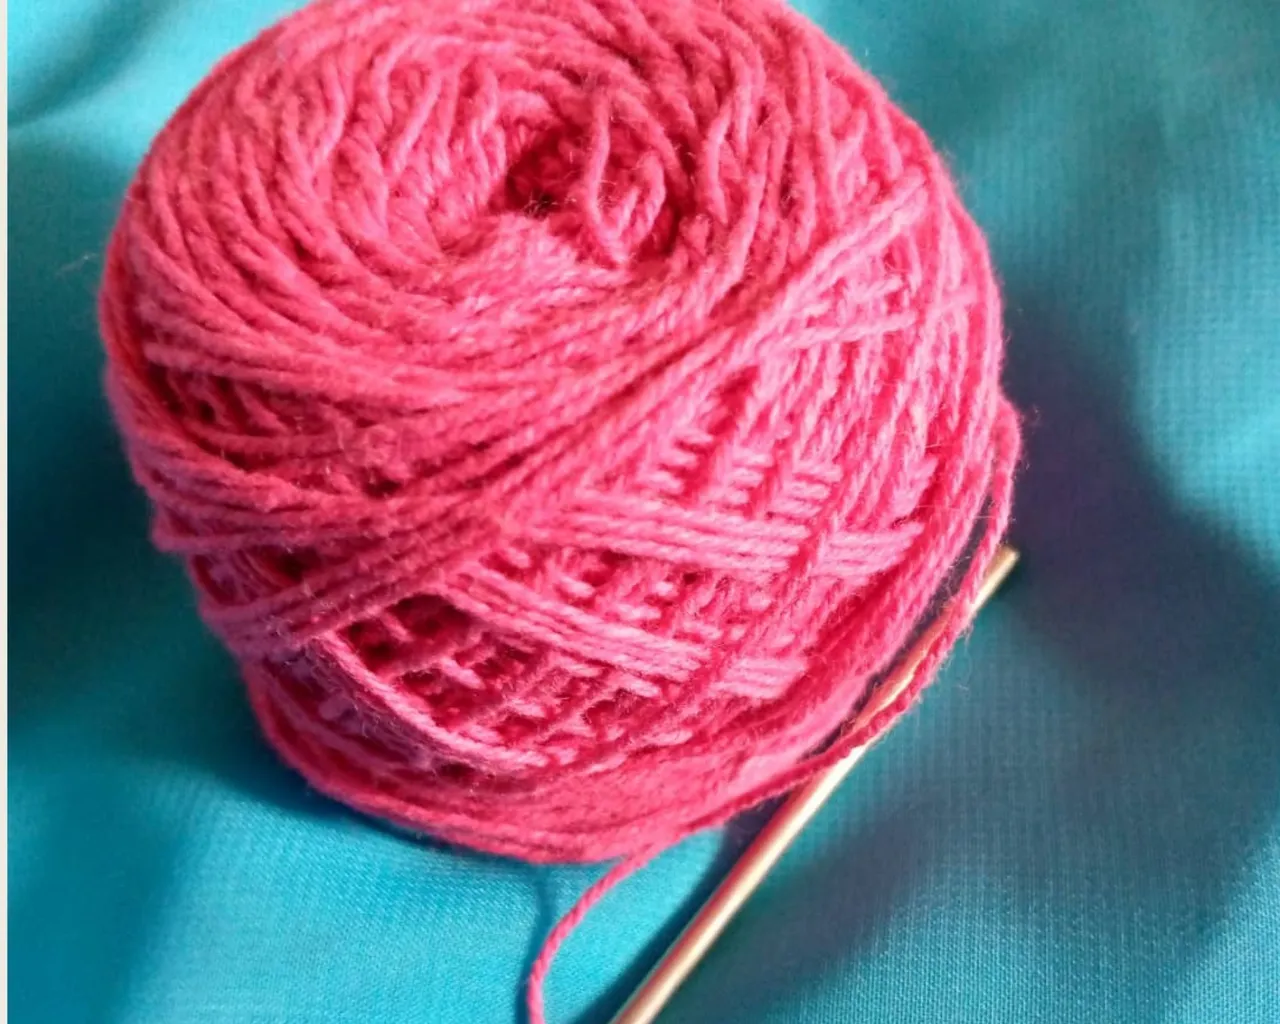
To make the rose, use the following MATERIALS:
- Fuscia colored cotton yarn.
- Crochet hook N° 2.
PROCEDURE
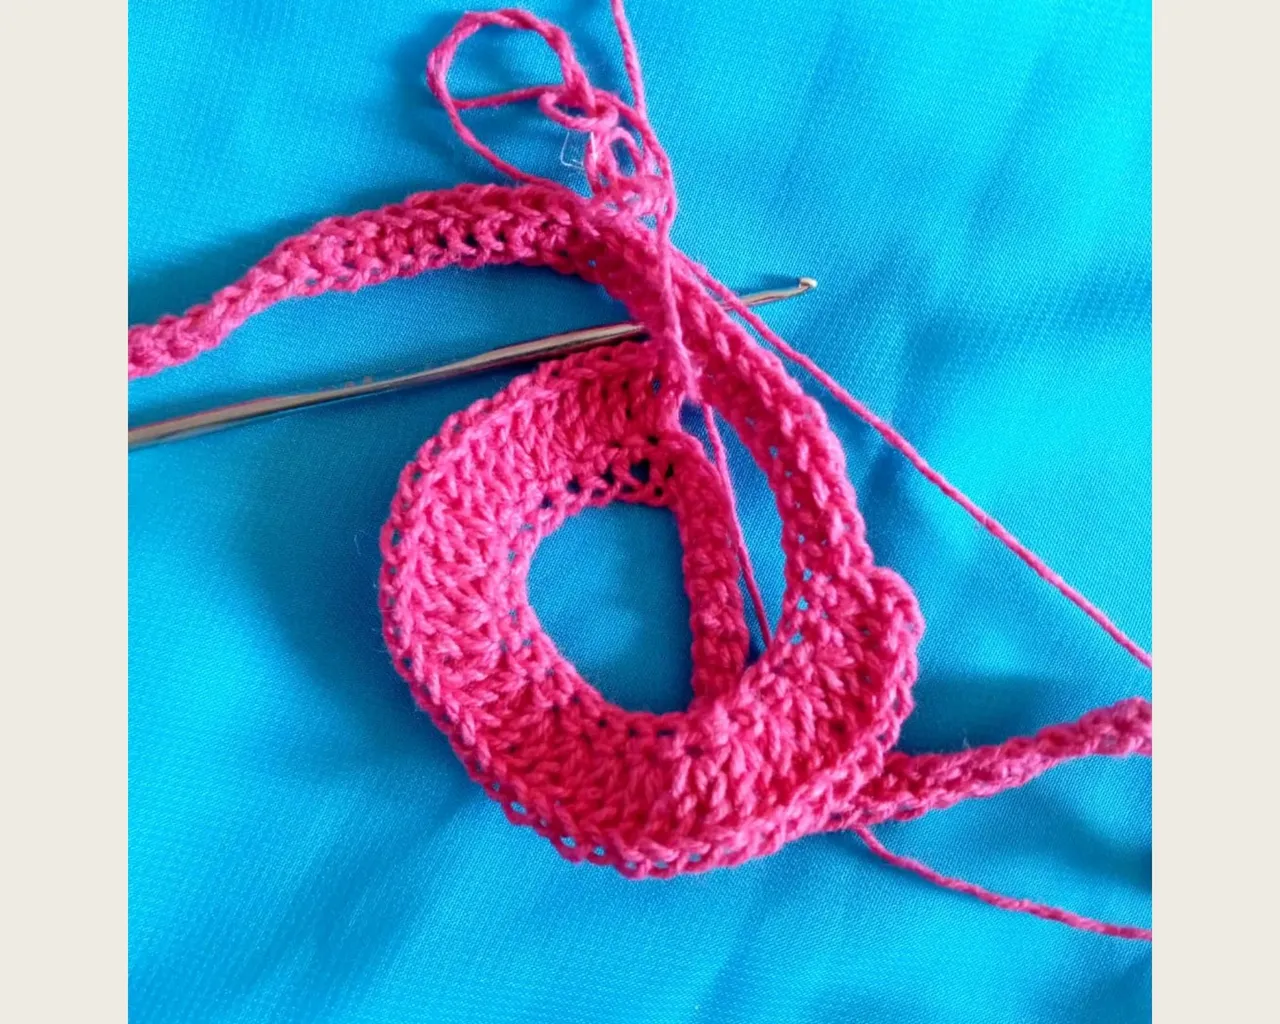
I knit 100 chain stitches and went back over each stitch knitting 100 half stitches. At this point I returned by knitting 40 slip stitches. The 40 stitches at both ends will be used as the loop of the rose, which will be tied to the harness.
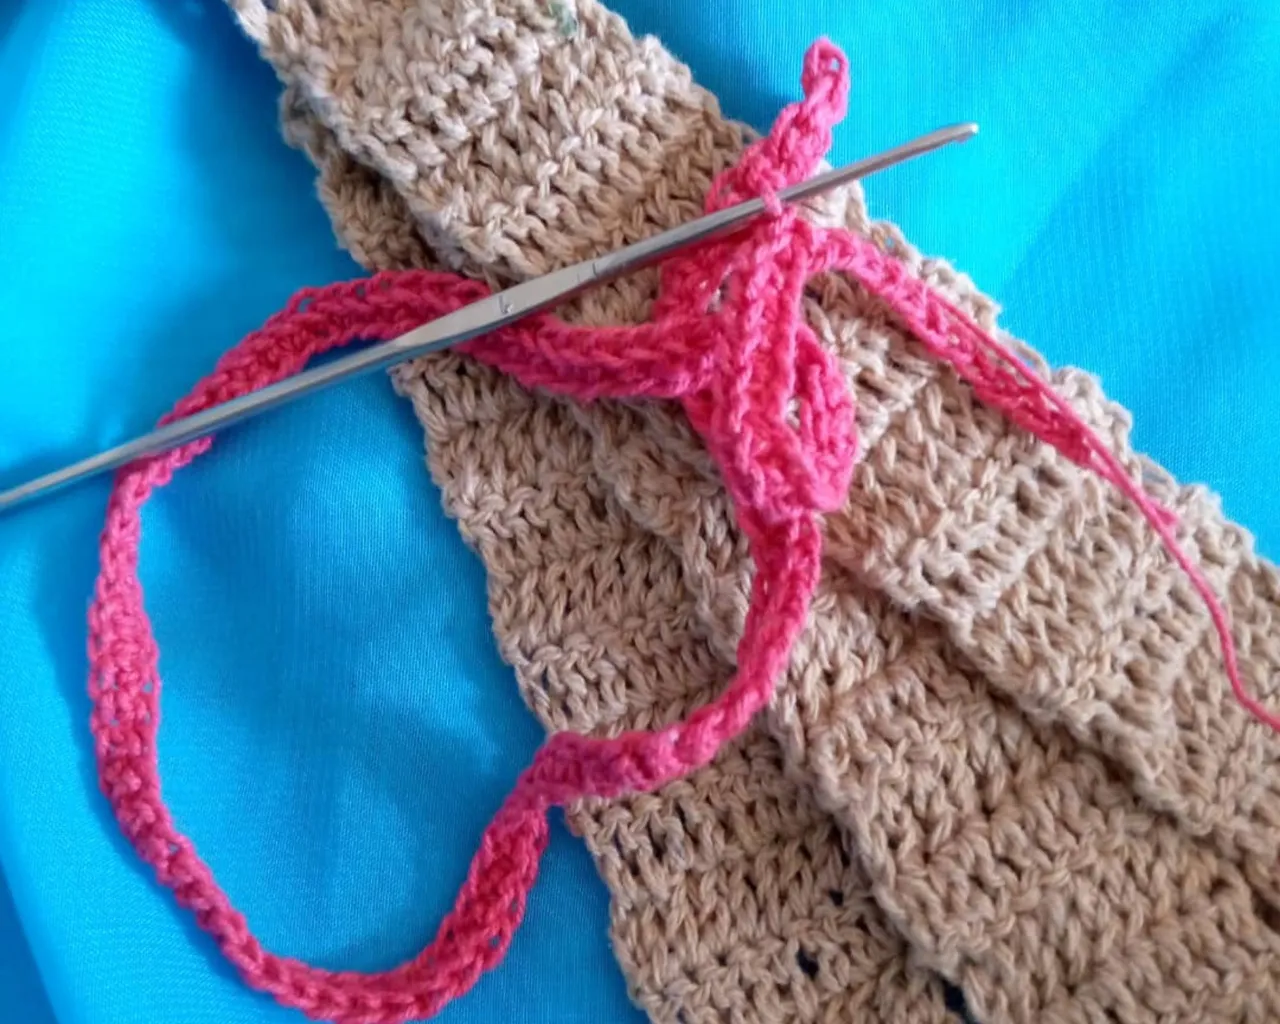
The body of the rose comprises only 20 stitches, so from stitch 41 to stitch 61 I knit 40 rods, that is, I made increases of two rods per stitch. I went back over the knitting, knitting one rod and one increase, until I reached the point where I started knitting the rods.
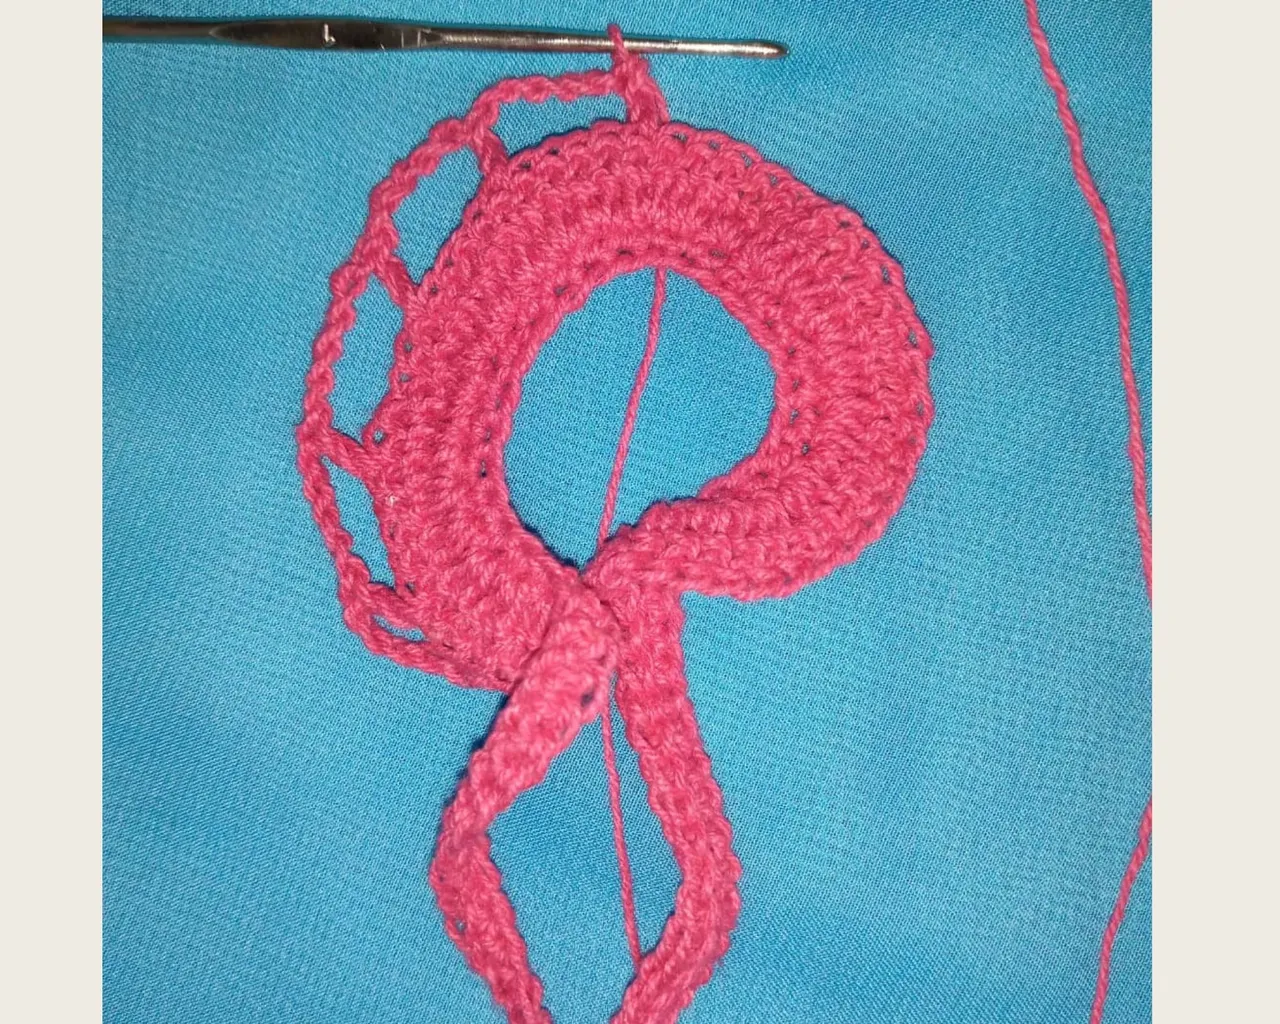
Once here I went back to the point where I knitted a purl, then 4 chain stitches that I joined with a purl to the fabric, I proceeded in the same way until I finished the body of the rose.
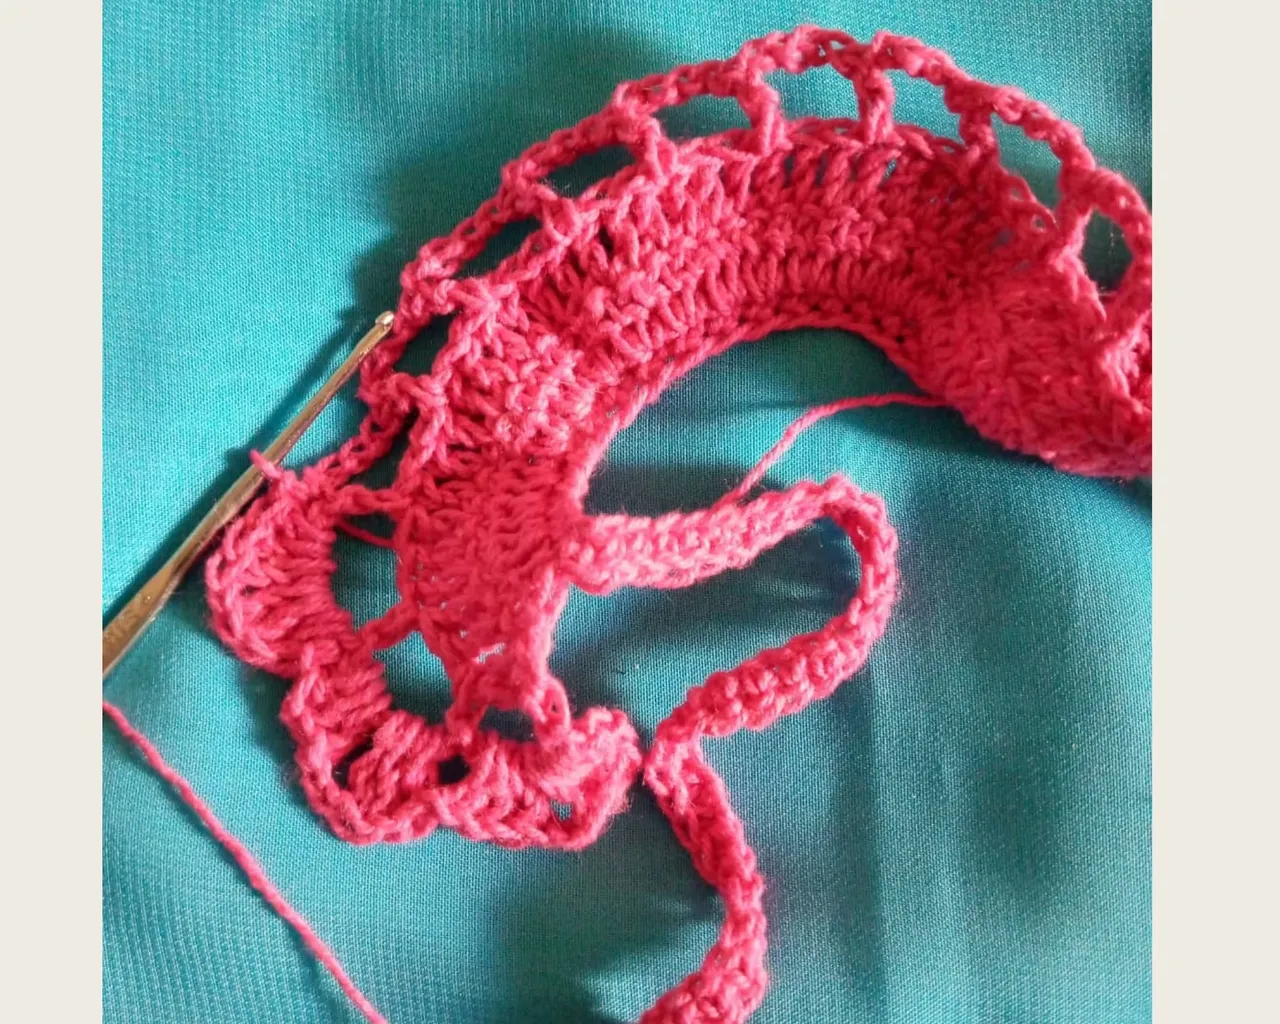
Finally I made the fan stitch, knitting three rods, one chain and three rods, all knitted over the free space of the previous knitting, finally I made a slipped stitch that I joined to the vareta stitch of the previous row. I proceeded in the same way until I finished knitting the rose.
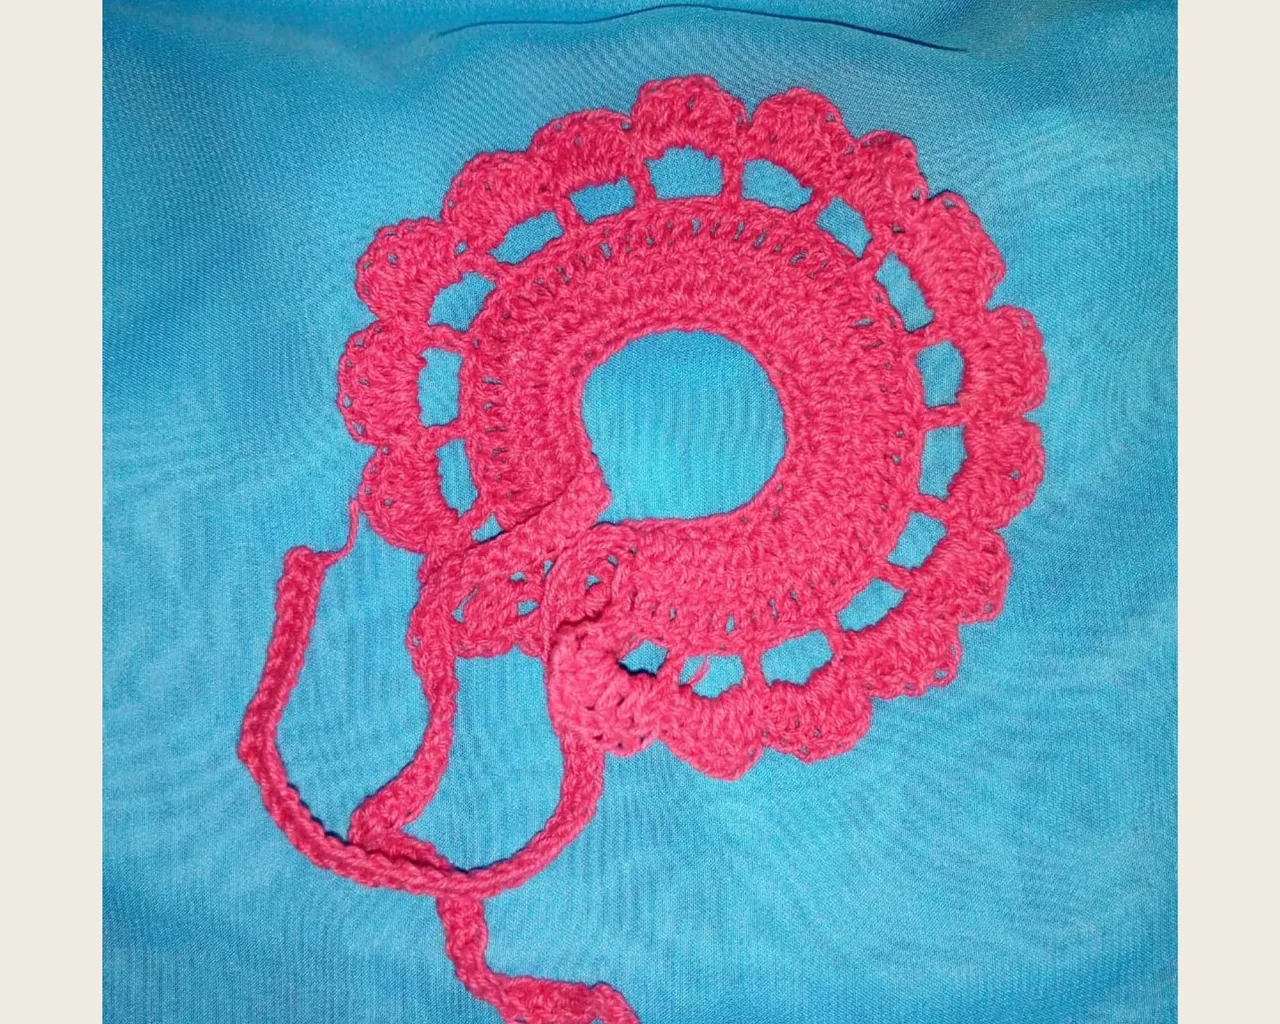
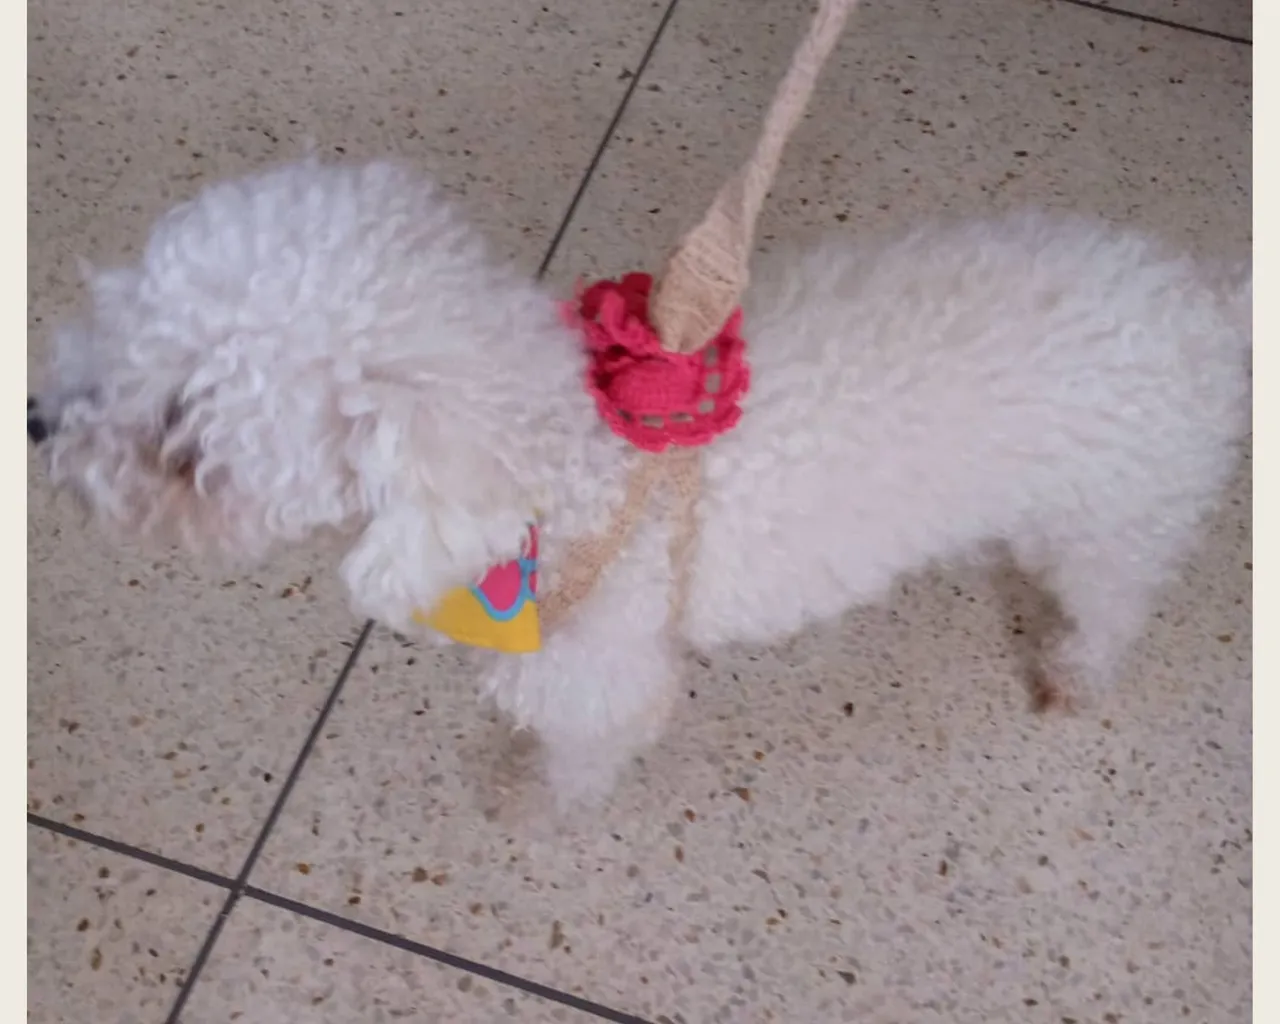
I took the loops of the rose and intertwined them to the harness, tied and ready the rose in Yuli's harness.
All photos are my own taken with my Tecno Spark cell phone and edited with Canva.Com //
I use Deepl.com as translator.
AHORA EN ESPAÑOL
Feliz día mis queridas y creativas amigas de #NeedleWorkMonday. La semana pasada hice un Arnés para mi Mascota “Yuli”, luego de pasearla me di cuenta de dos cosas:
- El color era simple, no tenía vida, por lo que @Jomarbym me recomendó hacerle un adorno en color fuscia.
- Para tejer el Arnés use el punto vareta, y en una conversación con @jicrochet me dijo que hubiese sido mejor en medio punto para que estuviera más firme y mi mascota no se escapara del arnés.
Considerando las dos recomendaciones anteriores, esta semana decidí tejer Una Rosa para Yuli y usarla como sujetador del arnés!, resuelto el problema dos en uno.
Para hacer la rosa, utilice los siguientes MATERIALES:
- Hilo algodón color fuscia.
- Aguja de ganchillo N° 2.
PROCEDIMIENTO
Tejí 100 cadenetas y regresé sobre cada punto tejiendo 100 medio puntos. En este momento regresé tejiendo 40 puntos deslizados. Los 40 puntos de ambos extremos serán utilizados como el lazo de la rosa, que será atada al arnés.
El cuerpo de la rosa solo comprende 20 puntos, así que desde el punto 41 hasta el punto 61 tejí 40 varetas, es decir, hice aumentos de dos varetas por punto. Regresé sobre el tejido, tejiendo una vareta y un aumento, hasta llegar al punto donde inicié con el tejido de varetas.
Una vez aquí regresé tejiendo una vareta, luego 4 cadenetas que uní con una vareta al tejido, procedí de la misma forma hasta terminar el cuerpo de la rosa.
Finalmente hice el punto abanico, tejiendo tres varetas, una cadeneta y tres varetas, todas tejidas sobre el espacio libre del tejido anterior, finalmente hice un punto deslizado que uní al punto vareta de la fila anterior. Procedí de la misma manera hasta finalizar el tejido de la rosa.
Tomé los lazos de la rosa y los entretejí al arnés, amarré y listo la rosa en el arnés de Yuli.
Todas las fotos son propias tomadas con mi celular Tecno Spark y editadas con Canva.Com //
Use Deepl.com como traductor.