« Clothes don't mean anything until someone lives in them »


🇪🇸 ~ Esta semana retomé varios proyectos de costura inconclusos y comencé a terminarlos. Uno de esos proyectos era convertir una camisa de hombre en un Overol-Falda ( ^◡^)っ✂
Hace mucho tiempo que quería hacer esta prenda a mi medida porque es ideal para utilizarla con leggins cuando hace calor, y puede combinarse con muchas de mis prendas superiores favoritas (como t-shirts oversize, tops y bodysuits).
🇺🇸 ~ This week I took up several unfinished sewing projects and started finishing them. One of those projects was converting a men's shirt into a Skirt Overalls ( ^◡^)っ✂
I've long wanted to tailor this garment to me because it's ideal for wearing with leggings when it's hot, and it can be paired with many of my favorite tops (like oversized t-shirts, tops and bodysuits).
• 𝕊 𝕋 𝔼 ℙ • 𝔹 𝕐 • 𝕊 𝕋 𝔼 ℙ •
« 𝑺𝒉𝒊𝒓𝒕 𝒕𝒐 𝑶𝒗𝒆𝒓𝒂𝒍𝒍𝒔-𝑺𝒌𝒊𝒓𝒕 𝑻𝒓𝒂𝒏𝒔𝒇𝒐𝒓𝒎𝒂𝒕𝒊𝒐𝒏 »


Si no sabes coser, es un buen proyecto para desarrollar tus habilidades y perder el miedo a la aguja e hilo.
« Esta es una prenda básica y versátil, muy popular ahora, que puedes comenzar y terminar en 1 solo día »
Si ya tienes experiencia con la costura, puedes experimentar con distintas opciones durante la confección:
Puedes hacer los tirantes rectos en lugar de cruzados, puedes modificar la silueta inferior para obtener distintos modelos de falda, o puedes agregar bolsillos exteriores o ocultos al diseño.
If you don't know how to sew, this is a good project to develop your skills and lose your fear of needle and thread.
« This is a basic and versatile garment, very popular now, that you can start and finish in 1 day »
If you already have experience with sewing, you can experiment with different options during sewing:
You can make the straight straps instead of crossover, you can modify the bottom hemline to get different skirt patterns, or you can add outside or hidden pockets to the design.
« 𝕋 𝕆 𝕆 𝕃 𝕊 • & • 𝕄 𝔸 𝕋 𝔼 ℝ 𝕀 𝔸 𝕃 𝕊 »


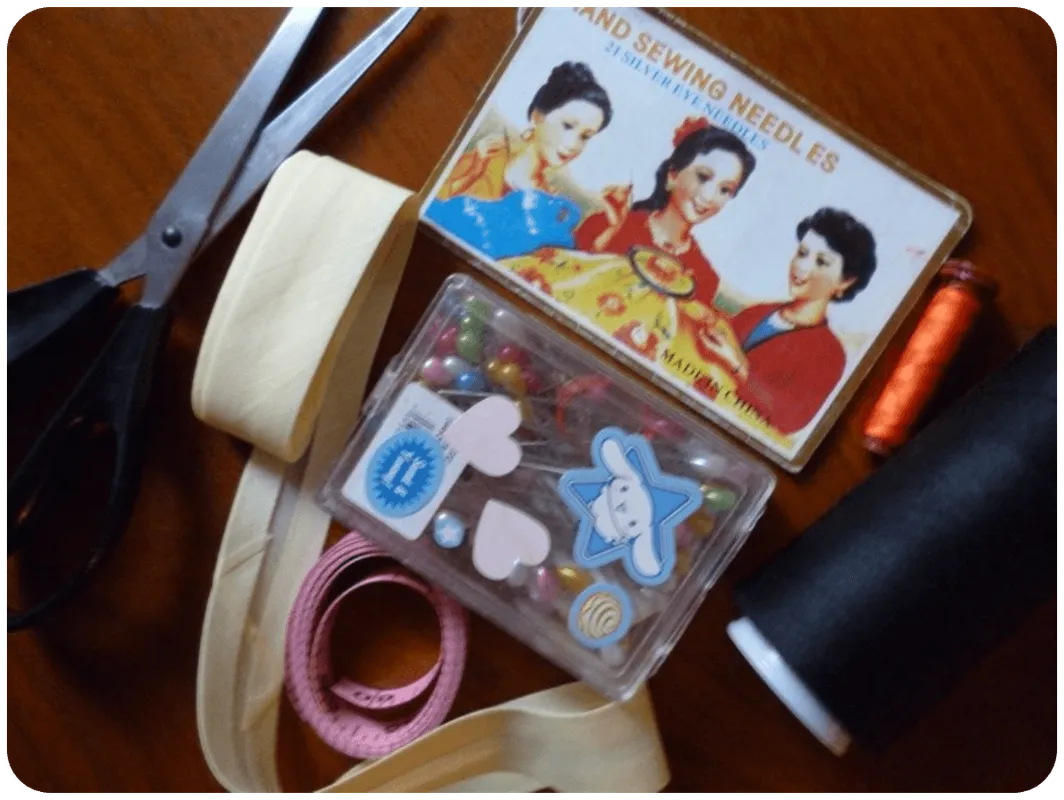
| • Saca hilo (Thread Remover). | • Bies grueso de 3,5 cm (3.5 cm bias). |
| • Aguja regular (Regular needle). | • Bies grueso de 2,5 cm (2.5 cm bias). |
| • Cinta métrica (Measuring tape). | • Máquina de coser -opcional- (Sewing machine -optional-). |
| • Tijeras para tela (Fabric scissors). | • Alfileres grandes y pequeños (Large and small pins.) |
| • Regla y bolígrafo (Ruler and ballpoint pen). | • Camisa manga larga de jean, de caballero (Men's long sleeve jean shirt.). |
| • Plancha para ropa (Clothes iron). | • Hilo color negro, gris, anaranjado y amarillo (Black, gray, orange and yellow yarn.). |
« STEP N° 1 »
• Shirt Disassembly & Design Selection •


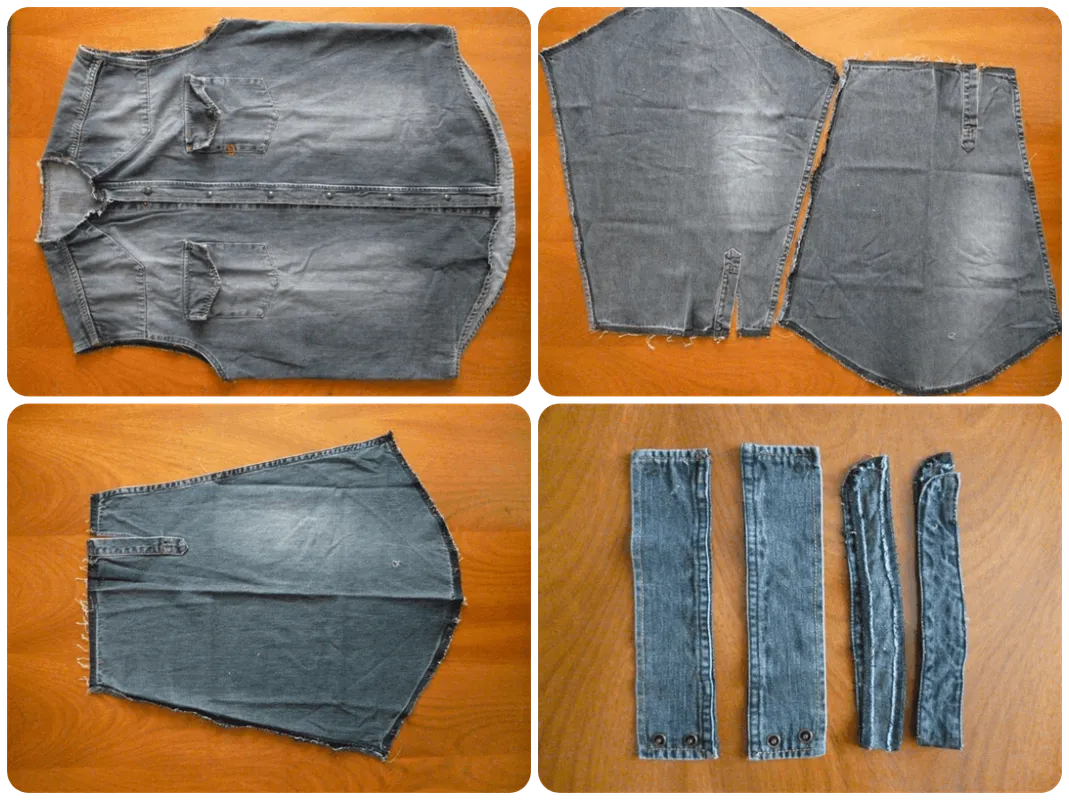
El primer paso es separar todas las partes de la camisa con el saca hilo (brazos, bolsillos, cuello y detalles).
The first step is to separate all the parts of the shirt with the thread puller (arms, pockets, collar and details).

Luego debemos escoger el tipo de diseño que queremos. En este caso yo asigne parte de las dos mangas para formar el pecho del overol, haciendo que la abertura de los puños mire hacia delante.
Then we must choose the type of design we want. In this case I assigned part of the two sleeves to form the chest of the coverall, making the cuff opening face forward.
« STEP N° 2 »
• Cutting, fitting and assembly of all parts •

A continuación, cortamos el frente y la espalda de la parte superior de la camisa, respetando el largo que queremos para la falda (en este caso para una talla M, es de 40 cm aproximadamente).
Para ajustar el radio de la cintura, experimenté probando distintos tipos de pinza.
Next, we cut the front and back of the top of the shirt, respecting the length we want for the skirt (in this case for a size M, it is 40 cm approximately).
To adjust the waist radius, I experimented by trying different types of pleats.
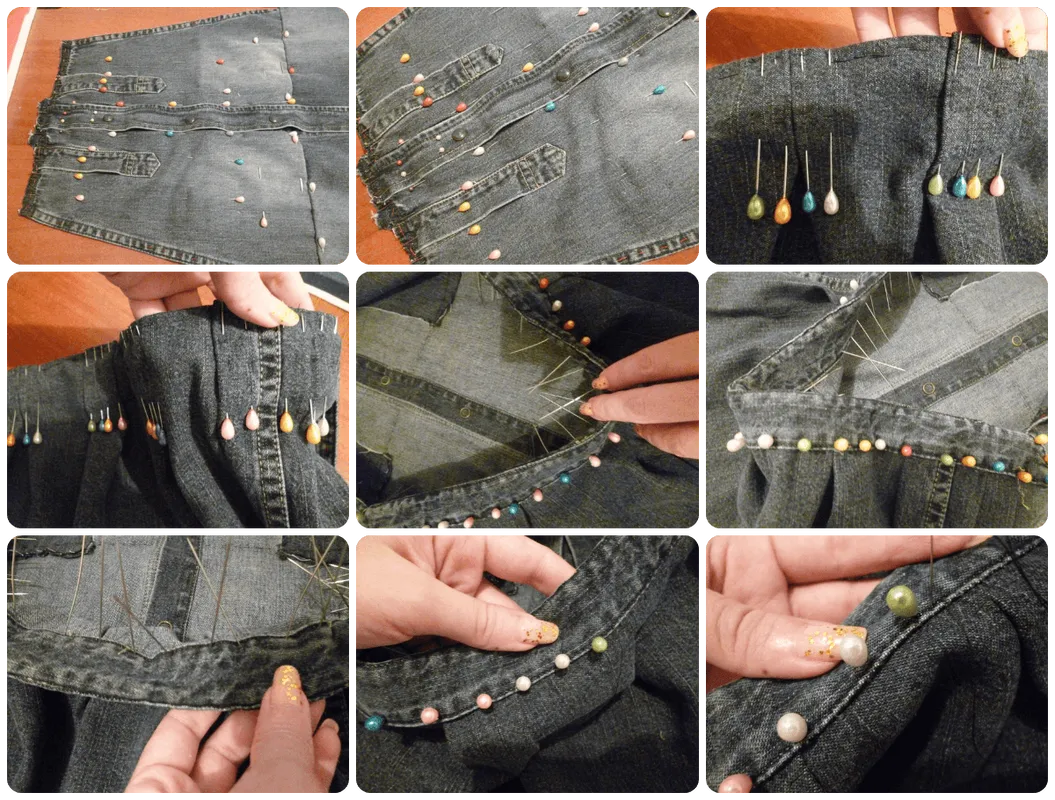
Después de medir y revisar nuestras opciones según nuestro tipo de cuerpo, debemos fijar todas las piezas en su lugar con suficientes alfileres grandes; yo decidí no cortar parte de la falda (como se aprecia en el collage anterior) y en su lugar agregue más pinzas en forma de acordeón.
Para el remate de la falda, utilice el borde que descocí de los puños como pretina para la cintura.
Todo se cose primero a mano, y si quieres puedes llevarlo después a la máquina de coser (๑•̀ㅂ•́)و
After measuring and reviewing our options according to our body type, we need to pin all the pieces in place with enough large pins; I decided not to cut off part of the skirt (as seen in the collage above) and instead added more accordion clips.
To finish off the skirt, I used the edge I removed from the cuffs as a waistband for the waistband.
Everything is first sewn by hand, and if you want you can take it to the sewing machine afterwards (๑•̀ㅂ•́)و
« STEP N° 3 »
• Improved interior details and stitching •

Una vez ensambladas las piezas principales y fijada la pretina de la falda, vamos a planchar a alta temperatura para suavizar todas las costuras y pliegues.
Once the main pieces are assembled and the waistband of the skirt is attached, we will iron at high temperature to smooth all the seams and folds.

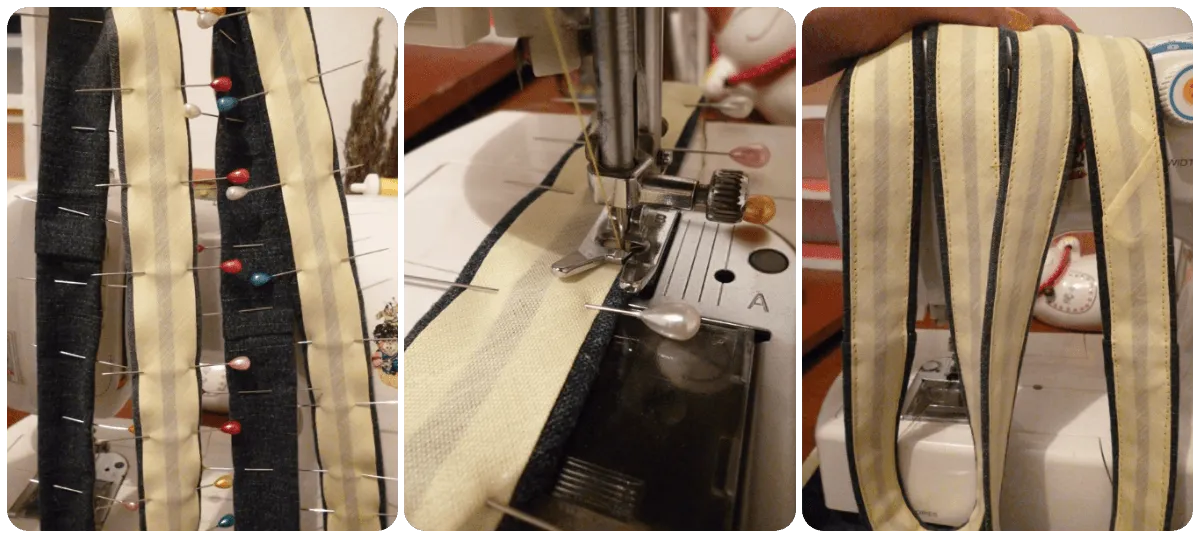
Para disimular las uniones de las distintas piezas de la camisa (en el reverso del overol), utilizaremos el bies grueso. Primero lo fijaremos con alfileres grandes.
To conceal the joints of the different pieces of the shirt (on the back of the overalls), we will use the thick bias binding. First we will fix it with large pins.

Esta parte puede hacerse con la máquina de coser, pero recomiendo hacerlo a mano utilizando el mismo color de hilo del que sea el bies.
This part can be done with the sewing machine, but I recommend doing it by hand using the same color thread as the bias binding.

El resultado es bastante limpio y soportará muy bien cuando deba lavarse en la lavadora.
The result is quite clean and will hold up very well when it has to be washed in the washing machine.
« STEP N° 5 »
• Straps •
Para los tirantes, cortaremos 2 tiras de tela de 7 cm de ancho, y 65 cm de largo. Esta medida puede variar dependiendo del tamaño de tu busto y el largo de tu torso.
Doblaremos las tiras hacia dentro, y colocaremos bies de 2,5 cm en su reverso antes de coserlo. Esto le dará un acabado más resistente y limpio.
For the straps, we will cut 2 strips of fabric 7 cm wide, and 65 cm long. This measurement may vary depending on the size of your bust and the length of your torso.
We will fold the strips inwards, and place 2.5 cm bias binding on their reverse side before sewing. This will give it a stronger and cleaner finish.
« STEP N° 4 »
• Closing of the top •

Para cerrar la parte superior, elaboraremos una pretina con tela de jean sobrante de la espalda de la camisa, y un poco de bies. El ancho de la pretina no debe superar los 3,5 cm.
To close the upper part, we will make a waistband with some denim fabric left over from the back of the shirt, and a little bias binding. The width of the waistband should not exceed 3.5 cm.
« STEP N° 6 »
• Final Stitches •

Es recomendable reforzar la costura de los tirantes en la base de la pretina de la falda (a 1,5cm de distancia de la pieza del pecho).
It is recommended to reinforce the shoulder strap seam at the base of the skirt waistband (1.5cm away from the chest piece).

También, podemos coser la unión donde coindicen los tirantes en nuestra espalda (entre los omóplatos) para darle más estabilidad a la prenda 👌✨
Also, we can sew the joint where the shoulder straps meet on our back (between the shoulder blades) to give the overall more stability on the back 👌✨
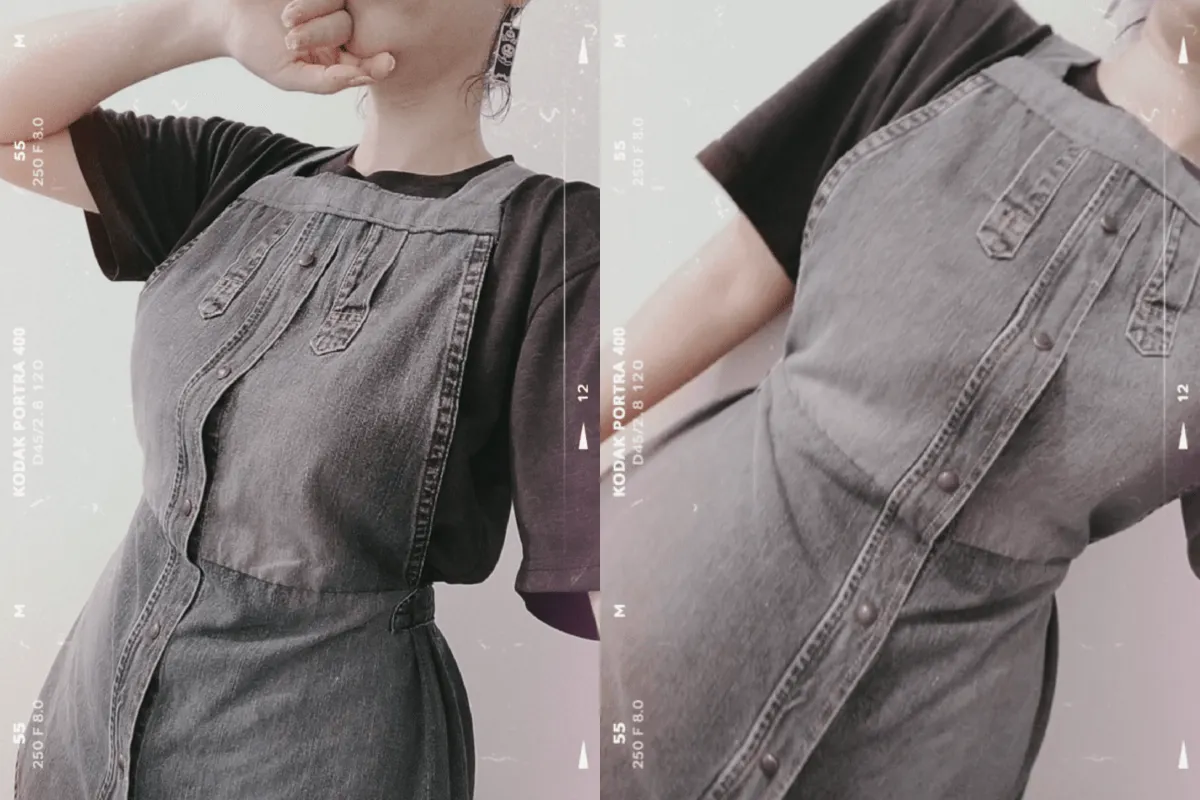
« R E S U L T »

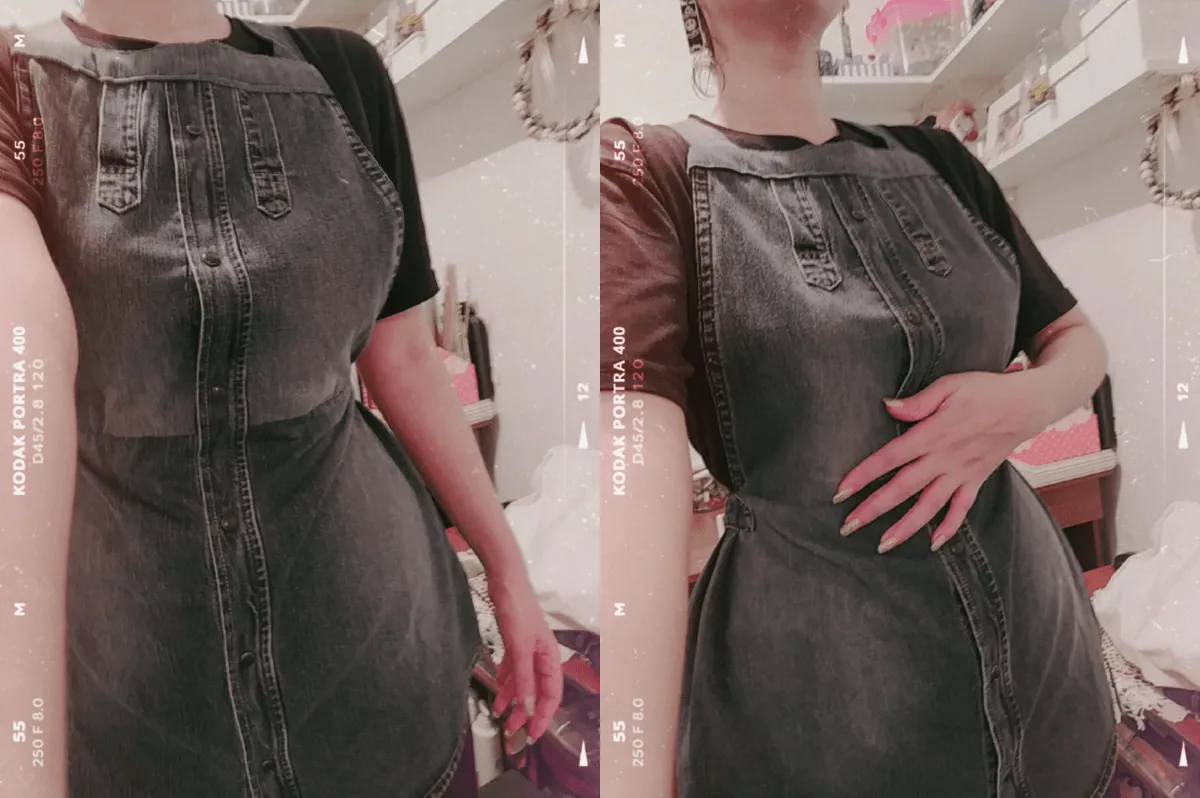

Normalmente este modelo de overol-falda tiene un ajuste bajo en la cadera, y es más holgado, pero yo lo diseñe a mi gusto haciéndolo ajustado a la altura de mi cintura; también, deje la falda bastante corta porque quiero utilizarlo con leggings de colores (tengo una colección de muchos colores brillantes, como azul, violeta, verde y rojo) ヽ(・ω・ゞ)
Si algo pudiera corregirle al diseño sería parte del frente, no estoy conforme con el aspecto de la parte superior del pecho, me gusta que sea alta pero tiene un aspecto de “delantal” que no me gusta (pero hacer una pretina más delgada habría hecho ver extraño el ancho de los tirantes).
Sin embargo, en general, estoy contenta con el resultado, es bonito y auténticamente resistente (por favor no pierdan su tiempo haciendo overoles con grapadora y silicón caliente, ¡es una pérdida de tiempo y materiales!) (×□×;)
Normally this overol-skirt model has a low hip fit, and is looser, but I designed it to my liking by making it fitted at my waist; also, I left the skirt quite short because I want to wear it with colorful leggings (I have a collection of many bright colors, like blue, purple, green and red) ヽ(・ω・ゞ)
If anything I could correct the design it would be part of the front, I'm not happy with the look of the upper chest, I like that it's high but it has an "apron" look to it which I don't like (but making a thinner waistband would have made the width of the straps look odd).
Overall, though, I'm happy with the result, it's nice and authentically sturdy (please don't waste your time making overalls with stapler and hot silicone, it's a waste of time and materials!) (×□××;)
👉 𝐒𝐔𝐌𝐌𝐀𝐑𝐘 & 𝐂𝐎𝐍𝐂𝐋𝐔𝐒𝐈𝐎𝐍 👈
 |  |
|---|
| ✔ Para hacer este modelo de overol-falda necesitas una camisa de caballero que sea al menos 2 tallas mayor que tu talla femenina (por ejemplo si eres talla M, necesitas una camisa de caballero talla XL). | 👉 To make this skirt-overall pattern you need a men's shirt that is at least 2 sizes larger than your female size (for example if you are a size M, you need a men's shirt size XL). |
| ✔ El largo de la pechera depende de la talla de tu busto. Mientras más grande sea tu talla de brassier, mas tela necesitaras para el frente del overol. | 👉 The length of the bust depends on your bust size. The larger your bra size, the more fabric you will need for the front of the coverall. |
| ✔ Este modelo de overol-falda puede coserse a mano con doble hilo y puntada recta corta, no es obligatorio usar una máquina de coser. | 👉 This skirt-overall model can be sewn by hand with double thread and short straight stitch, it is not obligatory to use a sewing machine. |
¡Muchas gracias por leer!
🚨 ¡Por favor no tomes, edites ni re-publiques mi material sin mi permiso! 🚨
📷 Herramientas: Postimages/TinyPNG/Lumix Panasonic DMC-FH2/Smartphone 📷
💌 ¿Deseas ponerte en contacto conmigo? Tesmoforia@Outlook.com 💌
✨ Translation done with Deepl - Separadores: Sewing ✨