This post is my contribution to #needleworkmonday challenge founded by @crosheille and hosted by @muscara, and @marblely .
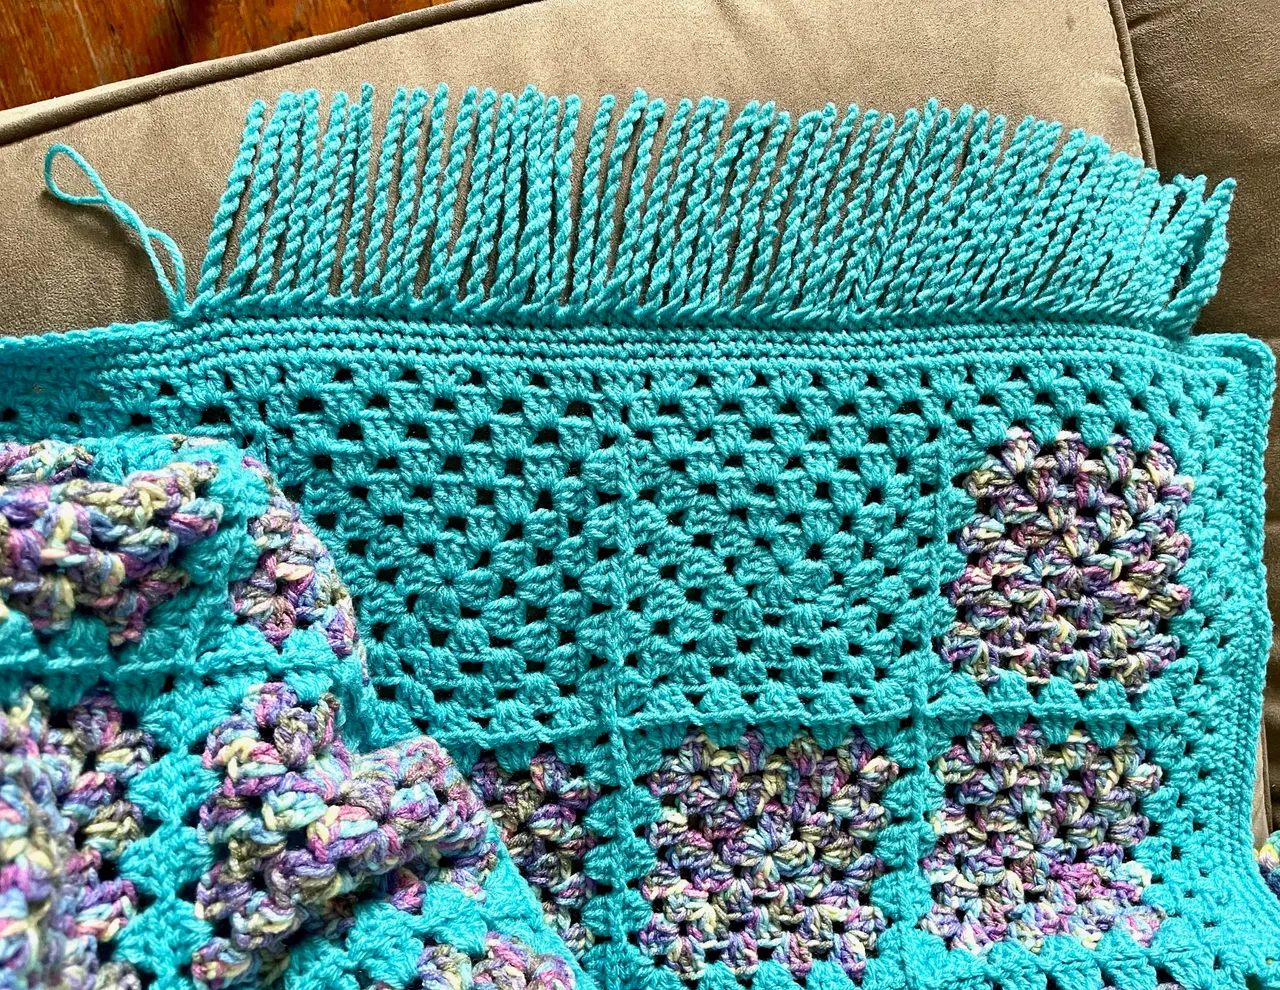
Hello! A while ago I was sharing a cool project: crocheted bedspread using granny squares. I love that bedspread/blanket/throw!
I decided to finish it up with some fringes. But the idea of cutting yarn and knotting was not appealing... so I decided to make some twisted fringes!
So here it is, work-in-progress!
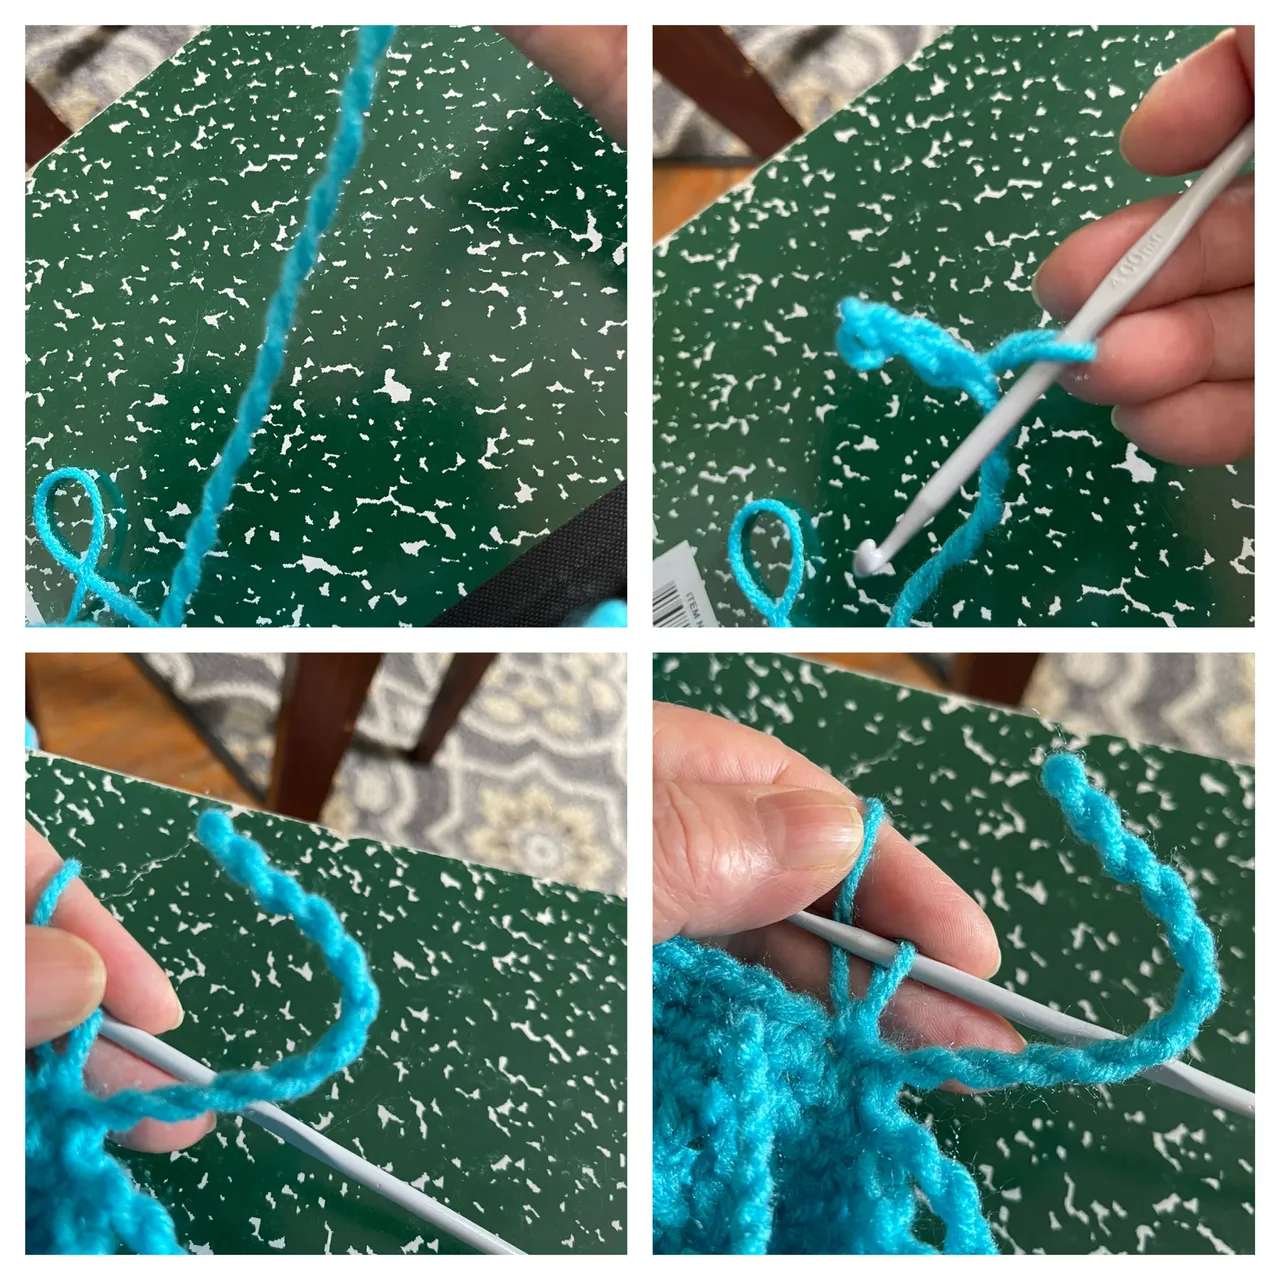
The technique is very simple: one single crochet, loop, one slip-stitch, one single crochet, loop, one slip stitch.... The only trick is to measure the length of the loop, and make sure it is the same length every time. Same with the number of twists.
In my case: the loop is the length of a note-book and the number of twists is 25. After 25 twists you come back into the base of the simple crochet stitch, make a slip stitch (in the same spot) and then move to the next spot, where you execute the next simple crochet stitch. The image below explains better than words. And if you you want to learn more, there is always YouTube!!!!
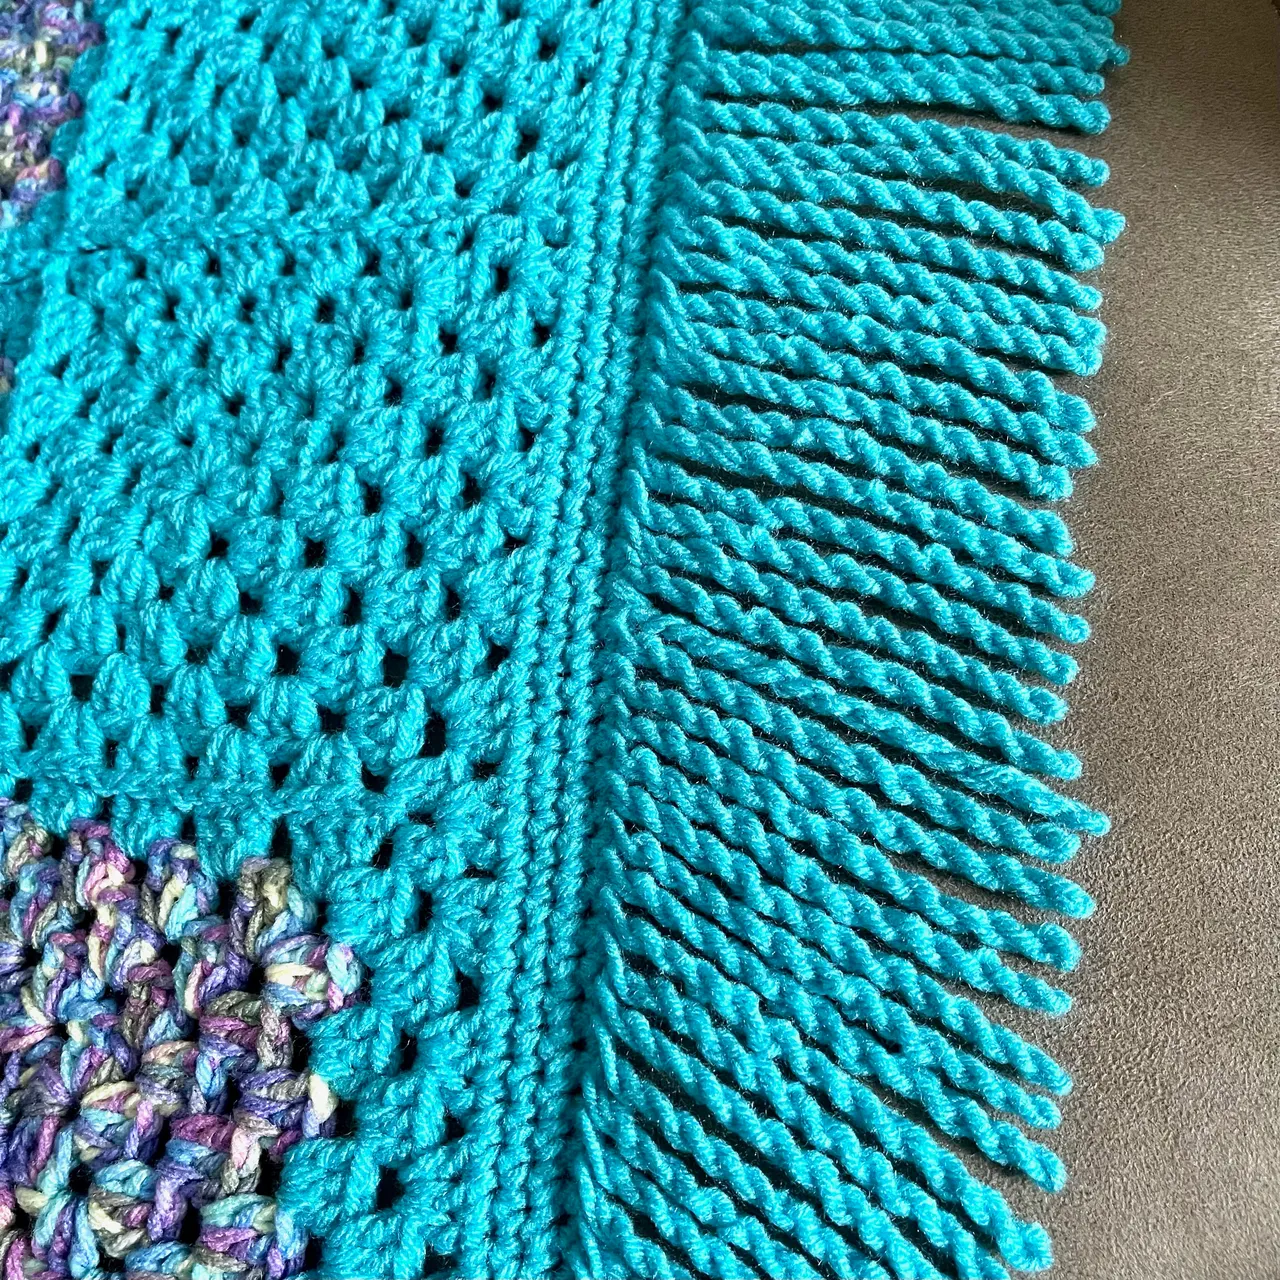
Here's another shot of my new twisted fringes. As you can see, I didn't measure 100% exactly, but I think it's ok. That's the beauty of handmade stuff, never perfect.
Well... I hope you like it and you learned something from my post. It will take me a while to finish this blanket, as it is quite large, and in summer time nobody really likes to crochet, right?