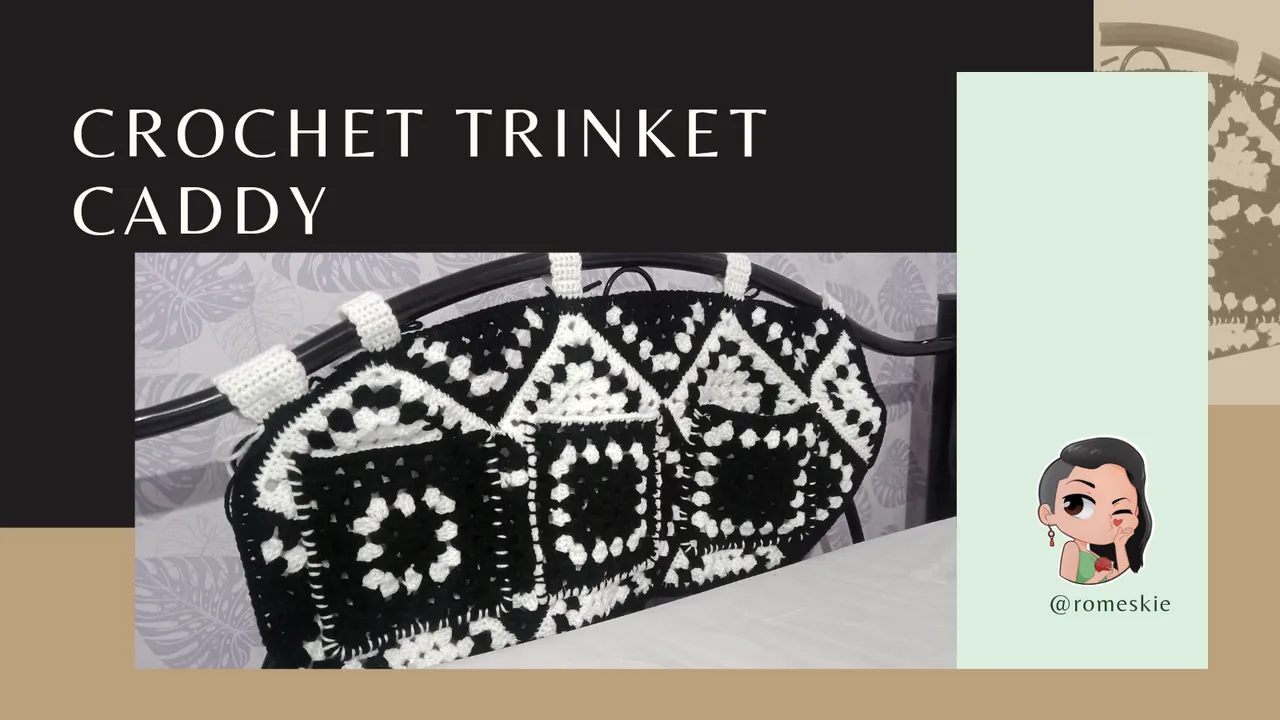
I'm not really a big fan of granny squares. Because to make a beautiful masterpiece with these squares, you have to be precise, not only with the number of stitches, but also with the tension of your hand. My hand tension tight when I crochet so I needed to adjust the way I hold the hook and yarn for this project.
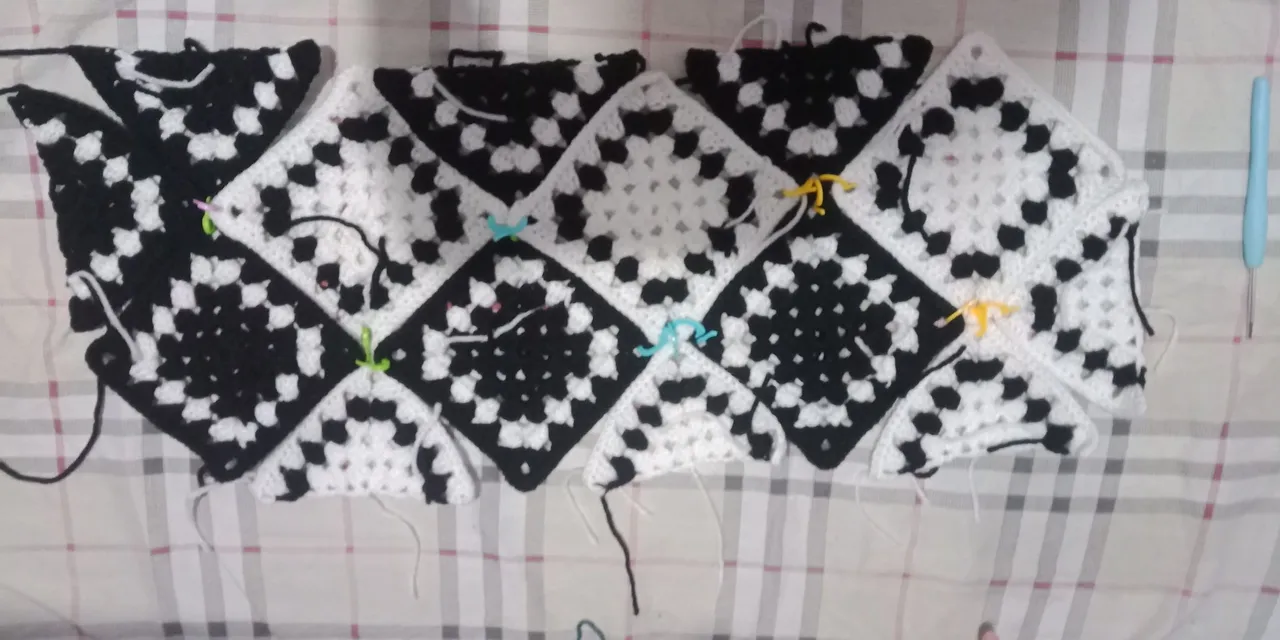
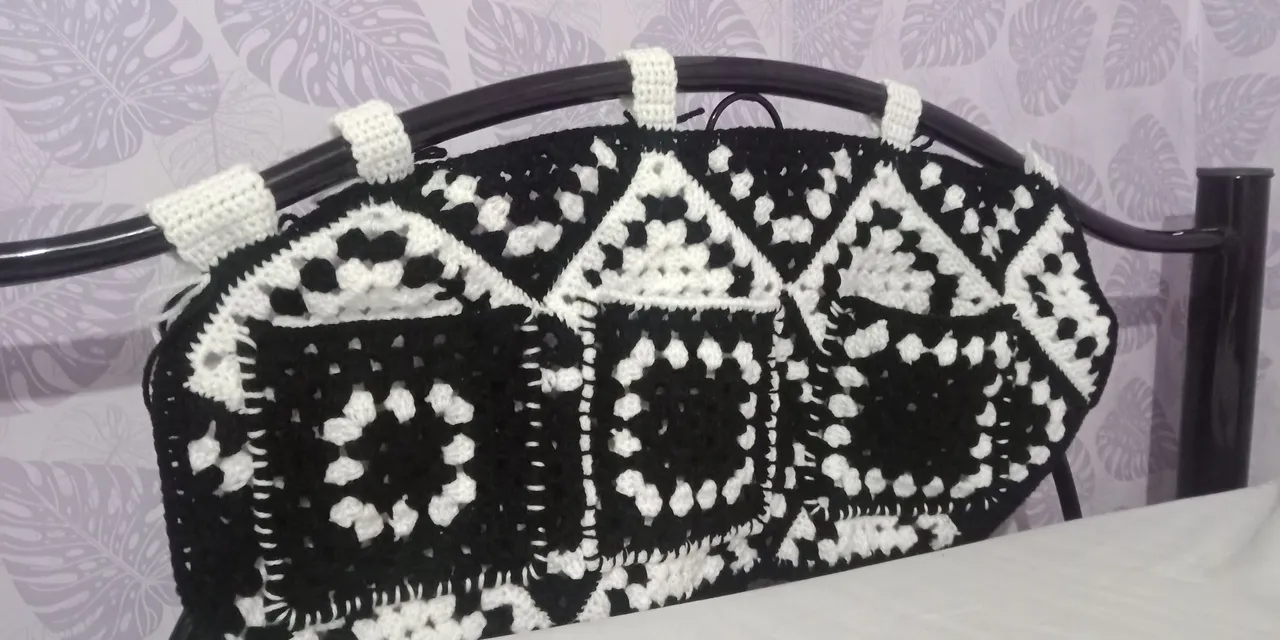
The crochet trinkets caddy is made of a base consisting of 6 squares and 8 triangles. Then I made 3 bigger squares for the pockets. The entire base is framed by dc's all over to make sure that the squares won't easily fall apart. Although I am quite sure that the stitch I made to join the squares are secure, I'd still want to make the crochet trinkets caddy is fool proof. My husband is a very strict client, I don't want him leaving a negative review. (This project is actually a gift for his birthday.)
Allow me to show you the assembly of the crochet trinkets caddy. First, make all the squares ans triangles needed. Stitch the squares and triangles together for the base. Then surround the stitched squares and triangles with double crochets. Attach the pockets. And lastly make the sleeves to attach it to.
Here's a more detailed process of how this crochet trinkets caddy was completed.
Materials
Love knits yarn (black and white colors)
3.5mm crochet hook
Blunted needle
Scissors
Process
The base
Make 6 squares.
Chain 5. Slip stitch on the first chain to make a circle.
Chain 3 (counts as 1dc from here on) make 2 dc into the circle. Chain 3. [Make 3 dc into the circle. Chain 3] Repeat [ ] 3x. Slip stitch on the third chain at the start of row.
Slip stitch into the ch3 space. Ch3, 2dc, ch3, 2dc. That should make the corner of the square. Ch1. [3dc, ch3, 3dc, ch1] Repeat 3x. Slip stitch into the 3rd chain at the beginning of the row.
Turn. Slip stitch into the ch1 space. Chain 3, 2dc in the ch1 space, ch 1. [3dc into the ch3 space, chain 3, 3dc into the ch3 space, ch1, 3dc into the ch1 space, ch1] repeat 3x. Slip stitch into the
3rd chain at the beginning of the row.
Turn. Slip stitch into the ch1 space. Change yarn color. Chain 3, 2dc into the ch1 space, ch1. [3dc into the ch1 space, ch1, 3dc into the chain 1 space, ch1.
Basically do a ch1, 3dc, ch on all chin 1 spaces and then do a 3dc, 3chain, 3dc on all chain 3 spaces. Then slip stitch on the 3rd chain at the beginning of the row.
Turn, slip stitch on the ch1 space. Change yarn color on the next row. 3ch, 2dc, chain 1. And again work 3dc, 3ch, 3dc on all corners. And then work 1ch, 3dc, 1ch on all ch1 spaces.
It is highly recommended to weave ends off after fastening. I did not and I had to deal with weaving and fastening after I stitched the squares together.
Make 8 triangles.
To make the triangles, make 4 chains. Slip stitch on the first chain to make a circle.
Chain 4. 3dc into the circle. Chain 3. 3dc into the circle. Chain 1. 1dc into the circle.
Chain 4. Turn. 3dc into the ch4 space. 1 chain. 3dc into the ch3 space, 3ch, 3dc into the ch3 space. 1chain. 3dc into the chain 1 space. Ch1. Dc into the 3rd chain at the first row.
Make 5 rows total. The start of the rows should be 4 chains, 3dc into the ch4 space, then chain 1. And for the chain 1 spaces, make 1 chain, 3dcs and 1 chain. For the chain 3 spaces, make 3dcs, chain 3, and 3 dcs. The end of each rows should be 1dc into the 3rd chain at the start of the previous row.
Next step is to attach the squares and triangles. To keep the base as flat as it should be, attach the squares and triangles through the back stitches. Insert the needle into the back stitch of the edge of one square, and then attach it into the back stitch of the edge of other square (or triangle).
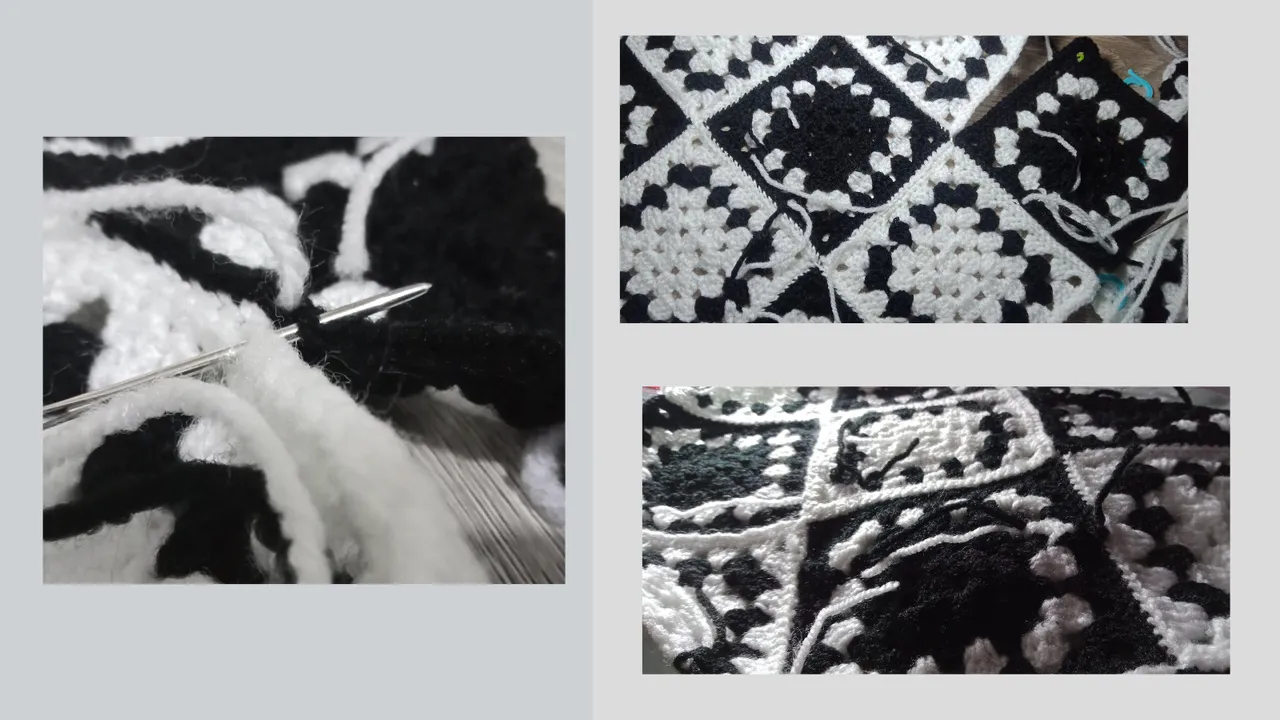
Close off the base by making double crochets all around.
Pockets
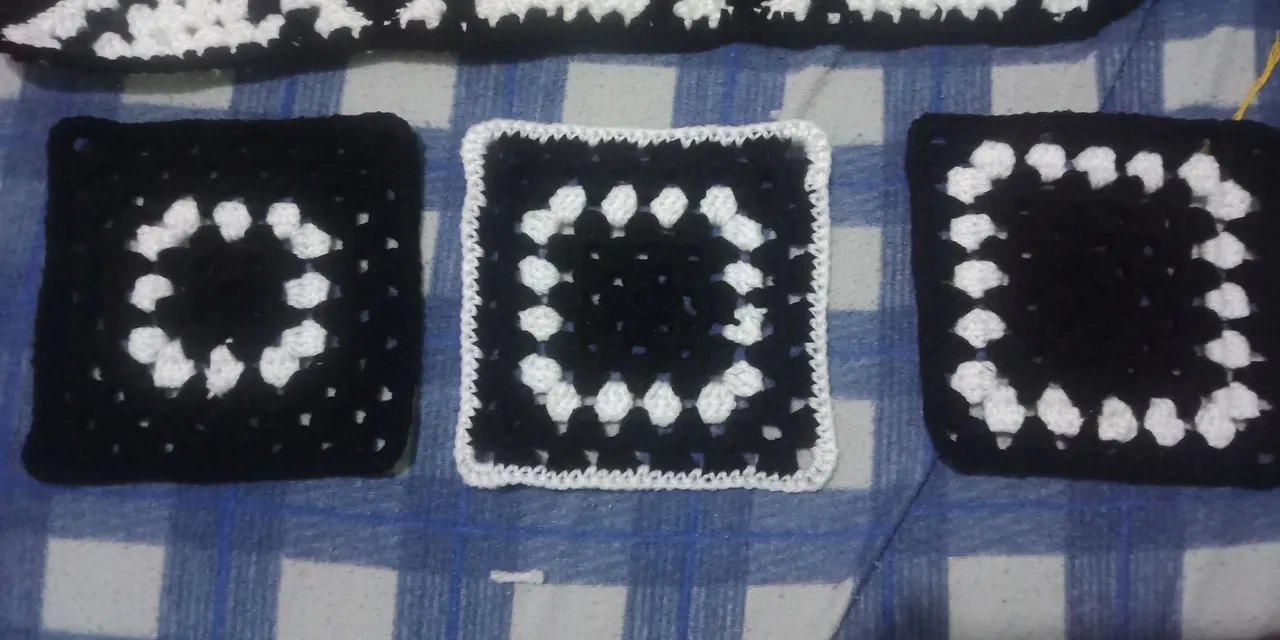
Make 3 squares for the pockets. Basically the same process as the squares on the base. I changed yarns on different rows though to make a sort of design on each pocket. Additionally, I added a row of sc all around to strengthen each squares.
I wanted to make a stylish way to attach the pockets into the base but I ended up making these childish stitches. It looked cute to me so I went with it. And besides, it's sturdy enough to hold the trinkets while they're hanging.
The last thing I added were the sleeves which is all made of single crochets, just long enough go around the metal bars on the bed.
After this project, I think I have more appreciation for granny squares. They're simple and easy to make but depending on how you played with the colors, the outcome could be very artistic. My husband is crazy about the functionality but with this crochet trinket caddy, I am so all about how the design turned out.
I wanted to write about this last Monday which is the first of March, which is also my 3rd year here in the blockchain. But I was too busy sulking about things I have totally no control of. One of the reason I love crocheting is because I can wallow in self pity and misery but still be creative. I tend to make masterpieces when I'm feeling low. And it helped lift my spirits up to have accomplish something while I was contemplating about life and how I end up where I'm at. But I think that's enough about that, I'm once again ready to take on another project.


@romeskie is a full-time stay at home mom juggling homeschooling, crocheting, and homemaking. A Business Administration graduate with a major in Marketing who ended up in the contact center industry, on the frontlines, climbing her way up to Workforce Management where she found her passion in real-time analysis and management. A once self-proclaimed careerwoman who soon realized homemaking was her real calling. Her passion varies from reading, writing, photography, and most of all, crocheting.
Connect with her through her Facebook Page: The Leftie Crocheter and on Instagram. Feel free to subscribe to her Youtube Channel: The Leftie Crocheter