
Community Challenge Reveal
At long last! It is finally reveal day! I have been excited about this since I made my teaser post last week. I even gave away the most obvious clue someone making pizza could ever give. Teaser teaser, Italian dinner. Or lunch. Or snack. My kid loves pizza. And when she got sick a few weeks back, she said that the moment she feels better, we should have pepperoni pizza. And we did. This toy is another treat for her for taking her medicines on time (with very minimal tears and struggle, parents know how kids are) and following doctor's orders.
I like to make sure that my projects serve multiple purposes. At least I try most of the time. Why? Because crocheting is not as easy as it looks. It's fun but it required a lot of passion and dedication. Now this project does not serve only as a toy, it is also an educational tool that we will be using for our homeschooling journey.
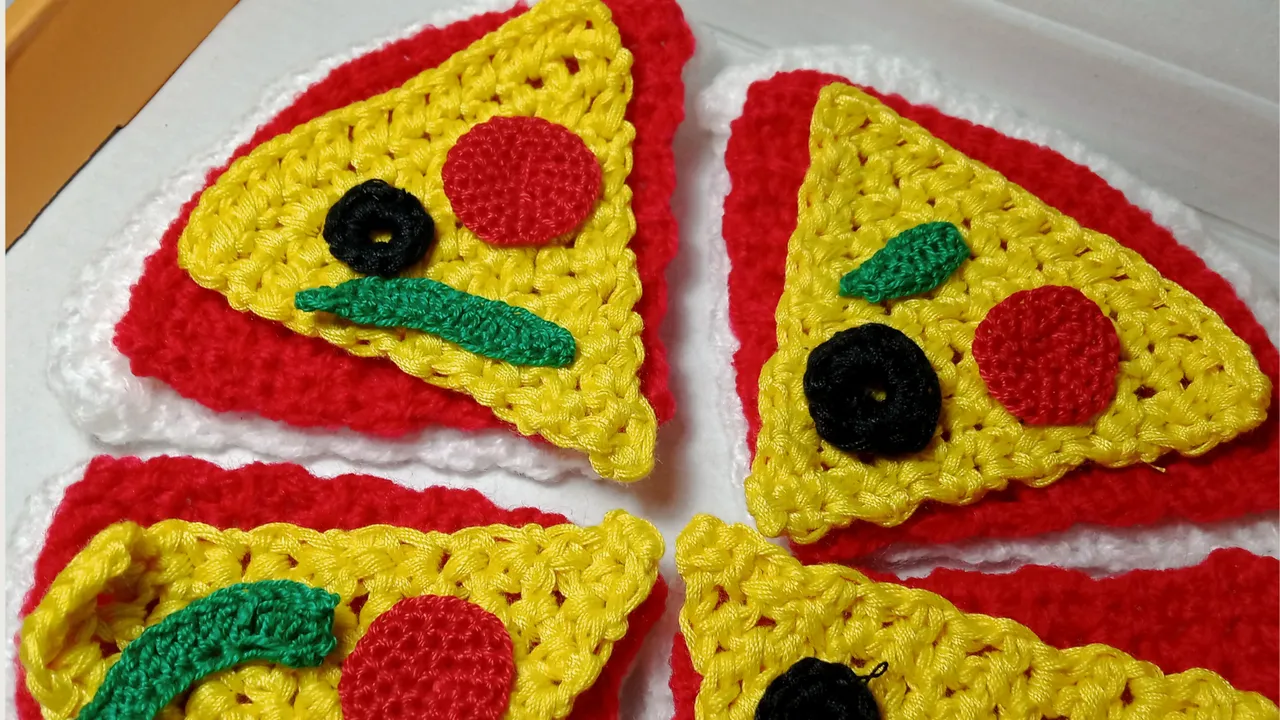
Aside from that, this is my ultimate test to see if I have mastered how to make the perfect crochet circle. If I could make variations out of an instruction, that means I have fully understood the dynamics. And this is an example of that. I made use of the concept behind making a perfect crochet circle, then made a 1/4 perfect crochet circle. Remember how I despise making pairs? Well for this crochet toy pizza, I made 8 identical pieces, and 4 pieces using a variation from the variation. I hope you're still with me. I will show you the process as we move on.
Materials
First, let's talk about the materials and tools I used to create this lovely crochet toy pizza.
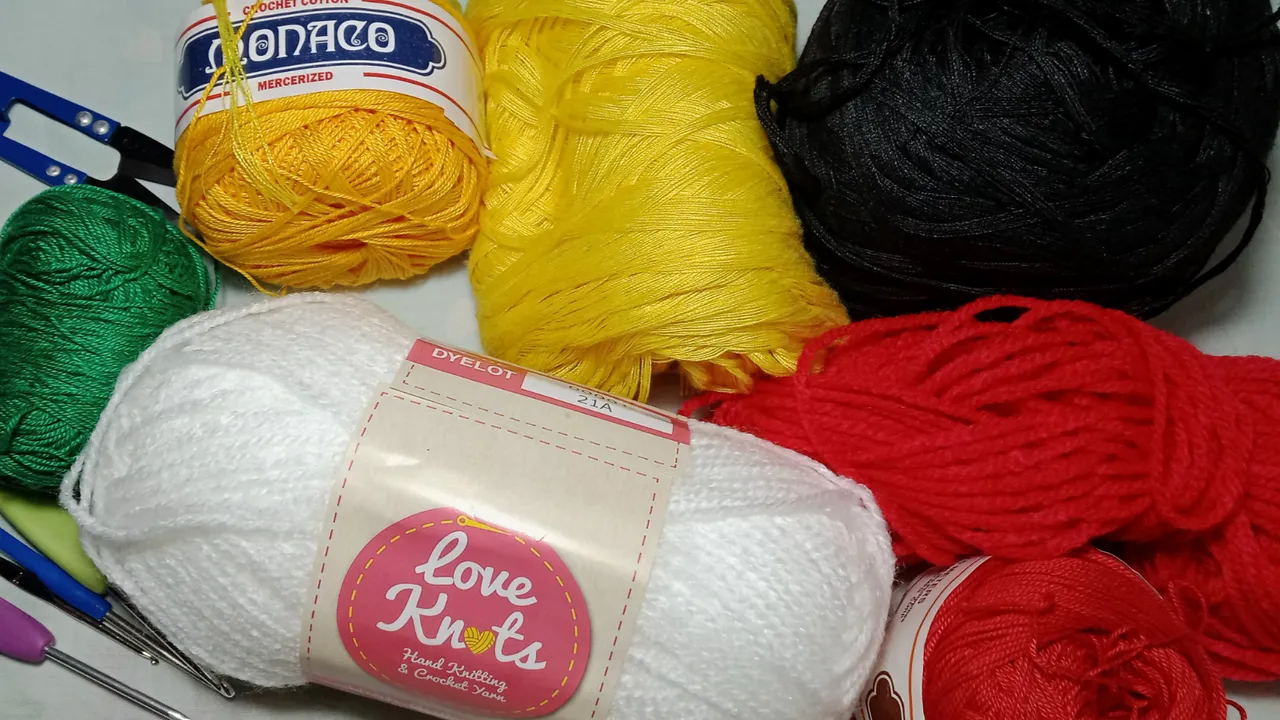
Yarns:
Acrylic - white and red (for the crust and tomato paste/sauce)
Polyester - yellow for the cheese, black for the olives
Mercerized - Green for the green peppers, red for the pepperoni
4.0 crochet hook - for the acrylic yarns
3.5 for the polyester yarns
IMIA #7 for the mercerized yarns
scissors
Process
To be honest, I just played everything by ear, made stuff up as I go until I finished the entire project.

The first part was making the crust. There were a lot of trials and errors until I was able to come up with the best form. For the entire set, I used HDC or half double crochet. The idea is to follow the instructions on making the perfect circle but divide it into 4. So technically, I am making a full circle that starts off with 8 hdc on the magic ring. I hope that makes sense.
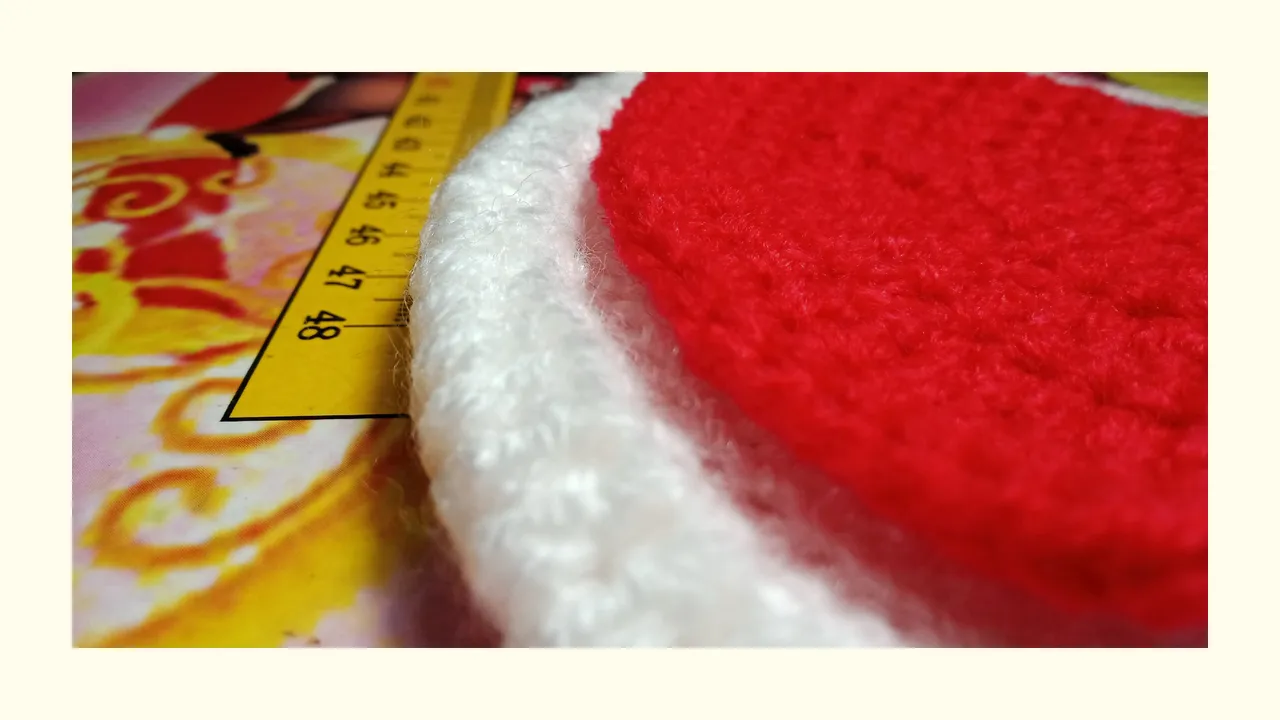

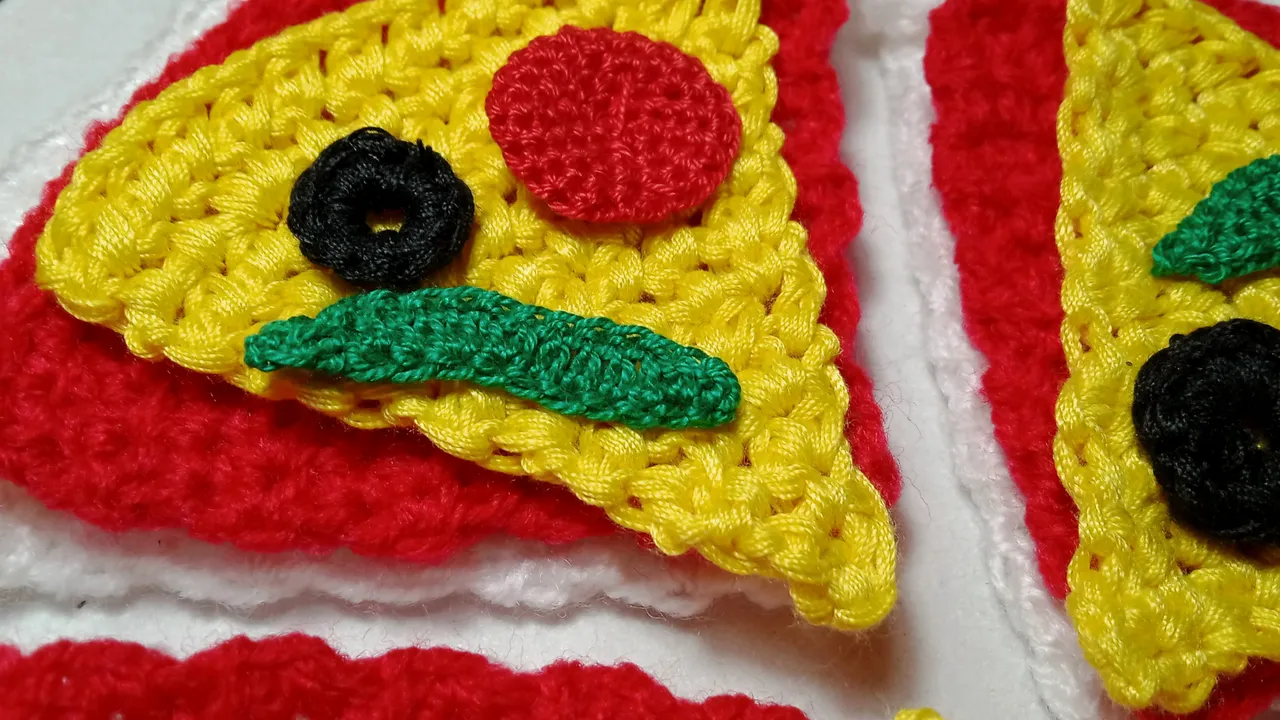
I used white for the crust. I made 4 pieces of 1/4 circles to make 4 slices. At first, I thought that should do it. But then I personally like thick crust pizza. So I added a sort of bump on the edge of the "slices". I just basically made double crochets over the hdc's on the edges of each slice. The tomato sauce layer is made of the same stitches as the base only I did not add the crusts. For these 2 layers, I used the acrylic yarns.

For the cheese layer, I used the polyester yarn just because I don't have yellow acrylic yarn in my stash and I have a lot of leftover yellow polyester yarn from my Belle dress project from earlier this year. The only difference is I made each row alternating hdc and chain 1 to make the illusion of the melted cheese. *I sure hope I was able to show that melted cheese image with that yellow yarn layer.
Now for the toppings, I made thinner yarns so I opted for the mercerized cotton yarns that have been in my stash since time immemorial. Have I mentioned I have been keeping yarns and crochet hooks even back when I was still an office girl and didn't have time to focus on making crochet creations? Even with no projects in mind, I just bought these yarns just to remind me of the time when my mom was still teaching me how to crochet.
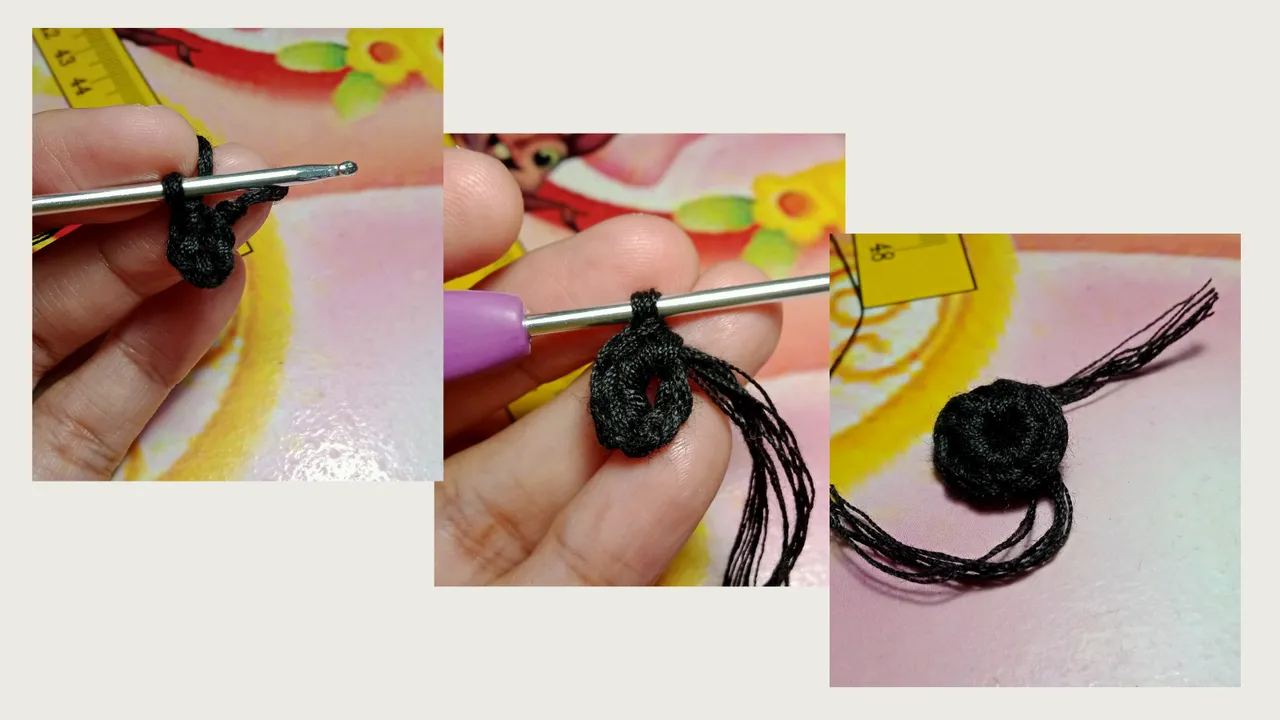
The toppings I chose to create were green bell peppers and pepperoni where I both used the mercerized cotton yarns for and the black olives where I used the black polyester yarn. To make the black olives, I just made a circle of chains, then single crocheted all around. I made big and small circles for variation.

The green bell pepper is made up of chains, then either HDC, sc, and dc (depending on the width I wanted to achieve.) As I said earlier, I just played everything by ear. And that was what made this entire crochet toy pizza even more fun.
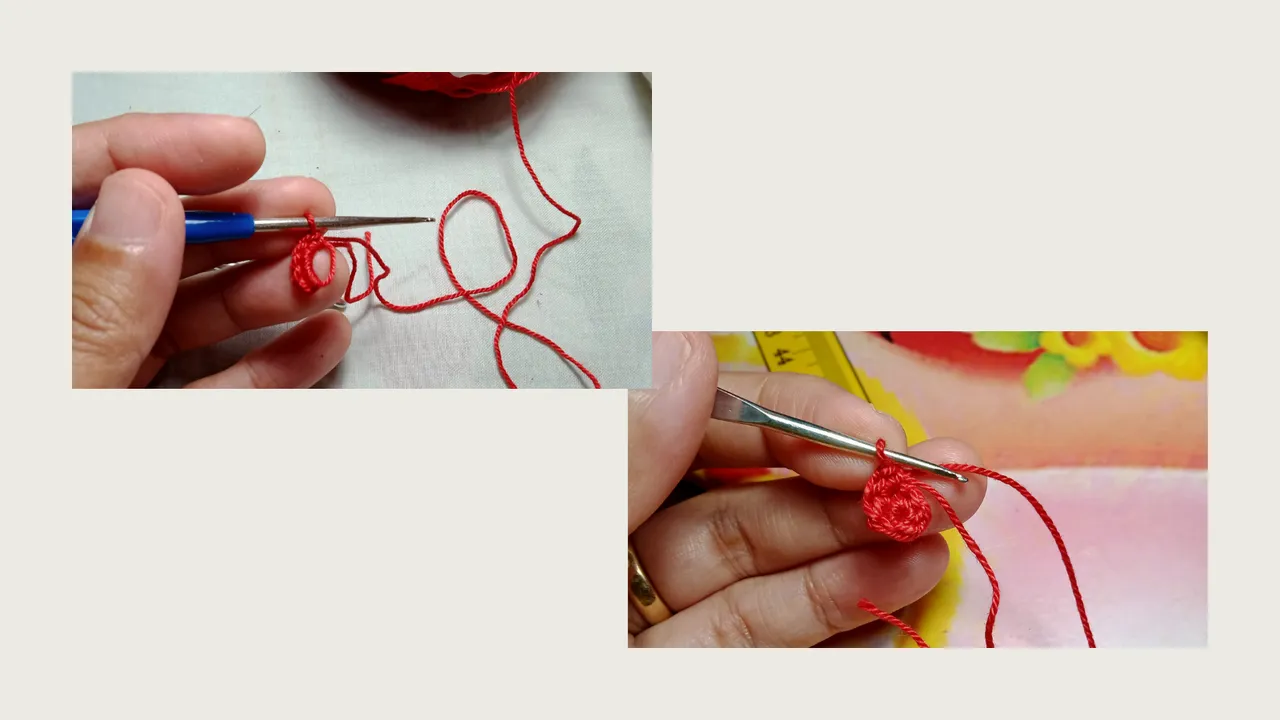
The pepperoni is another perfect circle made up of mercerized cotton yarn and #7 IMIA crochet hook. It was made of a magic ring with 5 sc stitched into the ring. The circle was increased for 3 rows. I actually made more pepperoni than all the other toppings because I got carried away.
Overall, this entire project has been so much fun. From the conceptualization to the teaser post, down to the reveal. The least fun part of this, I could say, is the fastening off and weaving off all the ends. That's actually my least favorite part of any project that I make. But this is also the part that ensures the project would not unravel as time goes by.
I can't wait to see this crochet toy pizza in action. This will be used for playtime but this is aimed at training her how to take instructions. I am excited to play pretend with her. You know how it feels to pretend to call a kid using a toy phone, asking if this is the pizza delivery? Oh, this is gonna be so much fun!


@romeskie is a full-time stay-at-home mom to a homeschooling toddler. Loves crocheting as a hobby. Maintains a mini food forest, aiming to grow more to achieve that farm-to-table homesteading. Learned how to cook after leaving the corporate world to take care of her family and is now starting to acquire basic baking skills. Learn more about her adventures and misadventures in the world of motherhood.
Connect with her through her Facebook Page: The Leftie Crocheter and on Instagram. Feel free to subscribe to her Youtube Channel: The Leftie Crocheter