Hola mi linda comunidad costurera, bendecida tarde tengan todos, espero se encuentren súper bien, llenos de mucha salud y alegría, es para mí un verdadero gusto compartir con ustedes una nueva idea de costura hecha a mano
Hello my beautiful sewing community, have a blessed afternoon everyone, I hope you are super well, full of good health and joy, it is a real pleasure for me to share with you a new sewing idea made by hand hand
Siento mucho todo este tiempo de ausencia; el cansancio físico y emocional acumulado a lo largo de todos estos días, creó en mi situaciones de desánimo, impotencia y mucha tristeza; tal vez por la intensa rutina del día a día o quizás por afrontar la perdida inesperada de un ser querido, pues aunque amo compartir contenido, estos fueron factores que influyeron mucho, para tomar la decisión de hacer una pausa y darme un poco de tiempo, sin embargo y pesar de la nostalgia de estos dias, cada día me levantaba con muchas ganas de formar parte del nuevo concurso propuesto en esta hermosa comunidad, dónde nos invitan a elaborar un proyecto de cocina.
I am very sorry for all this time of absence; the physical and emotional exhaustion accumulated throughout all these days, created in me situations of discouragement, impotence and a lot of sadness; perhaps due to the intense day-to-day routine or perhaps due to facing the unexpected loss of a loved one, because although I love sharing content, these were factors that greatly influenced me to make the decision to pause and give myself a little time, however, and despite the nostalgia of these days, every day I woke up eager to be part of the new contest proposed in this beautiful community, where we are invited to develop a kitchen project.
¡Cocina! lugar de la casa que muchos consideramos es el mejor, un lugar asociado a alegría, reuniones, felicidad, familia, comida, colores... y cuando de decorar se trata, es algo que encanta!!!. Fue así, como el día de ayer me propuse a dejar de pensar un poco lo que había pasado, o lo que está pasando; pensar en lo que me hacía falta en mi cocina, tomé mis telas, hilo y aguja y me enfoqué una vez más hacer algo lindo para compartir con ustedes y así hacer mi participación, por lo que elaboré hermosas agarraderas de mariposas, que a decir verdad las necesitaba mucho pues no tenía ni una en mi cocina jeje. Este tipo de proyecto, es muy decorativo y además de ser muy útil pueden resultar beneficioso y necesario para no sufrir quemaduras al momento de cocinar, así que si te es interesante acompáñame y te muestro como hacerlas. Vamos!
Kitchen! place of the house that many of us consider to be the best, a place associated with joy, meetings, happiness, family, food, colors... and when it comes to decorating, it is something that enchants! It was like that, like the day yesterday I decided to stop thinking a little about what had happened, or what is happening; and to think that in what I needed in my kitchen, I took my fabrics, thread and needle and focused once again on making something nice to share with you and thus make my participation, so I made beautiful butterfly holders, which To tell the truth I needed them a lot because I didn't have one in my kitchen hehe. This type of project is very decorative and, in addition to being very useful, it can be beneficial and necessary so as not to suffer burns when cooking, so if it is interesting to you, come with me and I will show you how to do it. Come on!
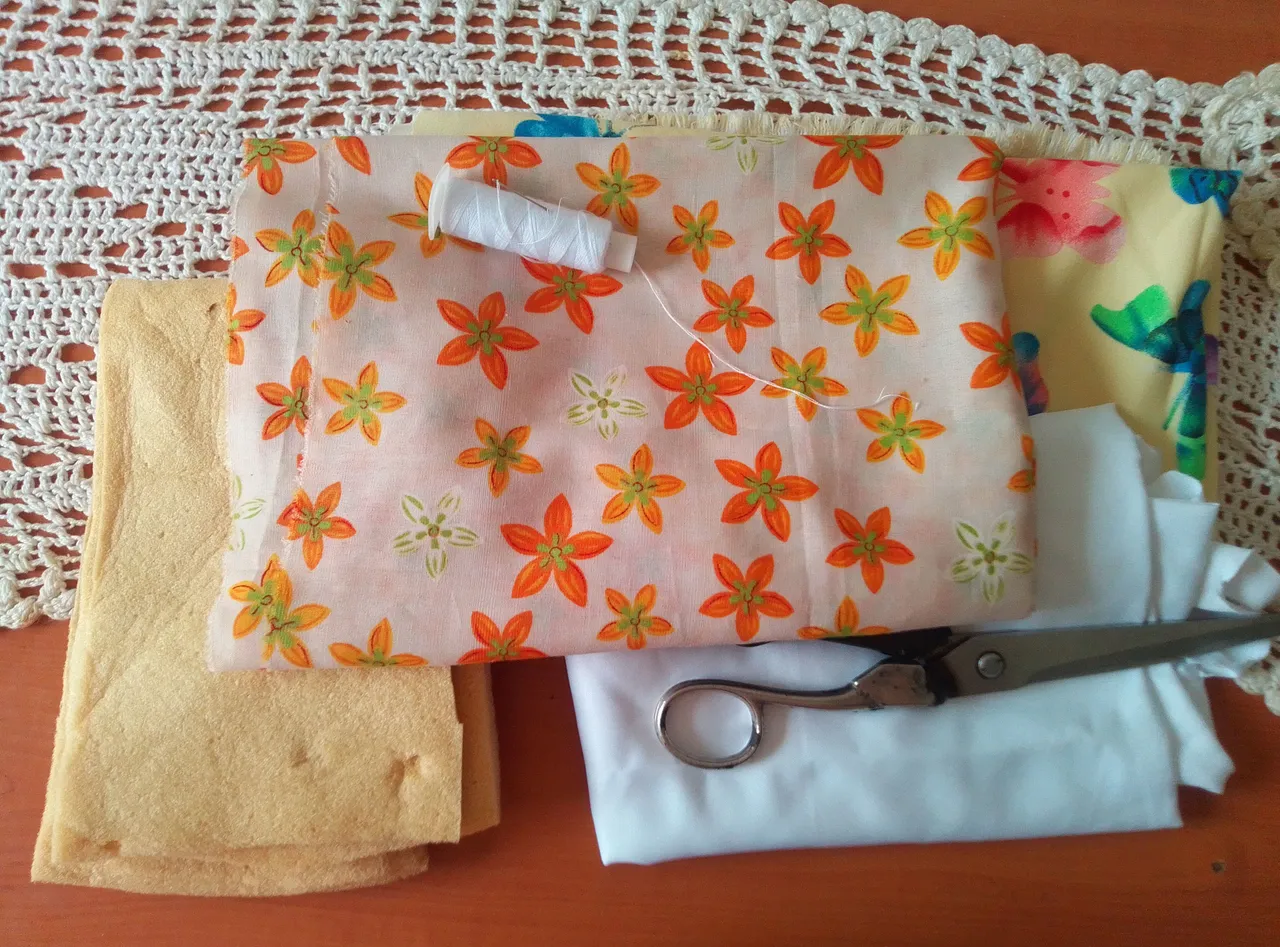
Materiales que necesitas:
- Tela.
- Tijeras.
- Hilo y aguja.
- Esponja o relleno.
Materials you need:
- Cloth.
- Scissors.
- Thread and needle.
- Sponge or padding.
(PROCEDIMIENTO)
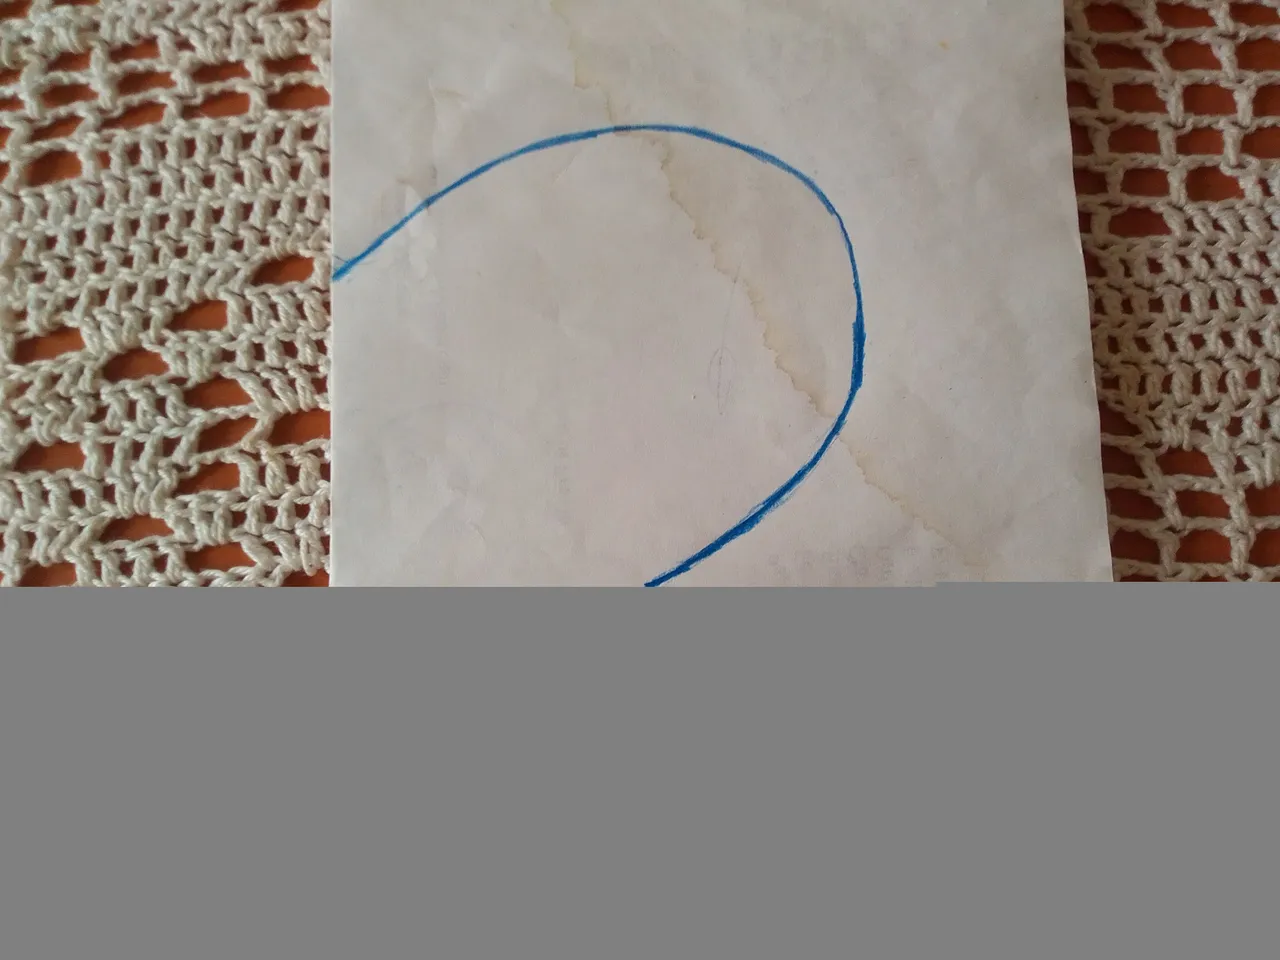
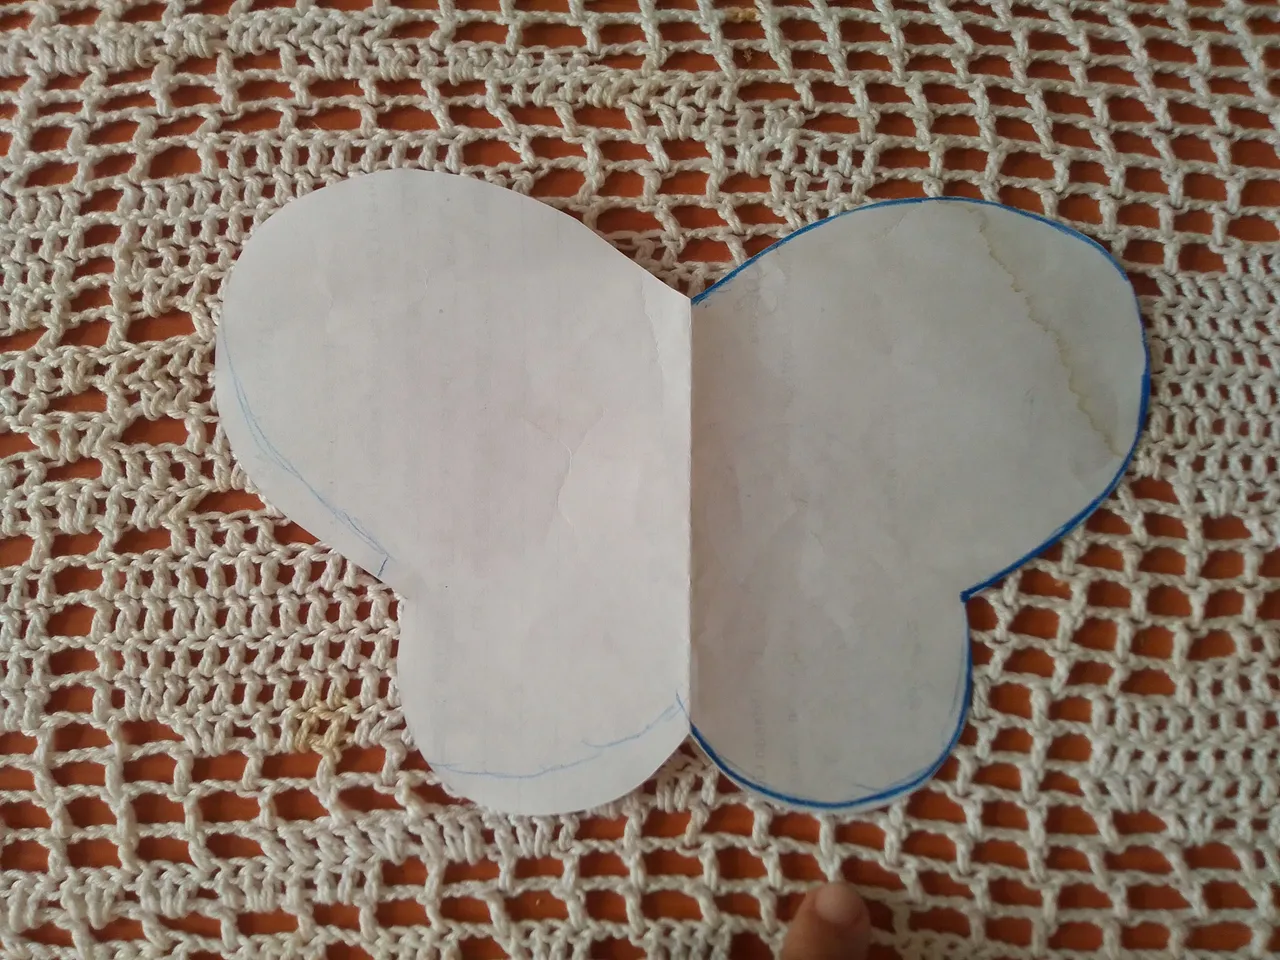
Paso 01
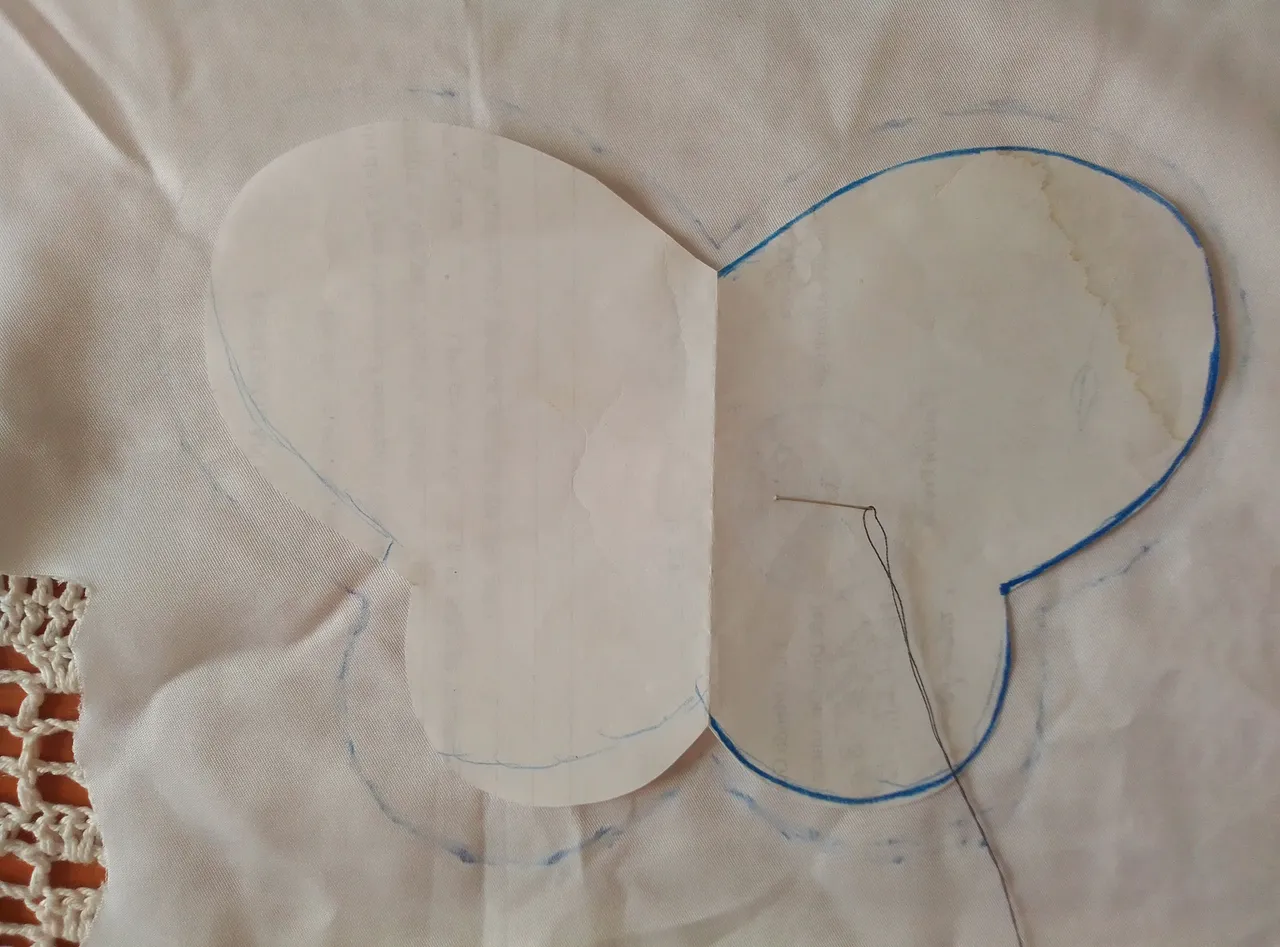
Primeramente, hacer el molde de este proyecto resulta ser sencillo, ya que lo que haremos será tomar una hoja de papel y la doblaremos por la mitad, luego dibujamos la mitad de las grandes alas de una mariposa dependiendo el tamaño que deseas que tengan nuestras agarraderas, así que recortamos y obtendremos dos una mariposa con su alas exactamente iguales.
Step 01
First off, making the template for this project turns out to be easy, as what we're going to do is take a sheet of paper and fold it in half, then draw half of the big wings of a butterfly depending on the size you want our handles to have, so we cut them and we will obtain two butterflies with exactly the same wings.
Paso 02
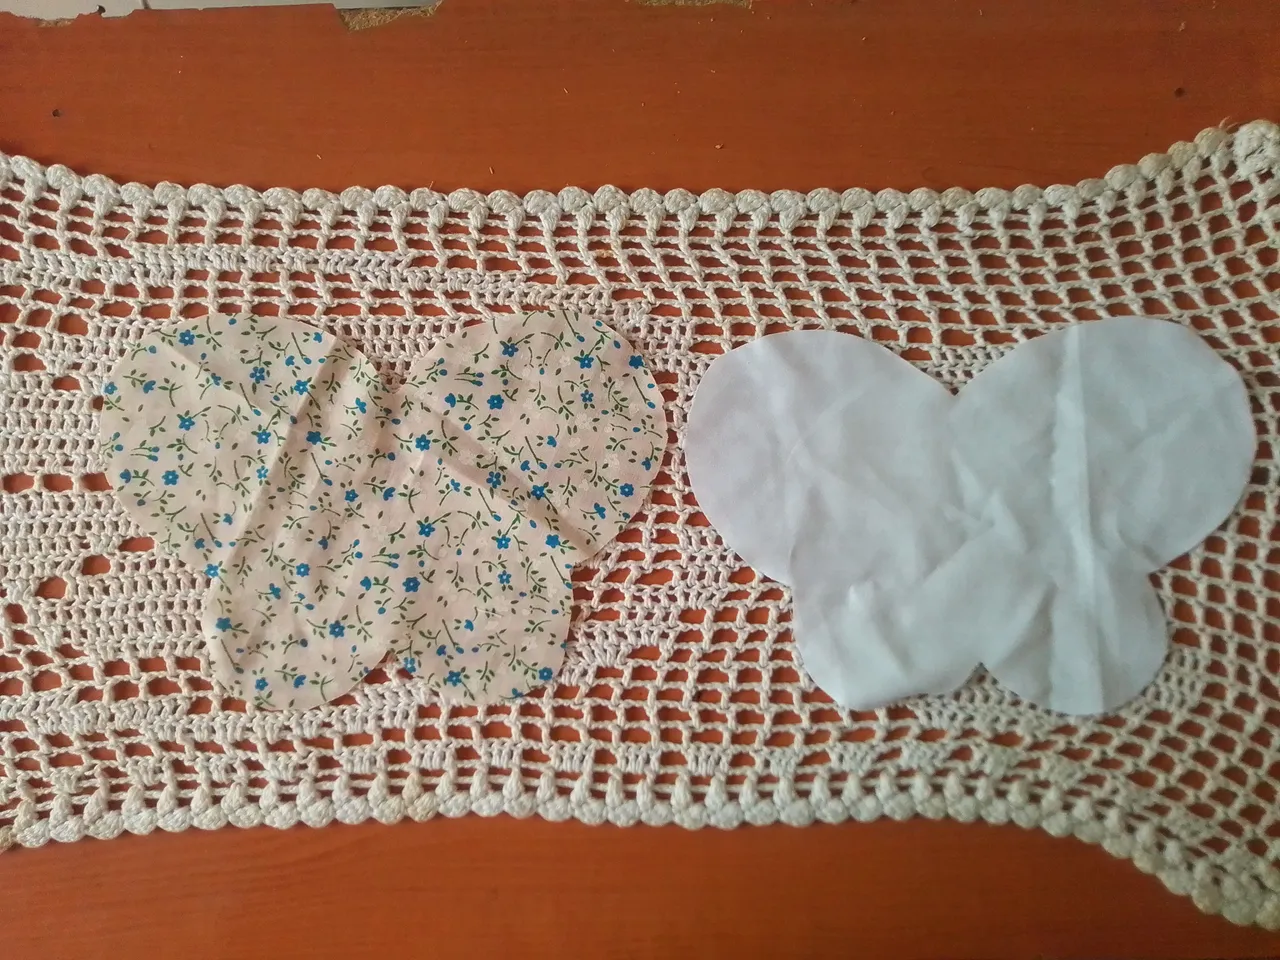
En este paso toma el patrón, colócalo sobre el primer color de tela y sujetarlo con un alfiler, luego marca el diseño un poco más grande para dejar el espacio de la costura y corta todo el contorno. Repite este paso en otro color de tela. Particularmente, para este proyecto utilicé tela Micromed, una tela de estampados hermosos, resistente y duradera con un toque sedoso ideal para proyectos de cocina.
Step 02
In this step take the pattern, place it on the first color of fabric and pin it in place, then mark the design a bit larger to allow for seam space and cut all the way around . Repeat this step on another color of fabric. In particular, for this project I used Micromed fabric, a beautifully patterned, strong and durable fabric with a silky touch that is ideal for kitchen projects.
Paso 03
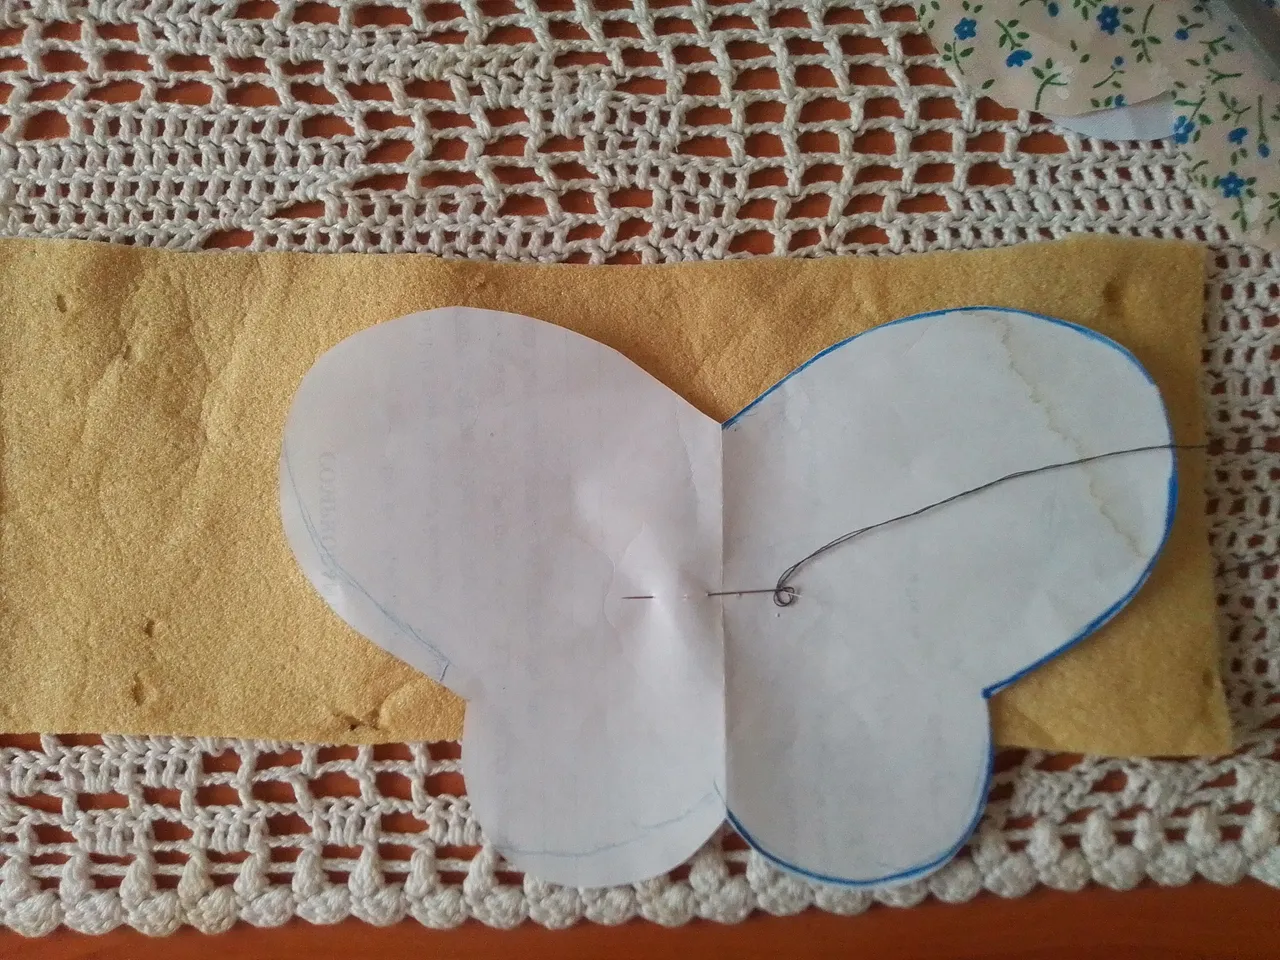
Continuamos, y utilizamos el mismo patrón para cortar la forma de la mariposa en la esponja. Cómo pueden observar mi material era poco así que lo hice por parte, uniendo con una costura, para o tener el tamaño que necesitaba. Trabajan con esponja puede resultar algo que requiera de mucha delicadeza, así que te recomiendo tener cuidado en este paso.
Step 03
Continuing, we use the same pattern to cut the butterfly shape out of the sponge. As you can see, my material was little, so I did it part by part, joining with a seam, to have the size I needed. Working with a sponge can be something that requires a lot of delicacy, so I recommend you to be careful in this step.
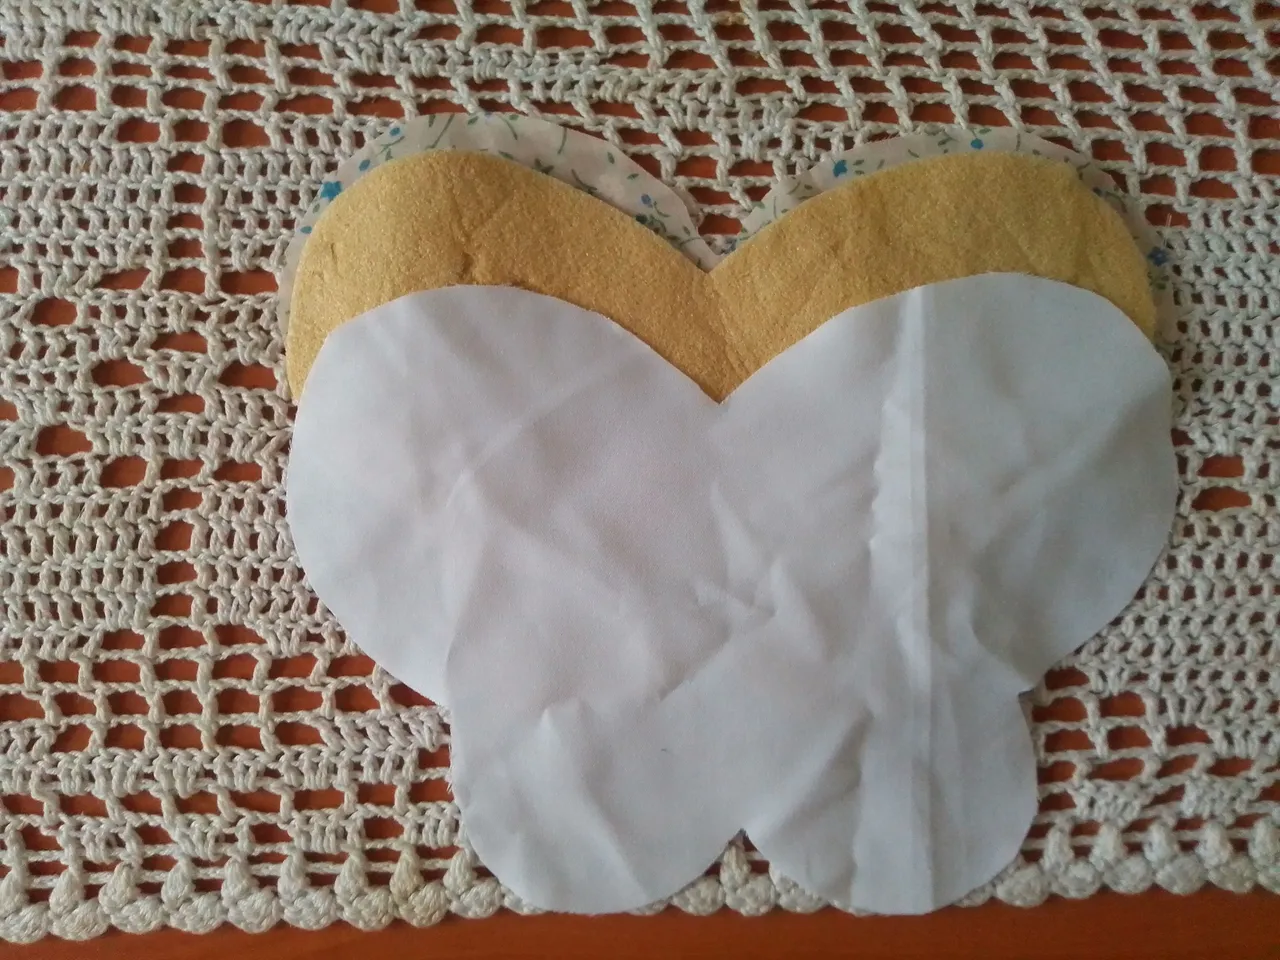
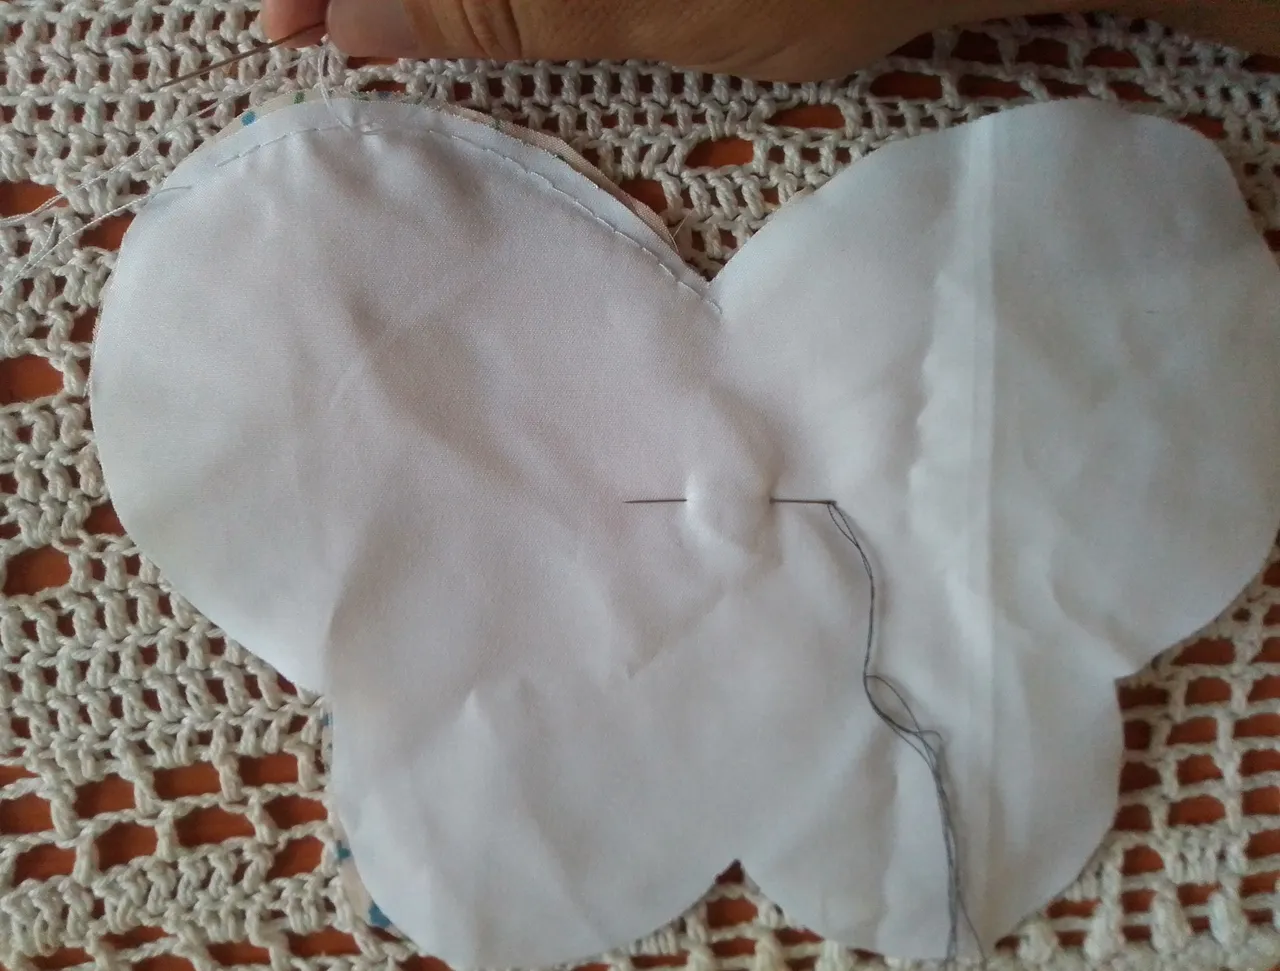
Paso 04
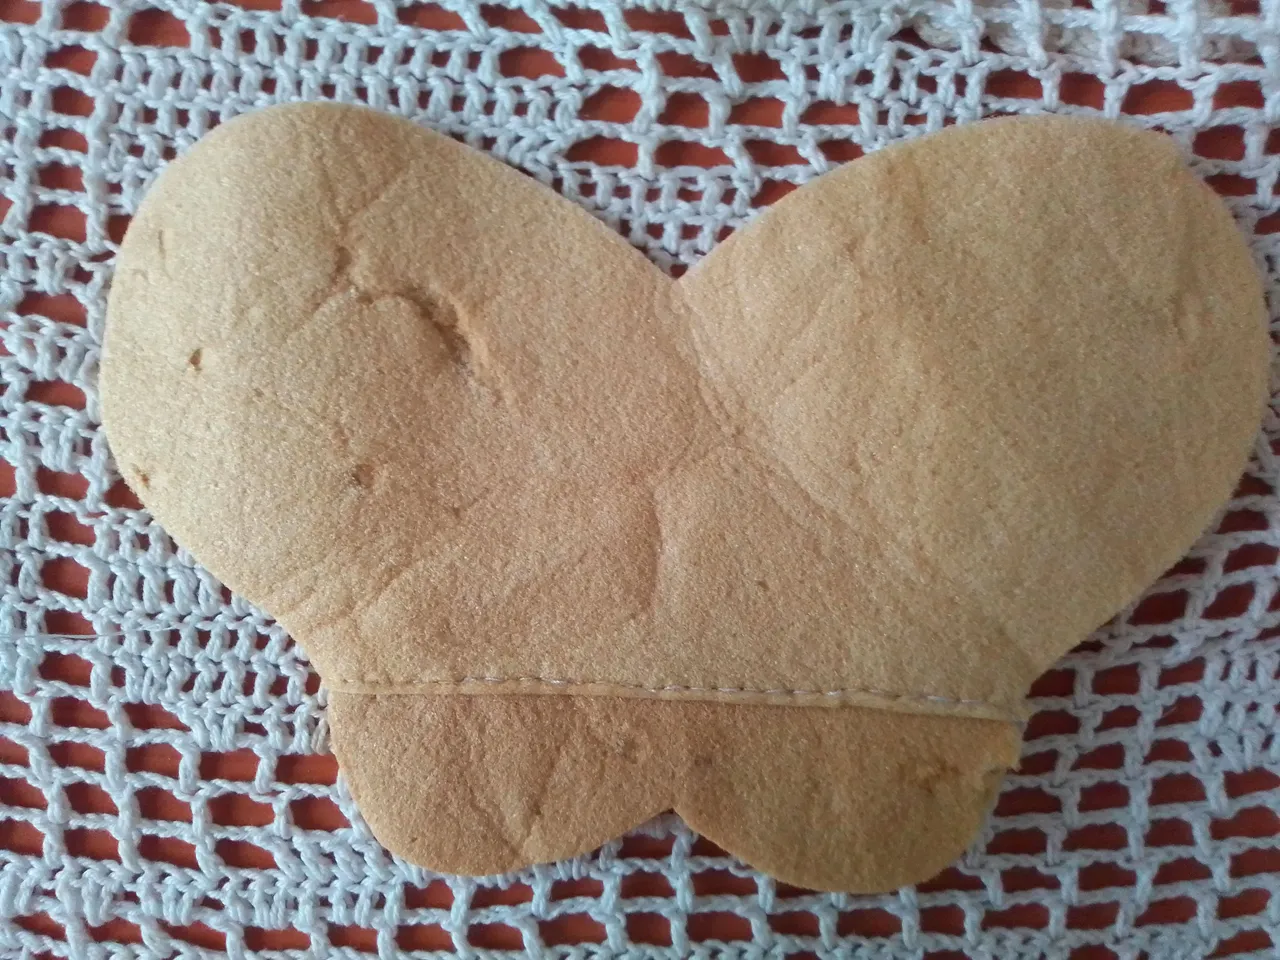
Luego lo que hacemos es colocar estar tres piezas una sobre otra, y unimos con una costura todo el contorno. Nos ayudamos colocando alfileres en la orillas para que estás no se muevan.
Step 04
Then what we do is place these three pieces one on top of the other, and sew the entire contour together. We help each other by placing pins on the edges so that they do not move.
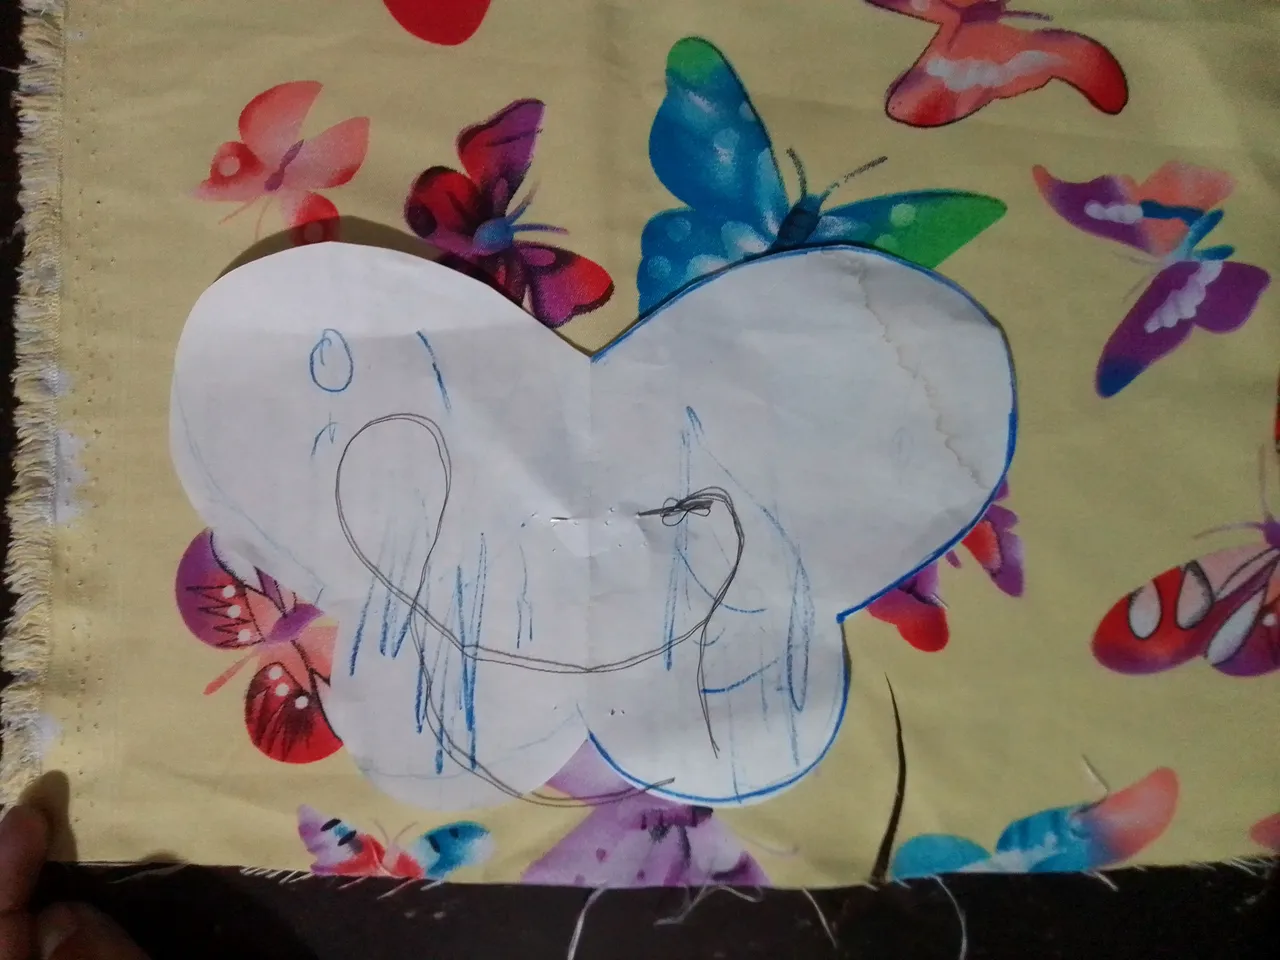
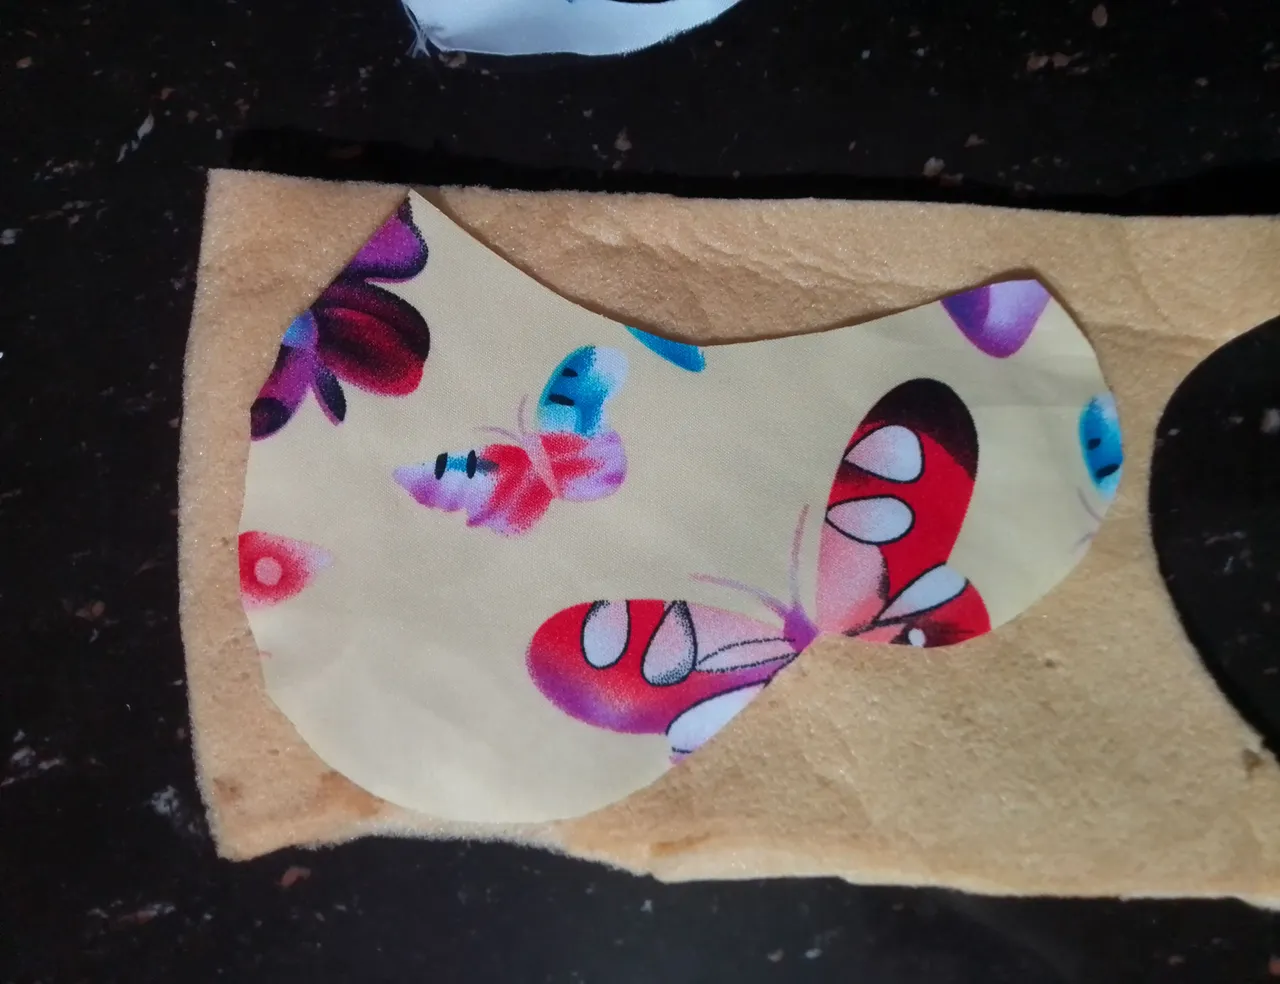
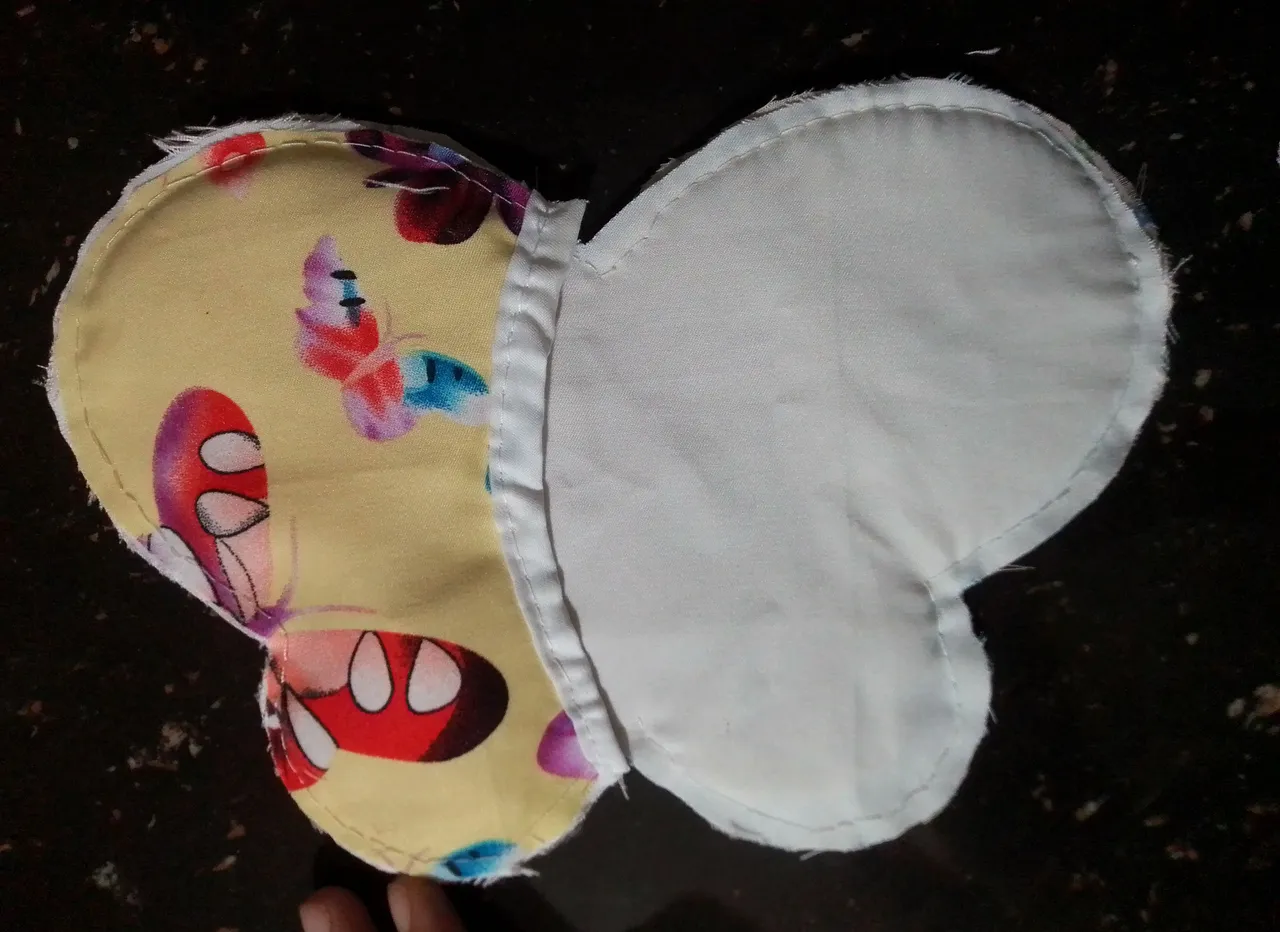
Paso 05
Seguidamente utilizamos el molde una vez más para marcar y contar una nueva pieza de mariposa, a diferencia que a está la dividimos por la mitad y cortamos una forma de media luna en el medio. Llegó la noche y aún así estaba decidida a terminar este proyecto, mi pequeña hija me dijo que le hacian falta unos ojitos a la mariposa, así que se los pintó al molde (risas).
Step 05
Next we use the template once more to mark and count a new butterfly piece, unlike this one we split it in half and cut a crescent shape out of the middle. Night came and still I was determined to finish this project, my little daughter told me that the butterfly needed some little eyes, so she painted them on the mold (laughs).
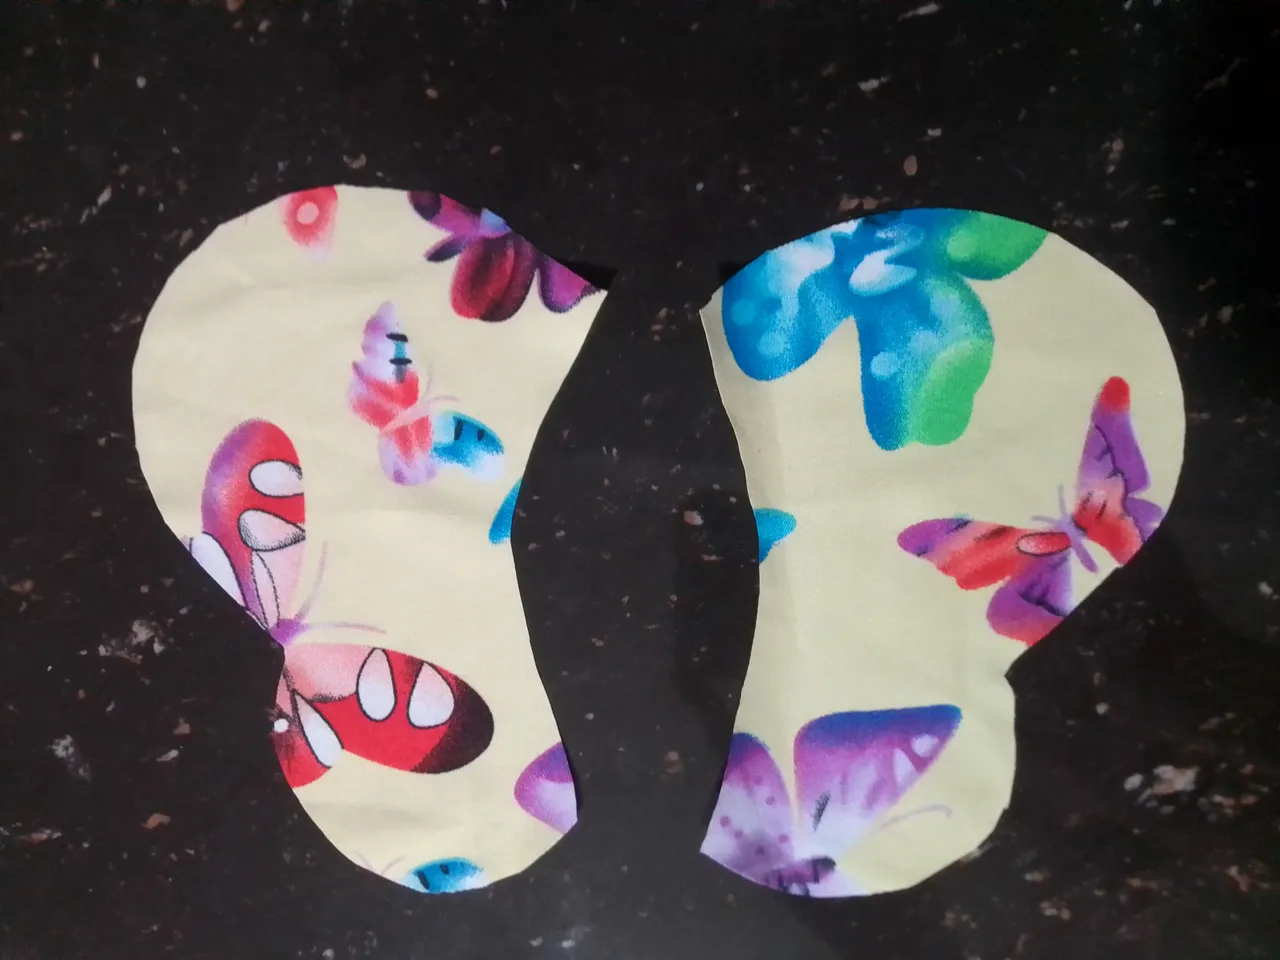
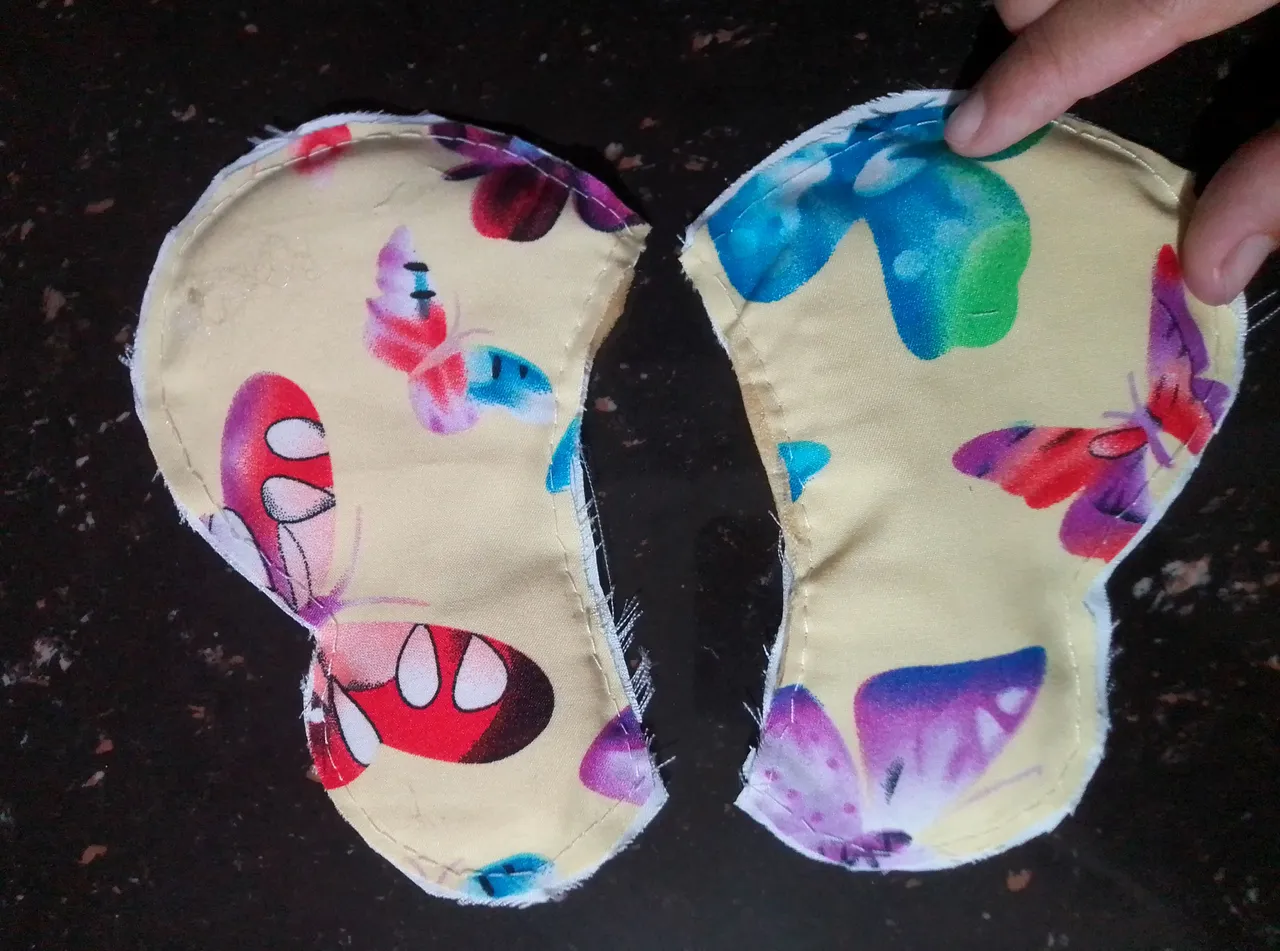
Paso 06
Haremos el mismo procedimiento de las piezas pasadas, cortamos la forma en la esponja y en otro color de tela y luego cosemos el contorno de ambas partes.
Step 06
We will do the same procedure of the previous pieces, we cut the shape in the sponge and in another color of fabric and then we sew the outline of both parts.
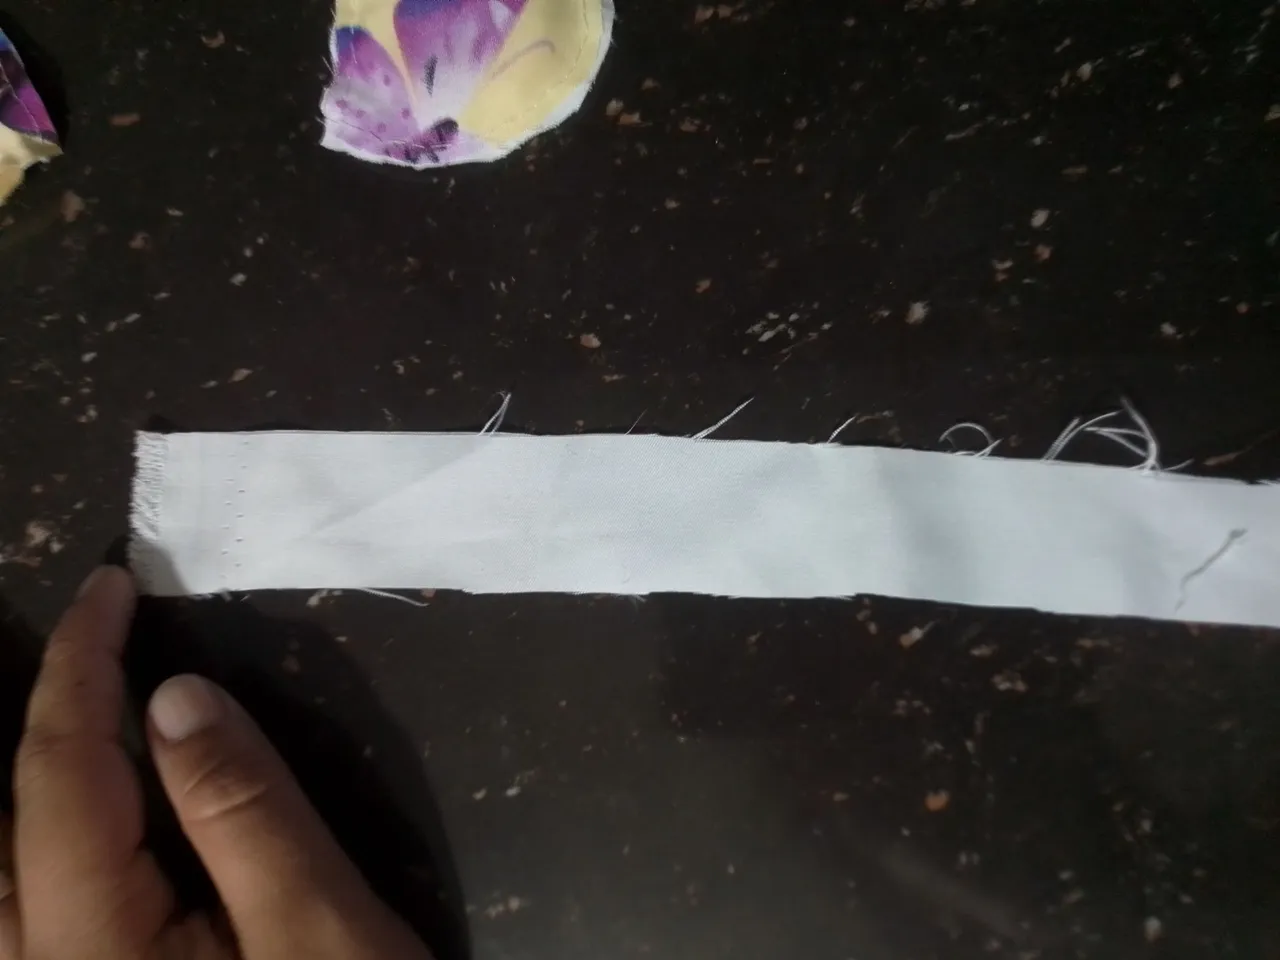
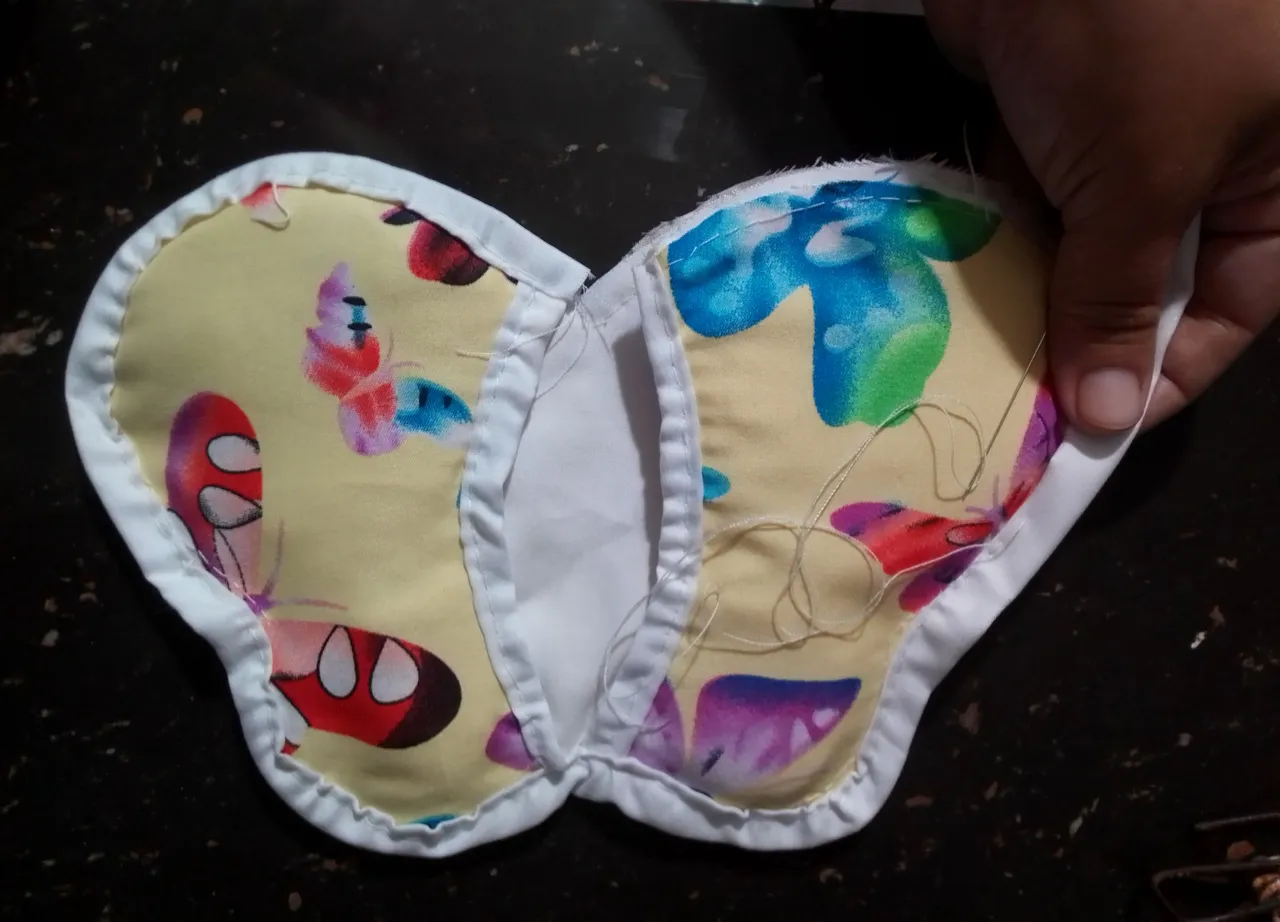
Paso 07
Listas nuestras partes de mariposa, es momento de cubrir los bordes, por lo tanto, el siguiente paso es cortar un tira larga combinando color de tela que usamos de base, y doblamos para el hacer el dobladillo de las orillas, iniciando por el corte del centro de la mariposa.
Step 07
Our butterfly parts are ready, it's time to cover the edges, therefore, the next step is to cut a long strip combining the color of the fabric that we used as a base, and fold, to make hem the edges, starting with the cut in the center of the butterfly.
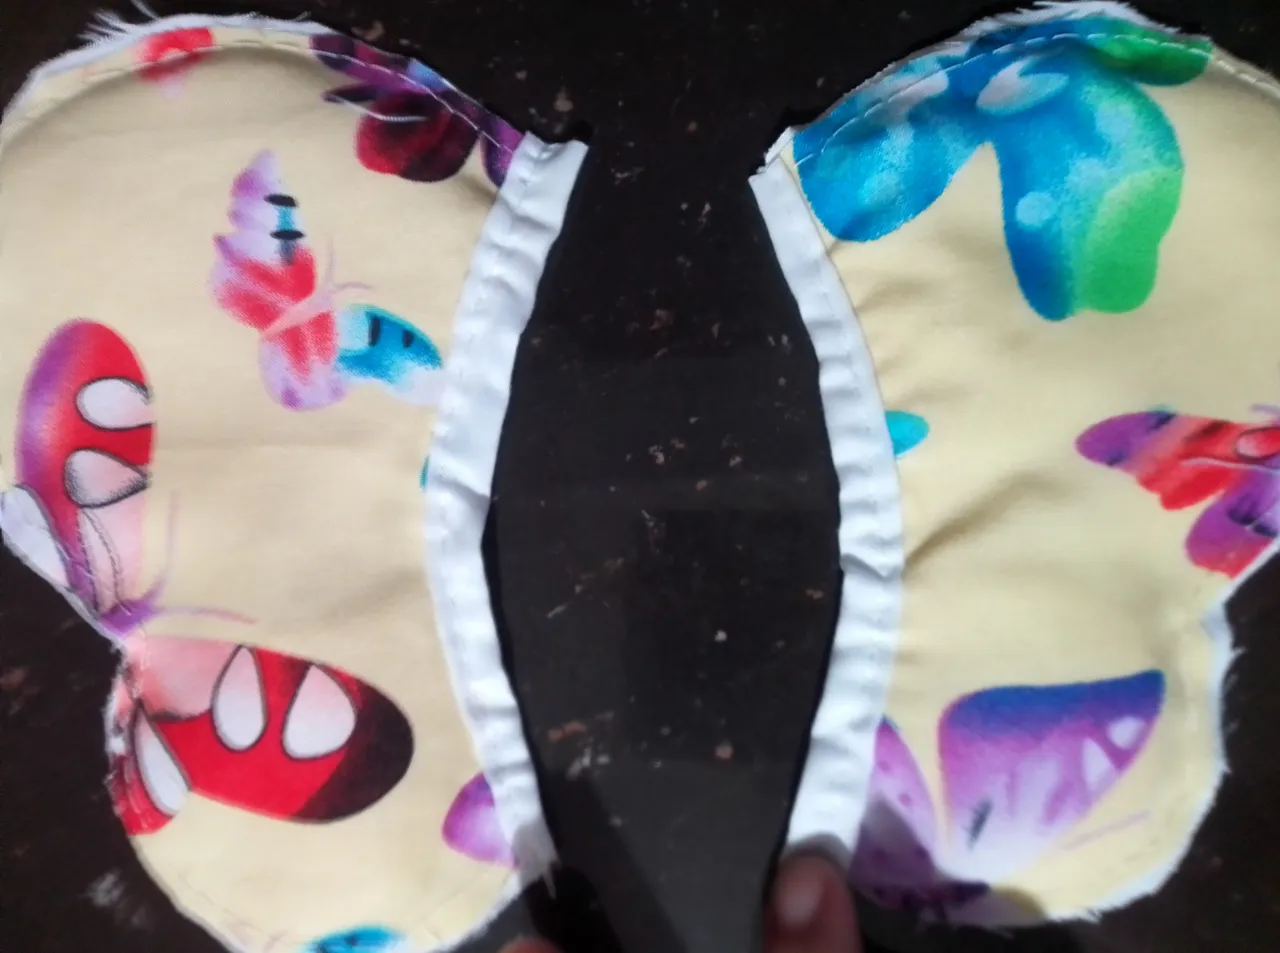
Paso 08
Con una costura externa, comienzo a armar nuestra mariposa colocando las partes una sobre otra, y con una tira más larga realizo los bordes de toda la agarradera.
Step 08
With an external seam, I begin to assemble our butterfly by placing the parts one on top of the other, and with a longer strip I make the edges of the pot holders.
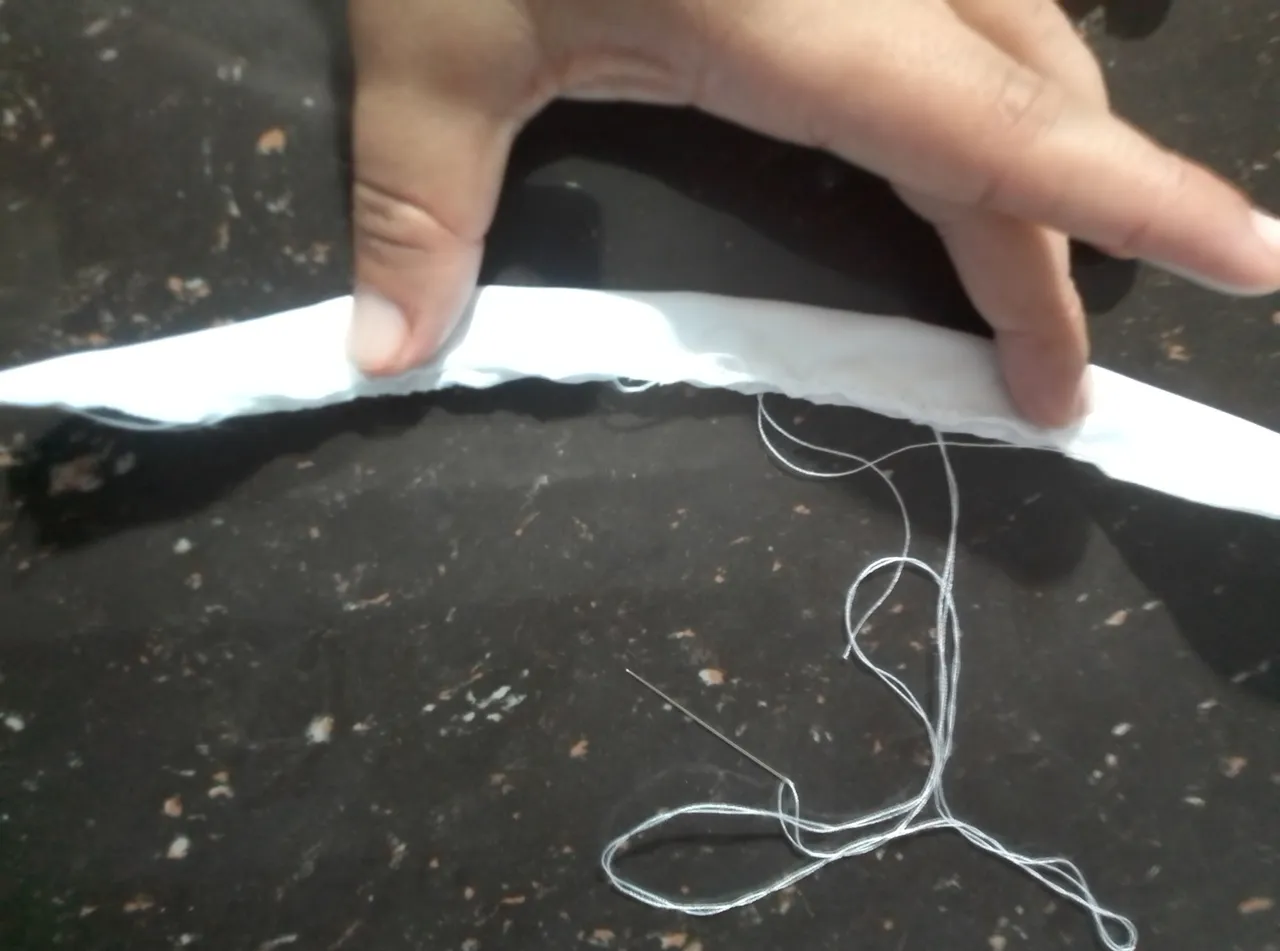
Paso 09
Finalmente realizo un tirillo y agrego con una costura en la parte trasera de la agarradera como colgante. De esta manera, luego de utilizarla puede decorar el lugar donde la coloques.
Step 09
Finally I make a strap, and add a seam to the back of the pot holders , as a pendant. In this way, after using it you can decorate the place where you place it.

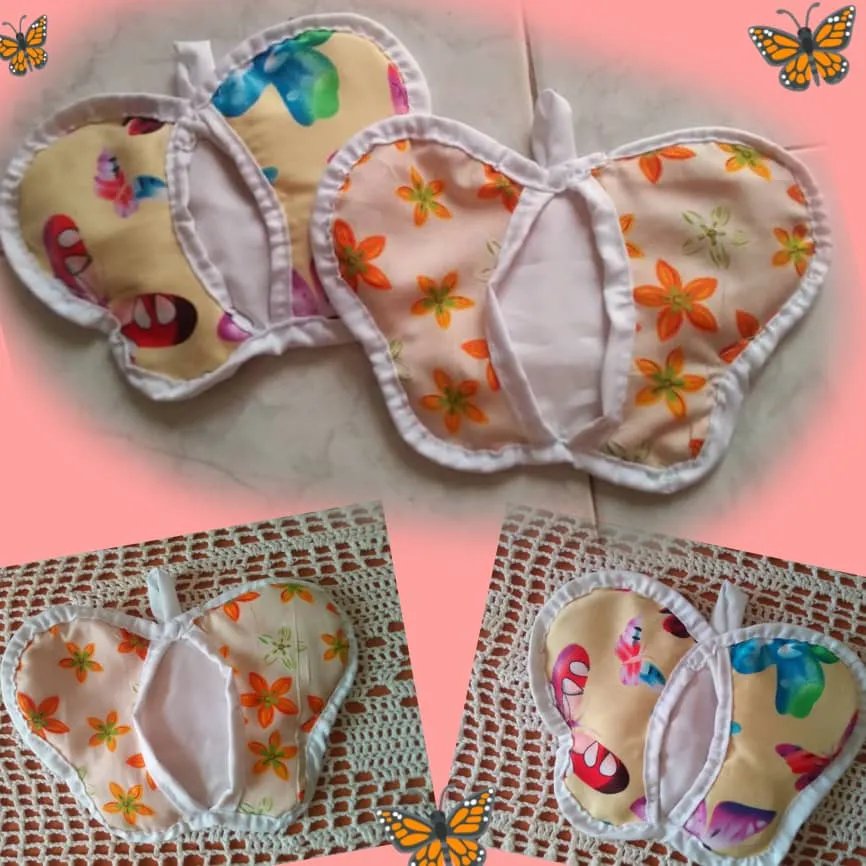
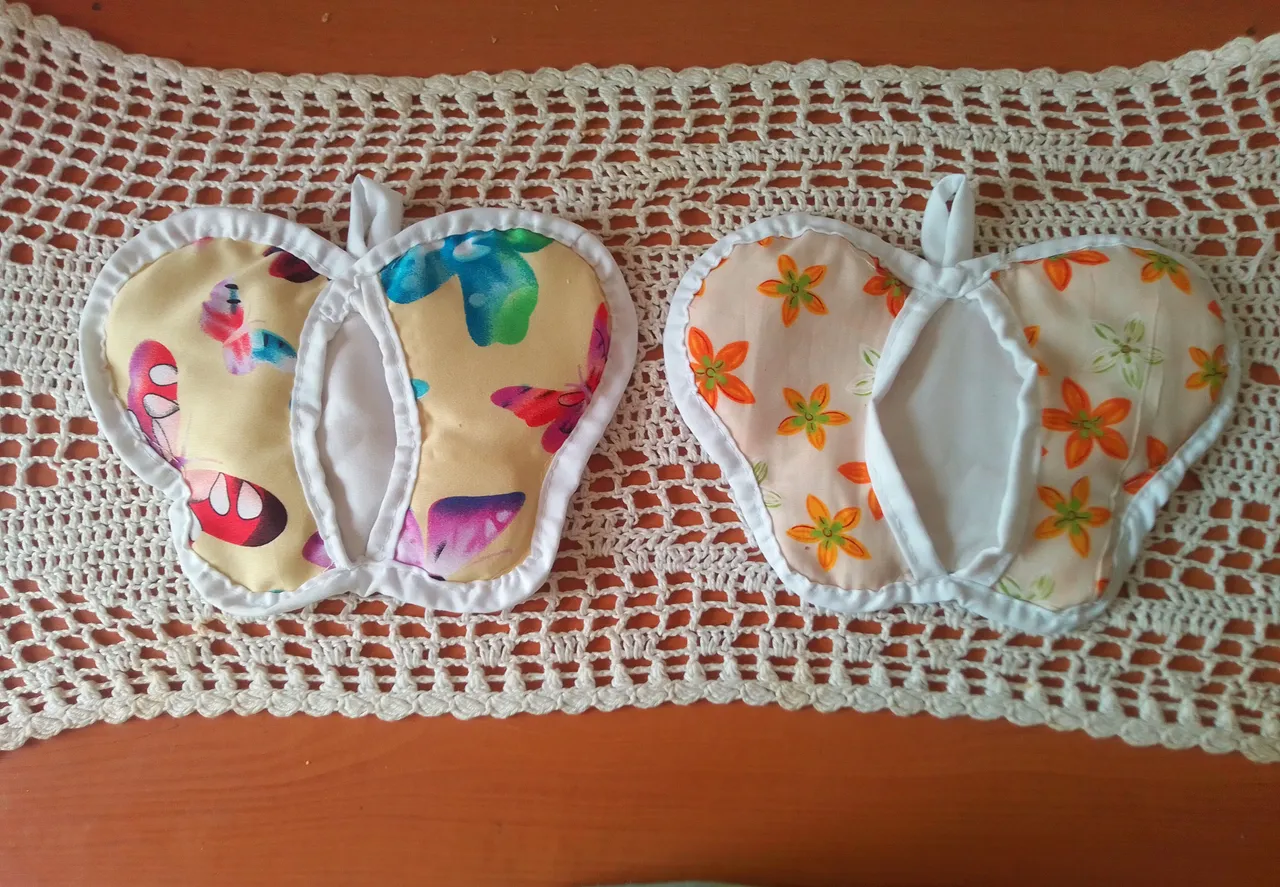
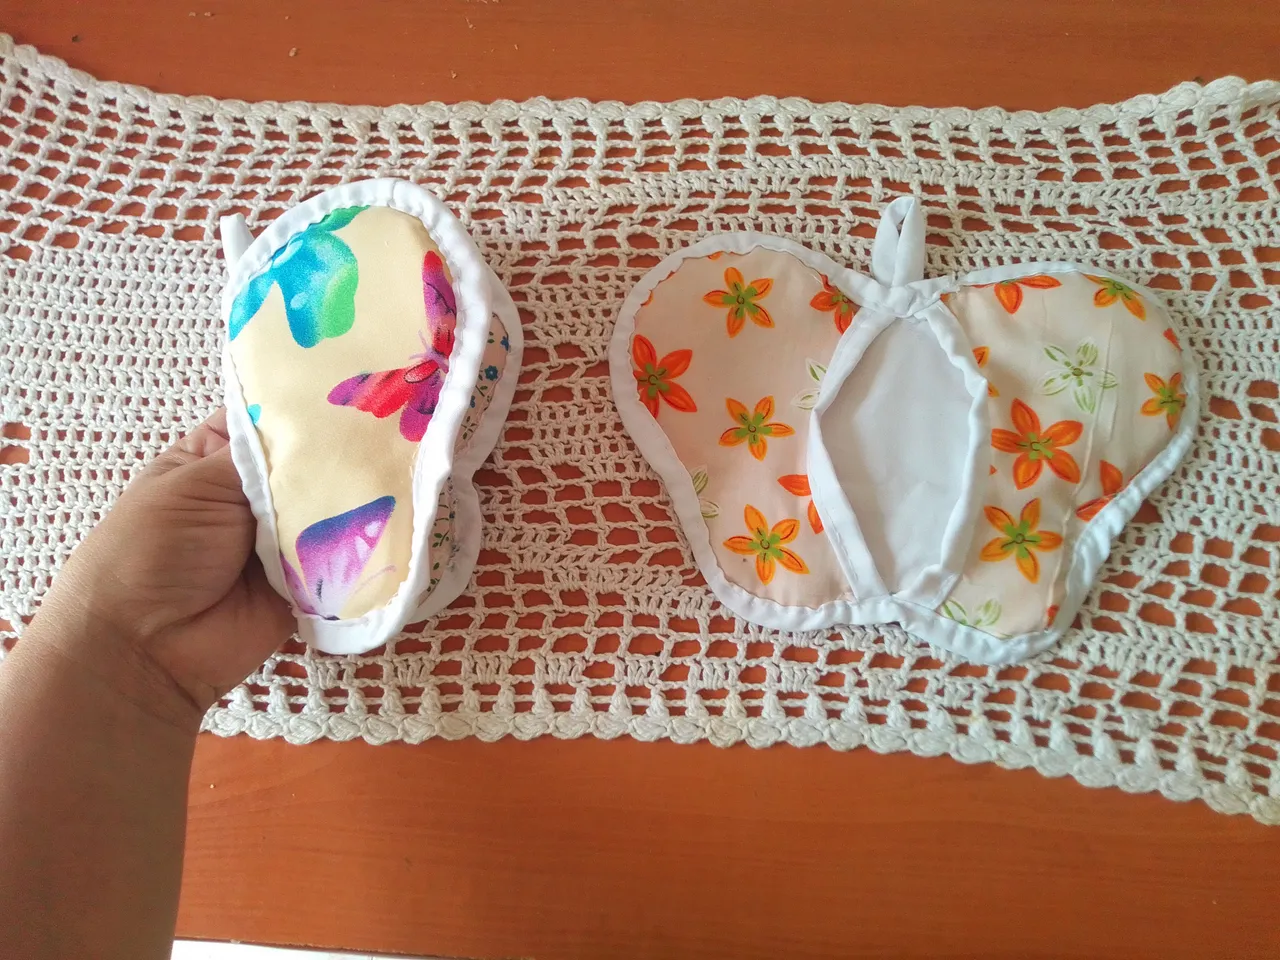
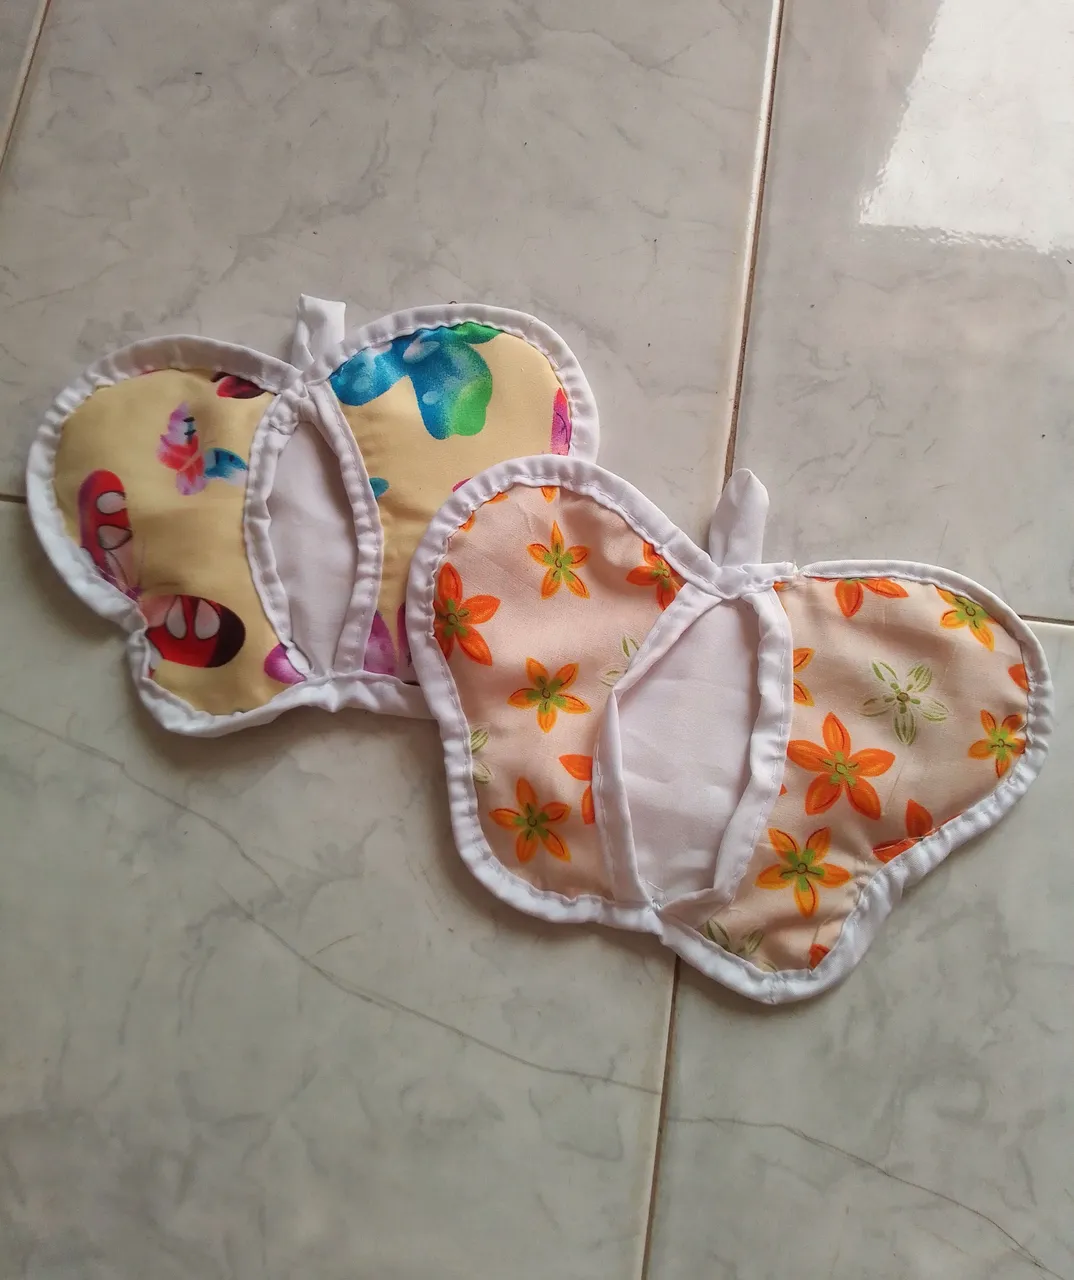
Resultado!
Listo mis bellos amigos! Aquí les muestro este hermoso resultado. Difícilmente es hacer algo bien cuando nos encontramos desanimados, afortunadamente este concurso este concurso dió bastante tiempo y aún sigue vigente, y hoy sin duda puedo decir que coser a parte de ser una pasión, es una terapia, que permite despejar la mente de lo que ha sucedido o lo que está sucediendo a tu alrededor. Espero te haya gustado mi trabajo el día de hoy!
Ready my beautiful friends! Here I show you this beautiful result. It is difficult to do something well when we are discouraged, fortunately this contest gave a lot of time and is still valid, and today without a doubt I can say that sewing, apart from being a passion, is a therapy, which allows us to clear the mind of what has happened or what is happening around you. I hope you liked my work today!
 .
.☺ Gracias por tu linda visita a mi post! ☺
Agradecida con los organizadores de este hermoso consurso, no olvides comentar y decirme que te parece esta idea, me despido deseandoles mucho éxito, mucha suerte y que Dios les bendiga de una manera especial y grande.! Invito a participar a las hermosas hivers @yolimarg y @carolycesar15. Hasta una próxima oportunidad!.
Grateful to the organizers of this beautiful contest, do not forget to comment and tell me what you think of this idea, I say goodbye wishing you much success, good luck and God bless you in a special and great way. ! I invite the beautiful hivers @yolimarg and @carolycesar15 to participate. Until next time!.