🌼 BIENVENIDOS A MI BLOG | WELCOME TO MY BLOG 🌼
Saludos, gente linda de hive, espero se encuentren de maravilla. El día de hoy les comparto un tutorial para realizar un tapabocas con bordado de abejitas y margaritas. Está muy hermoso, fácil de hacer, además de que puedes aplicar este bordado en cualquier prenda que quieras! Ojalá y les guste!
Sin más que decir, comencemos.
Greetings, beautiful people of hive, I hope you are feeling wonderful. Today I'm sharing with you a tutorial to make an embroidered face mask with bees and daisies. It is very beautiful, easy to make, plus you can apply this embroidery on any garment you want! I hope you like it!
Without further ado, let's get started.
Materiales | Materials:
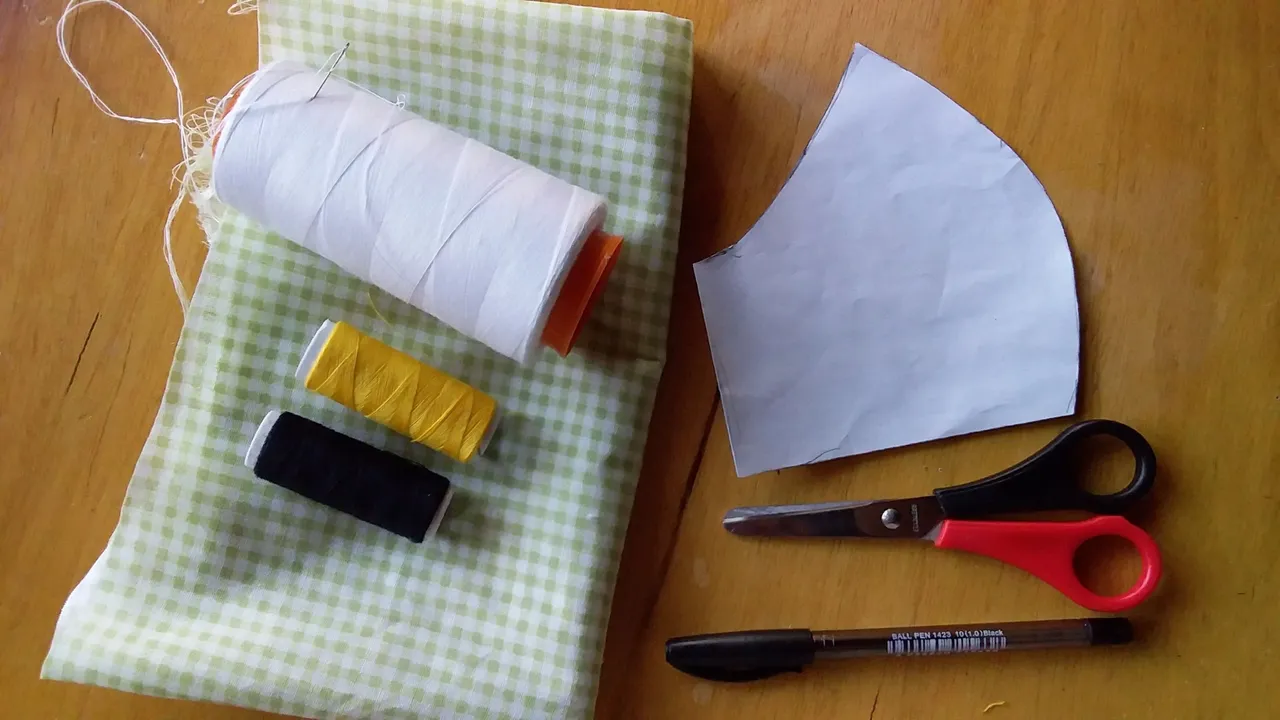
| Tela | Tijeras | Hilo negro, blanco y amarillo |
|---|---|---|
| Lápiz | Aguja | Patrón (puedes sacarlo de tu tapabocas habitual) |
| Fabric | Scissors | Black, white and yellow thread |
|---|---|---|
| Pencil | Needle | Pattern (you can take it out of your usual face mask) |
🌼 Proceso | Process 🌼
Paso 1 | Step 1
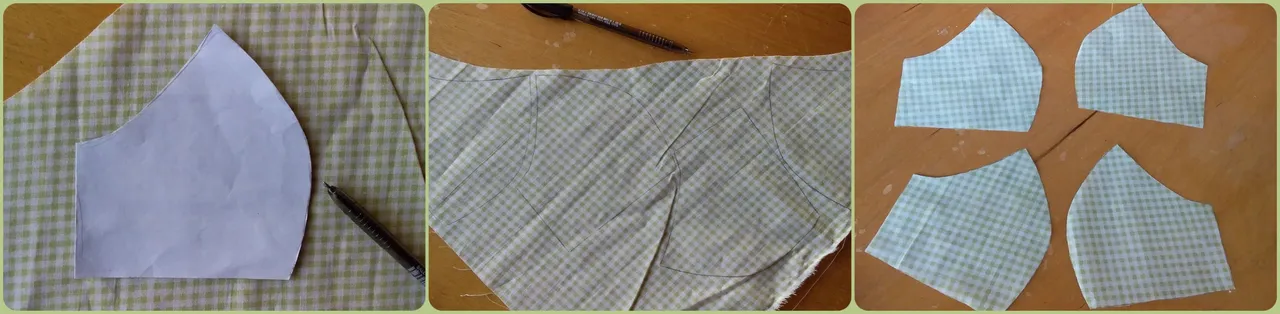
Lo primero será ubicar el patrón sobre la tela, marcar con un lápiz y cortar.
Deben ser 4 piezas en total, 2 para el exterior y 2 para el interior.
The first thing to do is to place the pattern on the fabric, mark with a pencil and cut.
There should be 4 pieces in total, 2 for the outside and 2 for the inside.
Paso 2 | Step 2
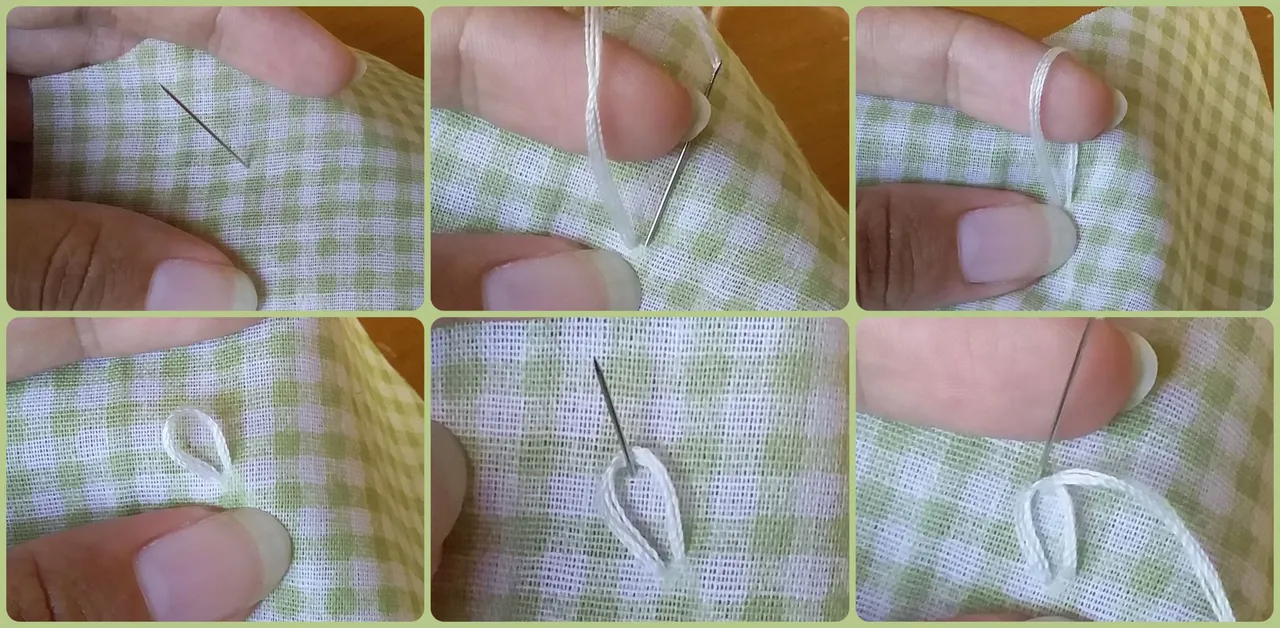
Tomaremos una de las piezas exteriores y bordaremos.
Para la margarita, ubicaremos el sitio donde la queremos y partiremos desde allí. Pasaremos la aguja e hilo muy cerca de donde iniciamos y con nuestro dedo índice, nos ayudaremos para darle forma de pétalo. Ajustamos el tamaño y para asegurarlo, haremos una pequeña puntada en la parte superior.
We will take one of the outer pieces and embroider.
For the daisy, we will locate the place where we want it and we will start from there. We will pass the needle and thread very close to where we started and with our index finger, we will help us to give it a petal shape. Adjust the size and to secure it, we will make a small stitch at the top.
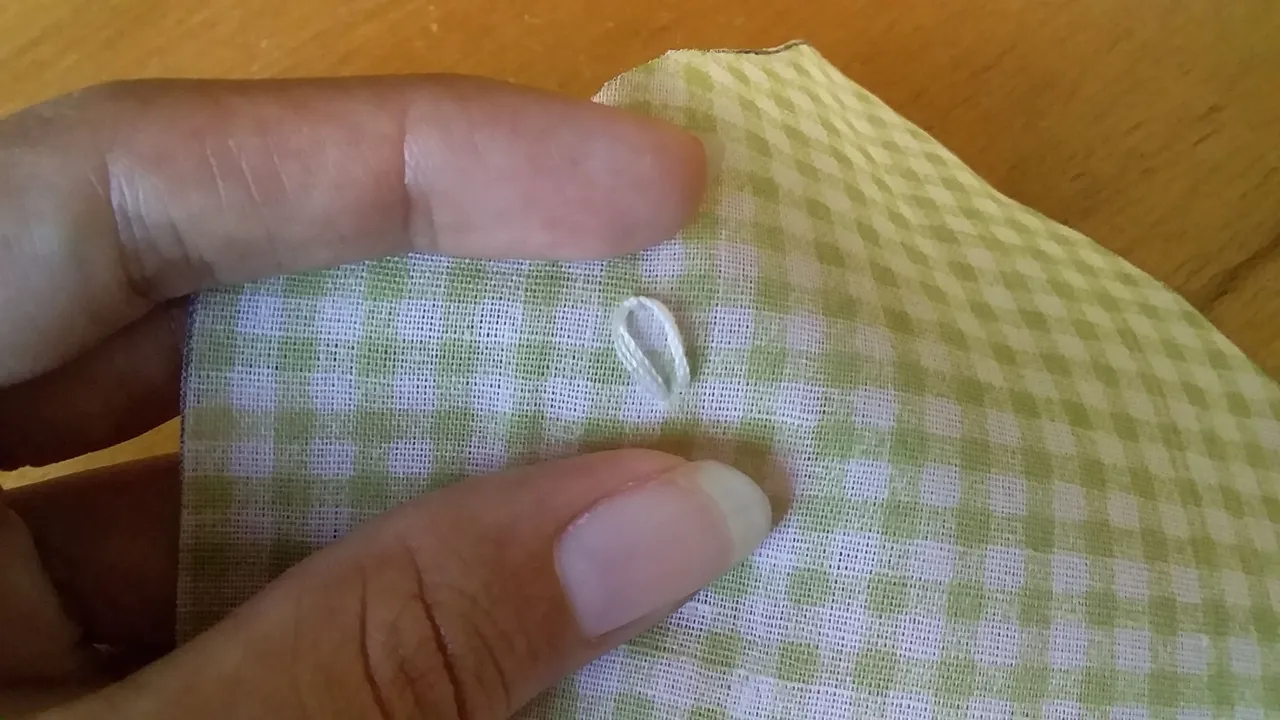
Deberá verse algo así.
It should look something like this.
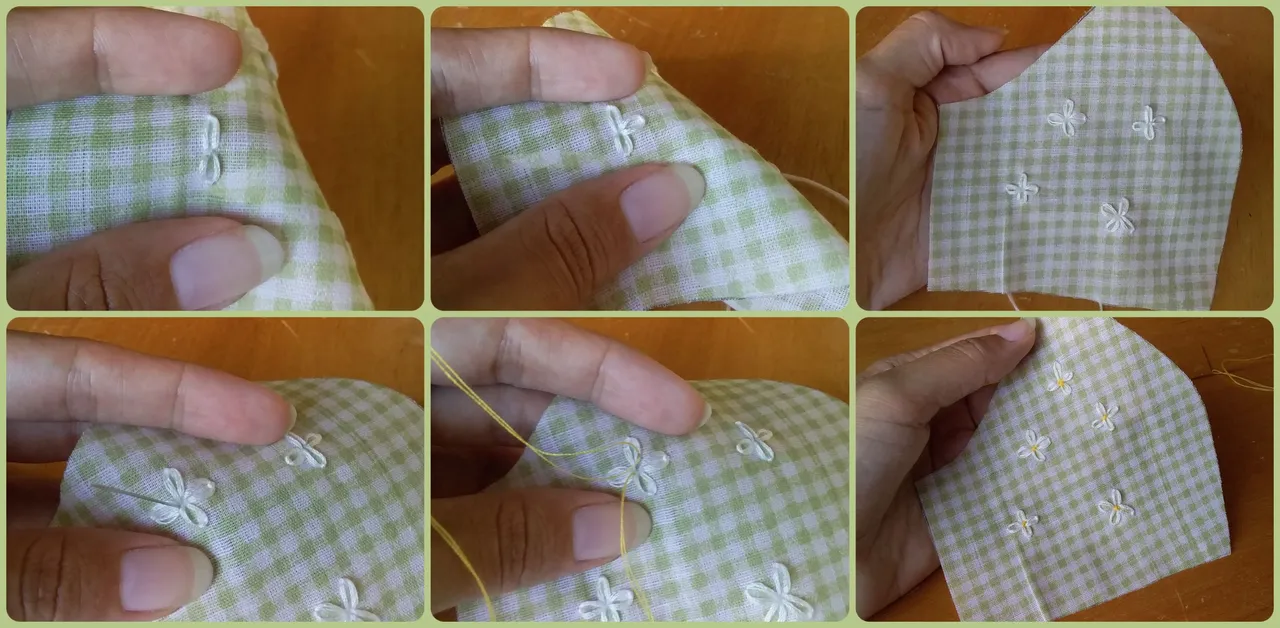
Repetiremos el proceso hasta tener 4 pétalos por flor y con un poco de hilo amarillo, le haremos unas puntadas en el centro.
We will repeat the process until we have 4 petals per flower and with a little yellow thread, we will stitch some stitches in the center.
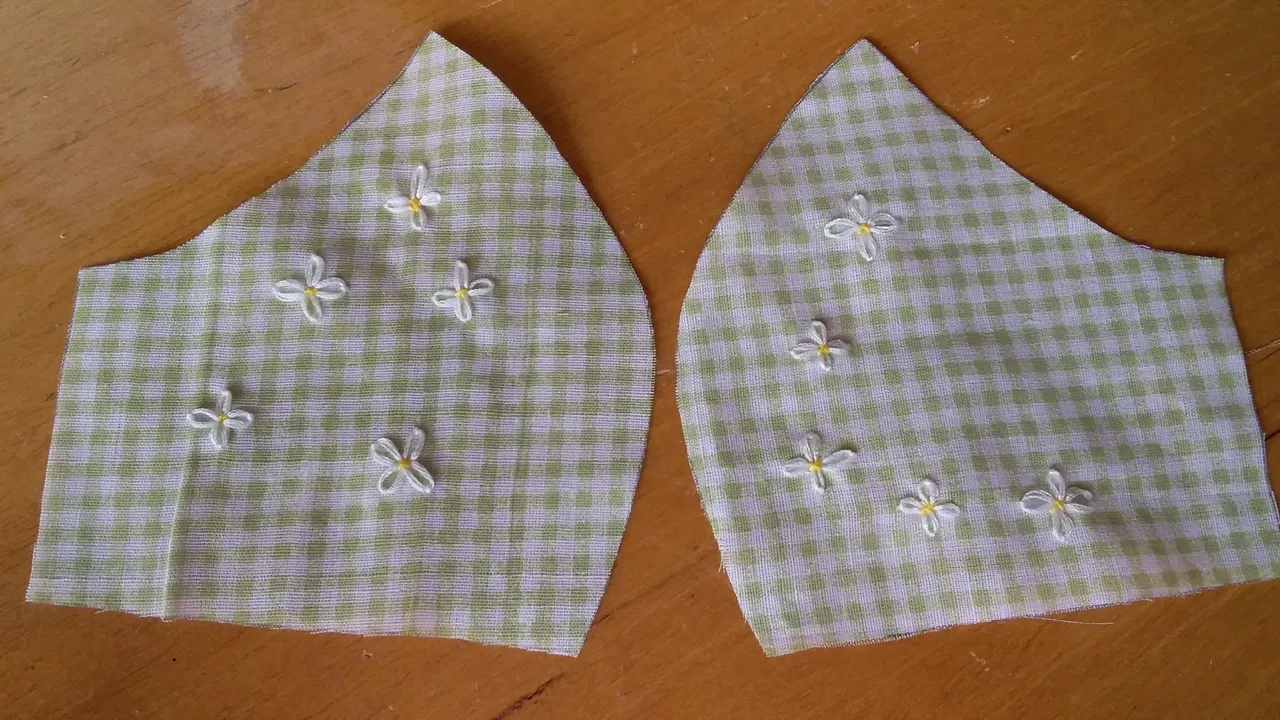
Y listas nuestras margaritas!
And ready our daisies!
Paso 3 | Step 3
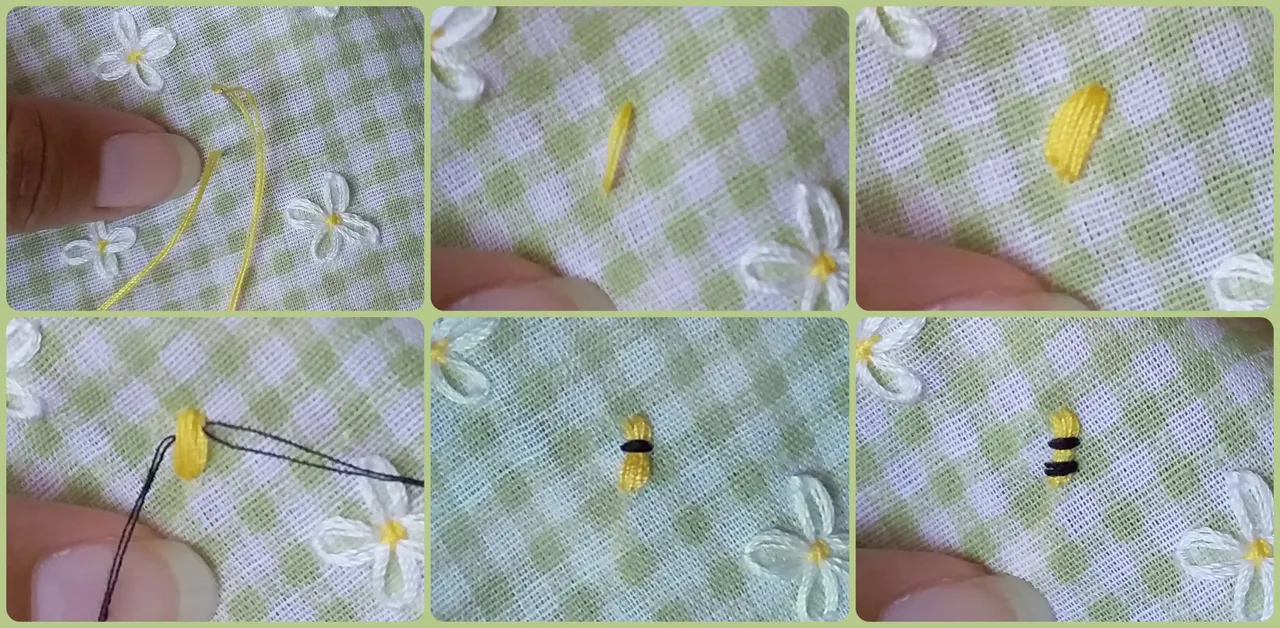
En el caso de las abejas, es mucho más simple. Con el amarillo haremos varias puntadas una al lado de la otra hasta que se vea tupido y con el hilo negro unas líneas horizontales.
In the case of the bees, it is much simpler. With the yellow thread we will make several stitches side by side until it looks dense and with the black thread we will make horizontal lines.
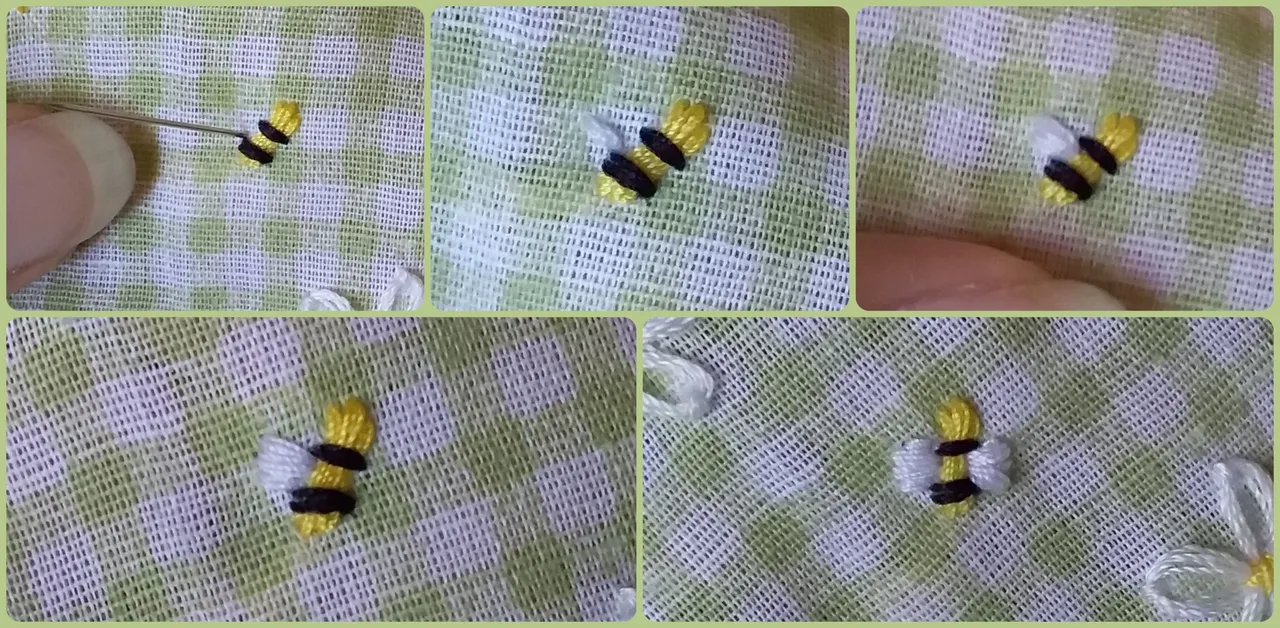
Para las alas es el mismo proceso: puntadas horizontales, una al lado de la otra hasta que se vea tupido.
For the wings it is the same process: horizontal stitches, side by side until it looks bushy.
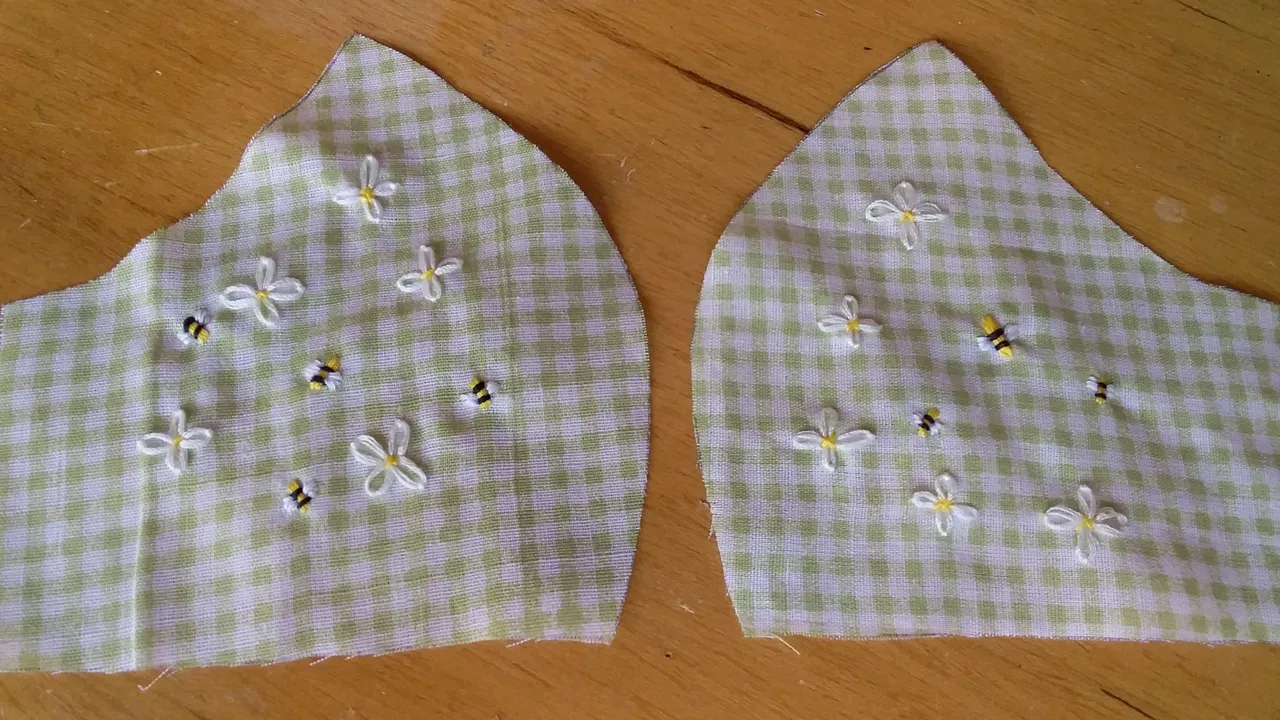
Listas nuestras abejitas!
Our little bees are ready!
Paso 4 | Step 4
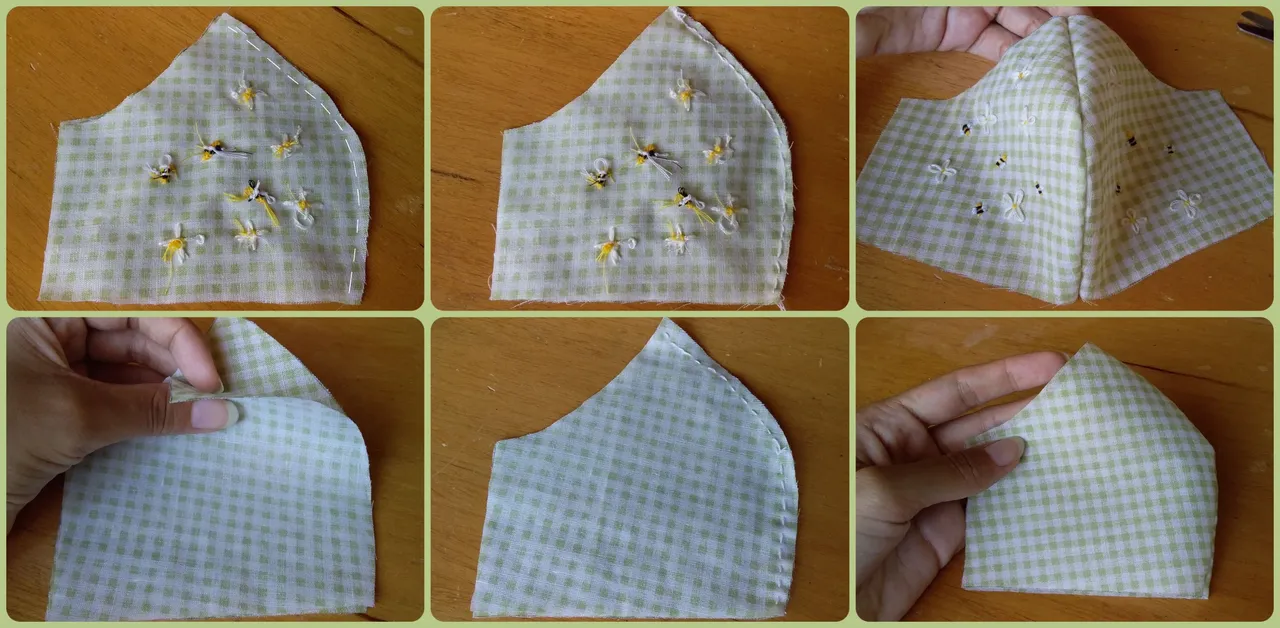
Lo siguiente será coser las piezas exteriores y luego las interiores, ambas con el derecho de la tela hacia adentro.
The next step is to sew the outer pieces and then the inner pieces, both with the fabric right side in.
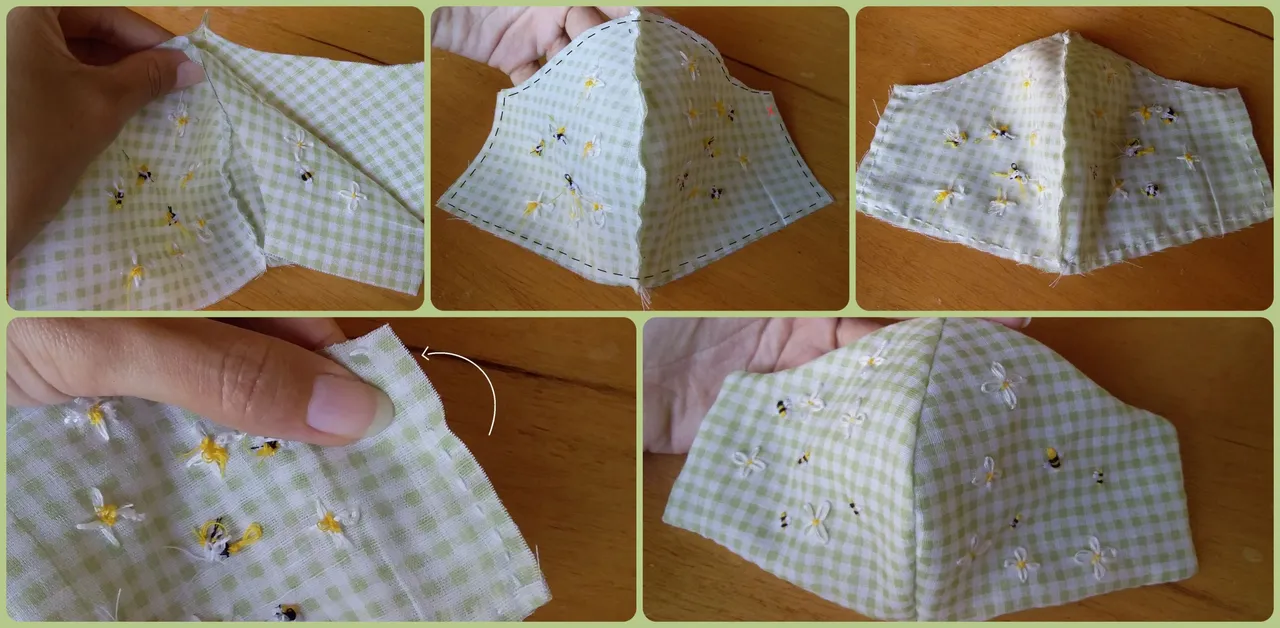
Juntaremos todas las piezas (nuevamente, con el derecho hacia adentro) y coseremos por todo alrededor, exceptuando 1.5 cm que nos servirá para dar vuelta al tapabocas.
We will join all the pieces together (again, right side in) and sew all the way around, except for 1.5 cm that will be used to turn the face mask.
Paso 5 | Step 5
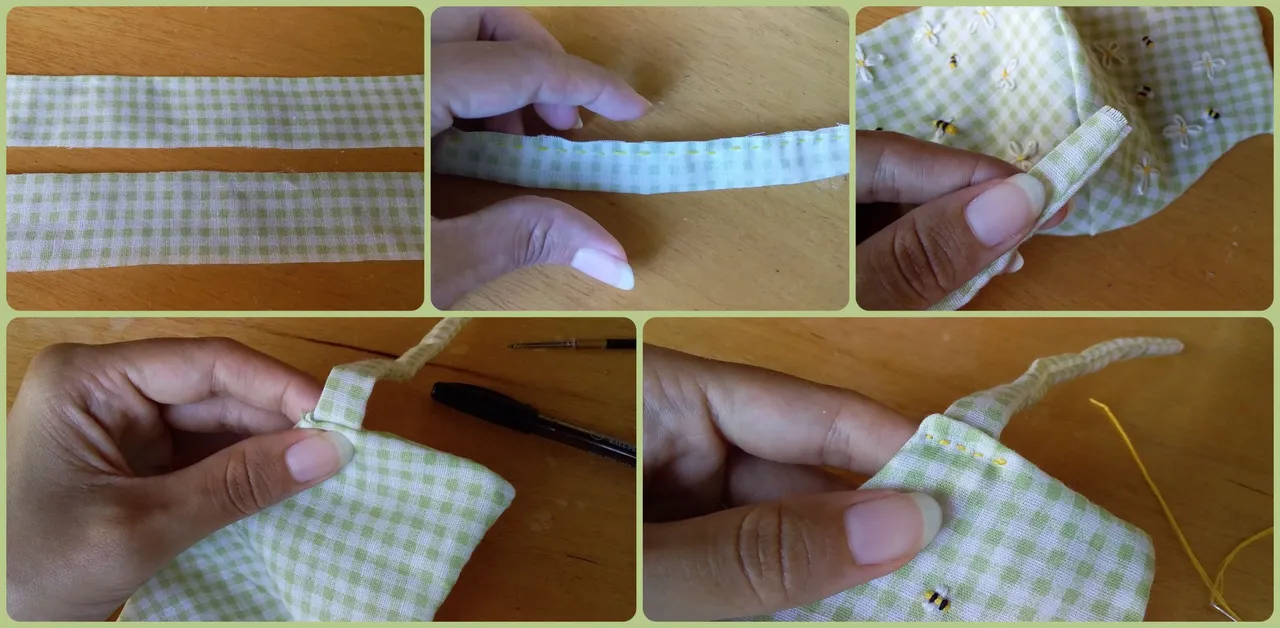
Por último cortaremos algo de tela para hacer las tiras. Cosemos, damos vuelta, ubicamos y volvemos a coser.
Nota: en este paso no olvides tomar la medidas de largo para la tira
Finally we will cut some fabric to make the strips. We sew, turn, position and sew again.
Note: in this step don't forget to take the length measurements for the strip.
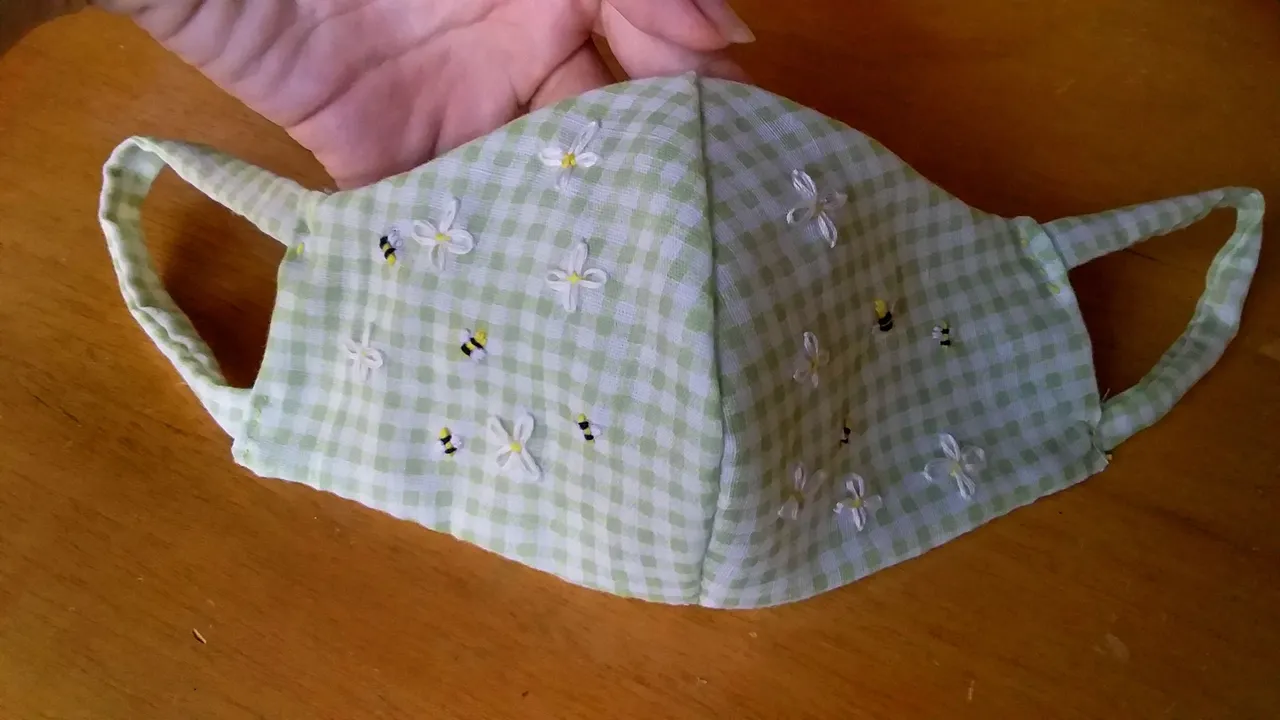
y listo, ya tenemos nuestro tapabocas!
and that's it, we now have our face mask
🌼 Resultado | Result 🌼
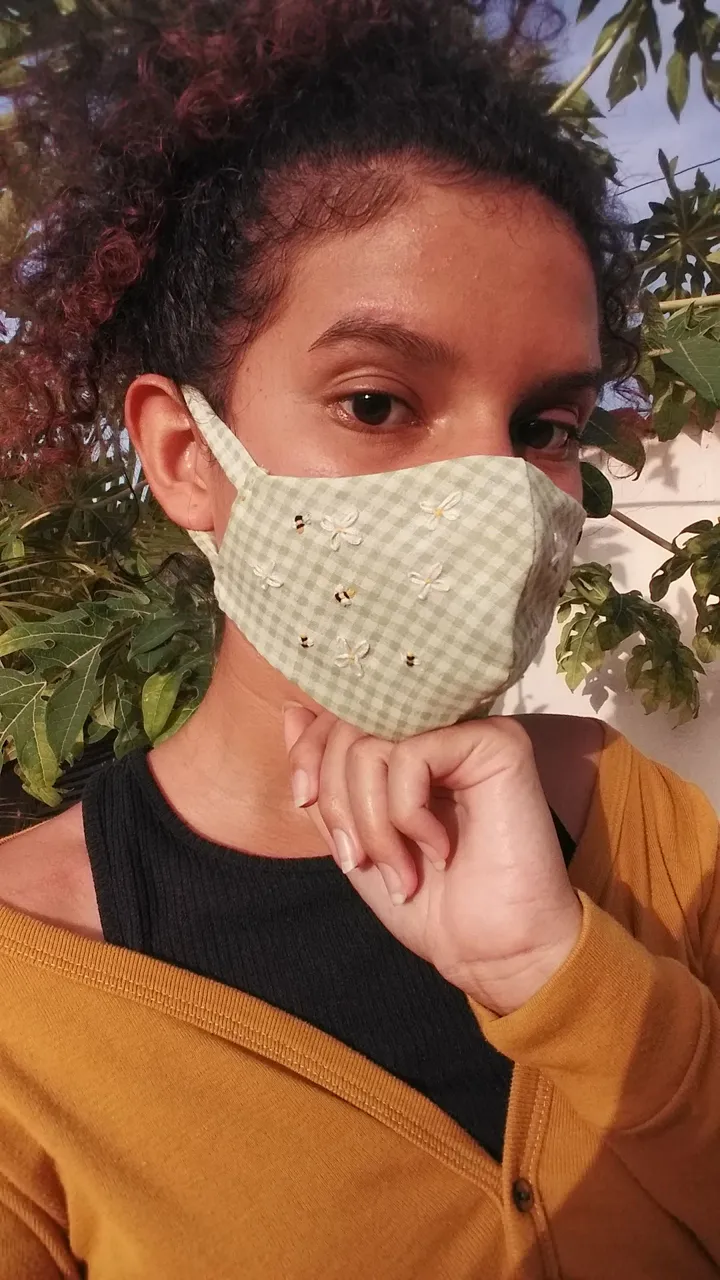
Espero les haya gustado mucho y que se animen a realizarlo en casa!
I hope you liked it a lot and that you are encouraged to make it at home!