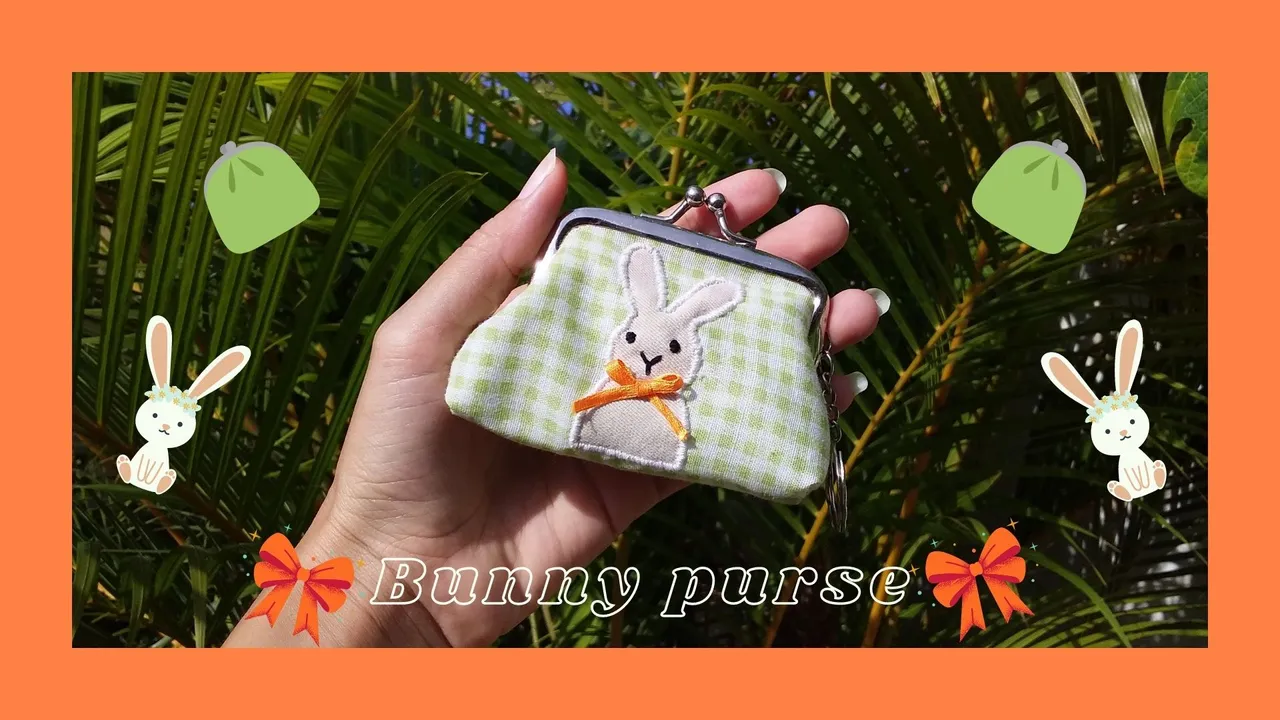
👛 BIENVENIDOS A MI BLOG | WELCOME TO MY BLOG 👛
Saludos, gente linda de needleworkmonday, espero se encuentren de maravilla. El día de hoy compartiré con ustedes un tutorial para renovar algún monedero viejito que tengas en casa, que ya no uses y convertirlo en un lindo monedero de conejito. Está muy fácil de hacer, no se requiere de muchos materiales y el resultado es simplemente precioso.
Sin más que decir, comencemos.
Greetings, beautiful people of needleworkmonday, I hope you are feeling great. Today I will share with you a tutorial to renovate an old purse that you have at home, that you no longer use and turn it into a cute bunny purse. It's very easy to make, it doesn't require a lot of materials and the result is simply beautiful.
Without further ado, let's get started.
Materiales | Materials:
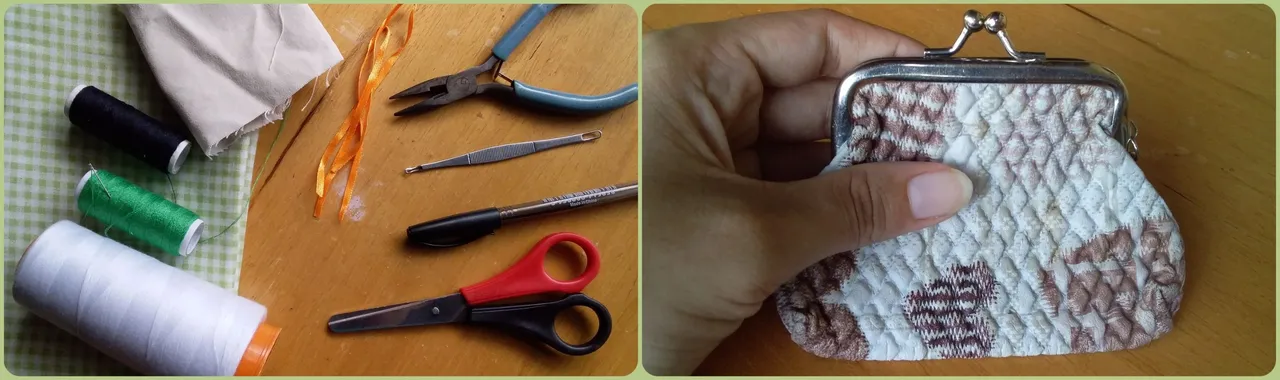
| Telas | Aguja e hilos | Cinta para decorar |
|---|---|---|
| Pinzas | Tijeras | Lápiz |
| Monedero viejo |
| Fabrics | Needle and thread | Ribbon for decoration |
|---|---|---|
| Pliers | Scissors | Pencil |
| Old purse |
🐰 👛 PROCESO | PROCESS 👛 🐰
Paso 1 | Step 1
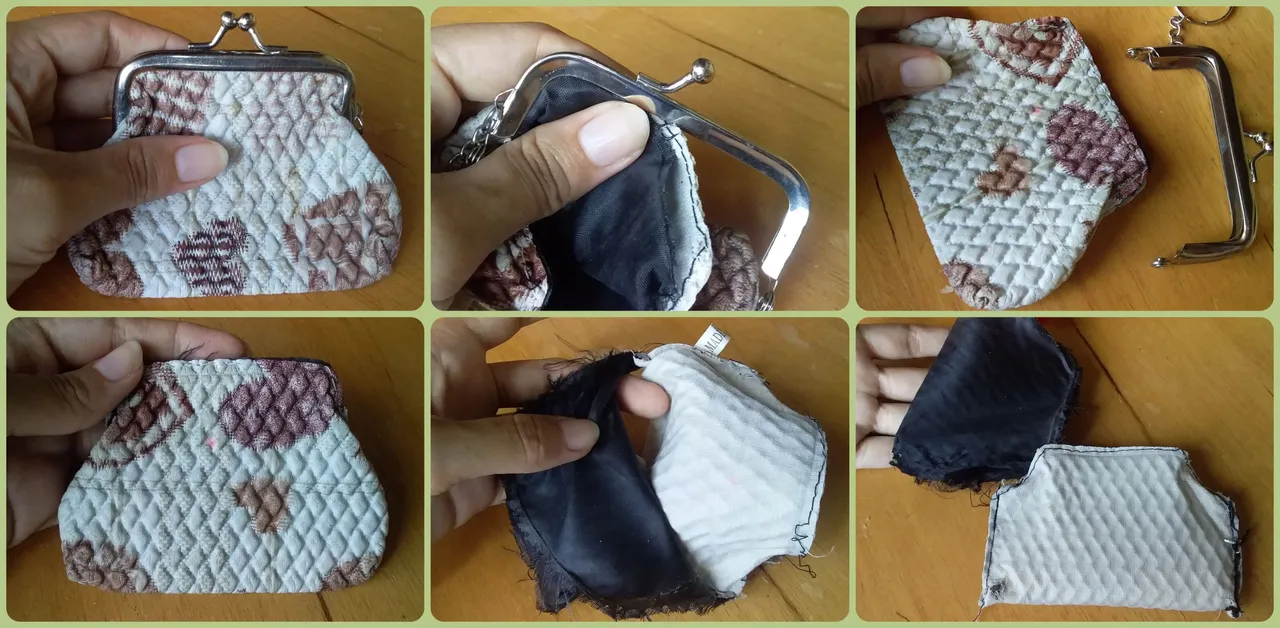
Lo primero que haremos será tomar el monedero viejo y desarmarlo completamente. Empezamos por separar la bolsita de la pieza de metal y luego quitaremos la tela de forro que trae por dentro.
The first thing we will do is to take the old purse and disassemble it completely. We start by separating the pouch from the metal piece and then remove the lining fabric inside.
Paso 2 | Step 2
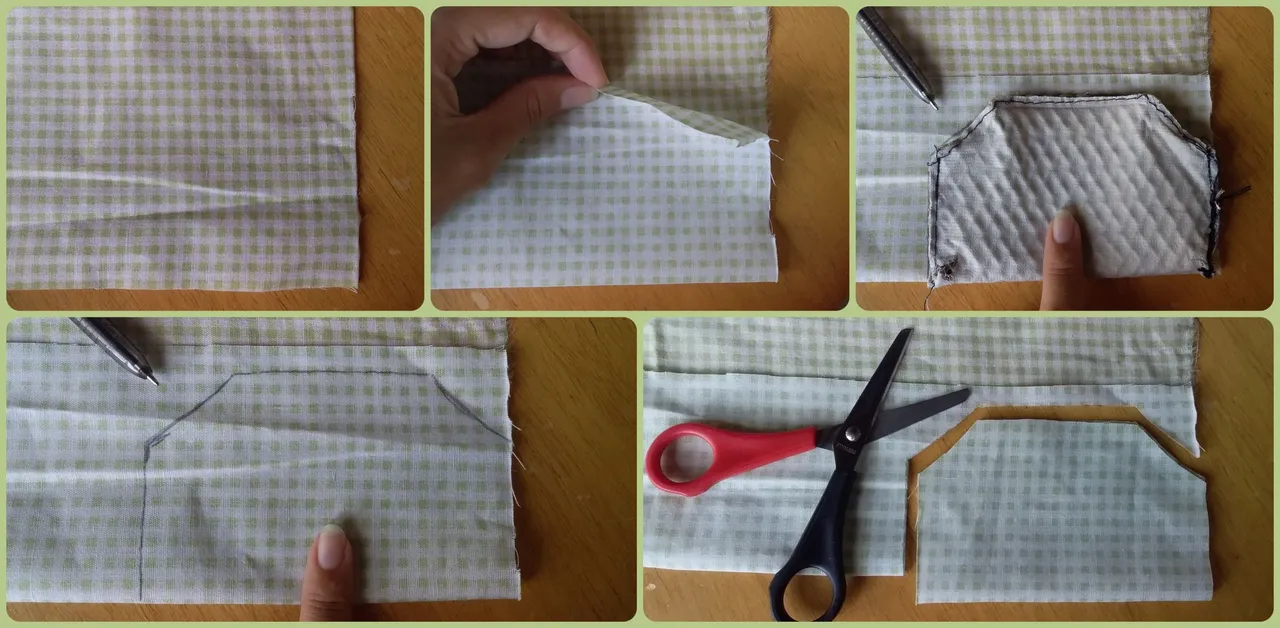
Lo siguiente será extender la tela y hacerle un doblez.
Luego, usaremos de patrón la bolsita que separamos anteriormente. La ubicaremos muy bien sobre la tela, marcaremos su contorno y cortaremos.
The next step is to extend the fabric and make a fold.
Then, we will use the bag we previously separated as a pattern. We will place it very well on the fabric, mark its contour and cut.
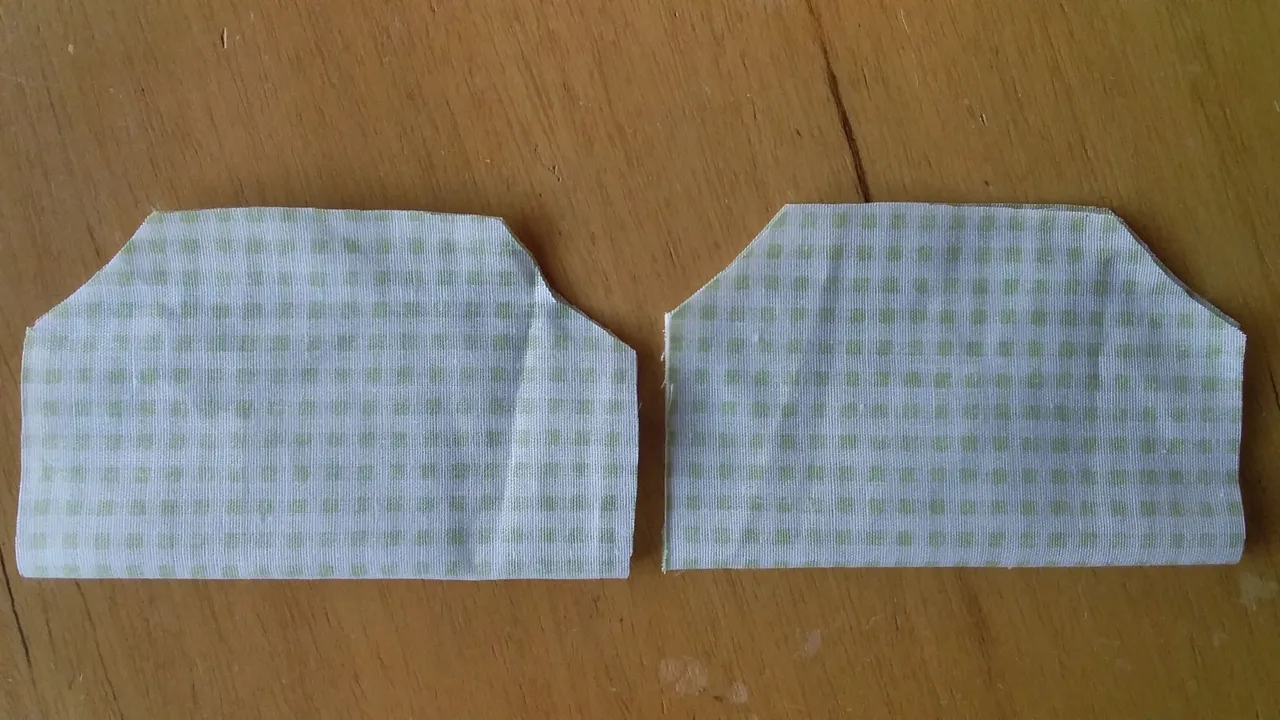
Repetiremos este proceso para así tener dos piezas iguales (una para el exterior y otra para el forro).
Repeat this process in order to have two equal pieces (one for the outside and one for the lining).
Paso 3 | Step 3
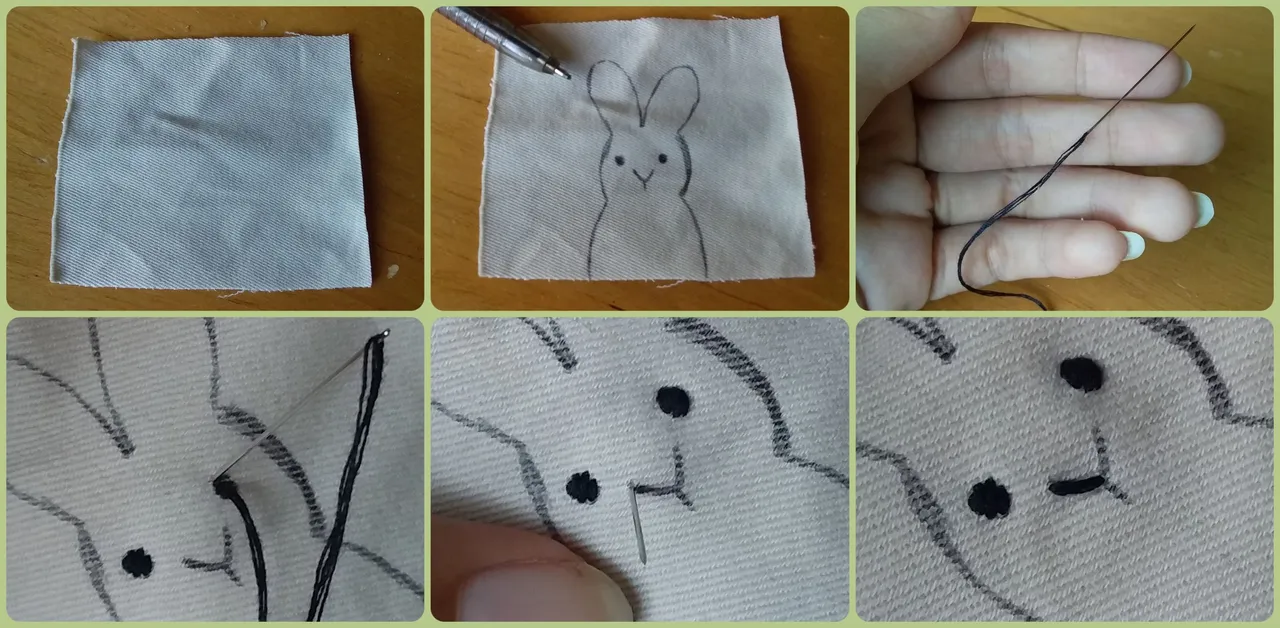
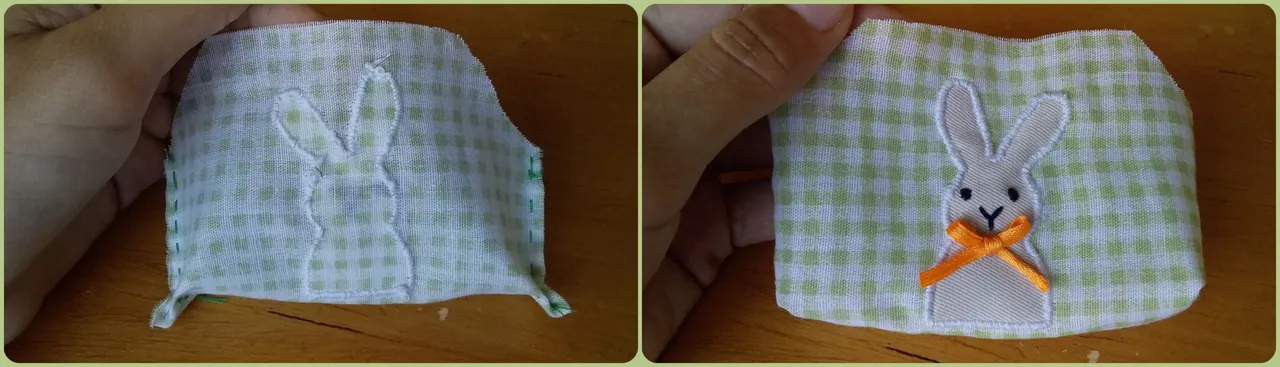
En un trozo pequeño de tela, dibujaremos a nuestro conejito o cualquier otro animal que nos guste y empezaremos a bordar. En mi caso el diseño que escogí fue bastante sencillo, por lo que solo tuve que bordar los ojitos y la nariz, pero si tu lo prefieres, puedes hacer algo un poco más elaborado.
On a small piece of fabric, we will draw our bunny or any other animal you like and start embroidering. In my case, the design I chose was quite simple, so I only had to embroider the eyes and the nose, but if you prefer, you can do something a little more elaborate.
Paso 4 | Step 4
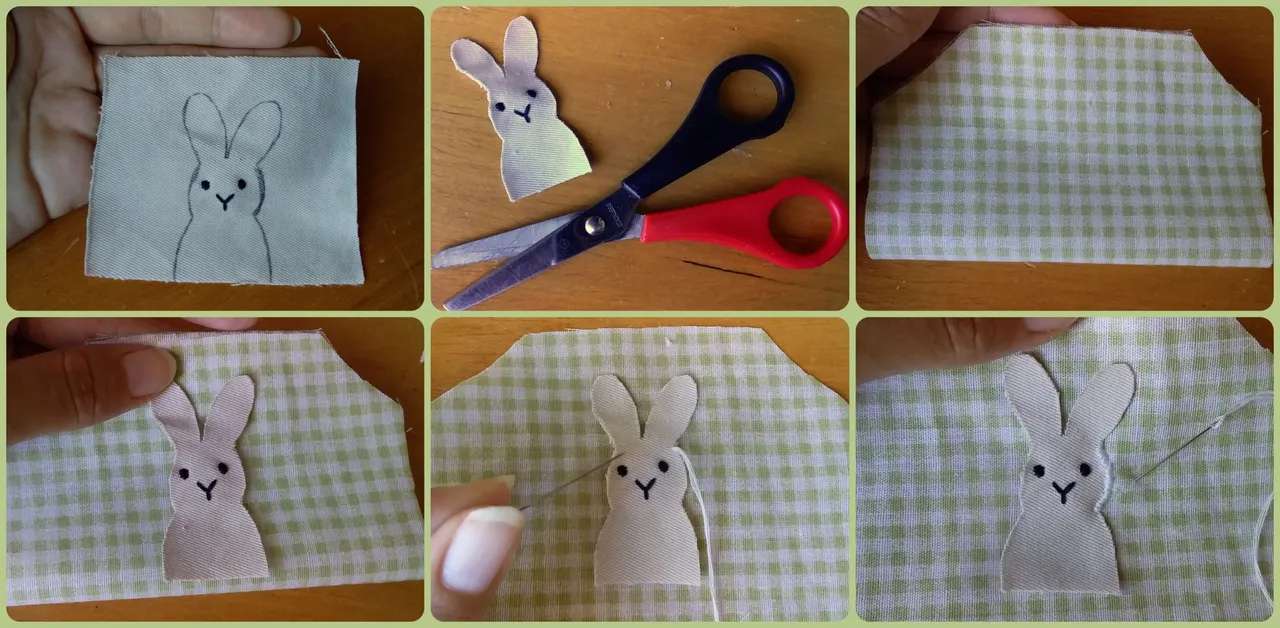
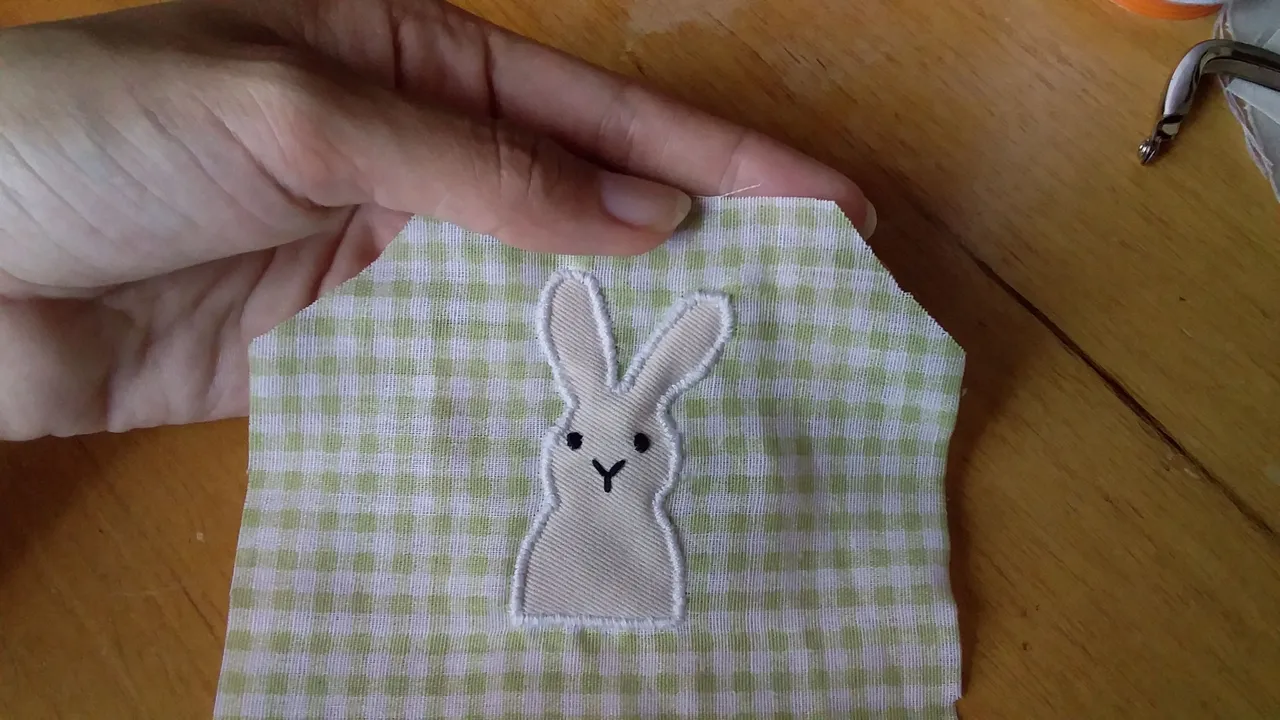
Una vez terminemos con nuestro conejito, lo cortaremos y lo ubicaremos sobre una de las piezas de tela (la exterior). Bordaremos por todo alrededor yendo de afuera hacia adentro...
Once we are done with our bunny, we will cut it out and place it on one of the pieces of fabric (the outer one). We will embroider all around going from the outside to the inside...
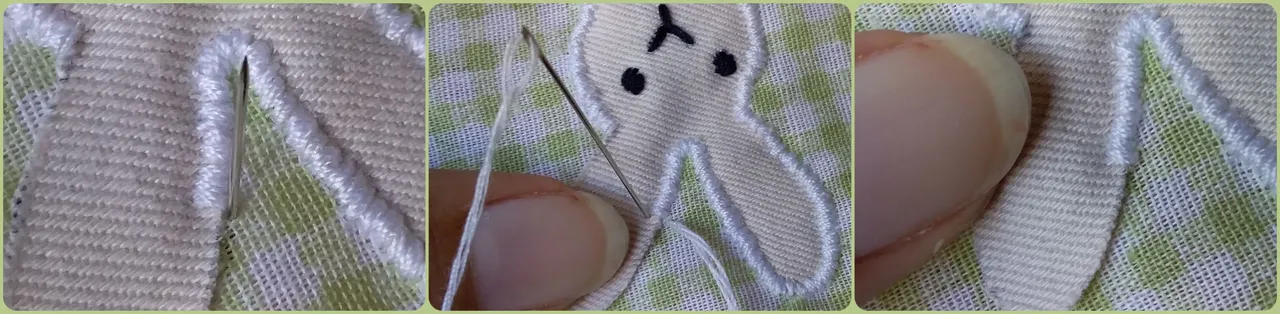
De esta manera
In this way
Hasta terminar
Until the end
Paso 5 | Step 5
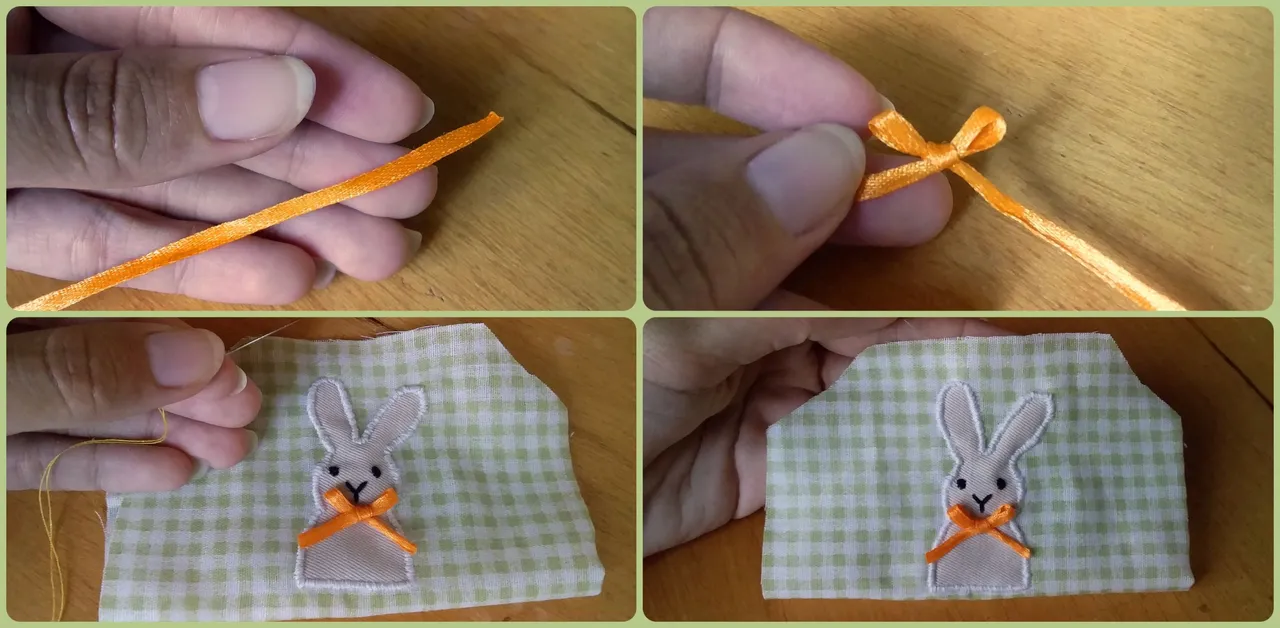
Para decorar, haremos un lazo con la cinta y lo coseremos.
To decorate, we will make a bow with the ribbon and sew.
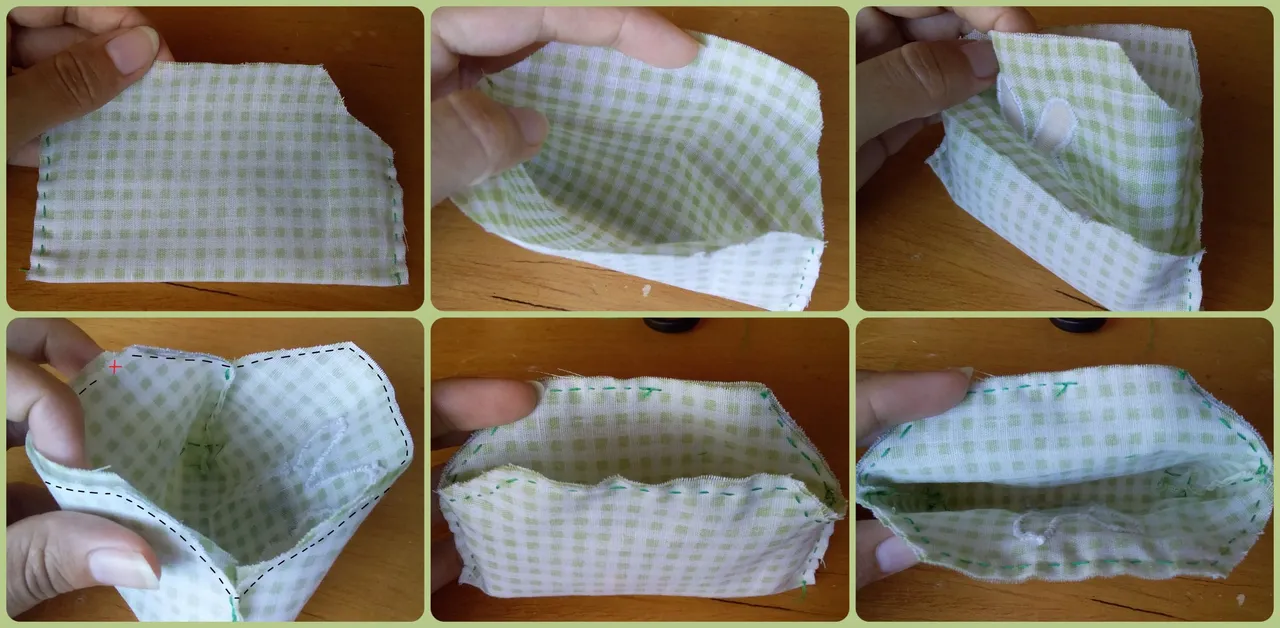
Paso 6 | Step 6
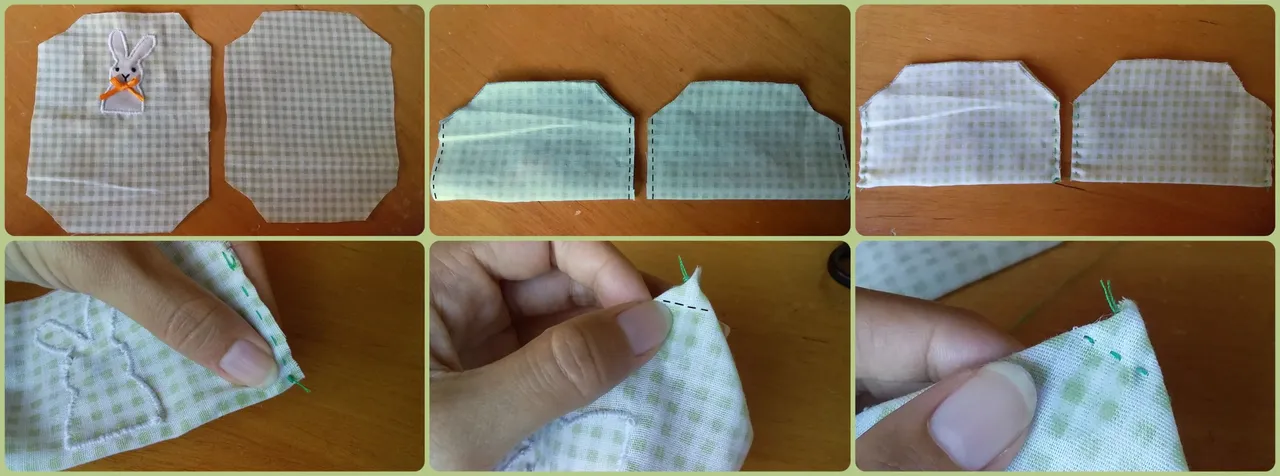
Ahora, extenderemos ambas piezas de tela (exterior y el forro) y las doblaremos a la mitad. Coseremos a los lados y a la pieza exterior le abriremos las esquinas inferiores para hacerle unas pequeñas puntadas (como se ve en las fotos).
Now, we will extend both pieces of fabric (outer and lining) and fold them in half. We will sew on the sides and to the outer piece we will open the bottom corners to make some small stitches (as shown in the pictures).
Al terminar le daremos vuelta y se verá así.
When finished we will turn it over and it will look like this.
Paso 7 | Step 7
A continuación, tomaremos el forro y abriremos un poco. Dentro de él, irá la otra pieza y las coseremos, dejando solo unos 2cm libres para dar vuelta.
Next, we will take the lining and open it a little. Inside it, the other piece will go and we will sew them together, leaving only about 2cm free to turn.
Paso 8 | Step 8
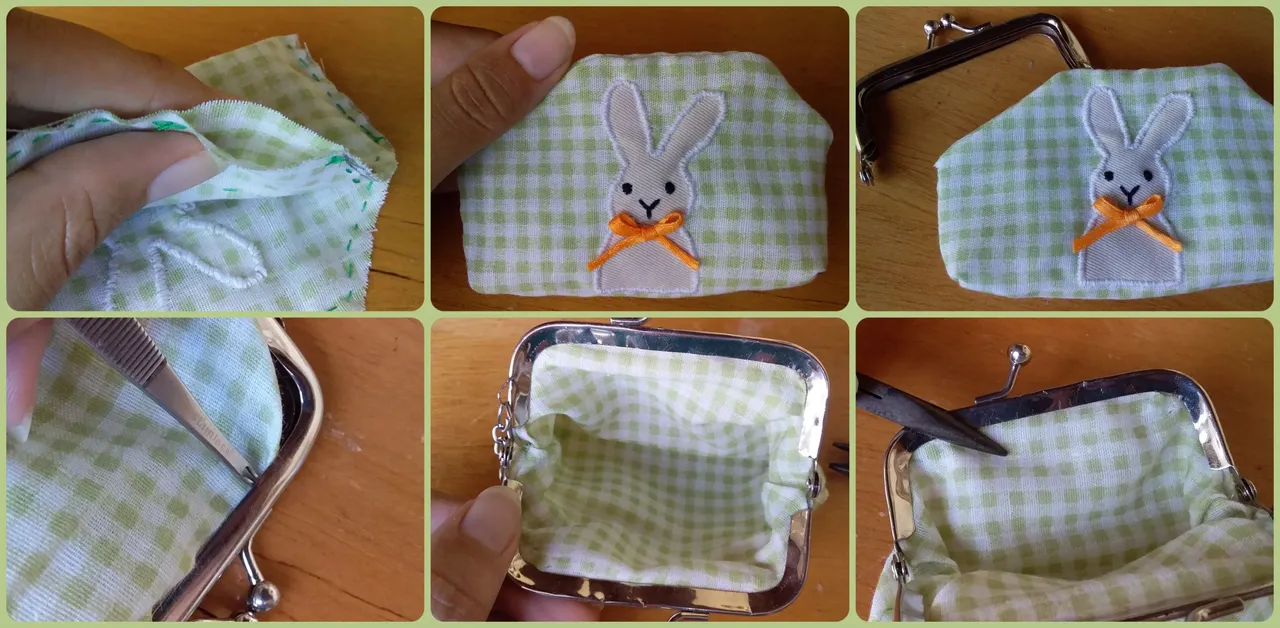
Por último sólo tenemos que girar y unir la pieza metálica con la bolsa. Con la ayuda de una herramienta plana (o lo que tengas a mano), iremos colocando la tela poco a poco y cuando terminemos, la apretaremos con las pinzas.
Finally we just have to turn and join the metal piece with the bag. With the help of a flat tool (or whatever you have at hand), we will place the fabric little by little and when we finish, we will tighten it with the pliers
🐰 👛 RESULTADO | RESULT 👛 🐰
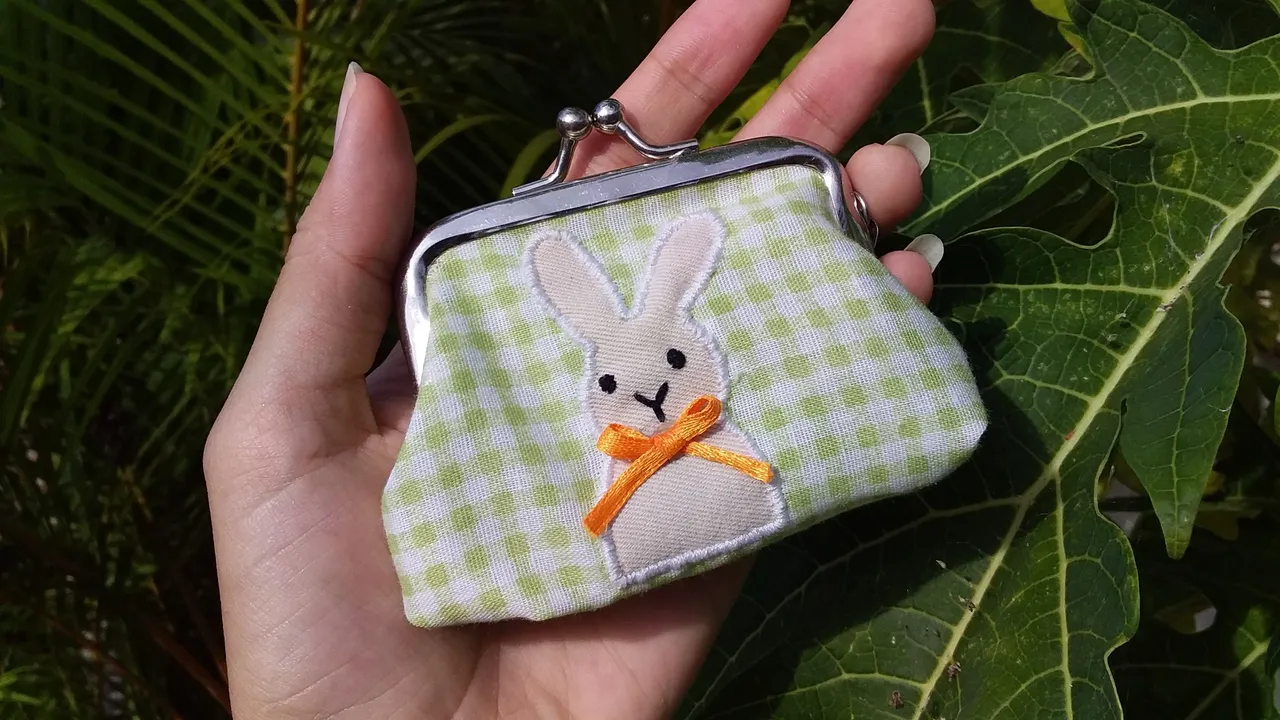
Finalmente este es el resultado.
Esto ha sido todo, espero les haya gustado mucho y que se animen a elaborarlo en casita, realmente es muy sencillo y lo mejor es que puedes jugar con los estampados en las telas o hacer cualquier otro animalito que te guste!
Finally this is the result.
This has been all, I hope you liked it a lot and that you are encouraged to make it at home, it really is very simple and the best thing is that you can play with the prints on the fabrics or make any other animal that you like!