¡Un gran saludo a la comunidad de Hive! | A big shout out to the Hive community!
Hoy quiero compartirles este curioso proceso de cómo realicé mi primer Bucket Hat. Siempre he querido uno y viendo pinterest hace unos días, encontré este diseño y me encantó, así que me animé a recrearlo con materiales que tenía en casa.
Today I want to share with you this curious process of how I made my first Bucket Hat. I've always wanted one and looking at pinterest a few days ago, I found this design and I loved it, so I decided to recreate it with materials that I had at home.
Materiales | Materials:
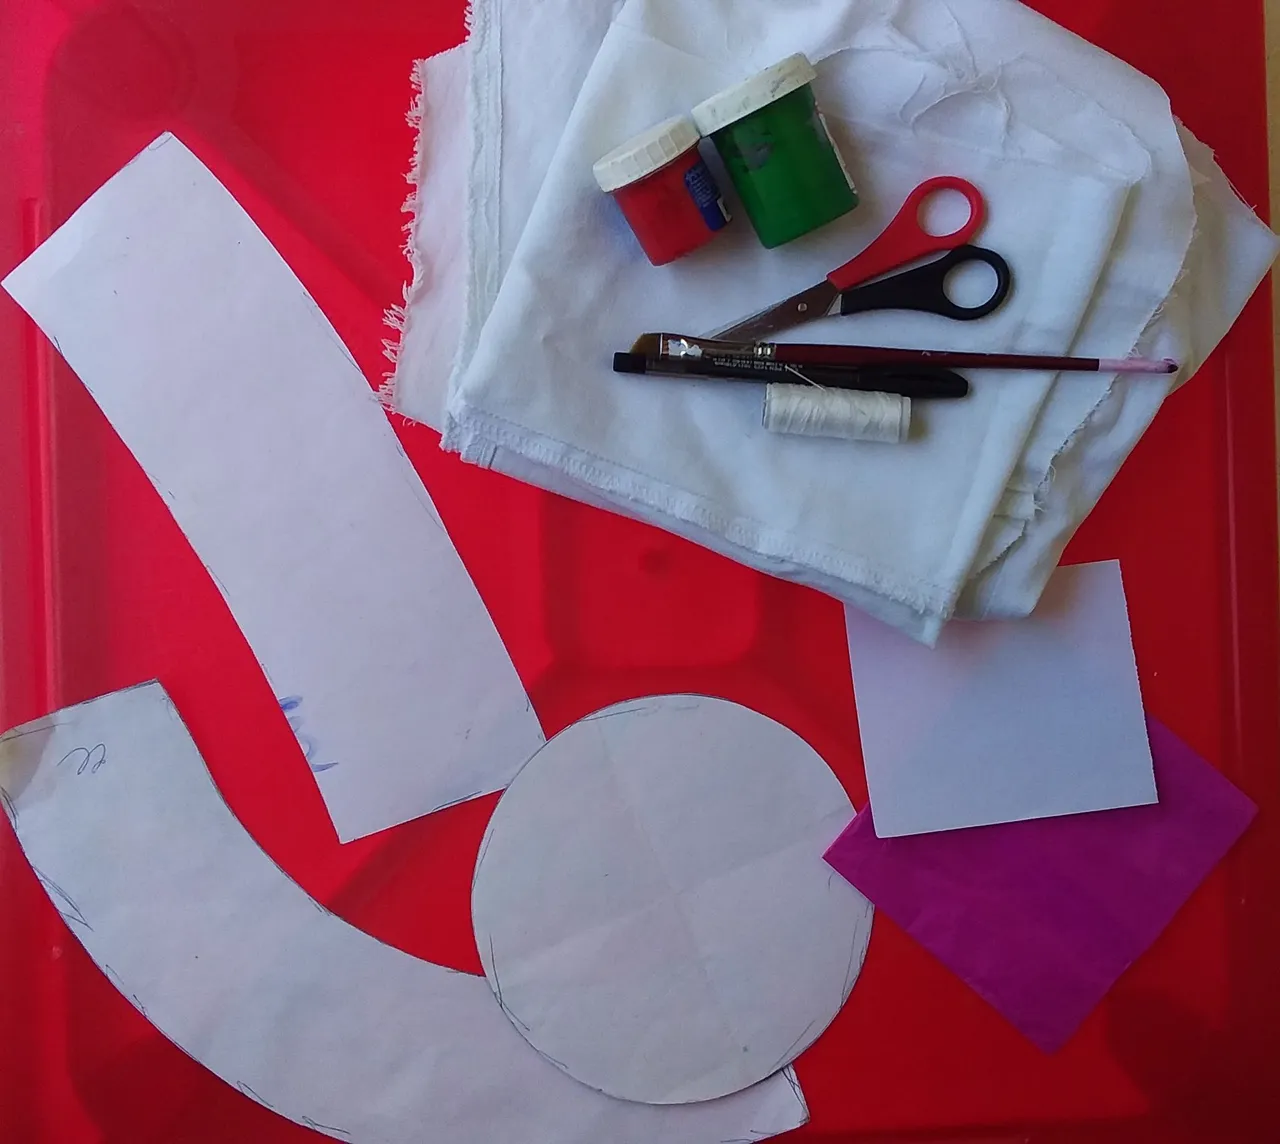
- Patrón
- Hilo y aguja
- Un trozo de goma eva
- Pintura para tela
- Pinceles
- Tijeras
- Un jean blanco viejo.
- Y por último, papel crepé para teñir.
- Pattern
- Thread and needle
- A piece of Eva rubber
- Paint
- Paintbrushes
- scissors
- Old white jeans.
- And finally, crepe paper for dyeing.
Paso 1 | Step 1
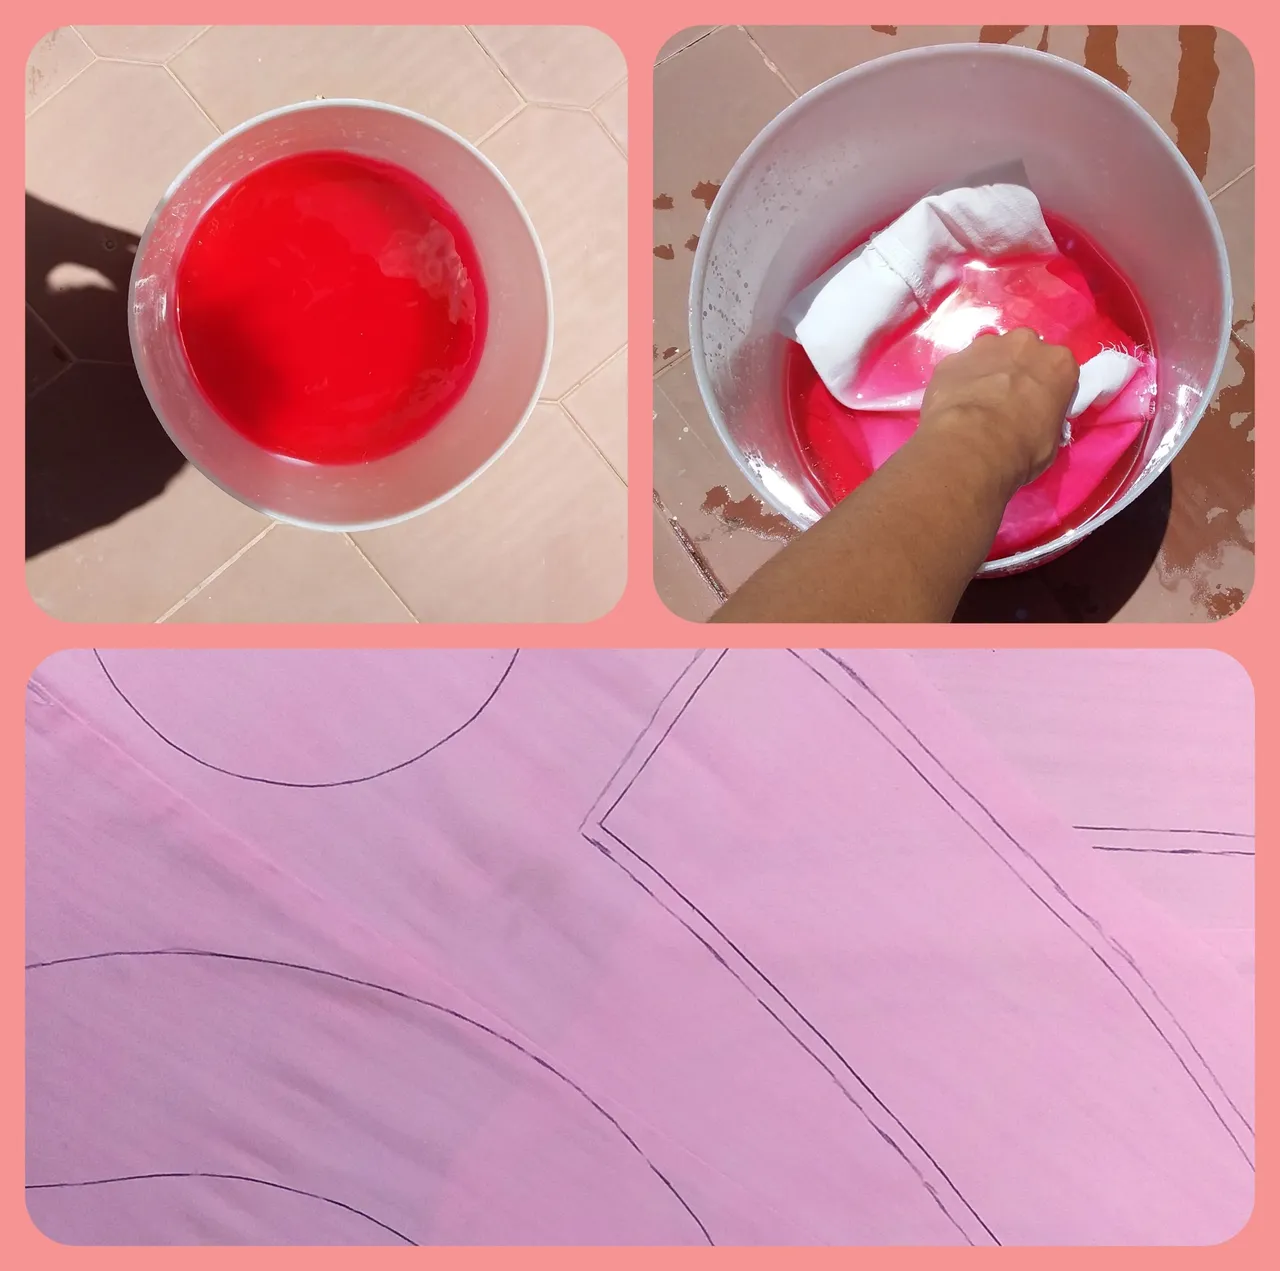
Lo primero que hice fue tomar una balde con suficiente agua y agregar el papel crepé para que desprendiera su color. Sumergí la tela para teñirla y luego de un rato la enjuagué con agua hasta que no saliera más tinte. Al terminar la dejé secar y marqué los patrones del gorro.
The first thing I did was take a bucket with enough water and add the crepe paper to release its color. I soaked the fabric to dye it and after a while rinsed it with water until no more dye came out. When finished I let it dry and marked the patterns of the hat.
Paso 2 | Step 2
Para las fresas | For the strawberries:
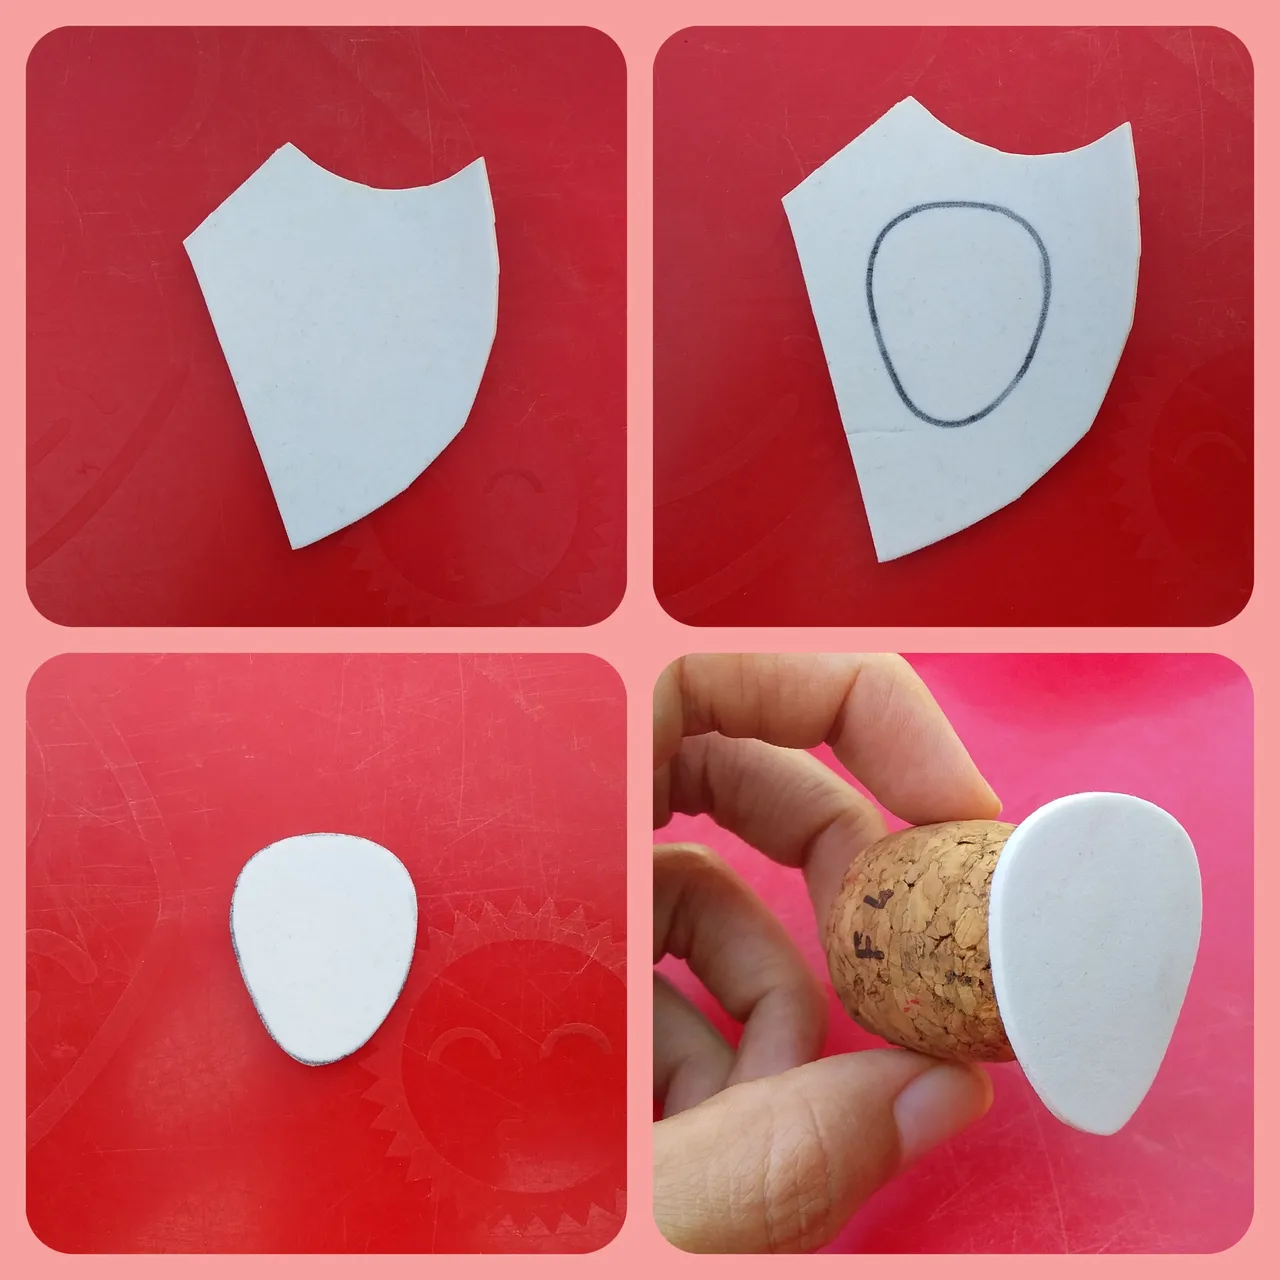
En un trozo de goma eva dibujé la silueta de una fresa, la corté y luego pegué en un corcho para realizar un sello.
On a piece of eva rubber, I drew the silhouette of a strawberry, cut it and then glue it to a cork wine to make a stamp.
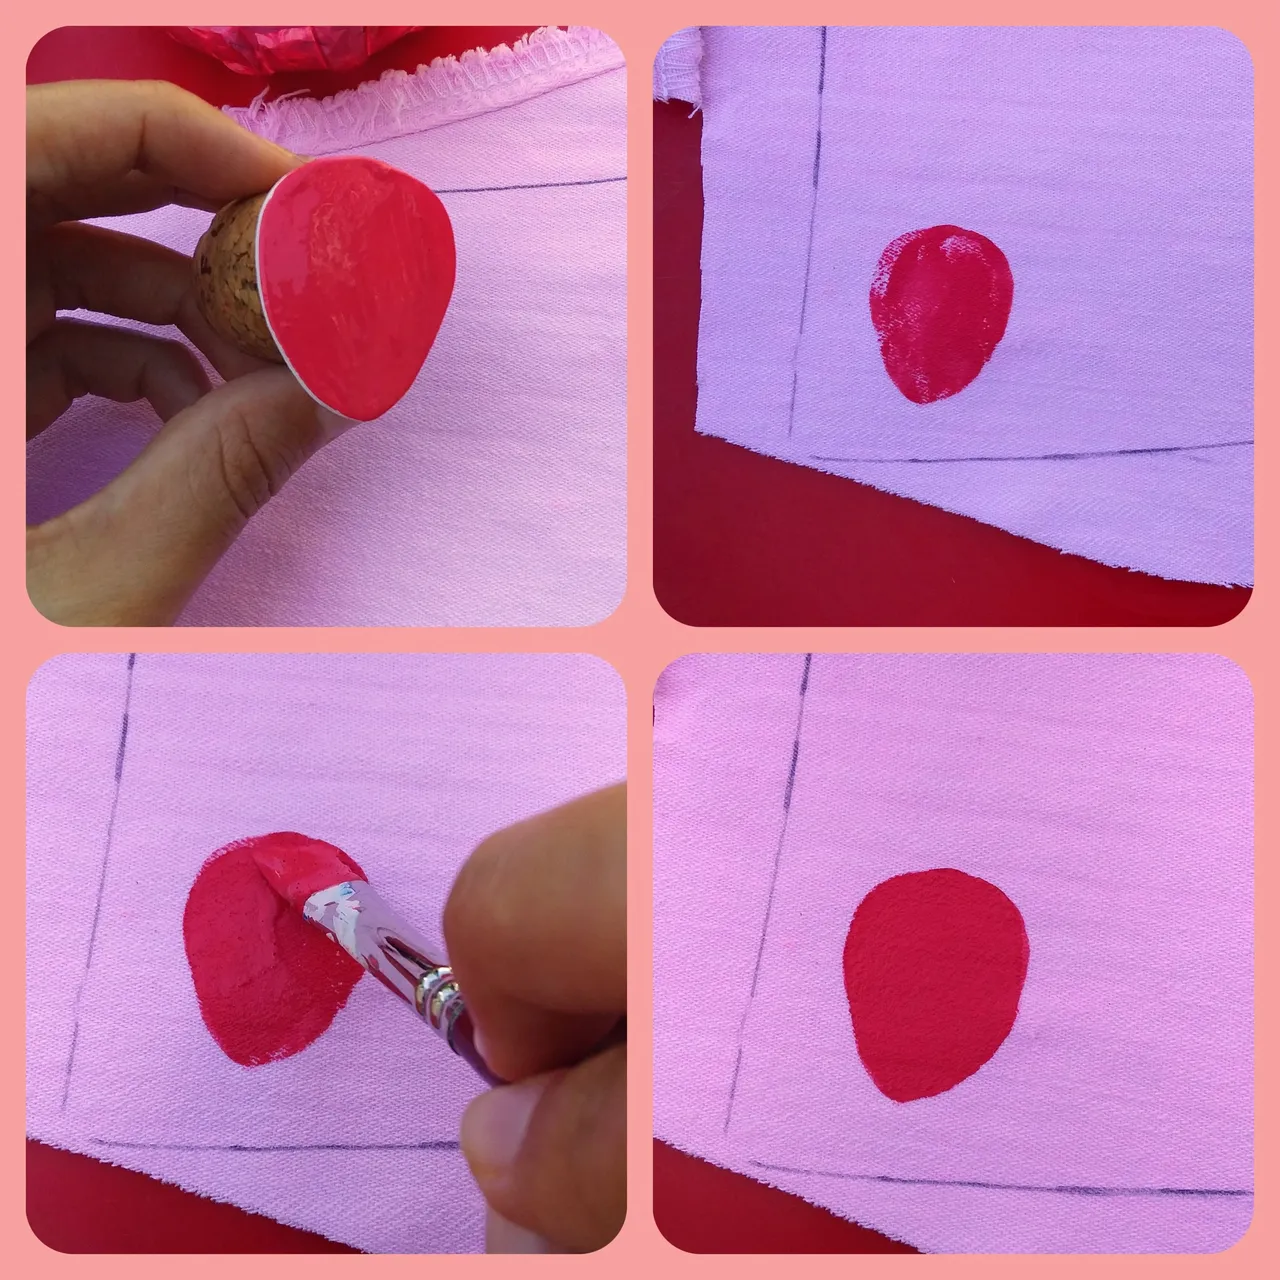
Llené el sello de pintura y lo presioné muy bien sobre la tela para pintarla, luego con un pincel cubrí los espacios en blanco.
I filled the stamp with paint and pressed it very well on the fabric to paint it, then with a brush, I covered the blanks.
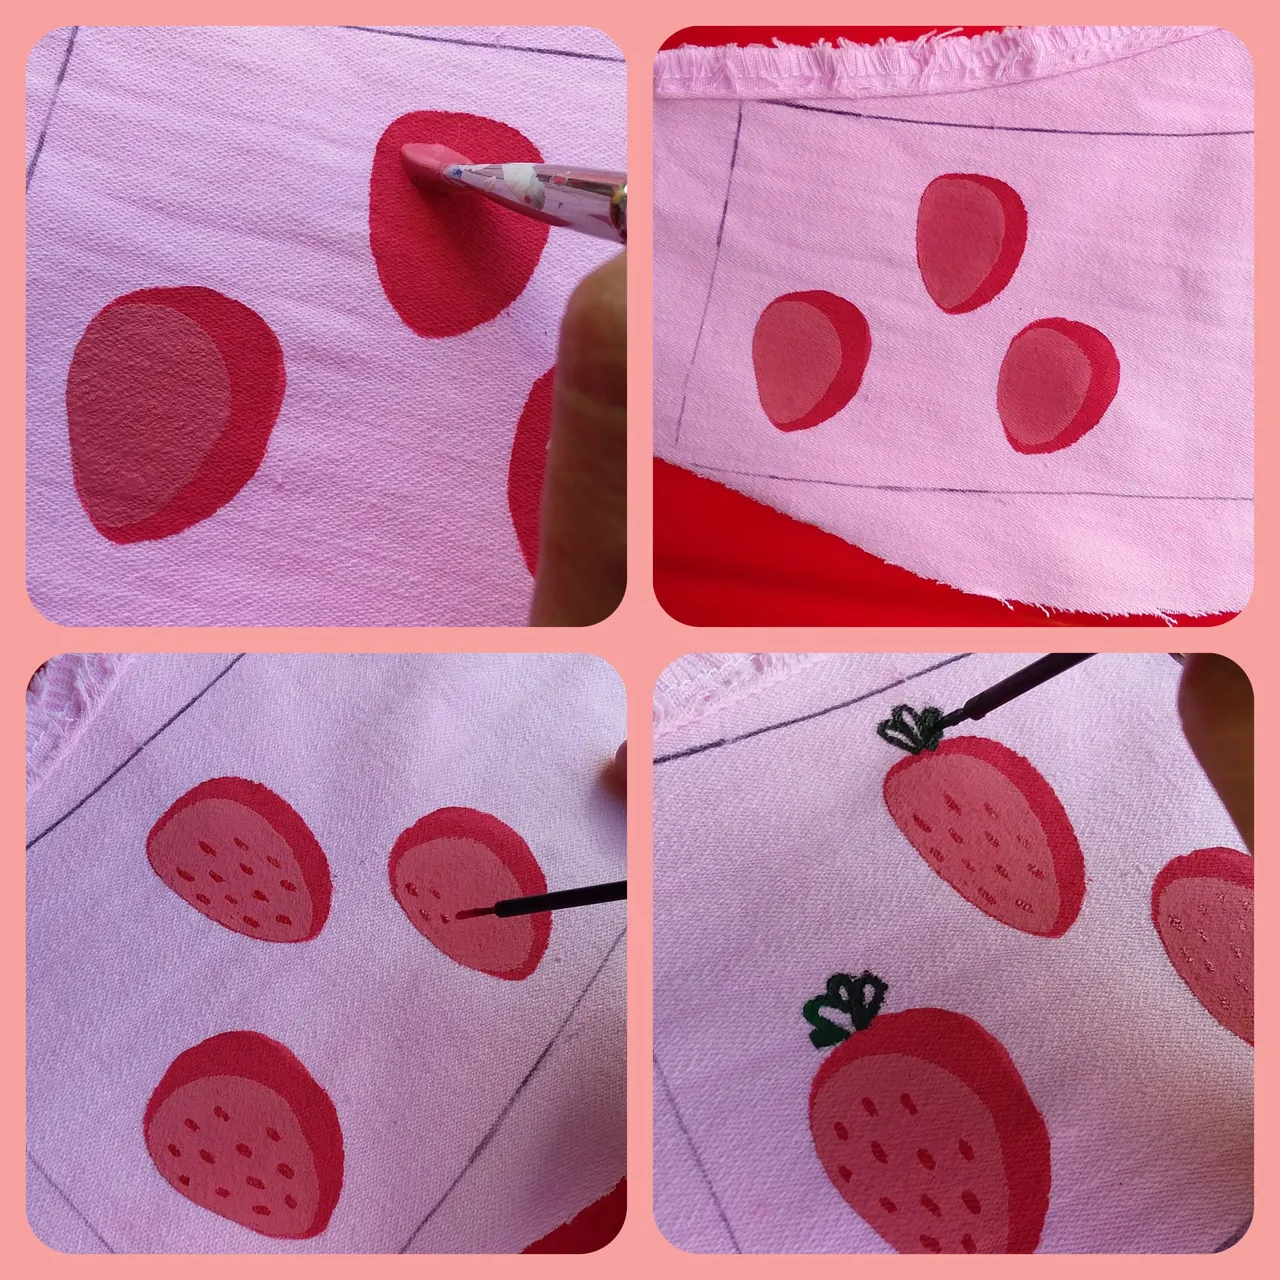
Para darle un toque de luz, apliqué una capa de pintura con un tono más claro sobre el tono base y al secar hice los detalles de las semillas y las hojas.
To give it a touch of light, I applied a coat of paint with a lighter shade on the base tone and when drying I made the details of the seeds and leaves.

Repetí este proceso hasta llenar todas las piezas.
I repeated this process until all the pieces were filled.
Paso 3 | Step 3
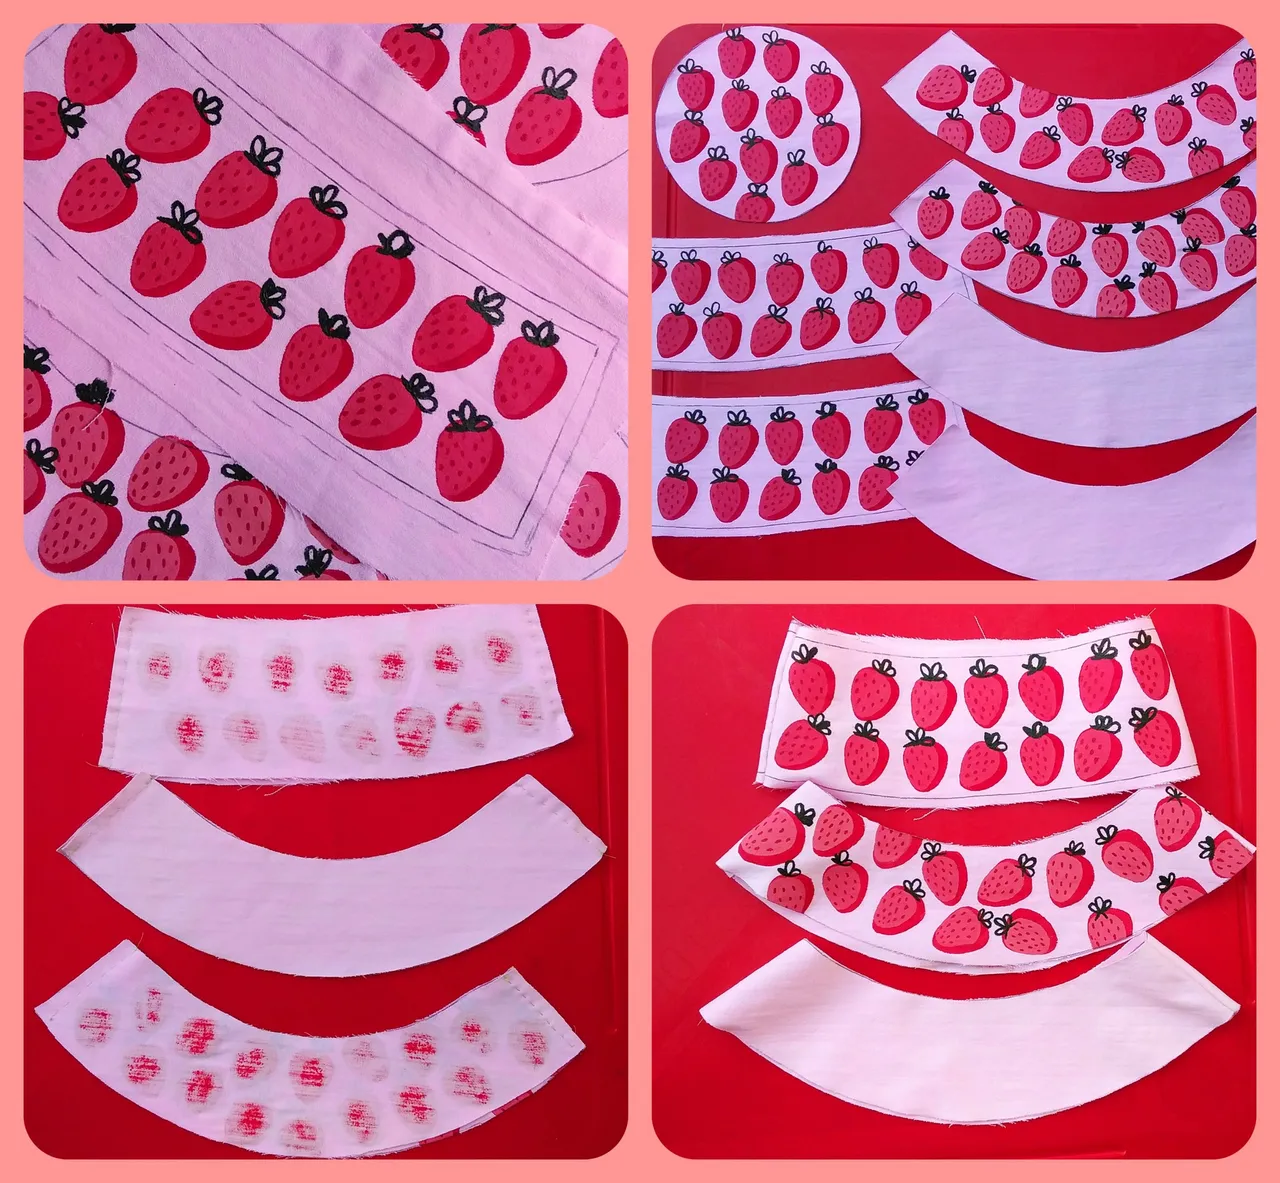
Ya con las piezas pintadas, procedí a cortarlas y coserlas por los extremos. Fueron 7 en total, Un círculo para la parte de arriba, 2 para el medio (cuerpo del gorro) y 4 para las alas (2 externas y 2 internas sin pintar).
With the pieces already painted, I proceeded to cut them and sew them at the ends. There were 7 in total, a circle for the top, 2 for the middle (body of the hat) and 4 for the wings (2 external and 2 internal unpainted).
Paso 4 | Step 4
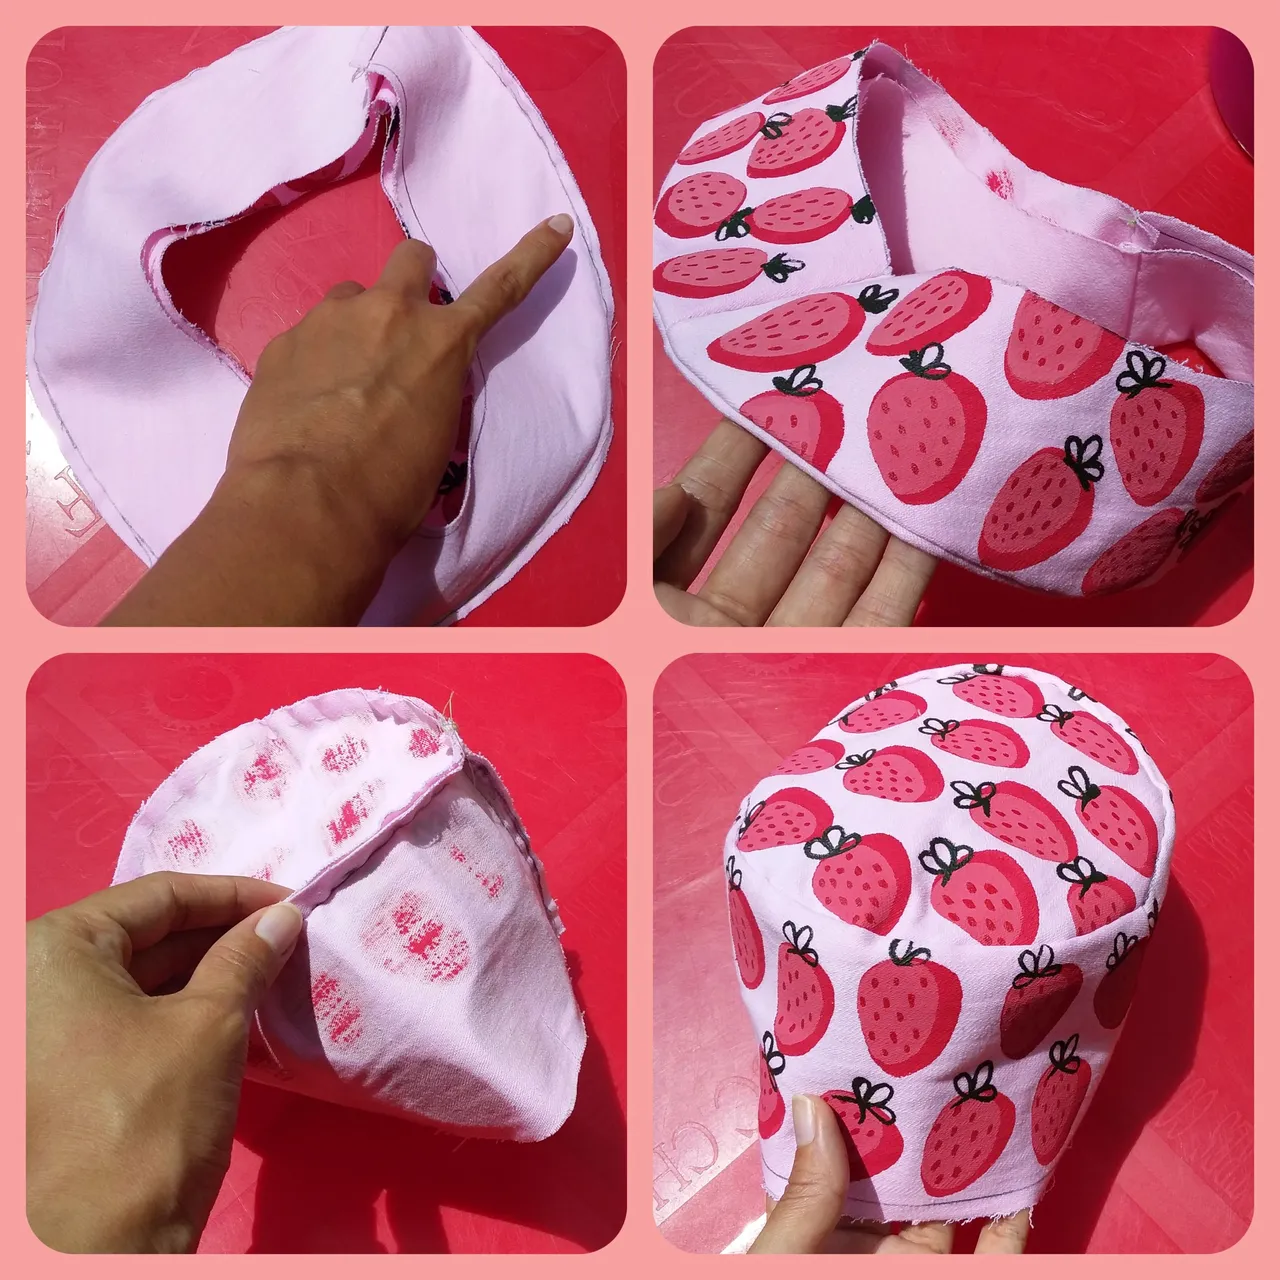
Junté las alas externas con las internas y las cosí por todo alrededor de ellas, luego el círculo con el cuerpo del gorro.
I joined the outer wings with the inner ones and sewed them all around them, then the circle with the body of the hat.
Finalmente cosí ambas piezas.
I finally sewed both pieces.

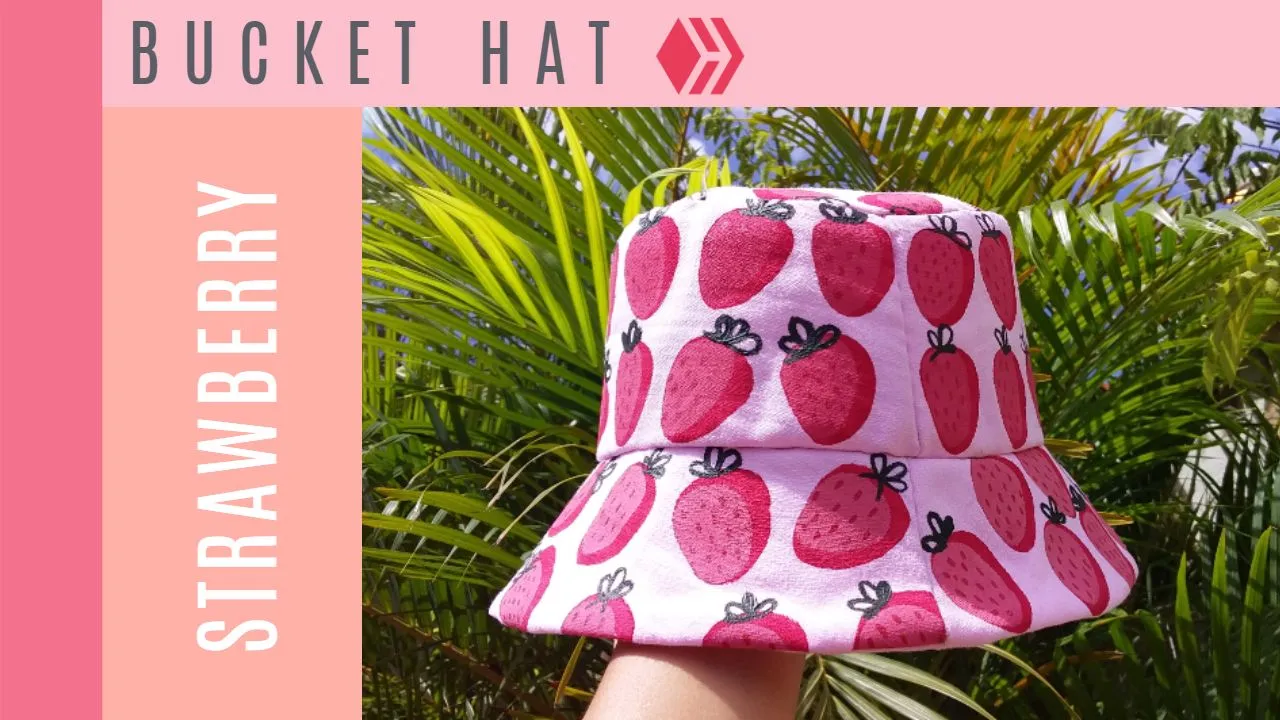
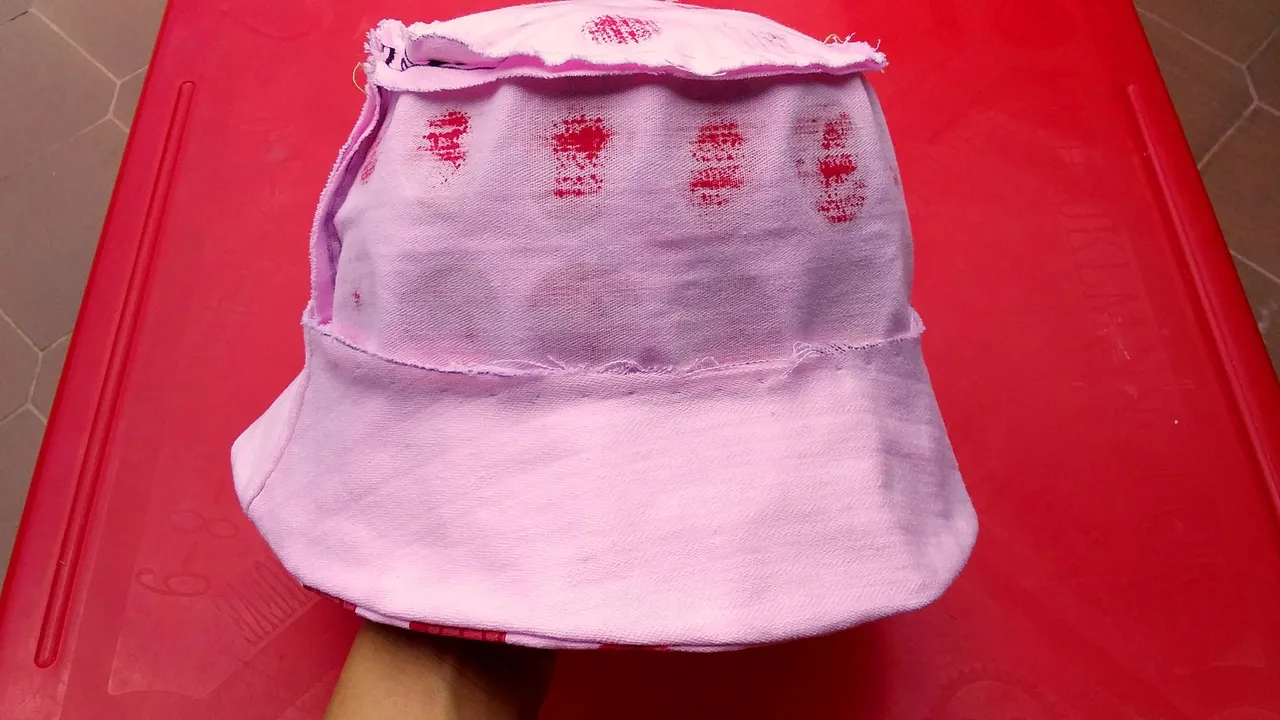
Y listo! Así es como se ve el Bucket Hat. Espero les sirva de inspiración y que les haya gustado. :)
And ready! This is what the Bucket Hat looks like. I hope it inspires you and that you liked it. :)