
✨BIENVENIDOS A MI BLOG | WELCOME TO MY BLOG✨
Saludos a esta linda comunidad de needleworkmonday, espero se encuentren bien. El día de hoy les traigo una idea para realizar un crop top bastante básico con un estampado line art. El proceso es bastante sencillo y no requiere de muchos materiales, así que sin más empecemos!
Greetings to this nice needleworkmonday community, I hope you are well. Today I bring you an idea to make a pretty basic crop top with a line art print. The process is quite simple and does not require many materials, so without further ado let's get started!

Materiales | Materials:

| Jeans Viejos | Pintura de bordado textil (o pintura de tela normal) | Tijeras |
|---|---|---|
| Aguja e hilo | Camiseta vieja con la forma que queramos el crop top | Alfileres |
| Máquina de coser |
| Old jeans | Textile embroidery paint (or regular fabric paint) | Scissors |
|---|---|---|
| Needle and thread | Old T-shirt with the shape we want the crop top to be | Pins |
| Sewing machine |
Proceso | Process
Paso 1 | Step 1

Primero tomaremos la camiseta vieja y la cortaremos por el lado que más nos guste. Esto lo usaremos como patrón para ambos lados del crop top.
First we will take the old t-shirt and cut it on the side we like best. We will use this as a pattern for both sides of the crop top.
Paso 2 | Step 2
Lo siguiente será cortar la parte de abajo del pantalón (o descoser si lo prefieres) y luego cortamos dejando solo las piernas (como se ve en las fotos)
The next step is to cut the bottom part of the pants (or unpick if you prefer) and then cut leaving only the legs (as shown in the pictures).
Paso 3 | Step 3
Ahora abriremos el pantalón y al hacerlo, deberá verse como una especie de trapecio. Le damos vuelta y encima pondremos nuestra camiseta vieja, la ajustamos con alfileres y cortaremos alrededor dejando un margen de costura.
Nota: Para el cuello y la sisa, dejaremos un poco de margen extra para hacer un pliegue.
Now we will open the pants and when we do it, it should look like a kind of trapezoid. We turn it over and put our old T-shirt on top, pin it and cut around it leaving a seam allowance.
Note: For the neck and armhole, we will leave a little extra seam allowance to make a fold.
Paso 4 | Step 4
Retiramos la camiseta y empezaremos a coser primero por los lados, cortando los excesos. Para evitar que se deshilache, podemos hacerle una costura adicional en zigzag.
We remove the shirt and start sewing the sides first, cutting off the excess. To avoid fraying, we can make an additional zigzag seam.
Poco a poco iremos cosiendo un pliegue en el cuello, la sisa y mediremos qué tan largo queremos el crop top. Luego de medir, haremos un ruedo.
Nota: Para los pliegues, recomiendo bastear antes de coser a máquina, así podemos llevar mejor control y evitar que salgan torcidos.
Little by little we will sew a pleat on the neck, the armhole and measure how long we want the crop top to be. After measuring, we will make a hem.
Note: For the pleats, I recommend basting before machine stitching, for better control and to prevent the pleats from turning out crooked.

Así es como me quedó luego de pasarla en la máquina de coser.
This is what it looked like after running it through the sewing machine.
Paso 5 | Step 5
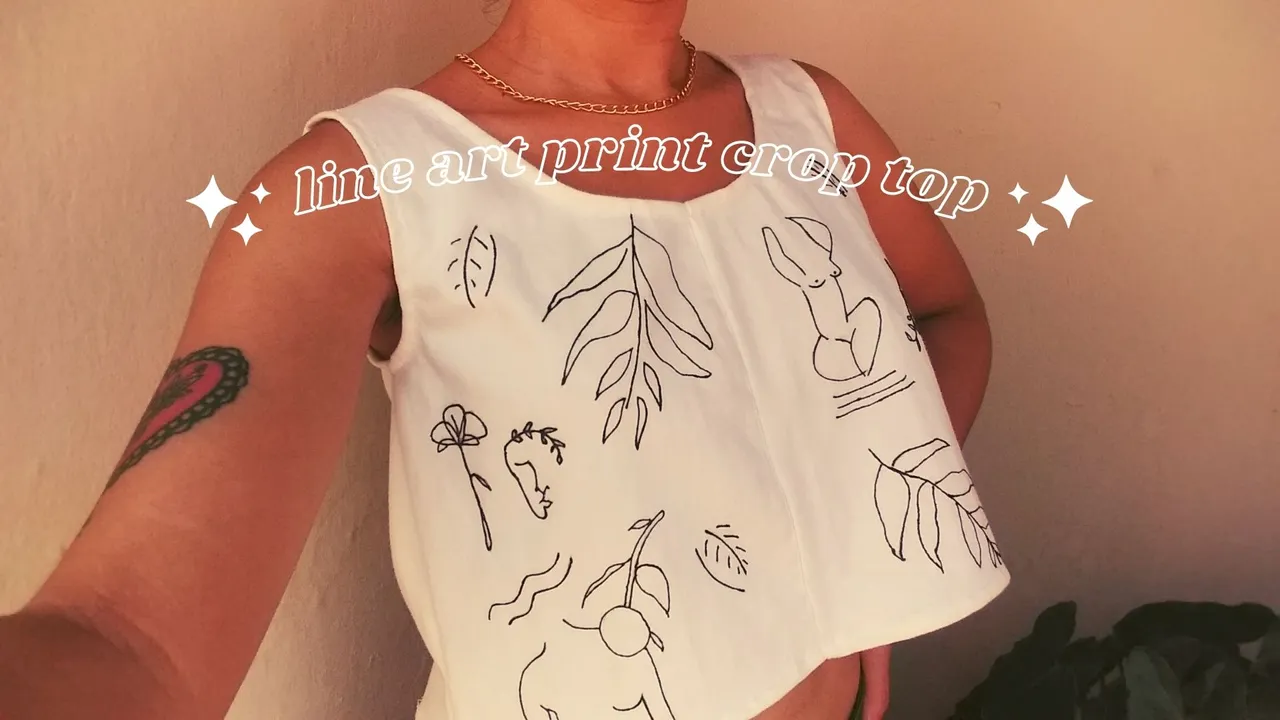
Como último paso nos queda dibujar y pintar el diseño que queremos. Lo bueno del line art es que no tiene que quedar perfecto y puedes buscar miles de ideas en pinterest.
The last step is to draw and paint the design we want. The good thing about line art is that it doesn't have to be perfect and you can find thousands of ideas on pinterest.
Finalmente así quedó.
Espero que les haya gustado!
Finally this is how it turned out.
I hope you liked it!
