ESPAÑOL
No sé a ustedes pero a mí me pasa que tengo un montón de sobrantes de telas, claro a la espera siempre de un nuevo proyecto, en esta ocasión realizare un alfiletero para la máquina de coser con la técnica de patchwork, gracias a un video que vi hace días.
Busque los materiales necesarios para el proyecto.
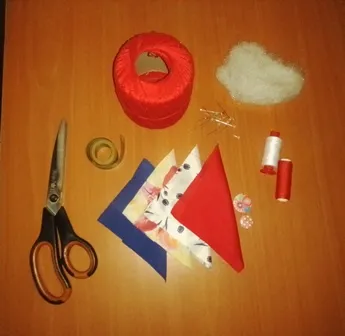
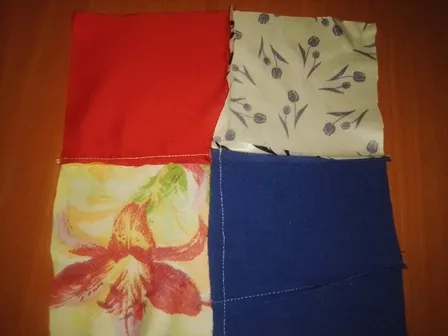
Tomé las medidas de lo que necesitaba, cuatro retazos de tela de 12 cm x 12 cm y una cinta de 60 cm x 8 cm que sería el ancho de mi máquina


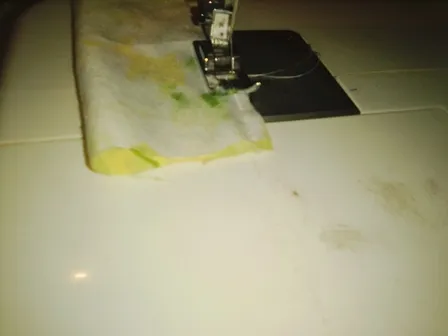
Luego que cosí en recta
Se unen los cuadrados cosiendo un extremo
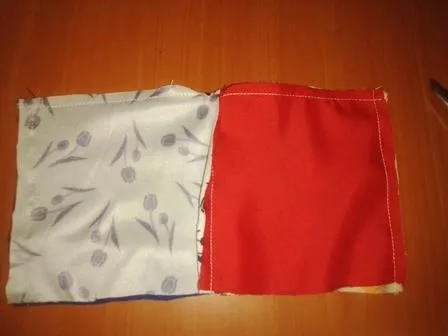
Así debería quedar
Volteamos la pieza y doblamos sus extremos, así


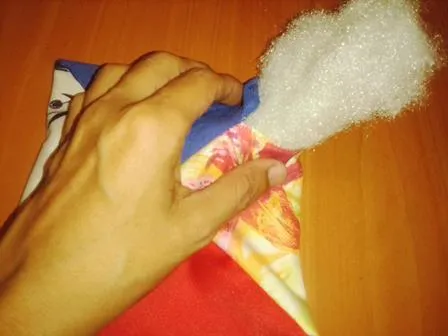
Cosemos nuevamente pero vamos a dejar una abertura por donde vamos a voltear y rellenar nuestra pieza
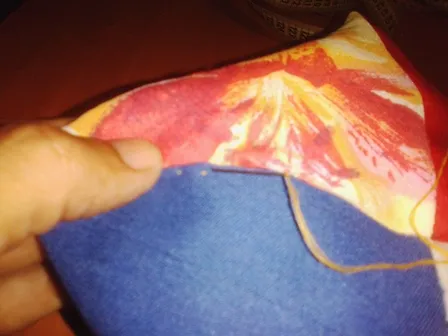
A la abertura que dejamos la cosemos a mano con punto escondido
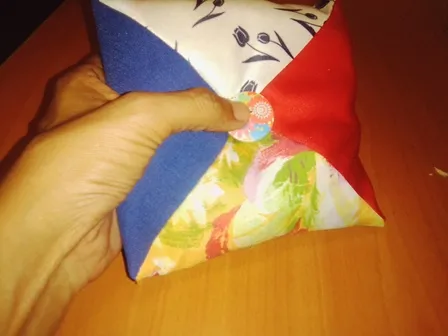
Hasta aquí quedaría terminado el alfiletero si lo quieres en este modelo, colocas un botón de tu preferencia en el centro
O bien podríamos continuar
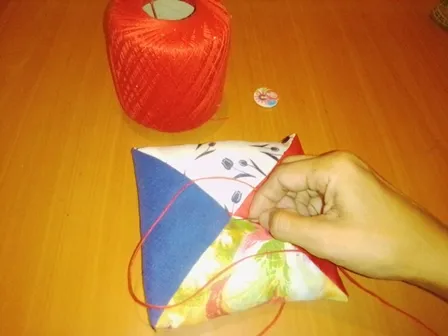
Busqué hilo de bordar de color rojo también puede servir estambre y amarré como unos pétalos

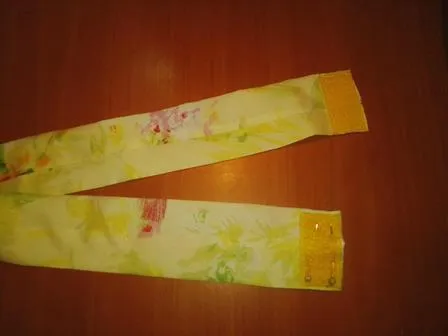
Por último, a la cinta que habíamos cortado de 60 cm y reservado en su momento, le coloque un cierre mágico o velcro

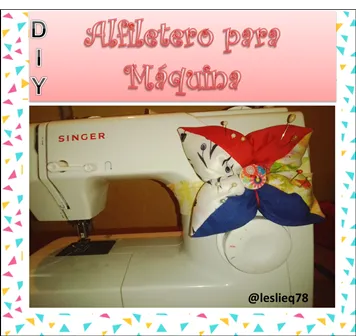
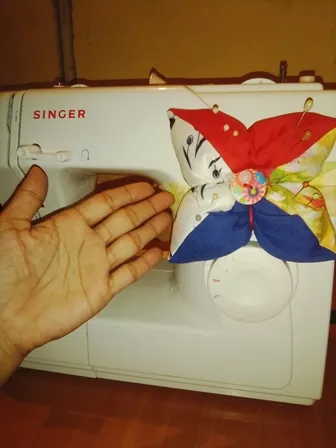
Y así quedo terminado mi proyecto de Alfiletero para Máquina de Coser.

"“Todo el mundo puede hacer pequeñas cosas y marcar la diferencia, todo cuenta”. Stella McCartney
Hasta aquí mi publicación por el día de hoy, espero que sea de tu agrado y pueda leer tus comentarios por alguna duda o sugerencia.
Te envío un caluroso abrazo virtual y muchas bendiciones.
Continúen creando, continúen cuidándose, nos leemos.
- Todas las fotografías aquí presentadas son de mi propiedad, tomadas con mi teléfono Blu Studio X10
- Los separadores los realice con ayuda de PowerPoint
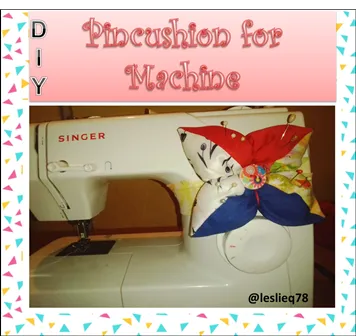
- El banner lo realice con la aplicación Collage Maker
- Mi idioma natal es el español, realice la traducción con ayuda de Deepl.com
ENGLISH
I don't know about you but it happens to me that I have a lot of leftover fabrics, of course always waiting for a new project, this time I will make a pincushion for the sewing machine with the patchwork technique, thanks to a video that I saw a few days ago.
Find the materials needed for the project.
I took the measurements of what I needed, four 12 cm x 12 cm fabric scraps and a 60 cm x 8 cm ribbon which would be the width of my machine.
After I sewed in straight
The squares are joined by sewing one end together
This should look like this
We flip the piece over and fold its ends, like this.
We sew again but we are going to leave an opening where we are going to flip and fill our piece.
The opening we left is sewn by hand with a hidden stitch.
So far the pincushion would be finished if you want it in this model, place a button of your choice in the center.
Or we could continue
I looked for red embroidery thread can also serve yarn and tied as a petals
Finally, to the ribbon that we had cut 60 cm and reserved at the time, I attached a magic clasp or velcro
And that's the end of my Sewing Machine Pincushion project.
""Everyone can do little things and make a difference, it all counts." Stella McCartney
So far my publication for today, I hope you like it and I can read your comments for any questions or suggestions.
I send you a warm virtual hug and many blessings.
Continue creating, continue taking care of yourselves, we will read each other.
- All the photographs presented here are my own, taken with my Blu Studio X10 phone.
- The separators were made with the help of PowerPoint
- The banner was made with the Collage Maker application.
- My native language is Spanish, I made the translation with the help of Deepl.com