ESPAÑOL
Pinterest y me pidio que la realizara.
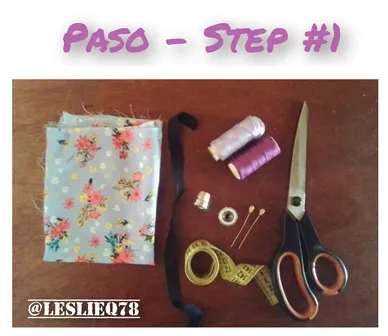
Paso 1
Ubicar los materiales necesarios para la realización del proyecto.
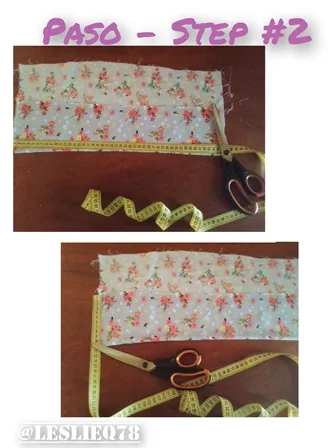
Paso 2
Medir dos trozos de tela de 45 cm x 10 cm
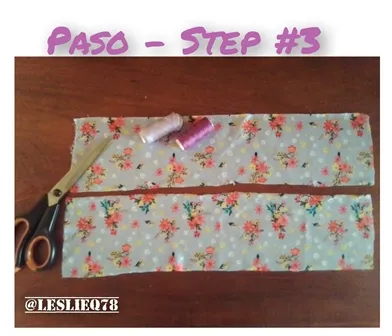
Paso 3
Listo el corte de las telas, proximo paso a coser
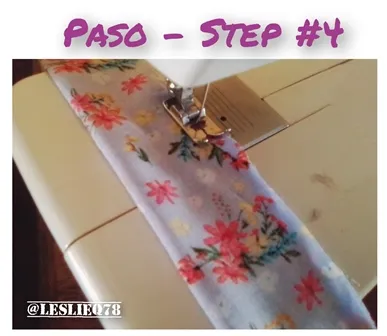
Paso 4
Doblamos por el reves nuestra tela y cosemos en linea recta
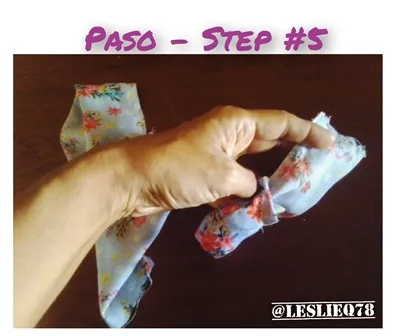
Paso 5
Damos vuelta a la pieza
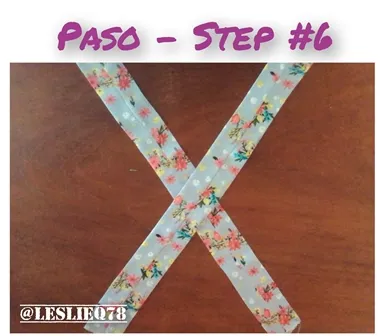
Paso 6
Cuando ya tenemos lista la costura de ambas piezas, las colocamos en forma de cruz como se muestra
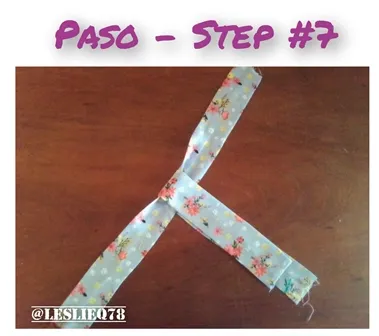
Paso 7
Siguiente paso, doblamos las piezas
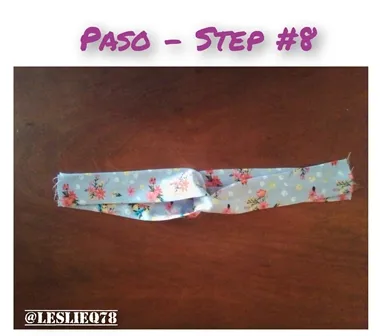
Paso 8
Asi deberia quedarte
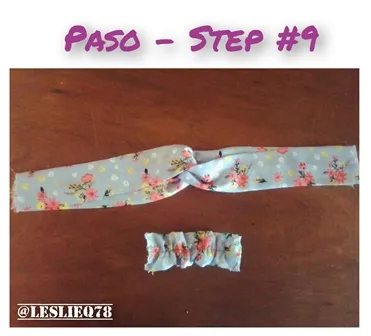
Paso 9
Ahora unimos con otro trozo de tela al que le colocamos elastica
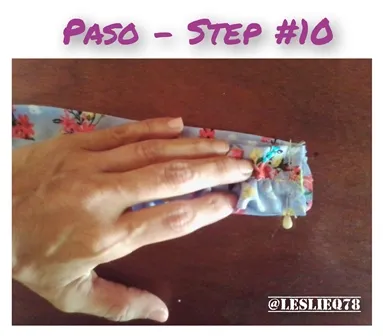
Paso 10
Cosemos ambas piezas
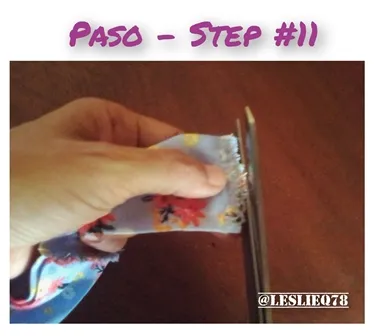
Paso 11
Cortamos cualquier sobrante para dar un mejor acabado
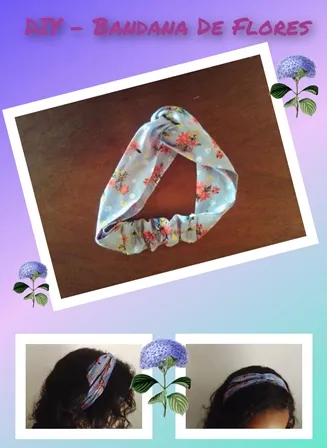
😍 Resultado final 😍


Hasta aquí mi publicación por el día de hoy, espero que sea de tu agrado y pueda leer tus comentarios por alguna duda o sugerencia.
Te envío un caluroso abrazo virtual y muchas bendiciones. Continúen creando, continúen cuidandose, nos leemos.
- Todas las fotografías aquí presentadas son de mi propiedad, tomadas con mi teléfono Blu Studio X10
- Los separadores los realice con ayuda de PowerPoint
- El collage lo realice con la aplicacion Collage Maker
- Mi idioma natal es el español, realice la traducción con ayuda de Deepl.com
ENGLISH
Pinterest and asked me to make it.

Step 1
Locate the materials needed for the completion of the project.
Step 2
Measure two 45 cm x 10 cm pieces of fabric.
Step 3
Ready the cut of the fabrics, next step to sew
Step 4
Fold our fabric inside out and sew in a straight line.
Step 5
Turn the piece over
Step 6
When we have ready the stitching of both pieces, we place them in a cross shape as shown
Step 7
Next step, we fold the pieces
Step 8
This should look like this
Step 9
Now we join with another piece of fabric to which we put elastic.
Step 10
Sew both pieces together
Step 11
Cut off any excess to give a better finish.
😍Final result 😍 .
So far my publication for today, I hope you like it and I can read your comments for any questions or suggestions.
I send you a warm virtual hug and many blessings. Continue creating, continue taking care of yourselves, we will read each other.
- All the photographs presented here are my own, taken with my Blu Studio X10 phone.
- The separators were made with the help of PowerPoint
- The collage was made with the Collage Maker application.
- My native language is Spanish, I made the translation with the help of Deepl.com