Feliz inicio de semana, amigos de @Needleworkmonday, un gusto de saludarles y bendecirles en este lunes maravilloso. Tenía días que no pasaba por aquí, hoy les traigo una de mis creaciones para mi princesa Ambar. Hoy se celebra Halloween y aunque es una tradición que en casa no celebramos, el año pasado en la urbanización organizaron una actividad para que los niños se disfrazaran, como no tenía que ponerles, le hice unos accesorios para el cabello.
Justo en ese día murió un familiar de una de las organizadoras y nos quedamos con los preparativos plantados. Esta vez Arianna andaba buscando que cosa ponerse y quería ir al centro comercial a ver las decoraciones. Andaba full ocupado y no me había motivado hacer nada.
Anoche como a las 11 de la noche me puse en la tarea de hacer este lazo, cuando empiezo a sacar los materiales, Ambar me dice que si le voy a hacer uno a ella, así que negociamos y ella ganó, se lo hice a ella. Les muestro en unos pasos bien sencillos como hacerlo.
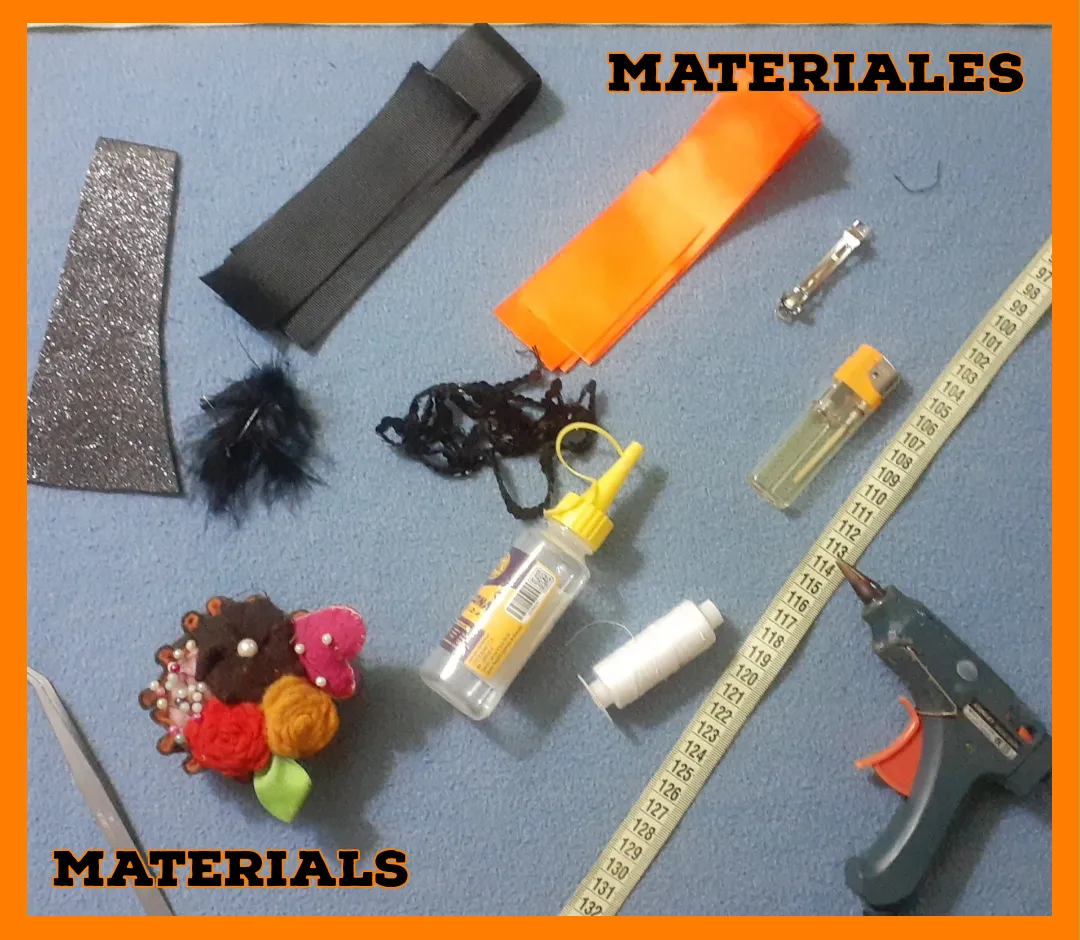
Materiales
Aunque parezcan muchas cosas es un poco de cada una. Cintas de razo, pinza, foami escarchado, decoraciones, silicona, tijera, cinta métrica, pistola de silicona, aguja e hilo, alfileres y encendedor.
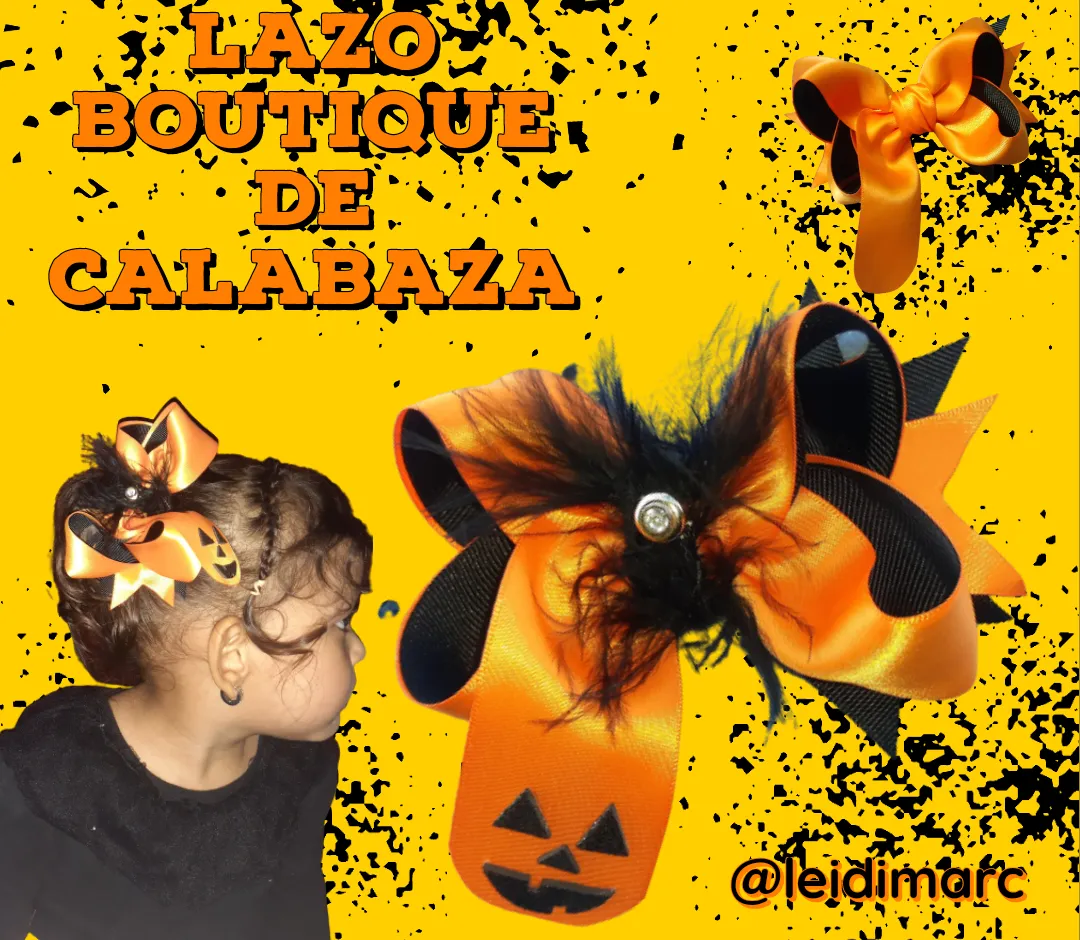
Modo de elaboración de este hermoso Lazo para el cabello, tipo Boutique, con decoración de calabaza.
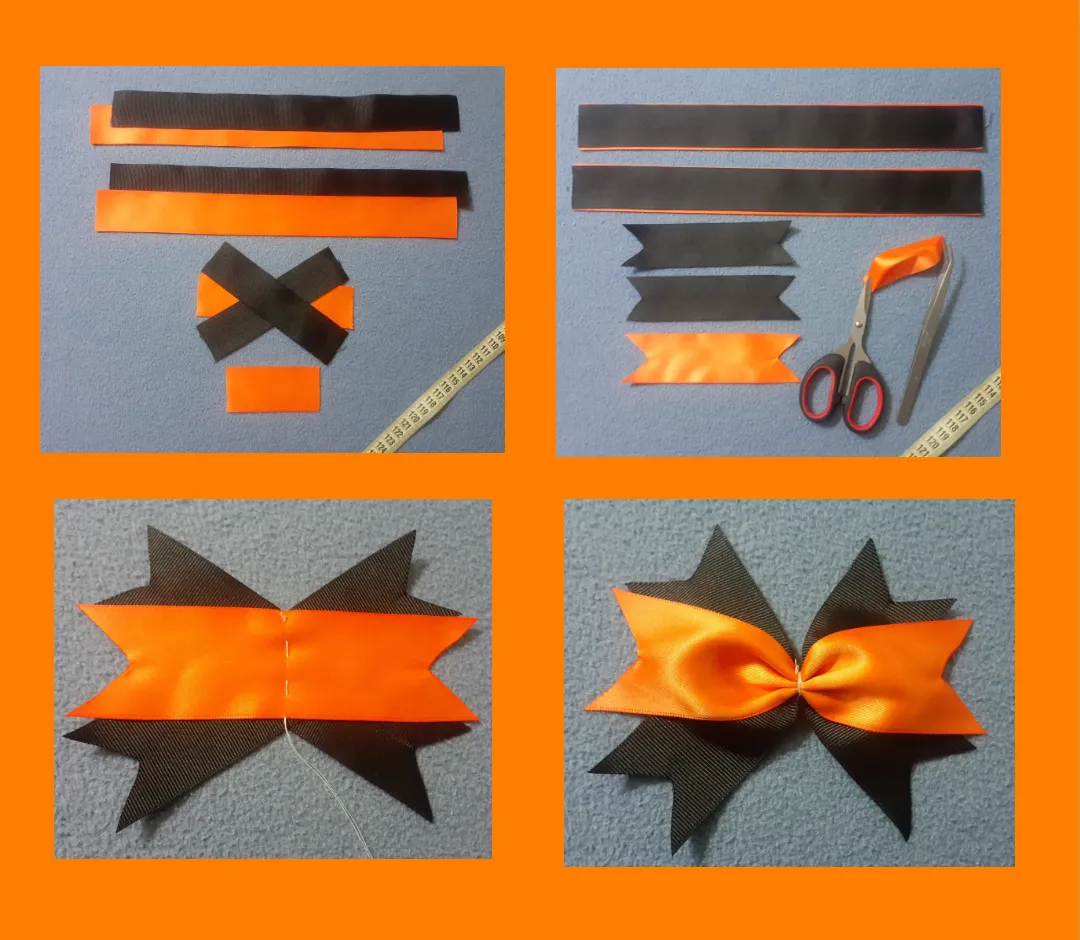
Se cortan 4 pedazos de cinta de razo de 32,5 cm, 2 de cada color.
Cortar 3 pedazos de cinta de 14 cm, 2 de color negro y uno naranja. Así como otro pedazo de 8 cm, para el centro.
Una vez cortados, sellamos las puntas con el encendedor, a la vez que juntamos dos colores, como se muestra en la imagen.
Para la parte de abajo del lazo, se cortan las puntas de la forma que se muestra y luego se juntan colocando el color naranja en el medio.
Luego le pasamos 6 puntos de costura, tiene que ser de esa forma, para que quede bonito. Después se frunce y queda así, se reserva para cuando tengamos lo demás listo.
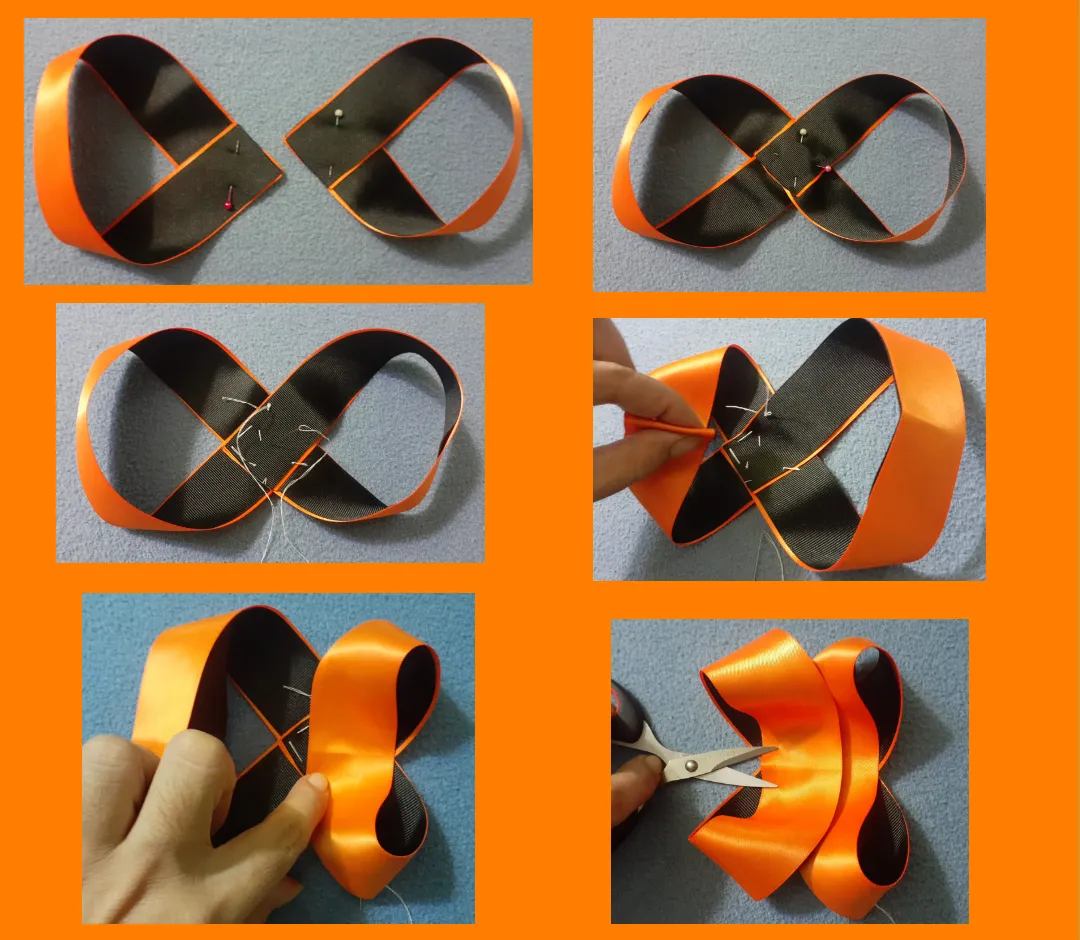
Ahora agarramos cada una de las cintas dobles y la juntamos por cada una de sus puntas con un alfiler, luego se coloca una encima de la otra.
Cuando lo iba a doblar como se ve en el GIF, se me hicieron incómodo los alfileres y le eche hilo y aguja.
Después que lo doble, para sacarle la mitad a ambas partes, lo fui llevando hacia el medio, como se muestra en las imágenes.
Una vez que llevamos ambas lados al centro, lo volteamos y se ve como en la primera imagen.
Ahora le vamos a colocar una cola al lazo, lo posicionamos en el centro como se muestra y cortamos según el tamaño deseado. Luego le corte en forma redondeada y selle con el encendedor.
En el centro le pasamos costuras con unos 6 puntos y como ven que sobresale una punta, se la cortamos y sellamos.
Ya en esta parte es solo jalar el hilo y darle varias vueltas alrededor del lazo para asegurarlo bien.
Le colocamos las colas de la parte de atrás y le cosí la pinza por el medio, después le puse una cinta en el medio. En este punto ya el lazo está listo y bello para cualquier ocasión.
Pero como era para ponérselo hoy para Halloween, le coloque esas decoraciones, que no fue más que cortar unos trozos de foami en forma de triángulos para formar los ojos y nariz de una calabaza y por supuesto la boca, sin dos dientes, para que se viera más terrorífico, muajajajaja.
En el GIF, les muestro como se ve en mi mano, nótese las proporciones en cuanto a tamaño y que para mi gusto y el de mis niñas se ve hermoso.
Por aquí mi princesa Ambar luciendo este bello accesorio para el cabello. Lo pueden hacer del color de su preferencia, en los colores del colegio queda genial. Espero que lo tomen en cuenta si van a hacer algo para sus niñas o algún obsequio que le vayan a hacer a otra princesa.
Muchas gracias por pasar por mi publicación, espero les haya gustado, así no le guste el Halloween je, je, je. Con Dios todo, sin él nada. Muchas bendiciones.

Pumpkin Boutique Bow
Happy start of the week, friends of @Needleworkmonday, a pleasure to greet you and bless you on this wonderful Monday. I hadn't been here for days, today I bring you one of my creations for my princess Ambar. Today is Halloween and although it is a tradition that we do not celebrate at home, last year in the urbanization organized an activity for children to dress up, as I did not have to put them, I made her some hair accessories.
Just on that day a relative of one of the organizers died and we were left with the preparations. This time Arianna was looking for something to wear and wanted to go to the mall to see the decorations. I was very busy and had no motivation to do anything.
Last night at about 11 pm I set myself the task of making this bow, when I start to get the materials, Ambar tells me that if I am going to make one for her, so we negotiated and she won, I made it for her. I show you in a few simple steps how to do it.
q
Materials
Although they seem like a lot of things, it's a little of each one. Ribbons, clothespin, frosted foami, decorations, silicone, scissors, tape measure, silicone gun, needle and thread, pins and lighter.
How to make this beautiful boutique hair bow with pumpkin decoration.
Cut 4 pieces of ribbon of 32,5 cm, 2 of each color.
Cut 3 pieces of ribbon of 14 cm, 2 of black and one orange. As well as another piece of 8 cm, for the center.
Once cut, we seal the ends with the lighter, while joining two colors, as shown in the picture.
For the bottom part of the bow, cut the ends as shown and then join them together placing the orange color in the middle.
Then we pass 6 stitches, it has to be that way, so that it looks nice. Then it is gathered and looks like this, it is reserved for when we have the rest ready.
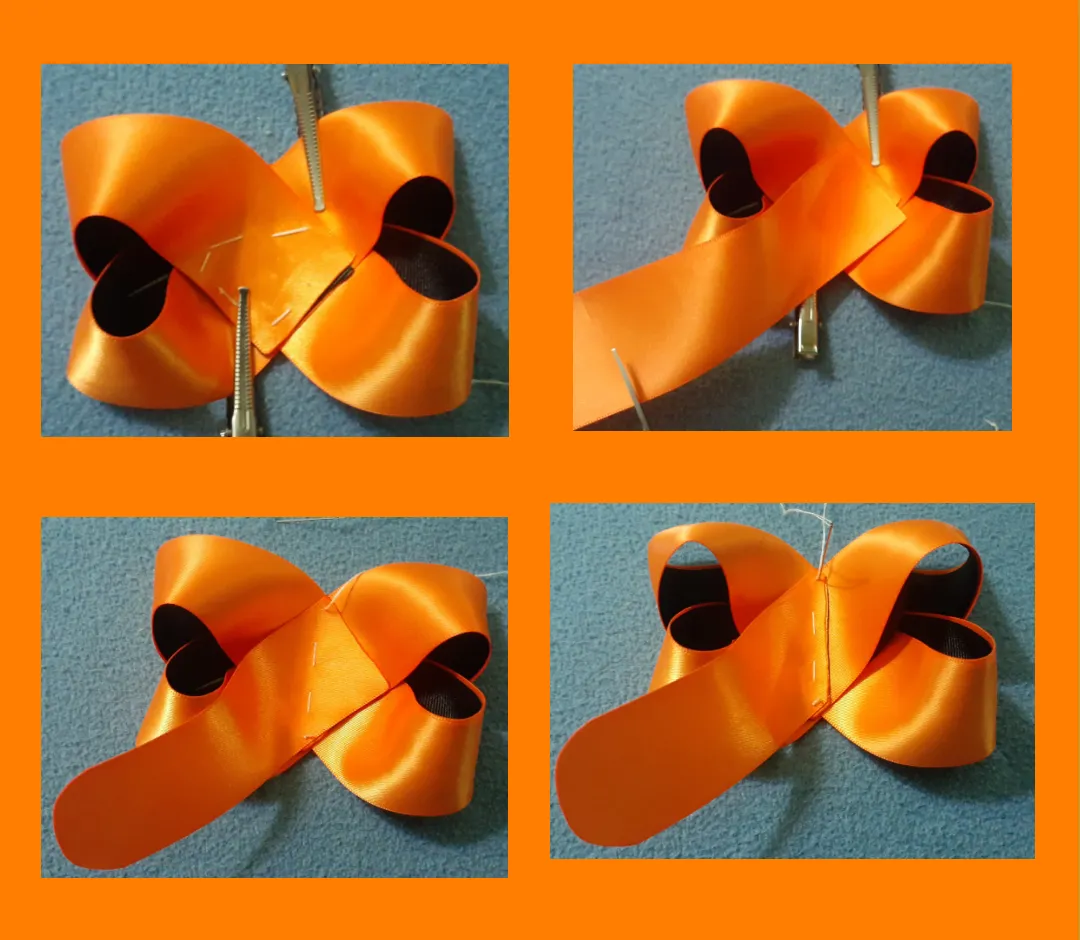
Now we take each of the double ribbons and join them together at each of their ends with a pin, then we place one on top of the other.
When I was going to fold it as shown in the GIF, the pins became uncomfortable and I put thread and needle.
After I folded it, to get half of both parts, I took it to the middle, as shown in the images.
Once we bring both sides to the center, we flip it over and it looks like in the first picture.
Now we are going to place a tail to the ribbon, we position it in the center as shown and cut it according to the desired size. Then cut it in a rounded shape and seal it with the lighter.
In the center we pass seams with about 6 stitches and as you can see that a tip protrudes, we cut it and seal it.
Now in this part is just pull the thread and give it several turns around the loop to secure it well.
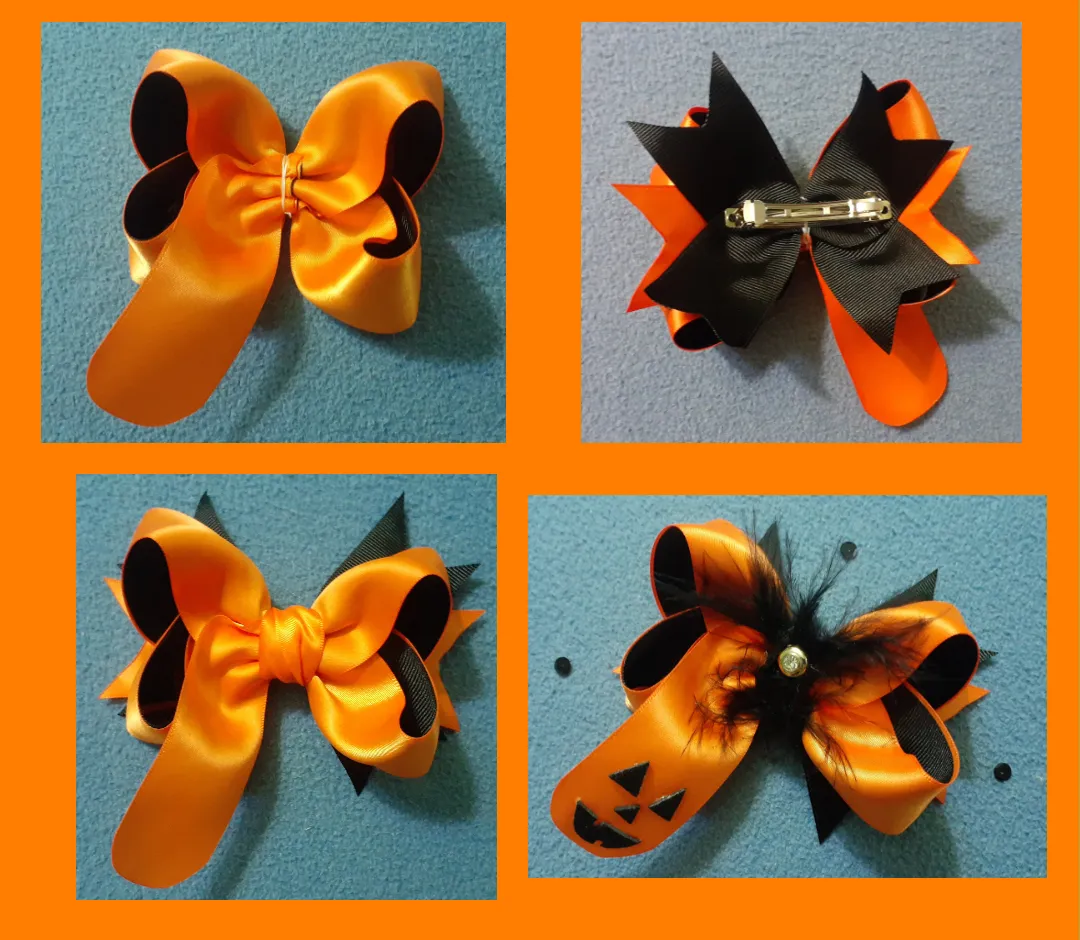
We put the tails on the back and I sewed the clip in the middle, then I put a ribbon in the middle. At this point the bow is ready and beautiful for any occasion.
But as it was to wear it today for Halloween, I put those decorations, which was nothing more than cutting some pieces of foami in the shape of triangles to form the eyes and nose of a pumpkin and of course the mouth, without two teeth, to make it look more terrifying, muajajajajajaja.
In the GIF, I show you how it looks in my hand, note the proportions in terms of size and that for my taste and that of my girls it looks beautiful.
Here is my princess Ambar wearing this beautiful hair accessory. You can make it in the color of your choice, in the school colors it looks great. I hope you take it into account if you are going to make something for your girls or a gift for another princess.
Thank you very much for stopping by my publication, I hope you liked it, even if you don't like Halloween heh, heh, heh. With God everything, without him nothing. Many blessings.
Fotos tomadas por | Photos taken by @leidimarc
Dispositivo | Device | Samsung Galaxy A20
Fotos editadas en: |Photos edited in | CC Express for Samsung
Removedor de imagen | Image Remover | App Remove
Separadores hechos en | Separators made in | CC Express for Samsung
Gif creado en | Gif created in | App Video Maker
Traducción con | Translation with| DeepL