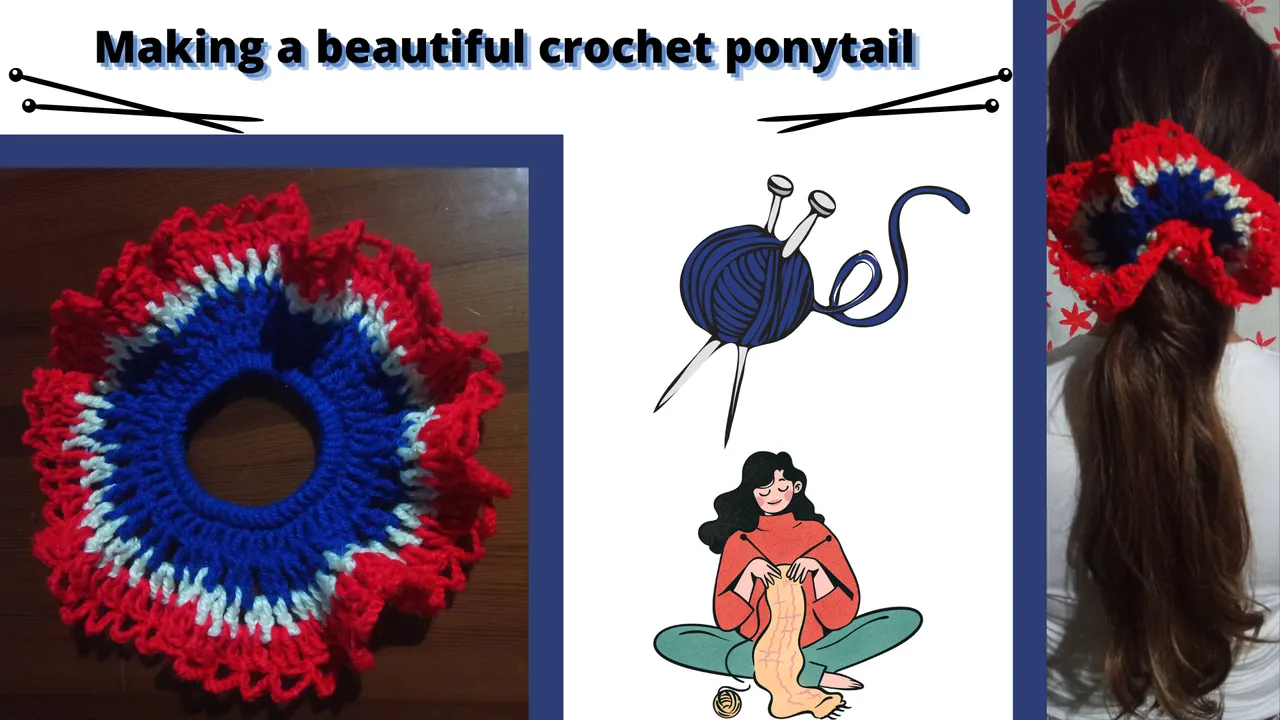

Hola amigos de esta comunidad @needleworkmonday, espero que se encuentren muy bien.
Hoy les presentó un nuevo proyecto como parte de desafío de la comunidad que me he planteado para este año, el cual consiste en aprender a tejer, me ha llamado tanto la atención con cada una de las hermosas creaciones que he visto en esta comunidad.
Cada vez que veo los proyectos de algunas de las amigas tejedoras de la comunidad me he sentido motivada en aprender, es por ello que me he puesto a ver algunos tutoriales de cómo hacer los puntos básicos para emprender este nuevo proyecto y aprendí hacer el punto de cadena, el punto bajo y el punto alto.
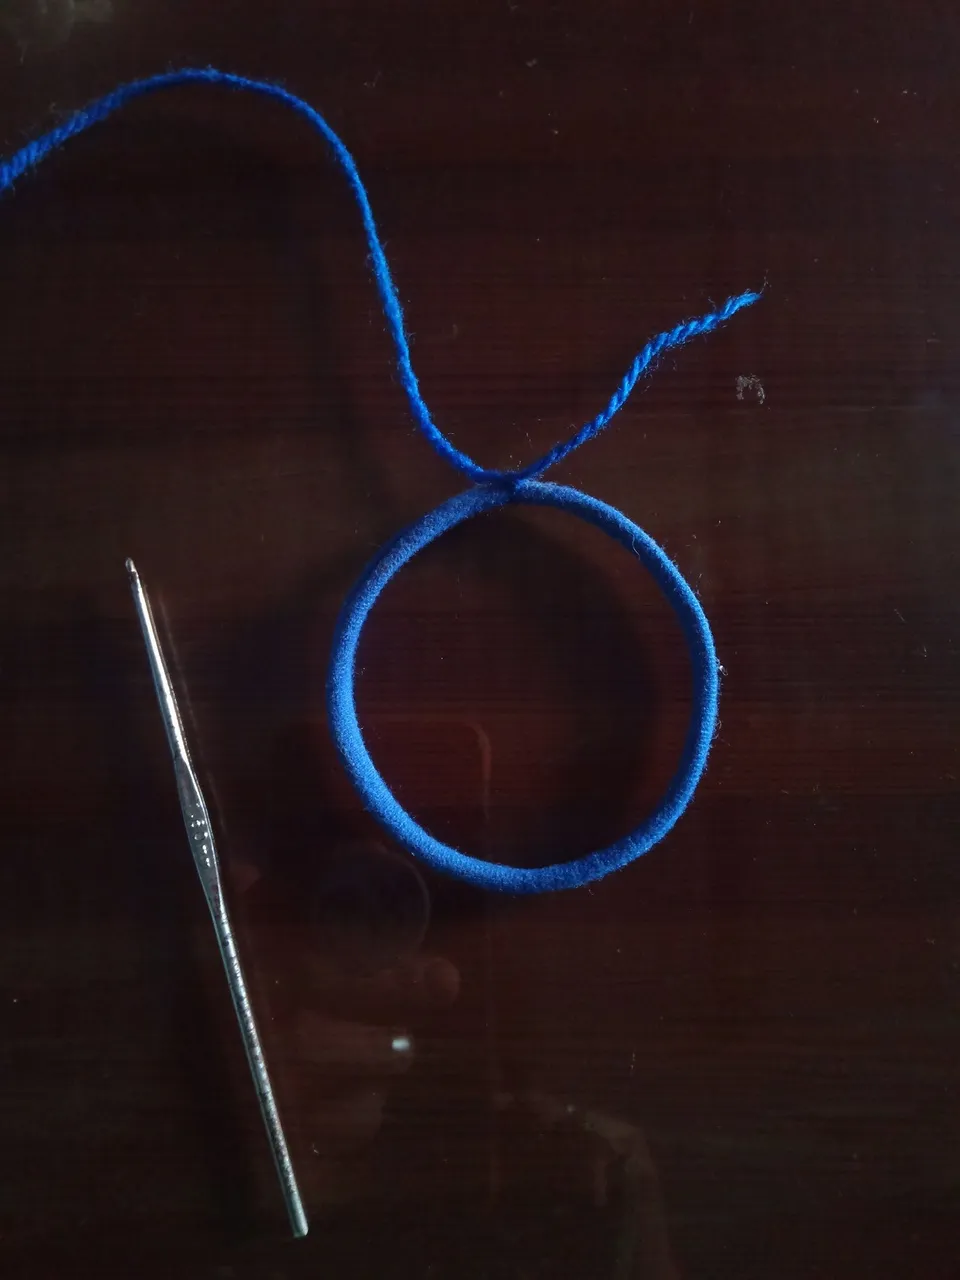
Les confieso que me ha costado un poco dominar la técnica, pero luego de días de práctica haciendo y deshaciendo, tejiendo y destejiendo para hacer mi hermosa colita de Crochet, para poder hacer esta cola, comencé utilizando estambre como material más fácil para aprender, sé que debemos contar cada punto y también aumentar en cada vuelta según sea el caso.
Quiero aprender y un día lograr hacer los Amigurumi que son tan lindos que tanto a los niños como los adultos nos encantaría tener uno, sinceramente me enamore de ellos.
Esta es una meta que ya teína tiempo planteándomelo, como amante de este hermoso arte quiero aprender todo lo necesario para seguir mejorando día a día.
Las fotografías que verán a continuación, fueron tomadas con mi teléfono modelo Alcatel_5044R.

Hello friends of this community @needleworkmonday, I hope you are very well.
Today I present a new project as part of the community challenge that I have set for this year, which is to learn to knit, it has caught my attention with each of the beautiful creations that I have seen in this community.
Every time I see the projects of some of the knitting friends of the community I have felt motivated to learn, that is why I have started to watch some tutorials on how to do the basic stitches to undertake this new project and I learned how to do the chain stitch, the single crochet and the double crochet.
I confess that it has cost me a little to master the technique, but after days of practice doing and undoing, knitting and unknotting to make my beautiful crochet tail, to make this tail, I started using worsted yarn as the easiest material to learn, I know that we must count each stitch and also increase in each round as appropriate.
I want to learn, and one day make the Amigurumi that are so cute that both children and adults would love to have one, sincerely I fall in love with them.
This is a goal that I have been thinking about for a long time, as a lover of this beautiful art I want to learn everything I need to keep improving day by day.
The pictures you will see below were taken with my phone model Alcatel_5044R.


Estos son los materiales a continuación:
Estambre de color rojo, verde, blanco, azul.
Aguja para tejer número 1.60 mm.
Cola para el cabello.
Tijera.
These are the materials below:
Red, green, white, blue yarn.
Knitting needle number 1.60 mm.
Glue for hair.
Scissors.
 |  |  |
|---|
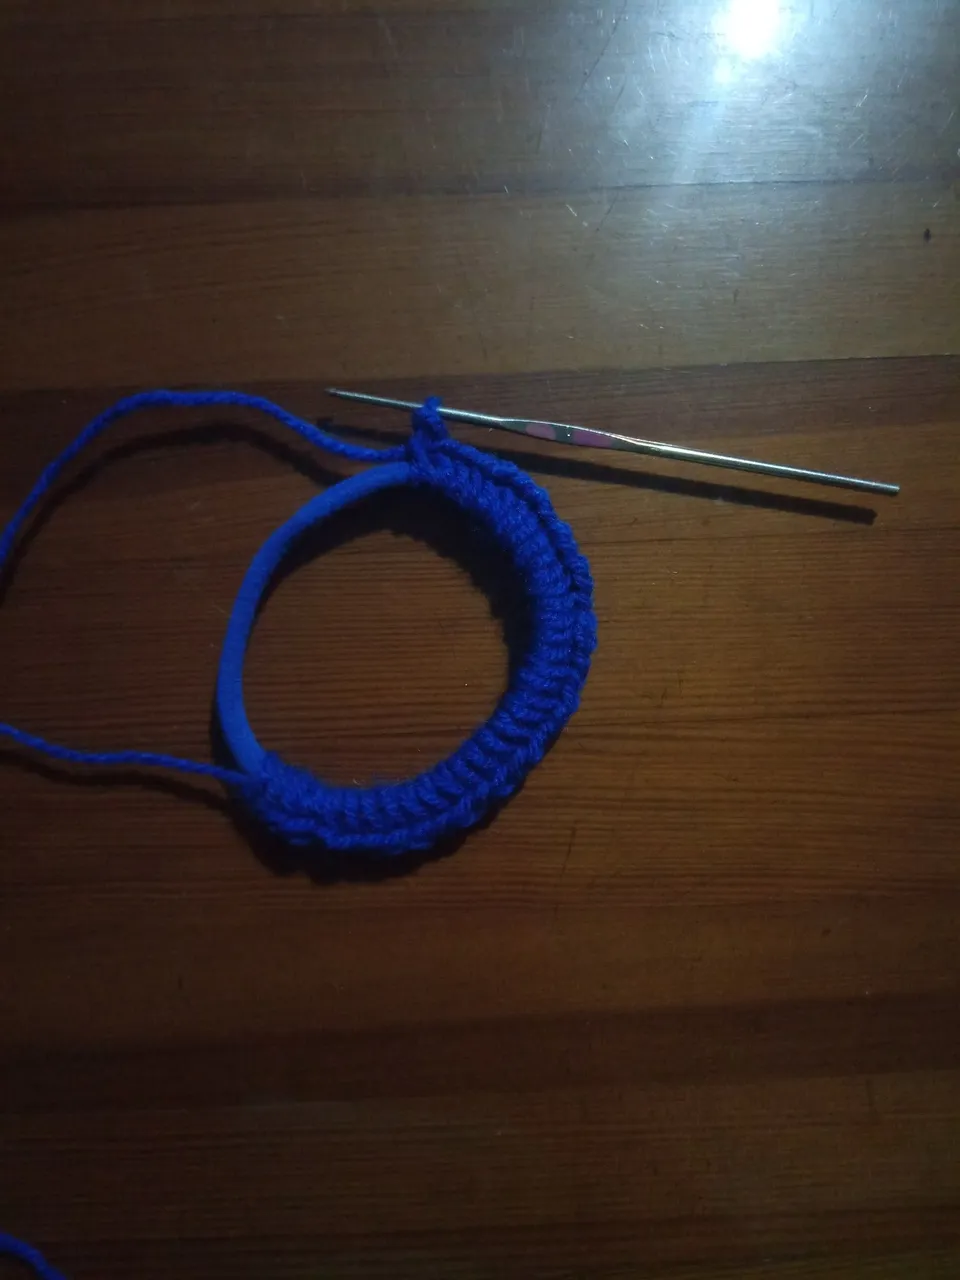
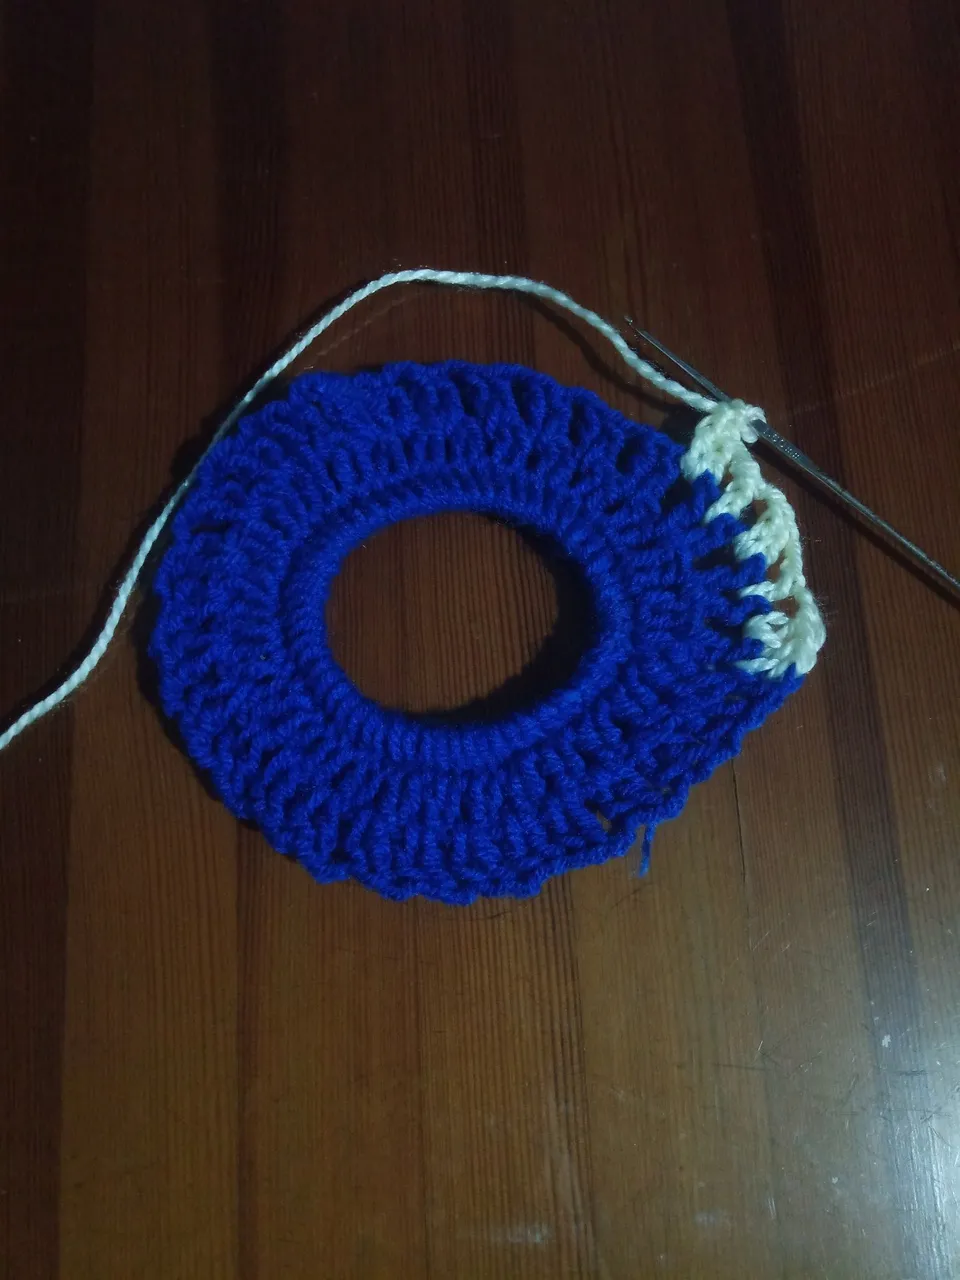
Primero comencé tejiendo sobre la cola sencilla la primera vuelta con punto bajo hasta completar de cubrir con este punto en su totalidad, comenzando una segunda vuelta de 50 puntos bajos.
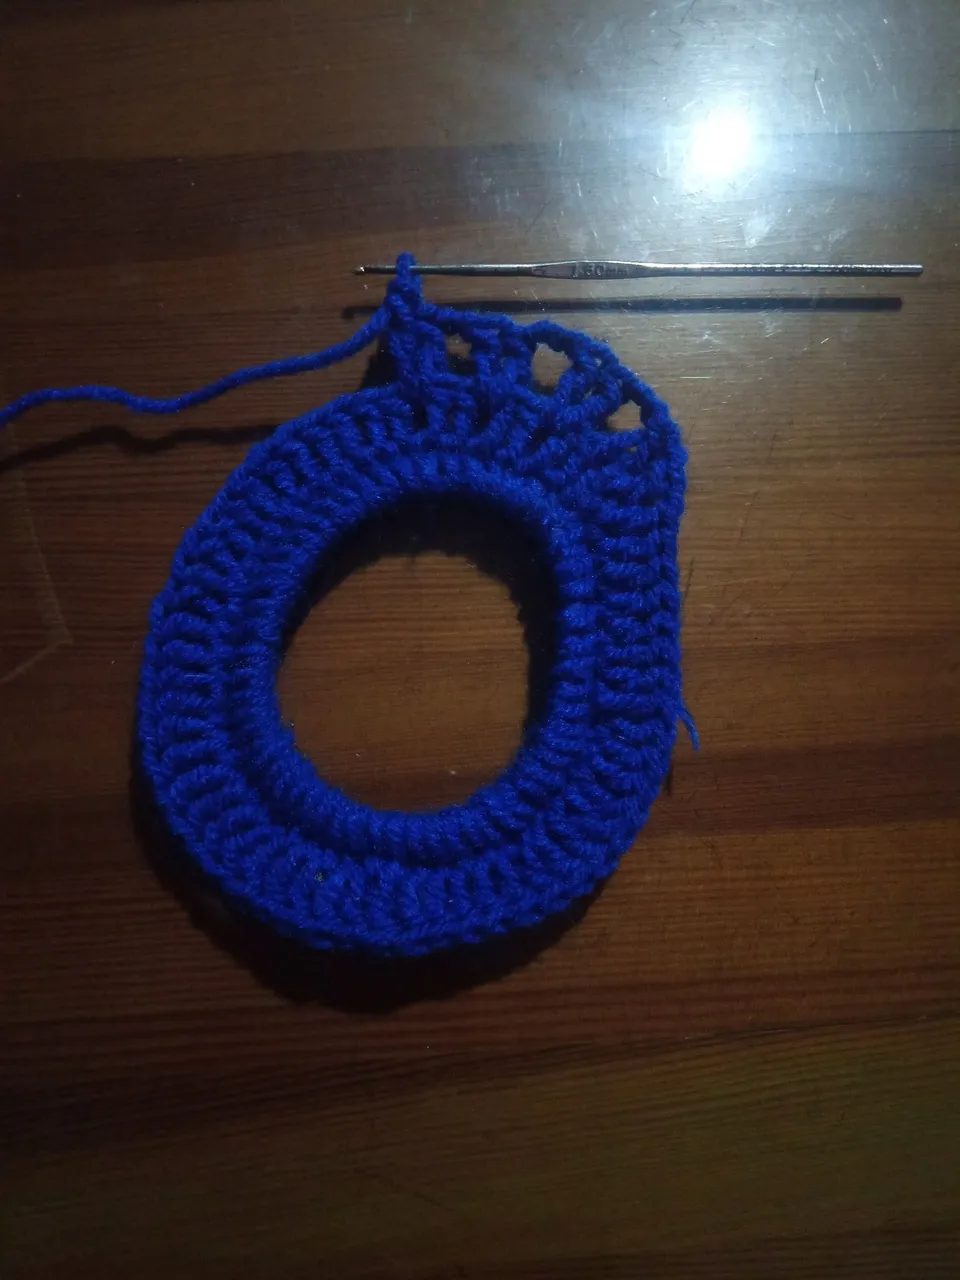
La tercera vuelta fue de 56 puntos altos, realizando 2 puntos altos seguidos más 3 cadenas, luego en el segundo espacio 2 puntos altos seguidos y 2 cadenas, de esta manera pude completar toda la tercera vuelta.
First I started by knitting over the single crochet tail the first row with single crochet until I completed the whole covering with this stitch, starting a second row of 50 single crochet stitches.
The third row was of 56 double crochet, making 2 double crochets in a row plus 3 chains, then in the second space 2 double crochets in a row and 2 chains, in this way I was able to complete the whole third row.
 |  |  |
|---|
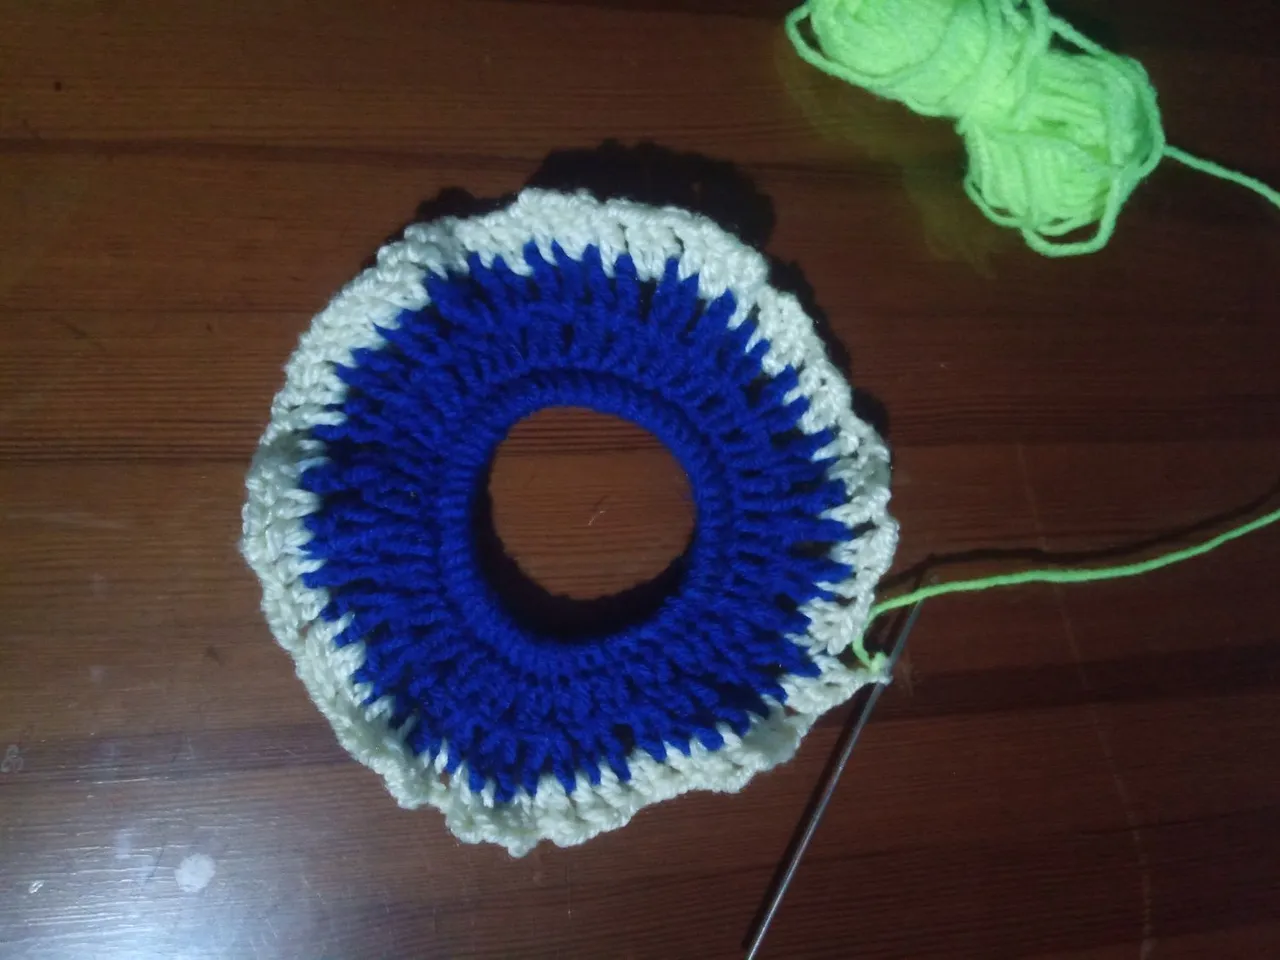
Luego de terminar con la tercera vuelta, realizo una cuarta vuelta utilizando el estambre blanco haciendo 70 puntos altos de la siguiente manera, comenzando 1 punto alto, 2 cadenas, 2 puntos altos, 2 cadenas, 1 puntos altos, 2 cadenas hasta completar la vuelta, aumentar los puntos nos da el efecto de flequillo y así nuestro diseño pueda lucir ms exótico.
En la vuelta número 5, quise colocarle estambre color verde para hacer más llamativo este accesorio, pero en transcurso del tejido el material no me alcanzo para culminar con el mismo color, por ello tuve que destejer y excluir este color.
After finishing with the third row, I make a fourth row using the white worsted yarn, making 70 high stitches in the following way, starting with 1 high stitch, 2 chains, 2 high stitches, 2 chains, 1 high stitch, 2 chains until completing the row, increasing the stitches gives us the fringe effect so our design can look more exotic.
In row number 5, I wanted to add green yarn to make this accessory more striking, but in the course of knitting the material was not enough to finish with the same color, so I had to unknot and exclude this color.
 |  |  |
|---|
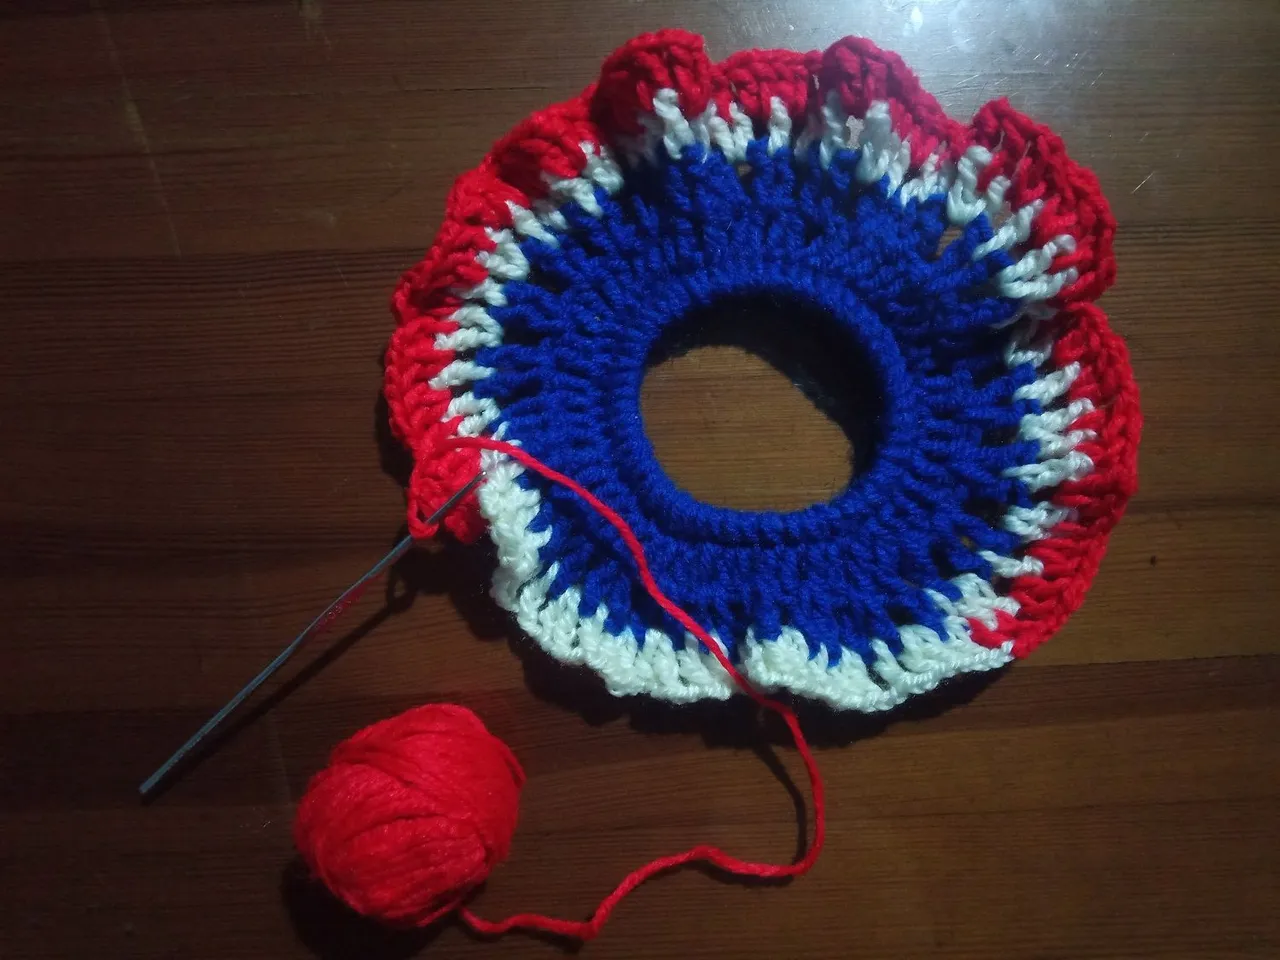
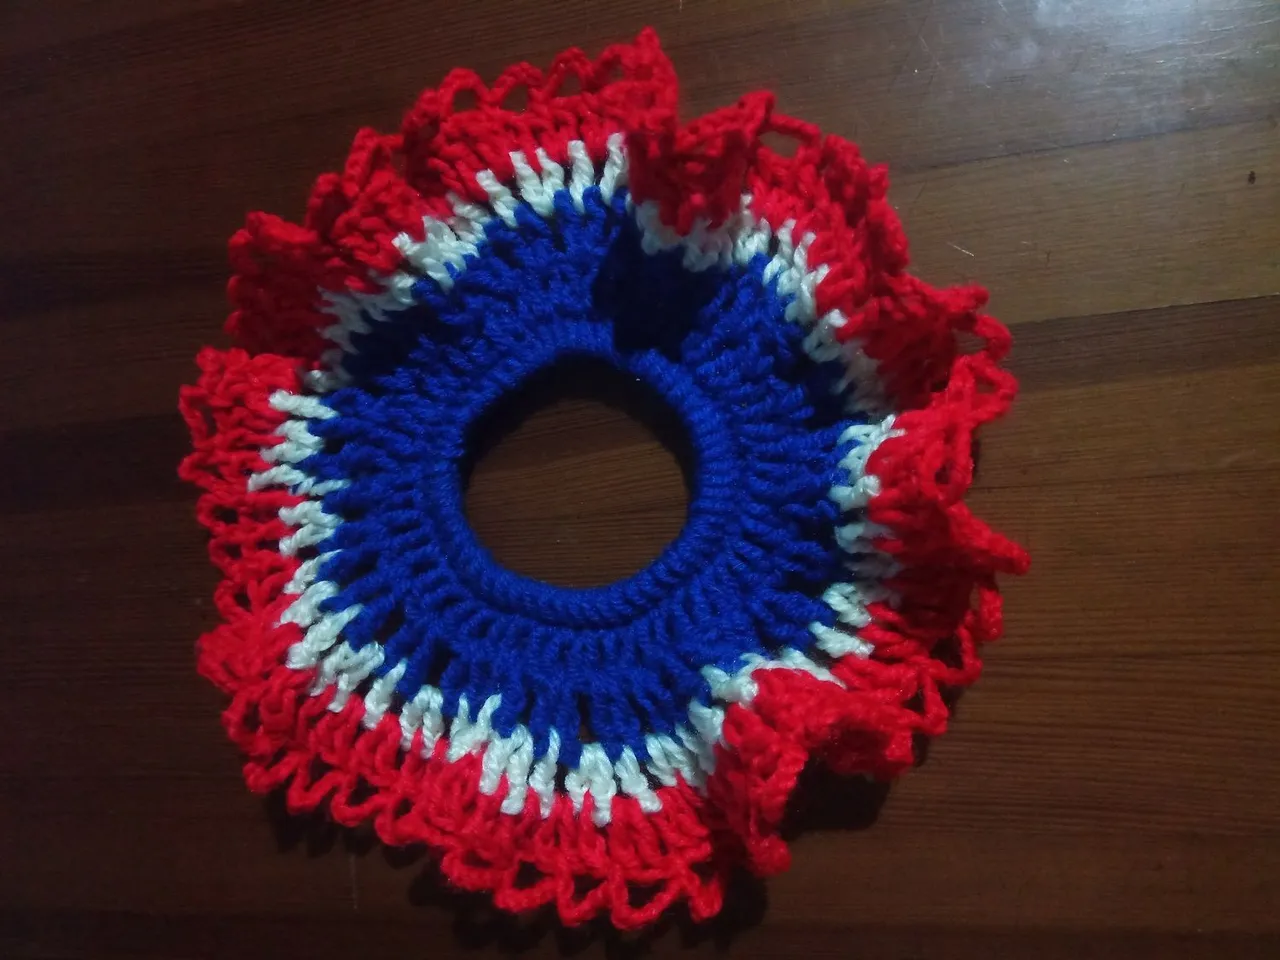
Para la sexta vuelta total 125 puntos.
Procedimiento.
2 Puntos altos juntos más 1 cadena más 1 punto alto más 1 cadena, luego 2 puntos altos juntos más 1 cadena repitiendo este procedimiento una y otra vez hasta completar la vuelta.
Para culminar el borde realicé cadenas de 8 puntos, para colocar a espacios de 3 puntos de cadenas hasta culminar la séptima vuelta para finalizar este trabajo.
Es muy satisfactorio realizar este arte, primero sentimos emoción de ver cómo serán los resultados, también me di de cuenta de que cuando estamos tejiendo olvidamos algunas cosas que nos preocupen, nos relaja y nos ayuda a desestresarnos, he incluso me ayudo a pensar en este proceso de cómo hacer mis próximos proyectos, se me vino muchas ideas a la mente para mejorar las técnicas y es que soy de proponerme metas y hacer las cosas lo mejor posible.
Como siempre es un placer para mí compartir cada paso que doy en esta comunidad y contar con sus buenas recomendaciones, me han ayudado a sentirme cada día más motivada con este don que durante mucho tiempo quise poder iniciar, pero por circunstancia de la vida no había podido tener la oportunidad de poner en práctica el deseo de crear con mis propias manos algunos accesorios, de verdad que es muy gratificante crear para nosotros y seres queridos, espero que les guste mi punto de partida para este desafío.
Nos estaremos viendo en otra de mis publicaciones, gracias por visitarme.
For the sixth row, total 125 stitches.
Procedure.
2 double crochets together plus 1 chain plus 1 double crochet plus 1 chain, then 2 double crochets together plus 1 chain, repeating this procedure over and over again until the round is completed.
To finish the border I made chains of 8 stitches, to place 3 chain stitches apart until the seventh row to finish this work.
It is very satisfying to make this art, first we feel excited to see how the results will be, I also realized that when we are knitting we forget some things that worry us, it relaxes us and helps us to de-stress, and even helped me to think in this process of how to do my next projects, many ideas came to my mind to improve the techniques, and I am to propose goals and do things as good as possible.
As always it is a pleasure for me to share every step I take in this community and to have your good recommendations, they have helped me to feel more motivated every day with this gift that for a long time I wanted to start, but by circumstance of life had not been able to have the opportunity to put into practice the desire to create with my own hands some accessories, it is really very rewarding to create for ourselves and loved ones, I hope you like my starting point for this challenge.
We will be seeing each other in another of my publications, thank you for visiting me.
social networks / redes sociales
![]()
![]()
Traductor Deepl
Translated Deepl
Ediciones Canva
Editions Canva