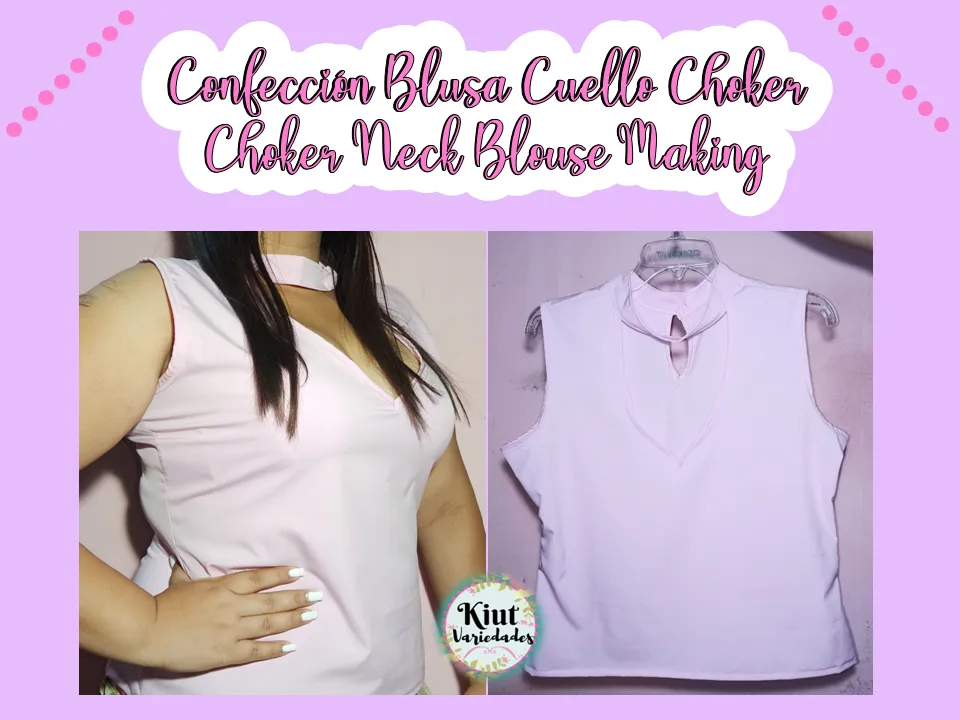
¡Hola queridos usuarios de Hive ✨💕!
Hi dear Hive users ✨💕!

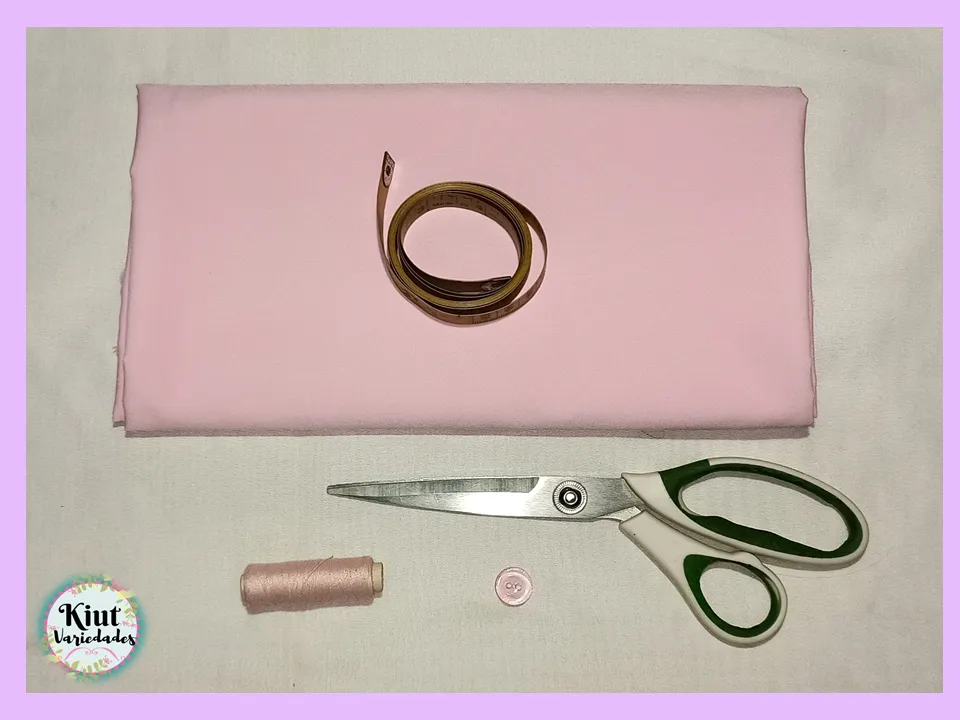
🧵 MATERIALES || MATERIALS 🧵
- Tela Seda Italiana (aunque también recomiendo telas como Crepe, Chiffon, Tela de Camisería, entre otras).
- 1 botón del color de la blusa.
- Tijeras para tela.
- Hilo.
- Cinta métrica.
- Patrones.
- Máquina de coser.
- Italian silk fabric (although I also recommend fabrics such as crepe, chiffon, shirting fabric, among others).
- 1 button in the color of the blouse.
- Fabric scissors.
- Thread.
- Tape measure.
- Patterns.
- Sewing machine.
🧵 COMENCEMOS || LET'S START 🧵
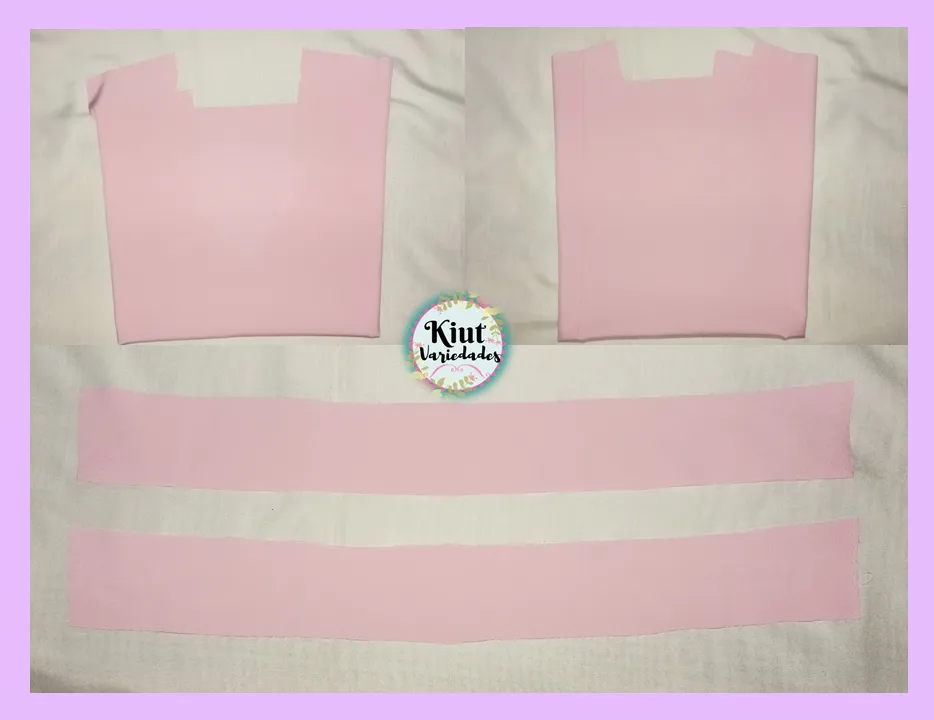
Teniendo los patrones (que realice en la publicación anterior), procedí a cortar todas las piezas.
Having the patterns (which I made in the previous publication), I proceeded to cut all the pieces.
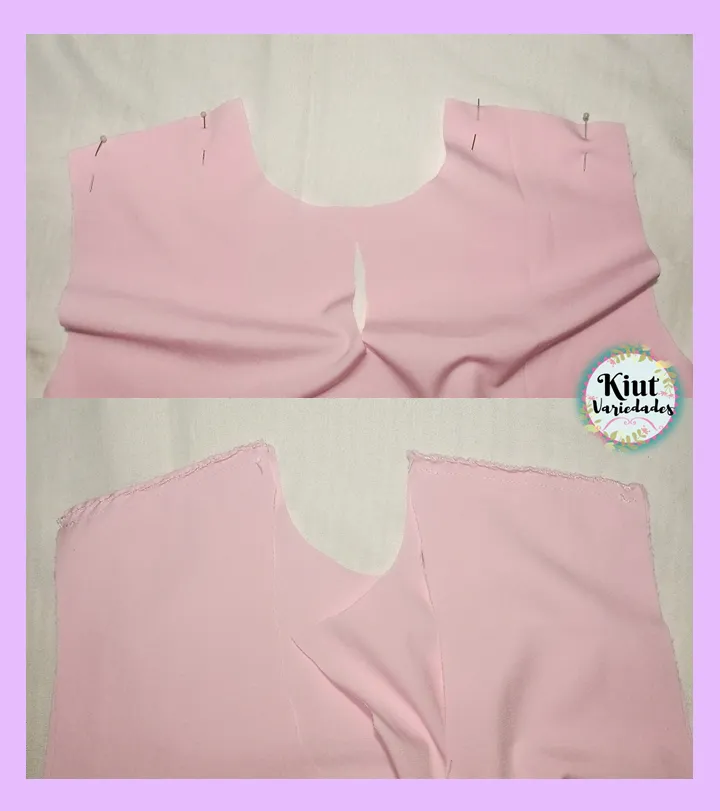
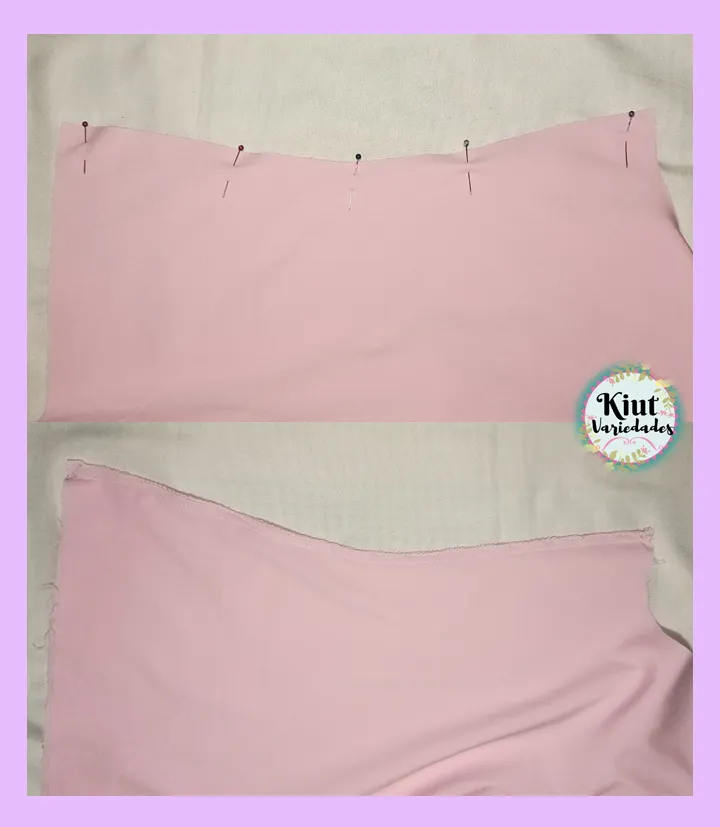
Unimos las piezas por los hombros y seguidamente cosemos los costados de la blusa, si podemos hacemos una costura en zigzag para evitar que la tela se deshile.
We join the pieces at the shoulders and then sew the sides of the blouse, if possible we make a zigzag seam to prevent the fabric from unraveling.
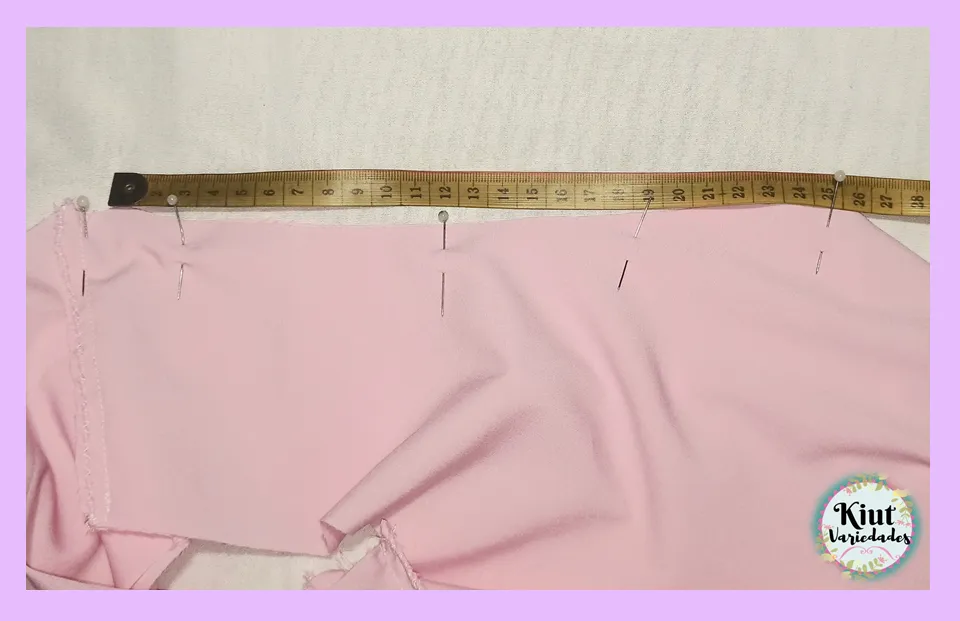
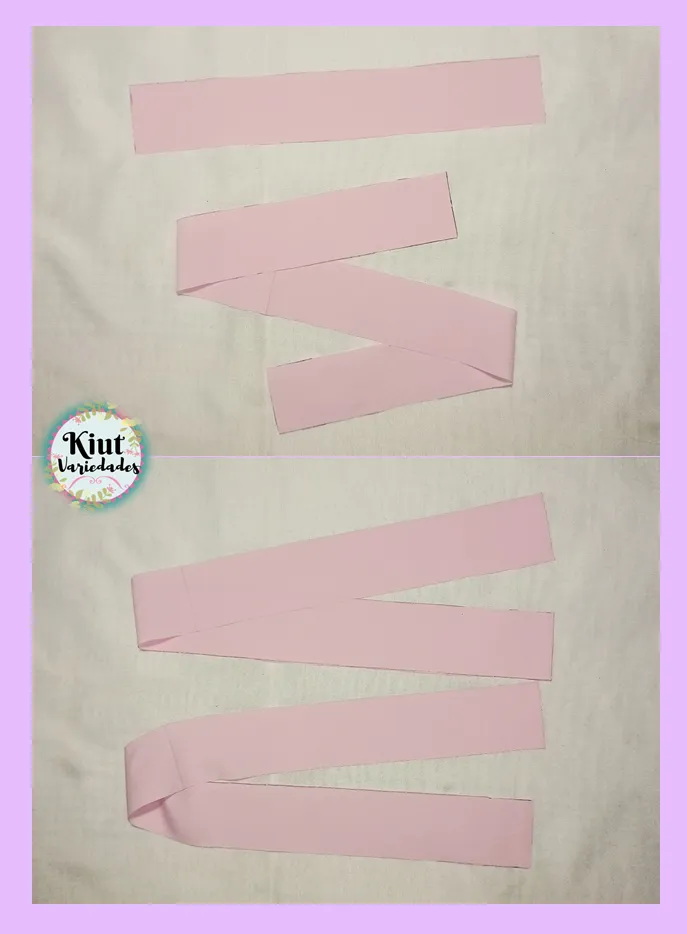
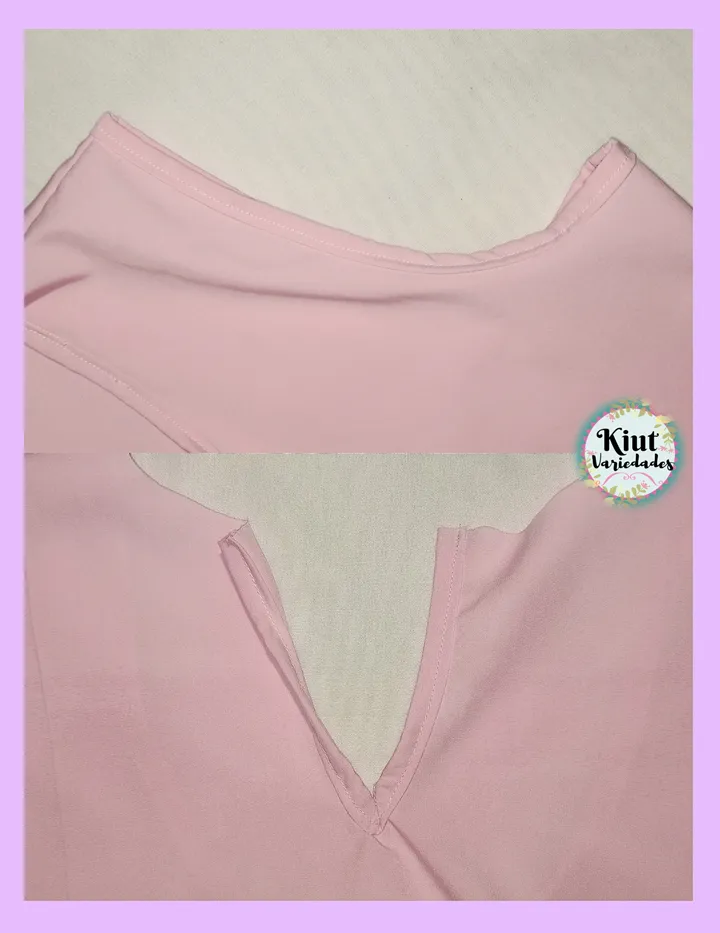
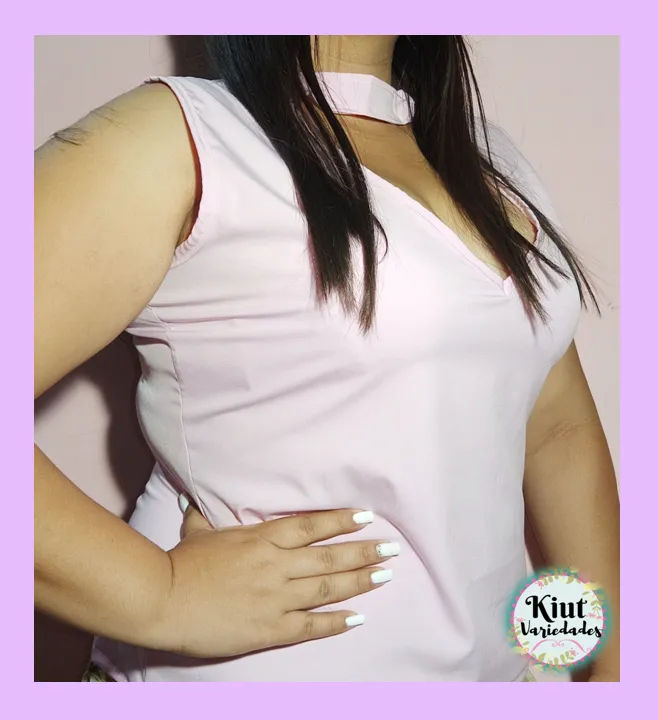
Se mide el cuello delantero desde la pestañita que deje para coser el choker hasta el final del escote, obviamente esta medida va al doble. Cortamos las tiras de sesgo de 4cm de ancho para el cuello delantero, las sisas y la abertura de la espalda.
Measure the front neck from the tab you left to sew the choker to the end of the neckline, obviously this measurement is doubled. Cut 4cm wide bias strips for the front neckline, armholes and back opening.
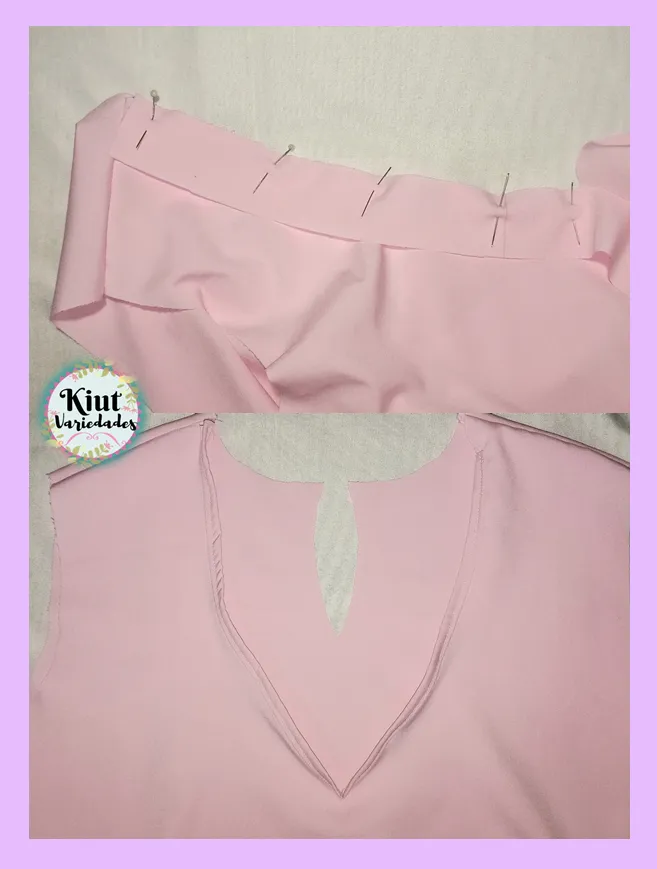
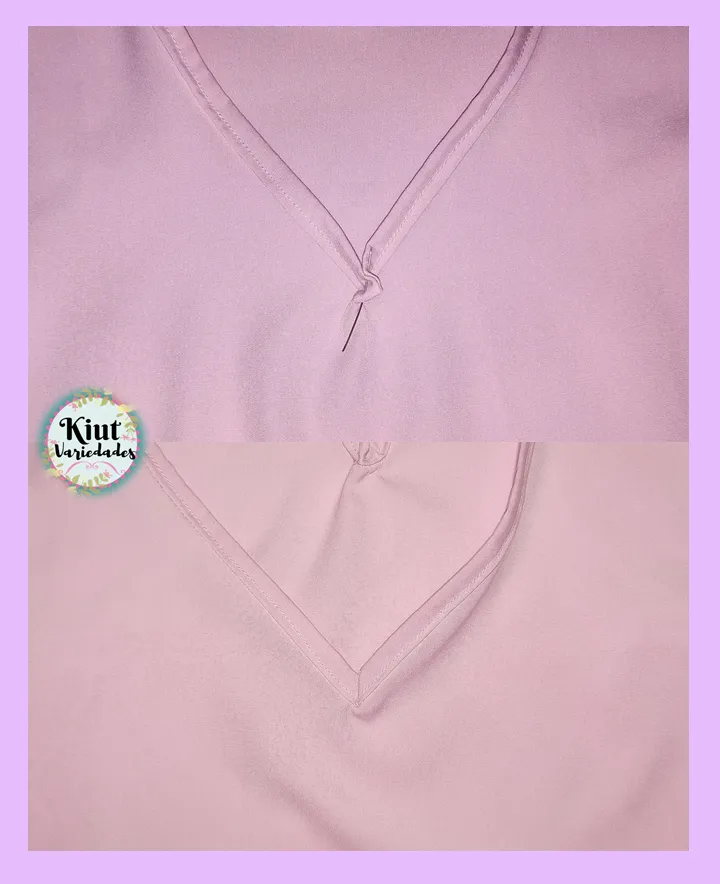
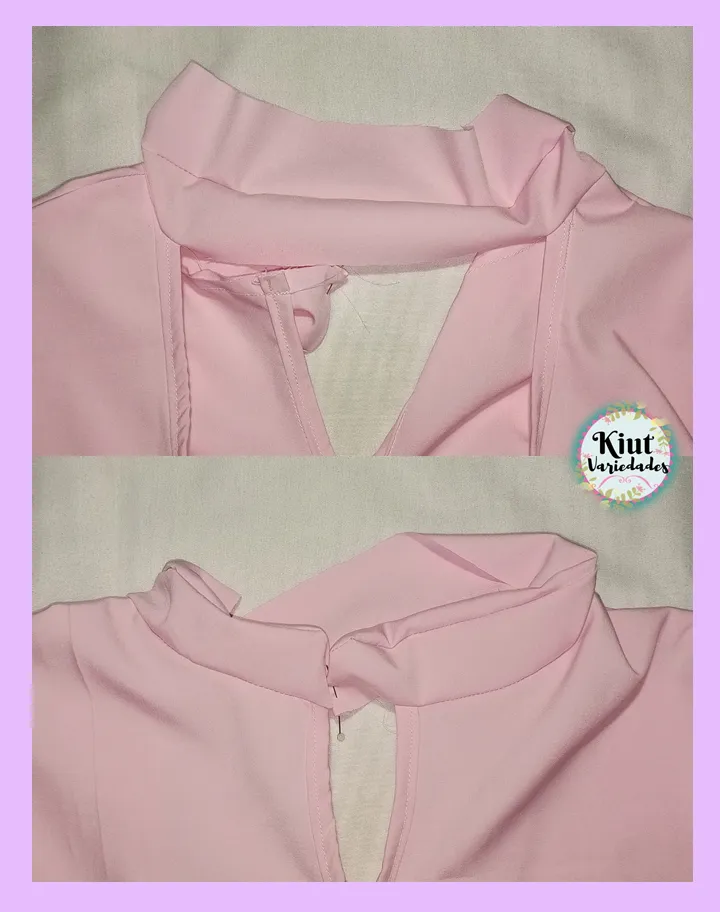
Cosí el sesgo en el cuello delantero de pestañita a pestañita, en el centro del escote para garantizar que se forme la V, lo que hice fue coser por el lado del revés la punta del escote así como muestro en las imágenes.
I sewed the bias binding on the front neckline from tab to tab, in the center of the neckline to ensure that the V is formed, what I did was to sew on the wrong side of the neckline tip as shown in the pictures.
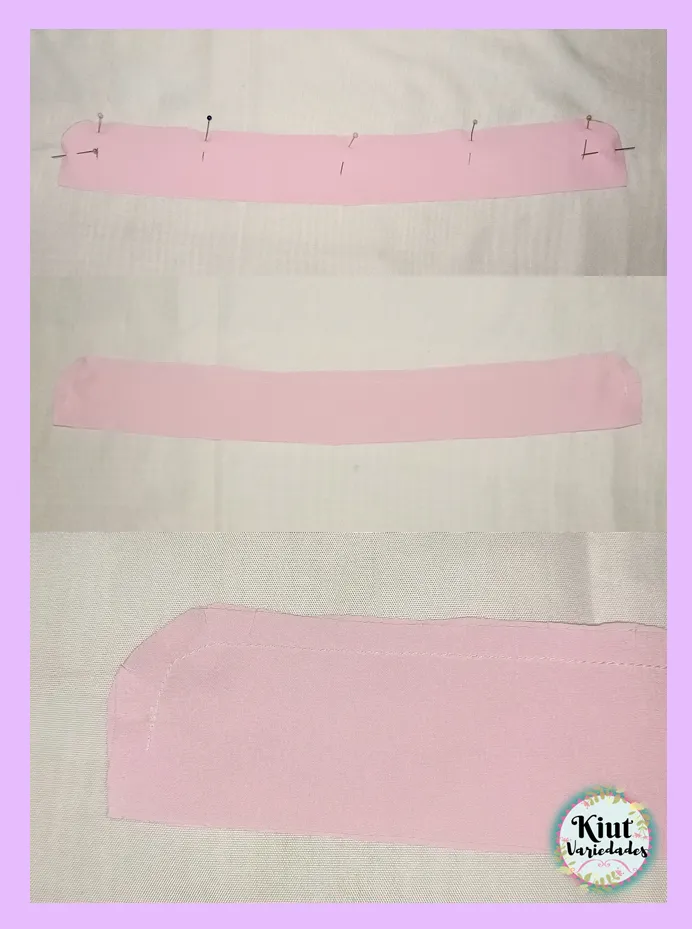
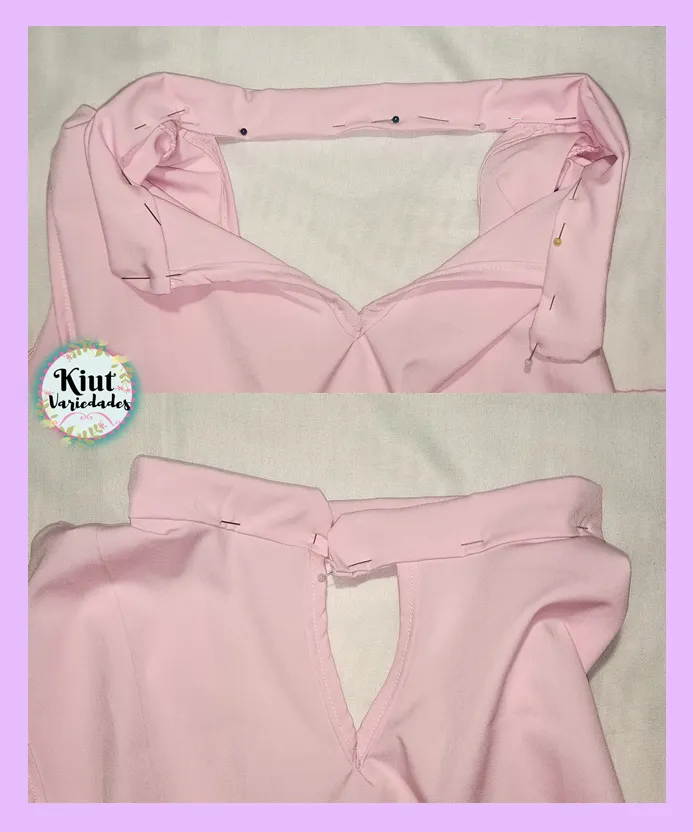
Seguidamente cosí el resto de los sesgos, sisas y escote de espalda. Uní las dos piezas del choker enfrentando los derechos de tela y dejando aproximadamente 2cm sin coser en los extremos.
Next I sewed the rest of the bias binding, armholes and back neckline. I joined the two pieces of the choker facing the right sides of the fabric and leaving approximately 2cm unsewn at the ends.
Para coser el choker medimos los cm extra que dejamos para el ojal del lado de la mano dominante, y desde allí sujetamos con alfileres por la parte de atrás, del otro lado de la espalda si unimos desde el borde, y en la parte delantera se deja libre todo el escote.
To sew the choker we measure the extra cm that we leave for the buttonhole on the dominant hand side, and from there we pin from the back, on the other side of the back if we join from the edge, and on the front we leave the whole neckline free.
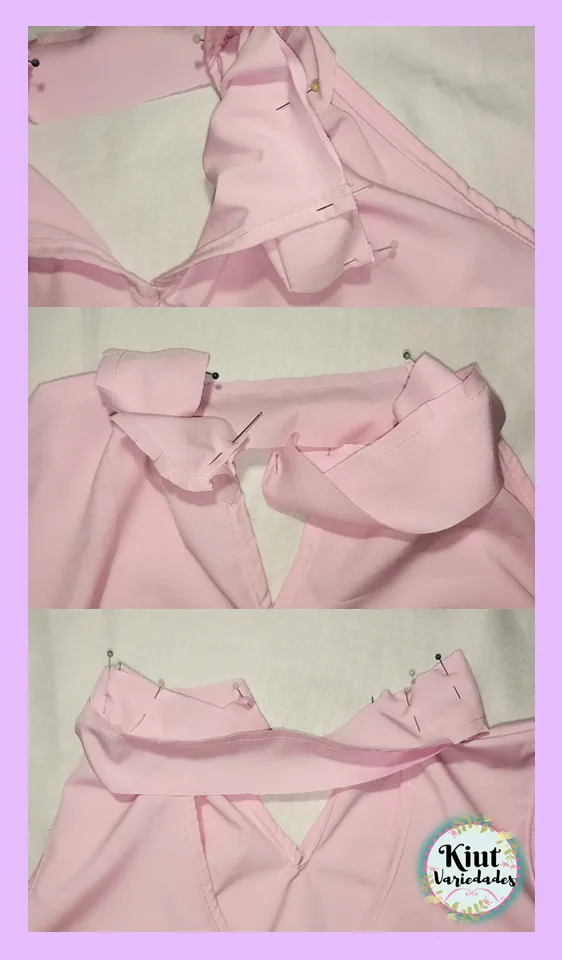
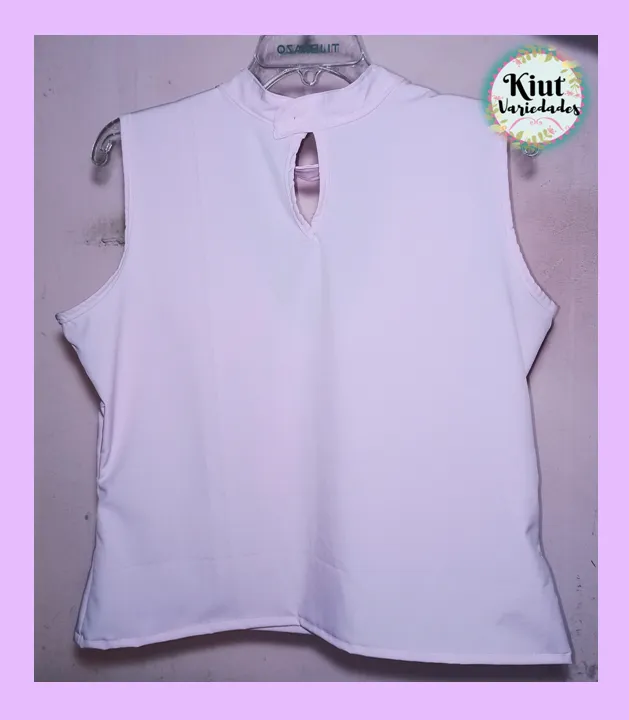
Una vez este cosido volteamos y cosemos la otra parte del cuello ocultando la costura anterior.
Once it is sewn, we turn over and sew the other part of the collar, hiding the previous seam.
Luego cosí el botón y realice el respectivo ojal para finalmente hacer el ruedo de la parte inferior de la blusa.
Then I sewed the button and made the respective buttonhole to finally make the hem of the bottom of the blouse.

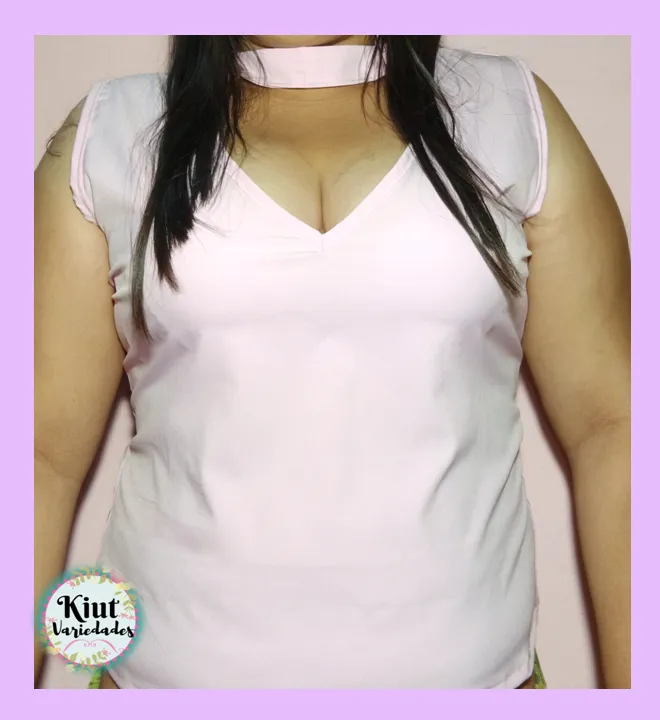
Te invitamos igual que siempre a que intentes este proyecto por tu cuenta y nos cuentes en los comentarios 👇 como es tu experiencia.
We invite you as always to try this project on your own and tell us in the comments 👇 as is your experience..


Síguenos en todas nuestras redes sociales… || Follow us on all our social networks ...
Facebook:KiutVariedades
Instagram:@Kiut_variedades
Twitter:@Kiut_variedades