One of my dreams was to make my daughter her very own fancy and elegant dress, specifically designed and tailored just for her. Right now, that still remains a dream because I am blessed with two wonderful boys. But the urge to create dresses is still there and I am still hoping of someday having a daughter. We're still far from realizing that dream but that doesn't stop me from giving in to the urge of crafting beautiful dresses. After all, this can be my training for the time when I actually will be making my baby girl's dresses.
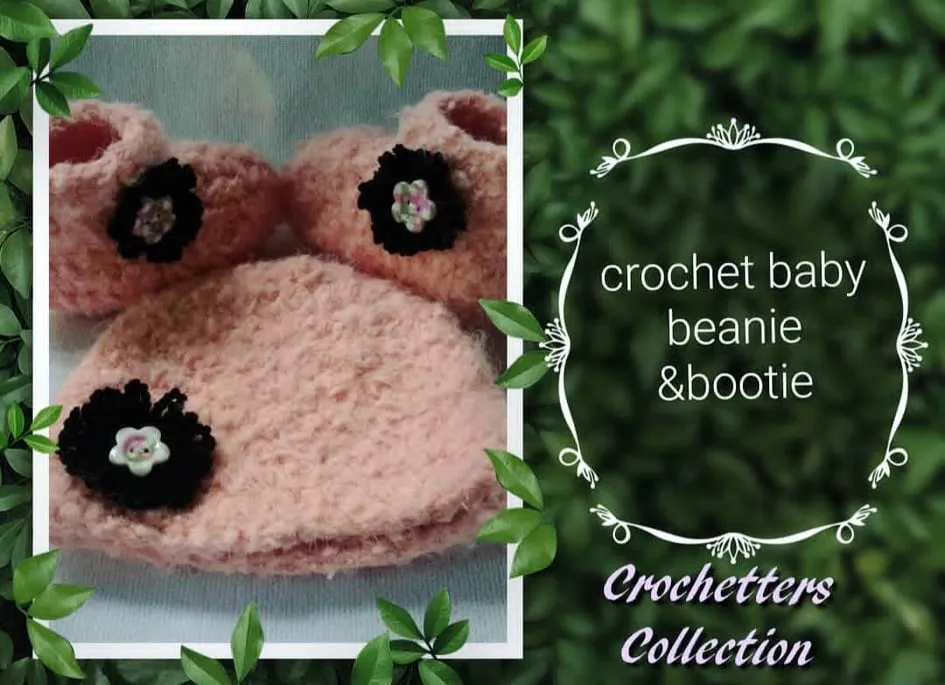
So for today, I would like to share to you how I am able to make this pretty dress that I once imagined. I have this feathery kind of yarn on my stash for a long time. I bought this yarn I think two years ago through online and I fell in love with its soft and fluffy texture. I already made a coinpurse, a beannie and a pair of boots from this.


I had some white feathery yarn also that I used on my commissioned project as an edging to give a fancy look.
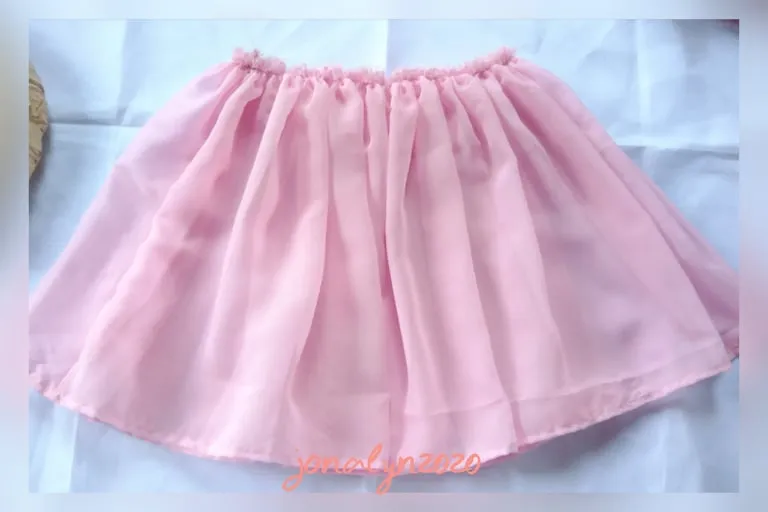
While I'm staring at what's left of it, I decided to make a dress. A crochet on top using the feathery yarn and some tulle on the bottom part with a lining inside.
This is how I do it.
Materials:
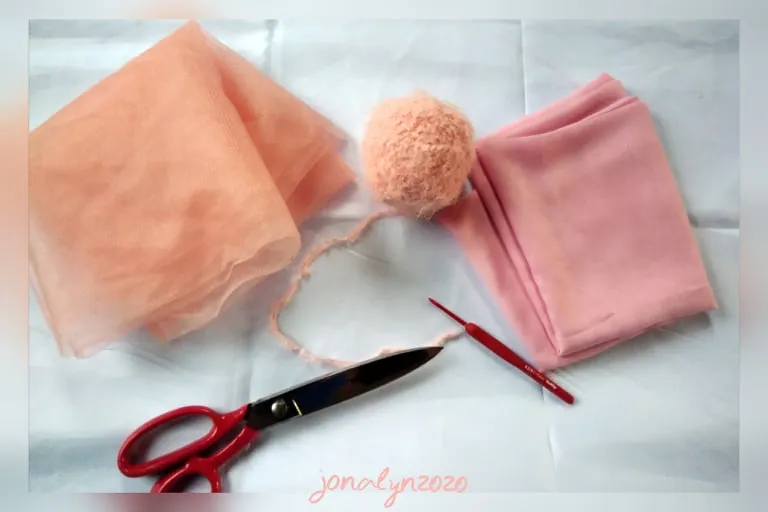
- feathery yarn
- soft tulle
- thin fabric for lining (pongee)
- 2.75mm hook
- scissor
Procedure:

- I sew the soft tulle by making a shear like this one (enough to fit for a baby's waist plus some extension).
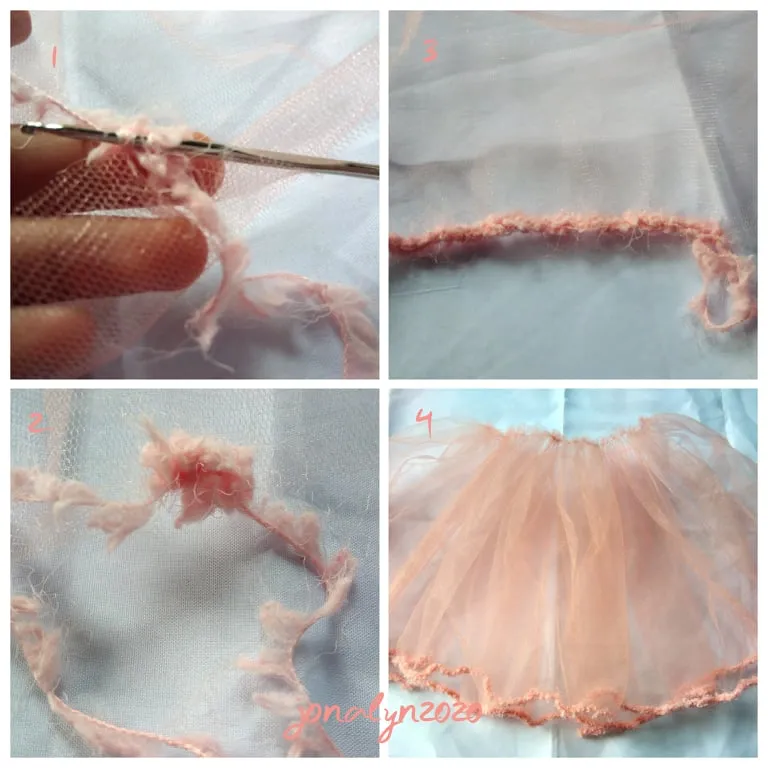
- On the edge of the skirt, I crochet the feathery yarn to make some designs. I used smaller size of hook (1 mm hook) enough for the head to get through on the holes of the tulle (but only on the 1st layer).
- 1st layer was single crochet
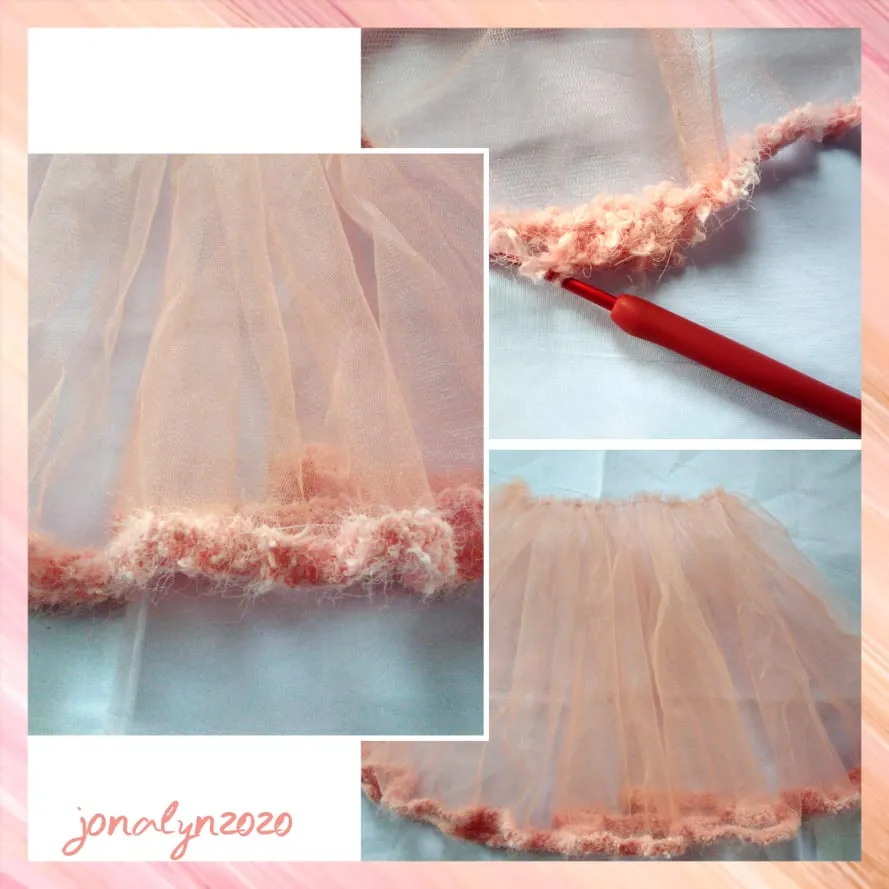
- 2nd layer was double crochet-chain-double crochet (I used the 2.75mm hook by this time
Note: I had a hard time crocheting this kind of yarn specially on the 2nd layer since I can't really see the stitches clearly so what I did was estimate and felt the stitches on the 1st layer.
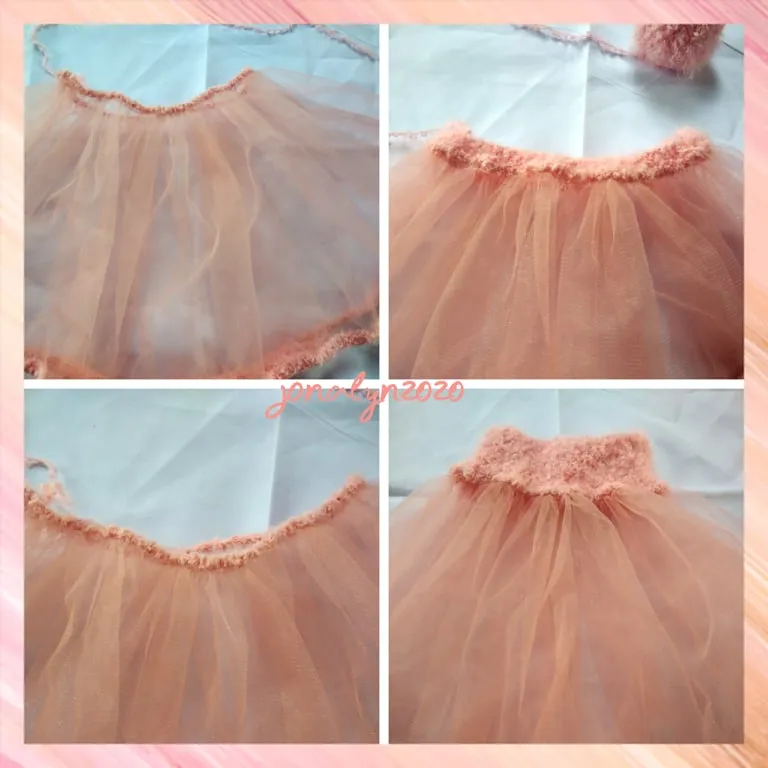
- Next, I was making the same on the upper portion of the skirt, only single crochet on the shears (doubling the tulle when crocheting so I will have the same size as the waist measurement).
- Then, next layers was double crochet - chain - double crochet until 7th layer.
- As I was working on the 8th layer, on the arm side, I make some chains, about 40 chains, skipping at least 2 inches then double crochet again to continue the 8th layer and then do the same with other side of sleeve.
- on the 9th and 10th layer, do the double crochet - chain - double crochet until end
- on the 11th layer, on the sleeve part - double crochet all skipping the chains. This will make the sleeve portion become smaller.
- and on the 12th layer, do the double crochet - chain - double crochet (including sleeve area skipping 1 stitch) until the end. In this area you will insert the ribbon as ties/adjuster to your baby dress.
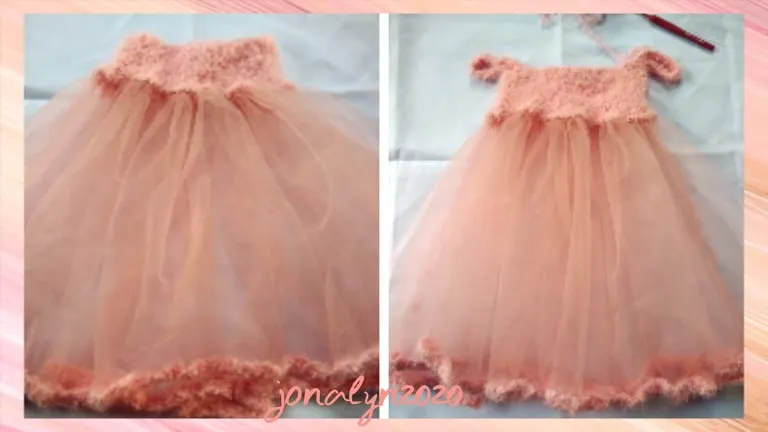
- This is how it looks like then.
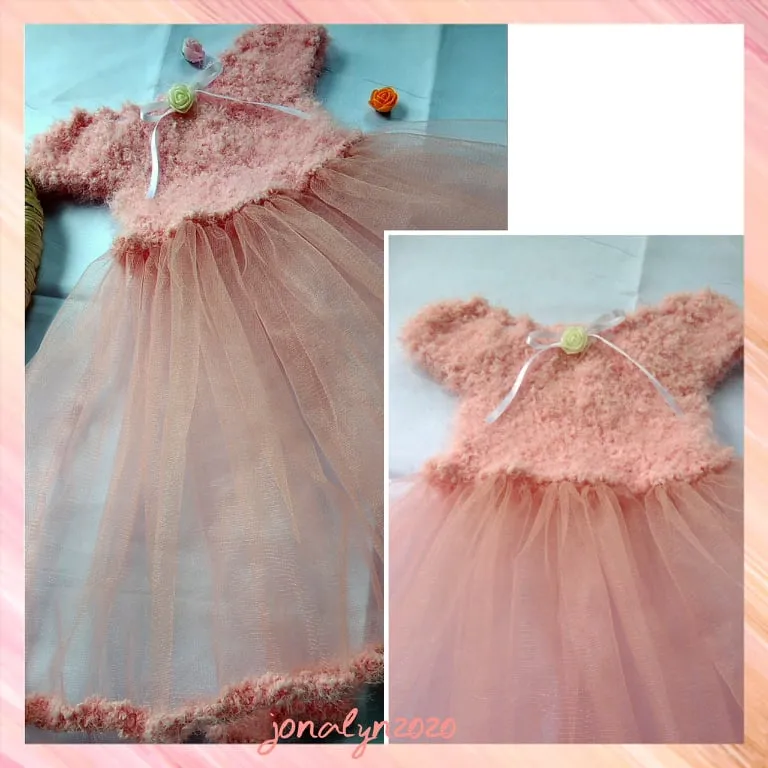
As I was making this dress, I can't help but imagine how cute and adorable the baby will look wearing this thing. This feeling I get whenever I finish a dress is what inspires me to learn and create more.
- Then I made the lining, doing the same shearing as the tulle with same measurement.
- I attached the lining that I made to the dress by sewing it directly to the feathery crochet at the bottom portion and we're done.
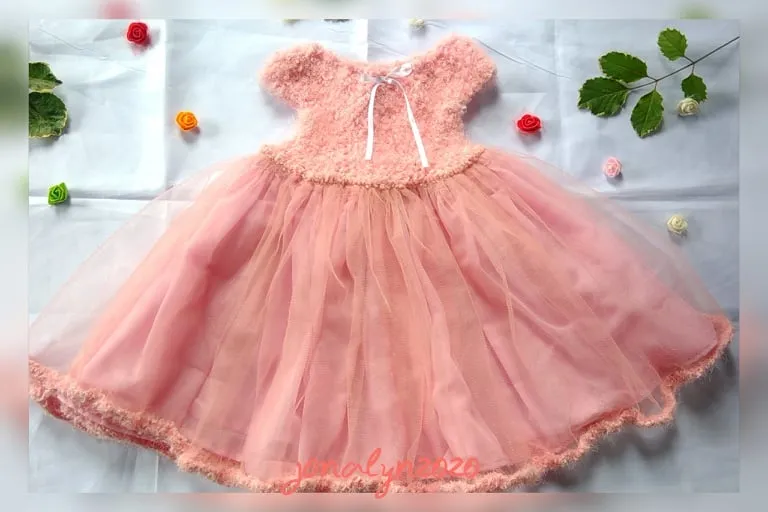
Looking at it feels like a success for me that it turned out to be a simple yet gives an elegant look and that makes me so happy.
And now, I want to thank God for giving this talent that I have in which I can share to all of you. And still thanking Him for using other people specifically @romeskie for inspiring and keep me pushing to make this kind of post and to the #needleworkmonday community in which inspires and support whatever needlework craft we share. Thank you from the bottom of my heart.