What kind of project/s do you dislike doing? Or do you find it less enjoyable? And why?
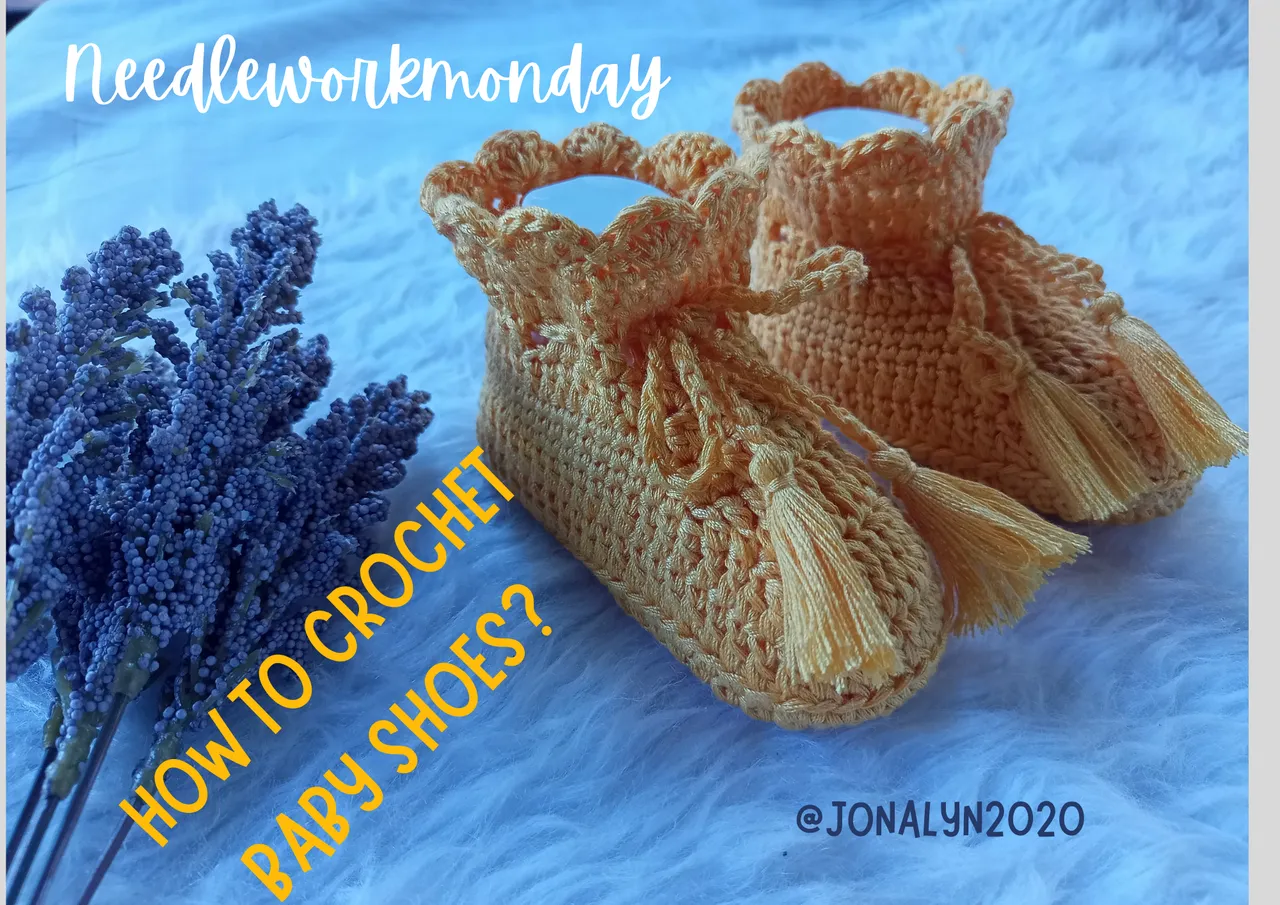
As for me, I would say a pair of baby shoes.
Why?
Well, I'm not that good at estimating the size of the sole with the number of chains as a beginning foundation. It means I have to make a trial and error on the sole part to be able to accomplish the exact measurement. If you're asking me if I'm a beginner in crocheting baby shoes, well not really. I mean, I already made, I think more than 10pairs of baby shoes including my kids' shoes when they were still a baby.
Then, why on Earth I'm still not learning of estimating the final sole of the shoes with chains?
My reasons or should I say alibi:
It depends on the type of yarn I'm using and the size of the hook. Yes, it matters a lot. And what else? The tension while I crochet.
I don't have a pattern as my guide. 😅 Everything is freehand. I only have an idea (but not the exact count of stitches) of how to make this, with the help of experience. I feel tired of finding certain patterns in the projects I'm making. Because looking at patterns will take you longer. Some patterns aren't free and that means you have to buy them.
If I don't like making it, then why I'm making it now?
Well, I can't say no to customers. And that's the only reason why.
I asked about her baby's foot sole measurement and it was 9cm, a newborn baby boy. Usually newborn baby tends to grow faster in just a matter of months. Therefore, we will be making our baby shoes, a little bigger, but not too big enough for his feet to be used for a long time.
Anyway, I've decided to make a tutorial for the baby shoes I made and am happy to share them with you. So brace yourself, ready your yarns and hooks, and let's begin.
Materials:
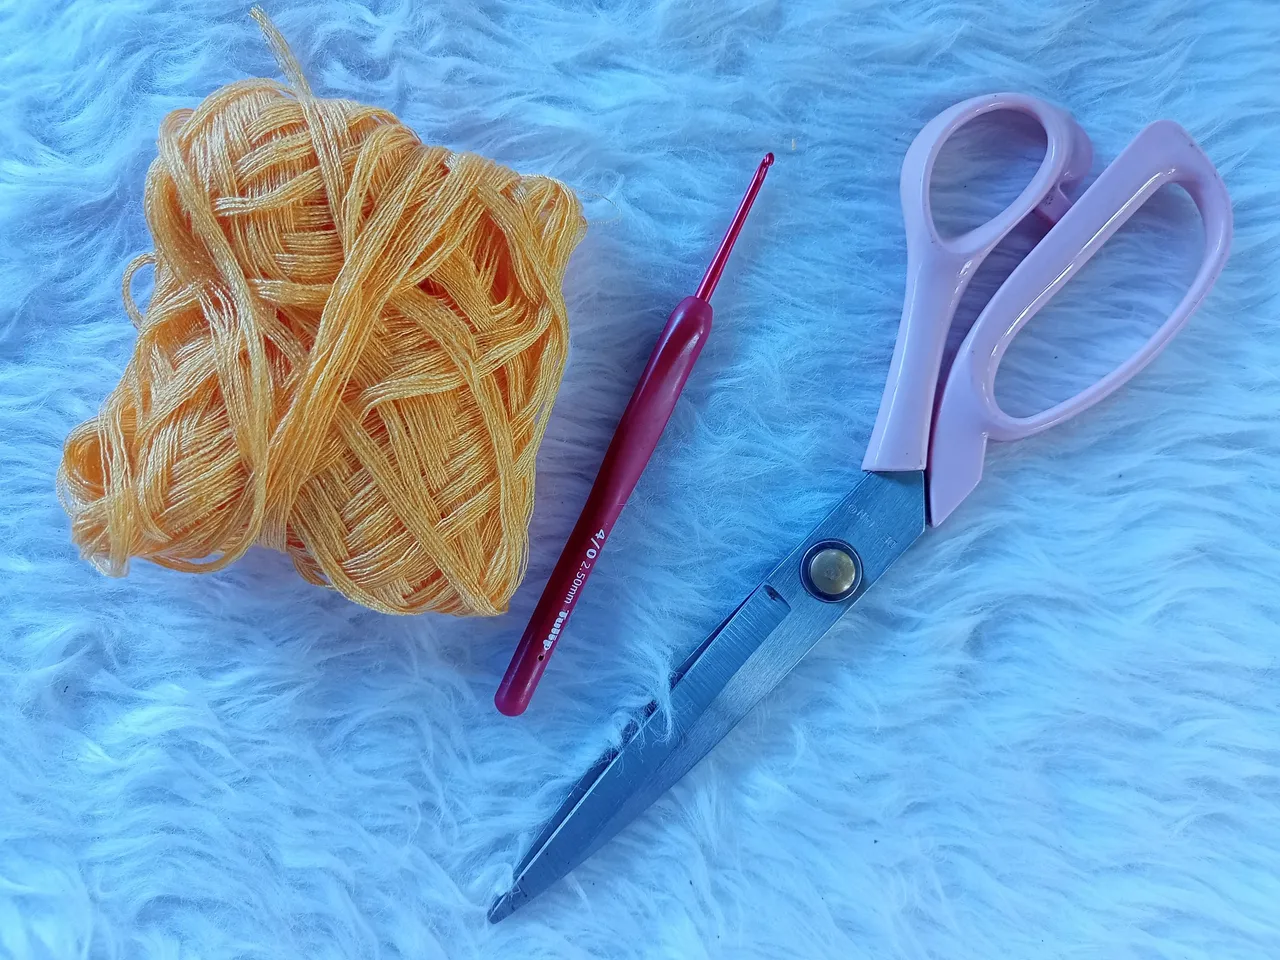
- 8ply spun poly-cotton yarn 🧶 (double pull, total of 16ply)
- 2.5mm crochet hook 🪝
- scissors ✂️
As for the yarn and hook, you can use any kind of cotton yarn (recommended for babies) you have with the corresponding hook of course.
Procedure:

Sole part.
• First, make 16 chains (measure 8cm)
• Dc on the 13th chain, all the way to the 1st chain. When you reached the 1st chain, make 6 dc (notice how it turns to the other side) then continue doing the double crochet on the other side. When you reached the last part, make 5dc (a total of 6, since you already have 1dc on the other side).

• 2nd round. Chain 1, 1sc on 6 consecutive stitches, 1hdc 2 times, and 1dc 4 times ( 1 on every stitch).
• Then 2dc on every stitch 6 times, 1dc on every stitch 4 times, 1hdc 2 times, 1dc on 7 consecutive stitches. And 2sc in 4 remaining stitches and slip stitch to the 1st chain of the 2nd round.

• 3rd round. Chain 1, 1sc 6 times, 1hdc twice, and 1dc 7 times ( 1 on every stitch).
• Next, 2dc on every stitch twice, 1dc 3 times, 2dc twice, 1dc 7 times, 1 dc twice, 1sc 6 times, 2sc twice, 1sc 4times, 2sc twice, and ss.

• 4th round. Chain 1, 1sc 14times, 2sc once, 1sc twice, 2sc once, 1sc 5times, 1sc twice, 2sc once, 1sc 17times, 2sc once, 1sc 5times, 2sc once, 1sc once, and ss.
• 5th round. Chain 2, 1dc on every stitch - we will be working on the back loop of double crochet.
• 6th round. Chain 2,1dc on 13 stitches, 1 tr3tog, 2 tr2tog, 1tc, 2 tr2tog, 1 tr3tog then 1dc all the way and ss.

•7th round. Chain 1, make 1sc on 11 consecutive stitches, skip 1 stitch, 1dc, then 1tc on 8 consecutive stitches, 1dc, skip 1 stitch, and so all the way.
•8th round. Chain 1, 1sc on 10 consecutive stitches, skip 1stitch, 1dc on 10 consecutive stitches, skip 1 stitch, and single crochet all the way.
•9th round. Chain 1,1sc on 9 consecutive stitches, skip 1 stitch, 1 dc2tog, 1 dc twice, 1 dc2tog, 1 dc twice, 1 dc2tog, skip 1 stitch, sc all the way, and ss.

•10th round. Chain 2, 1dc on 12 consecutive stitches, 1 dc2tog, 1dc all the way, and ss.
•11th round. Chain 2, make 1 dc, chain 1, skip 1 stitch and make 1 dc on 2 consecutive stitches. Repeat 'till the end and ss.

•12th-13th round. Make 1 dc in every stitch.
• Edging: Make shell stitch all over the top.
• Tie: Make 2 pieces of 17-inch chain, insert them on the shoes and finally make a tassel on every end.

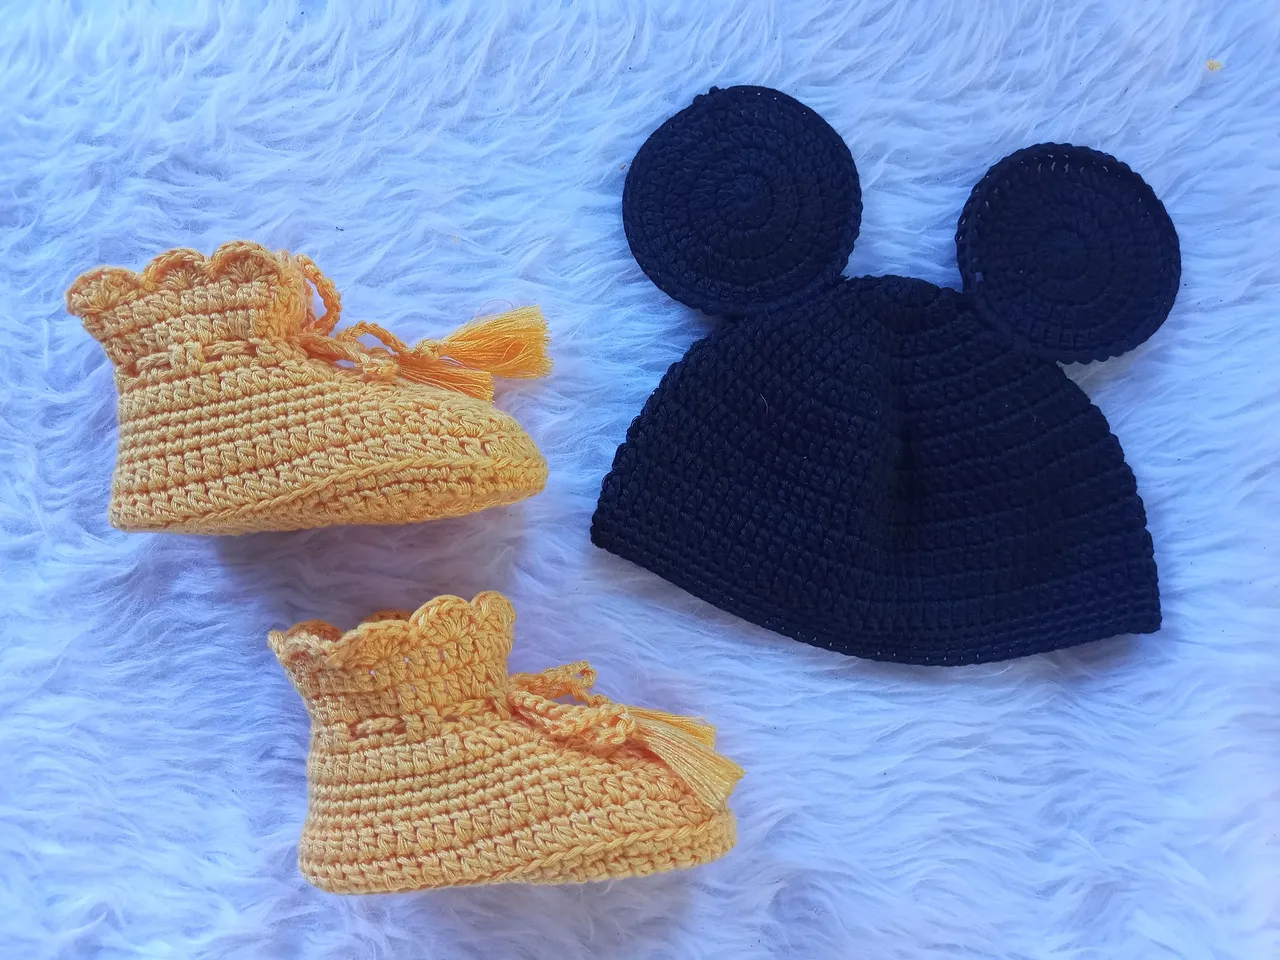
This is the final look of our baby shoes. Though at the beginning of this post, I express doing this unenjoyable project, still the outcome amazed me. That is also the reason why I shared it here, and to have a record (for myself) of how to do it in the future.
This will be the beginning of loving to crochet baby shoes.

And my creative mind is now planning to make another one with a different design. And how I wish my hand work faster, as fast as to what my mind is processing the design.
 (Client's order. Still doing the red short to complete her order.)
Hope you understand the tutorial and find it helpful. I appreciate any corrections, or recommendations that you can give. Just comment below your opinion and reactions to this tutorial. Thank you and God bless.
Love lots,
@jonalyn2020

Shopee
To God Be The Glory