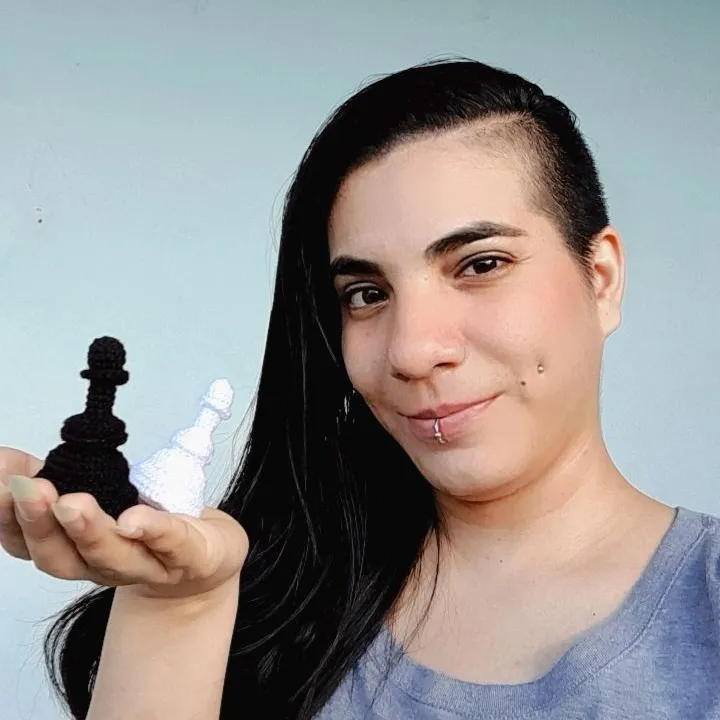
Greetings dear community, today is the time to share my great Chess project, a long time ago I had the idea of making a completely crochet chess, this is a long challenge so this is just the beginning, I prepared everything to start and decided to do it with the first chess piece, the chess pawn is the piece that is repeated the most, there are 8 white pieces and 8 black pieces, the other figures such as the rook, the bishop and the knight are repeated 4 times and the queen and king are repeated only twice, so for me it was important to do the pieces that are repeated the most first and thus spend more time on the more difficult pieces, this was the initial plan but it turned out that this took me about two weeks and my fingers are still sore to continue, I will try to take it easy and in the next posts I will be sharing the other chess pieces as I make them, I hope you will join me on this great journey that begins and be co with me to the end.

Materiales/ Materials
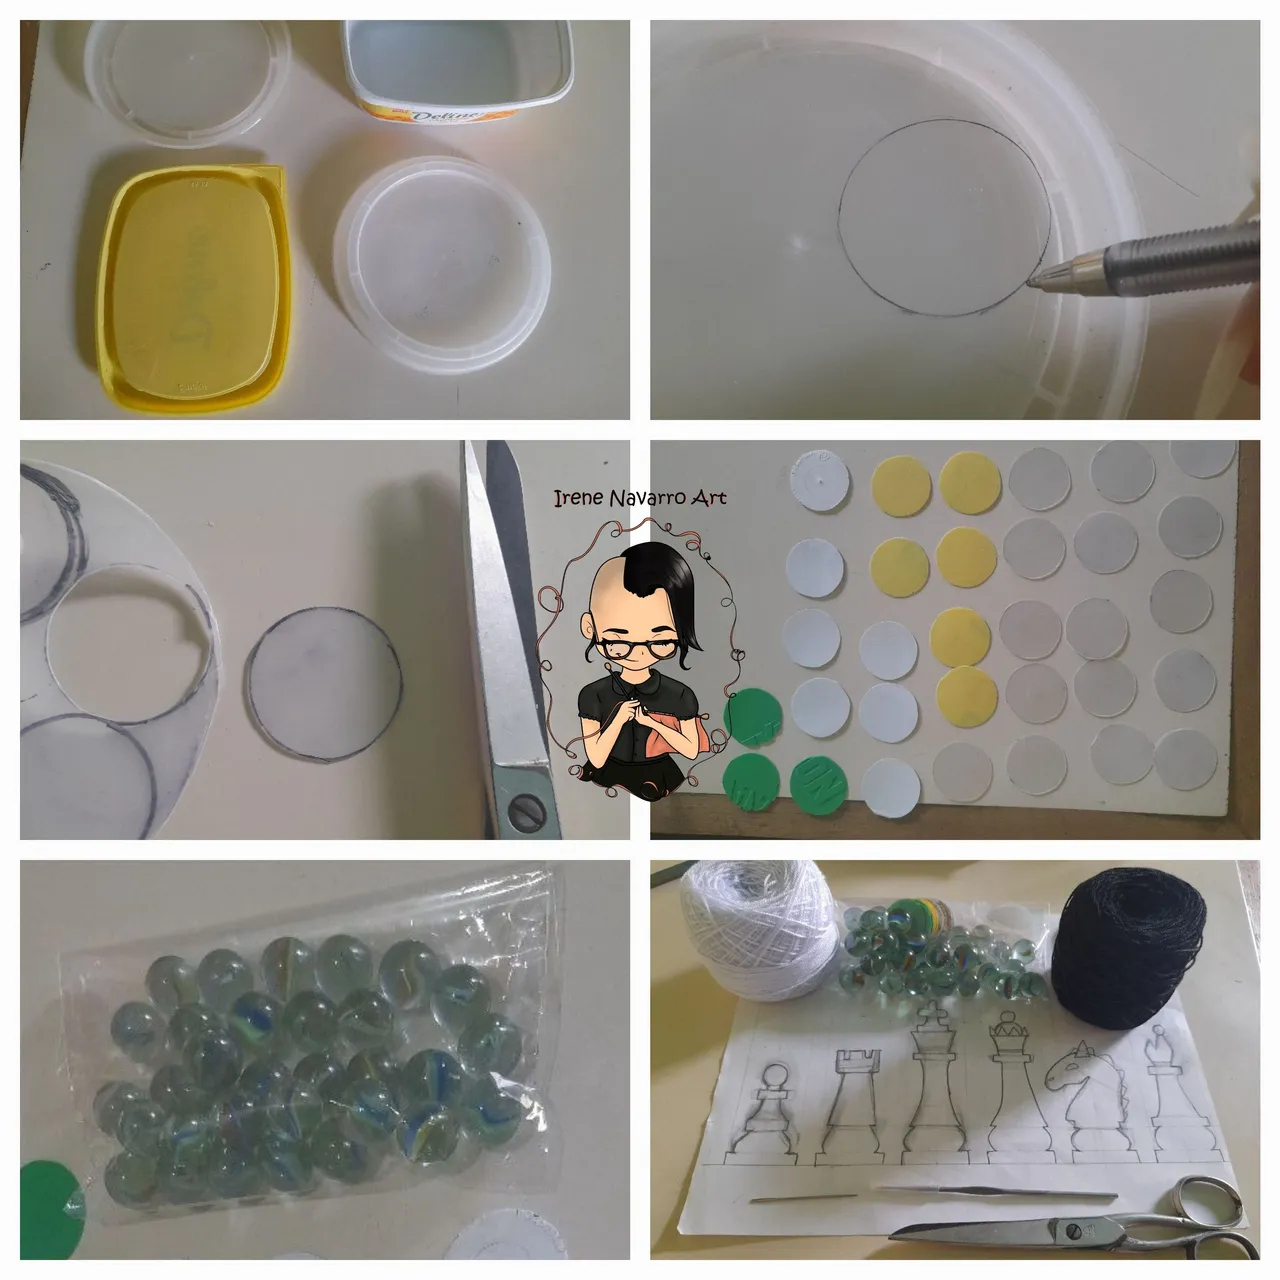
To make this first part of pieces I used a ball of 50 grams white acrylic yarn and a ball of black, crochet hook #4 (1.25mm), synthetic filling, scissors and additionally I used: recycled plastic caps, with these I made the 32 bases circular of the diameter of the pieces, this is very helpful for the base to be flat, also as the filling is very light and the chess pieces need to have enough weight to prevent them from falling, I had the idea to use glass marbles, these marbles are going to be used one per piece, that is, 32 are needed.
Proceso/ Process
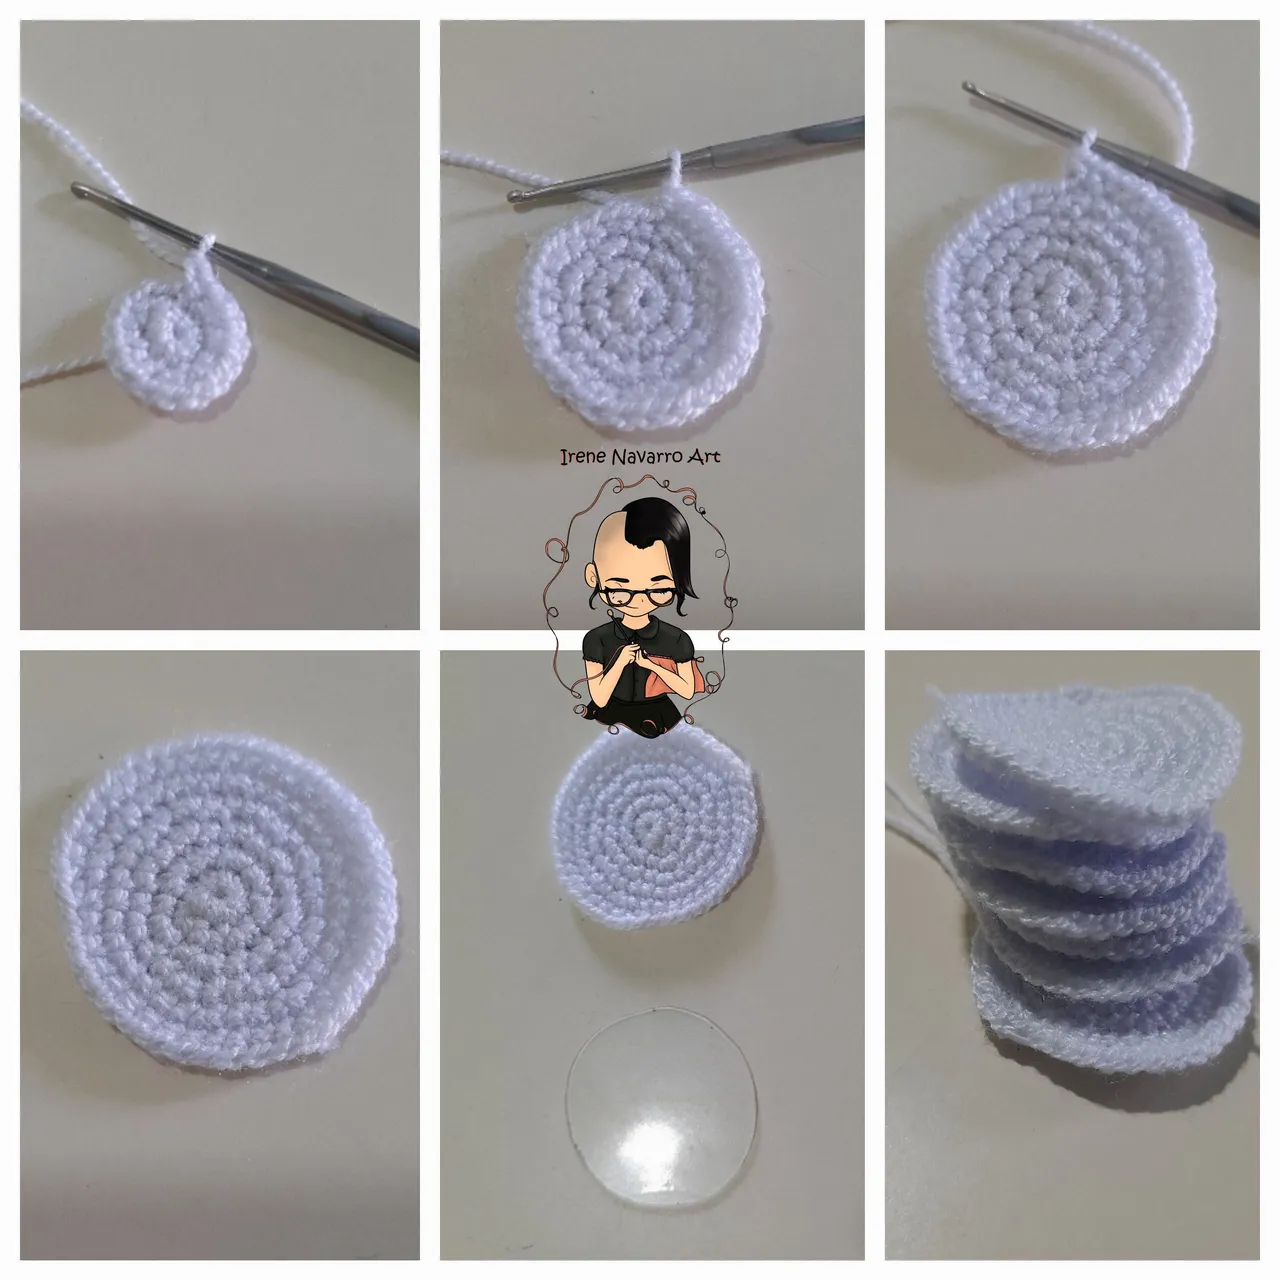
Para la base hacer 8 puntos bajos en un anillo.
Hilera 1: 8 aumentos. Total de puntadas: 16
Hilera 2: (1 punto bajo, 1 aumento) X 8. Total de puntadas: 24
Hilera 3: (1 punto bajo, 1 aumento, 1 punto bajo) X 8. Total de puntadas: 32
Hilera 4: (3 puntos bajos, 1 aumento) X 8. Total de puntadas: 40
Hilera 5: 40 puntos bajos. Terminar con 1 punto deslizado.
Hacer 8 bases blancas y 8 negras.
For the base make 8 single crochets in a ring.
Row 1: 8 increases. Total stitches: 16
Row 2: (1 single crochet, 1 increase) X 8. Total stitches: 24
Row 3: (1 single crochet, 1 increase, 1 single crochet) X 8. Total stitches: 32
Row 4: (3 single crochet, 1 increase) X 8. Total stitches: 40
Row 5: 40 single crochet. Finish with 1 slip stitch.
Make 8 white and 8 black bases.
Para el cuerpo hacer 6 puntos bajos en una anillo
Hilera 1: 6 aumentos. Total de puntadas: 12
Hilera 2-4: 12 puntos bajos.
Hilera 5: (1 punto bajo, 1 disminución) X 4. Total de puntadas: 8
Hilera 6: Tomando solo el lado del frente hacer 8 puntos bajos.
Hilera 7-11: 8 puntos bajos
Hilera 12: 8 aumentos. Total de puntadas: 16
Hilera 13: (1 punto bajo, 1 aumento) X 8. Total de puntadas: 24
Hilera 14: Tomando solo el lado frontal 24 puntos deslizados.
Hilera 14.1: Tomando solo el lado de atrás de la hilera 13 hacer 24 puntos bajos.
Hilera 15: Tomando solo el lado frontal 24 puntos deslizados.
Hilera 15.1: Tomando solo el lado de atrás de la hilera 14.1 hacer (1 punto bajo, 1 disminución) X 8. Total de puntadas: 16
Hilera 16: (1 punto bajo, 1 disminución, 1 punto bajo) X 4. Total de puntadas: 12
Hilera 17: Tomando solo el lado frontal hacer 12 aumentos. Total de puntadas: 24
For the body make 6 single crochet in a ring
Row 1: 6 increases. Total stitches: 12
Row 2-4: 12 single crochet.
Row 5: (1 single crochet, 1 decrease) X 4. Total stitches: 8
Row 6: Taking only the front side make 8 single crochet.
Row 7-11: 8 single crochet
Row 12: 8 increases. Total stitches: 16
Row 13: (1 single crochet, 1 increase) X 8. Total stitches: 24
Row 14: Taking only the front side 24 slip stitches.
Row 14.1: Taking only the back side of row 13 make 24 single crochets.
Row 15: Taking only the front side 24 slip stitches.
Row 15.1: Taking only the back side of row 14.1 make (1 single crochet, 1 decrease) X 8. Total stitches: 16
Row 16: (1 single crochet, 1 decrease, 1 single crochet) X 4. Total stitches: 12
Row 17: Taking only the front side make 12 increases. Total stitches: 24

Hilera 18: (3 puntos bajos, 1 aumento) X 6. Total de puntadas: 30
Hilera 19: (2 puntos bajos, 1 aumento, 2 puntos bajos) X 6. Total de puntadas: 36
Hilera 20: 36 puntos bajos
Hilera 21: (1 punto bajo, 1 disminución) X 12. Total de puntadas: 24
Hilera 22: Tomando solo el lado frontal (1 punto bajo, 1 aumento) X 12. Total de puntadas: 36
Hilera 23: (4 puntos bajos, 1 aumento, 4 puntos bajos) X 4. Total de puntadas: 40
Hilera 24: Tomando solo el lado frontal 40 puntos deslizados
Hilera 24.1: Tomando solo el lado de atrás de la Hilera 23 hacer 40 puntos bajos.
Hilera 25: 40 puntos bajos
Row 18: (3 single crochet, 1 increase) X 6. Total stitches: 30
Row 19: (2 single crochet, 1 increase, 2 single crochet) X 6. Total stitches: 36
Row 20: 36 single crochets
Row 21: (1 single crochet, 1 decrease) X 12. Total stitches: 24
Row 22: Taking only the front side (1 single crochet, 1 increase) X 12. Total stitches: 36
Row 23: (4 single crochet, 1 increase, 4 single crochet) X 4. Total stitches: 40
Row 24: Taking only the front side 40 slip stitches
Row 24.1: Taking only the back side of Row 23 make 40 single crochet.
Row 25: 40 single crochet

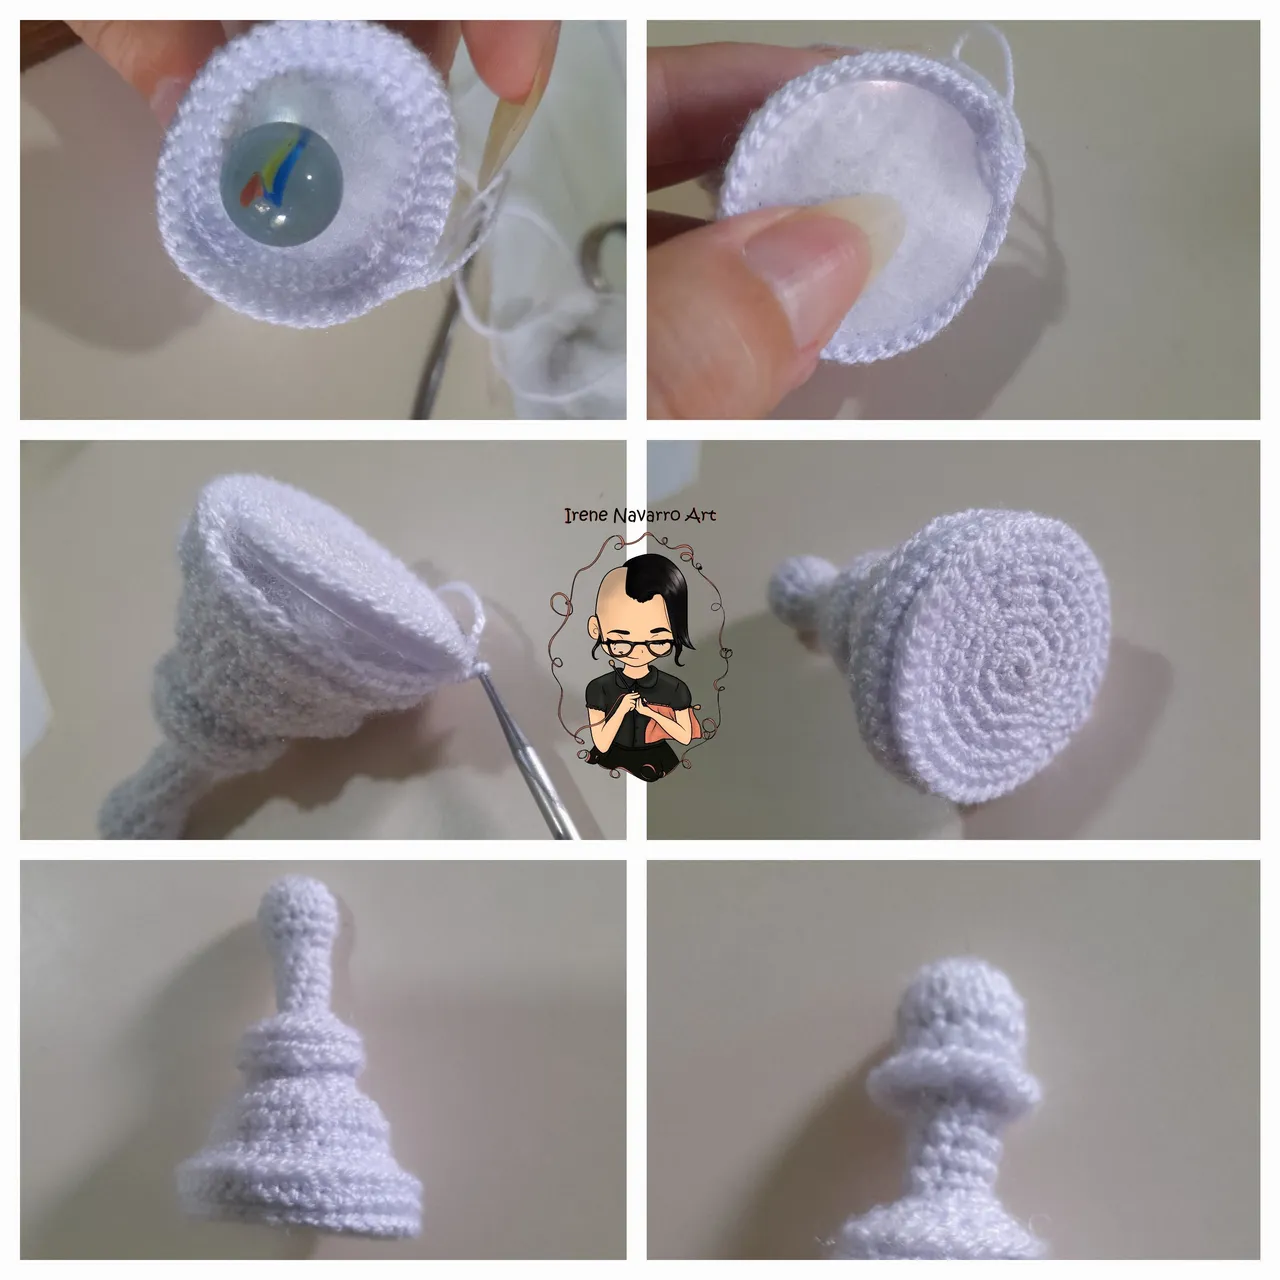
Meter el relleno y luego introducir la canica de vidrio, por ultimo introducir el círculo de plástico, colocar la base de crochet y hacer 40 puntos deslizados tomando solo el lado frontal de ambas partes, esconder la hebra por dentro.
Levantar 8 aumentos en los lados frontales de las puntadas dejadas en la Hilera 5.
Luego tomando solo el lado de atras hacer 16 puntos deslizados y esconder la hebra por dentro
Insert the filling and then insert the glass marble, finally insert the plastic circle, place the crochet base and make 40 slip stitches taking only the front side of both parts, hiding the yarn inside.
Pick up 8 increases on the front sides of the stitches left on Row 5.
Then taking only the back side make 16 slip stitches and hide the yarn inside
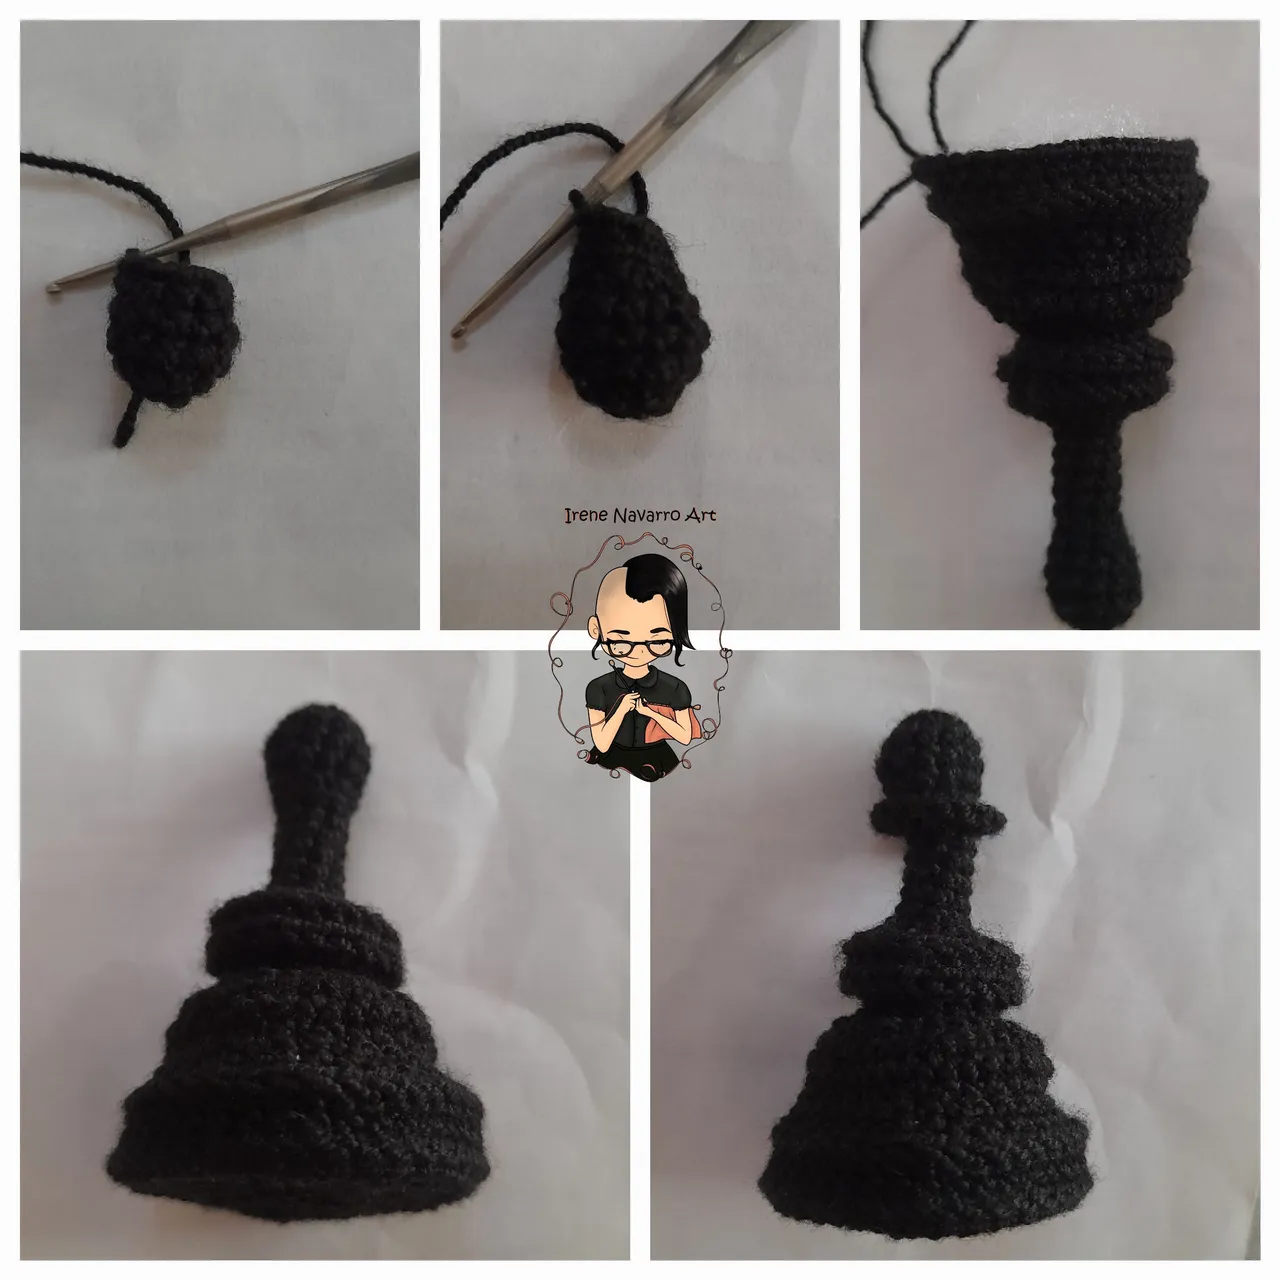
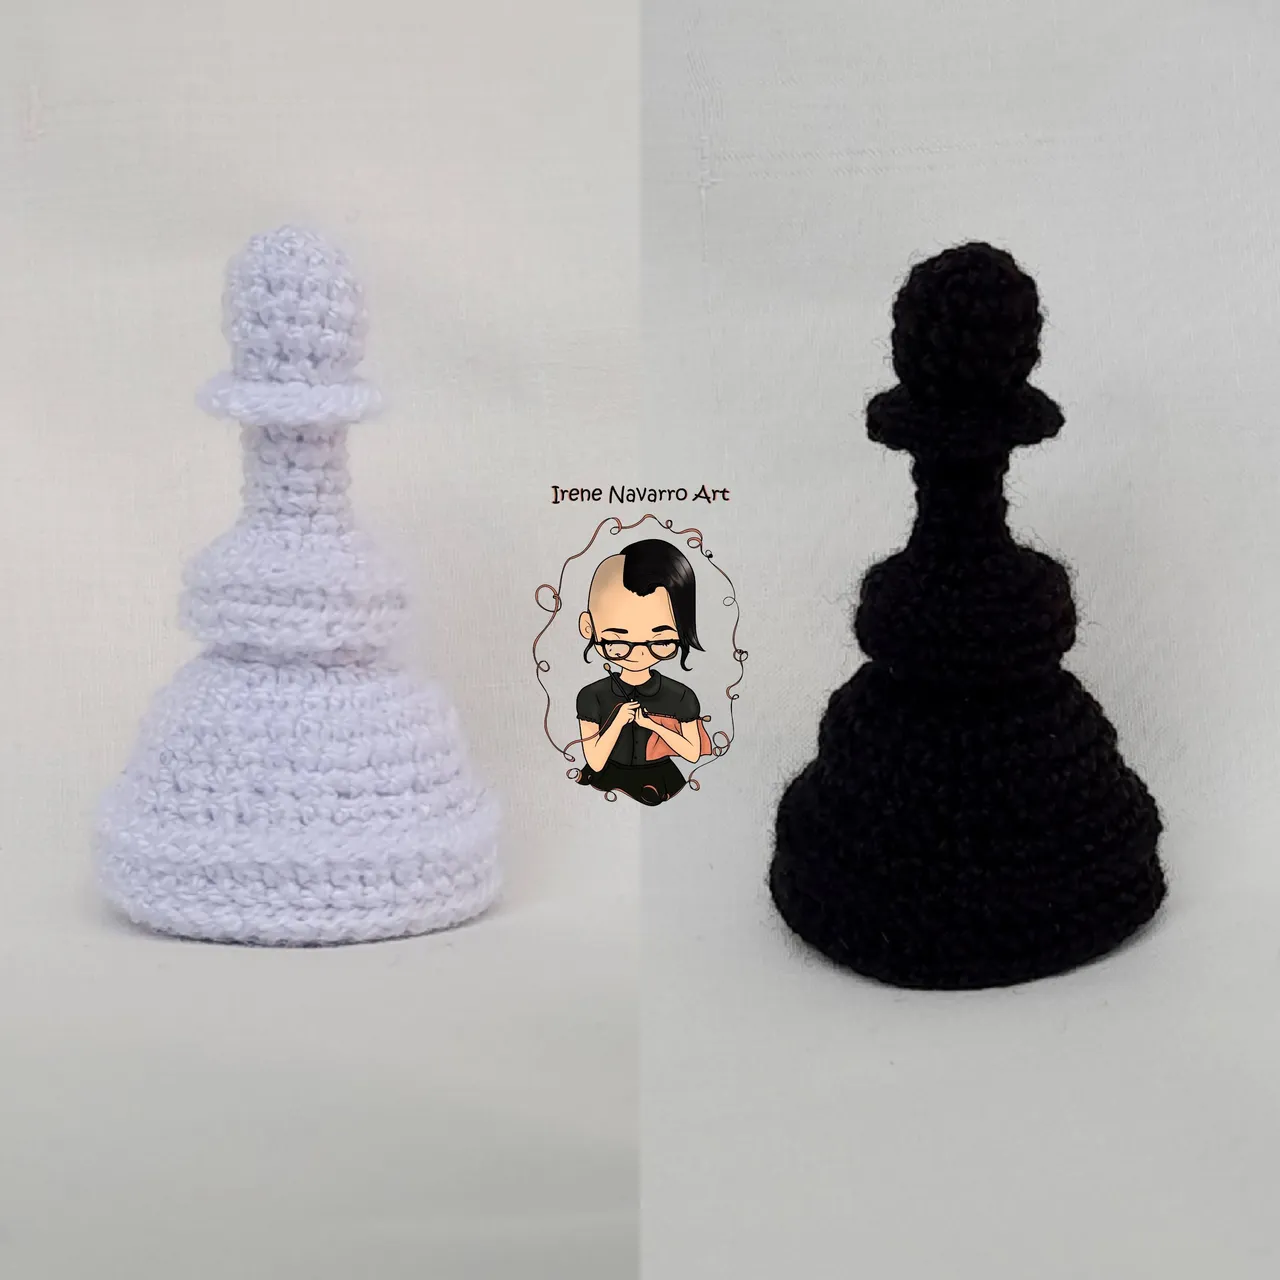
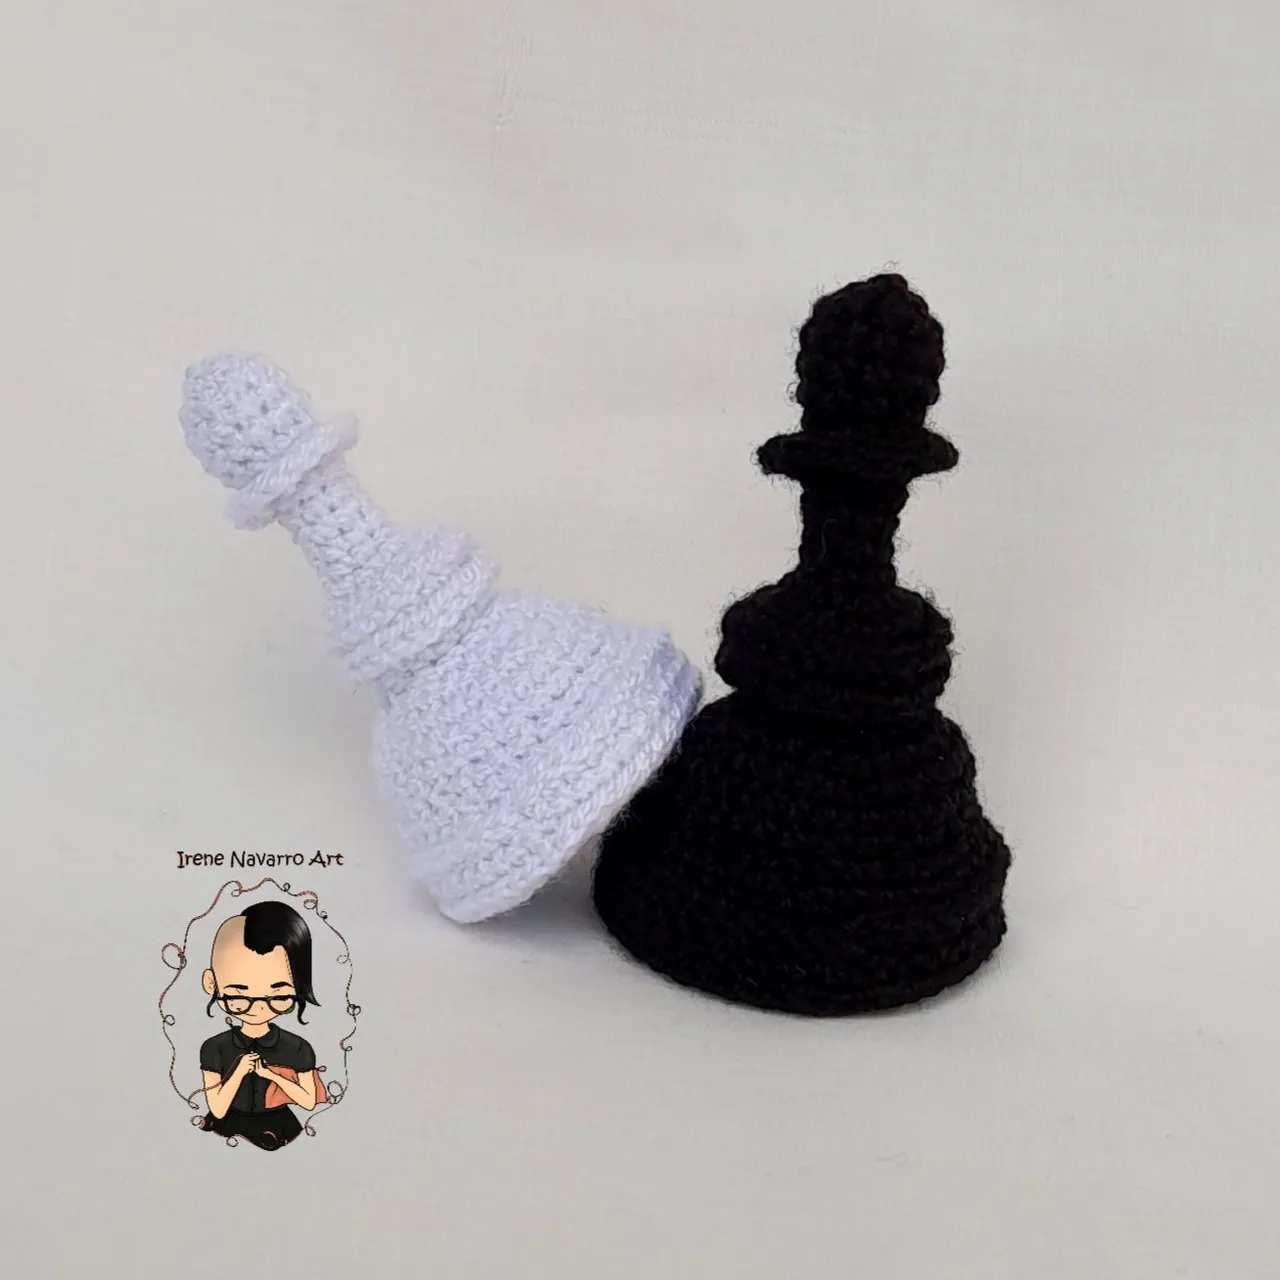
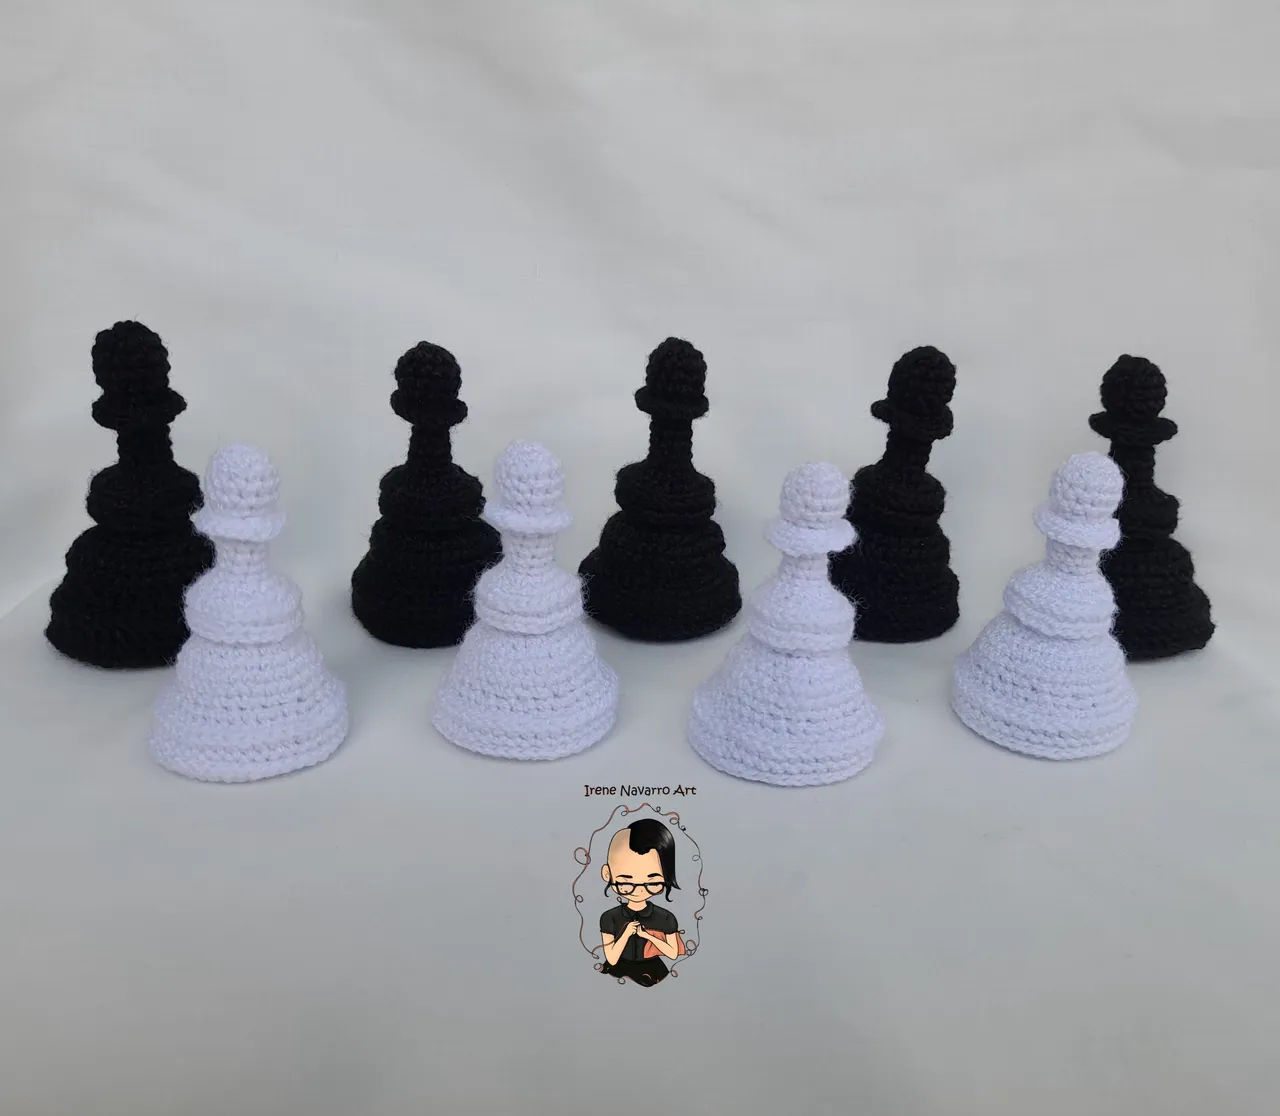
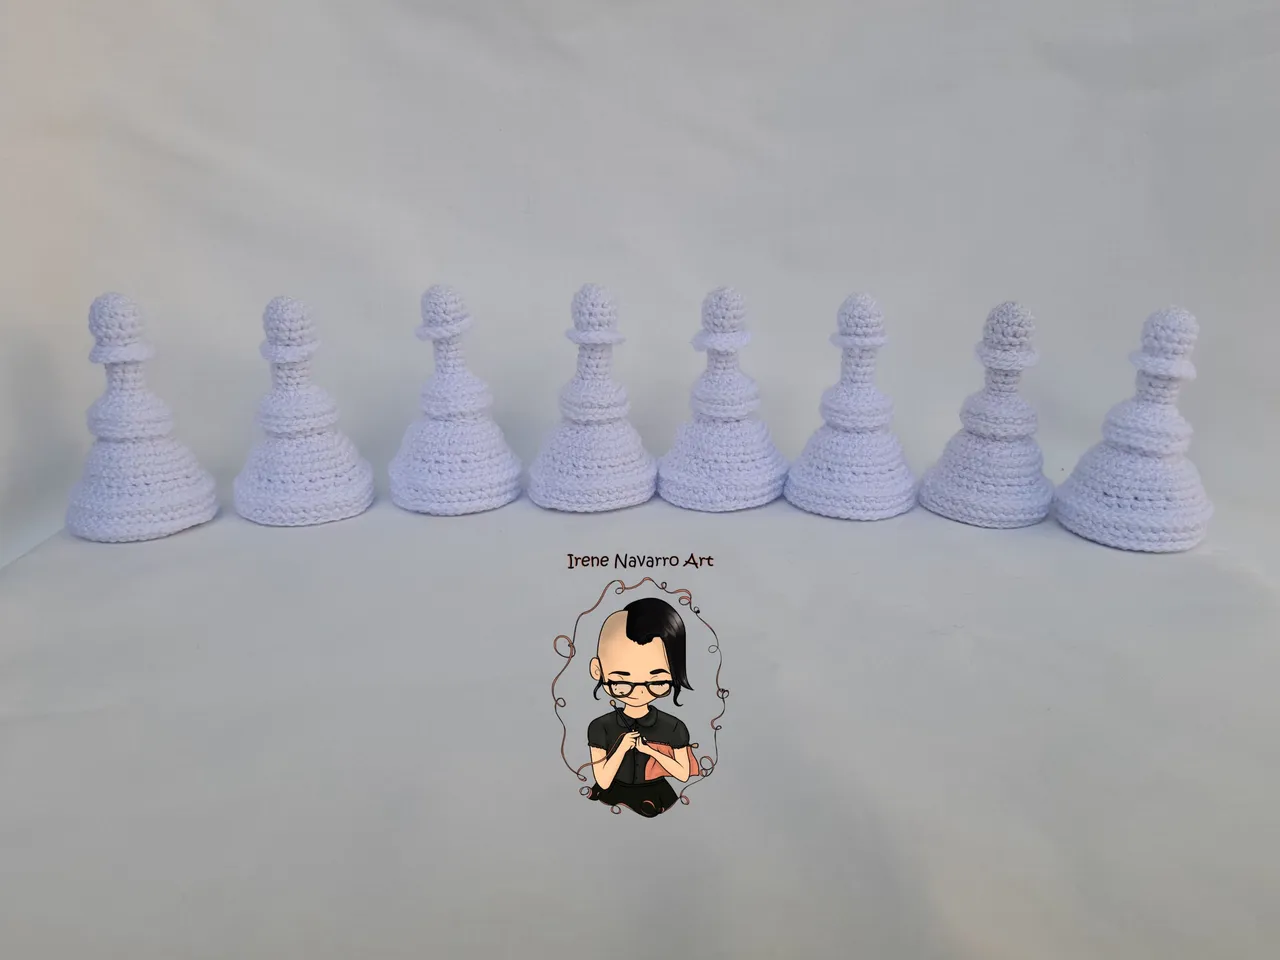
Resultado / Result
16 pieces are made in this way as I told you at the beginning, I am really excited to start the other chess pieces, every time I manage to finish a figure I will be sharing with you the process in detail as I did on this occasion, if you got to here and you want to motivate me to continue with the Chess project leave your comment 🤗🥰
Imágenes tomadas con dispositivo Samsung A12.
Pictures taken with Samsung A12 device.
Invítenme un Café/Support Me on Ko-Fi

https://ko-fi.com/irenenavarroart
If you want to support my art you can also make donations for the value of a coffee (Ko-Fi)

Espero les haya gustado. Les invito a leer mis próximas publicaciones y siempre estaré dispuesta a responder sus preguntas y comentarios, también pueden seguirme y contactarme en cualquiera de mis redes sociales. ¡Muchas gracias!
I hope you liked it. I invite you to read my next publications and I will always be willing to answer your questions and comments, you can also follow me and contact me on any of my social networks. Thank you!