Hello, today is Monday and a week starts with many positive expectations. That is why I bring you this cute bikini top mold.
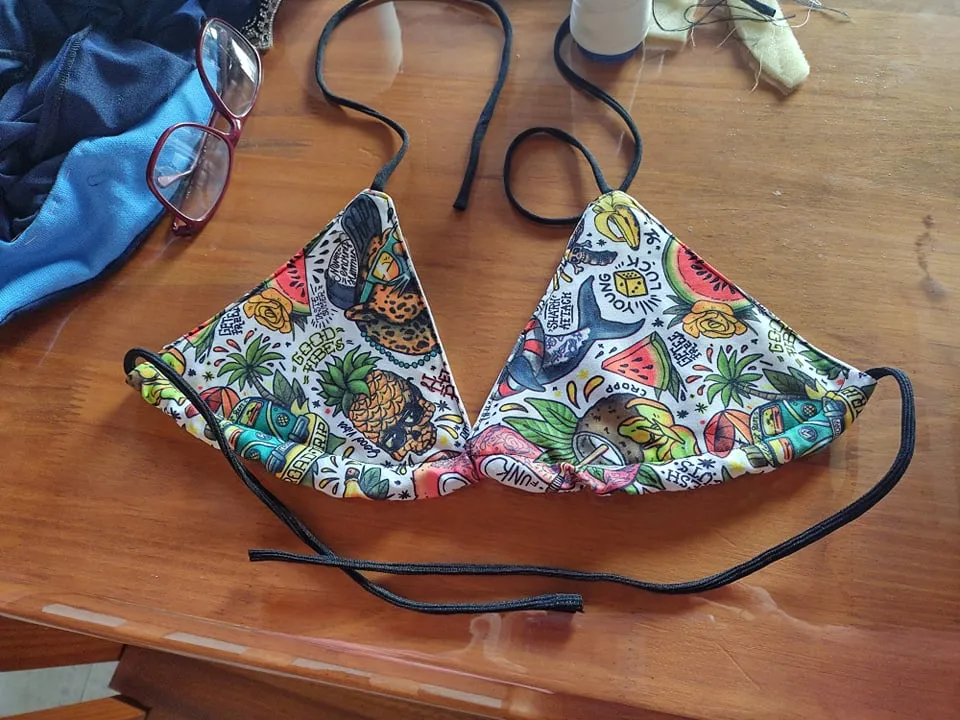
The sizes go two by two.
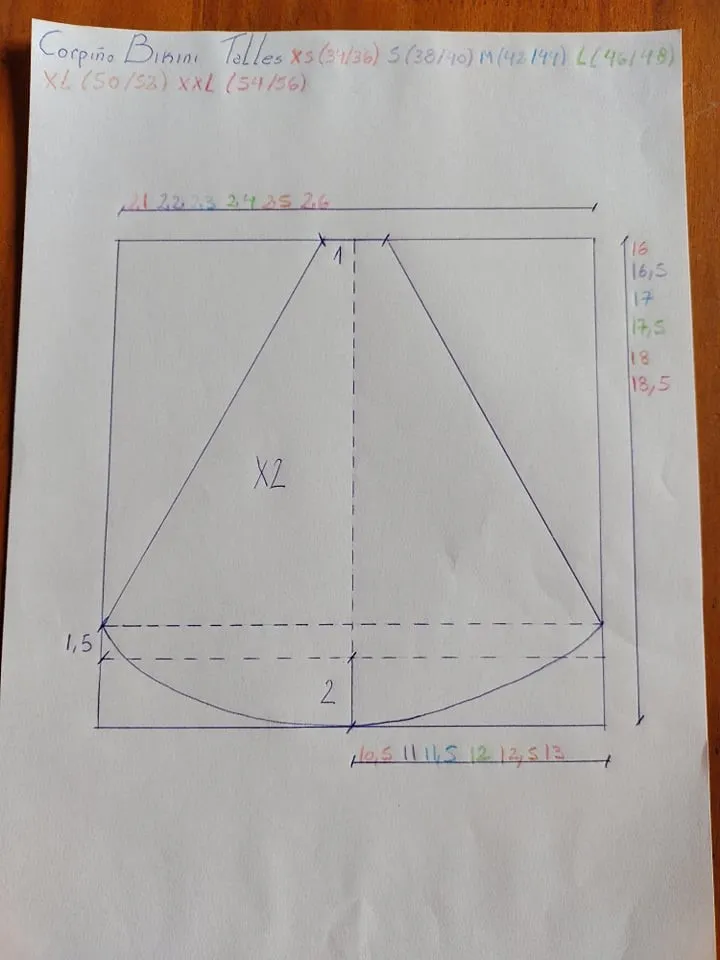
I made size S, which would be a 38/40.

This is how the mold would look once cut.
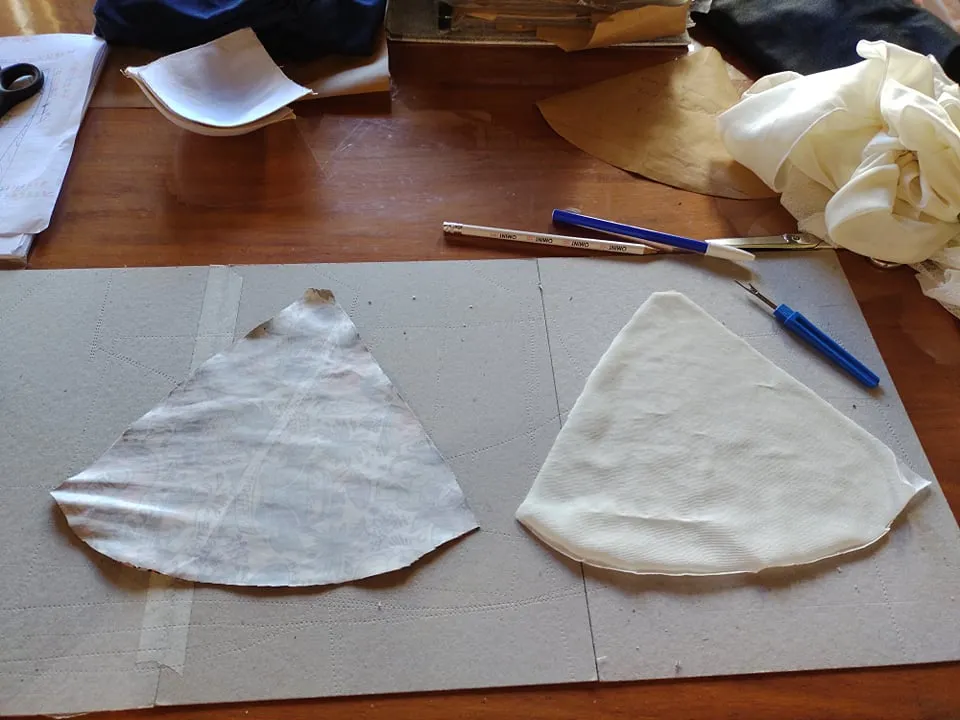
The fabric that I use are: mesh lining and a mesh fabric that I had from a recycled pants. The strips are part of the other fabric that I had, also mesh.
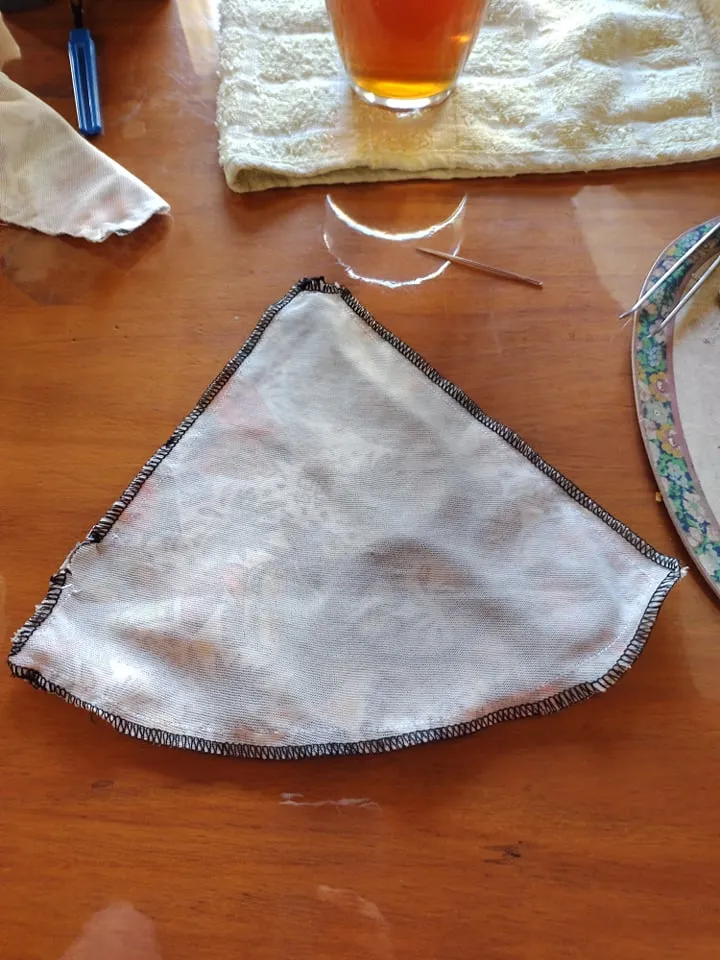
This photo corresponds to the fabric already cut. Remember to leave 1.00 cm of margin for the seams.
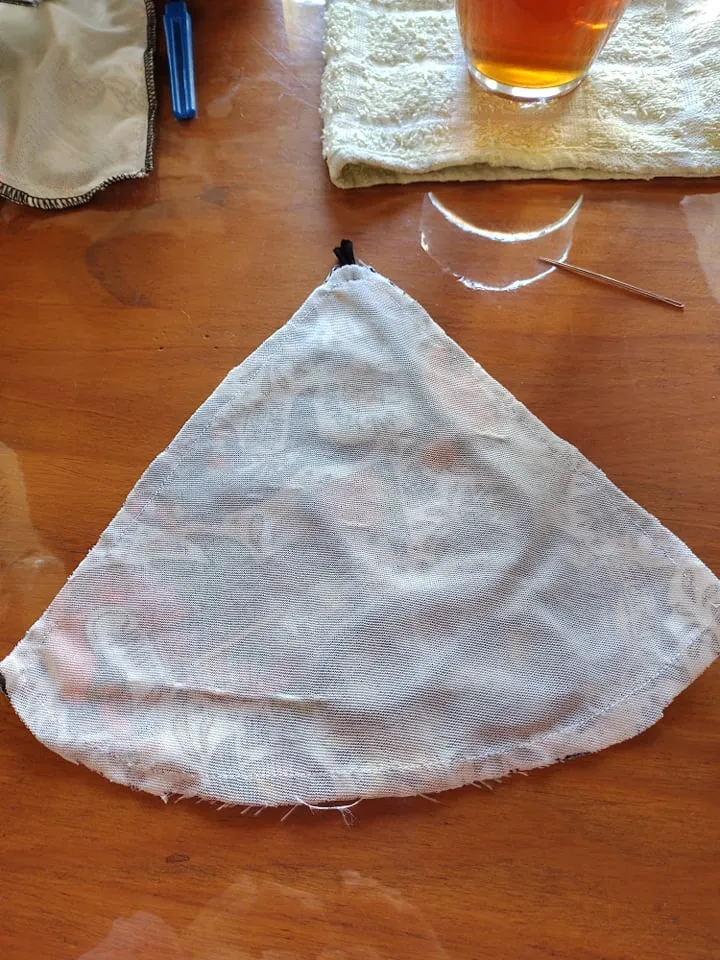
Time to make, the first thing we go to do is face the faces of the mesh with the lining and secure the strip that later goes around the neck. What I did was to pass a straight seam and leave one of the sides unsewn, so that later I could turn it over.
Once we secure with a straight, we pass the overlok, also leaving a space to turn the garment. As you can see in the picture.
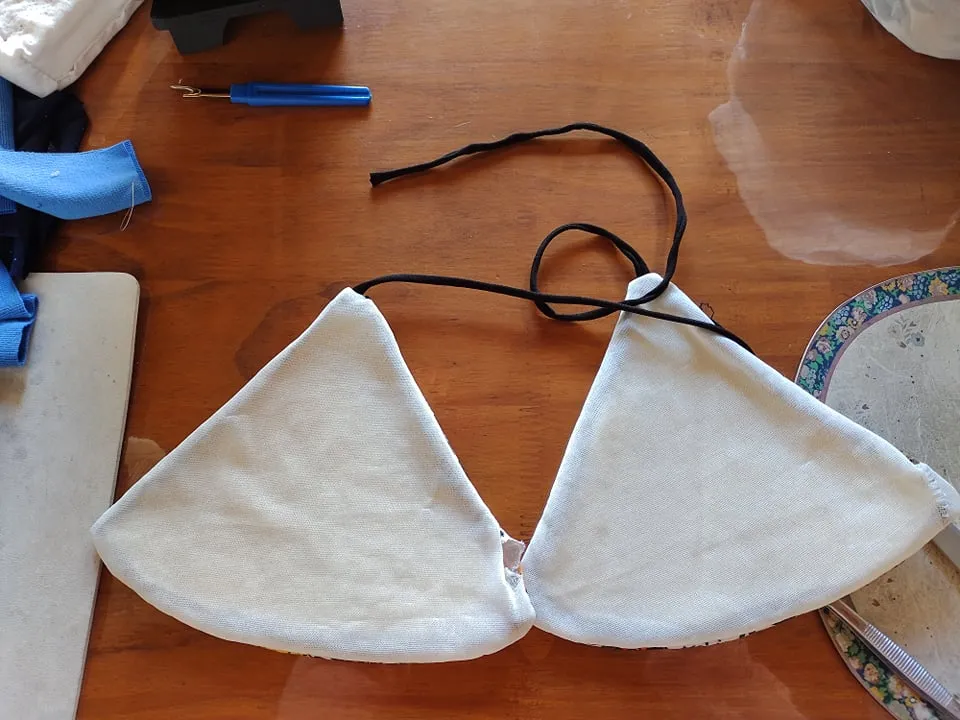
Already having the two cups of the bikini sewn, we turn it over, as seen in the image and add a cup for bikini. You can buy it at a haberdashery or they can recycle one they have from another bikini. I did that, since it was new.
Placed the cup, we secure with a manual seam.
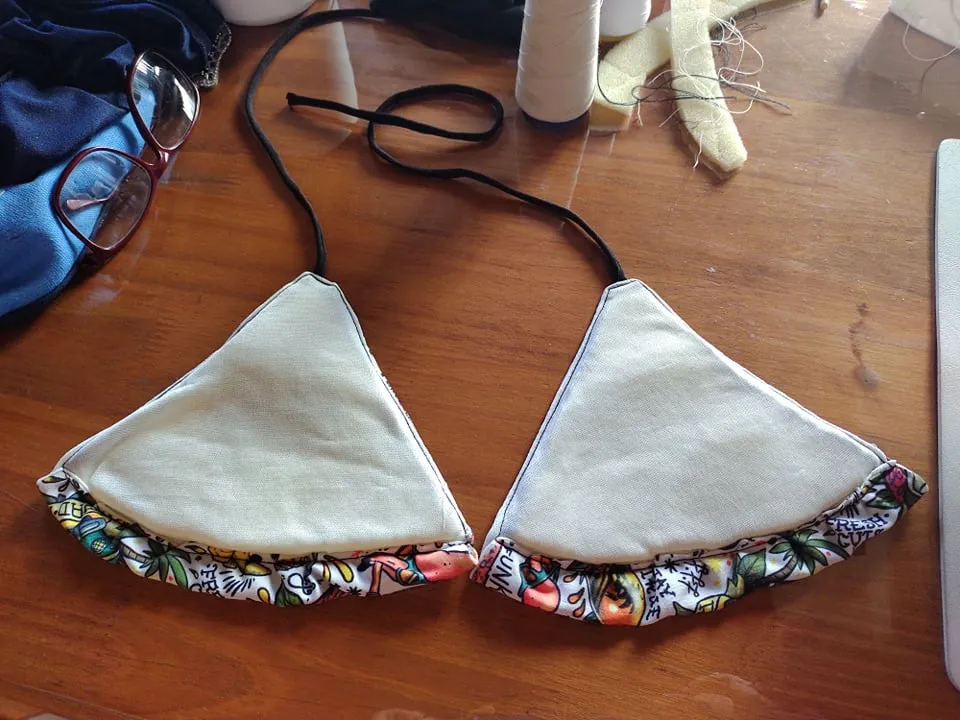
Then we are going to fold the lower part, on the side of the lining, that is so that later the strip that goes around the body passes through there. We secure it and with a straight seam we go around the entire contour of the cups. As seen in the image.
Once we are done, we just have to pass the strip and voila, we have our bikini top finished.