Even though I only make bags, this is a constant challenge for me. Each bag is different, these are all unique pieces, you can't find two identical. It's basically impossible as I'm working with jeans I'm buying from the second hand shop and no way I can find two identical jeans. Besides, I don't like monotony, change is always welcome and I'm happy to try out new designs.
The Design
I've been watching tutorial videos that has helped me to understand and learn about how things work and have seen this kind of design as well. Then I said I must try it out. The basic idea is to save and #recycle, #upcycle as much as you can
The upper part of the jeans is mostly wasted, except for the belt part and pockets, unless you're doing this design. It's a little bit complicated, I'll tell you why later on in my post, but it worth it. Most likely it's going to divide people as some are saying this design looks too much as "jeans" but who knows, others may like it. Time will tell, I'm going to find out once the lockdown is lifted.
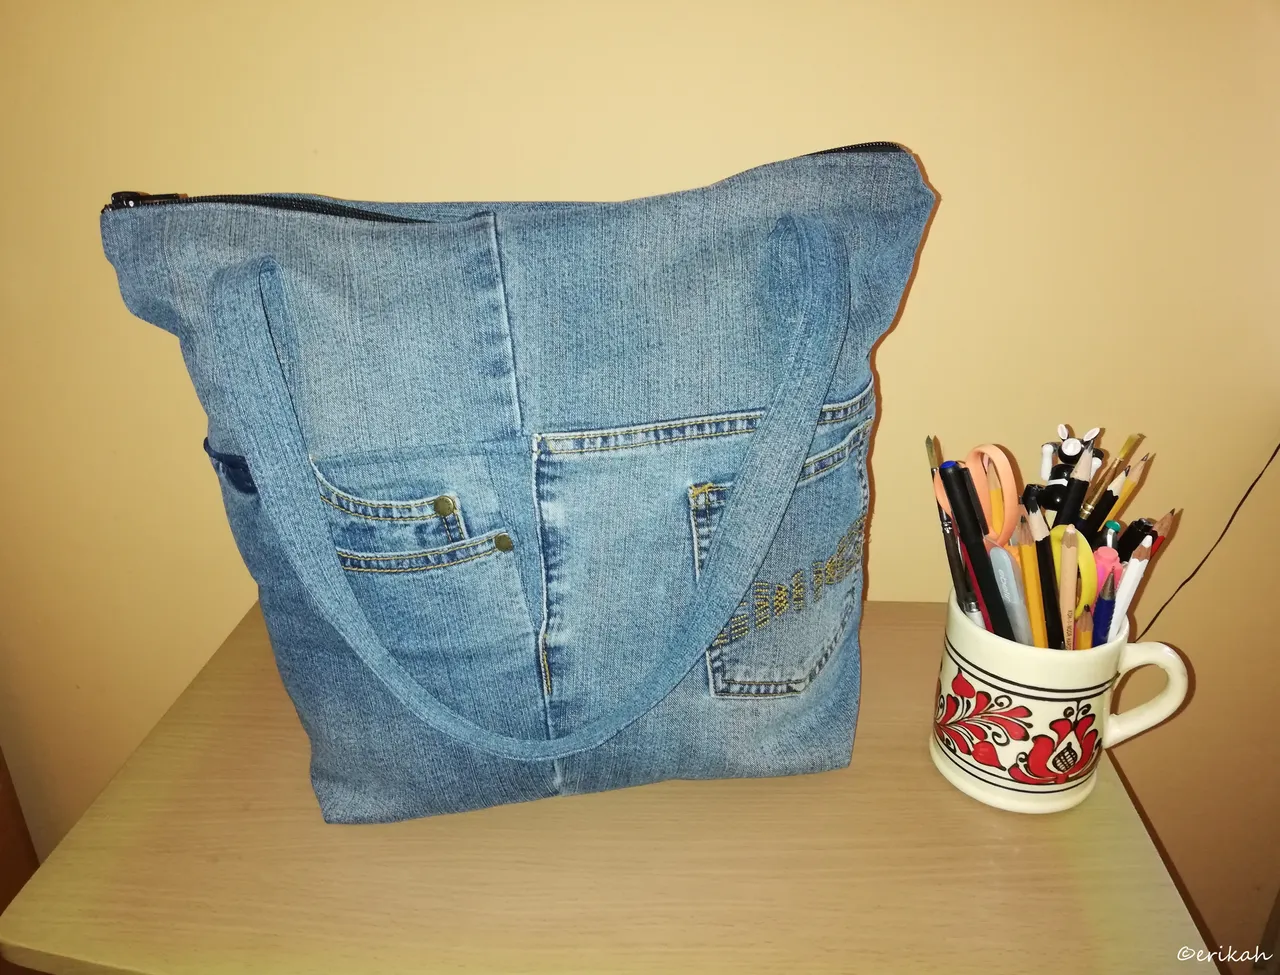
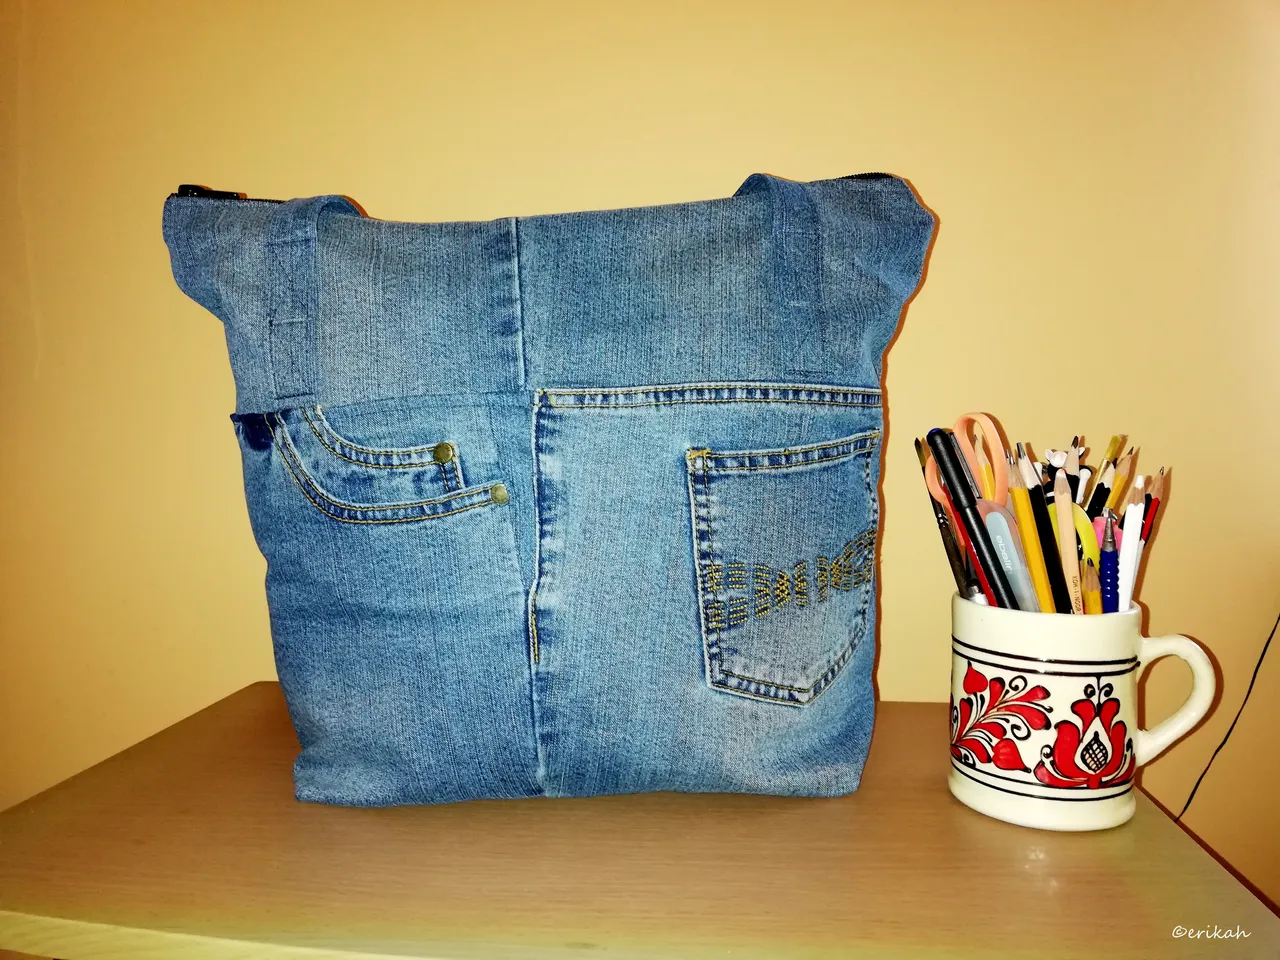
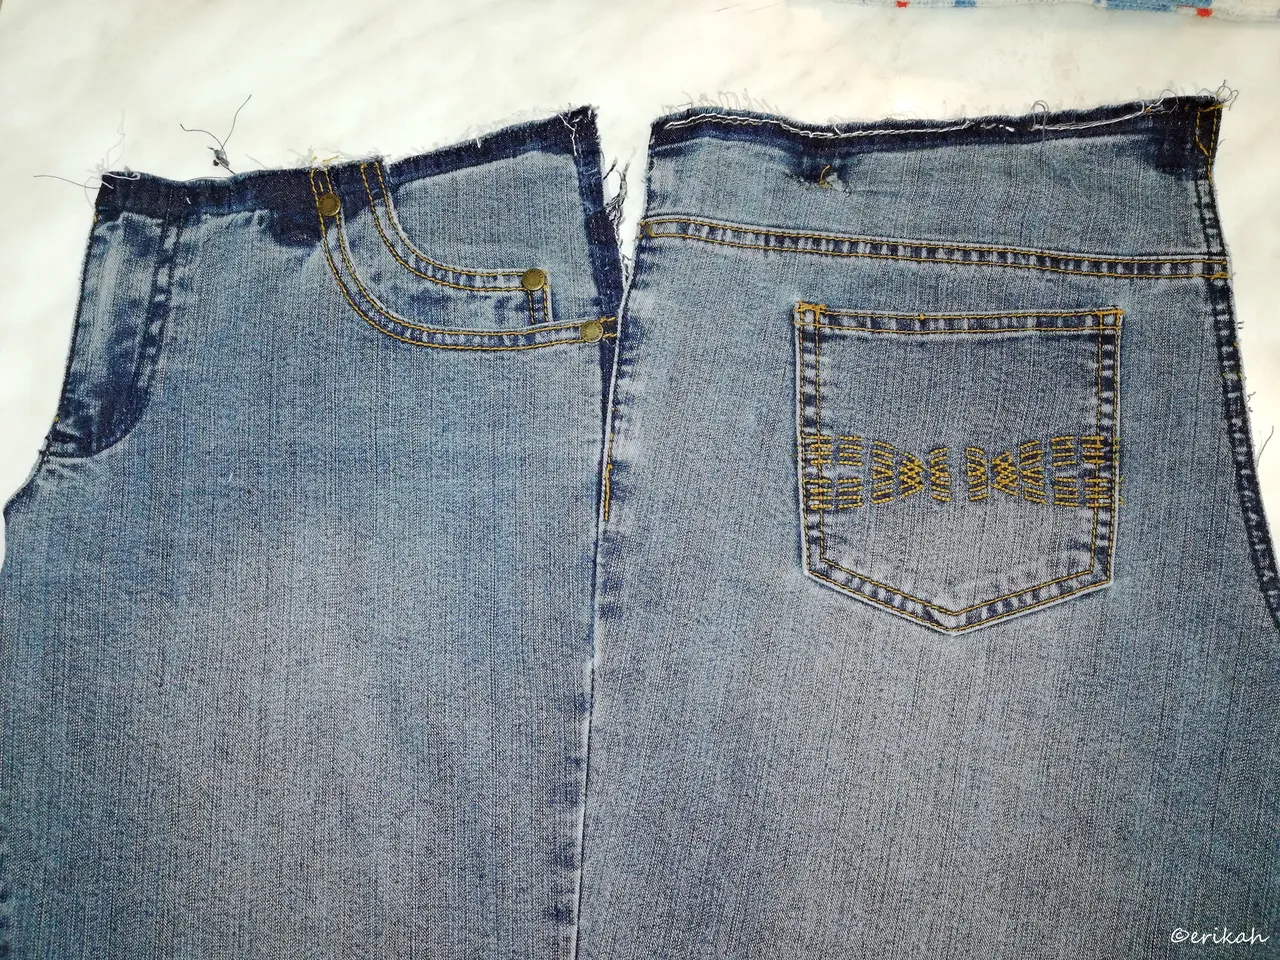
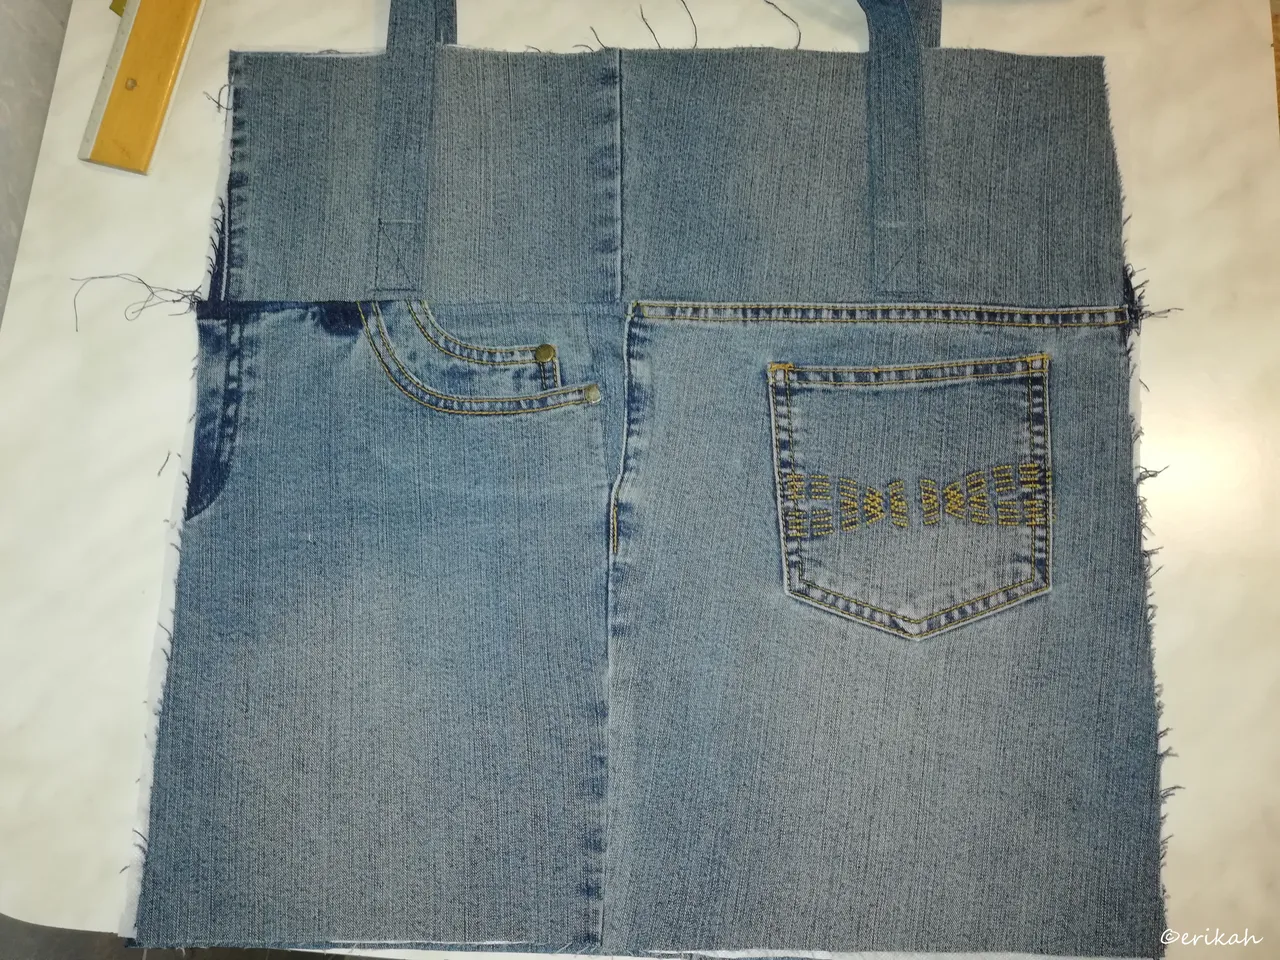
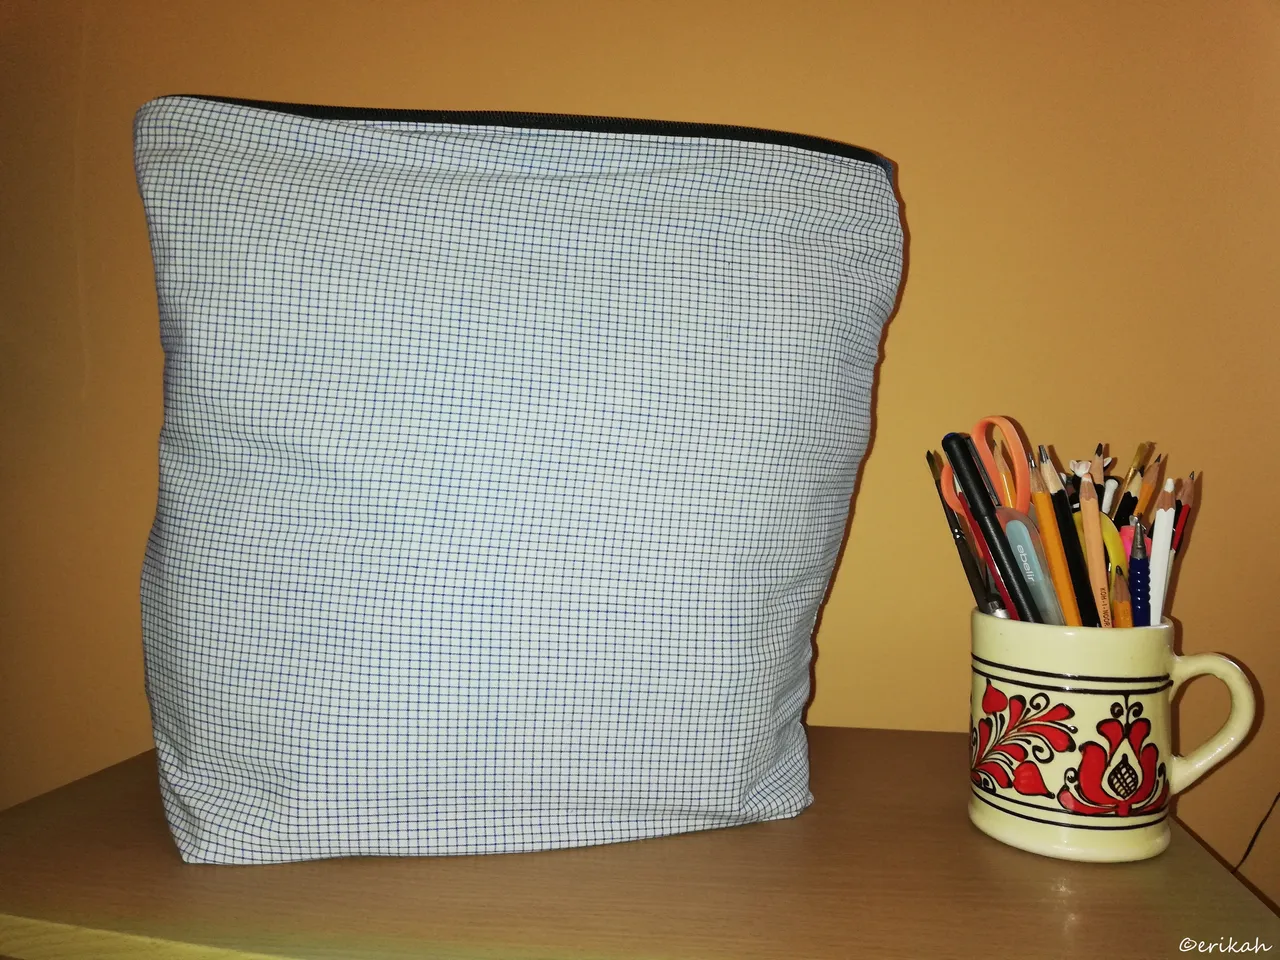
This is the front of the bag and below the back.
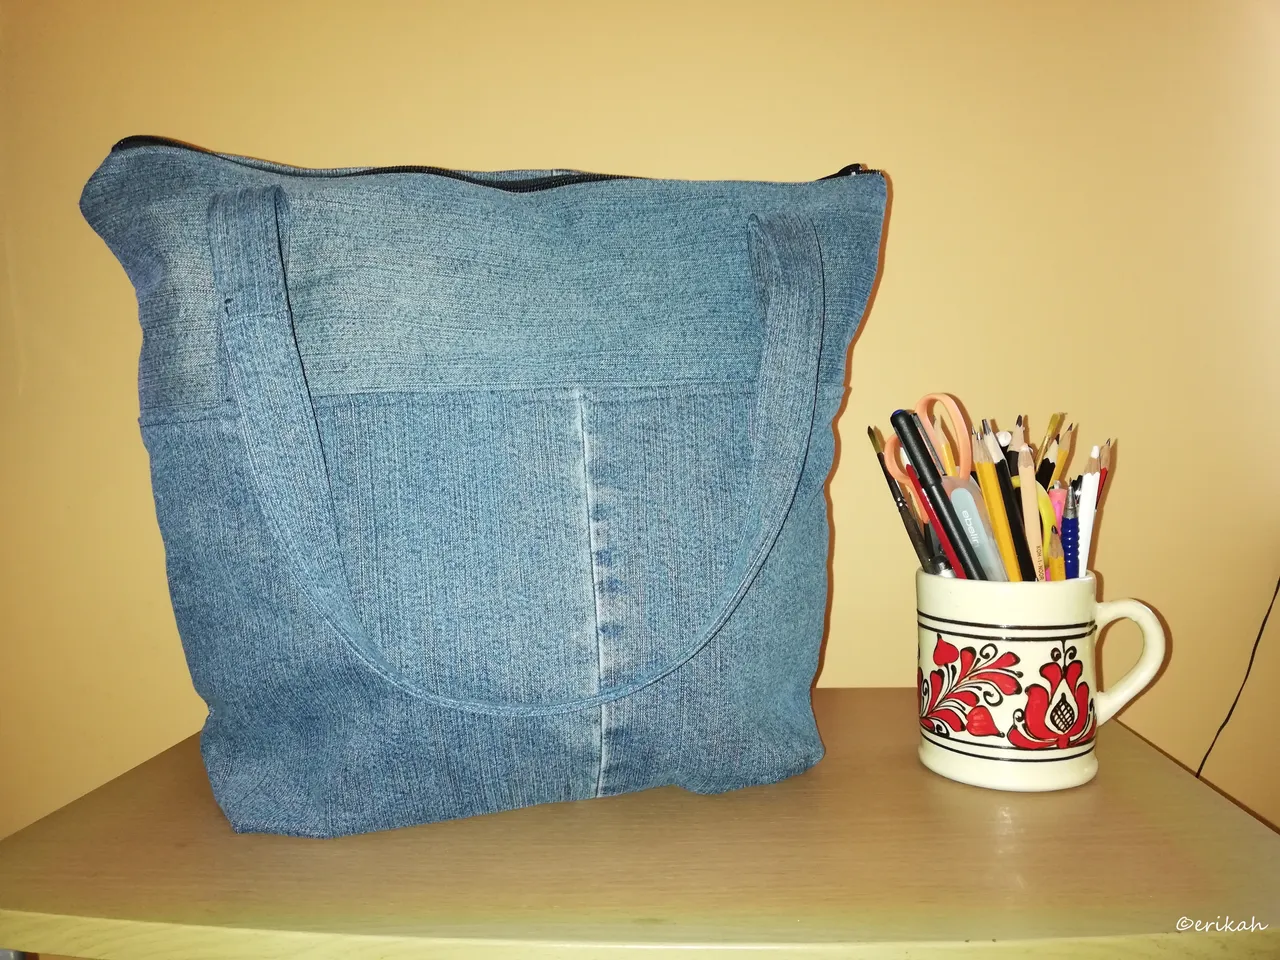
The back is very simple, basically it's made of two pieces as the jeans were, and the upper part. I could have made the front and the back similar as the jeans have two almost identical parts but at the end opted for using only one. I'm going to use the other one with some other #upcycled fabric.
The Process
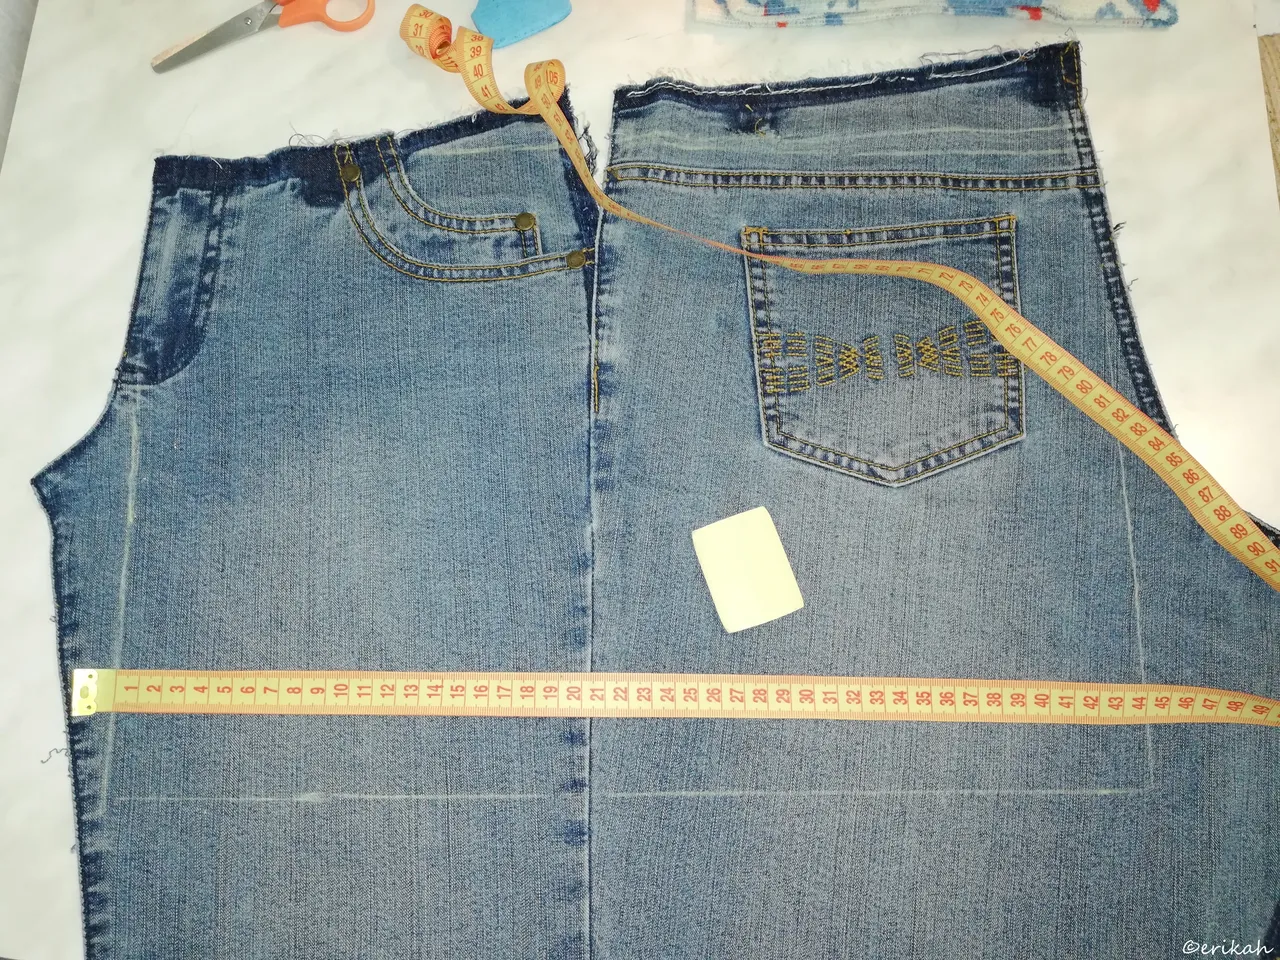
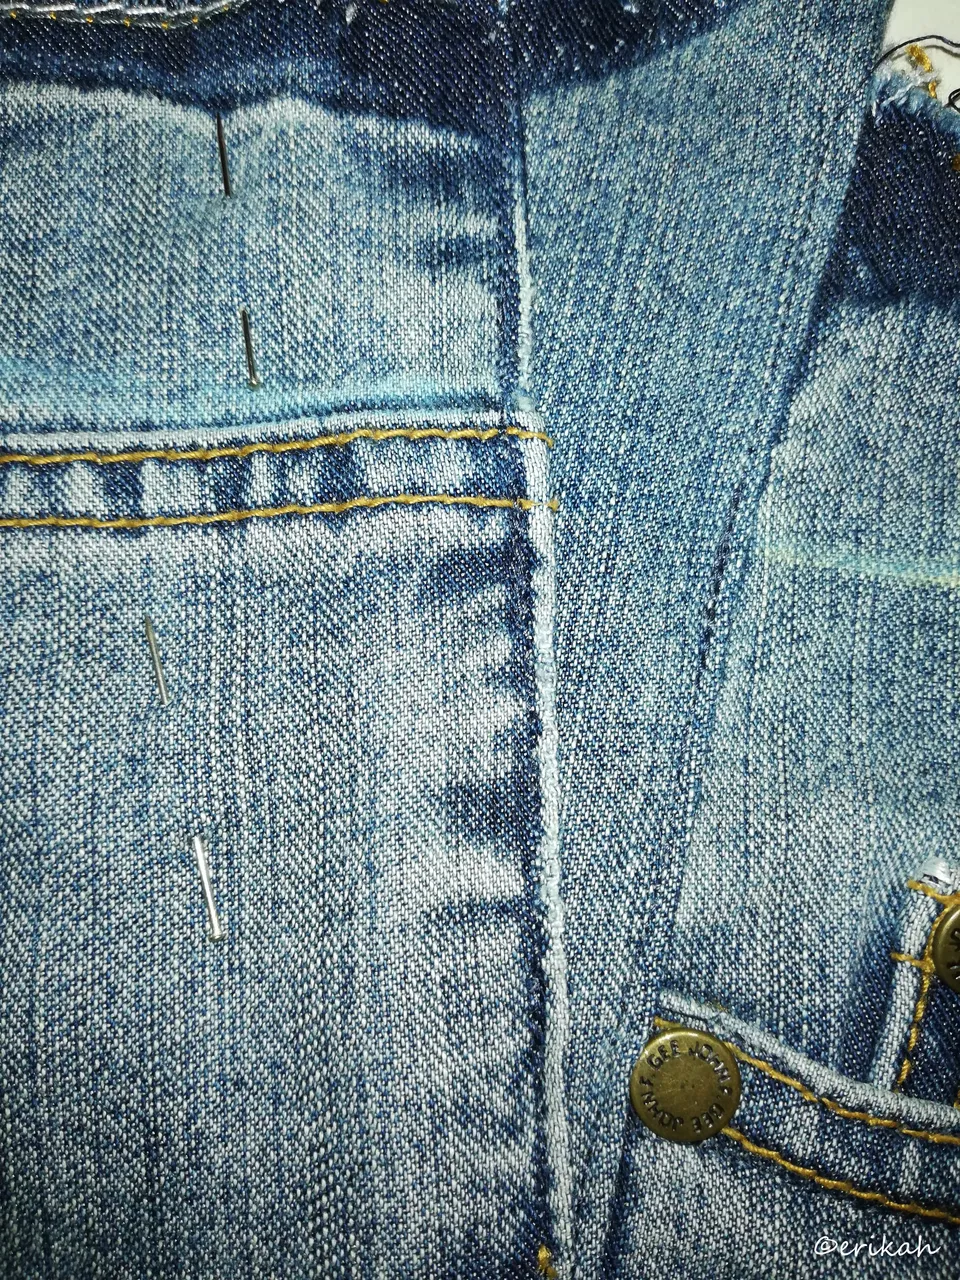
This was the starting point, this was what I had to work with. Basically the measurements were set in stone by the design, there was not much I could do, except for cut out what I could so I could get a decent piece that include the pocket on each side.
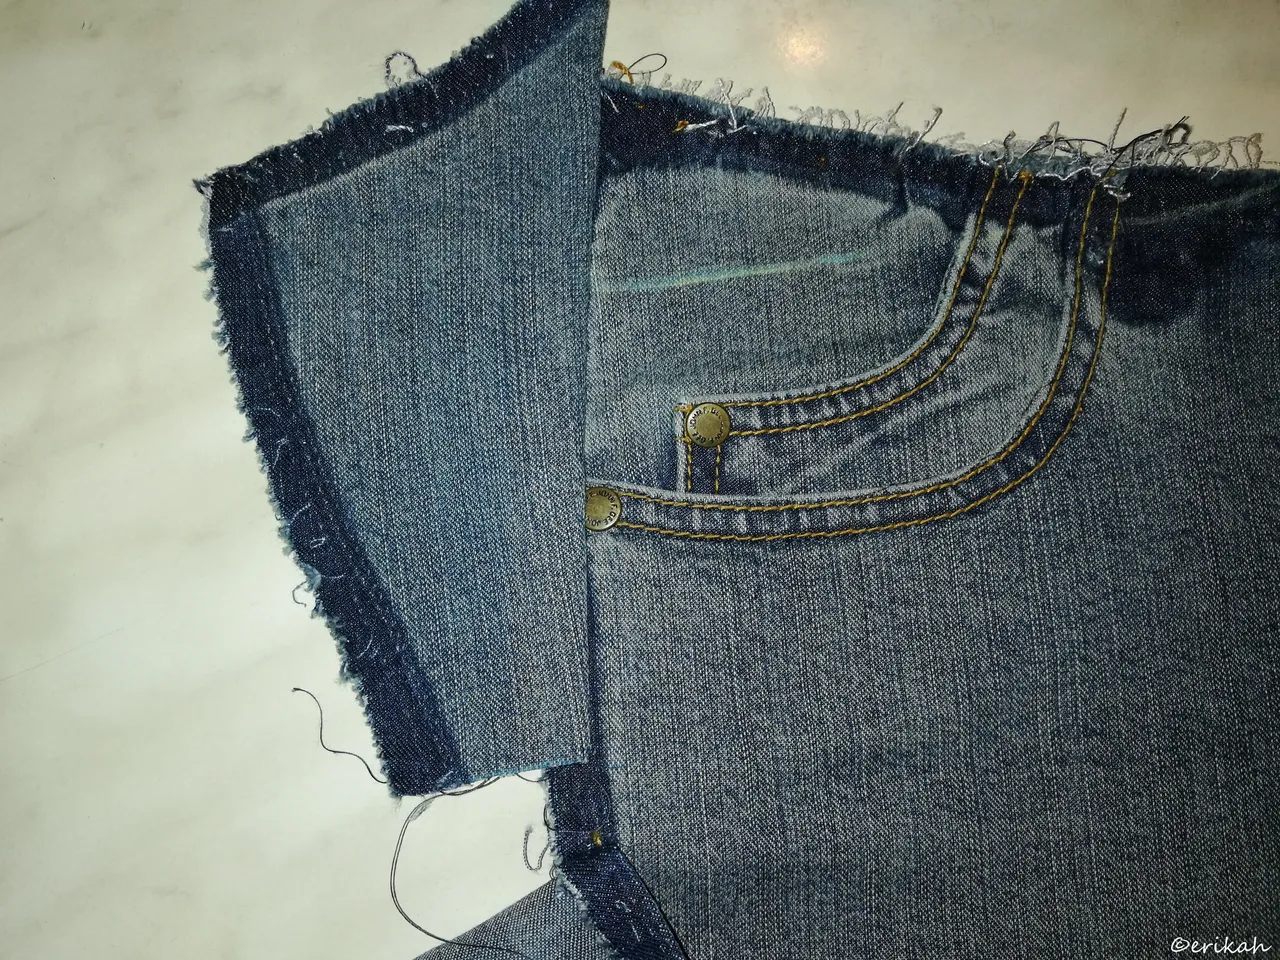
There was a triangle shaped gap at the bottom as jeans for women are made like that so they follow the body line. That was where I needed to insert a piece, to fill that gap. Adding a piece is never a problem, but this piece had those metal rivets, very close to the edge. To make it safe, I need to leave at least 0.5cm and avoid hitting the rivets with the needle.
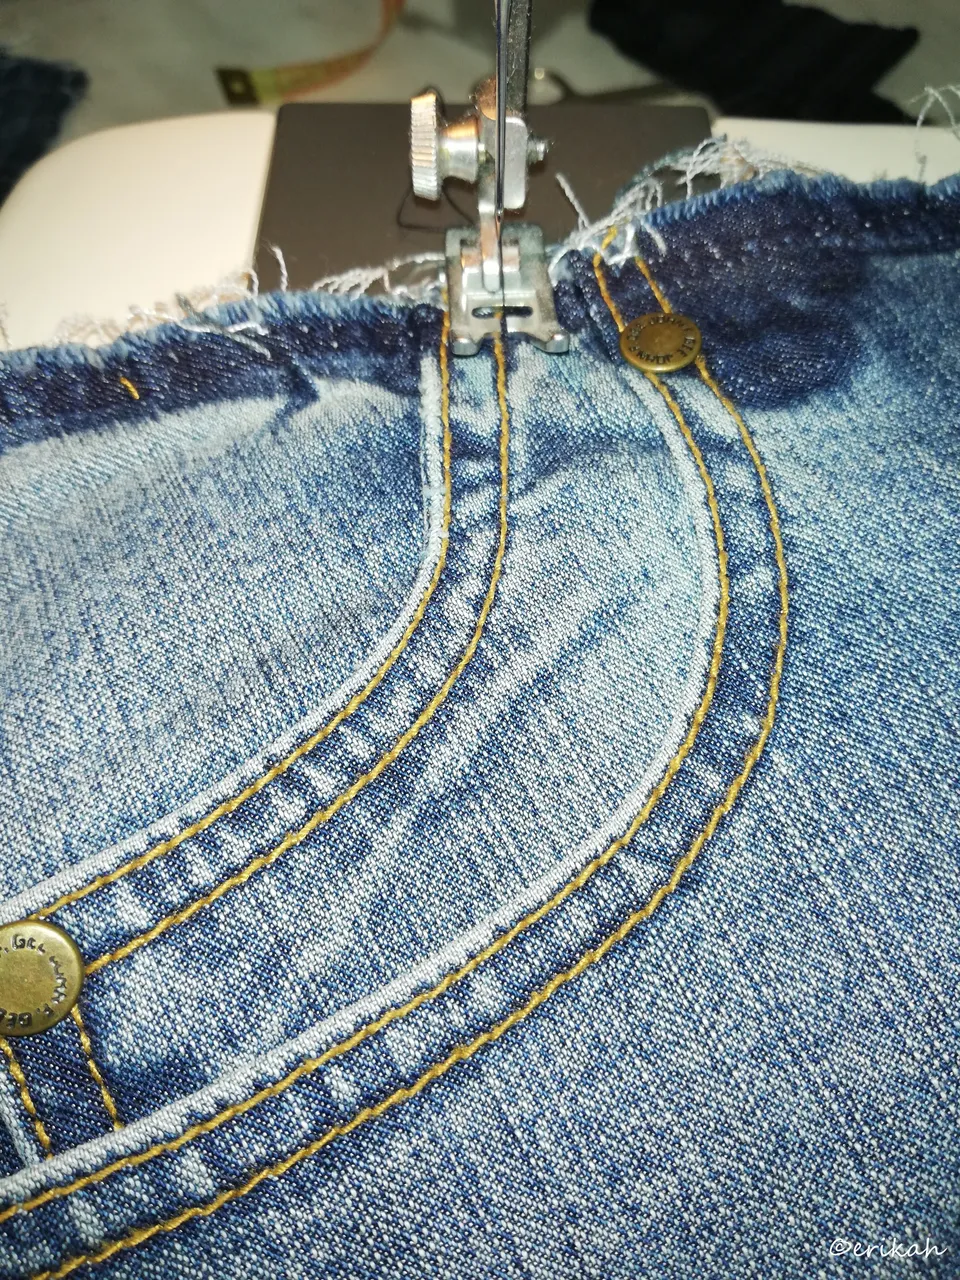
I had to sew the pockets as these became fake pockets, just for decorative purpose. The little one had the rivet exactly on the line, which meant I could not use my sewing machine on that spot. The smartest solution seemed like leave the little one as it was and only sew the other. And Still had to eliminate the upper rivet to be able to do it.
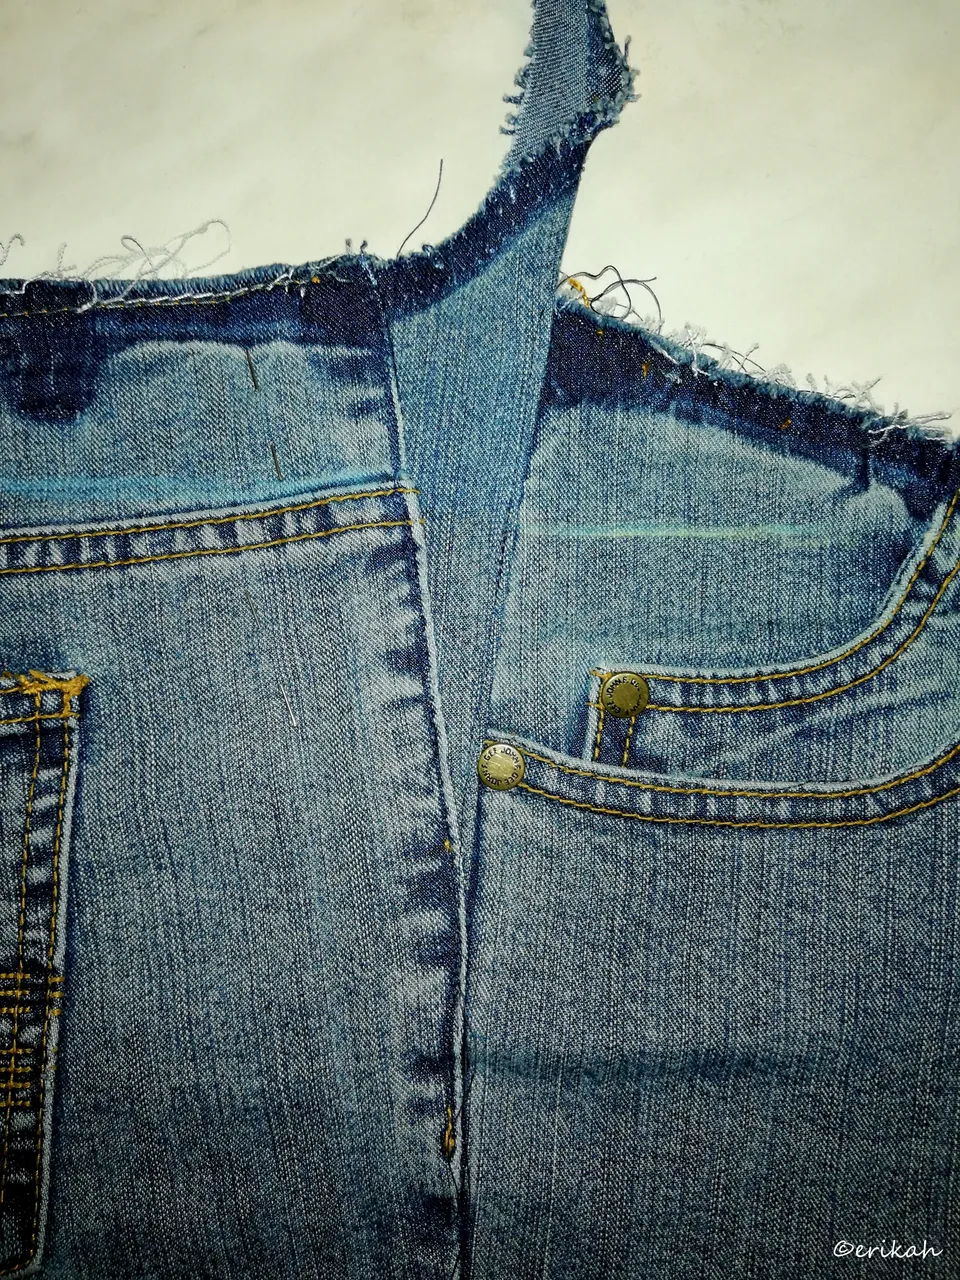
Then came the fun part. When I sewed the triangle, the rivet was covered and I could only guess where it was and needed to estimate (without mistake) where the needle is going to hit. Obviously the goal was to avoid the rivet. It wasn't easy but I did it without any problems, so the needle was safe. Actually I haven't broken any needles yet. Some of the rivet is covered, but just a tiny little part. There was no other way of doing it.
At the end it came out well, can't really complain.
The problem is, I did both pieces but took photos of the first process only and at the end used the other, so that can be confusing.
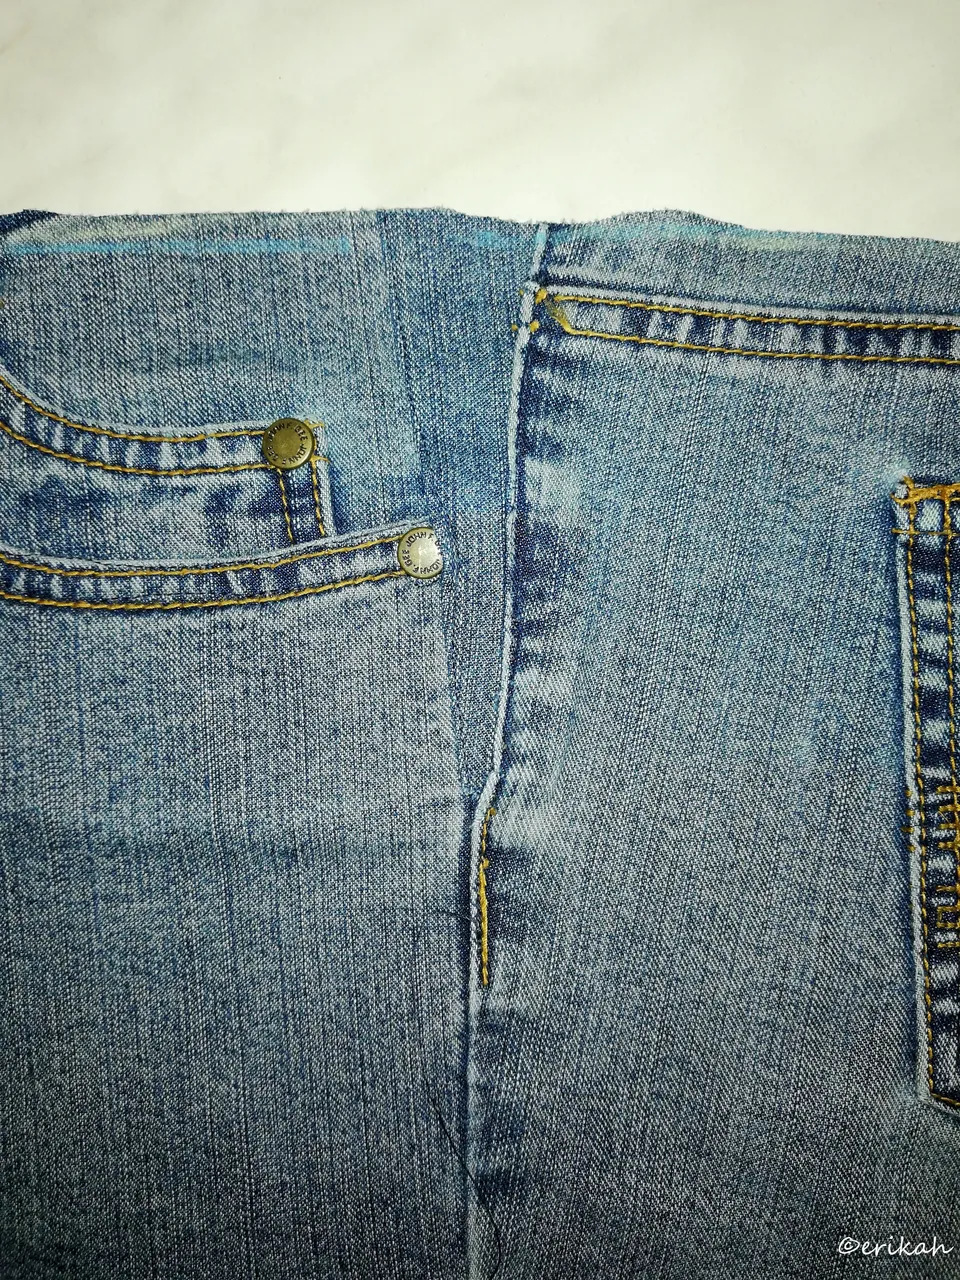
Going through the photos at the moment of writing just made me realize I did photos of both and this is the second one, the one I used for the bag. This one has some flaws but only if you can see it.
The rest wasn't eventful either as attaching the upper part was also a challenge. I wanted to keep the double stitched line and had very little space left to sew but I did it.
The Lining
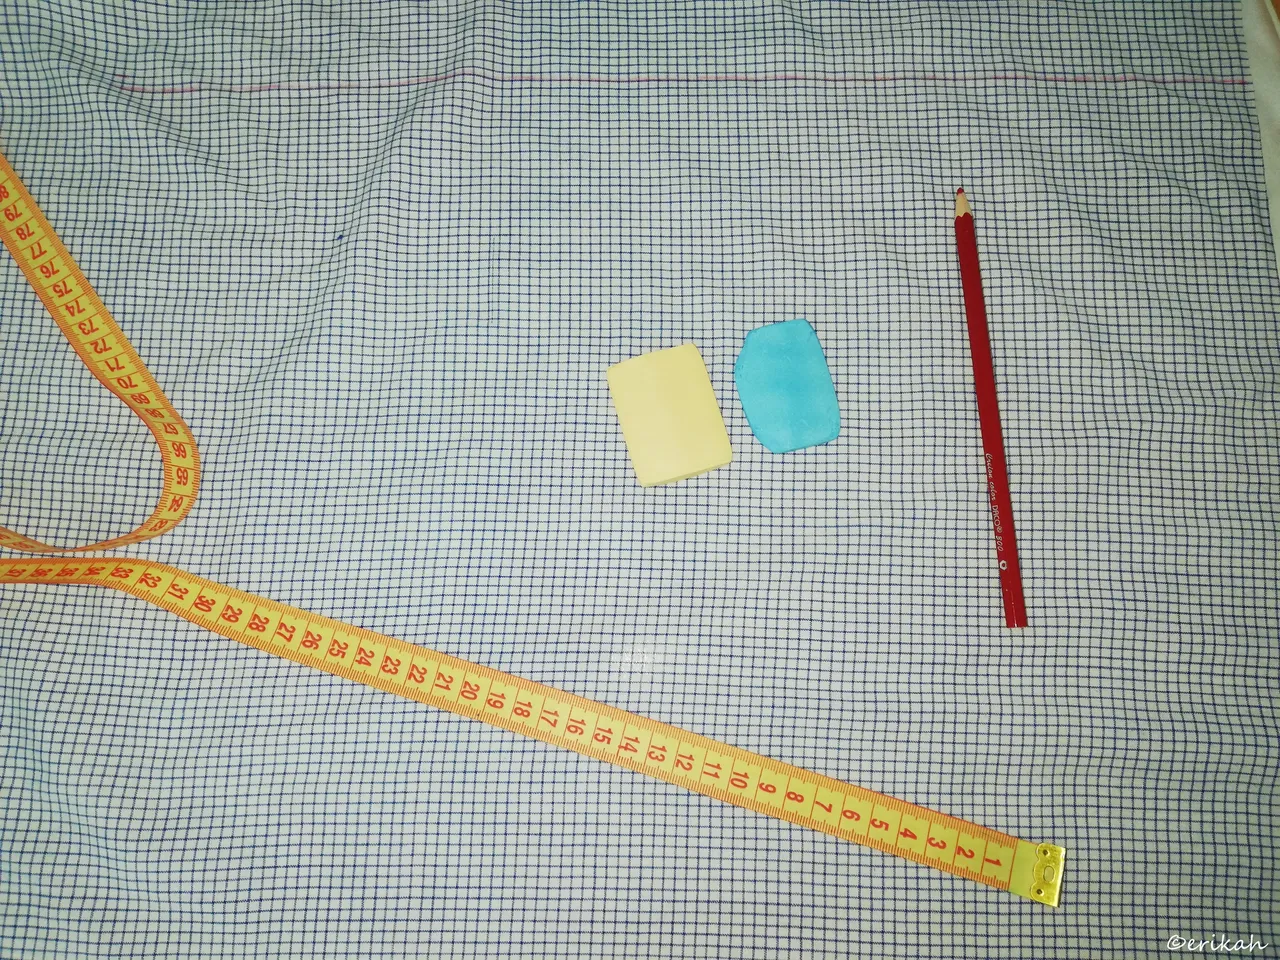
This one was a tough one as well. I usually buy striped shirts of very good quality as that's what they are selling, but this was a shirt I got from my dad, he has never used it, has been sitting in the closet, so why not #upcycle it, right? Right! It's just that this is checkered and killed my eyes basically, beside making it harder to mark it.
I've got three chalk, white, light blue and yellow, none of which was visible on this fabric, so lucky me, I have a bunch of pencils for drawing, luckily the red one worked perfectly.
So if you ask me, I will never ever buy this checkered fabric. It killed my eyes and was more than happy when the whole thing was over but I'm still happy I could #repurpose an item that was not in use anymore.
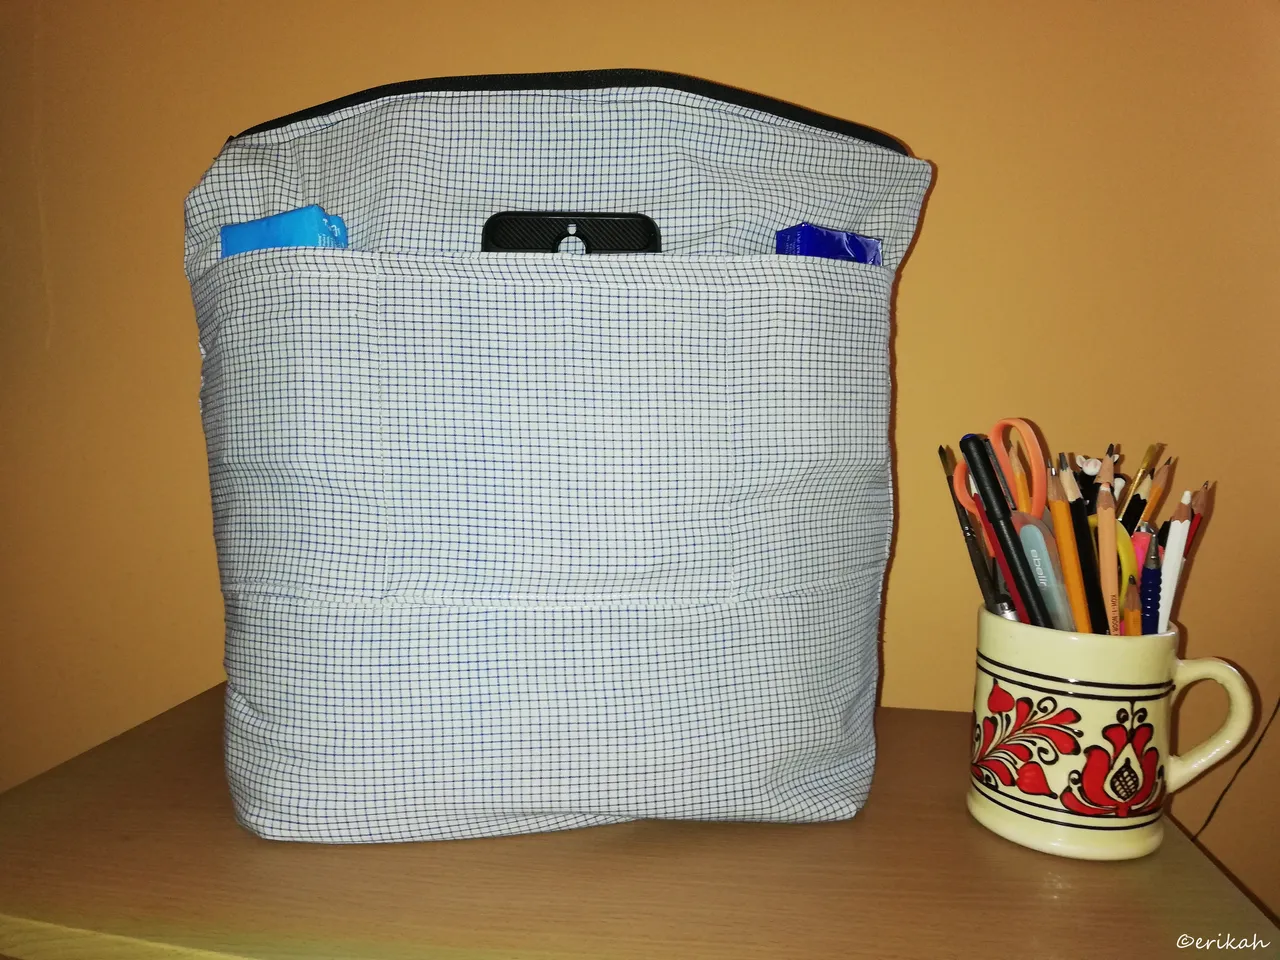
So this is how the inside looks, three deep pockets as usual.
The other side is simple, no extra pocket here. The shirt had a pocket and I intended to use it initially but after the other part had killed my eyes I had to change my mind.
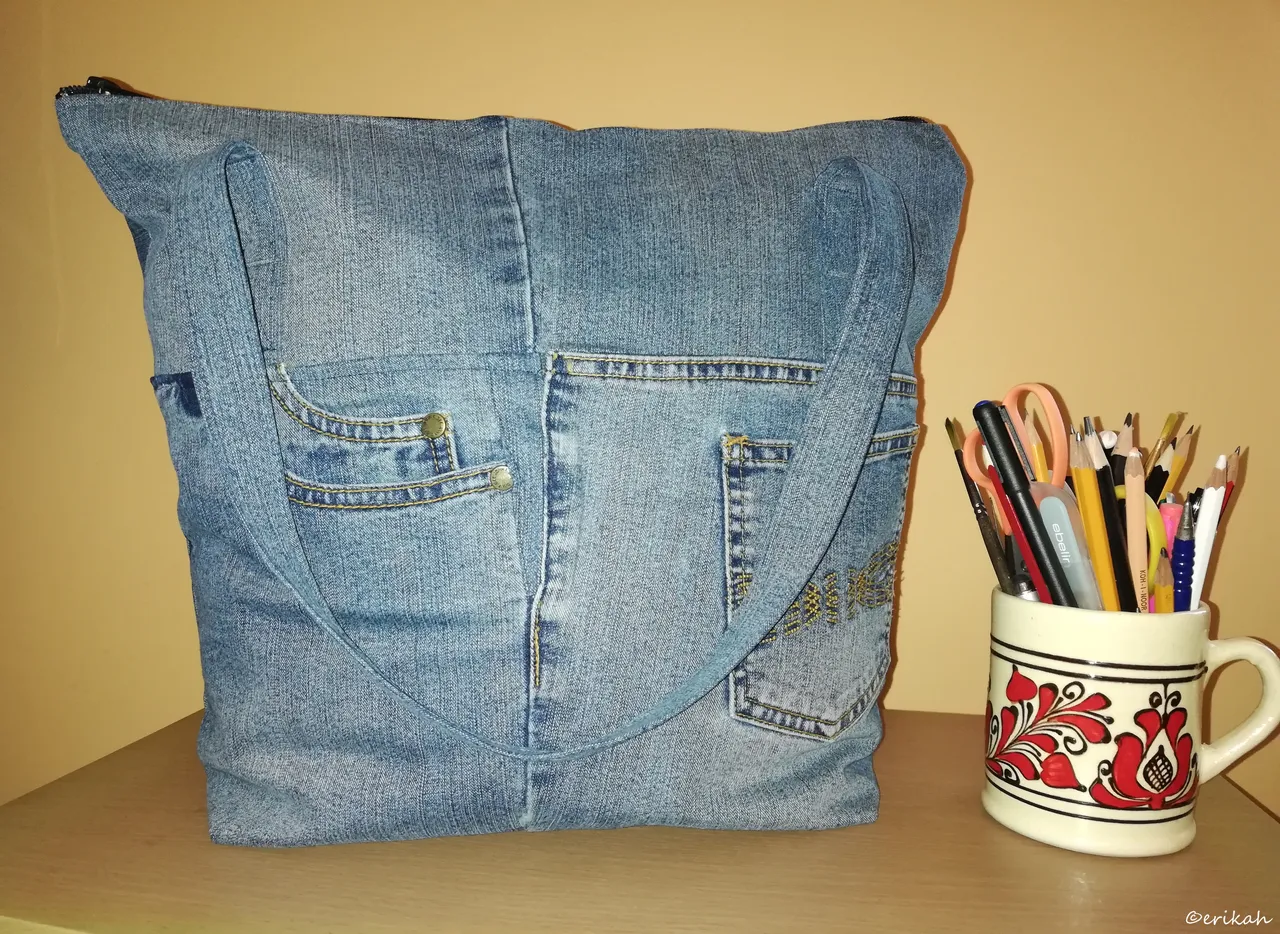
So this is the final product, ready to be used 😀. I'm curious to see who's going to be the proud owner of it.
It wasn't easy but I have learned a lot and ready for the next adventure. Each bag and the hardships, problems that come with them is teaching me a lot. I'm not afraid of the sewing machine anymore, ready to try out just about any design now obviously with my limited resources but still ready. Stay tuned to see what I'm going to come up next time.
Today I'm happy that I've been able to save another pair of jeans and a shirt and gave them both a new purpose.
Feel free to let me know what you think about the bag. I'd be happy to get some feedback and don't forget to check out this initiative -> Be POSH, Engage and help Hive Thrive | A Challenge sponsored by Blocktrades, Theycallmedan, Threespeak and OCDB

Check out my other sewing posts:
- My First Bag
- Upcycled Double Pocket Denim Bag
- Upcycled Double Pocket Tote Bag, My 3rd One
- Upcycled Denim Zipper Bag
- Handmade Mask - Experience and Necessity
- Two Toned Upcycled Denim Bag
- #Upcycled Initiative And A New Upcycled Denim Bag Made Of Bits And Pieces
- Upcycled Denim Tote Bag
- Fake Pockets Upcycled Denim Bag And Some Treasures