Hola amigos Hivers, reciban un cordial saludo.
Siempre estoy realizando objetos utilitarios para ayudar a realizar las labores en casa de manera más práctica. Es así como utilizando unos trozos de tela e hilos y agujas he realizado este útil agarra ollas.

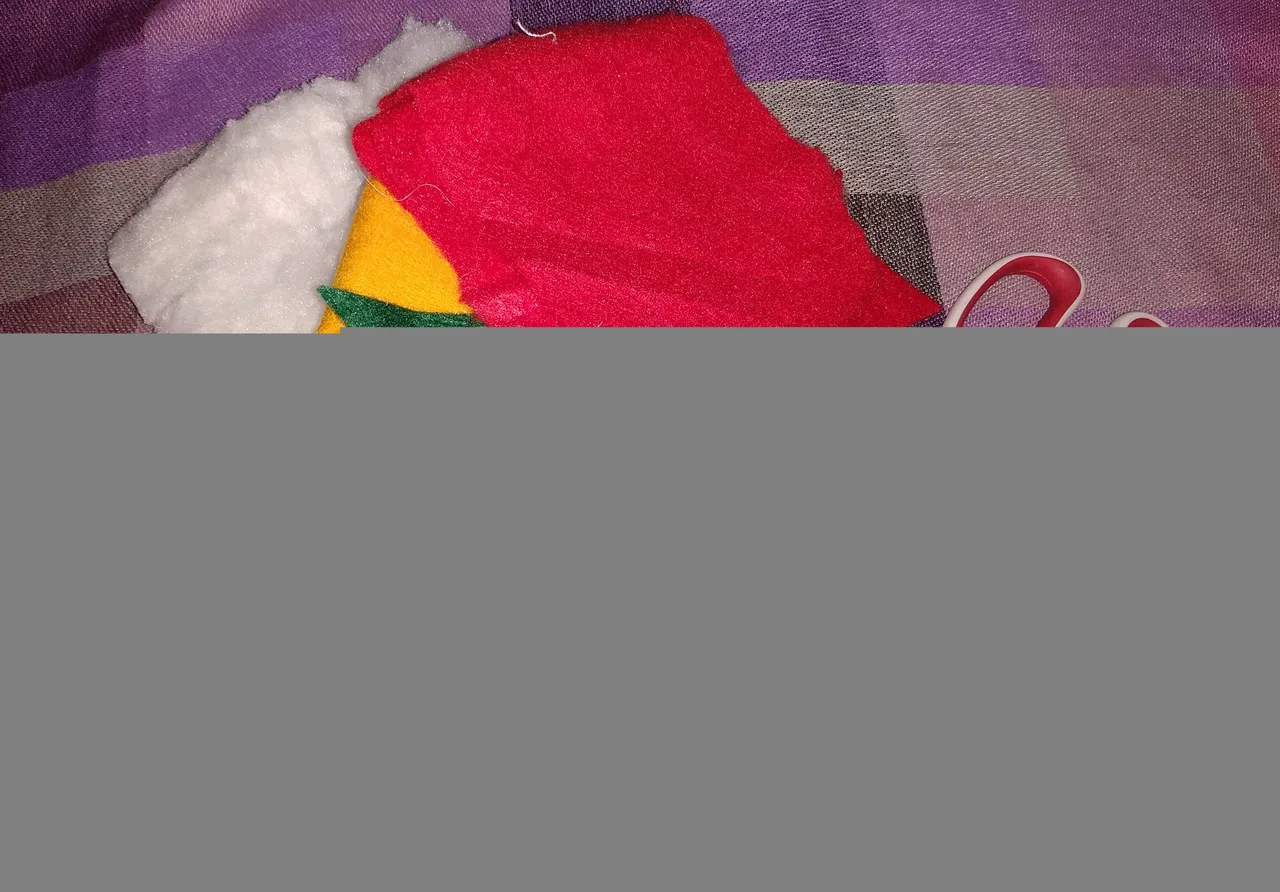
Materiales:
Trozos de tela
Fieltro
Hilos
Aguja
Tijera
Elaboración Paso a Paso.
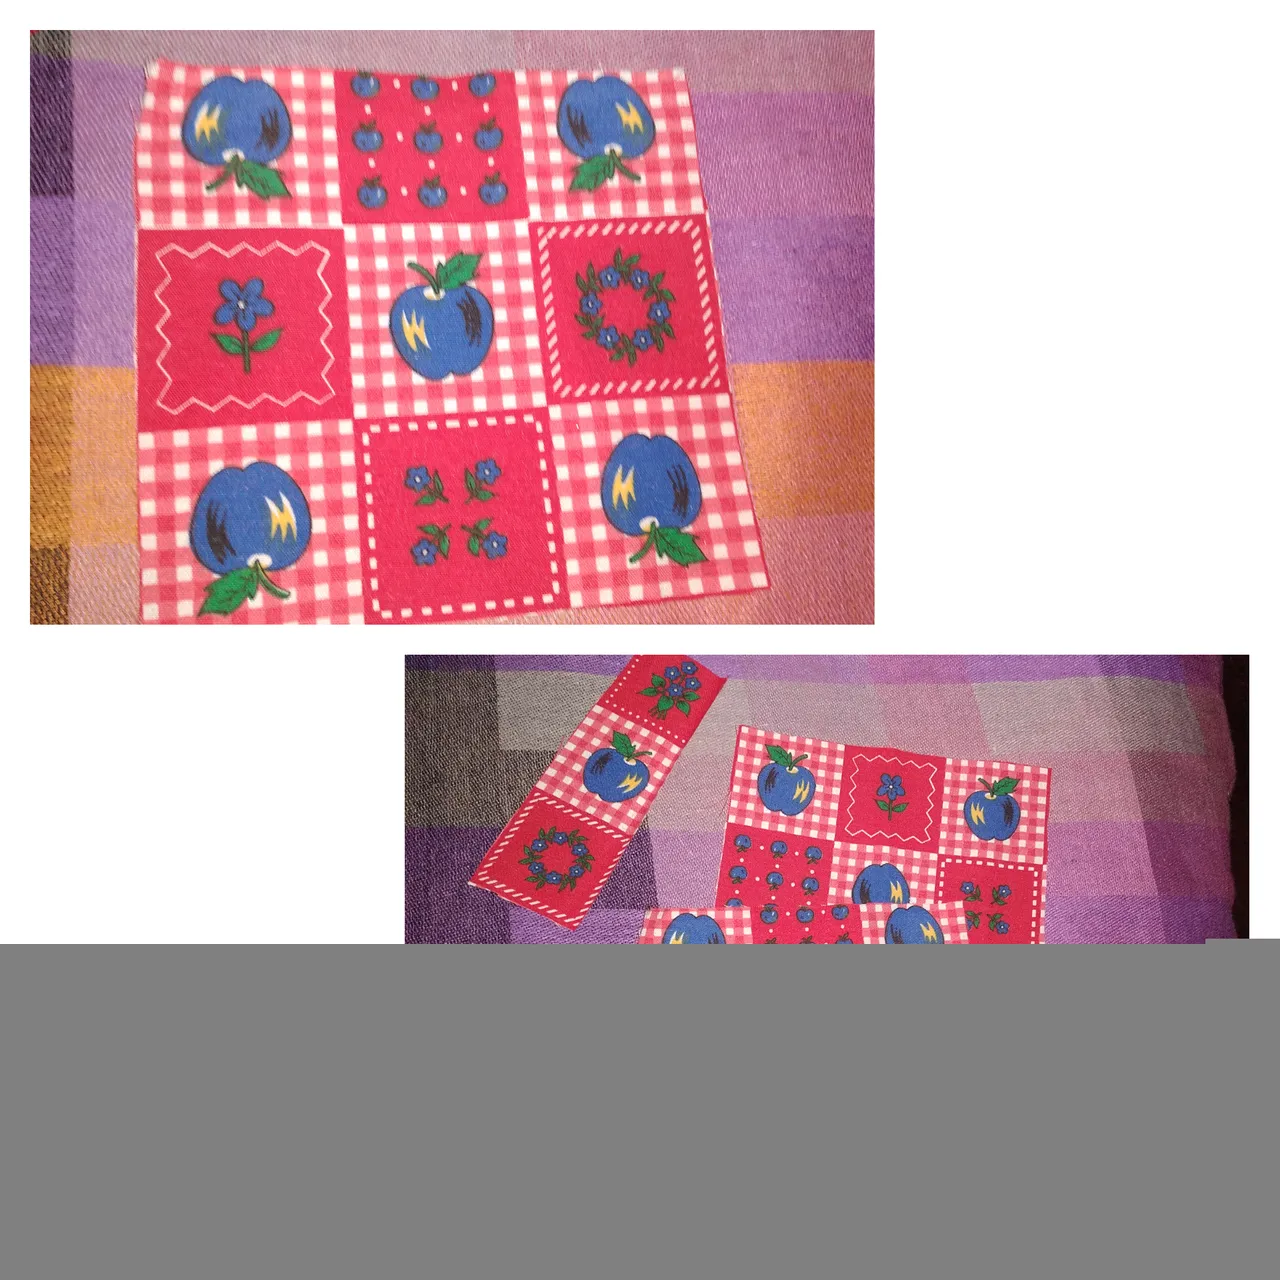
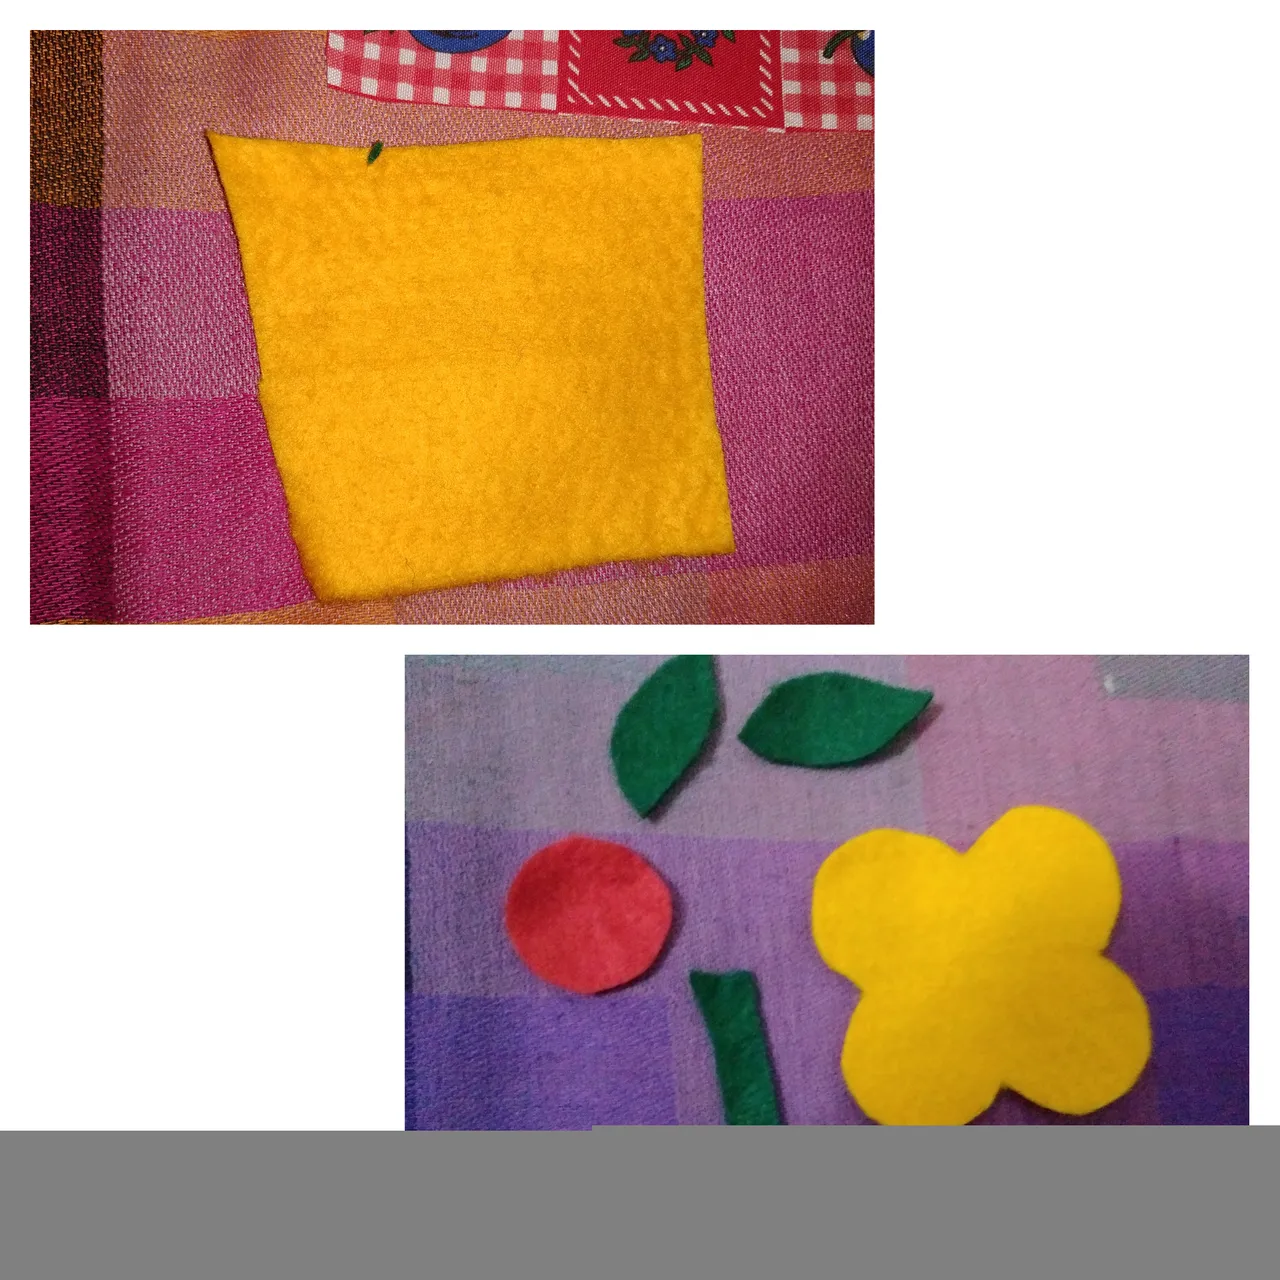
Paso 1.
Comienzo recortando dos cuadrados de tela de 17x 17 cms y una cinta de 10x3 cms.
A partir de un cuadrado de fieltro recorté una flor, igualmente un círculo para formar el centro de la flor y el tallo y hojas en fieltro verde.
Paso 2.
Procedí a coser la flor a la tela, previamente la fijé con alfileres para luego realizar unas puntadas por el borde.
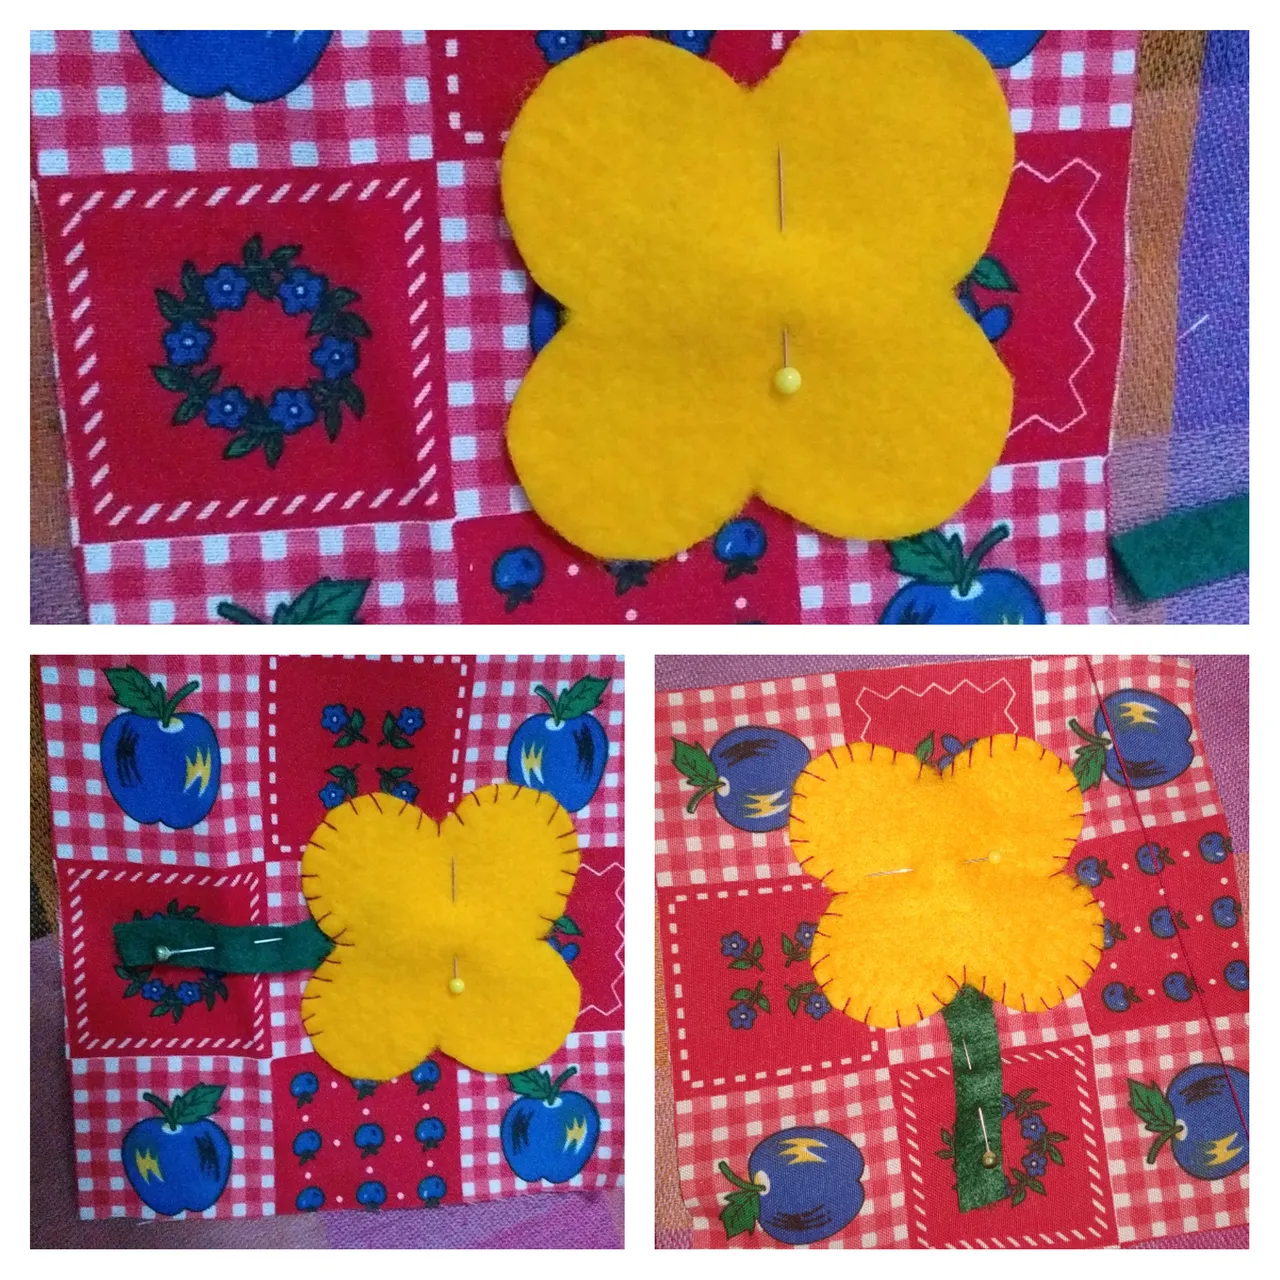
Paso 3.
Cosí el centro de la flor, antes de cerrarlo le coloqué algodón de relleno para dar un poco de volumen. Igualmente cosí el tallo y hojas realizando unas puntadas. Es importante rematar las costuras para evitar que se deshagan.

Paso 4.
Con el trozo de tela rectangular realizo el doblez y paso una costura recta para formar el asa del agarra ollas.luego lo ubico en la esquina superior de las tres enfrentadas por el derecho y procedo a pasar una costura recta por el contorno, dejando una pequeña abertura para rellenar.

Paso 5.
Para finalizar le coloco algodón de relleno por la parte interna del agarra ollas y cierro la pequeña abertura utilizando unos puntada escondida.
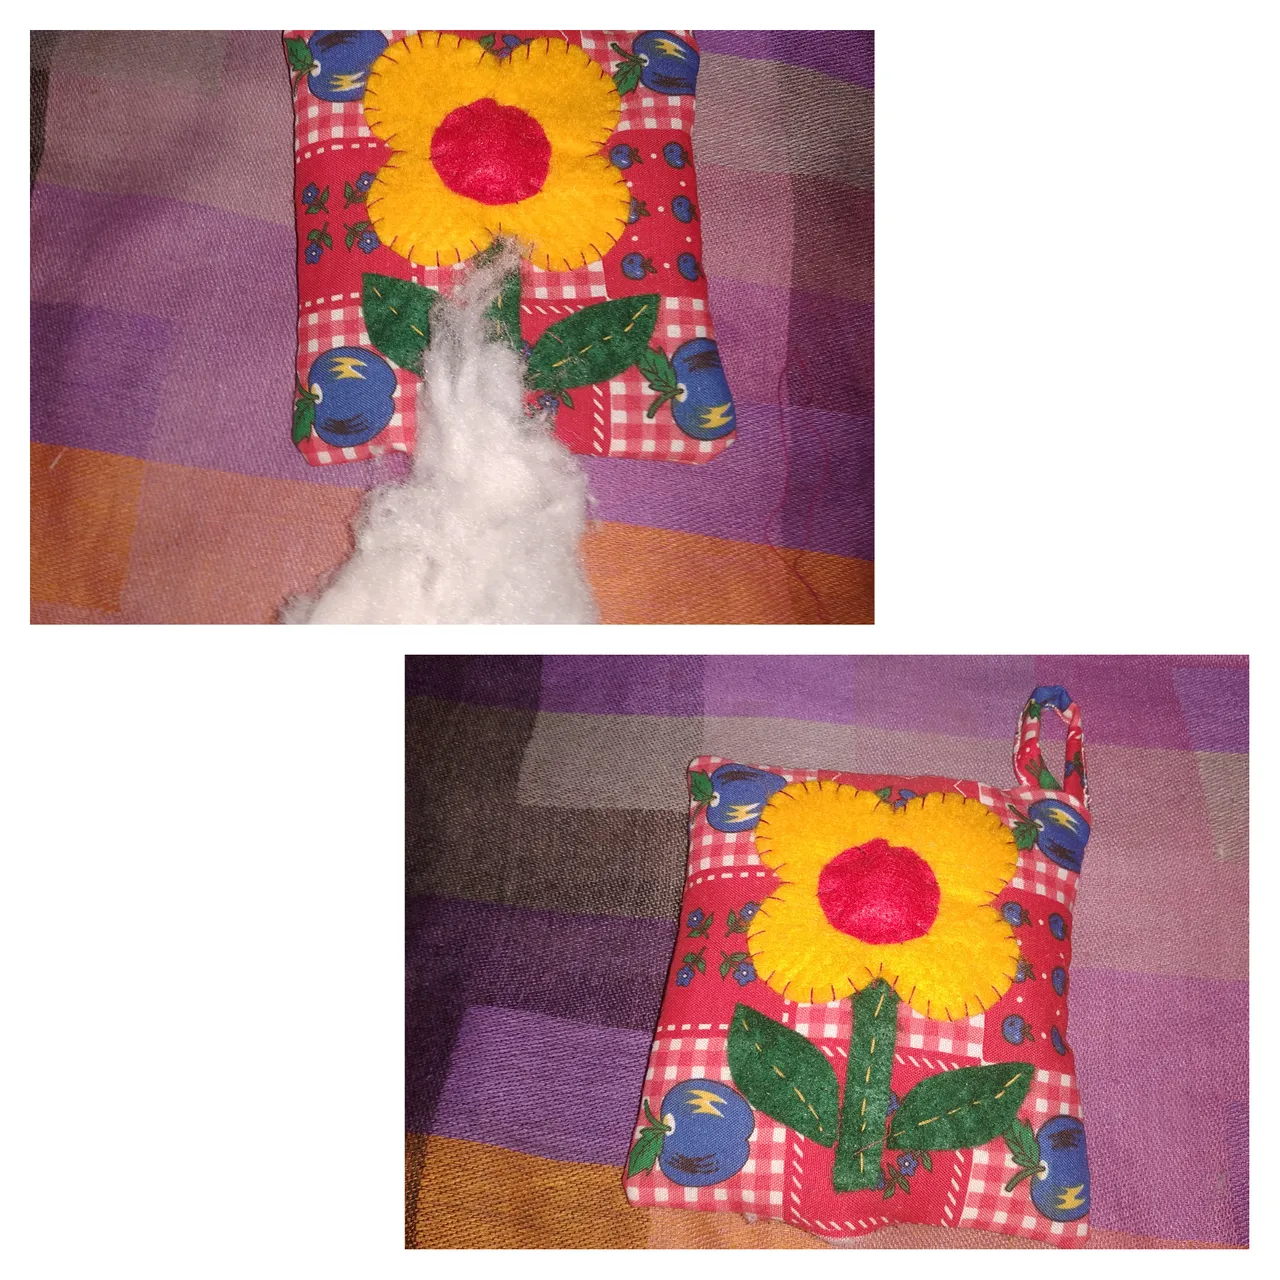
Aquí está culminado el agarra ollas...
La Vida es Arte...
Gracias por leerme! Nos encontraremos en el próximo Post @dorada.
Nota: fotos de mi autoría capturadas con dispositivo móvil Redmi 8.
English Versión
Hello friends Hivers, I send you a warm greeting.
I'm always making utilitarian objects to help make housework more practical. So, using some pieces of fabric and threads and needles I have made this useful pot holder.
Materials:
Pieces of fabric
Felt
Thread
Needle
Scissors
Step by step.
Step 1.
I start by cutting out two 17x 17 cm squares of fabric and a 10x3 cm ribbon.
From a square of felt I cut out a flower, also a circle to form the center of the flower and the stem and leaves in green felt.
Step 2.
I proceeded to sew the flower to the fabric, I previously pinned it and then made a few stitches along the edge.
Step 3.
I sewed the center of the flower, before closing it I placed cotton stuffing to give it some volume. I also sewed the stem and leaves with a few stitches. It is important to finish off the seams to prevent them from unraveling.
Step 4.
With the rectangular piece of fabric I make the fold and pass a straight seam to form the handle of the pot holder.Then I place it in the top corner of the three facing each other on the right side and proceed to pass a straight seam along the contour, leaving a small opening to fill.
Step 5.
To finish, I place cotton stuffing on the inside of the pot holder and close the small opening using a hidden stitch.
Here is the finished pot holder....
Life is Art...
Thanks for reading me! See you in the next Post @dorada.
Note: photos of my authorship captured with Redmi 8 mobile device.