Hello, friends especially needleworkers!
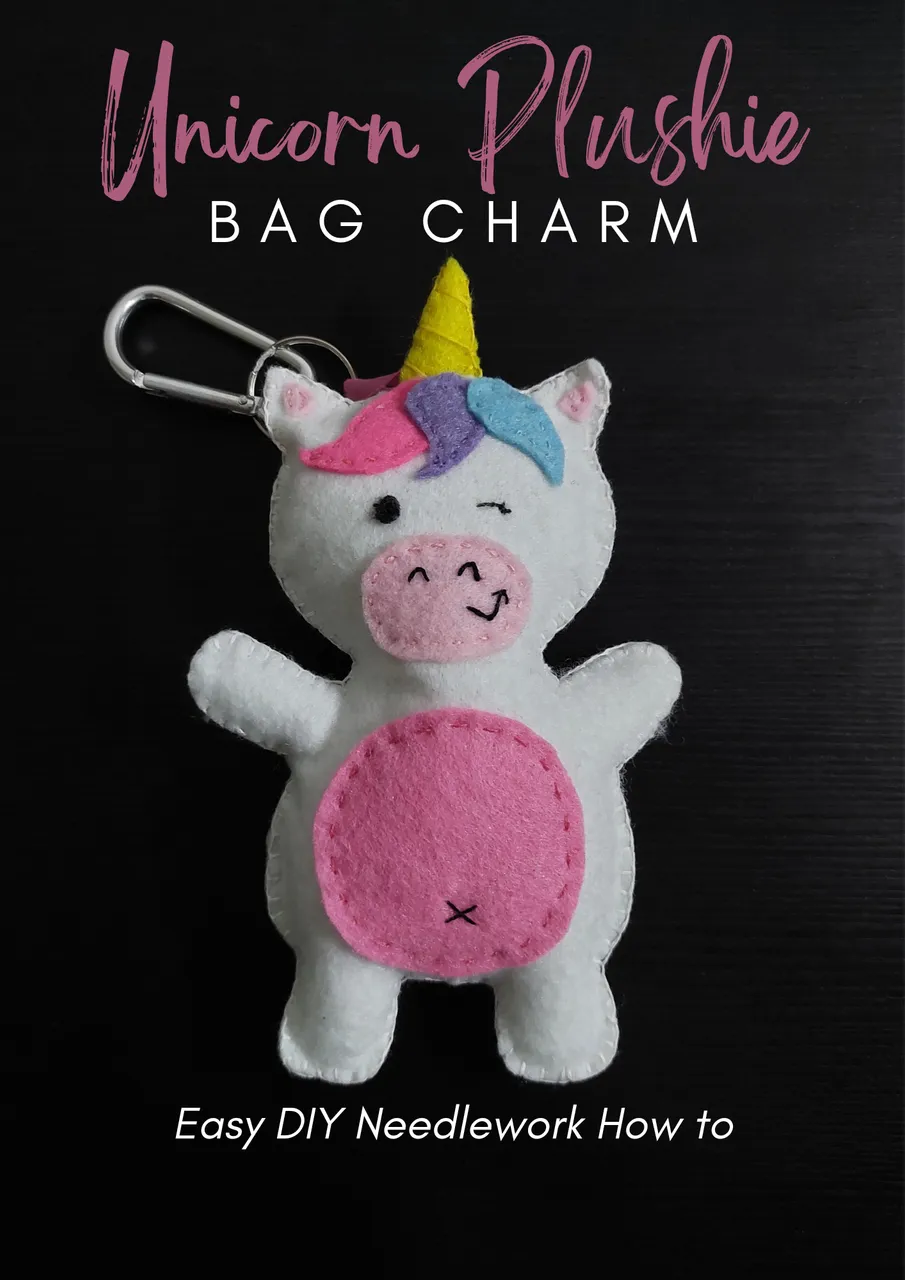
Yesterday like usually I spent the day at home doing my hobby. First I tried to make a mini crochet body cross bag, but I failed, my mood was ruined :’ and to cheer up myself I made a cute unicorn plushie bag charm. The result made me smile again and I would like to share how I made it with you all.
Project Time: approximately 6-7 hours
Difficulty: Medium
Skills Needed:
- Whipped stitch
- Blanket stitch
- Running stitch
Materials & things needed:
- Unused paper for the pattern
- Pencil
- Paper and Craft scissors (craft scissors used for small details objects)
- Felt fabrics in white, bright yellow, pink, medium purple, soft pink, soft blue and black
- Sewing needle
- Embroidery floss
- Filling stuff (dacron)
- Scissors (I used paper scissors and craft scissors)
- Pink ribbon
- Keychain ring or any hook
- Pinset
How to make it:
1ST
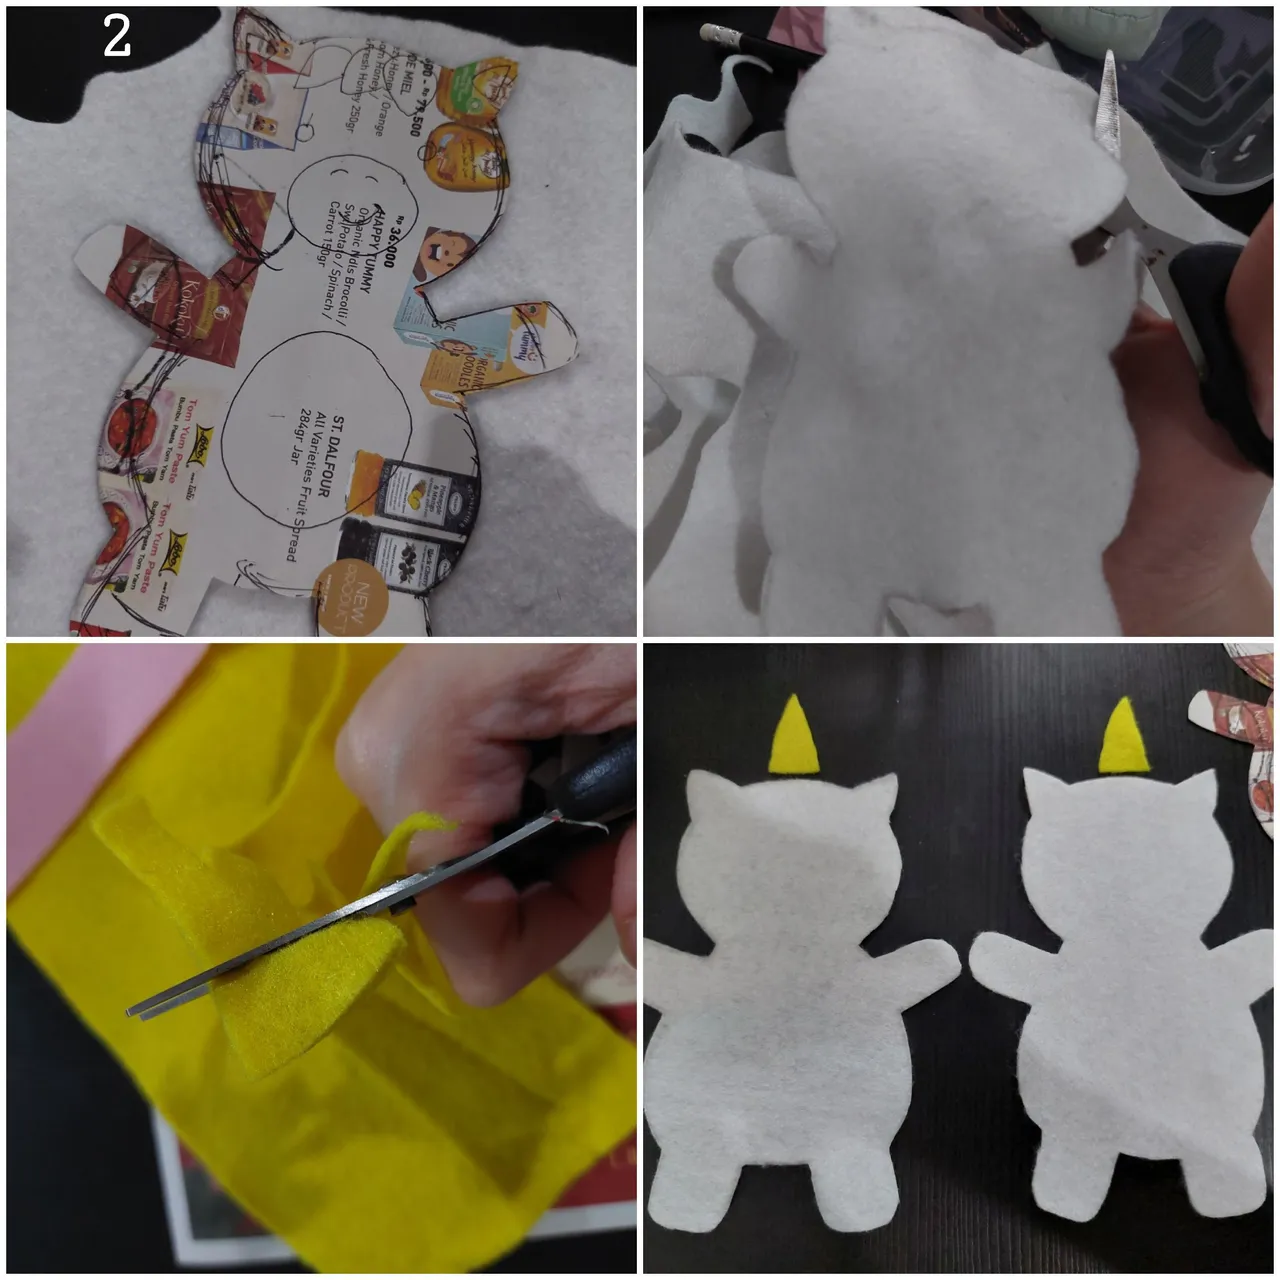
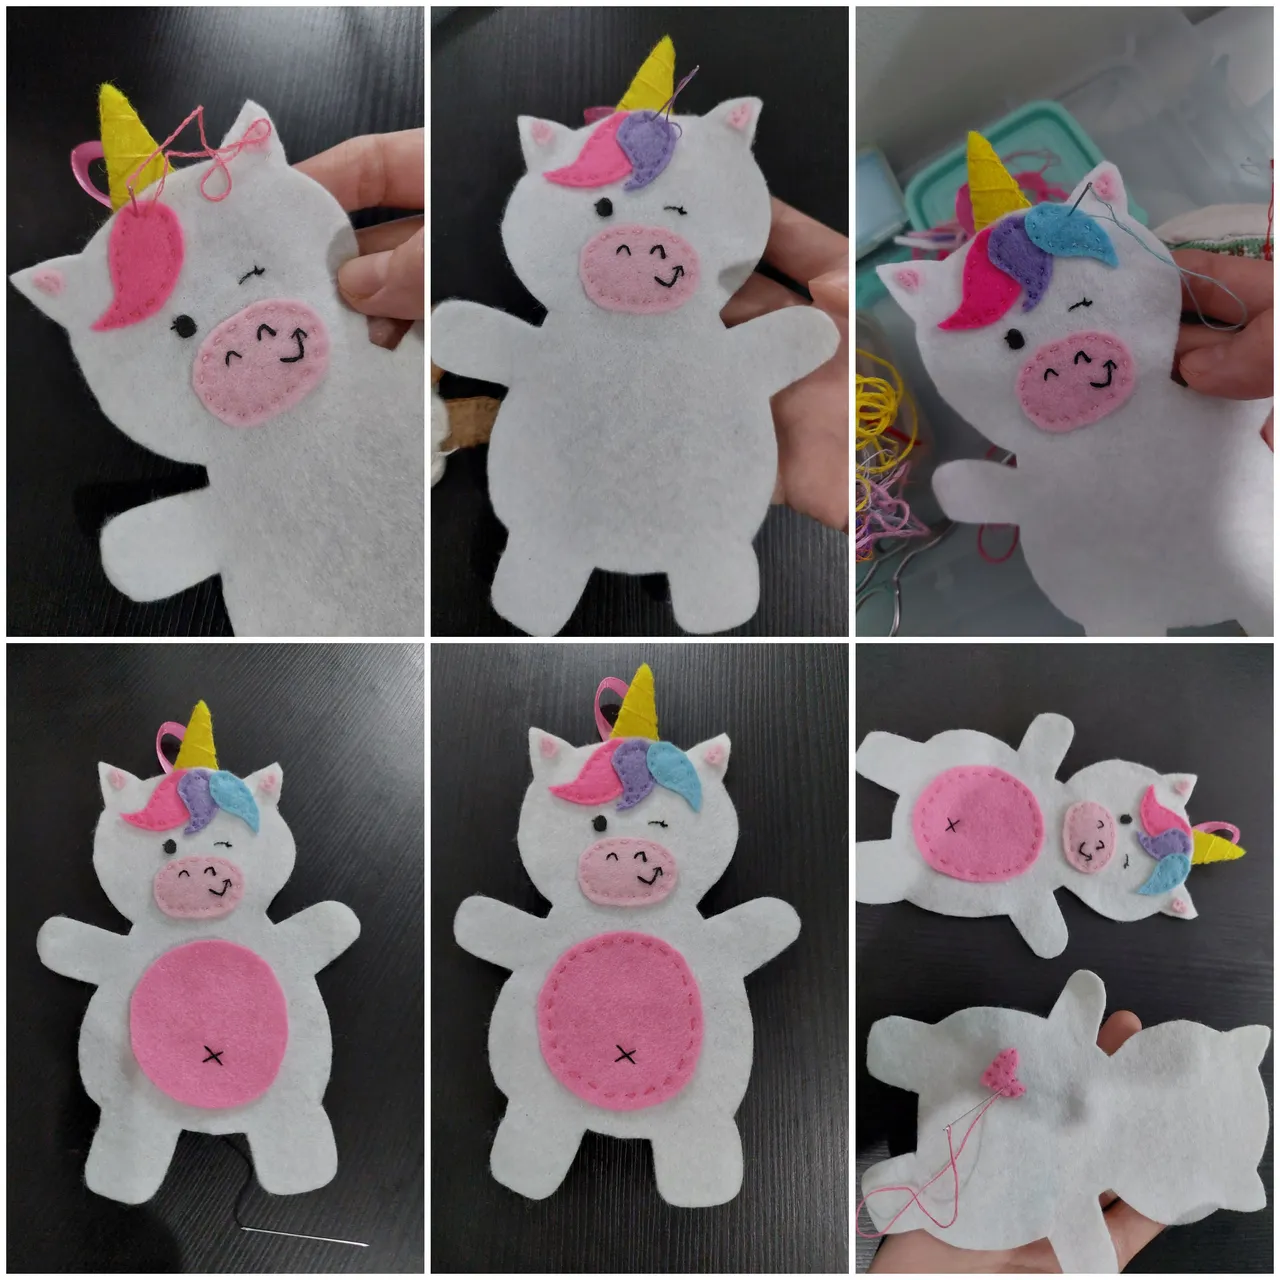
First I drew the whole body of the unicorn on a piece of unused paper then folded it in the middle and cut it off. Then I copied it on the white felt and cut it off.

2ND
Then, I made another one side also on the white felt and cut it off too. After that, I cut two yellow triangles for the horn.
3RD
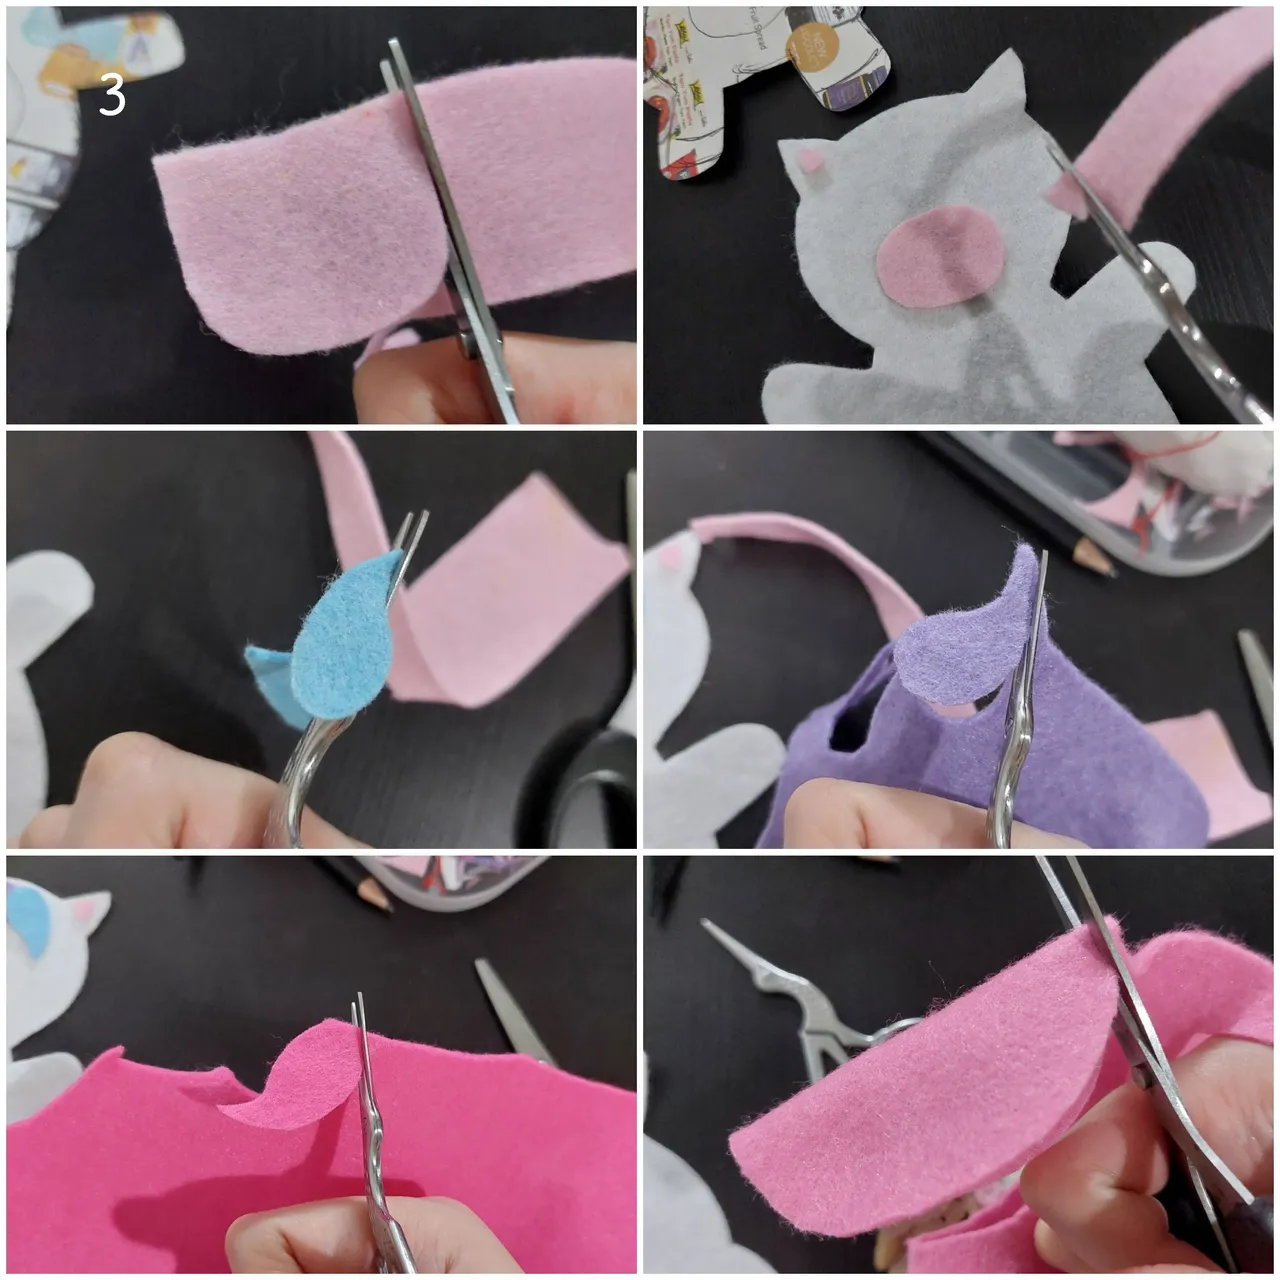
I also cut the soft pink felt for the mouth area and also inside the ear. Then, I cut the bang with soft blue, purple and pink. For the tummy area, I cut the pink felt, to make sure it was symmetric, I folded it in the middle first before I cut it off.
4TH
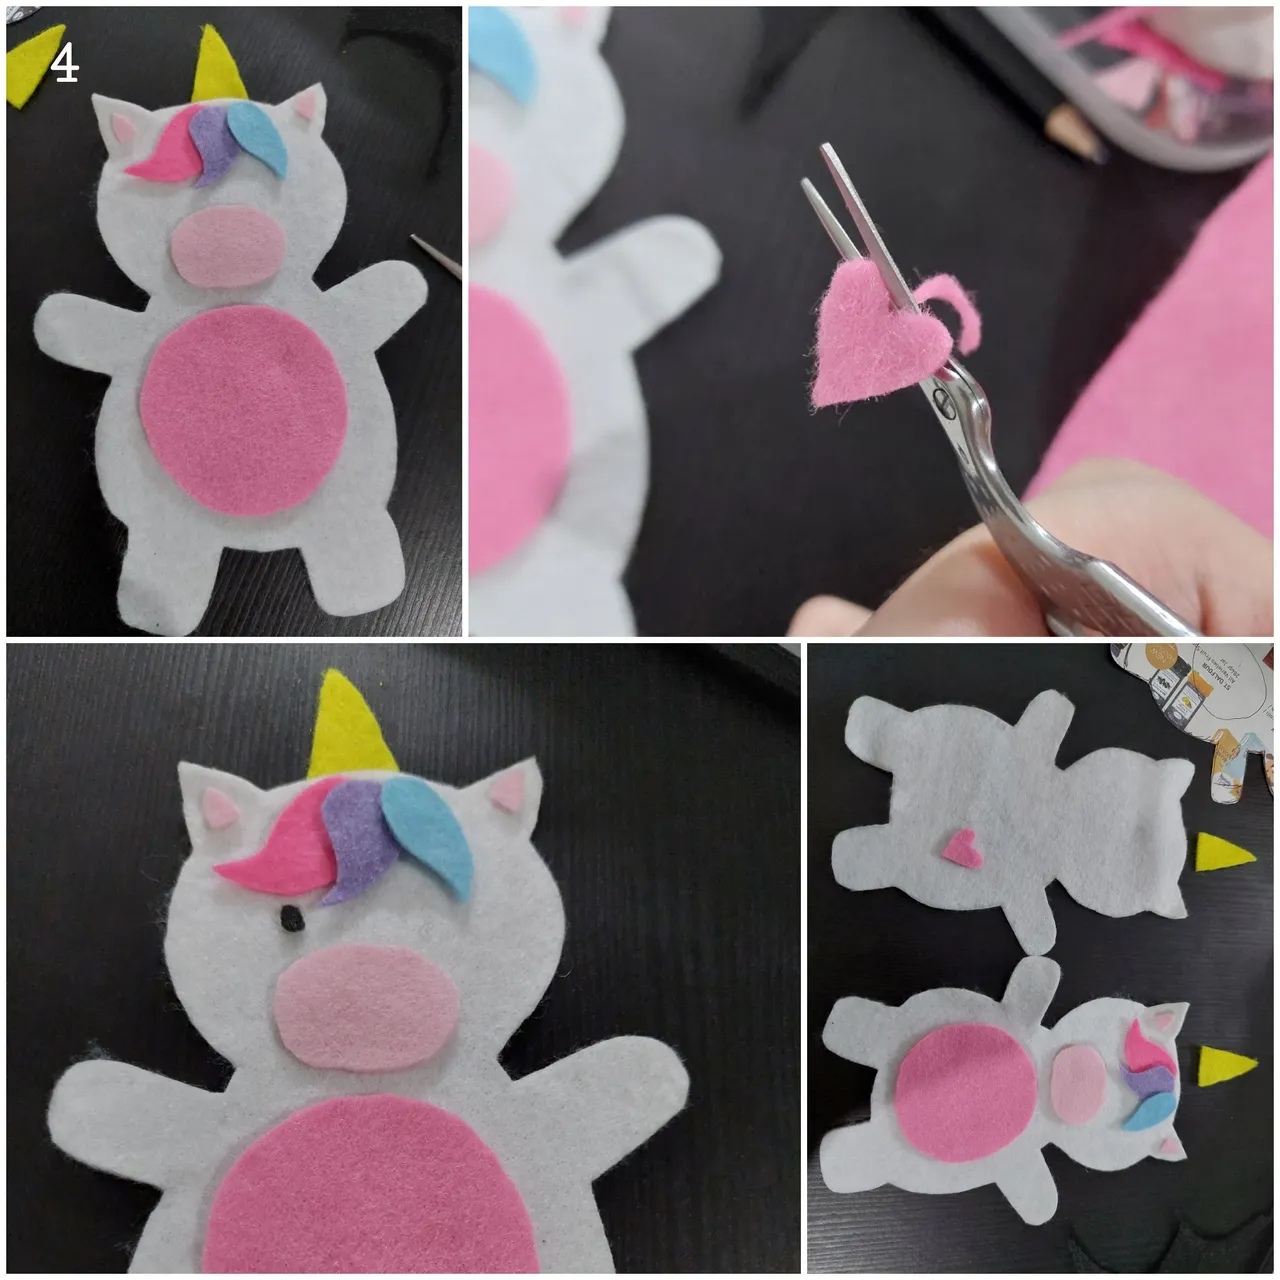
After the parts finished, I made a small heart for the back with pink felt. Also I made a small black oval for the eye. Now all the parts were cut off.
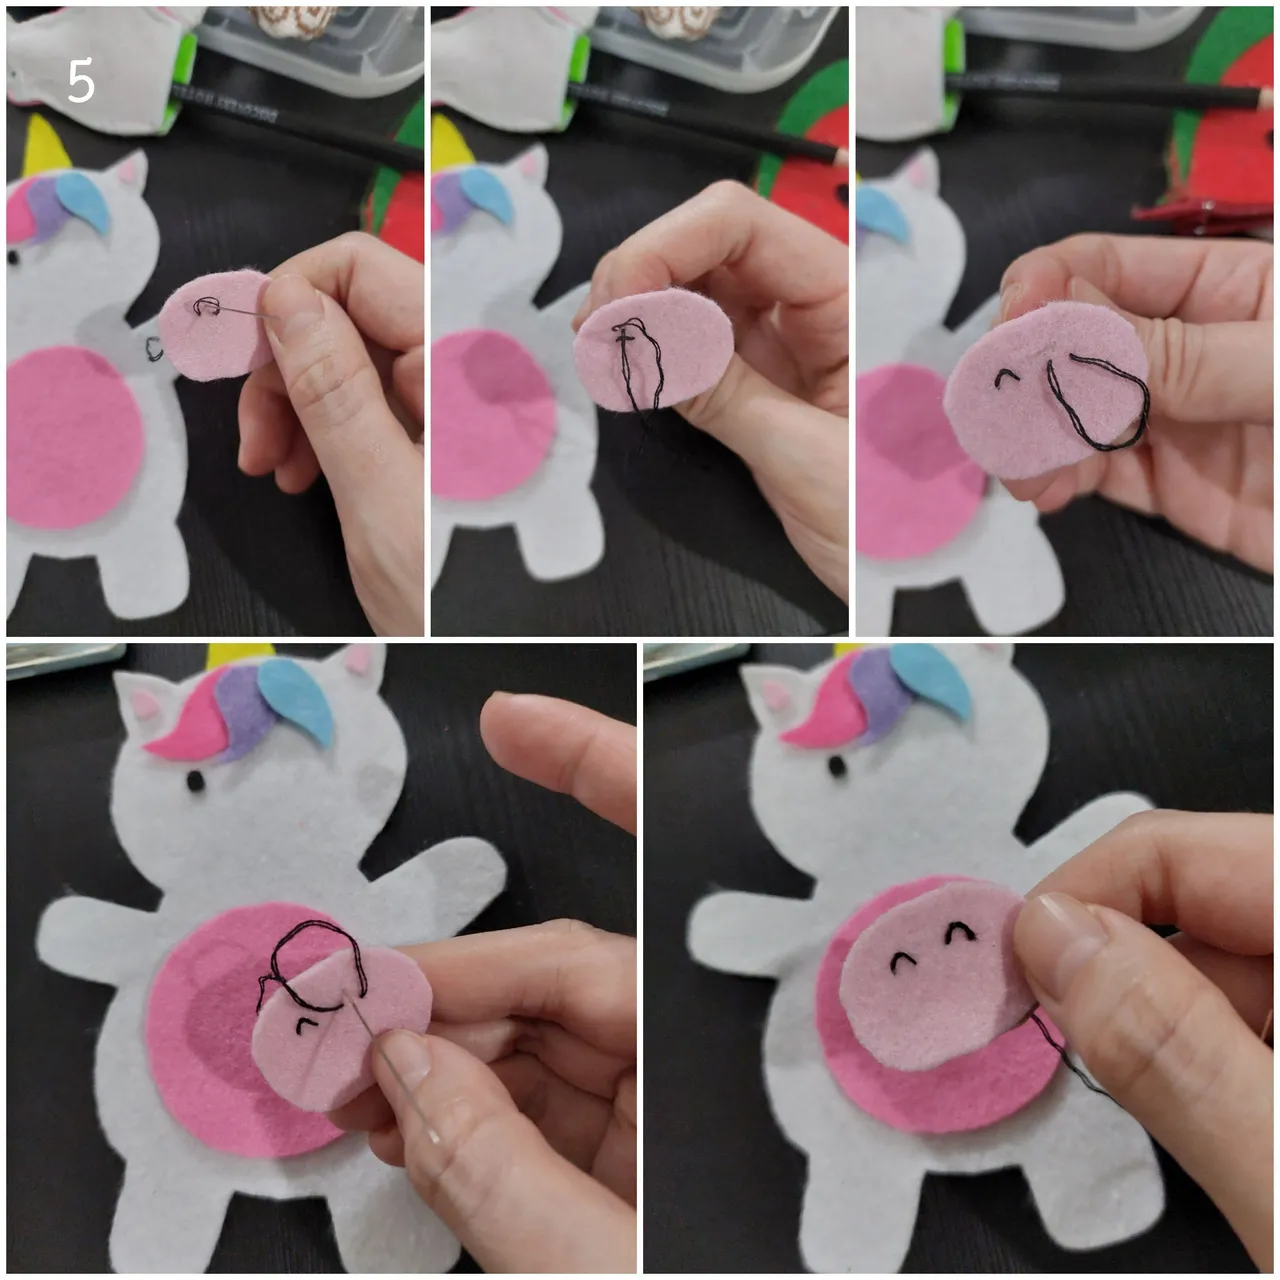
5TH
I then did the hand sewing for the two nostrils. To made it was easy, just did like a running stitch but made holded it in the middle with the needle and also floss, then sew back at the same point. It was like when we did the daisy stitch. Voila, two nostrils just finished.
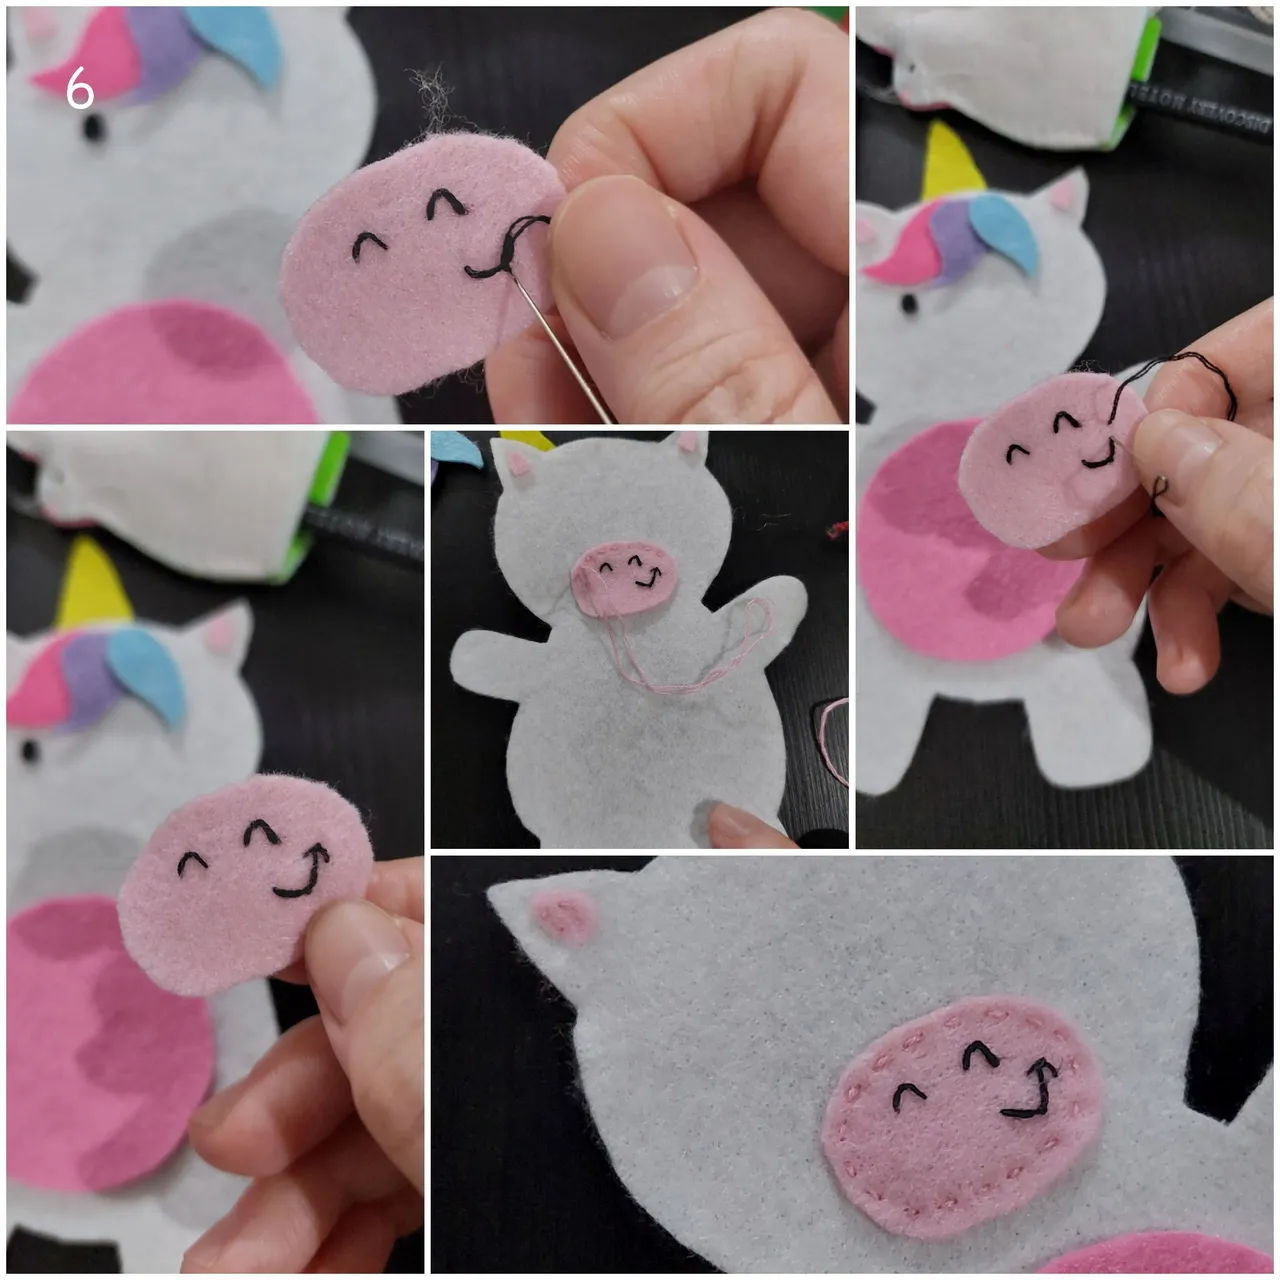
6TH
I did the same way for the mouth, but I added some stitch there so it was like below. Then I did the running stitch to join the mouth nose part with the white body.
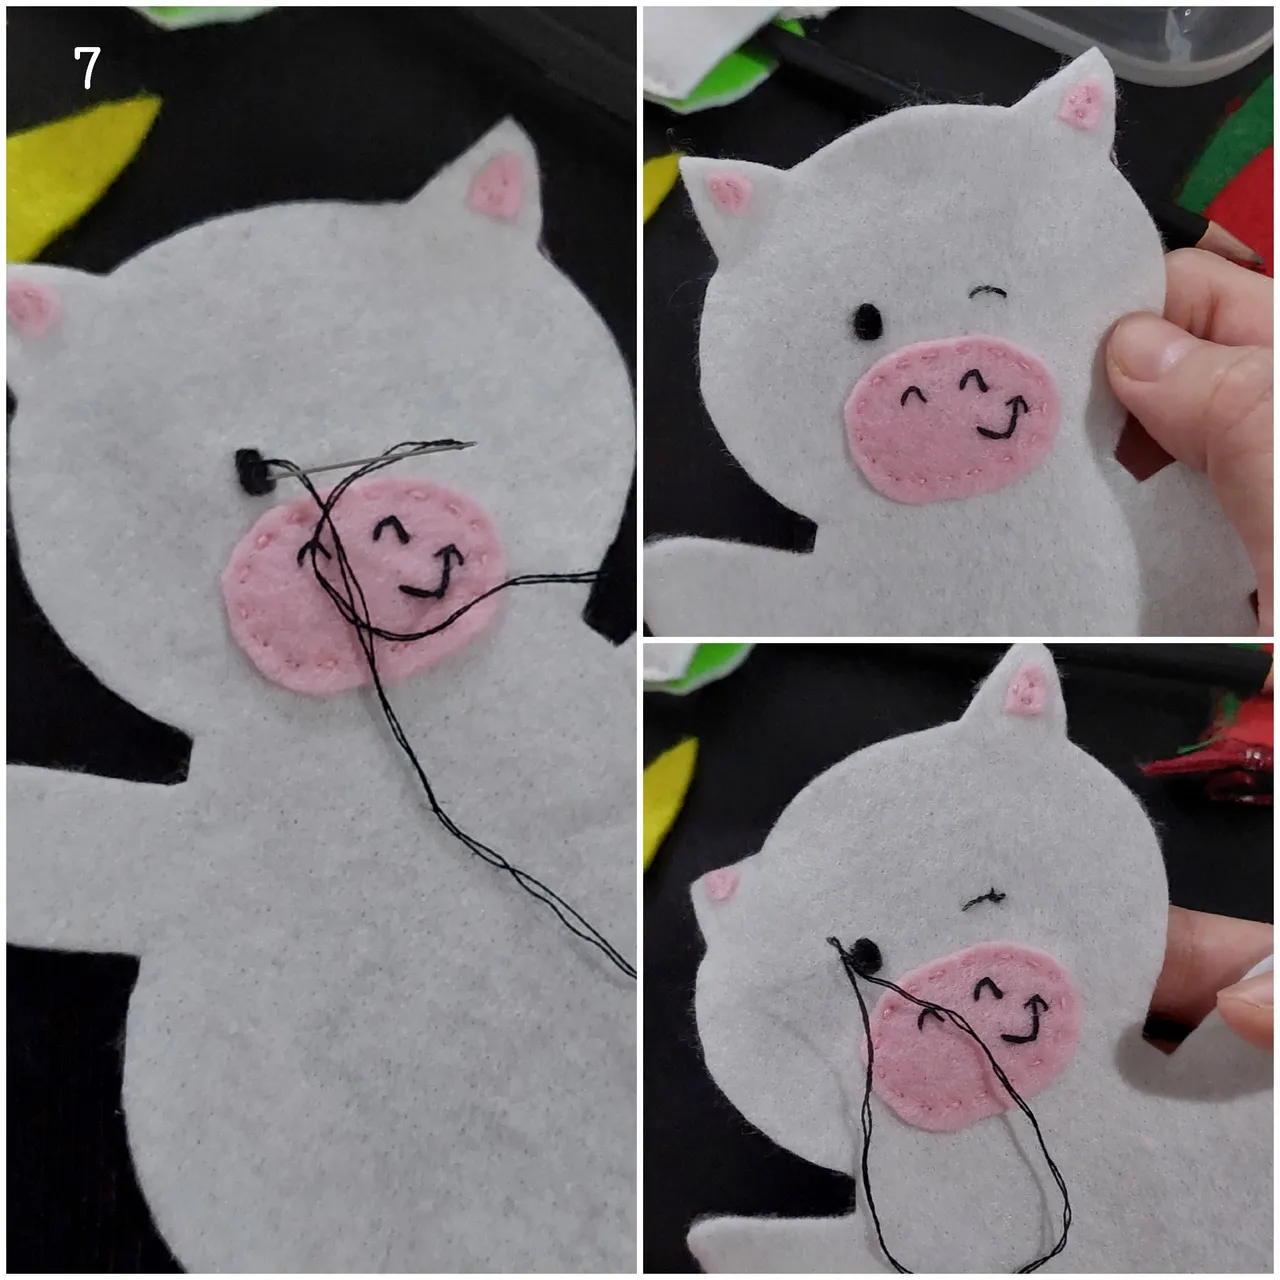
7TH
Next I sew the oval eye. And made the other smiling closed eye. After that I made the eyelashes.
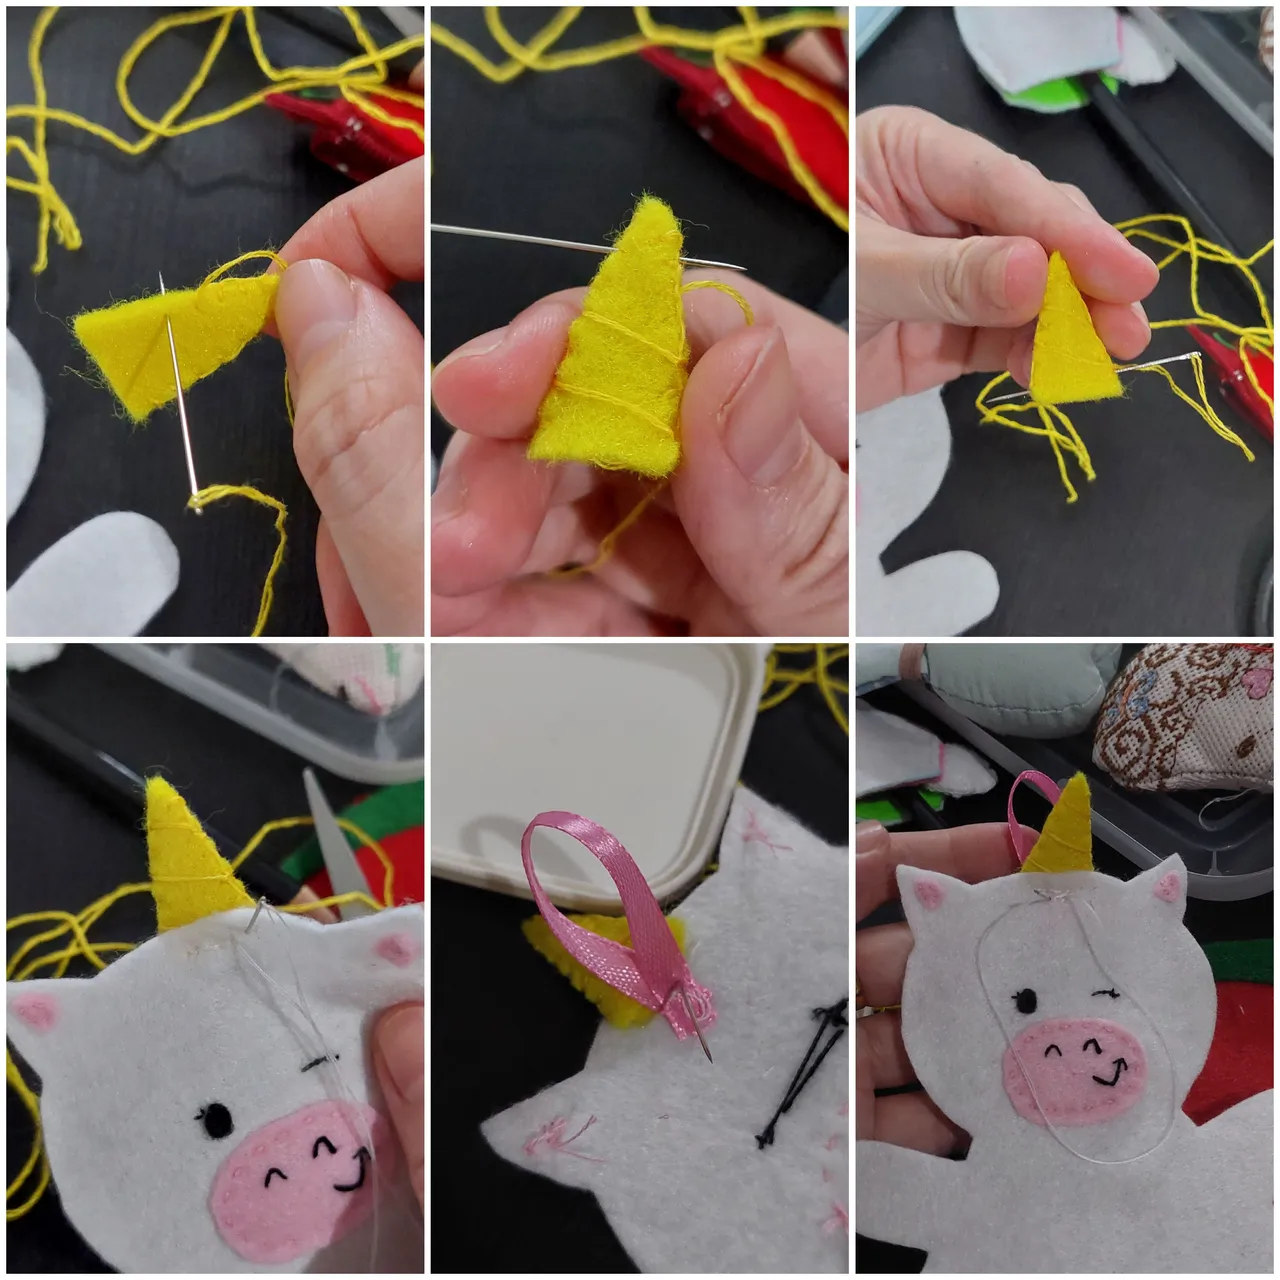
8TH
For the horn first I joined them with the blanket stitch. Then I made some diagonal sewing like below. Then I joined it to the unicorn body with white floss. Also I sew the ribbon behind, like below.
9TH
Close the white sewing with the colorful bang. First I did the running stitch for the pink, then purple and last, blue. After that I cross stitched the pink tummy with black floss then running stitched it to the white body. For the back, I only whipped stitch the pink heart to it.
10TH
Next I joined the back and front part with blanket stitch. Before I closed it I put on some filling stuff there.

VOILA, now this cute unicorn plushie is ready to use. I put the keyring with a hook there. This bag charm brought back my mood and made me smile again.

Do you like it too?
Thanks for reading my article, hope you enjoy it and stay tune for more CRAFT things from me!
All of the pictures were taken with Samsung A52 5G android phone with no filters.
A bit about the author
She works in a bank but she interests in CRAFT (CRaft, Art, Food and Travel). To pursue her art passion she does the cross stitch, embroidery, handsewing, crafts, crochet and also draws. Find hers in
https://de-creartique.redbubble.com and https://decreartique.threadless.com/designs. Also find her cute collectibles pixel cat pictures here https://opensea.io/collection/pixelcryptocat .