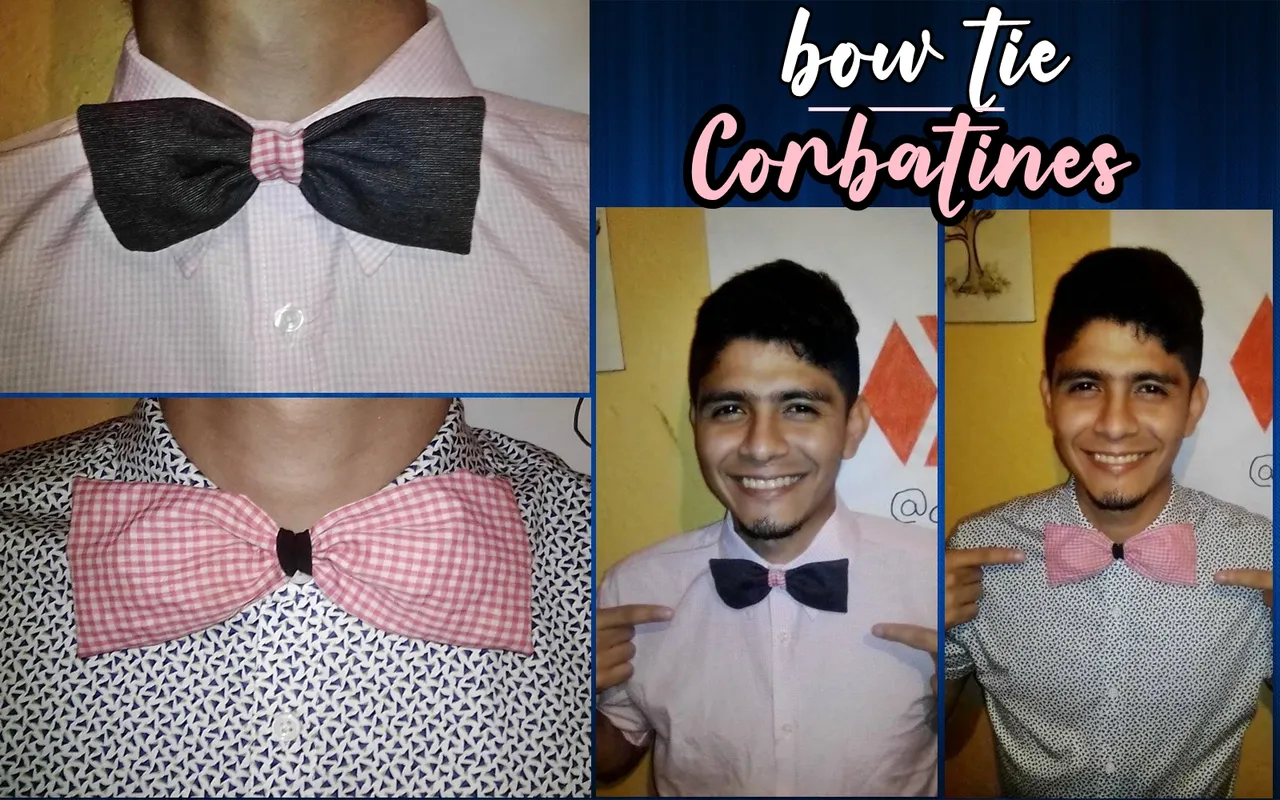
He estado intentando hacer y crear diferentes cosas con la aguja y el hilo estos días, y hoy quiero compartir 2 corbatines que hice con un poco de tela que tenia en casa, estos son bonitos accesorios de moda masculino y femenino usado habitualmente con vestimenta formal, bonito objeto decorativo para nuestro cuello que nos harán lucir muy elegantes a la hora de salir a cualquier ocasión especial.
Hello, happy weekend, I am happy to share once again my content with you.
I have been trying to make and create different things with the needle and thread these days, and today I want to share 2 ties that I made with some fabric I had at home, these are nice fashion accessories for men and women usually used with formal dress, nice decorative object for our neck that will make us look very elegant when we go out to any special occasion.

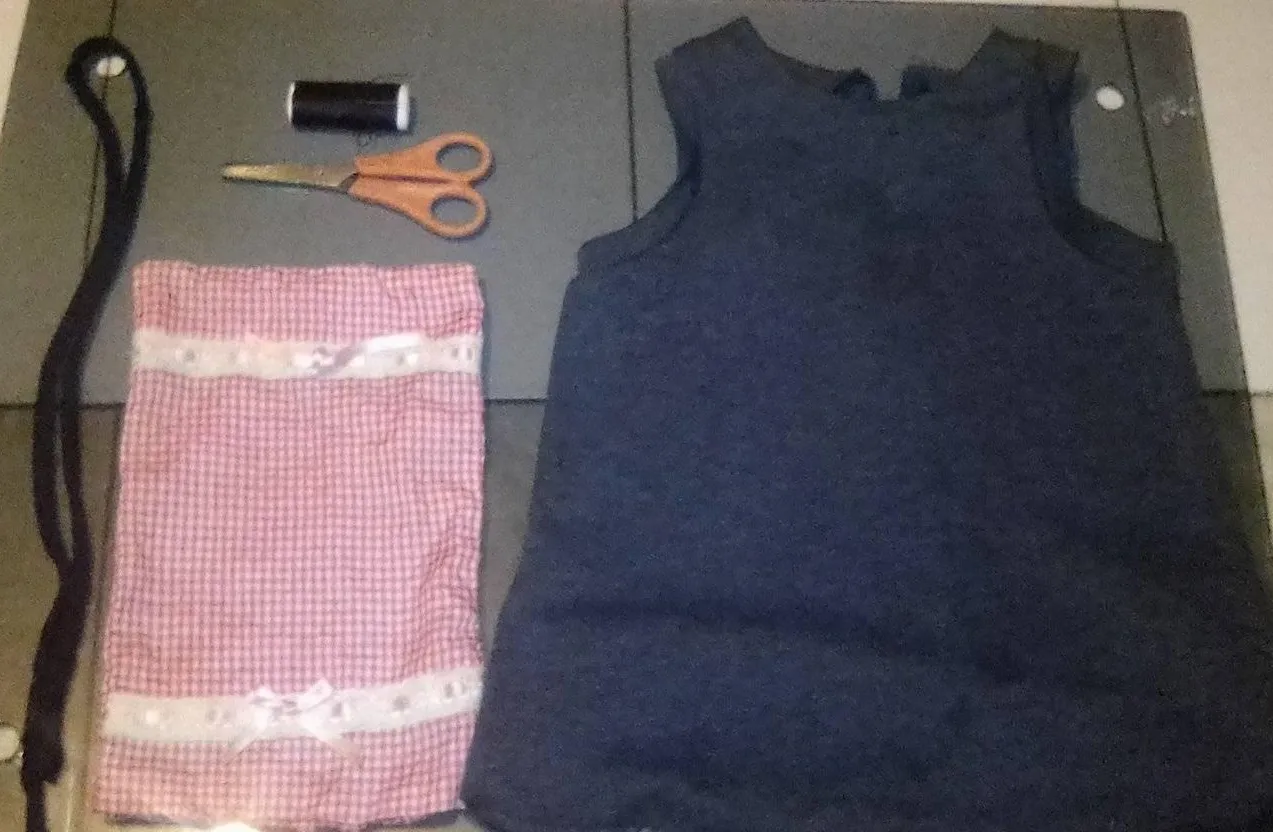
•1 Camisa usada color negro.
•1 Trozo de tela color rosa con cuadros blancos.
•1 Metro de trenza elástica.
•Tijera.
•Hilo y aguja.
•1 Used black shirt.
•1 Piece of pink cloth with white squares.
•1 Meter of elastic braid.
•Scissors.
•Thread and needle.

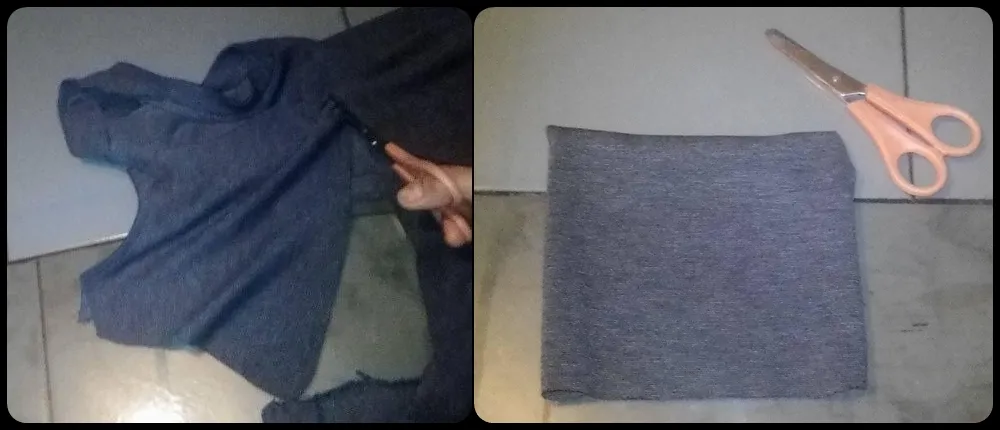
•Paso 1: Iniciamos Cortando un cuadro de tela de la camisa negra con la Ayuda de la Tijera.
• Step 1: Start by cutting a square of fabric from the black shirt with the help of the scissors.
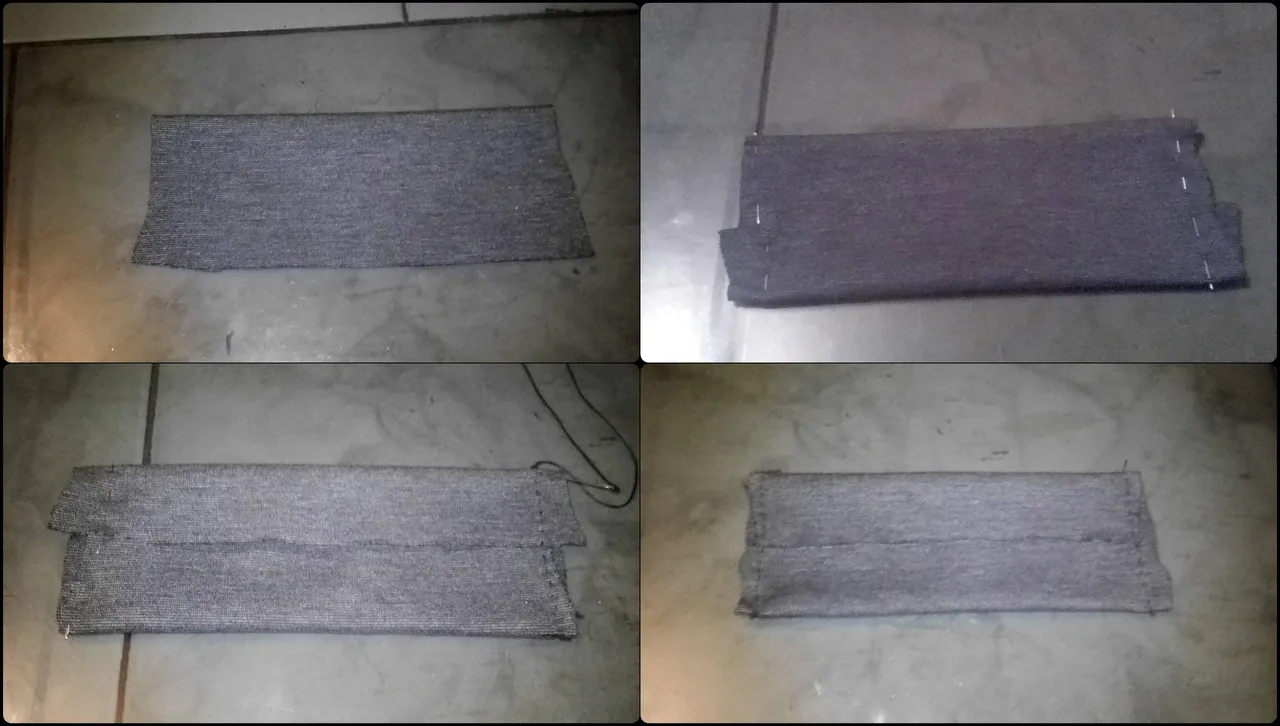
•Paso 2: Doblamos el cuadro de tela colocando ambos lados en medio, luego lo aseguramos colocando agujas o alfileres a los lados para iniciar la costura, cocemos ambos lados de la tela para que quede de la siguiente forma.
• Step 2: Fold the fabric square placing both sides in the middle, then secure it by placing needles or pins on the sides to start the stitching, sew both sides of the fabric so that it looks like this.
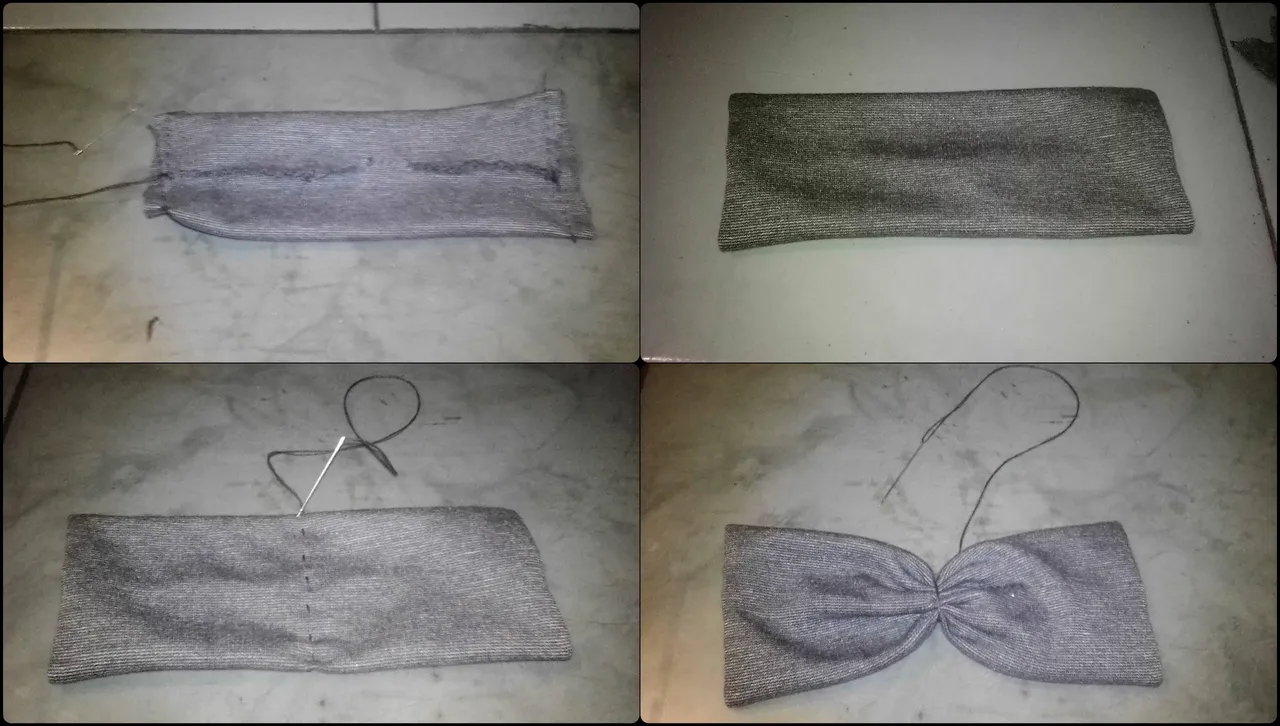
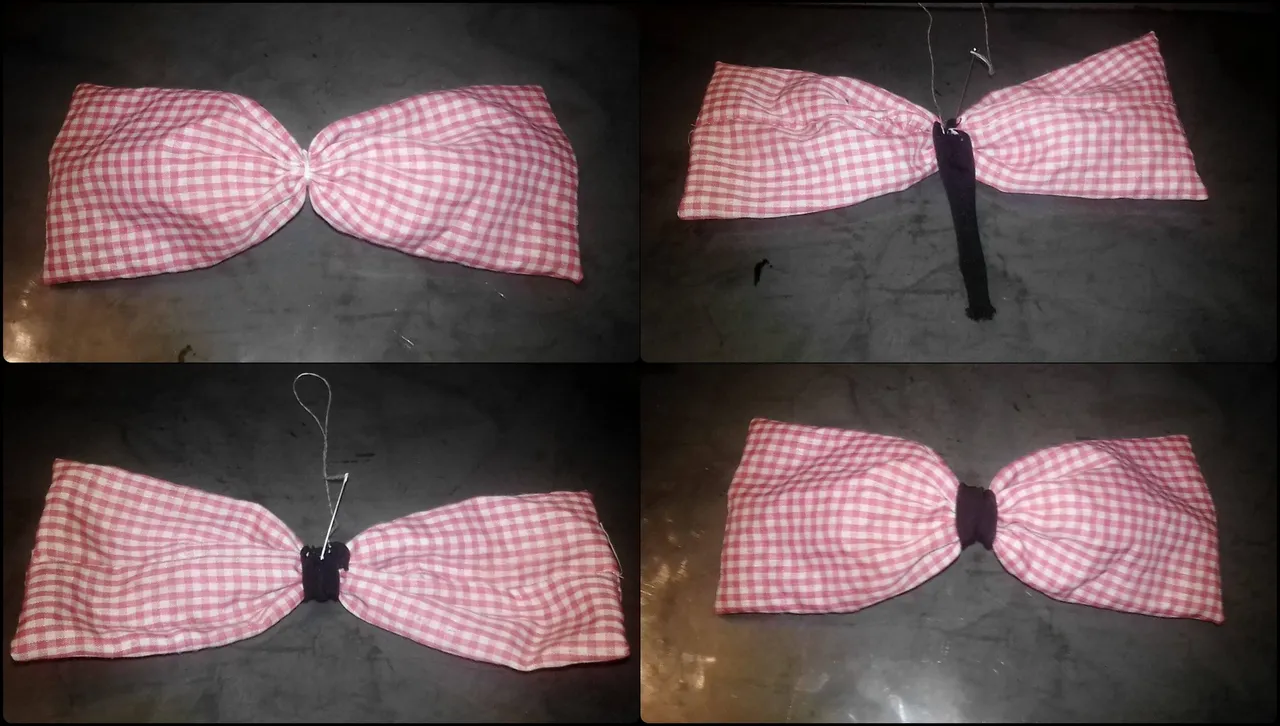
•Paso 3: Cocemos la tela del medio para unirla dejando un centímetro de espacio para poder colocar derecha la tela ya cocida, luego precedemos a cocer en medio de la tela de esta manera, procedemos a corrugar la tela halando el hilo hacia arriba, damos varias vueltas en medio y cocemos para que tome forma de Lazo.
• Step 3: We cook the fabric in the middle to join it leaving a centimeter of space to be able to place the already cooked fabric straight, then we precede to cook in the middle of the fabric in this way, we proceed to corrugate the fabric pulling the thread upwards, we give several turns in the middle and we cook so that it takes the form of a loop.

•Paso 4: Ahora cortamos una tira de tela Rosada para crear una cinta para el medio del Corbatín en forma de lazo, la tira de tela la doblamos hasta que tome la forma correcta.
• Step 4: Now we cut a strip of Pink fabric to create a ribbon for the middle of the bow tie in the shape of a bow, the strip of fabric we fold it until it takes the right shape.
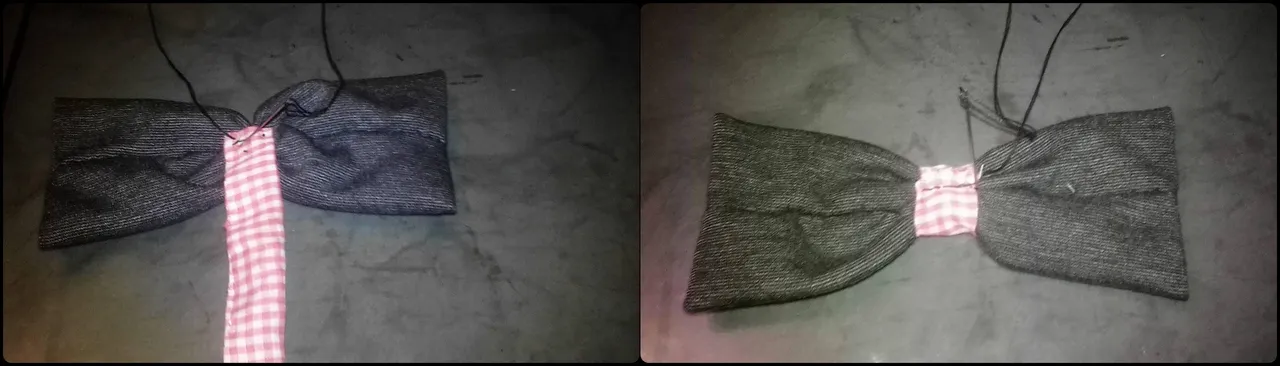
•Paso 5: Cocemos la cinta por la parte trasera del corbatín, juntamos ambas puntas de la cinta y cortamos el restante.
• Step 5: We cook the ribbon at the back of the tie, join both ends of the ribbon together and cut off the remaining ribbon.
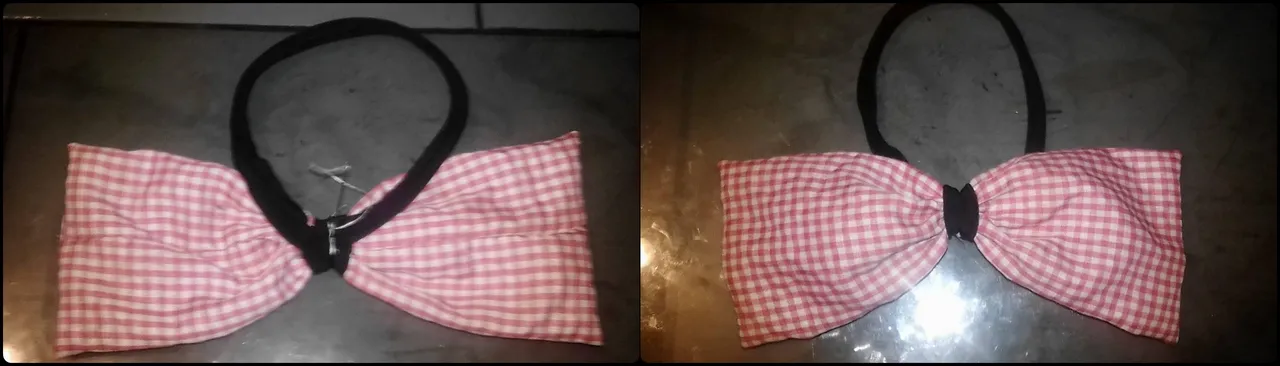
•Paso 6: Cocemos un poco de trenza elástica negra en la parte trasera del corbatín.
• Step 6: We cook some black elastic braid on the back of the tie.

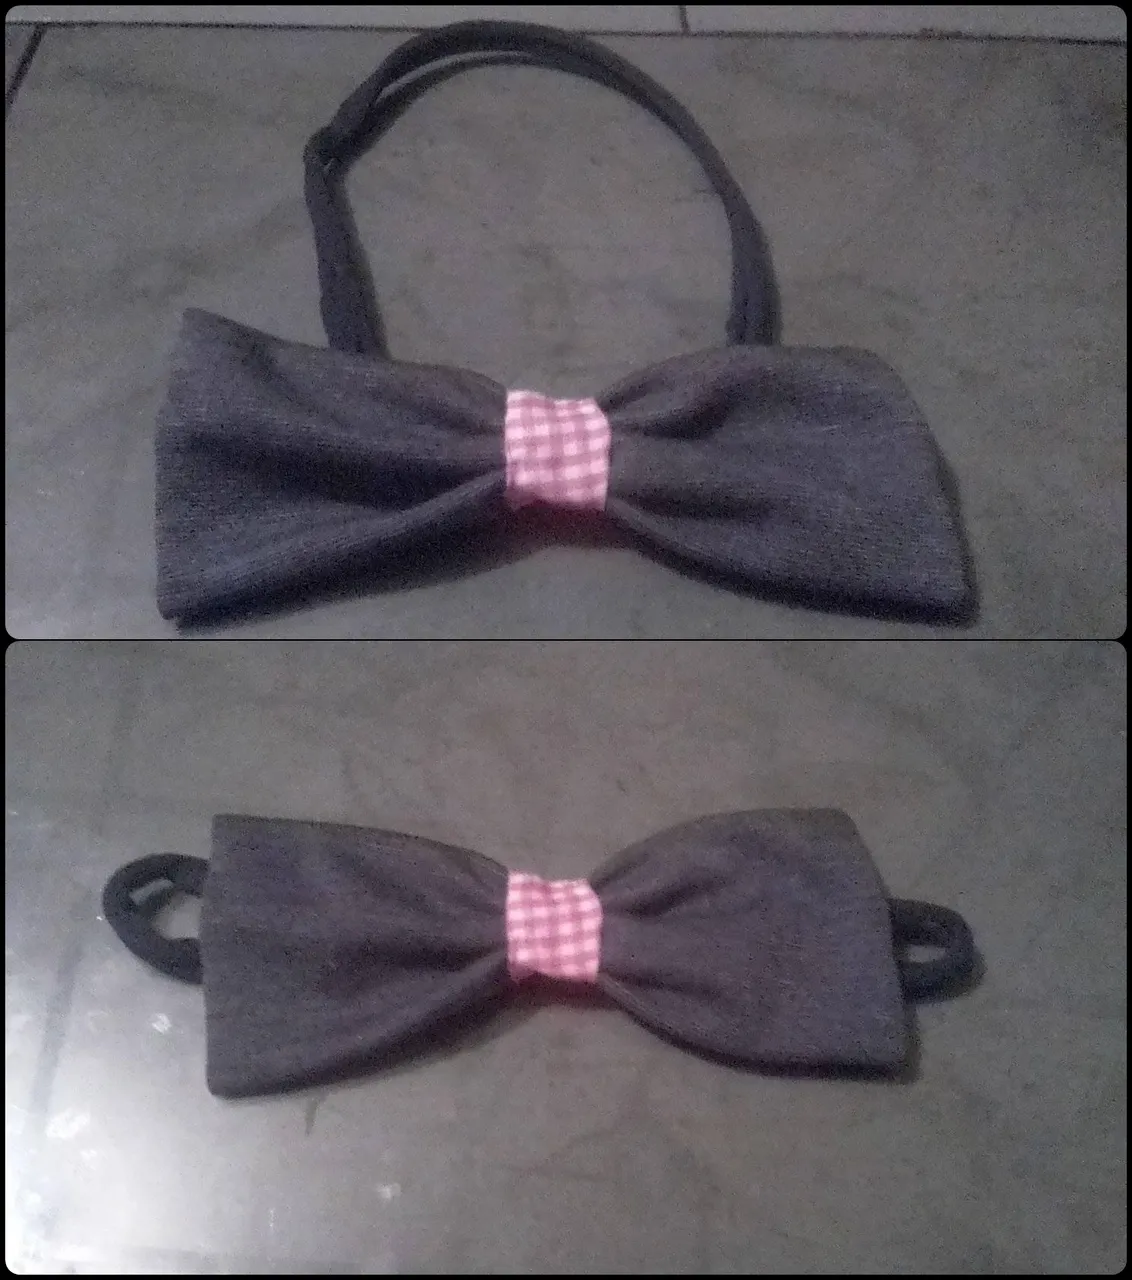
This way we finished making one of the bow ties, now we proceed to make the other bow tie.
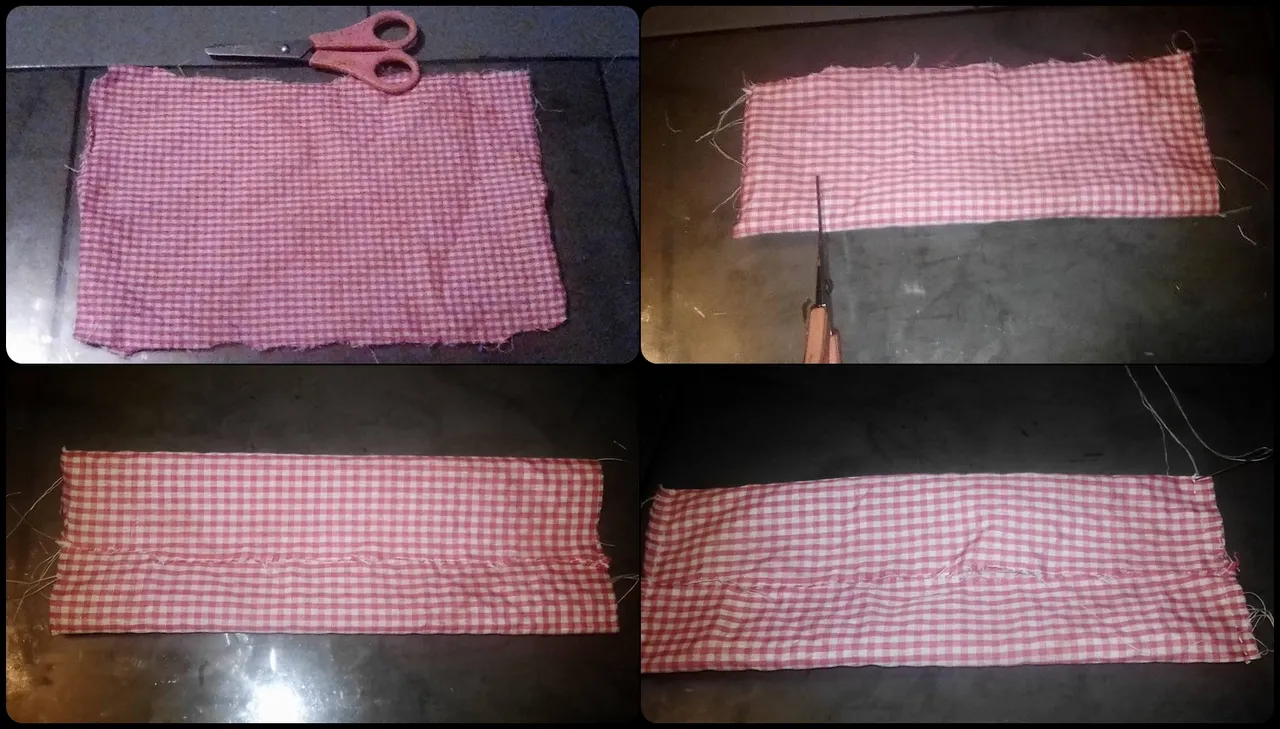
•Paso 1: Cortamos un cuadro de tela Rosa para realizar el corbatín, Doblamos la tela a la mitad y cortamos un poco, luego doblamos ambas puntas a la mitad para comenzar a cocer, ahora cocemos ambos lados de la tela.
• Step 1: Cut a square of pink fabric to make the tie, fold the fabric in half and cut a little, then fold both ends in half to start cooking, now we cook both sides of the fabric.

•Paso 2: Cocemos la parte del medio para unir la tela dejando un espacio de un centímetro para poder doblar y quede de esta forma, cocemos en línea Vertical el medio de la tela.
• Step 2: We bake the middle part to join the fabric leaving a space of one centimeter to be able to fold and it is in this way, we bake in vertical line the middle of the fabric.
•Paso 3: Luego procedemos a estirar el hilo hacia arriba corrugando para dar forma de lazo, luego damos varias vueltas al hilo y cocemos, así le damos forma a él corbatín.
• Step 3: Then we proceed to stretch the thread upwards corrugating to give a loop shape, then we give several turns to the thread and cook, so we give shape to the tie.
•Paso 4: Cocemos un poco de cinta elástica en la parte trasera del corbatín para poder colocarlo con mas facilidad.
• Step 4: We bake some elastic tape on the back of the tie to be able to put it on more easily.

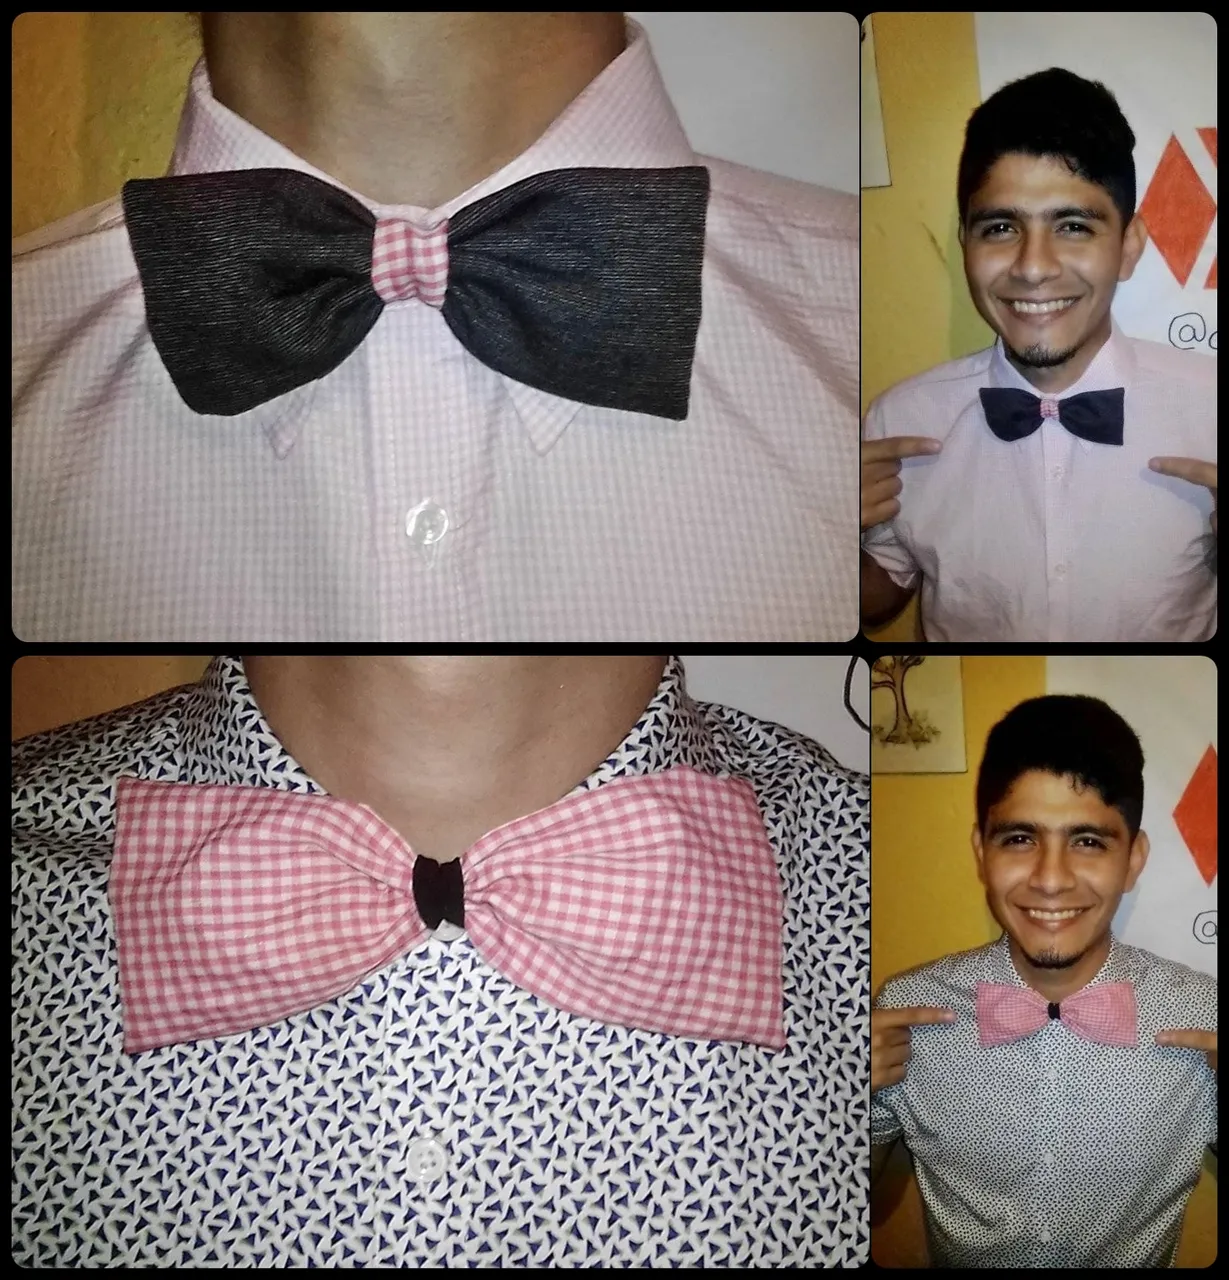
Ready, this is the final result of these two bow ties, perfect for any special occasion, simple and elegant, I hope you liked it and that it is easy to make.

All photos are my own, edited in PhotoScape, translator used: DeepL.