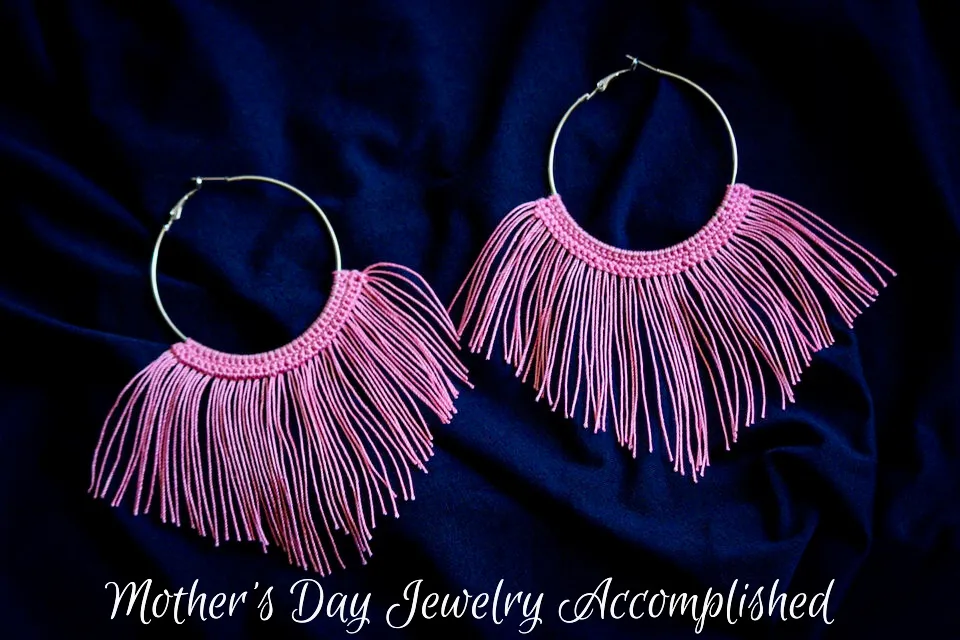
It’s another Happy Monday and I’m glad to be able to share with you my completed Mother’s Day needlework.
I have not been able to purchase the other colored threads for my mother-in-law and sisters yet. On top of that we had to do a senior photoshoot and I had to finish the edits within a week (stay tuned because I’ll be sharing some of those photos with you later this week). So I’ve been pretty strapped for time and energy.
I honestly do not know if I’ll be able to make three sets in time for Mother’s Day. I will figure out a backup plan in case I do run out of time. I may just have to gift them a set of earrings on a different occasion.
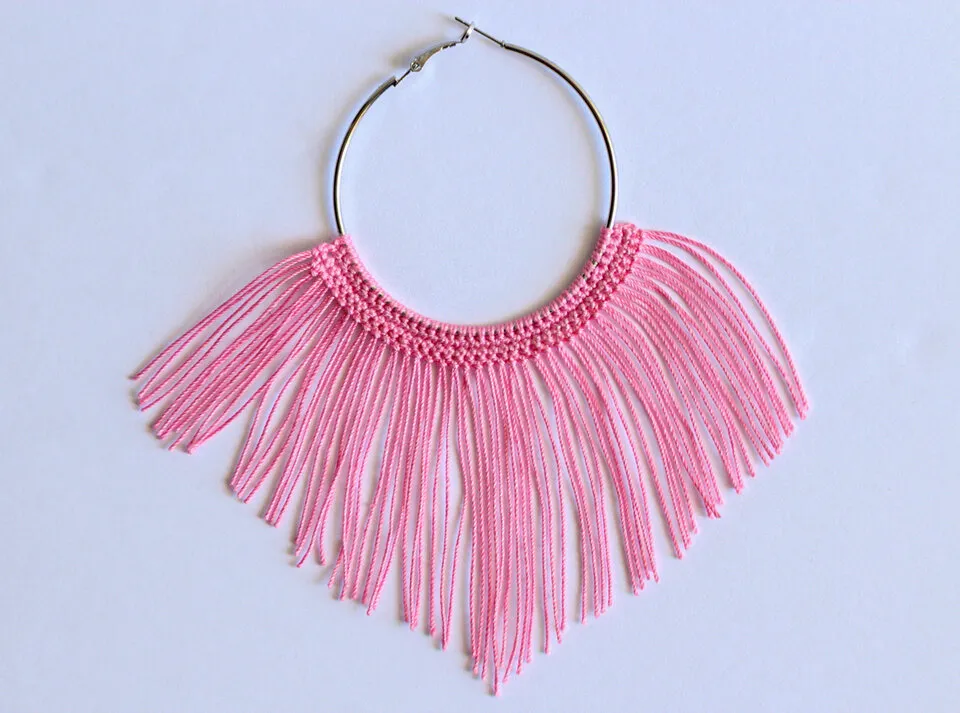
Making these earrings was a lot of fun. I did try to add on some silver beads but they were too big and didn’t really add any flare. I need to stock up on smaller beads that will be more suitable for jewelry making.
I like the simplicity of this pair I made but would also like to try more intricate designs. I think for the next pair I do I won’t use any hoops but instead crochet the entire earring shape. It will be fun playing around with different sizes and adding a variety of beads and jewels.
With the correct sized hook it was pretty easy adding on the fringe. I simply wrapped the thread around the bottom of my phone multiple times and then cut it to make the fringe.
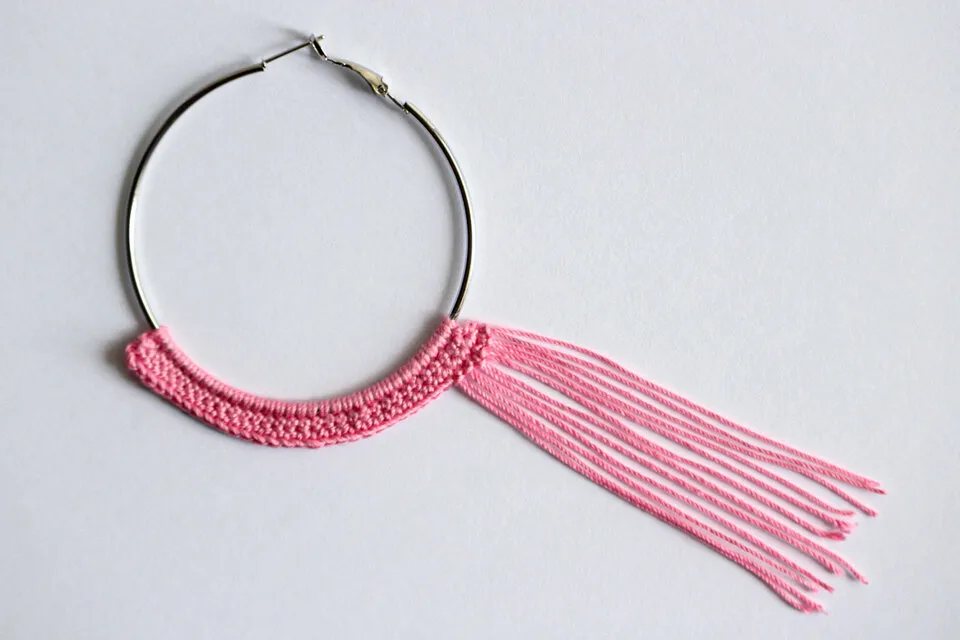
When I first started it did seem as if it would take forever but it went by quick enough. The loops added to the single crochet stitches made a nice simple design that I was satisfied with. With this being my first time making earrings I was okay with not adding too much to them.
Trying to add on the beads did give me another idea for a future project. When I’m ready to add beads to the bottoms of my earrings I know that all I have to do is crochet them on along the way. I used a small darning needle to slip on the bead and then crocheted around it to secure it.
I will most likely use smaller hoop earrings when I’m ready to try the beads in that way. It was easy adding them on when my work was already attached to the hoop.
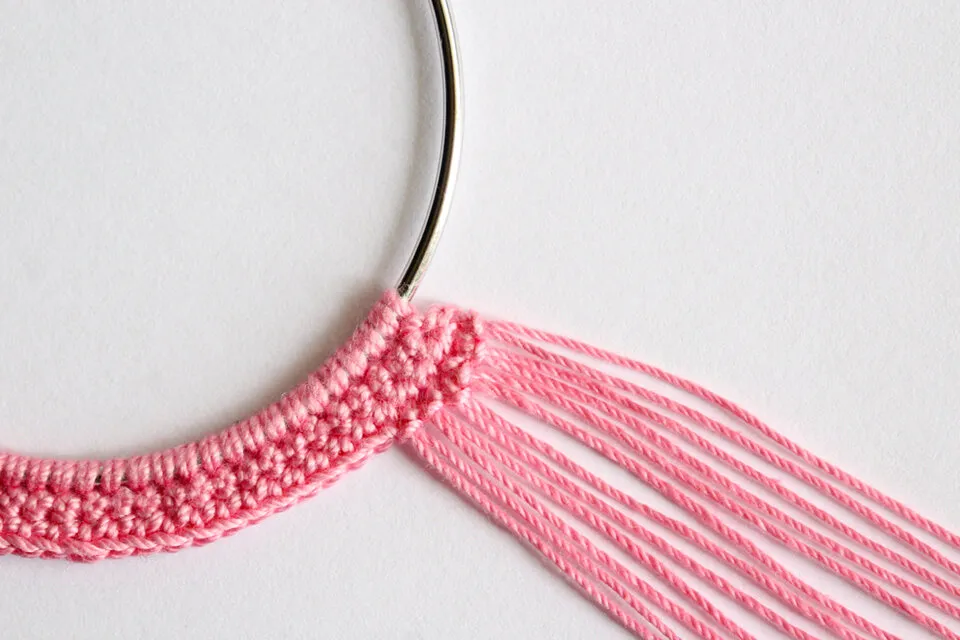
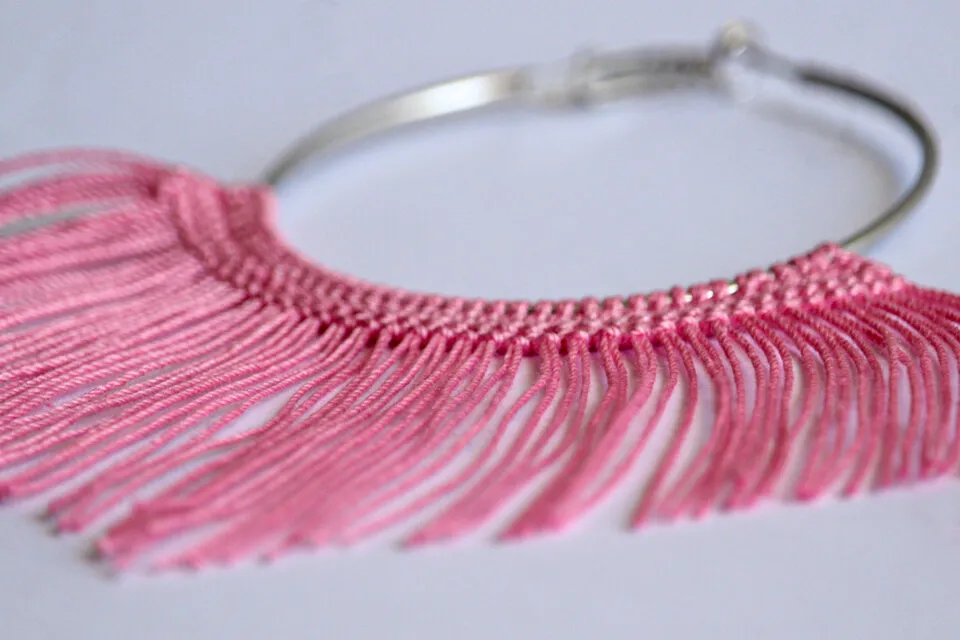
Here’s a close up of the added fringe…
To make the slanted shape which is pointed in the middle I held both earrings back to back in midair. To make sure they were even I decided to do them at the same time. I cut one side downward in a slanted direction and then turned the earrings around to do the exact same to the other side.
I could make them a little more even but I’m actually satisfied with how they turned out. I am pretty excited with how easy it is to make a set of earrings.
You know I gotta mention my three year old. She will most likely take after me in craft making because she watches everything I do and asks questions.
While I was cutting the earrings she was so intrigued. Once they were done she followed me into the bathroom and watched me try them on. Later on when we went grocery shopping she asked
Mama, where are your new earrings?
I told her they were too fancy for groceries 😅! The fact that she asked me about them and wondered why I didn’t have them on really impressed me. She is always surprising me with how she observes and pays attention.
Well I’m off to get ready for Co-op. I look forward to seeing your entries today. I will comment on as many of your posts as I can once we return home. I hope you had as much fun making yours as I did mine! 😊🪡
Thanks for Reading ~