¡Hola a todas! Mis queridas amantes de las agujas. Quiero aprovechar la oportunidad para felicitar a todas las madres por su increíble labor y recordarles que todos los días es nuestro día así que dejemos huella. Un abrazo para todas.
Hoy les traigo un proyecto sencillo, pero practico. Me tomó 3 horas realizar un par de estos encantadores sujeta cortinas. Aquí les presento el paso a paso ¡Empecemos!
Hello everyone! My dear needlepoint lovers. I want to take this opportunity to congratulate all mothers for their amazing work and remind you that every day is our day so let's make our mark. Hugs to all of you.
Today I bring you a simple but practical project. It took me 3 hours to make a pair of these lovely curtain holders. Here I present to you the step by step Let's get started!

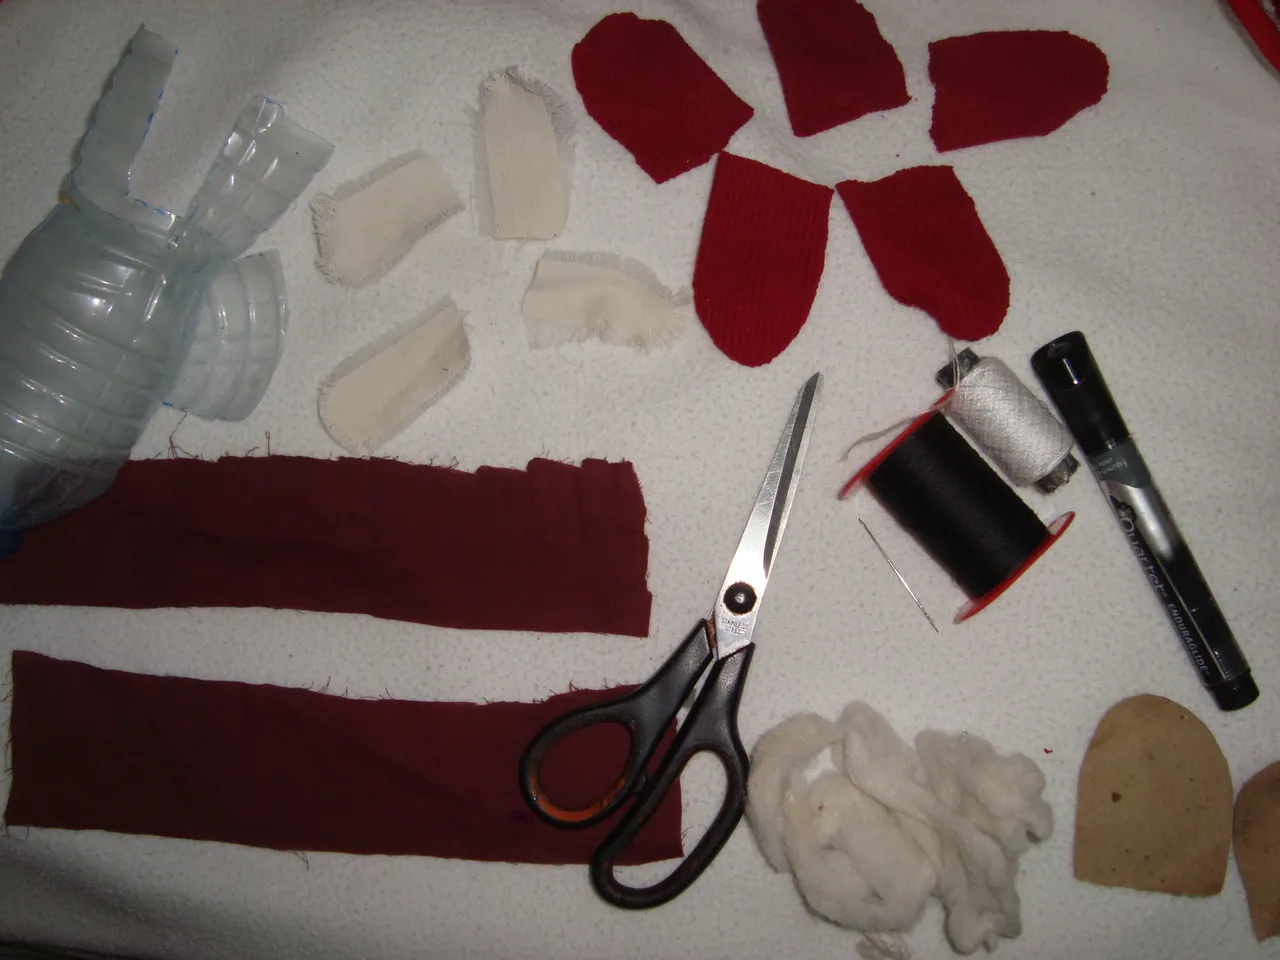
Materiales:
Botella de agua mineral (para reciclar)
Retazos de tela, del color que prefieras
Tijera
Hilo y aguja o máquina de coser
Marcador
Cartón
Algodón o felpa de relleno
2 monedas metálicas
2 imanes
Materials:
Mineral water bottle (for recycling).
Fabric scraps, in the color of your choice.
Scissors
Thread and needle or sewing machine
Marker
Cardboard
Cotton or plush stuffing
2 metal coins
2 magnets
Elaboración:
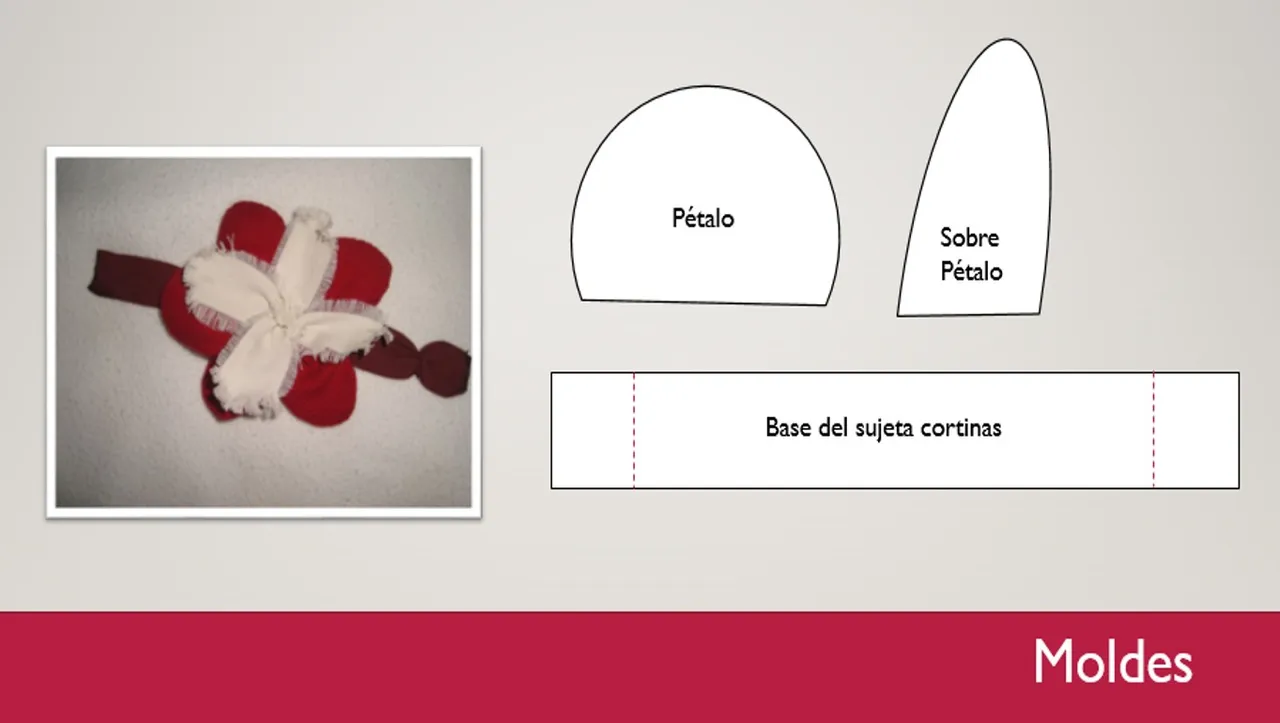
Paso 1: Primero pasamos los moldes al cartón con el marcador y cortamos. Transferimos los moldes a la tela.
Necesitamos 2 piezas de sujeta cortinas. 20 piezas de pétalos para armar las flores. Y 8 sobre pétalos para darle volumen.
Elaboration:
Step 1: First we transfer the molds to the cardboard with the marker and cut. We transfer the molds to the fabric.
We need 2 pieces of curtain holders. 20 pieces of petals to make the flowers. And 8 over petals to give volume.
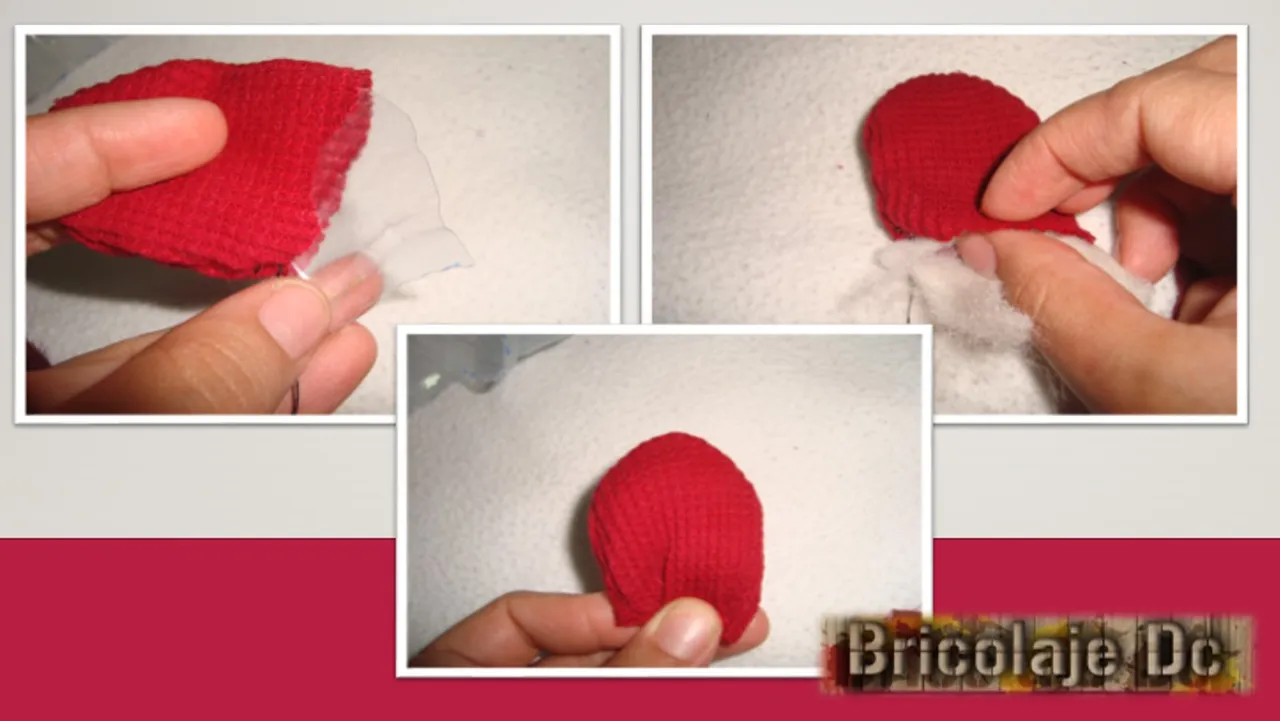
Paso 2: Trasferimos el molde de pétalos a la botella y cortar 10 piezas.
Paso 3: Cosemos los pétalos enfrentando el derecho de la tela. Volteamos y procedemos a rellenar con 1 pétalo de plástico y relleno de algodón. Vamos a repetir el proceso con los 10 pétalos.
Paso 4: Una vez terminados los pétalos, vamos a tomar 5 para armar la primera flor. Los cosemos desde la base y reservamos. Repetimos con la siguiente flor uniendo los otros 5 pétalos.
Step 2: Transfer the petals mold to the bottle and cut 10 pieces.
Step 3: Sew the petals facing the right side of the fabric. Turn over and proceed to fill with 1 plastic petal and cotton stuffing. We will repeat the process with the 10 petals.
Step 4: Once the petals are finished, we will take 5 petals to assemble the first flower. We sew them together from the base and set aside. Repeat with the next flower joining the other 5 petals.
Paso 5: En otro retazo de tela de diferente color, vamos a transferir el molde de sobre pétalo. Y vamos a cortar 8 piezas. Los unimos de la base y reservamos.
Paso 6: Ahora vamos a unir las flores que tenemos armadas con los sobre pétalos.
Step 5: On another piece of fabric of a different color, we will transfer the petal mold. And we will cut 8 pieces. We join them together from the base and set aside.
Step 6: now we are going to join the flowers that we have assembled with the petals.
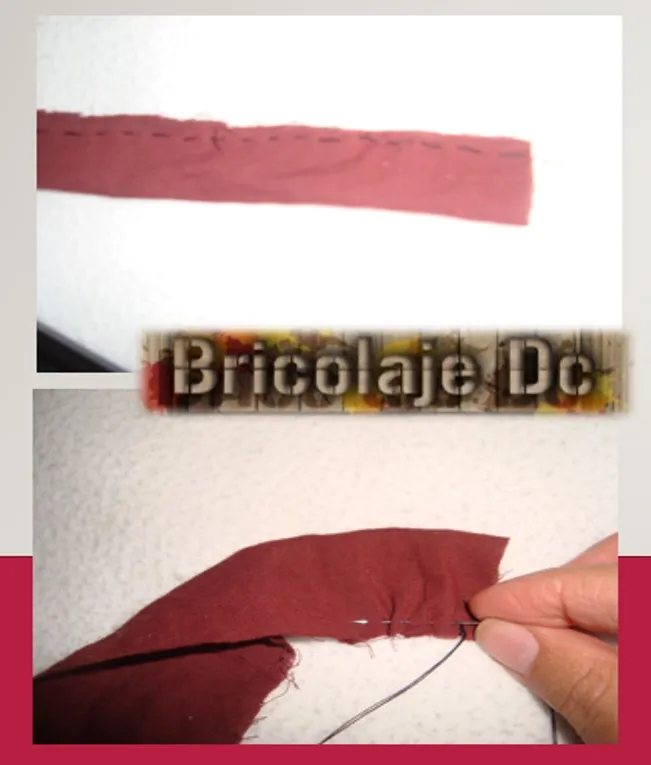
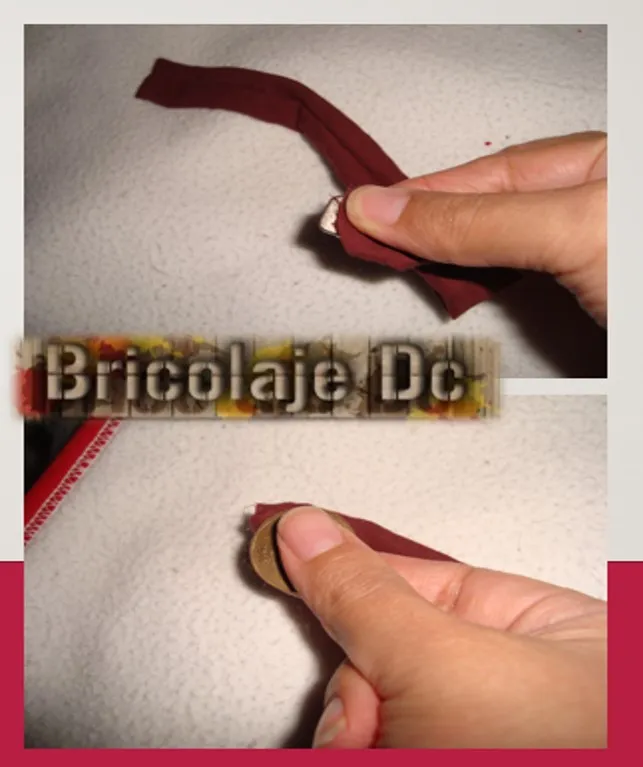
Paso 7: cosemos la base del sujeta cortinas por el revés y volteamos. En un extremo vamos a poner una moneda y sellamos con una costura. En el otro extremo ponemos el imán y sellamos con una costura.
Paso 8: Unimos la flor a la base del sujeta cortinas.
¡Y listo! Tenemos un practico sujeta cortinas con mucho estilo y muy fácil de usar.
Step 7: we sew the base of the curtain holder on the reverse side and flip it over. At one end we are going to put a coin and seal with a seam. On the other end we put the magnet and seal with a seam.
Step 8: Attach the flower to the base of the curtain clip.
And that's it! We have a practical curtain clip with a lot of style and very easy to use.
Espero que les guste y se animen a realizar este bonito proyecto. Gracias por leerme y nos vemos en un próximo post.
I hope you like it and I encourage you to make this beautiful project. Thanks for reading and see you in a future post.