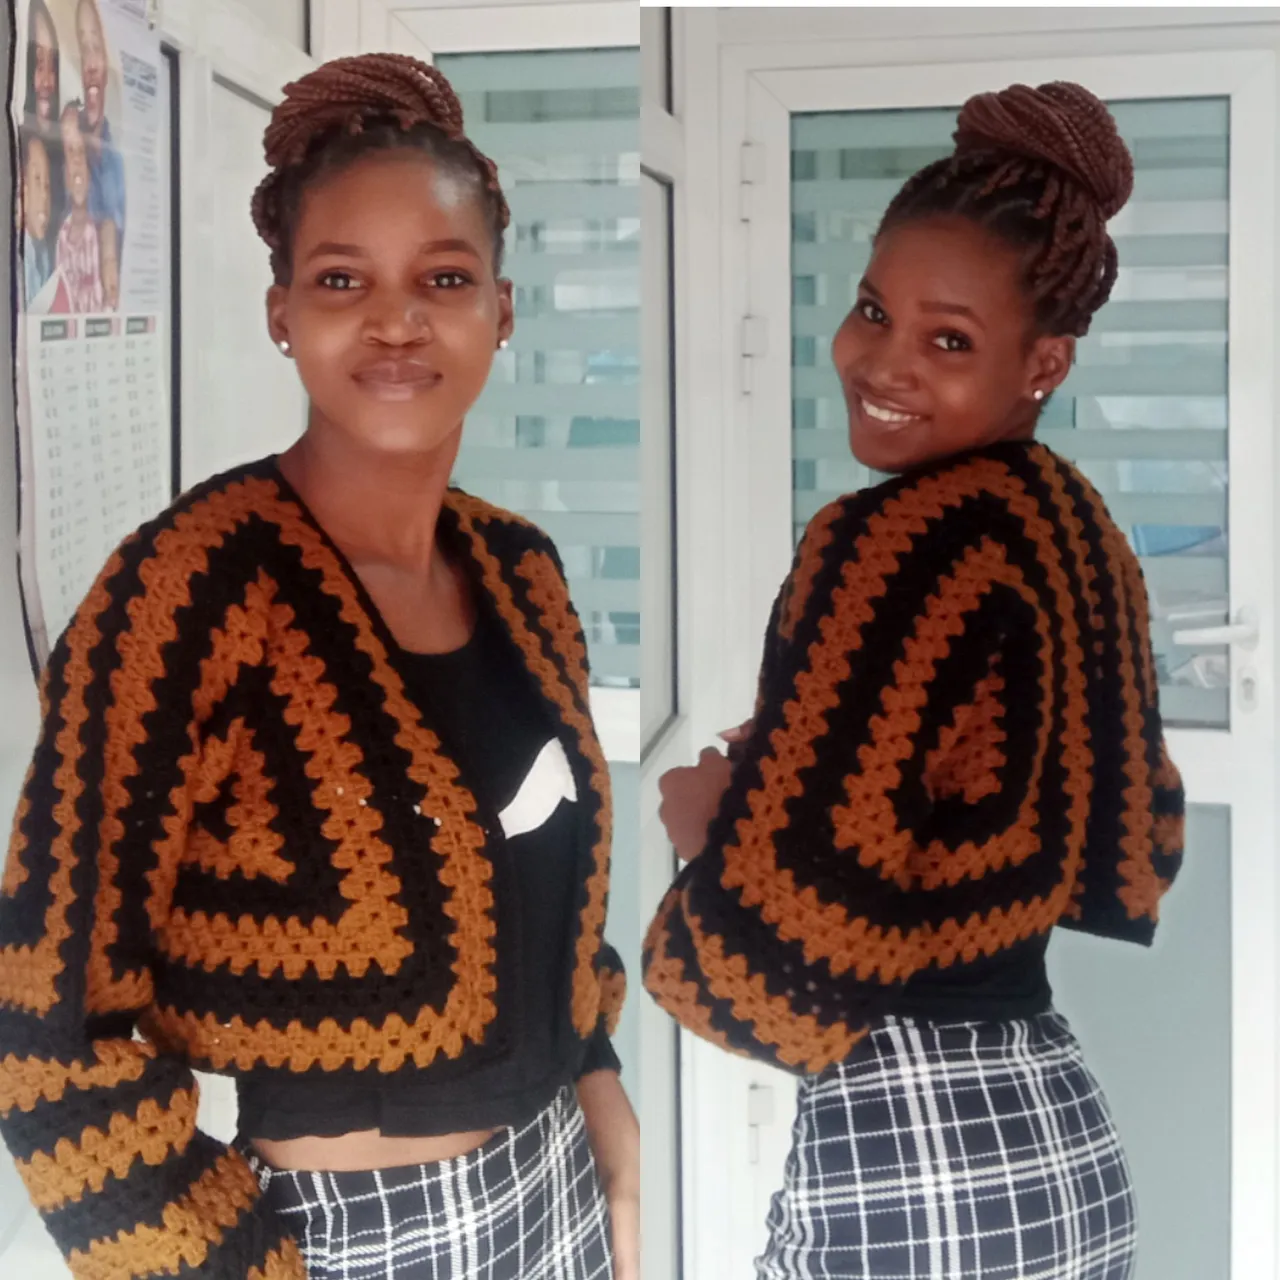
Hello everyone, it’s another beautiful Monday and I’m happy to be here again. Today I bring to you one of my favorite creations so far. I have to say when I went shopping for yarn, I had something else in mind for the yarn I used for this project.
I was initially going to make a gown, like a two-piece kind of gown. Black and gold seemed okay for what I had in mind so I started the gown with black since it’s the dominant color of what I intended to create. Halfway through I realized I made a mistake with the measurement and would have to unravel it. Lucky for me, I already had plans to make this cardigan after the gown, so I decided to make the cardigan while I unravel. Somehow I am happy I made that mistake because I later realized I wouldn’t have liked the gown with black and gold.
I have seen this cardigan on a few creators and I love it. I think one of my favorite things about the cardigan is how easy it is to make compared to the regular type of cardigan. I don’t know if it’s because it doesn’t involve filling every hole with double crochet stitches or it is because we kind of work the arm and body simultaneously or maybe it is my love for granny squares but it was fun to make and I love it.
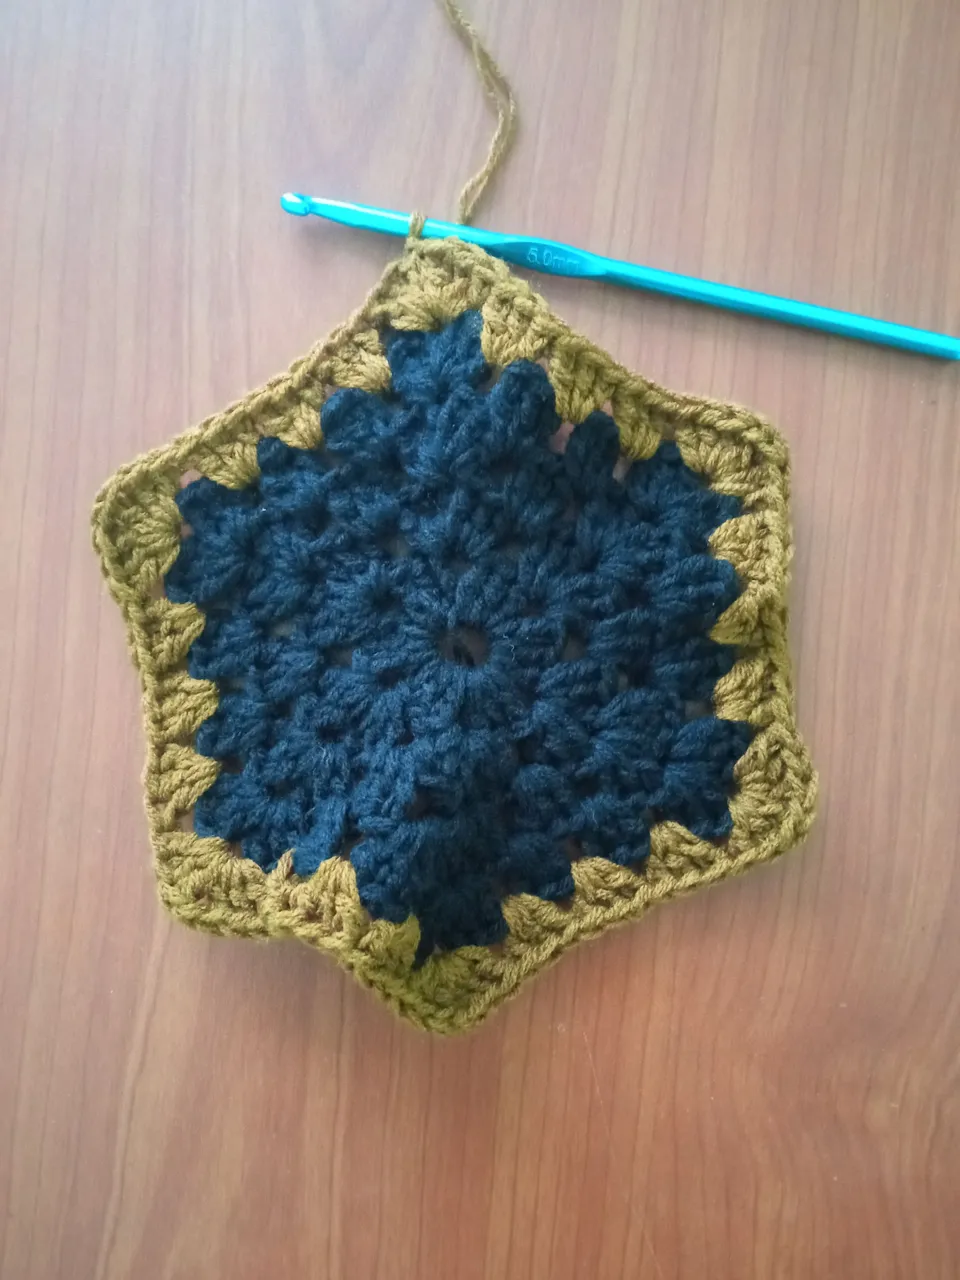
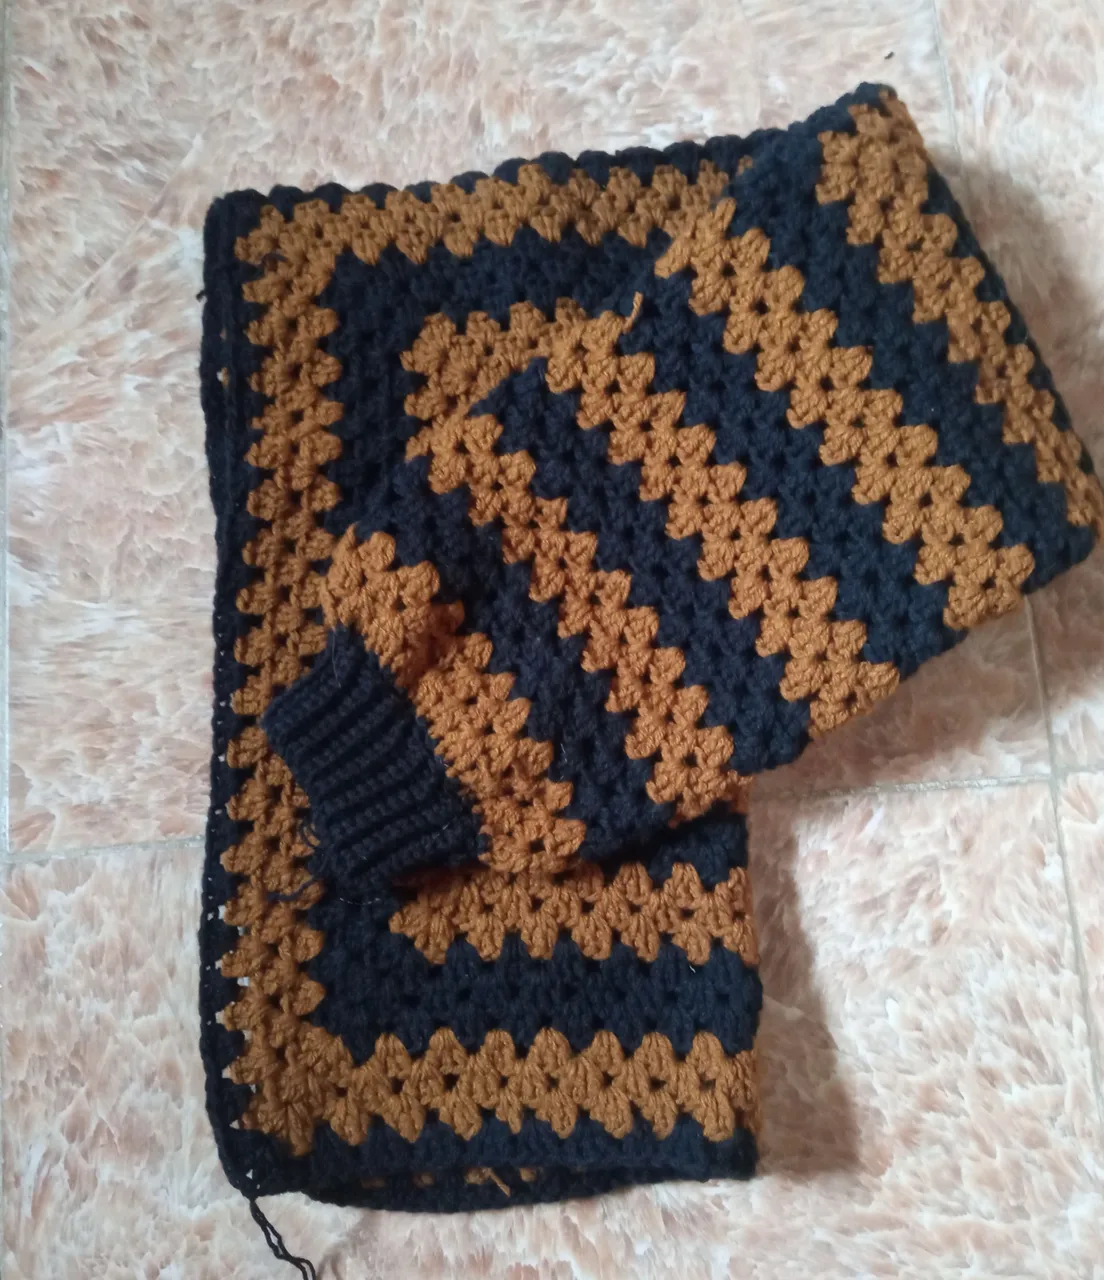
So the making of this cardigan is done like the regular granny squares except it has 6 sides instead of 4. Since this is the first time I am making this I used a tutorial from PassionKnit Kelsie on YouTube. I love how she explains the whole process, although I did a few things different from her like the hook size, joining at the back, and border, for the most part, I used her tutorial.
I started with making the 6 sides of my project as you would for a regular granny square and kept adding more rows till I got the required size which is the width of the arm. Another thing I love about this cardigan is that I need just one measurement which will essentially dictate what I will do. So after I got that size on one of the corners which are 17 inches for me. I folded it in an L shape to get some part of the arm and the length of the cardigan.
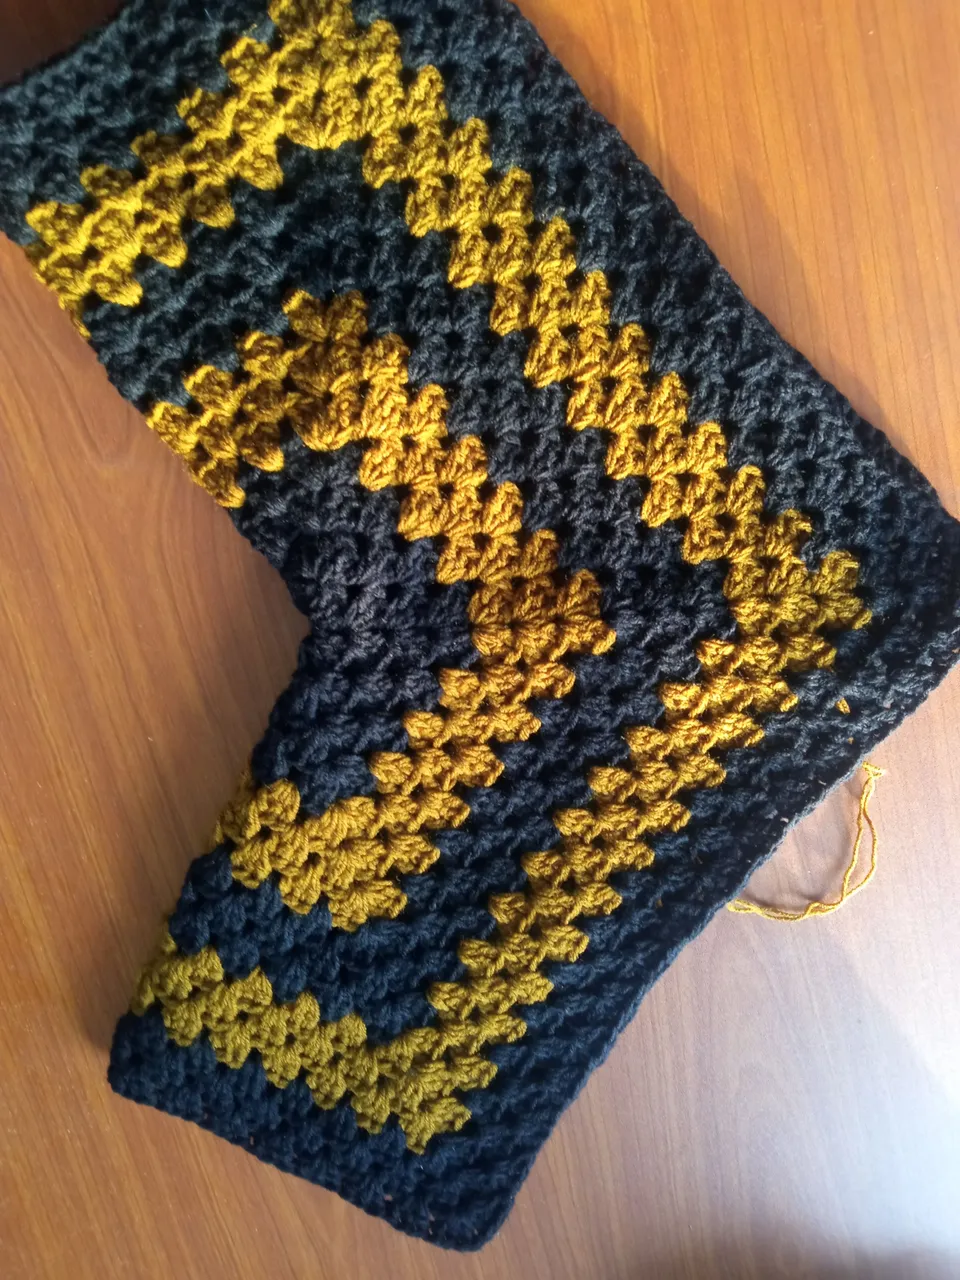
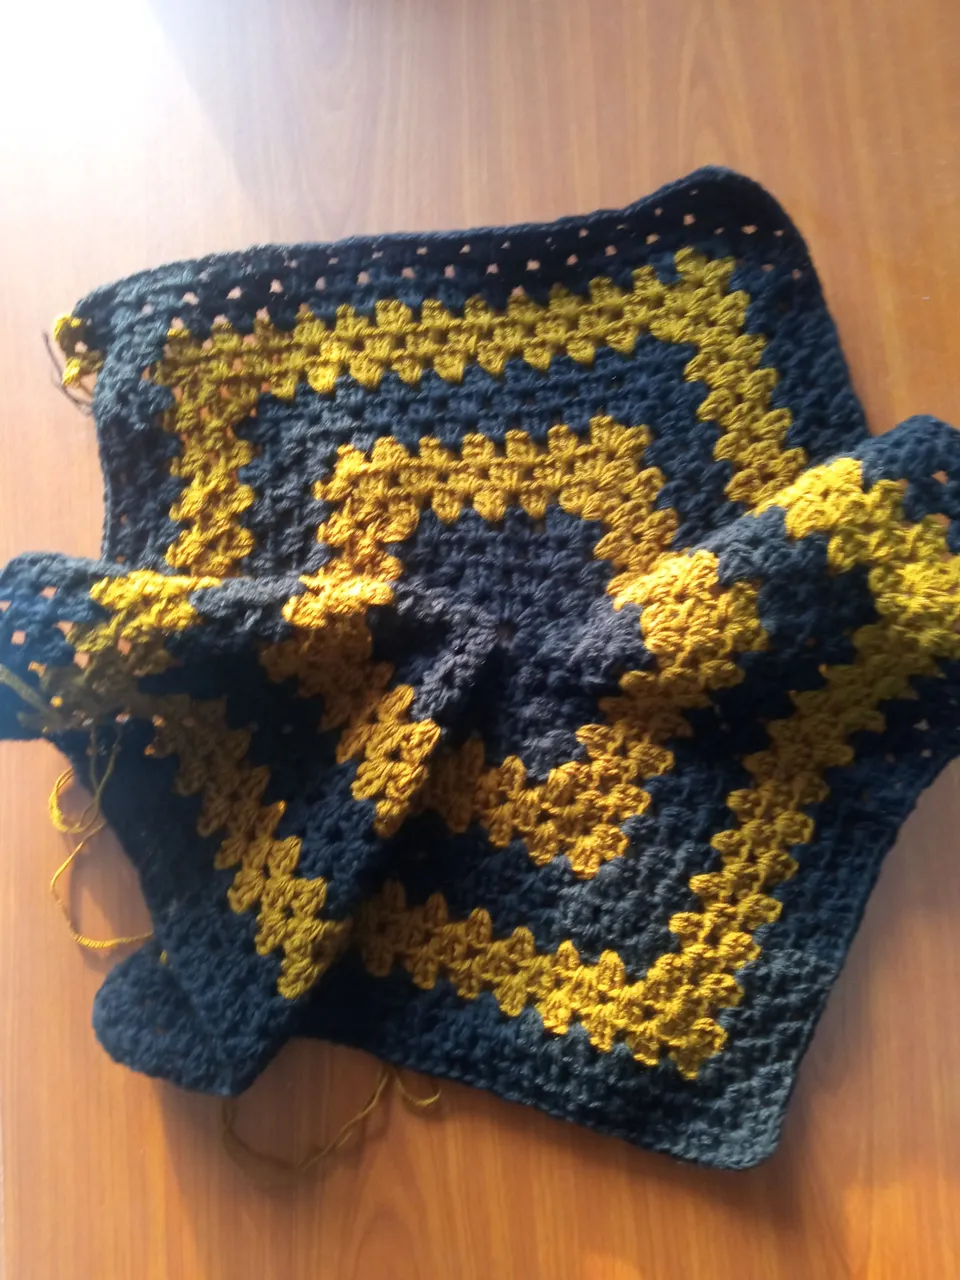
Once it is in the L shape, I join the upper part - which is the shoulder. If I wanted the arm to be short then one side of the cardigan would have been completed but I wanted a long arm, so I had to add more rows to the hand then did the cuffs also.
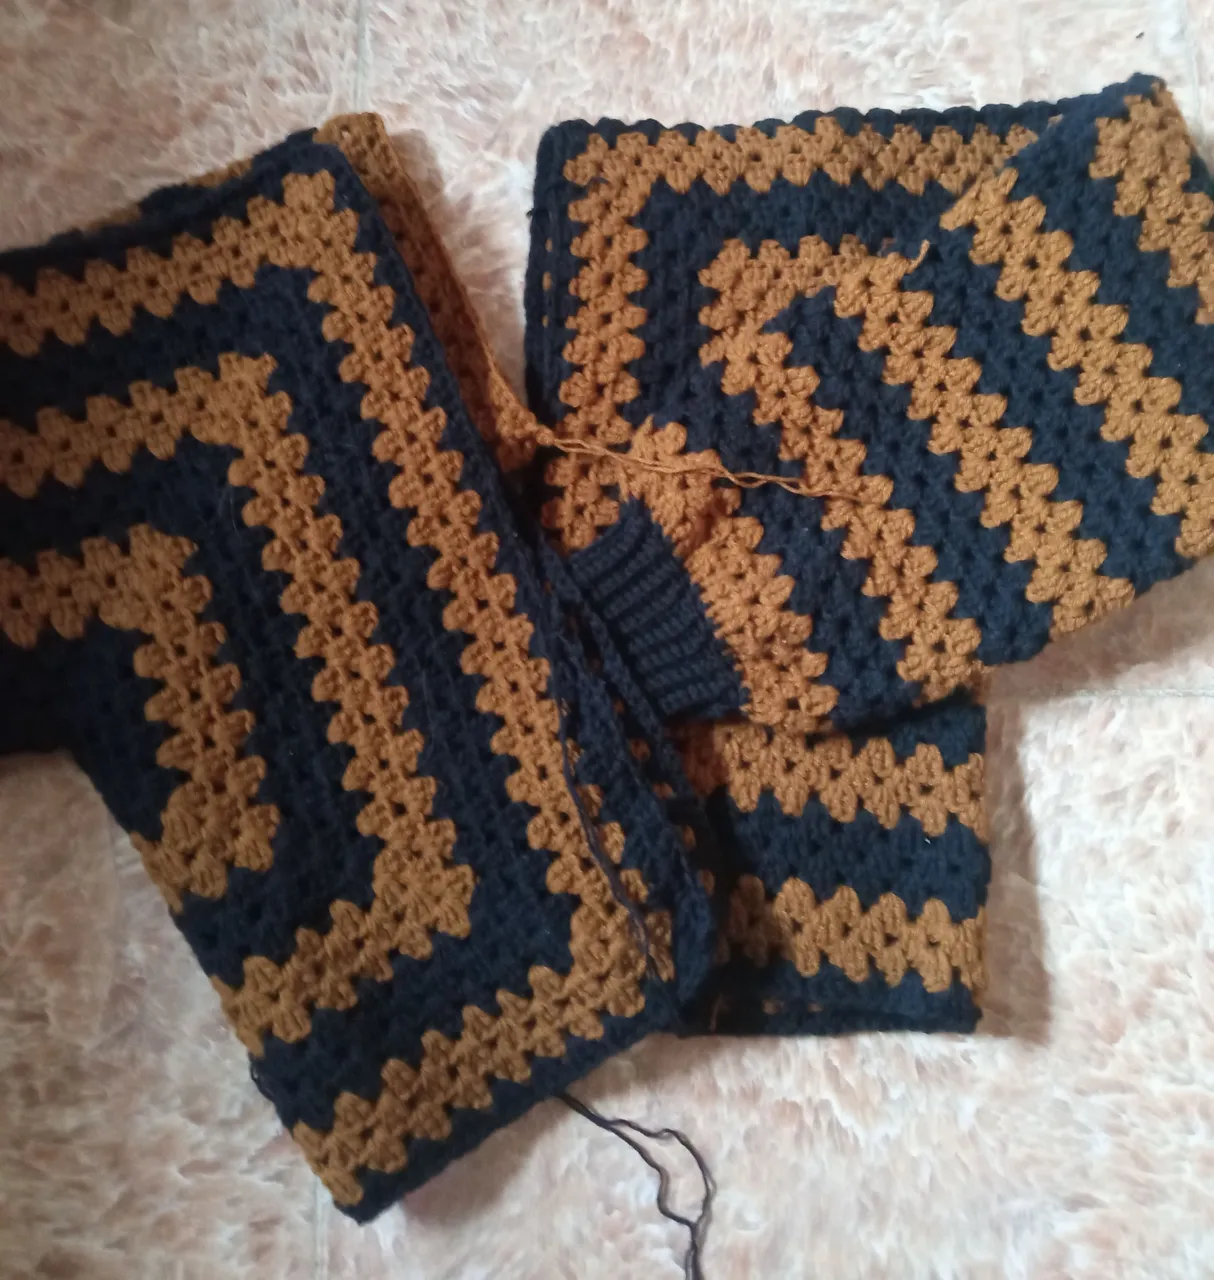
When I finished with one side, I did the same thing for the other side of the cardigan using the same pattern.
The next thing would be to join both sides at the back but if I join immediately there won’t be room for the neck, so I added seven more rows at the back, 3 on each piece and 1 to join both pieces. Then I did the border row and my cardigan was ready. I wanted it cropped, so I didn’t add any extra length for the cardigan.
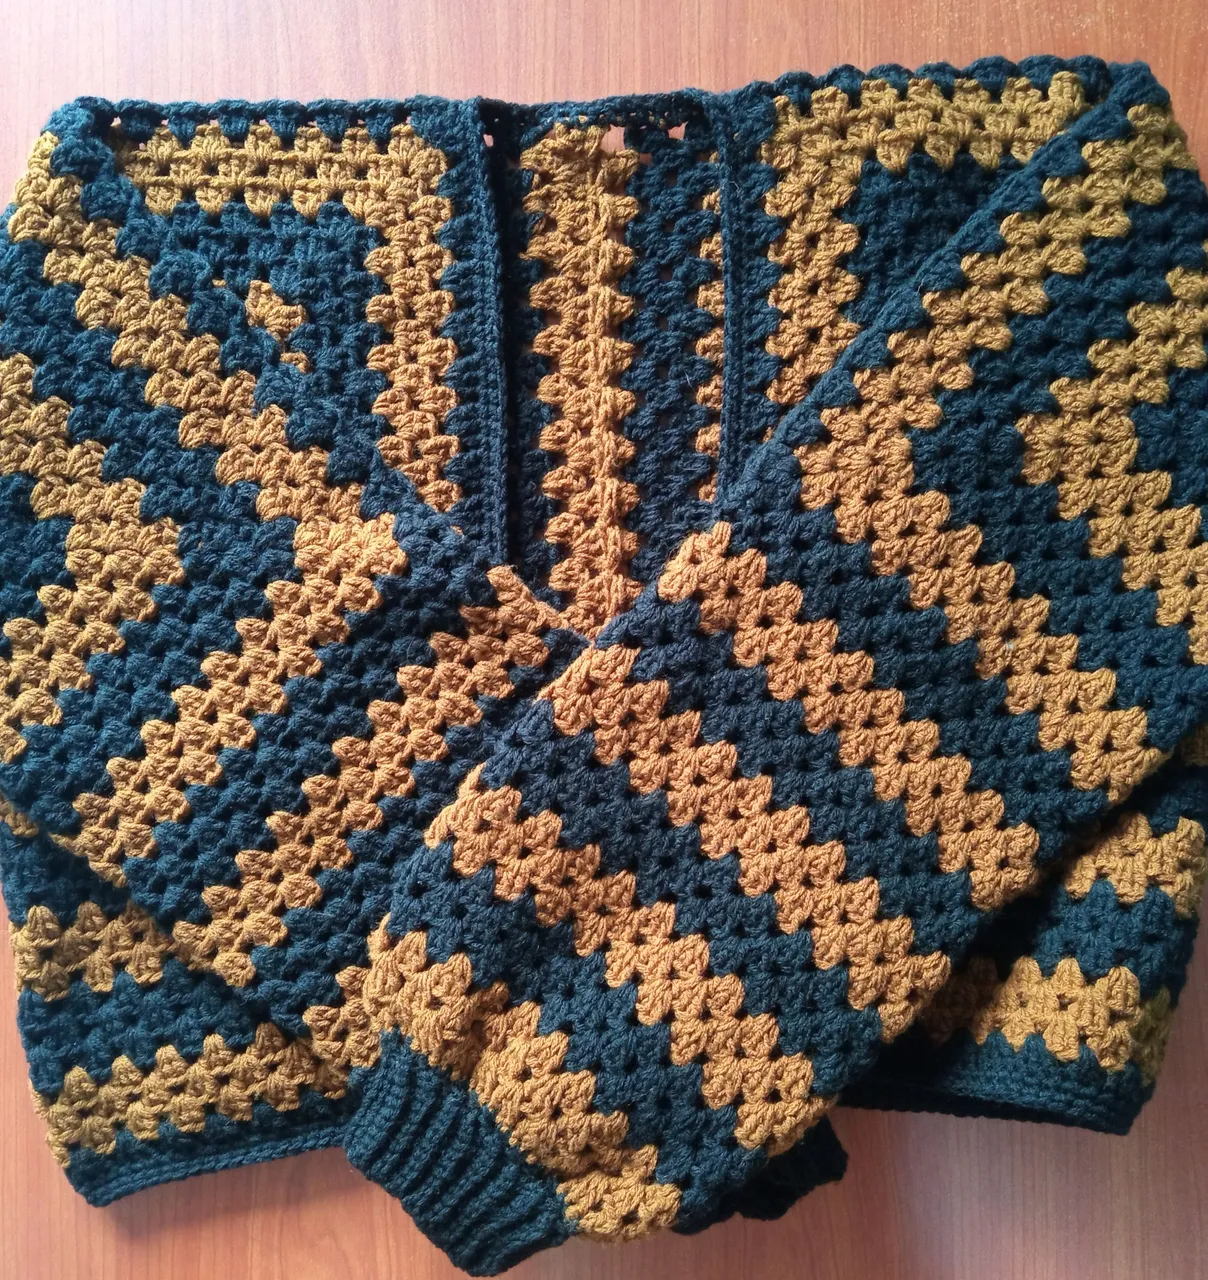
Here’s the final result. I hope you like it too.


Thanks for stopping by❤