

Hello everyone, today I will be posting a step-by-step way to achieve the crochet pattern in the image above.
A few days ago I talked about how a client came to me for urgent order. Well, this is the pattern he chose. I hope you like it too.
Rw - Row
Ch - chain
St - slip stitch
DC - double crochet
Hdc - half double crochet
SC - single crochet
PART 1: DESIGN ON THE CHEST AREA
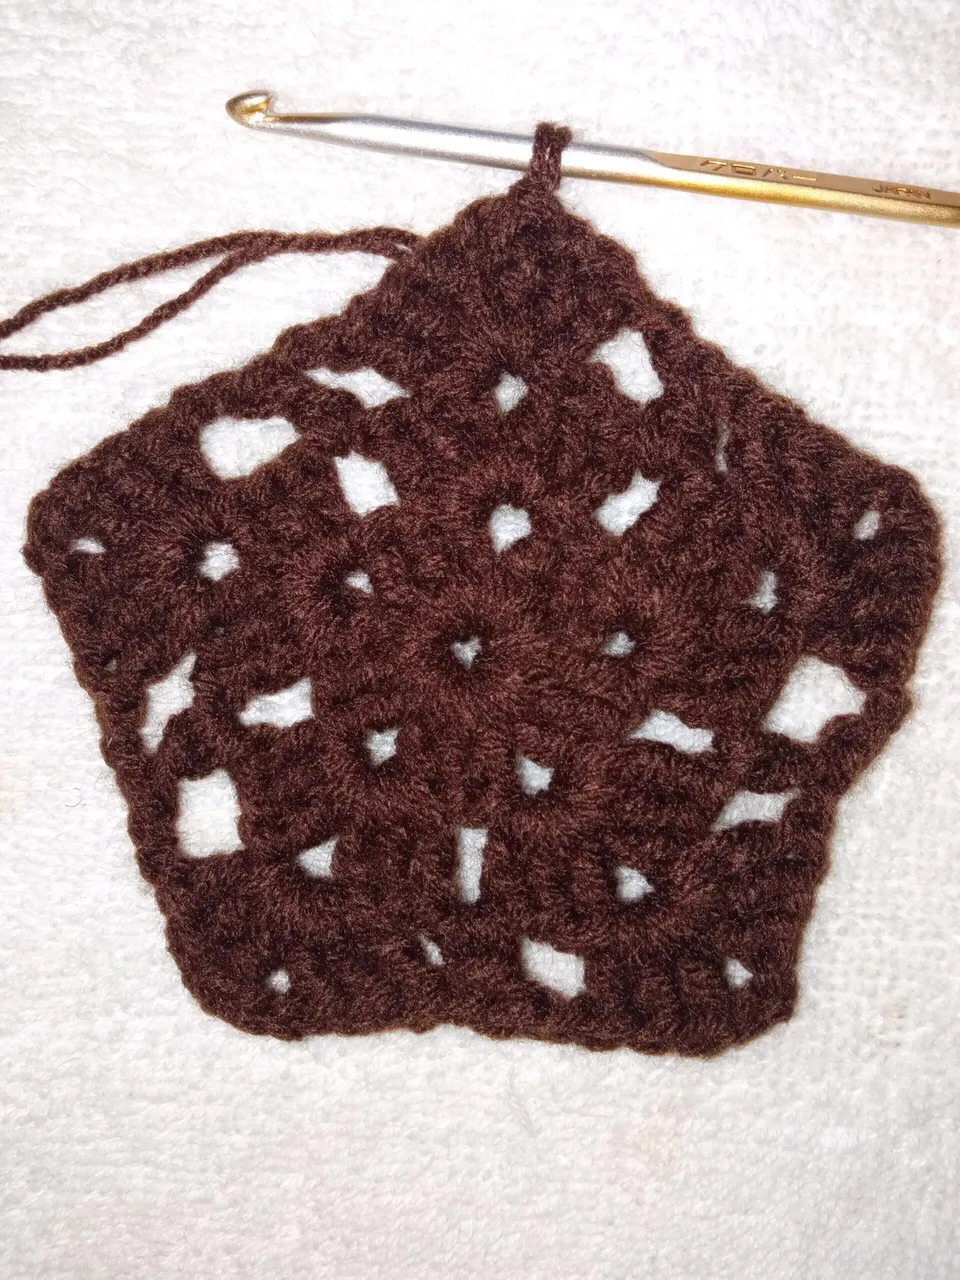
First, you start with a magic circle; for this make a ch of 4 and St into the first Ch to close it into a circle
Rw 1: make 3 DC separated by Ch 2 spaces 5 times.
I make a chain 3 to represent my first DC on every row. Then close it up with a St to end the Rw.
Rw 2: ST into the top of the Ch 3 and into the 2 DC to get into the Ch 2 space from the previous row.
Then make 3 DC ch 2 3 DC in the same space to make a shell.
Then Ch 2 and make another shell. Repeat till you close the Rw.
Rw 3: Get to the Ch 2 space and make a shell. Into the next Ch 2 make 1 DC.
Make a shell into every shell from the previous Rw and 1 DC into every Ch 2 space that's not a shell.
Repeat Rw 3 till you get to Rw 6.
I worked with 2 colors. This is what it should look like after Rw 6.

PART 2: BODY AREA
Here we move into the body area. If you follow the pattern above, you'll get 5 corners with the shell stitches.
We'll focus on 3 of those 5 corners.
Rw 1: make 1 DC into the first Ch 2 space, 1 DC in every stitch from the previous Rw. 2 DC in every Ch 2 space.
In the exact middle which is the 2nd corner, make 1 DC chain 2 1 DC. Repeat till you get to the last corner, which is the 3rd corner.
Rw 2: 1 DC on top of every DC stitch from the previous Rw. In the exact middle make 1 DC chain 2 1 DC.
Repeat Rw 3 till you get the length you want. He wanted a crop top so I did 14 inches which amounted to 16 rows. Considering I was using a thin yarn.
It's advisable to always use your measuring tape because our yarn and tension are different.
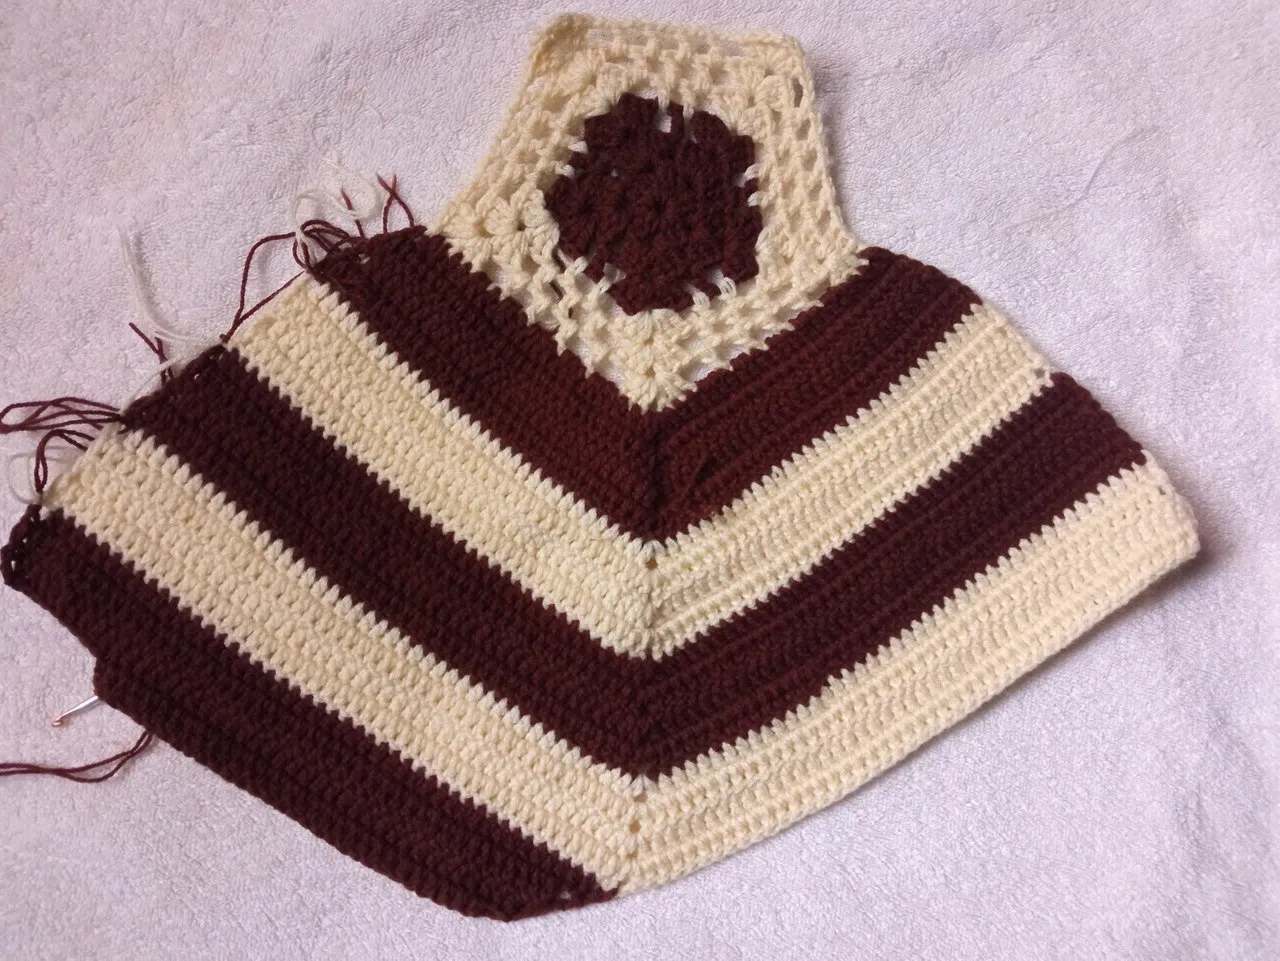
It will come out in a V shape. So we have to flatten the bottom and fill in the sides. To flatten the sides we start on one side and do the other side when we're done with the first side.
Here's a video on how to flatten the bottom;
To flatten it. You skip 2 stitches before the exact middle, make a Dc, Ch 3 and turn, skip 2 stitch and continue the row.
I did 12 rows of flattening the bottom and also used the same technique to flatten the back.
This is what it should look like when you're done

Do the same thing for the other side of the top.
PART 3: FINISHING THE TOP
For the design around the body.
Rw 1: I made 2 Hdc on every Dc row.
Rw 2: 1 DC Chain 1 skip 1 stitch, repeat.
Rw 3: Sc in the Ch 1 space, Ch 4, and SC in that same space. St into the next chain 1 space and repeat.
I hope you like this, if you have further questions please feel free to leave a comment below.
Thanks for stopping by ❤️