Hola linda comunidad de NeedleWorkMonday, es un gusto saludarlos, espero la estén pasando bien!
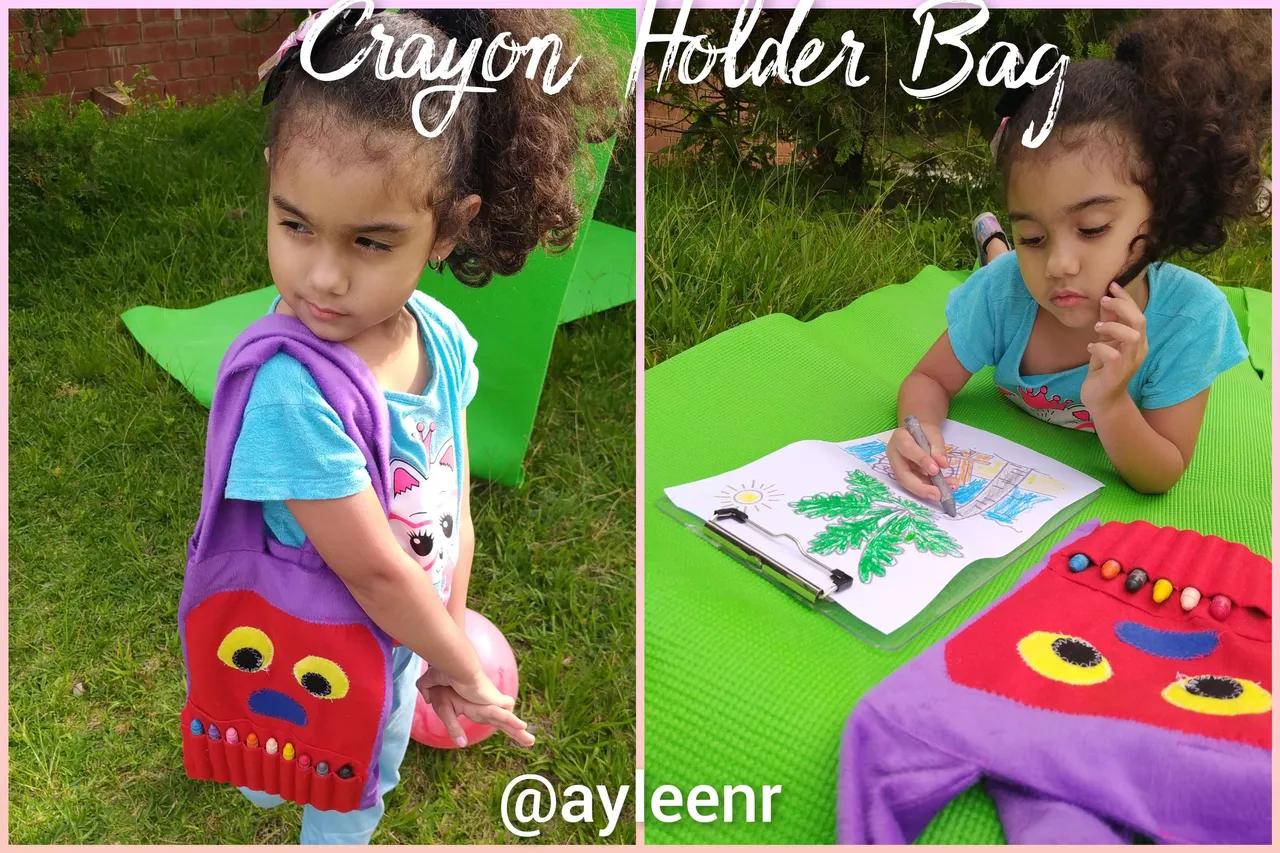
Como siempre pensando en la felicidad de mi hija, los que me conocen, saben que mis trabajo en agujas los he diseñado pensando en mi princesa, les cuento que uno de sus hobbies es colorear, así que esta vez le realicé un bolso porta crayones para que lo pueda llevar al parque, playa, consultorios médicos, en fin a donde mas le guste y tenga inspiración para colorear.
Lo mas interesante de esto es que no dejará sus colores olvidados ya que el bolso monstruo se lo recordará cuando vea que falta uno de sus dientes (crayones).
Hello beautiful NeedleWorkMonday community, it's a pleasure to greet you, I hope you are having a good time!.
As always thinking about my daughter's happiness, those who know me, know that I have designed my needlework with my princess in mind, I tell you that one of her hobbies is coloring, so this time I made her a crayon bag so she can take it to the park, to the beach, to the doctor's office, wherever she likes and has inspiration to color.
The most interesting thing about this is that he will not leave his colors forgotten because the monster bag will remind him when he sees that one of his teeth (crayons) is missing.

Materiales a utilizar | Materials to be used
- Fieltro rojo de 20 cm de ancho x 25 cm de alto para la cara
- Fieltro rojo 20 cm de ancho x 11 cm de largo para la boca
- Círculos de 4 cm de fieltro amarillo para los ojos
- Círculos de 2 cm de fieltro negro para los ojos
- Ovalo de 6cm x 4 cm de fieltro azul para la nariz
- Crayones
- Red felt 20 cm wide x 25 cm high red felt for the face
- Red felt 20 cm wide x 11 cm long for the mouth
- 4 cm circles of yellow felt for the eyes
- 2 cm circles of black felt for the eyes
- 6 cm x 4 cm oval of blue felt for the nose
- Crayons
- Tela de peluche morado de 22 cm de ancho x 30 cm de alto
- Tela de peluche morado de 12 cm de ancho x 54 cm de largo para las - tiras
- Maquina de coser e hilos
- Alfileres
- Tijera para cortar telas
- Purple plush fabric 22 cm wide x 30 cm high
- Purple plush fabric 12 cm wide x 54 cm long for the - strips
- Sewing machine and threads
- Pins
- Fabric cutting scissors

Tutorial paso a paso | Step by step tutorial
Paso 1 | Step 1
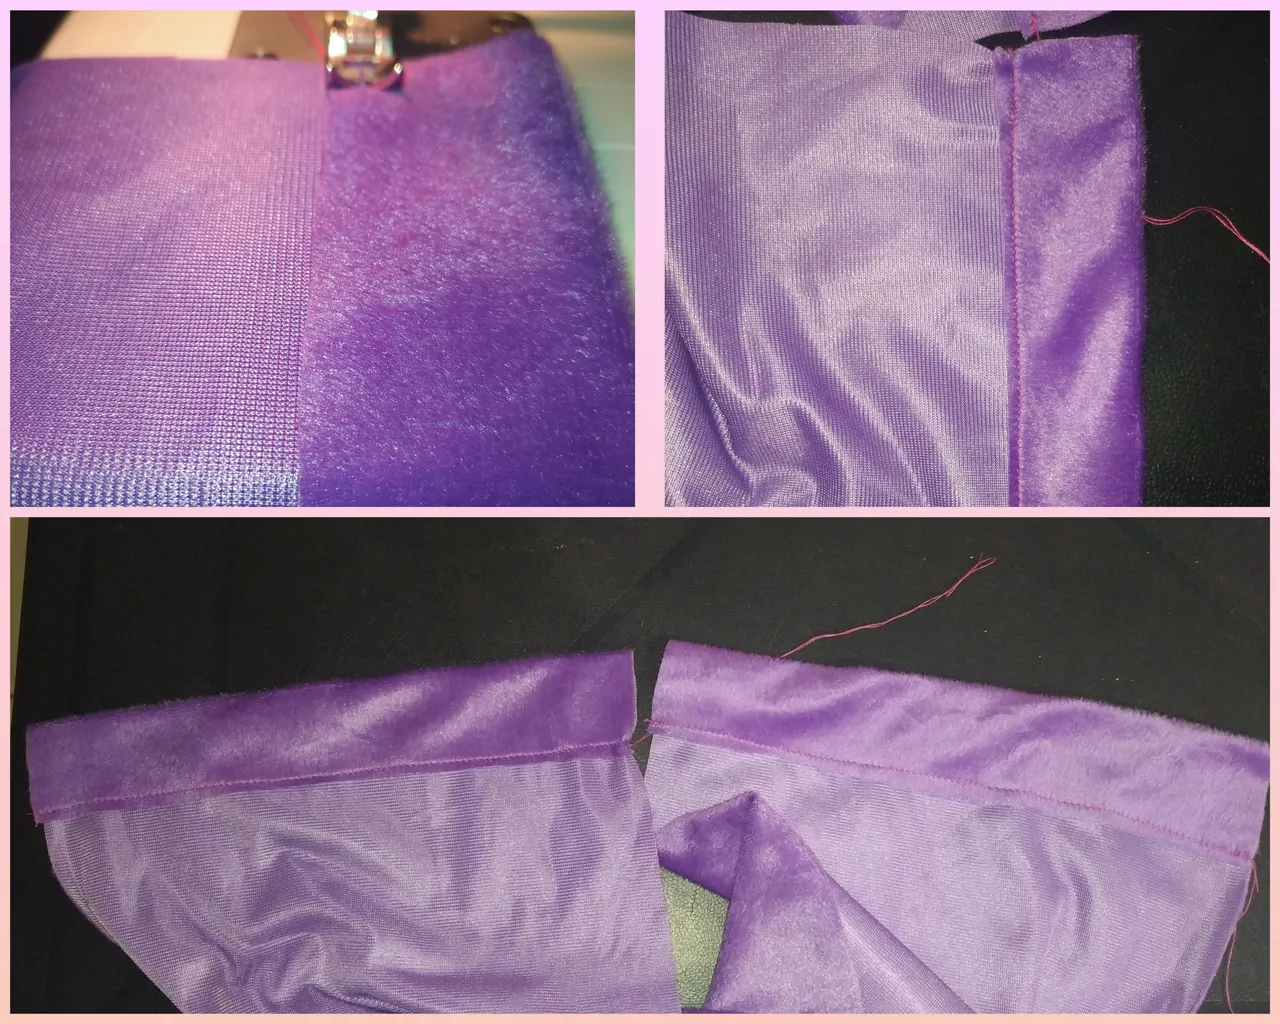
Para el bolso se dobla la tela a la mitad lo que debería dejarte un rectángulo, cosemos los bordes superiores con puntada recta para darle forma al bolso.
For the bag, fold the fabric in half which should leave you with a rectangle, sew the top edges with a straight stitch to shape the bag.
Paso 2 | Step 2
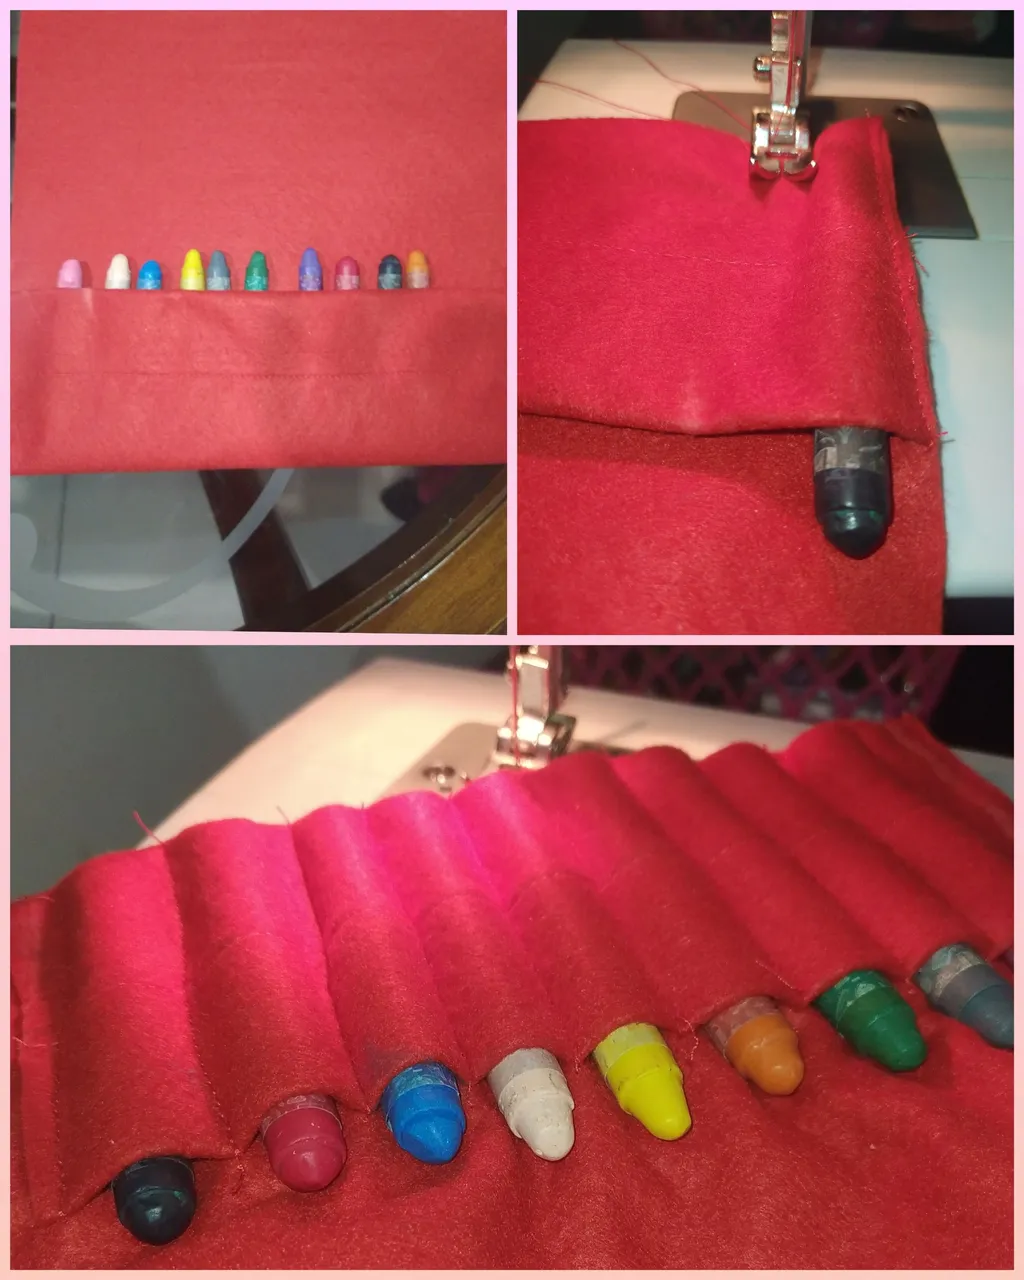
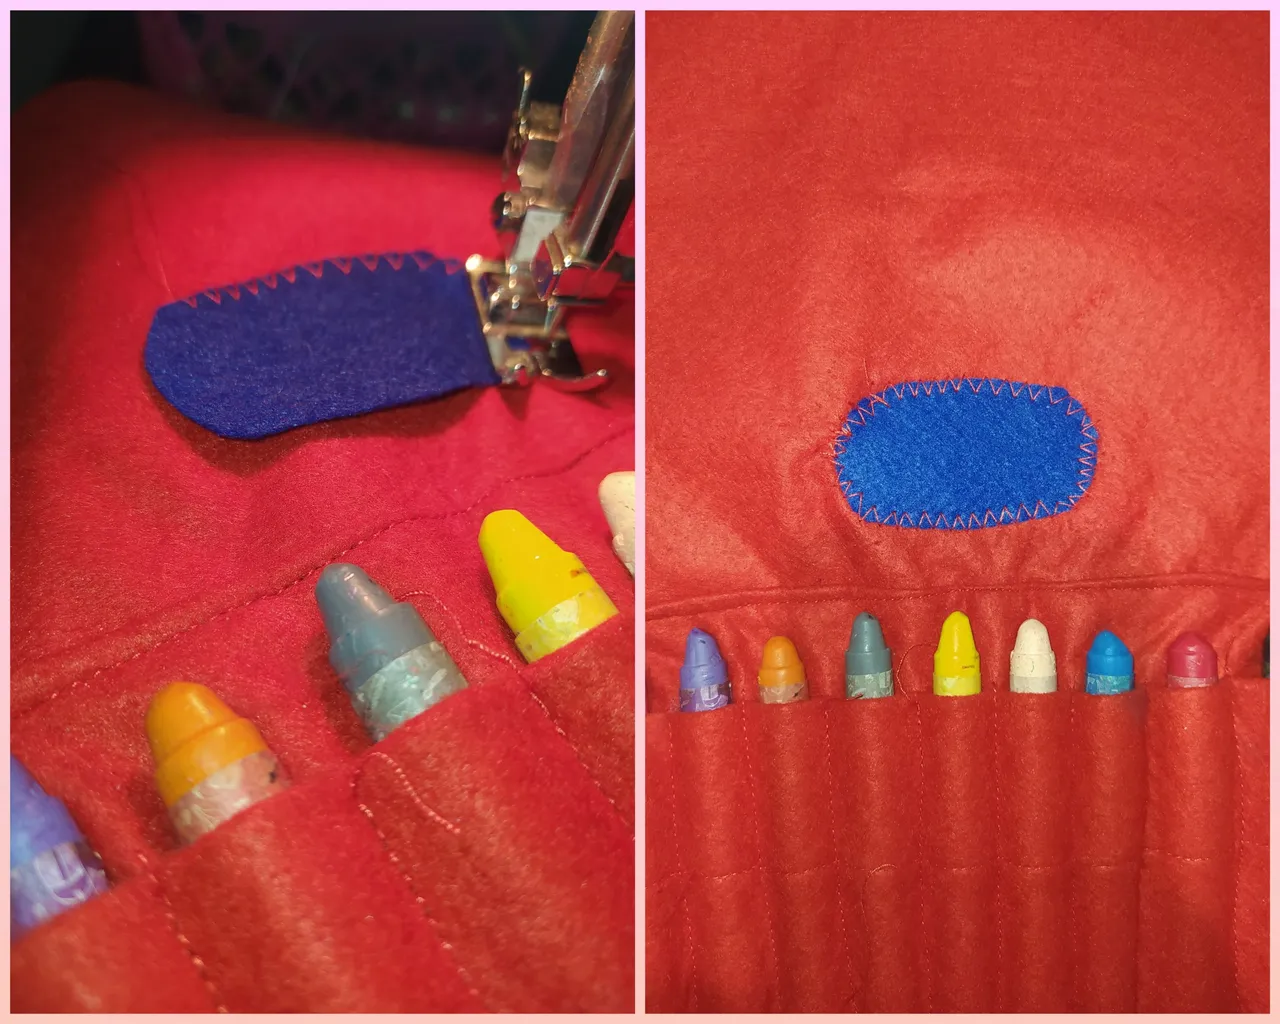
Ahora con la tela de fieltro rojo para la boca (20cm de largo x 11cm de ancho), realizaremos un doblez en la parte superior para el ruedo y con puntada recta realizaremos los espacios donde se ubicarán los crayones, estos serán los dientes del monstruo.
Now with the red felt fabric for the mouth (20cm long x 11cm wide), we will make a fold in the upper part of the fabric to make the ruffle and with a straight stitch we will make the spaces where the crayons will be placed, these will be the monster's teeth.
Paso 3 | Step 3
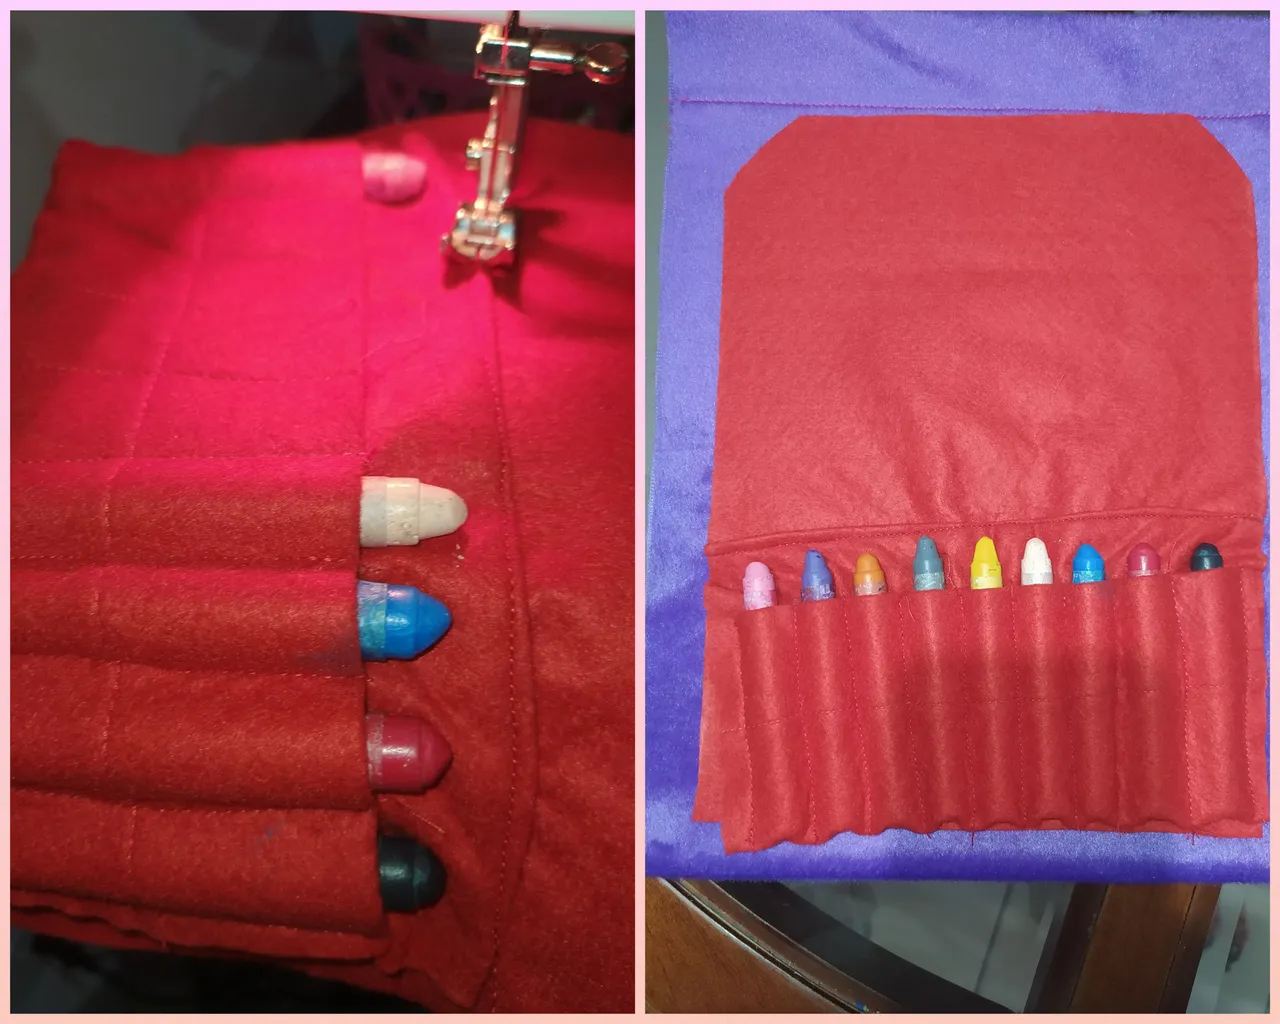
Unimos la boca con la cara del monstruo (20 cm de ancho x 25 cm) realizando costura recta para crear la forma de la boca.
We join the mouth with the face of the monster (20 cm wide x 25 cm) making straight stitching to create the shape of the mouth.
Paso 4 | Step 4
Le colocamos la nariz al monstruo, con el ovalo azul (6cm x 4 cm) ya cortado lo vamos a coser con puntada zig zag.
We place the nose on the monster, with the blue oval (6cm x 4 cm) already cut, we are going to sew it with zig zag stitch.
Paso 5 | Step 5
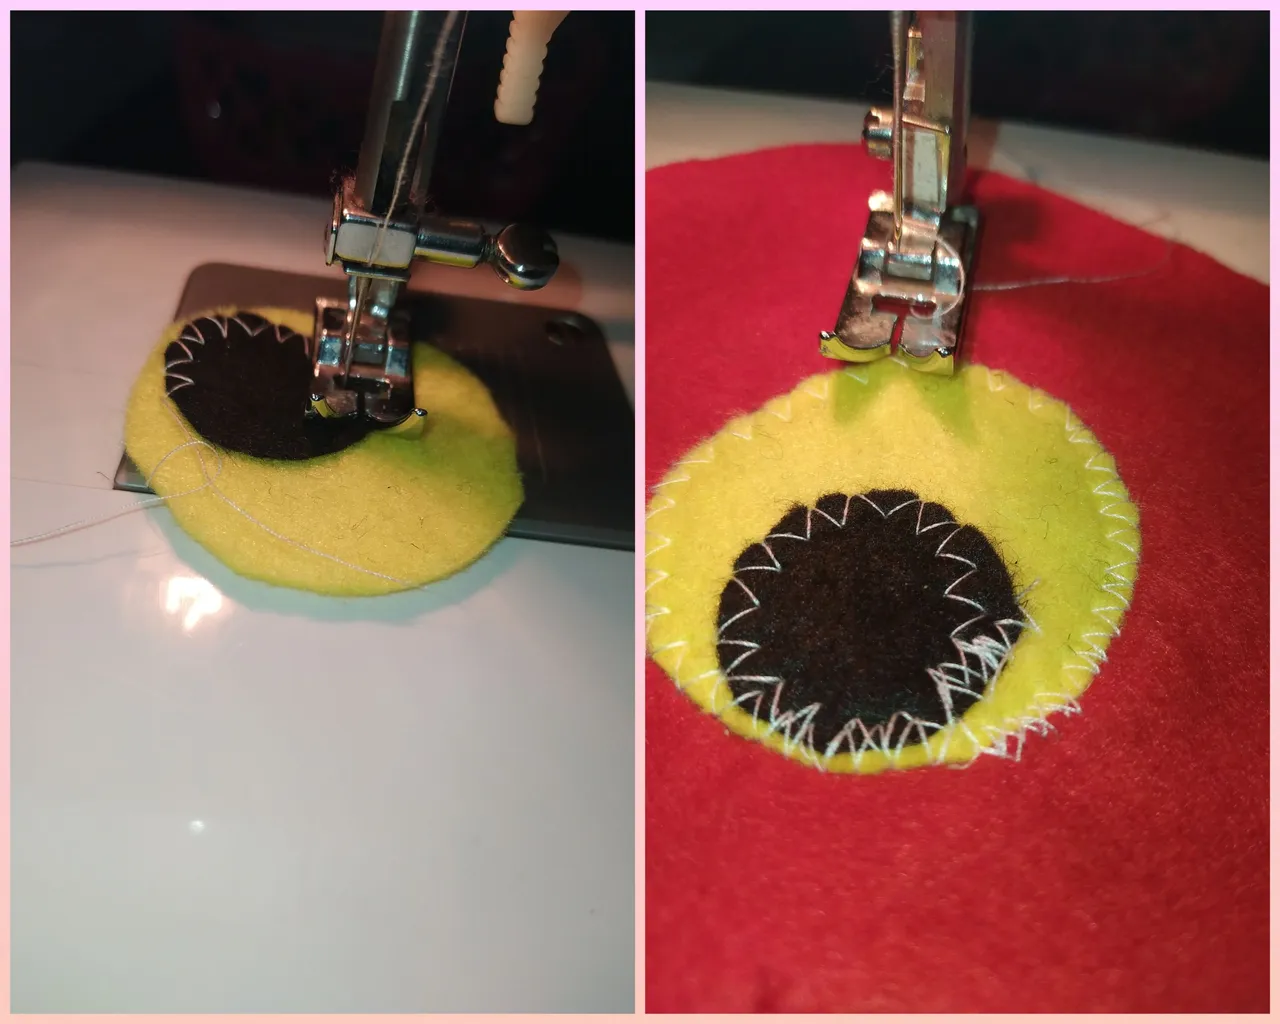
Realizamos los ojos con los círculos de 4cm y 2 cm lo uniremos con puntada zig zag y luego lo unimos cada ojo los lados de la cara del monstruo.
We make the eyes with circles of 4 cm and 2 cm, we join them with zig zag stitch and then we join each eye to the sides of the monster's face.
Paso 6 | Step 6
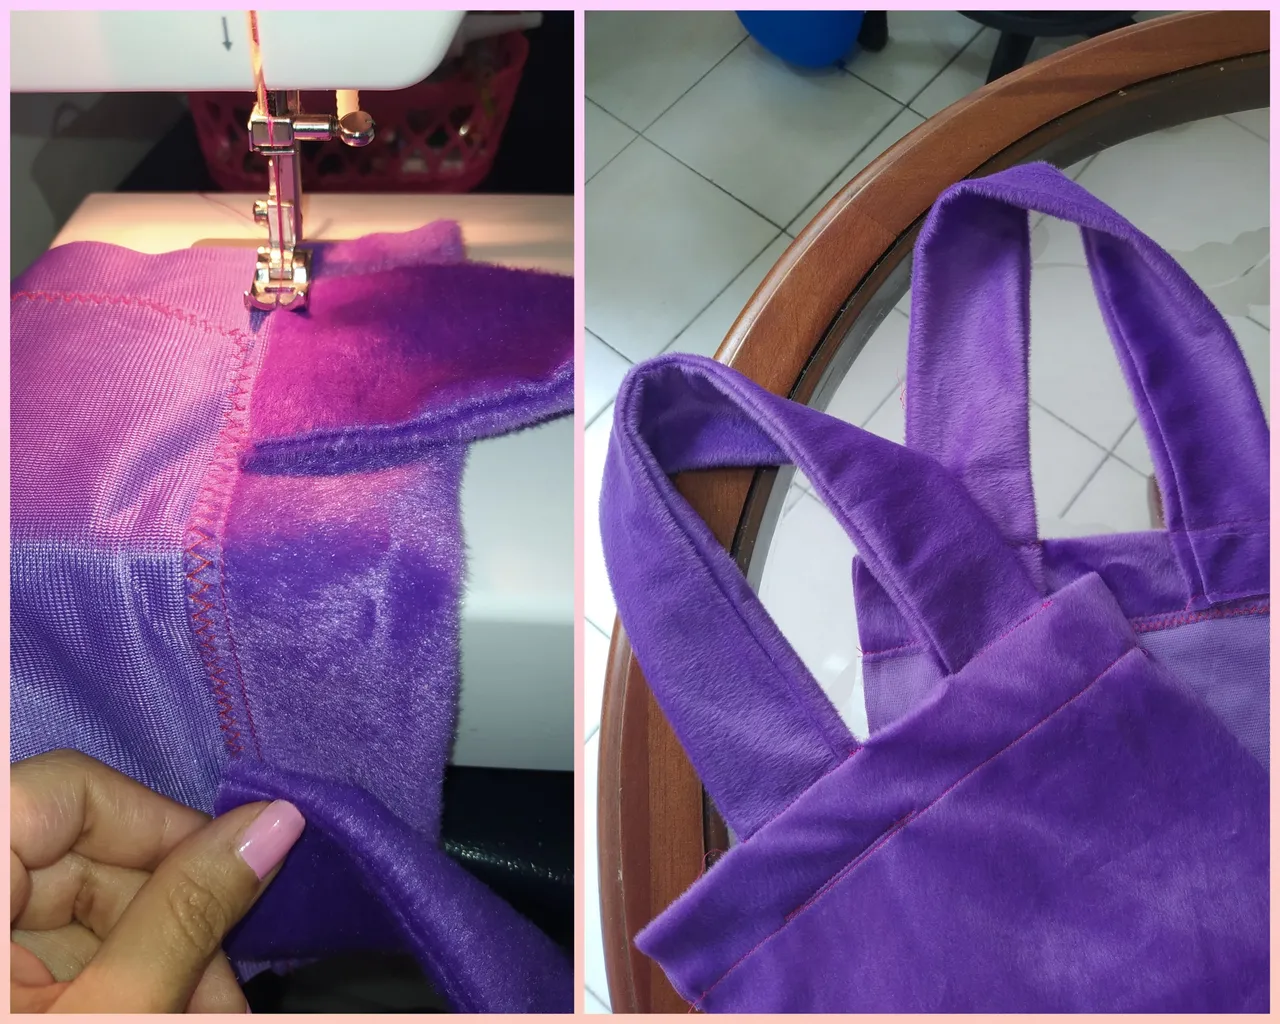
Creamos las tiras del bolso con tela de peluche morado (12 cm de ancho x 54 cm), cosemos con puntada recta y luego zig zag para asegurar la costura.
We create the strips of the bag with purple teddy fabric (12 cm wide x 54 cm), sew with a straight stitch and then zig zag to secure the seam.
Paso 7 | Step 7
Unimos los laterales para cerrar el bolso, volteamos y listo.
We join the sides to close the bag, flip it over and it's ready.
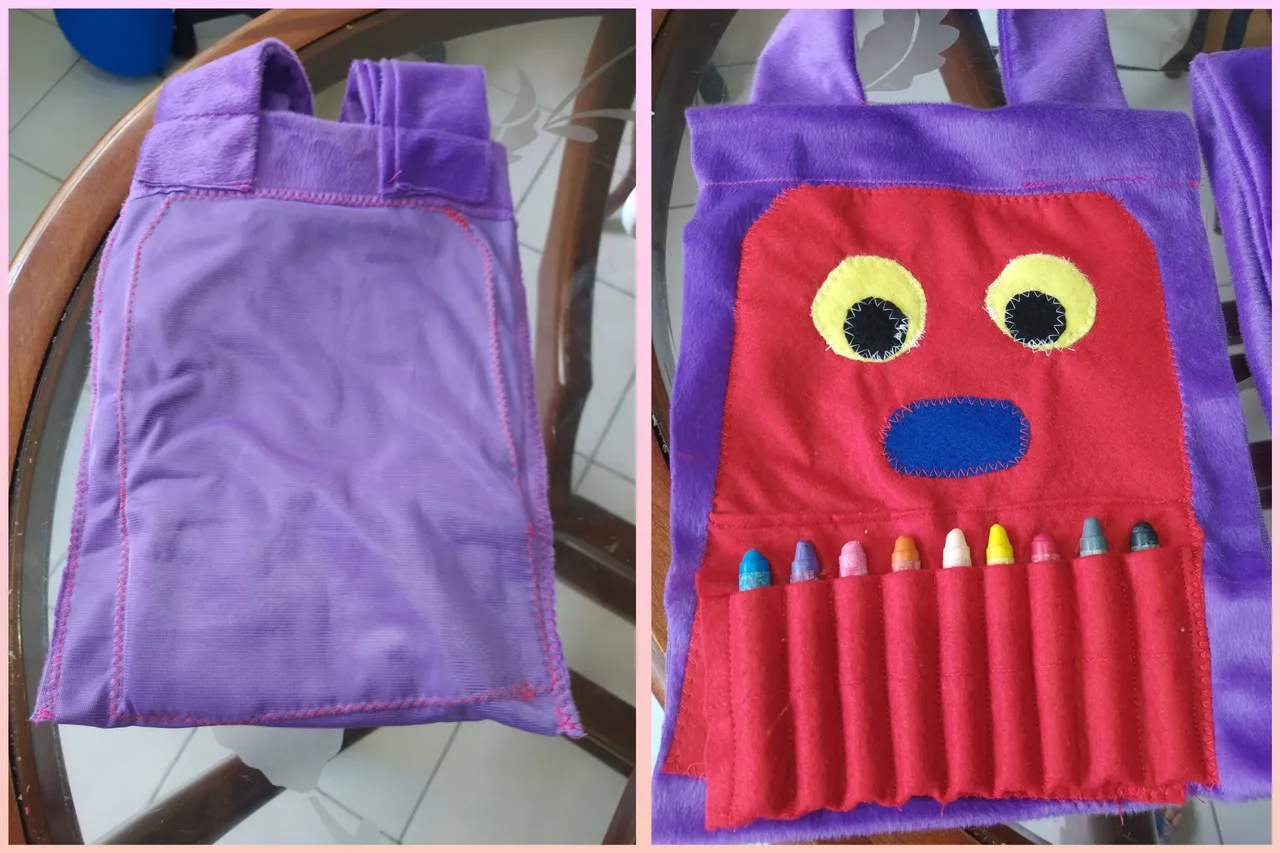
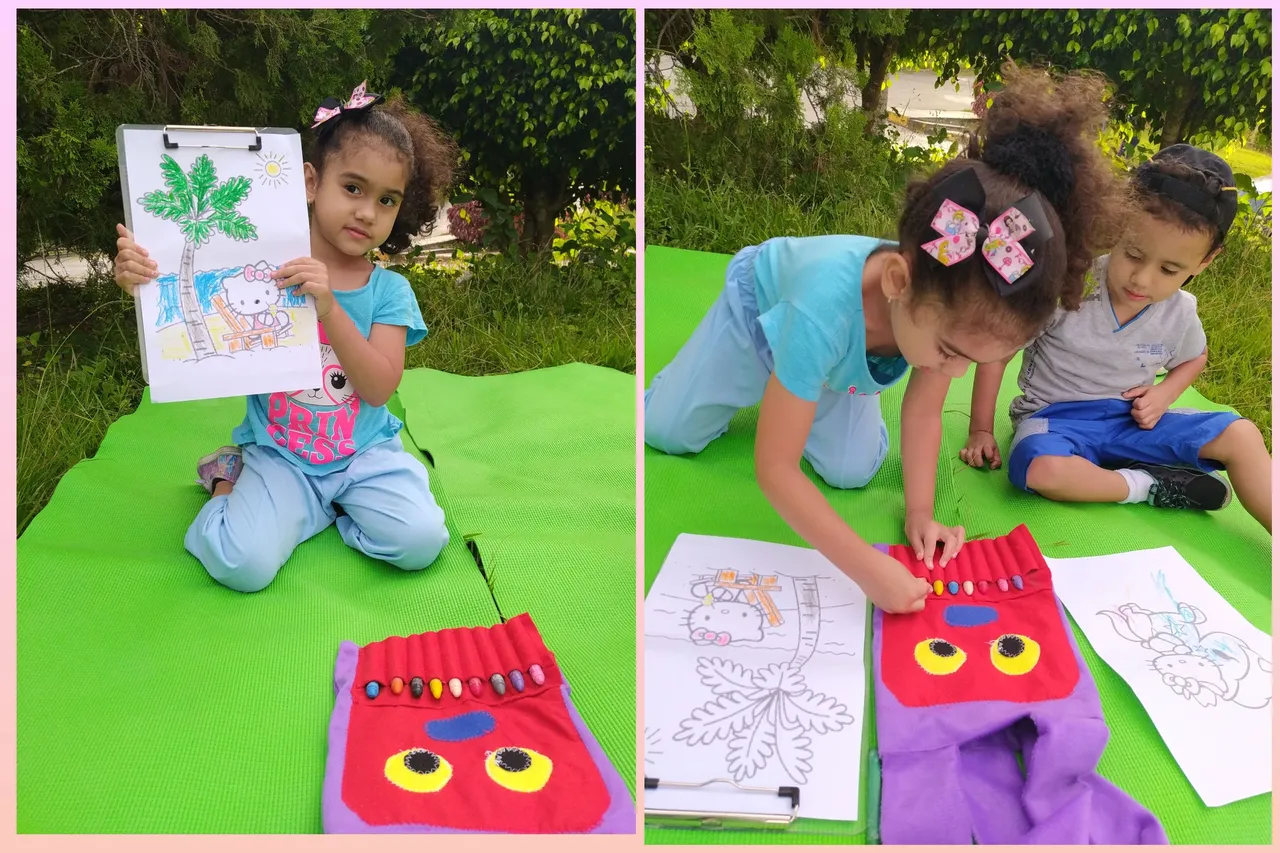
Finalmente tenemos este grandioso resultado...lo mas importante es que salimos a disfrutar y colorear.../Finally we have this great result...the most important thing is that we went out to enjoy and color....

Casualmente mi hija estaba pintando a Hello kitty y se acercó un amiguito, así que ella lo invitó a colorear, disfrutaron increíblemente...
By chance my daughter was painting Hello kitty and a little friend came over, so she invited him to color, they enjoyed incredibly...
Espero les haya gustado este bolso porta crayones...Nos vemos en un proximo post... | I hope you liked this crayon bag...See you in a future post....

❤️Gracias ❤️ / ❤️Thanks❤️