

My glasses are practically my eyes. I can't do anything without them and even though you'll hardly ever see me in a picture with them, I'm totally dependent on my glasses for anything. | Mis lentes son prácticamente mis ojos. No puedo hacer nada sin ello y aunque casi nunca me verán en una foto con ellos, soy totalmente dependiente de los lentes para cualquier cosa. |
For some time now my glasses case has been quite deteriorated and the inner lining is almost completely detached, I was ashamed to take it out of my purse, so when I had to take out my glasses, I opened my wallet and inside the wallet I opened the case, never, not even by mistake, took the old case out to see the sunlight. But while browsing through the social networks I saw a very interesting case and it inspired me to make my own and solve the case issue. | Hace tiempo que el estuche de mis lentes está bastante deteriorado y el forro interior casi que desprende por completo, ya me daba vergüenza sacarlo de mi bolso, así que cuando tenía que sacar mis lentes, abría la cartera y dentro de la cartera abría el estuche, jamás, ni por error, sacaba el viejo estuche a ver la luz del sol. Pero paseando por las redes sociales ví un estuche muy interesante y me sirvió de inspiración para hacer el mío y así resolver el asunto del estuche. |
https://www.etsy.com/mx/listing/1545765389/crochet-glasses-case-cover-pattern?ref=share_v4_lx
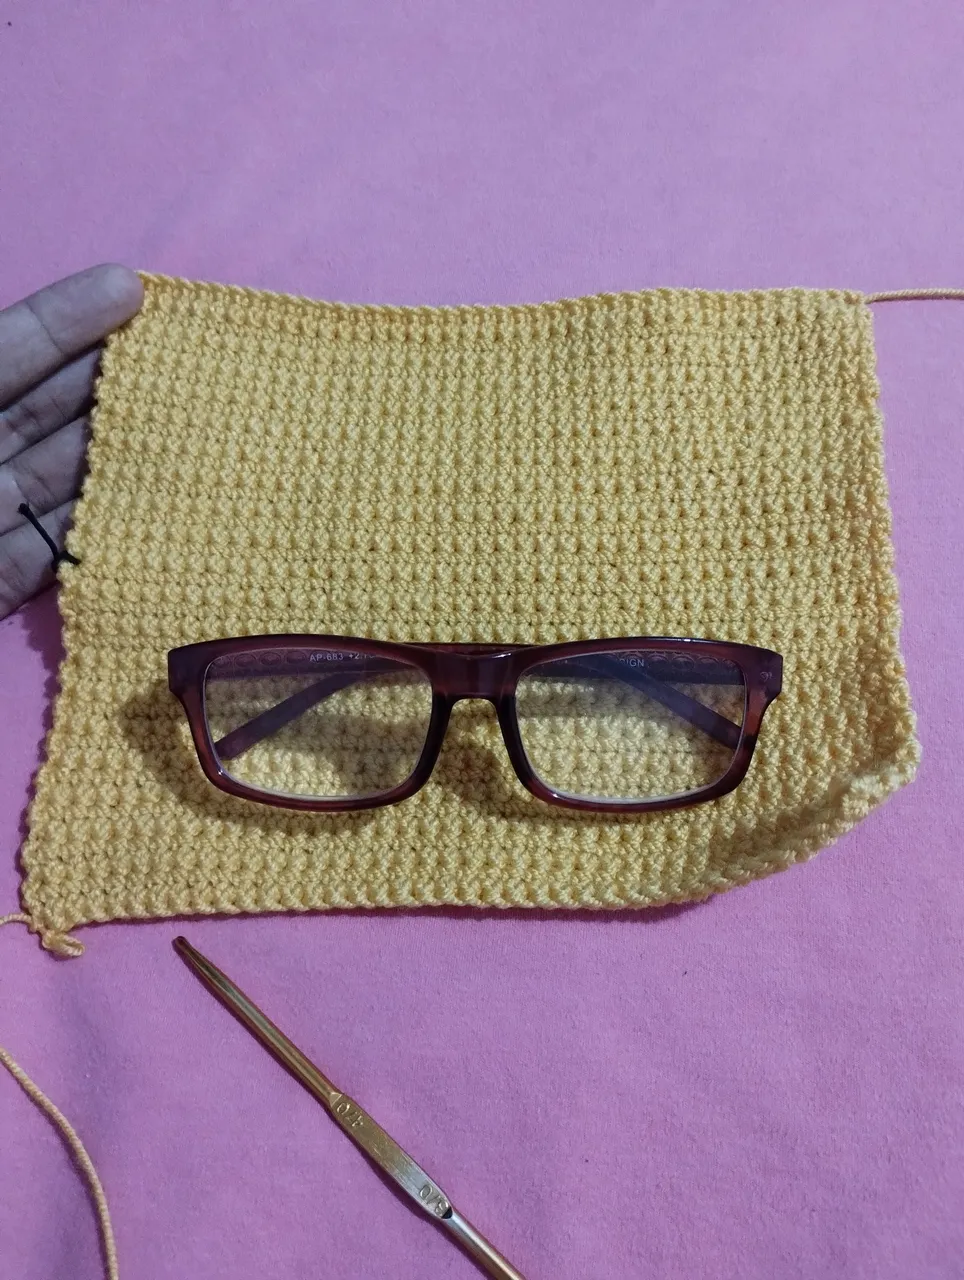
You see, this model is very easy to make. It consists of a rectangle whose size depends on the size of the glasses. The stitch we choose to knit can be our preference. I wanted to make a cruch stitch, but I didn't have an audience for yarn so I opted to knit low stitches throughout the knitting. I liked it and it seemed perfect because the knitting is very tight and we avoid scratching the glasses with the other things inside our purse. | Verán, este modelo es muy fácil de realizar. Consta de un rectángulo cuyo tamaño depende del tamaño de los lentes. El punto que elijamos para tejer puede ser nuestra preferencia. Quería hacer un punto cruch, pero no tenía audiencia hilo así que opté por hacer puntos bajos en todo el tejido. Me gustó y pareció perfecto porque el tejido queda bien tupido y así evitamos rayar los lentes con las demás cosas dentro de nuestra cartera. |

We measure the size of the glasses until we get the desired width and height. Remember to weave twice the height because we will fold it in half to sew all the contour and thus assemble the case. | Vamos midiendo el tamaño de los lentes hasta obtener el ancho y altura deseada. Recordemos tejer el doble de la altura ya que lo doblaremos a la mitad para coser todo el contorno y así armar la funda. |
We made an ornament for the case and it is a pair of sunglasses. This was the most interesting part that brought the case to life. I wanted to make some with white glass, but I didn't have a single strand of white yarn or wool. So I decided to make sunglasses. For this we worked two circles of 24 single crochet stitches in their last round. We start with 6 low stitches in a magic ring and we go in increments multiples of 6. On the edge I put a lilac colored yarn and a stitch in each stitch, but where we want to make the corner of the glasses, we make a triple increase. | Realizamos un adorno para el estuche y se trata de unas gafas de sol. Está fue la parte más interesante y que le dió vida al estuche. Quería hacer unos con el cristal blanco, pero no tenía ni una hebra de hilo o lana blanca. Entonces me confirmé con que fueran unos lentes de sol. Para ello trabajamos dos círculos de 24 puntos bajos en su última vuelta. Empezamos con 6 puntos bajos en un anillo mágico y vamos en aumentos múltiplos de 6. En el borde puse un hilo color lila y un punto en cada punto, pero donde deseamos hacer la esquina de los lentes, hacemos un aumento triple. |


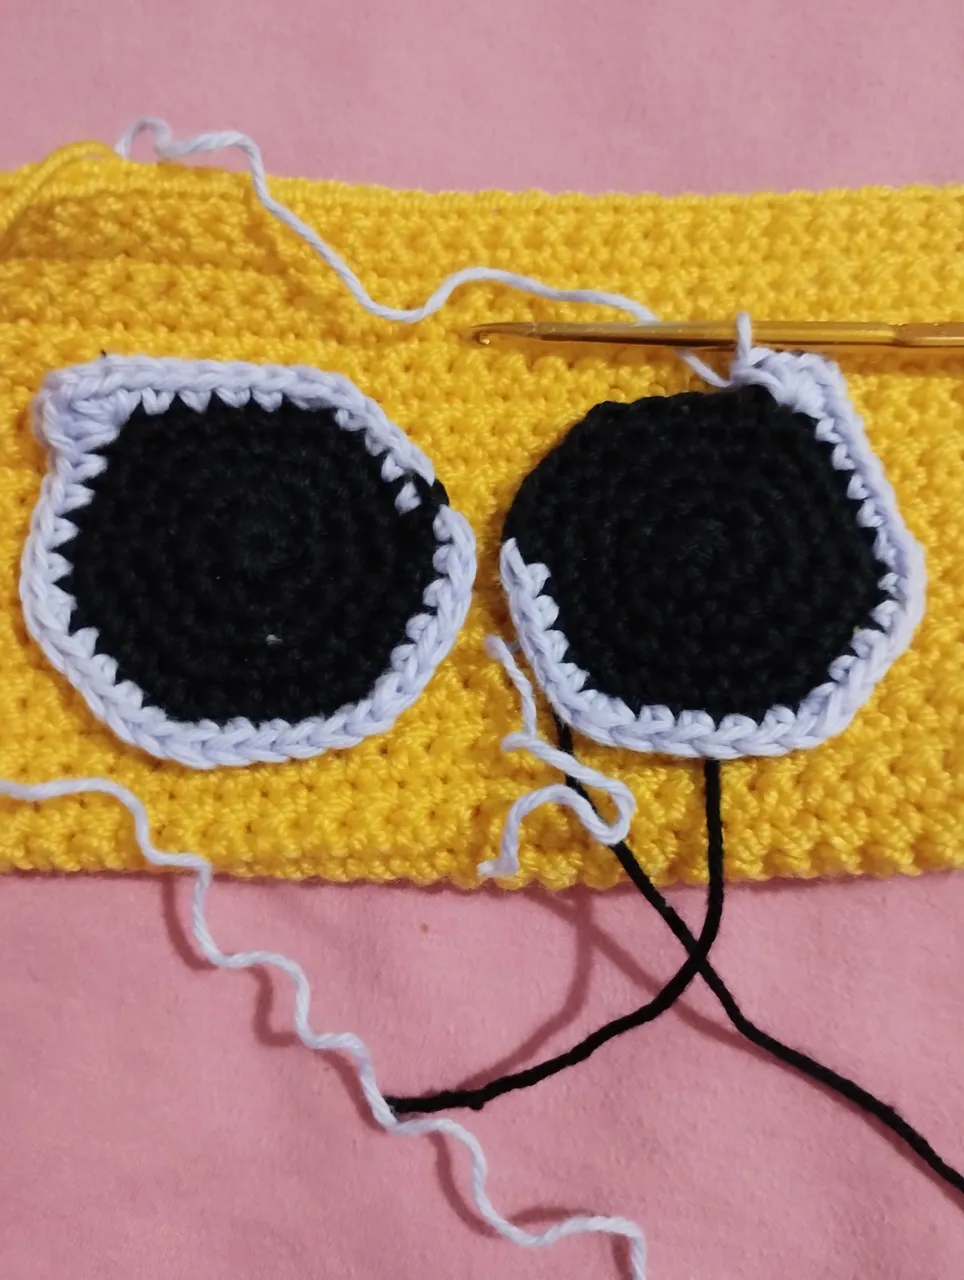
It is the same for both parts. We glue them with silicone to the case and knit a small strip to place it in the middle of the two circles. For closure we sew a chain of about 8 centimeters. We weave it directly over the edge of the cover and fix it one centimeter apart. At the back we sew a button to fix the strip we just made and thus we have the closure. | Es lo mismo para ambas partes. Los pegamos con silicón a la funda y tejemos a parte una pequeña tira para colocarla en medio de los dos círculos. Para cierre cosemos una cadena de aprox 8 centímetros. Está la tejemos directamente sobre el borde de la funda y la fijamos a un centímetros de separación. Por detrás cosemos un botón para fijar la tira que acabamos de hacer y así tenemos el cierre. |


Nothing easier to do. I don't know why I hadn't done it before. It's also something really useful and very eye-catching. I've had a lot of compliments now that if I take the case out of the purse to remove the lenses. We could also make little cases for makeup or some things we need to carry in our purses but don't need to be displayed. Thanks for reading. See you next time. | Nada más fácil de hacer. No sé porqué no lo había hecho antes. Además es algo realmente útil y muy llamativo. He tenido muchos elogios ahora que si saco el estuche de la cartera para extraer las lentes. También podríamos hacer pequeñas fundas para el maquillaje o algunas cosas que necesitamos llevar en nuestras carteras pero que no necesitan ser expuestas. Gracias por leer. Hasta la próxima. |

