Hello Fashionista, welcome to my blog💕💕.
Today is all about making gathers with a stretchy mesh fabric.
This outfit is for a teenager who wanted to make something simple for a church program.
Materials needed
Mesh Fabrics
Lining
Zipper
Thread
The teenage girl is slim in stature but busty, what I admired about her physique is her tiny waist which made her look very attractive to me.
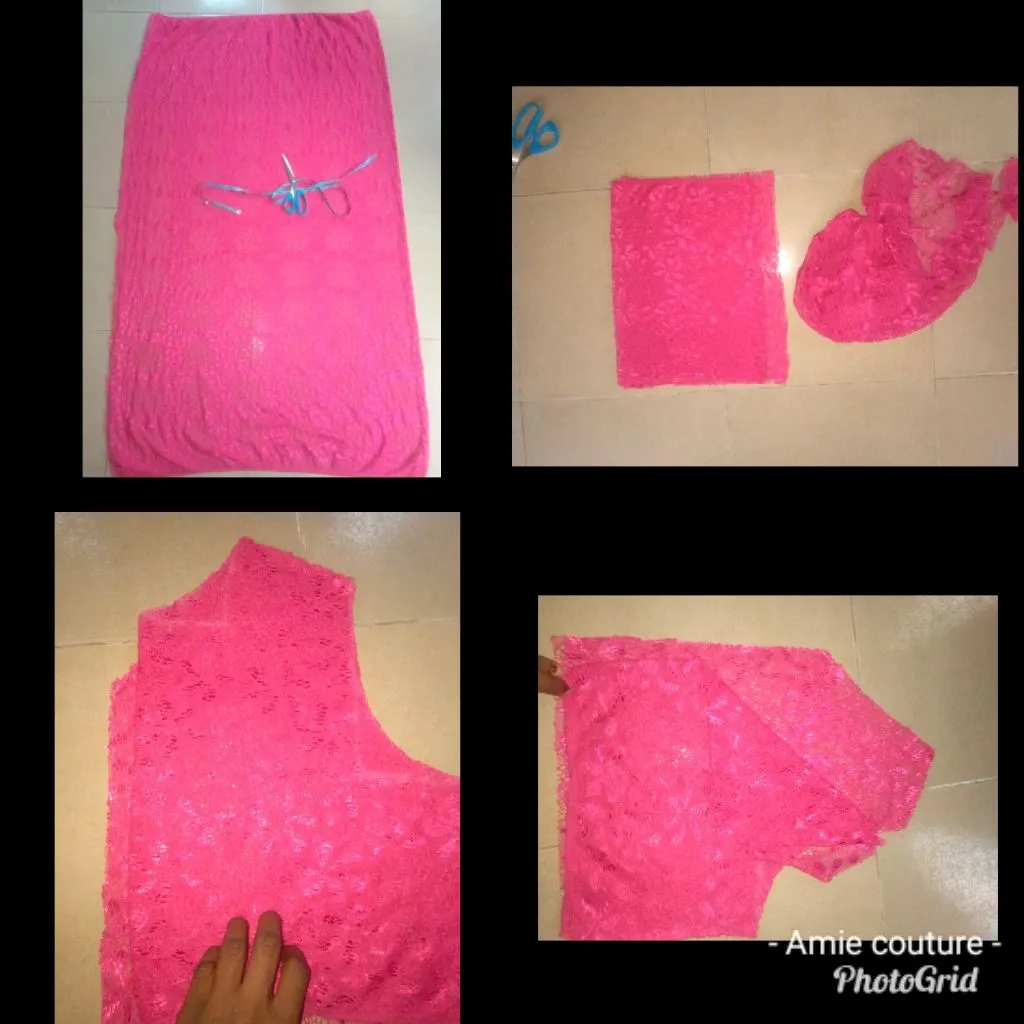
On the first collage, the fabric was widely spread about to be cut, on it, I placed my tape ruler and scissors which I will be using to transfer her body measurement, and then cut.
The first thing I did was to cut out the lower bodice part, which will be used for the gathers, the struggle I had with this fabric was that it wasn't enough, she brought just 2yards, which would make the gathers full.
But I had to work with it anyways, so I deducted her full length which was about 46 inches from her half-length which was 15inchess so I had 31 inches, I added inches of sewing allowance.
Moving on, I placed her shoulder measurement to get her arm sleeve depth and her shoulder width, her shoulder width was 14 which when divided into 2 will give me 7 inches.
I also marked her bust measurement on the fabrics which were 34 divided by 4 which gave me 8.5 inches since the fabrics were stretchy I ensured I used the stretchy part for the width and added just an inch allowance for sewing.
I placed the front bodice to cut out the back bodice but added another 1 inch for zipper allowance.
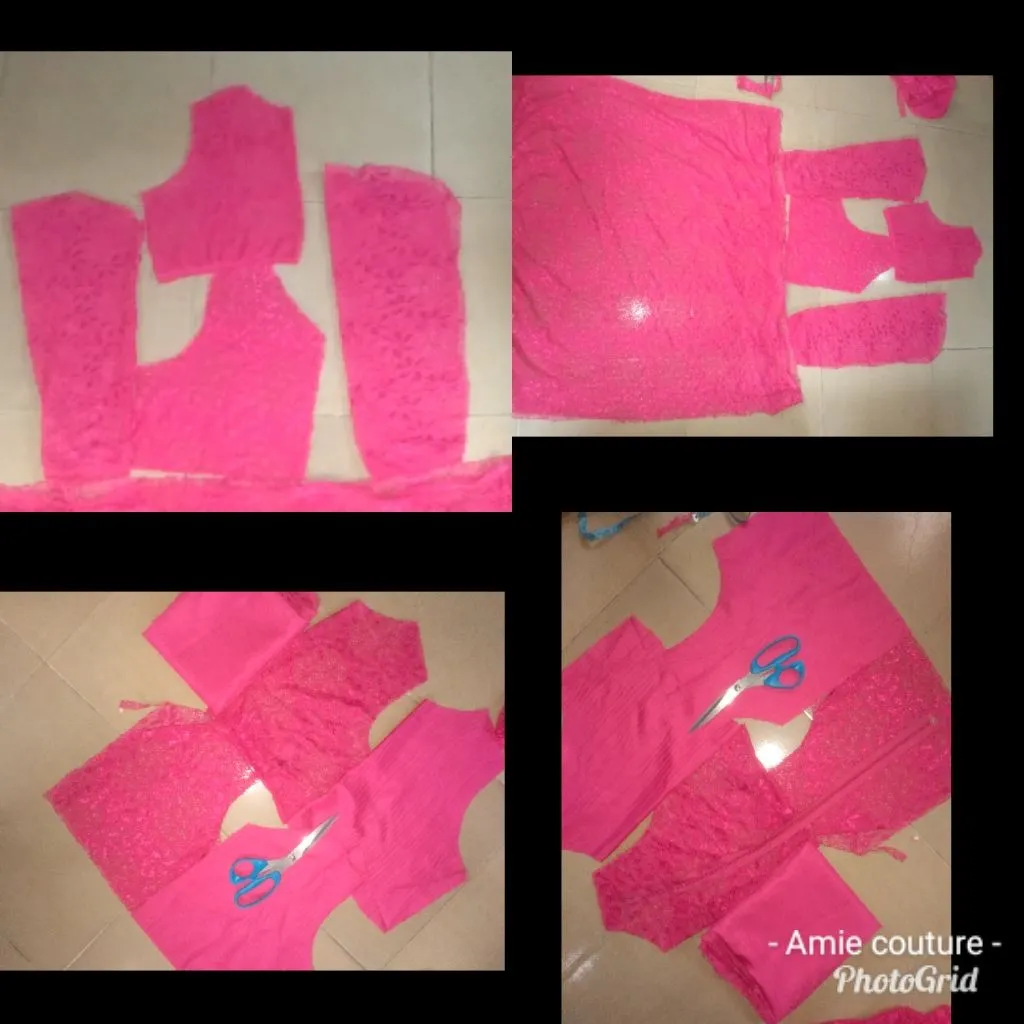
On this collage, I had already cut the front and back panels and then the long sleeve, I used her sleeve measurement to cut out her sleeve.
If you look closely, you'll see how I arranged them, the front and back panels of the mesh, and the same thing for the lining.
Then you'll also see the sleeves and lining which will be underneath the gathers.
I used the lining to turn the mesh using my sewing machine, starting with the neckline and giving it a nice top stitch after notching.
Then I proceeded to join the shoulder together for both the front and back panels.
I placed a dart on it to give it fittings.
I used her body measurement to shape the outfit, this time dividing her bust into two.
I joined the zipper at the back, and then formed my gathers, though it was not full because I had to manage the fabrics.
I used the lining to compliment it by making gathers too with it underneath the mesh.
Then I joined the sleeve together.
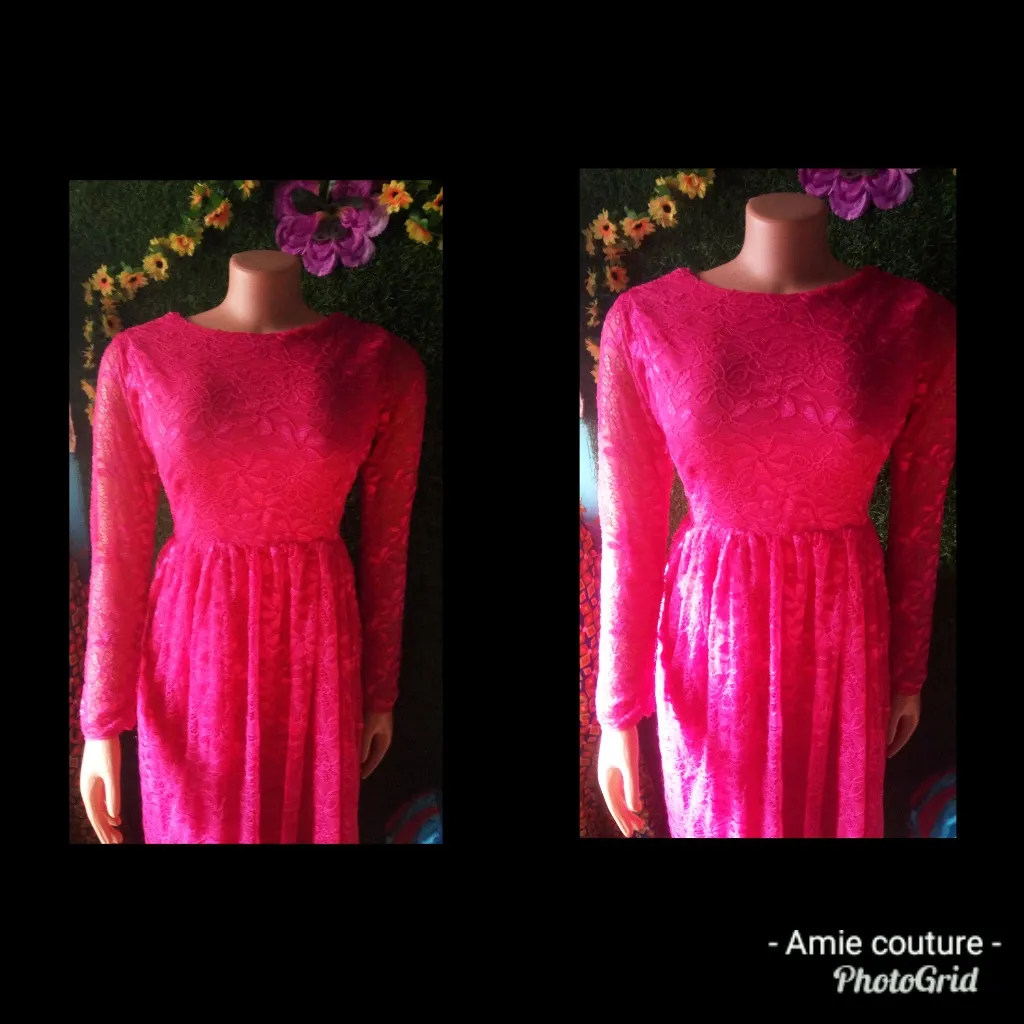
And this was the outcome of the fabrics.
This particular fabric does not require ironing as it's fragile and very soft and stretchy.
I hope it came out well, I'm sorry the picture wasn't clear enough, I could use my flash as my phone battery was very low as at then.
Thanks for reading.
All images are mine, cut and sewn by me.