Hi all 😊
I wanted to share with you today my Airbrushed Portrait and show you a few progress steps / step by steps of how I created it. (SBS)
This beautiful Smile should be shared I thought in these times… 😊
As this was a while ago 2012 to be precise… I don’t have many steps of it I’m afraid, but still found these 9 photos to show you.
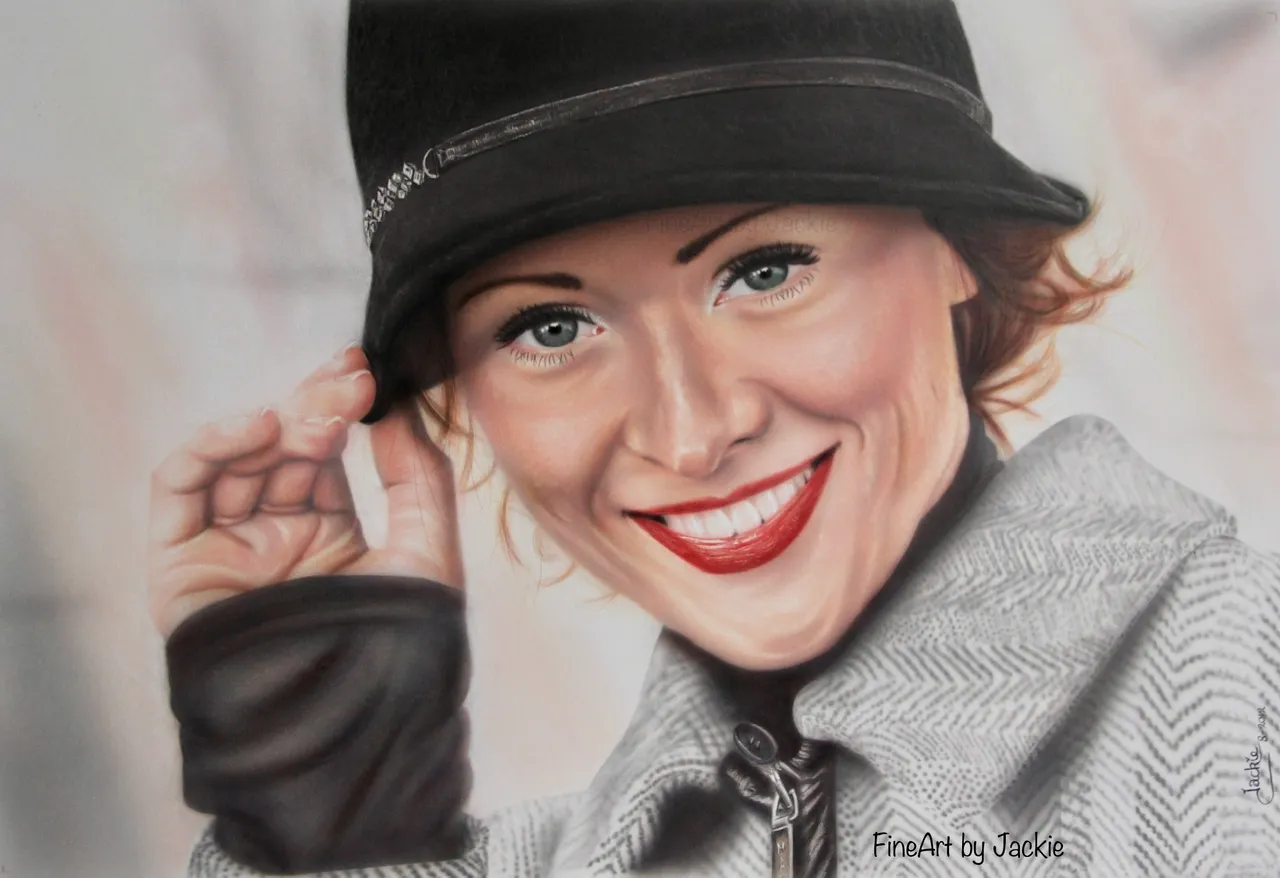
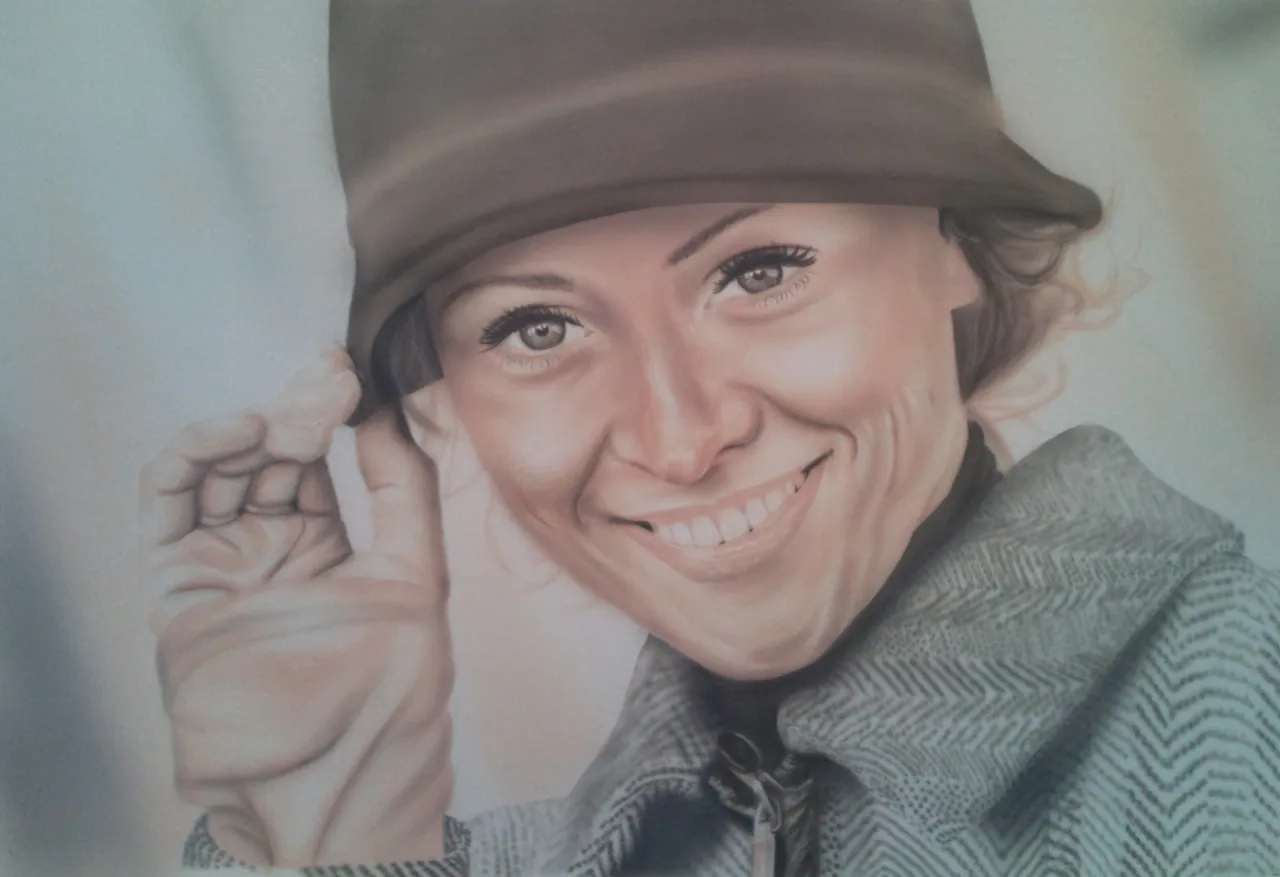
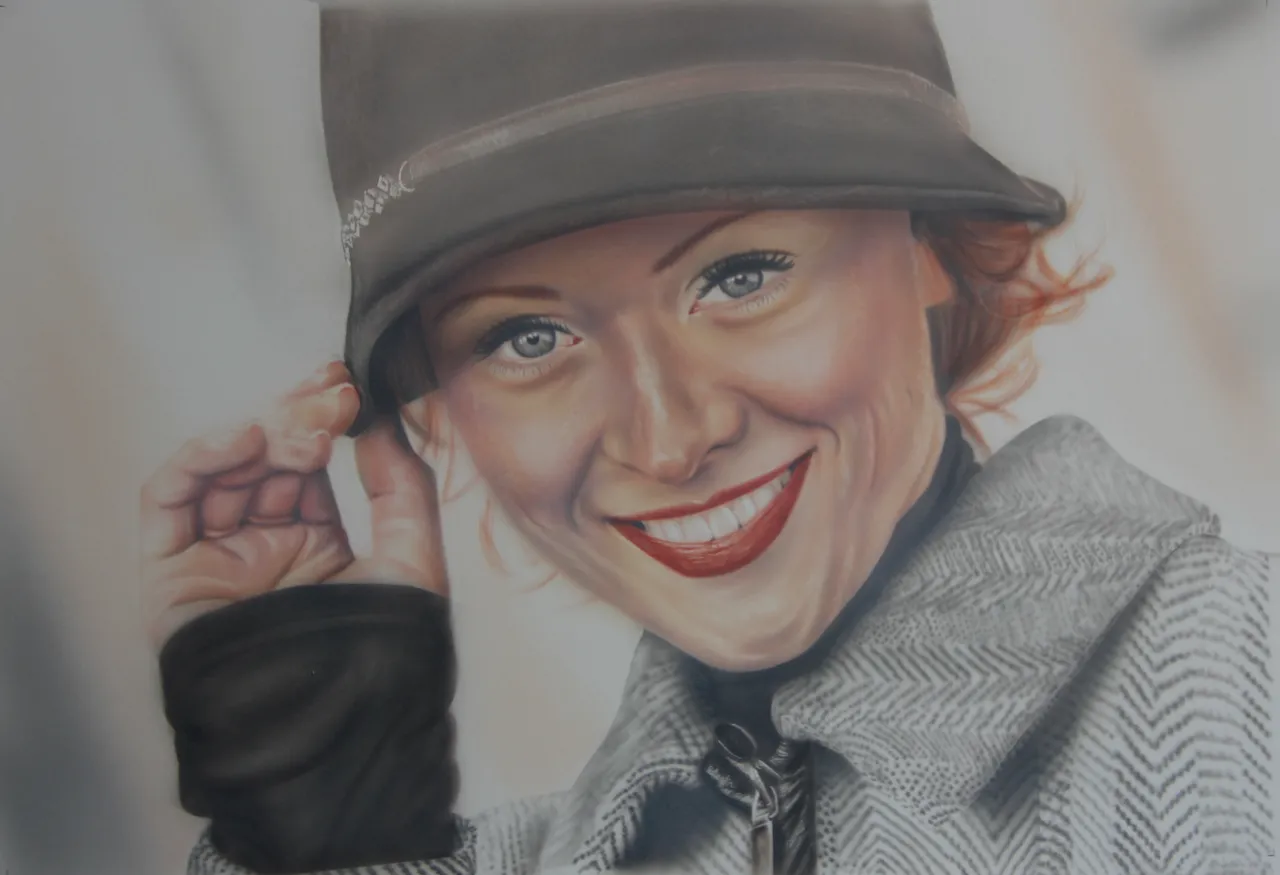
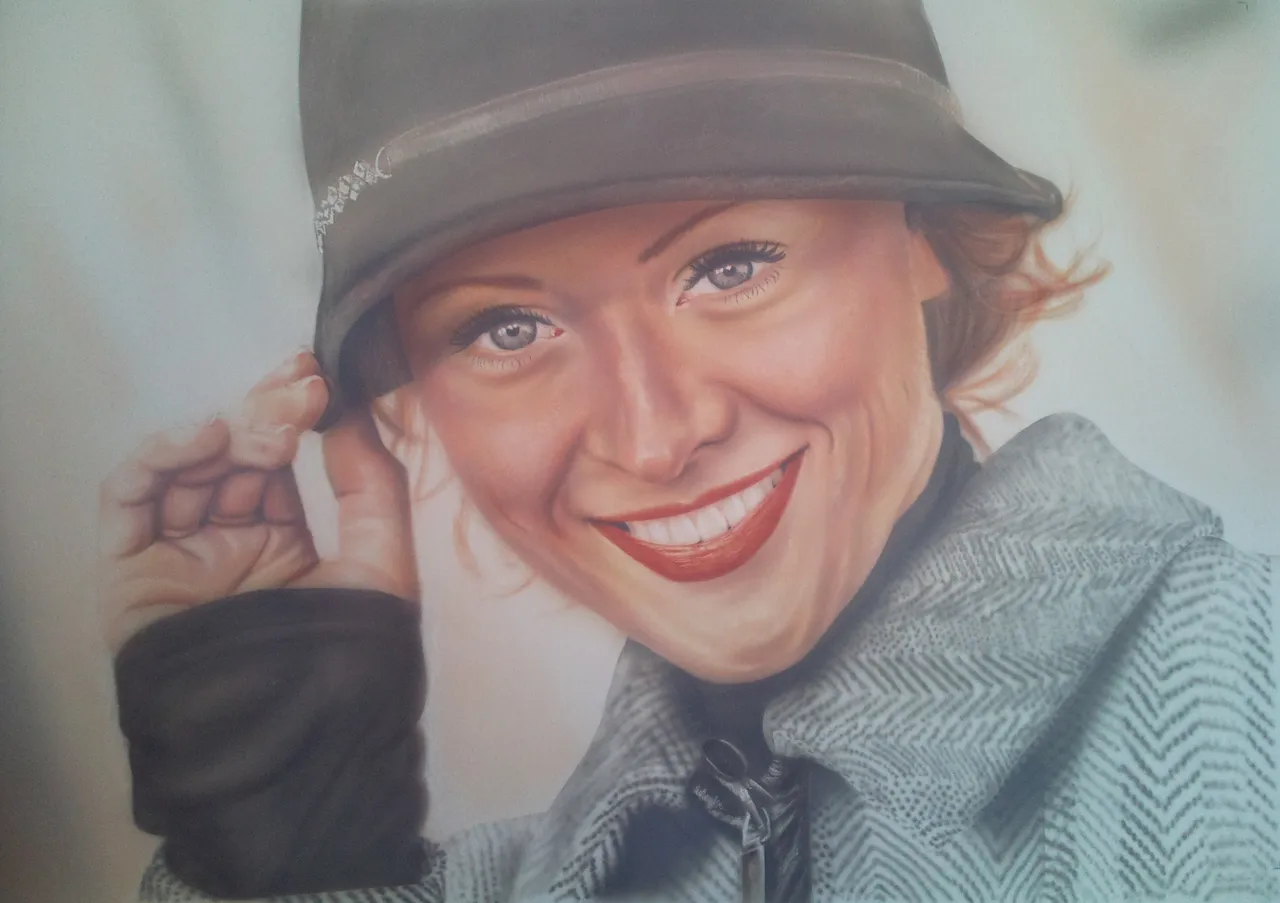
Title: ”Hat”
I finished this painting in August 2012 and it is one of my earlier Airbrush/ Artworks.
I started my art in 2011, I am self taught. I love to share my progress steps of my artworks with you all, all around the world. 😊
This original painting is still available for purchase.
I also have all kind of prints from this painting, on different objects, if you would like a print from it have a look In my PRINTSHOP!
~The Dimensions are 30 x 43 cm / 11.8 x 16.9 inch
~Underground is an illustration board.
~Acrylic airbrush paints I am using are from Schmincke.
~reference photo used with permission from Elvira Timoshkina.
~It depicts a young woman, with a beautiful hat and a gorgeous smile.
My airbrush gun
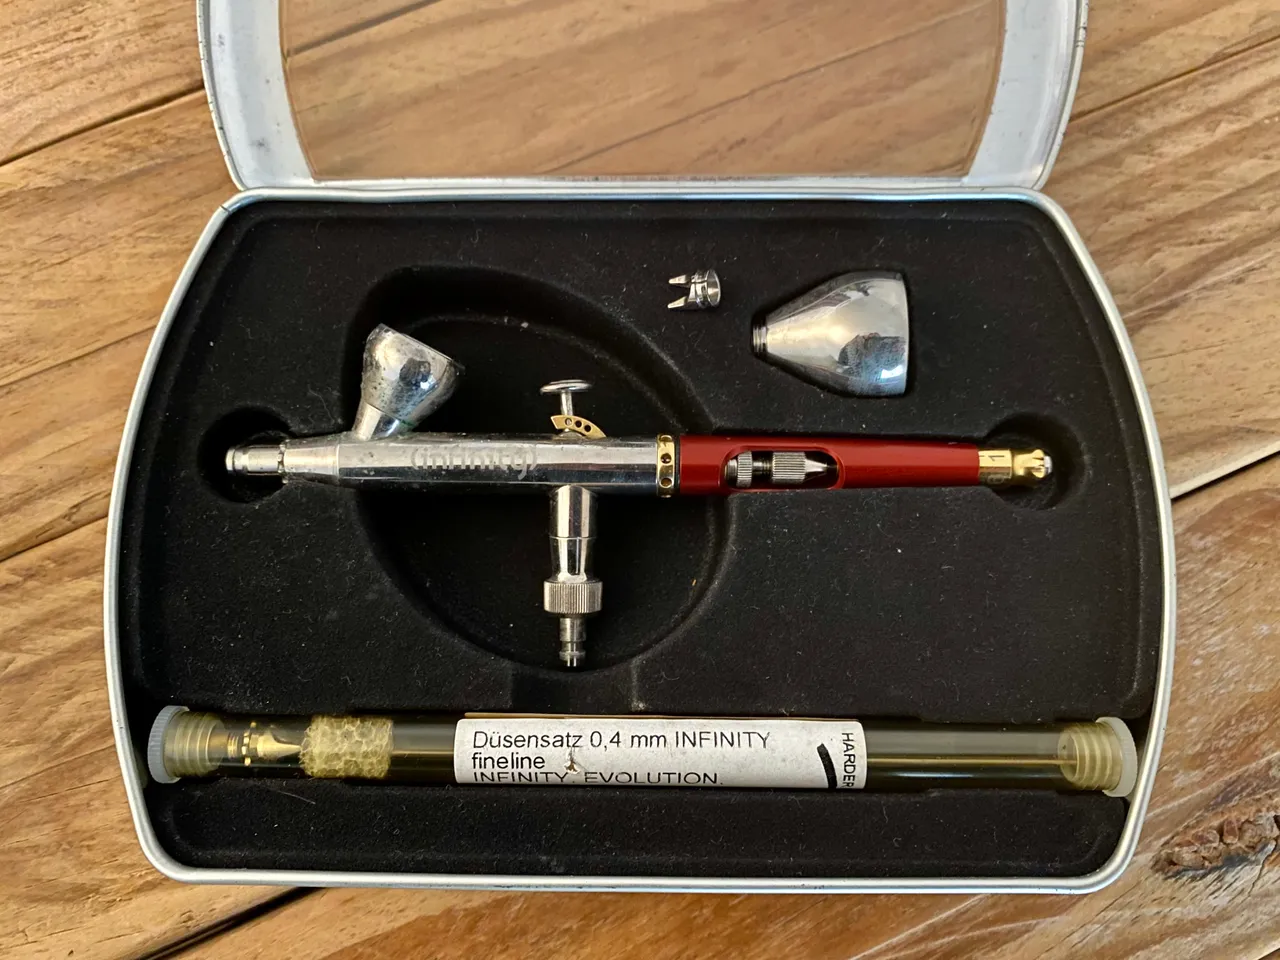
Harder & Steenbeck Infinity 0.15 and 0.4 mm needle. It’s 2 in one. Meaning it can be used for very detailed work, like airbrushing hair-lines… or used for backgrounds, bigger surfaces with the larger needle.
As I just love details and fine works I tend to only use the 0.15 mm needle.
My airbrush paints
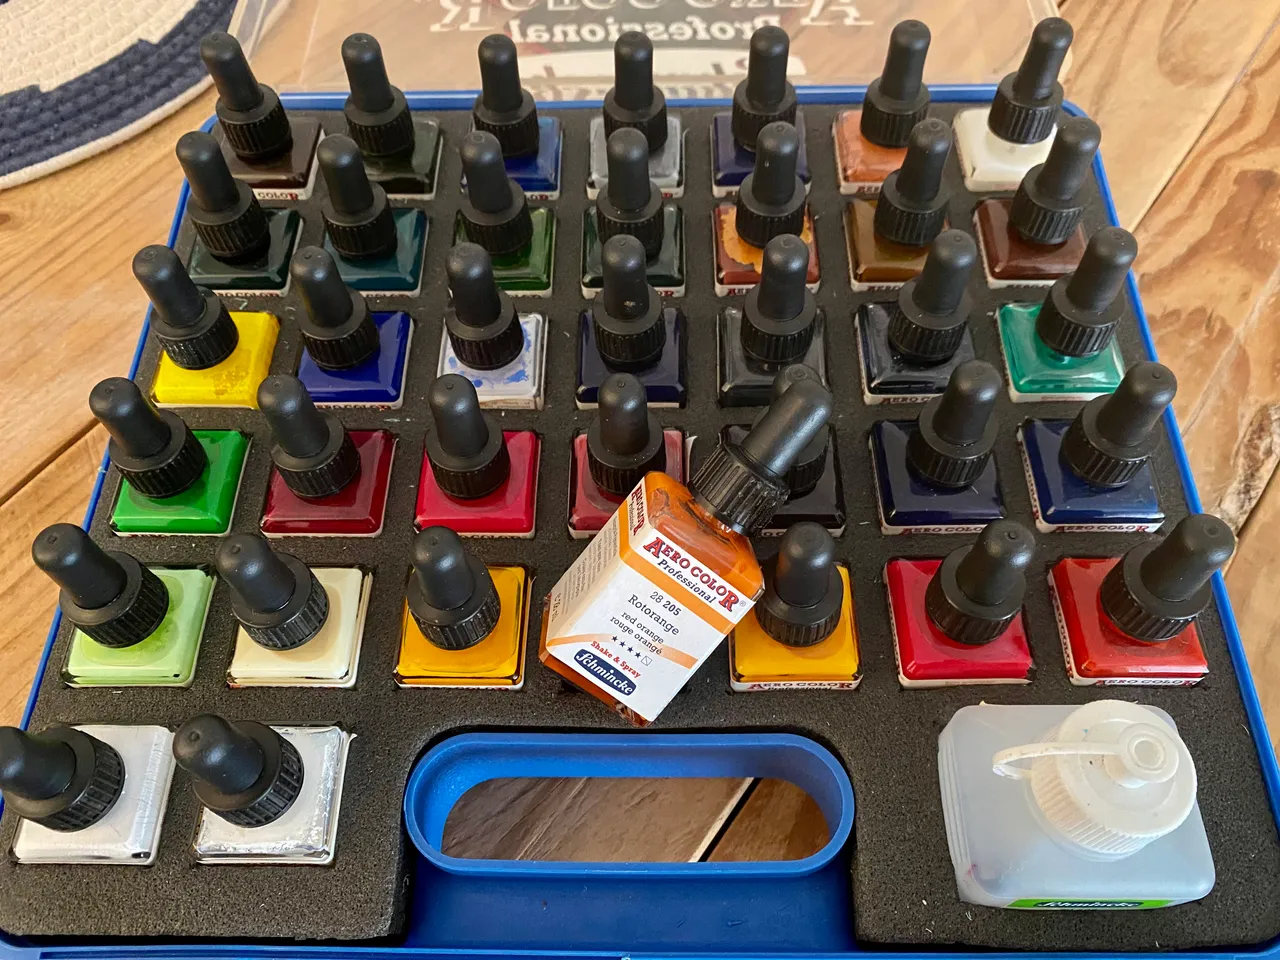
Schmincke Aero Color Professional.
This artwork is fully airbrushed with my airbrush gun and my acrylic airbrush paints. No brushes are used.
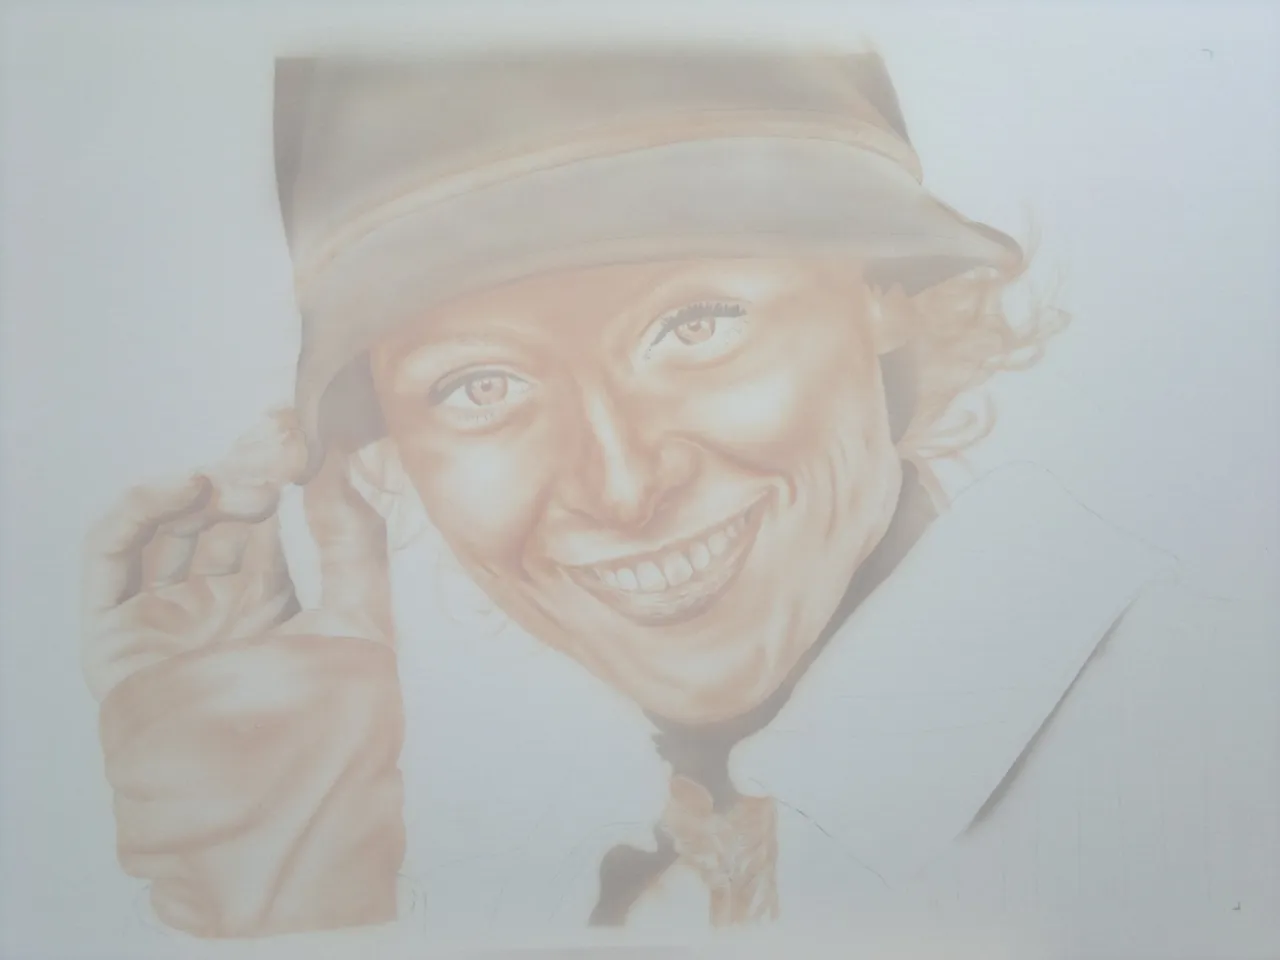
Step 1
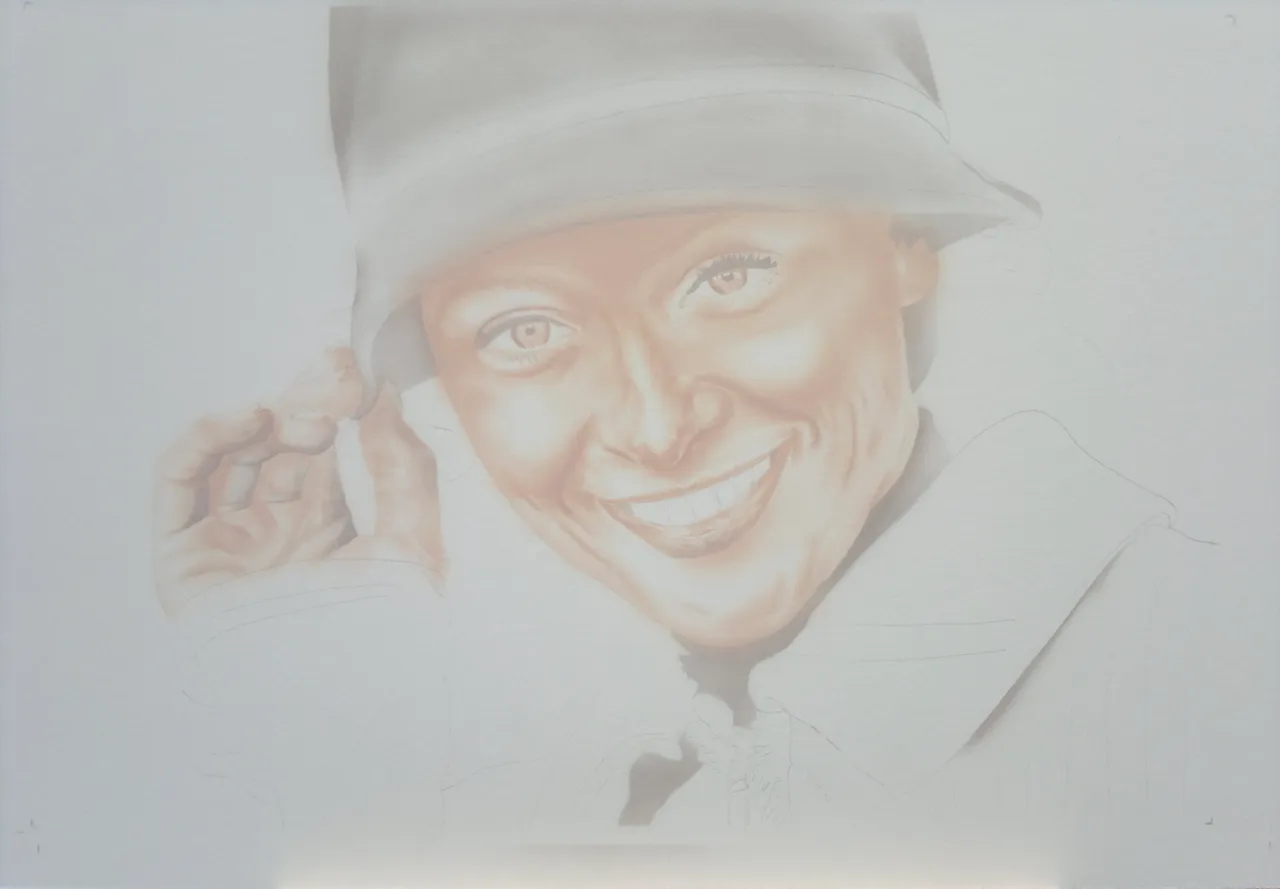
In this portrait I build up many layers… here I used a shadow colour and flesh colour for the underlayers. I kept in mind already where the dark and light areas are and details.
Step 2
Second layer over it. Same colours. Now I start erasing details and with my airbrushgun I spray paint lightly over it. To create dimensions, structures and more detailed. You see them through the layers.
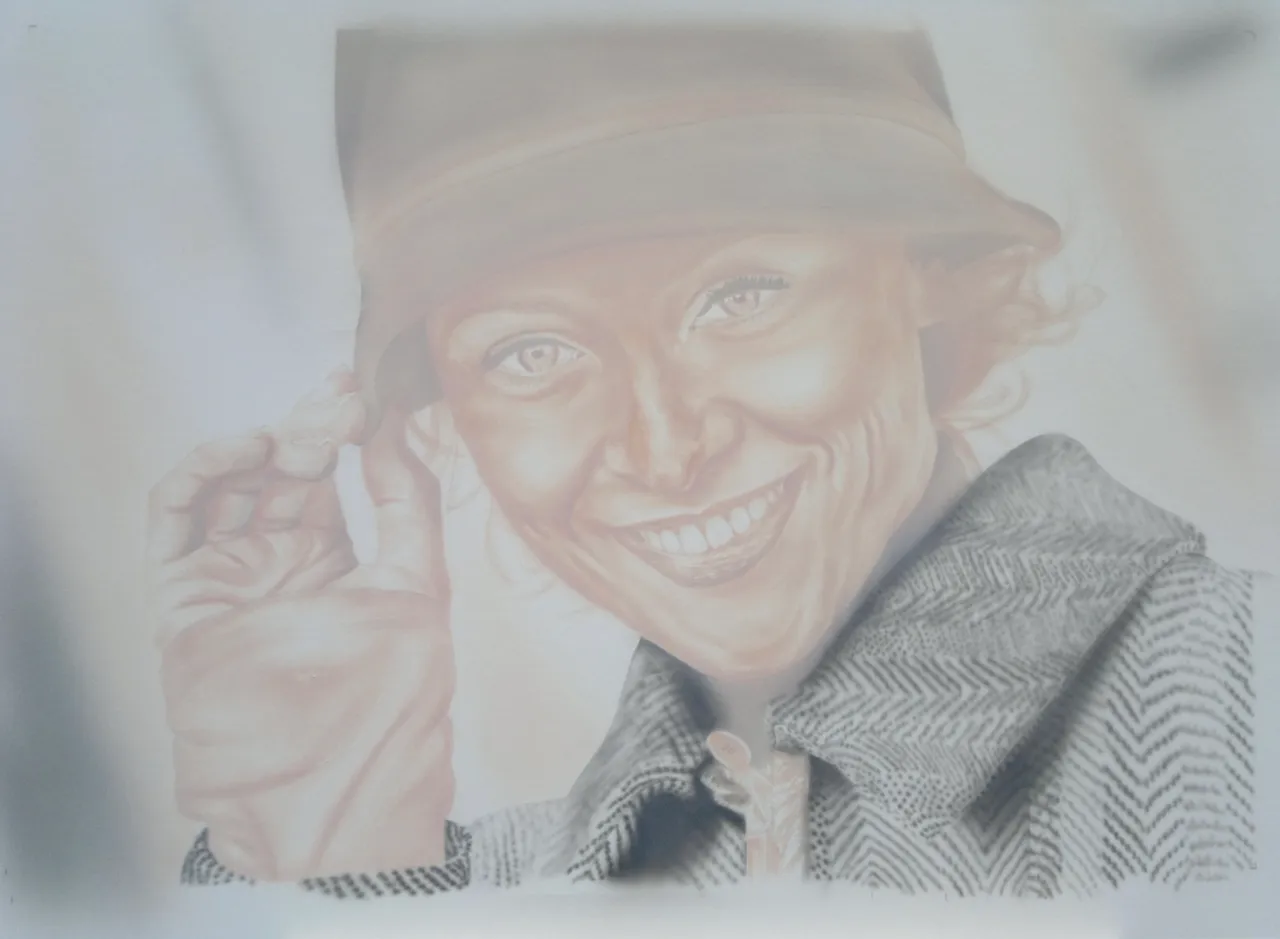
Step 3

Here I started the details of her jacket those are all very fine dots made with the airbrush. Remember I do not use brushes. Just air and paint with the help of my compressor and my airbrush gun.
Step 4
More layers added, and I started to build up more shadow parts.
Step 5
Delicate details like eyes are added, but just under layers… more layers and details will follow.
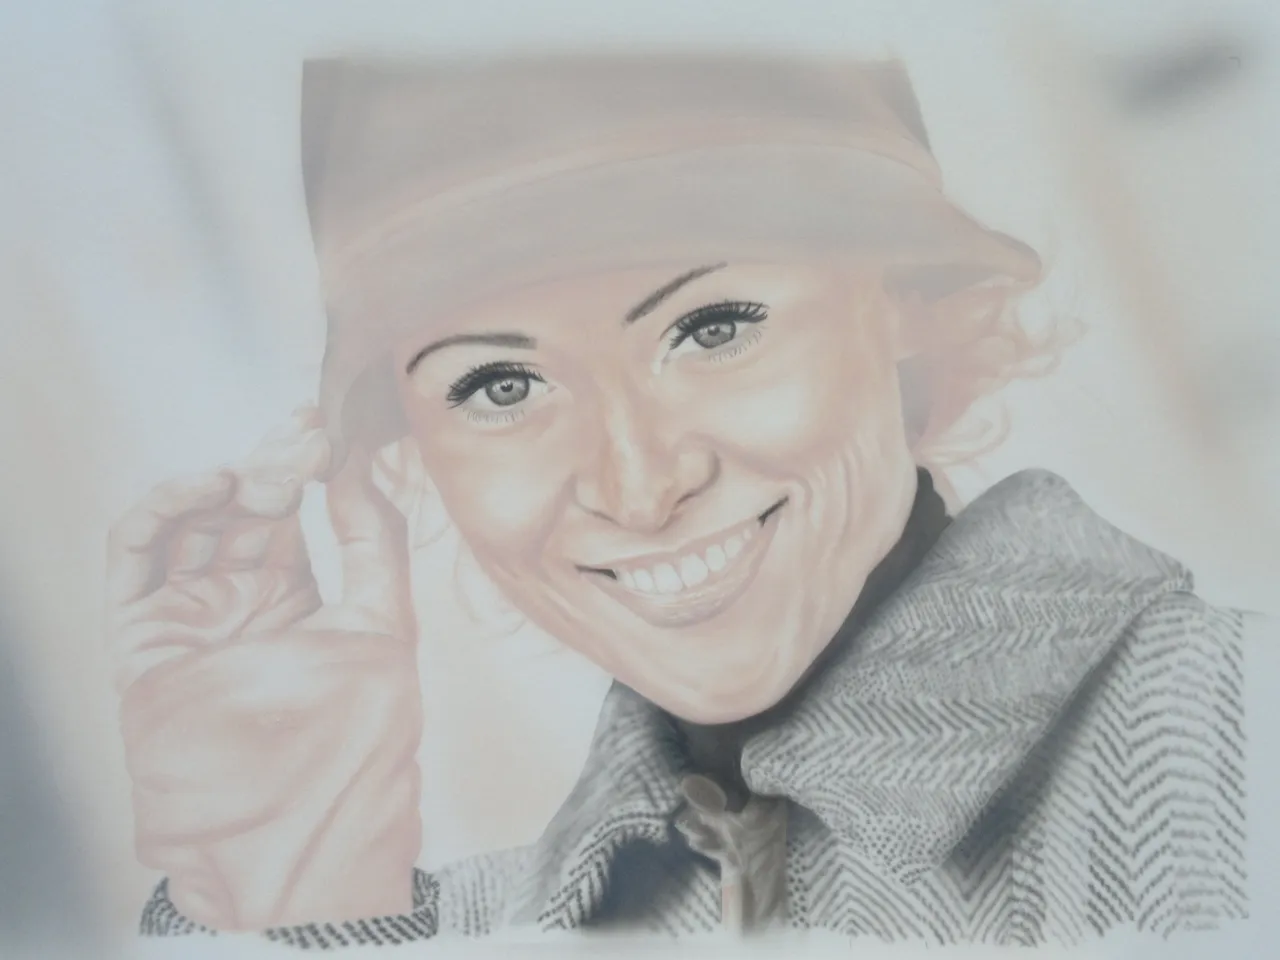
Step 6
Here I started to build up the skin colour. Adding warm or cold colours.
Step 7
As I didn’t like the shift of the colour from the skin. I have to colour correct it as I go further.
Step 8
Almost there… more details added. Now it is to red. So I colour correct it with green. With the next step as result:
Step 9 Finished.

TITEL: “Hat”
I hope you enjoyed my Step by Step of this airbrushed portrait/ art work. Thank you for looking and reading 😊 🙏🏻
Any questions or comments, let me know. Always happy to help and talk about art 🎨
Have a great Monday all 😎 Stay Creative!
Grtz Jackie

The divider is Created by SilverFish / @ mondoshawan
Unless stated otherwise: All art and photos used in my posts are taken, created and owned by me. If you wish to use any of my photographs, please contact me first. As I have used some commercially myself. We don’t want that you or somebody else gets into trouble 😉 So please don’t use them without my consent.