Hi all 😊
I wanted to show you my Gouache painting and some progress steps / step by steps of it today. (SBS)
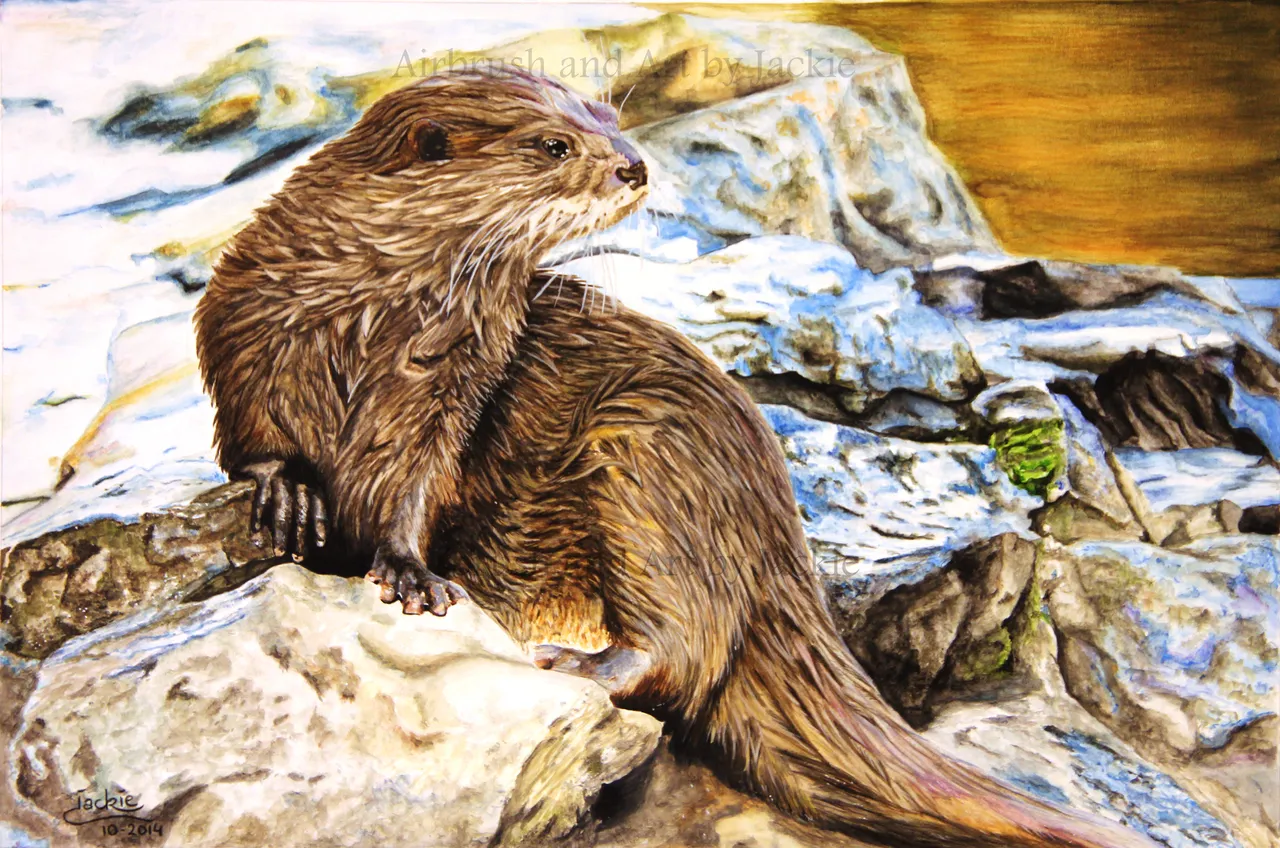
Title: ”After the Plunge”
I finished this painting 10-2014 and it is one of my earlier Artworks. This painting was started April 2013… it had a lot of breaks inbetween as big life changes happened. I did finish it over time 😎
I started my art in 2011, and I am self taught. I love to share my progress steps of my artworks with you all and the world.
This original painting is still for sale and all kind of prints from this painting, on different objects, are available at My Pixels Shop!
~The Dimensions are 41 x 27 cm / 16.1 x 10.6 inch
~Underground is an illustration board.
~Gouache paints I am using are from Dahler Rowney and Winsor and Newton.
~reference photo used with permission from Paul Sherman.
This painting is fully painted with the normal brushes and gouache paint. (I mention this as my earlier artworks are all airbrushed)
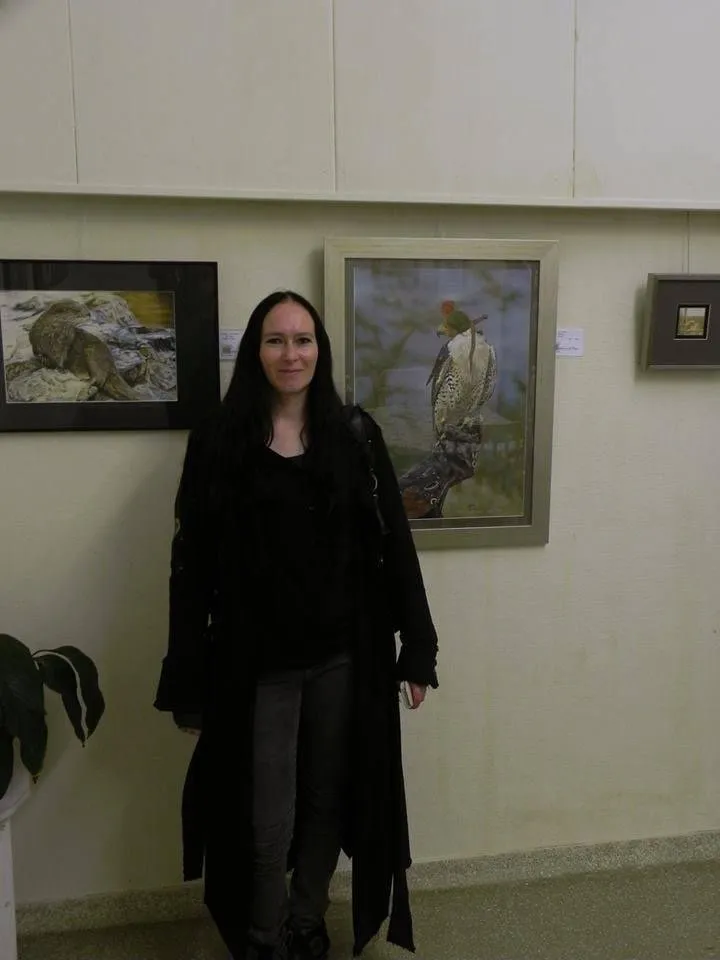
I had also a few Exhibitions with this painting in past years. Here you see an photo of me standing next to it during “Wild in de Natuur” November 2014 in Enschede NL (Plus some other paintings I created)
As said: Here are my SBS’s of creating it, Enjoy 😊
Step 1
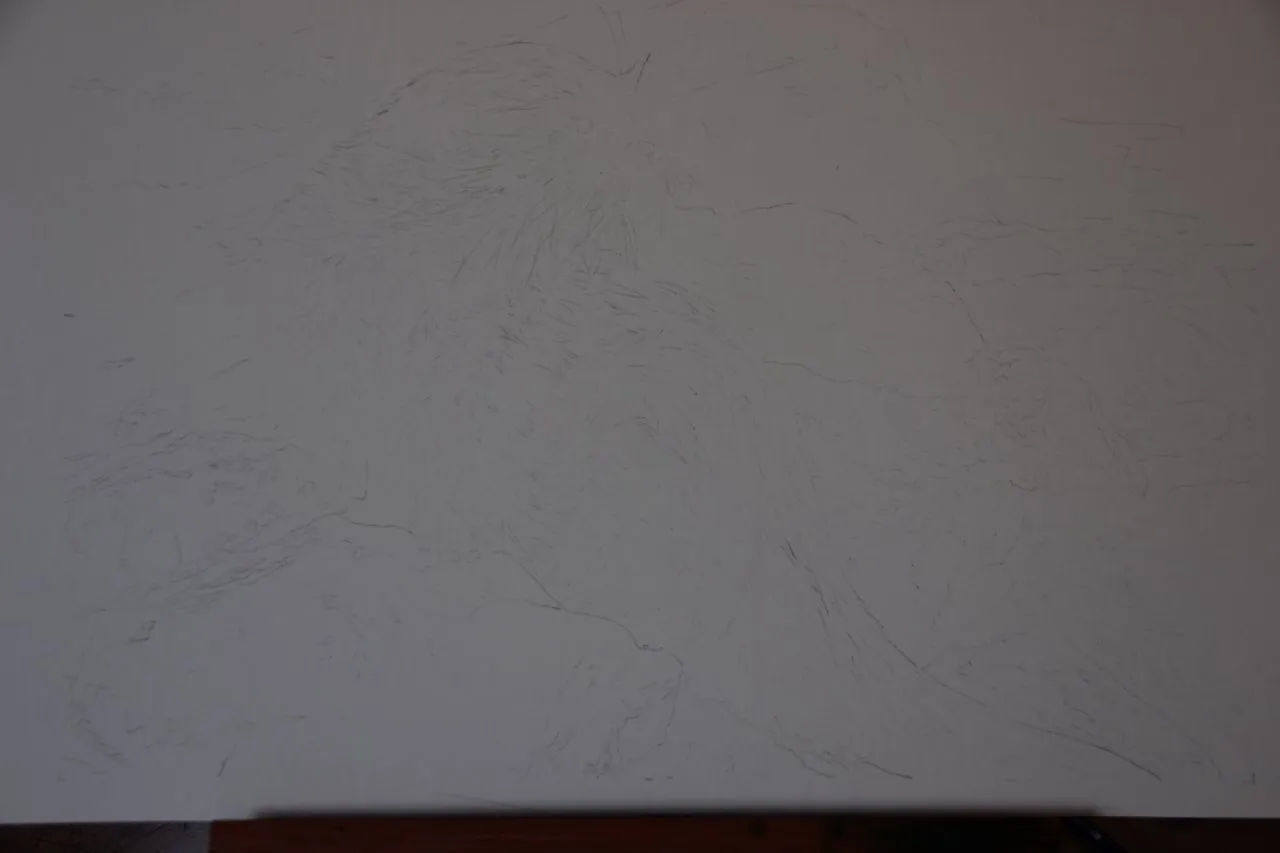
I sketched here with graphite pencil the main features of my subjects. The rocks and the Otter.
Step 2
I started the background by painting with the gouache paint as if it was watercolour paint. Thin and with layers to achieve the desired look and feel. I would move the paint around even after drying if needed. You can reactive gouache paints with water.
Step 3
More progress made on the background.
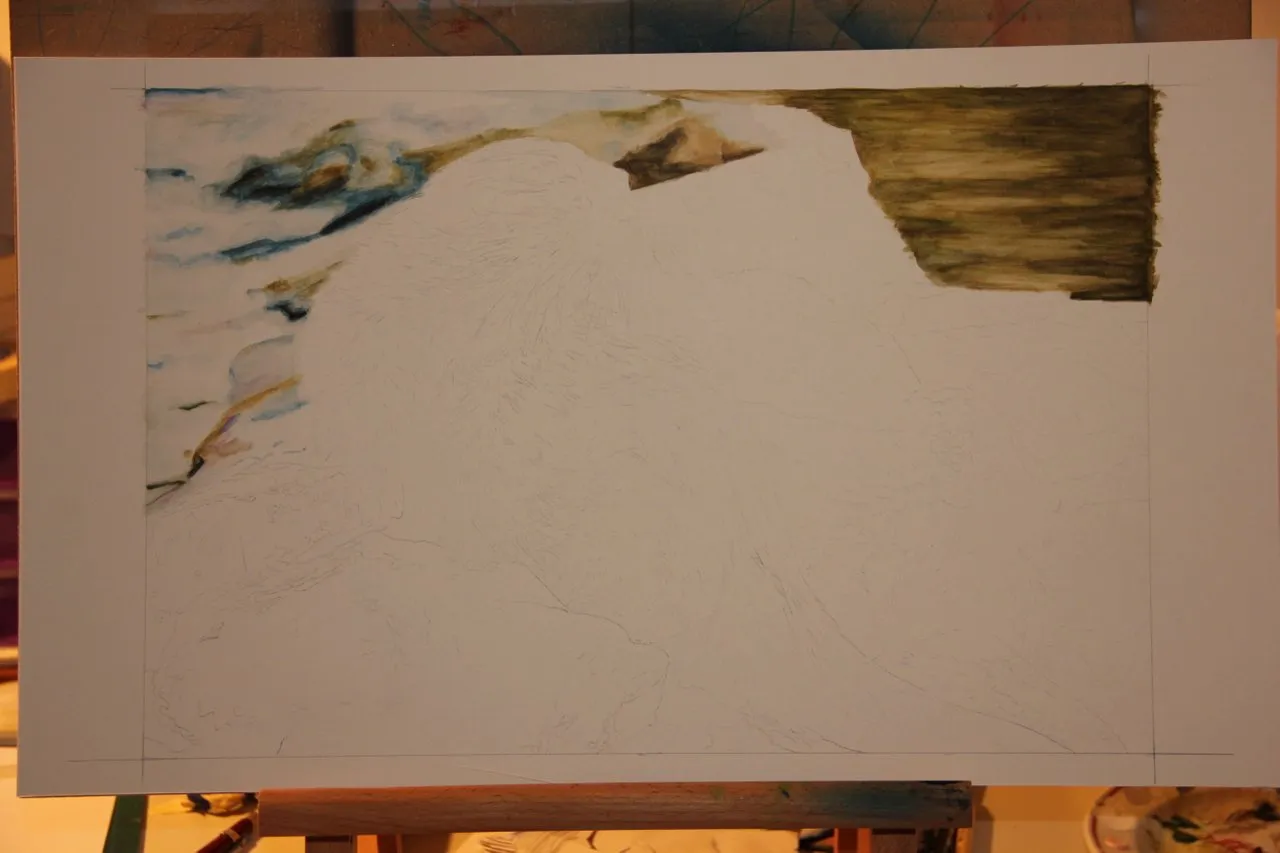
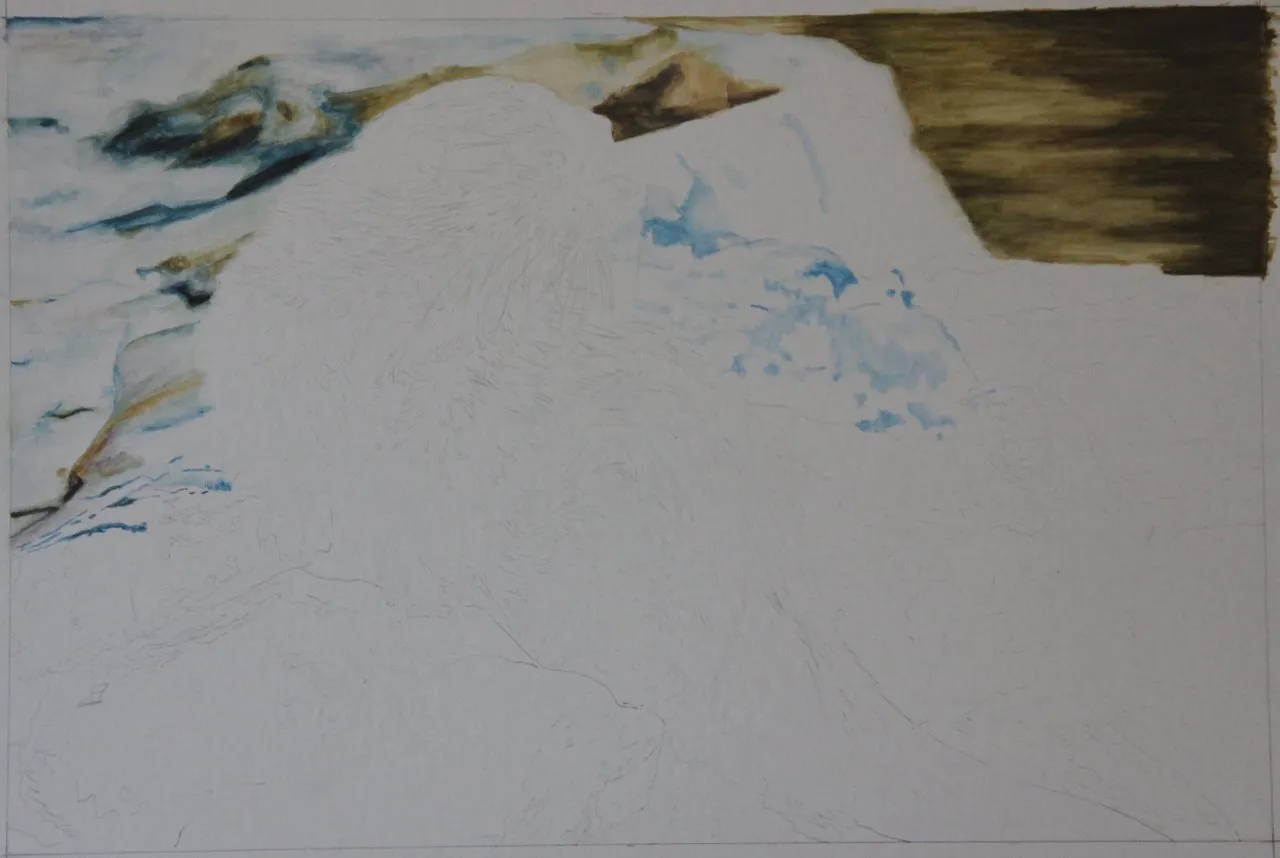
Step 4

Painted the wet rocks on the right side. My paint is thicker now.
Step 5
Little bit further.
Step 6
Started the rocks in the foreground. To give the otter some placement.
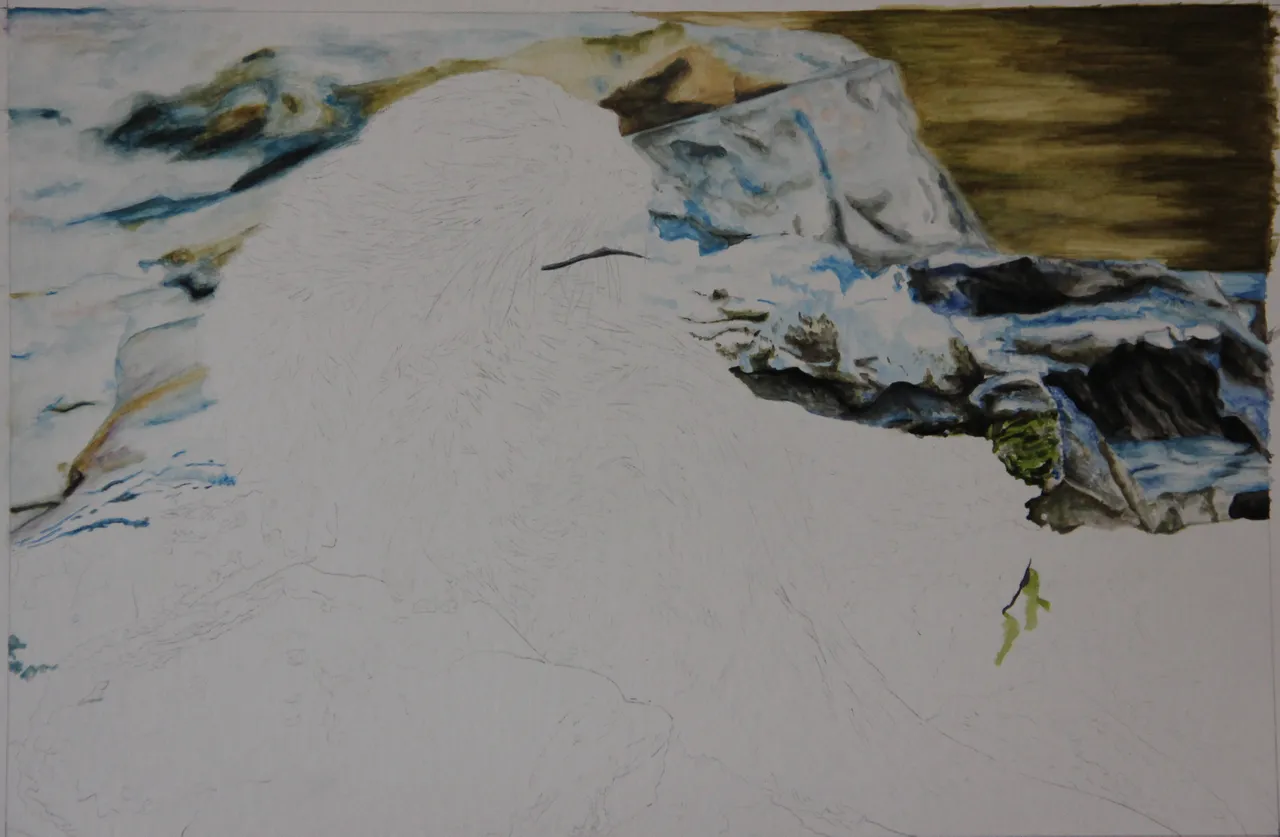
Step 7
Worked more on the rocks and background. Added lots of details…
Step 8
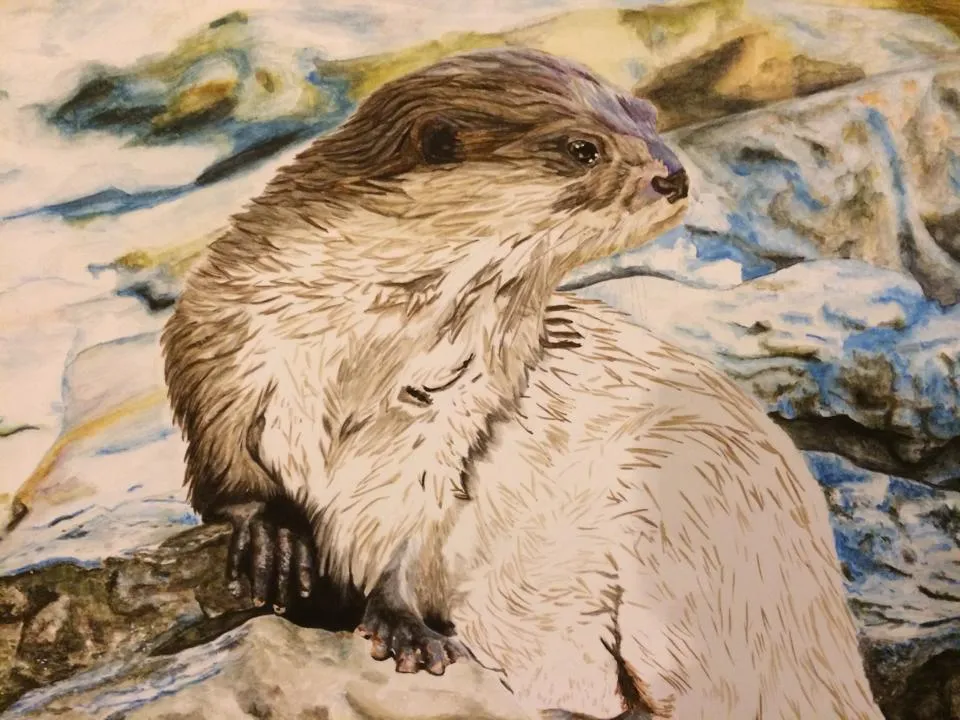
I started the head of the otter. As he just came out of the water I want to try to achieve a wet fur look. By using purple and white (mostly from the paper) I achieve this look on the top of his head. I also paint in, most of the direction of the fur to have a guide while painting.
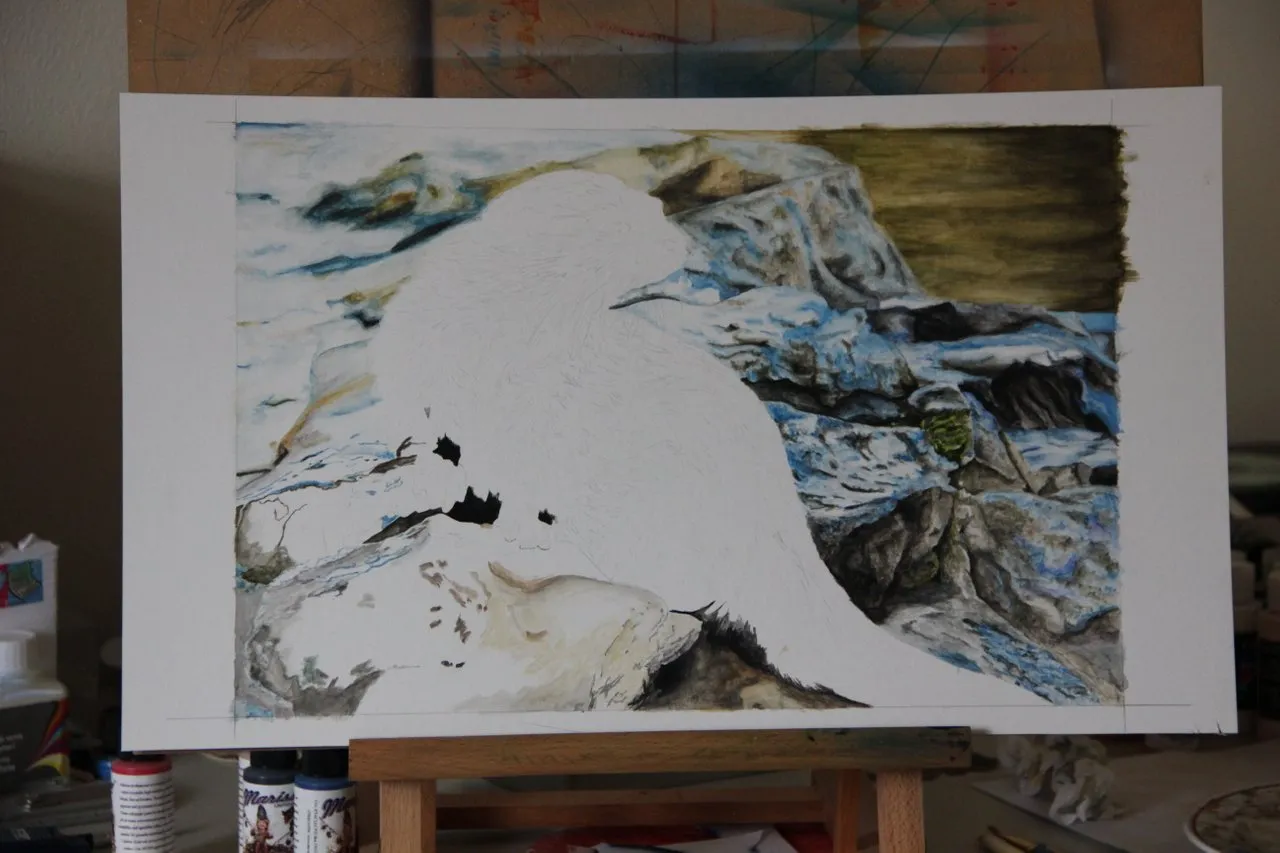
Step 9

Painted his wet feet and started the fur on the left side.
Step 9 detail
A little closer by to see some details.
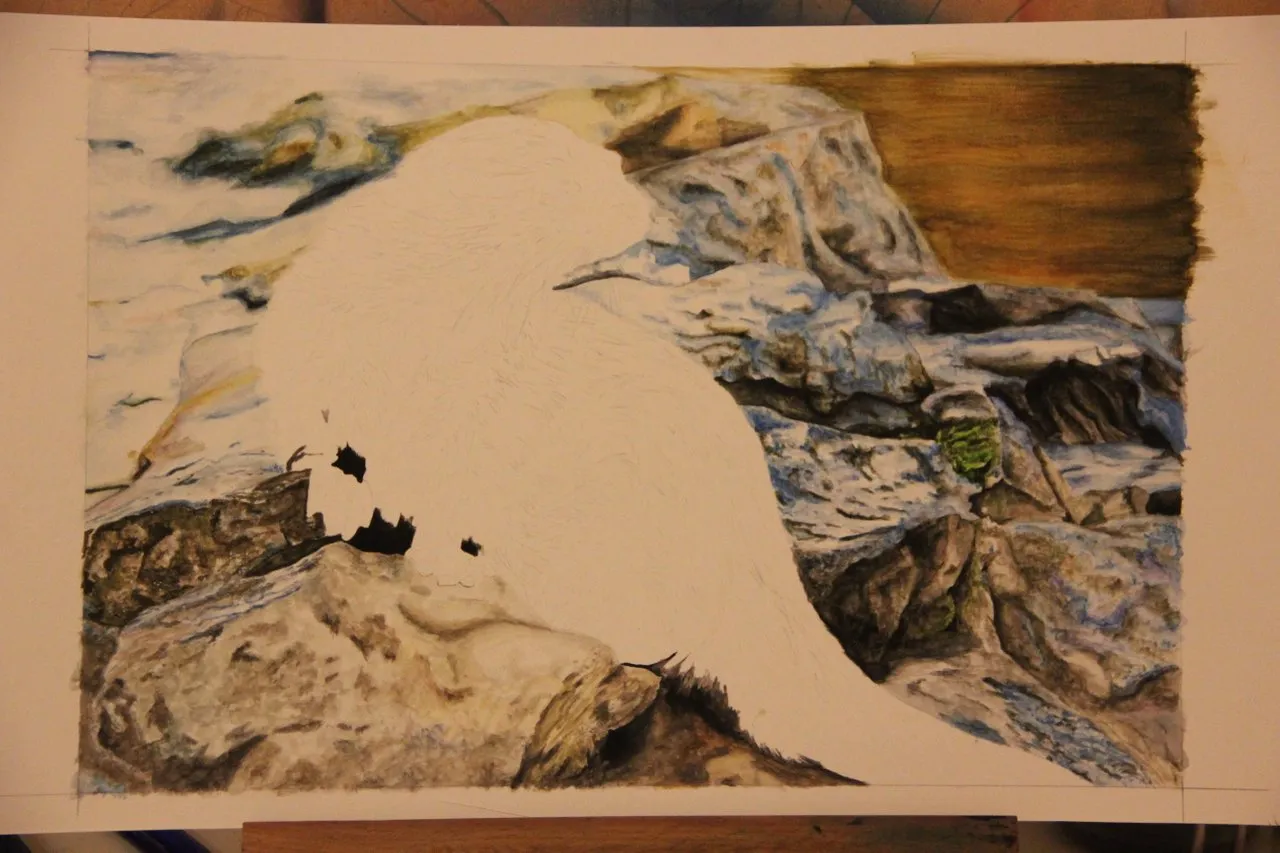
This photo is not of great quality I’m afraid, but the only one I have from this step.
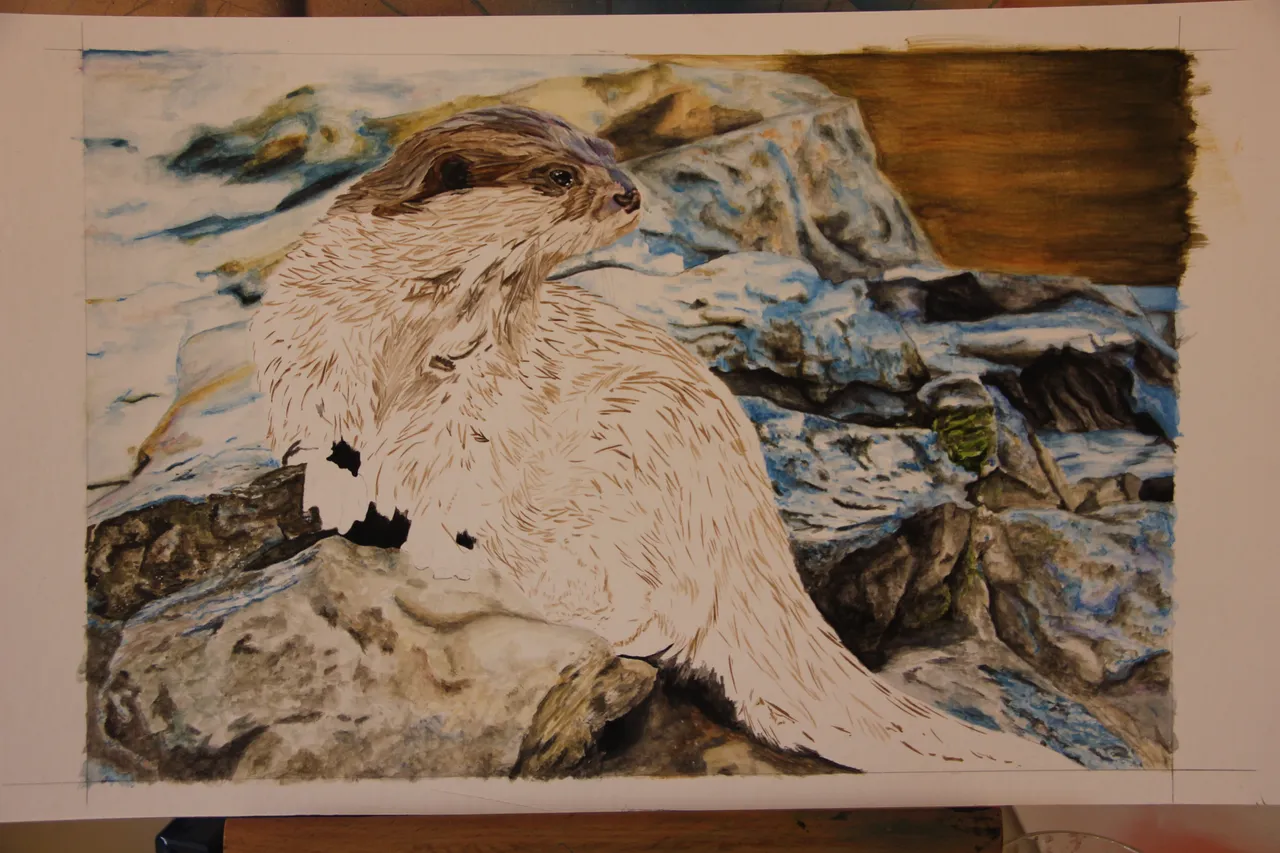
Step 10
I added more fur and followed the directions I placed before. Building the under painting of the fur up bit by bit.
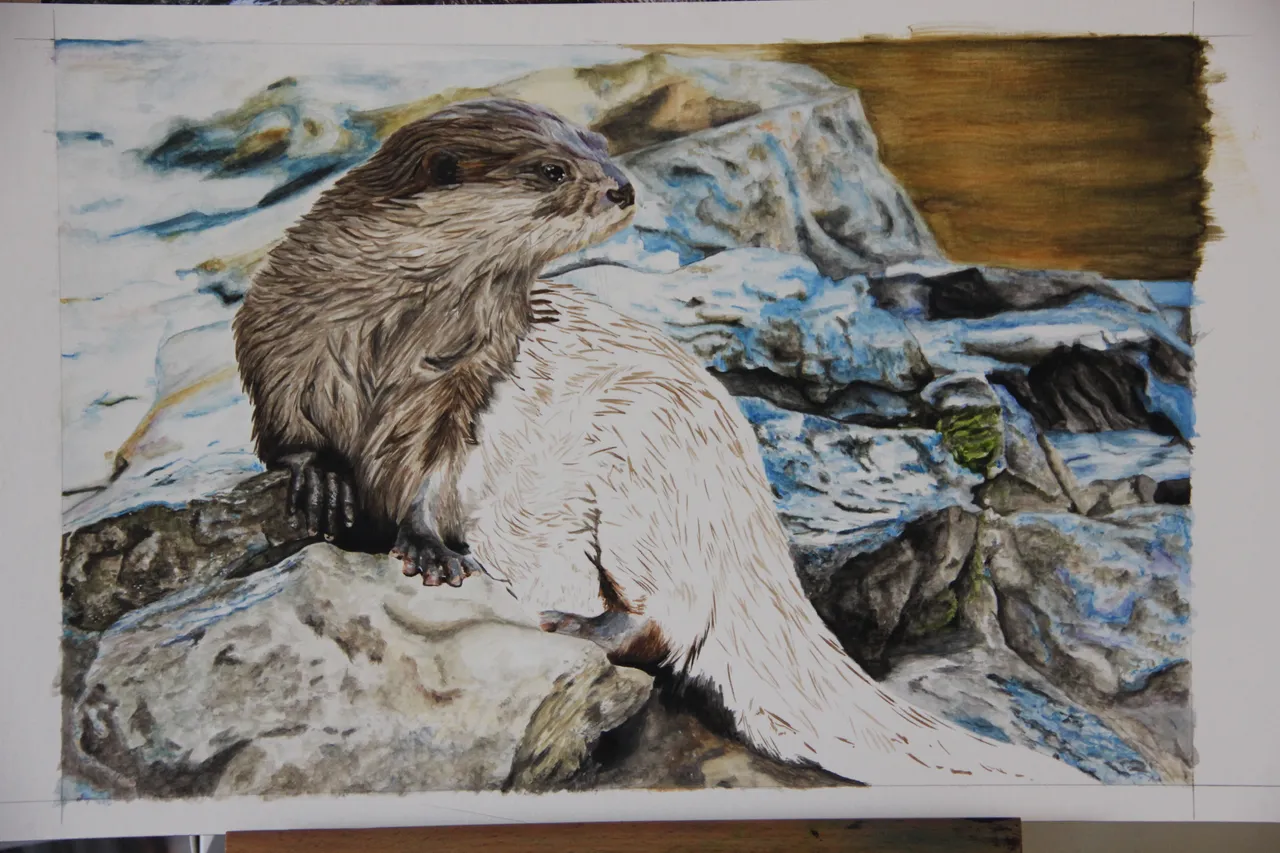
Step 11
More progress on his fur going along his body. Creating a large shadow to give depth.
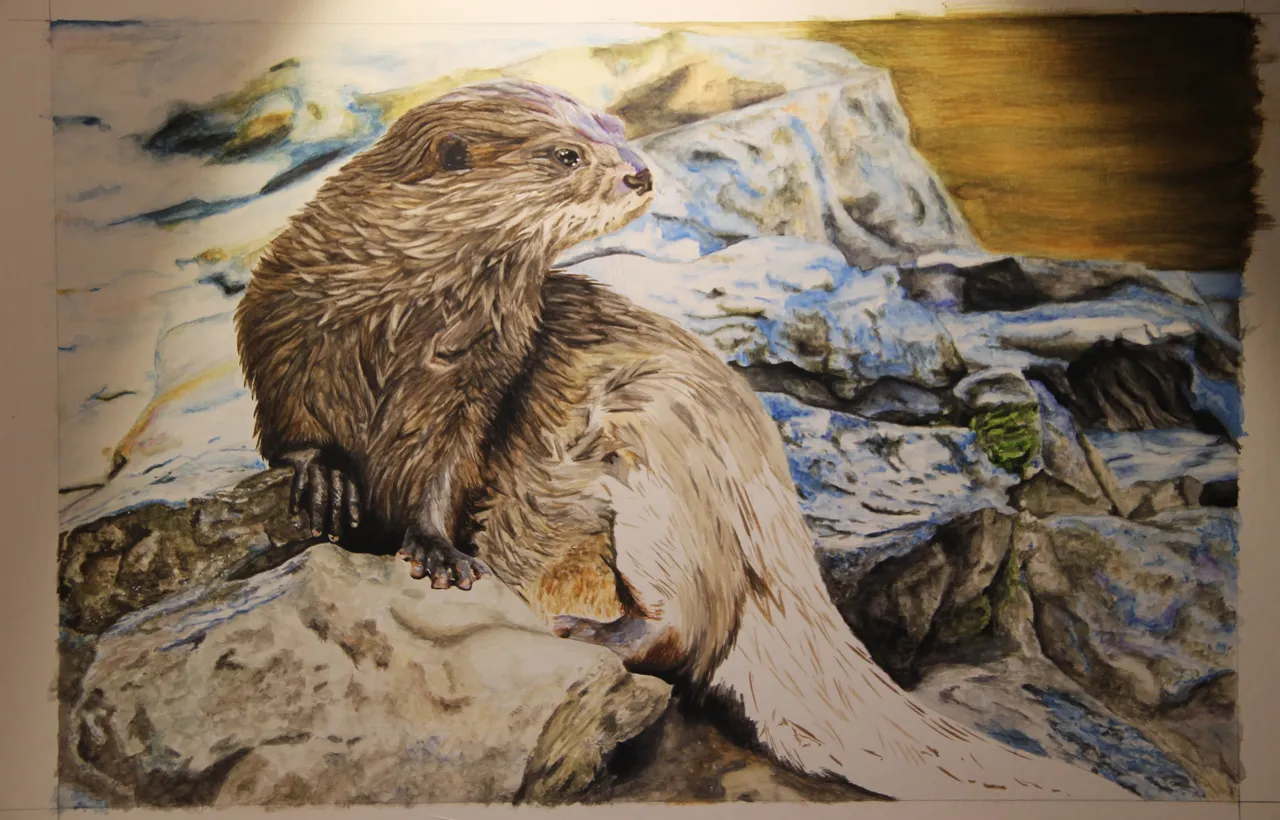
Step 12 Finished
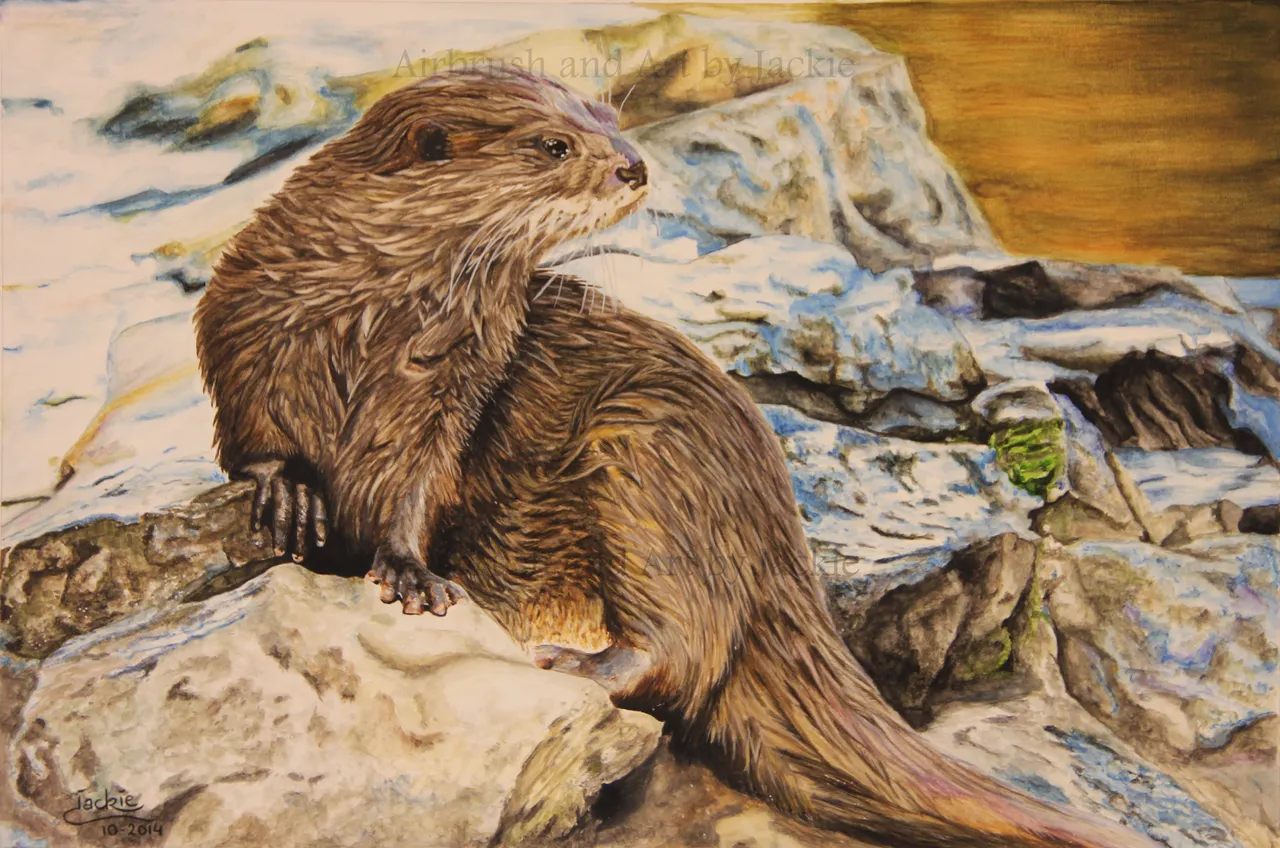
Title: ”After the Plunge”
Photo taken inside… so this is another version closer to the real colours:
Thank you for looking and reading. I hope you enjoyed my Step by Step of this Otter painting. 😊
With my future new artworks, I will make a more detailed step by step for you, maybe even videos.
Any questions or comments, let me know. Always happy to help.😊 And talk about art.
Have a great day all 😎👋🏻
Grtz Jackie
Unless stated otherwise: All art and photos used in my posts are taken, created and owned by me. If you wish to use any of my photographs, please contact me first. As I have used some commercially myself. We don’t want that you or somebody else gets into trouble 😉.