INTRODUCTION
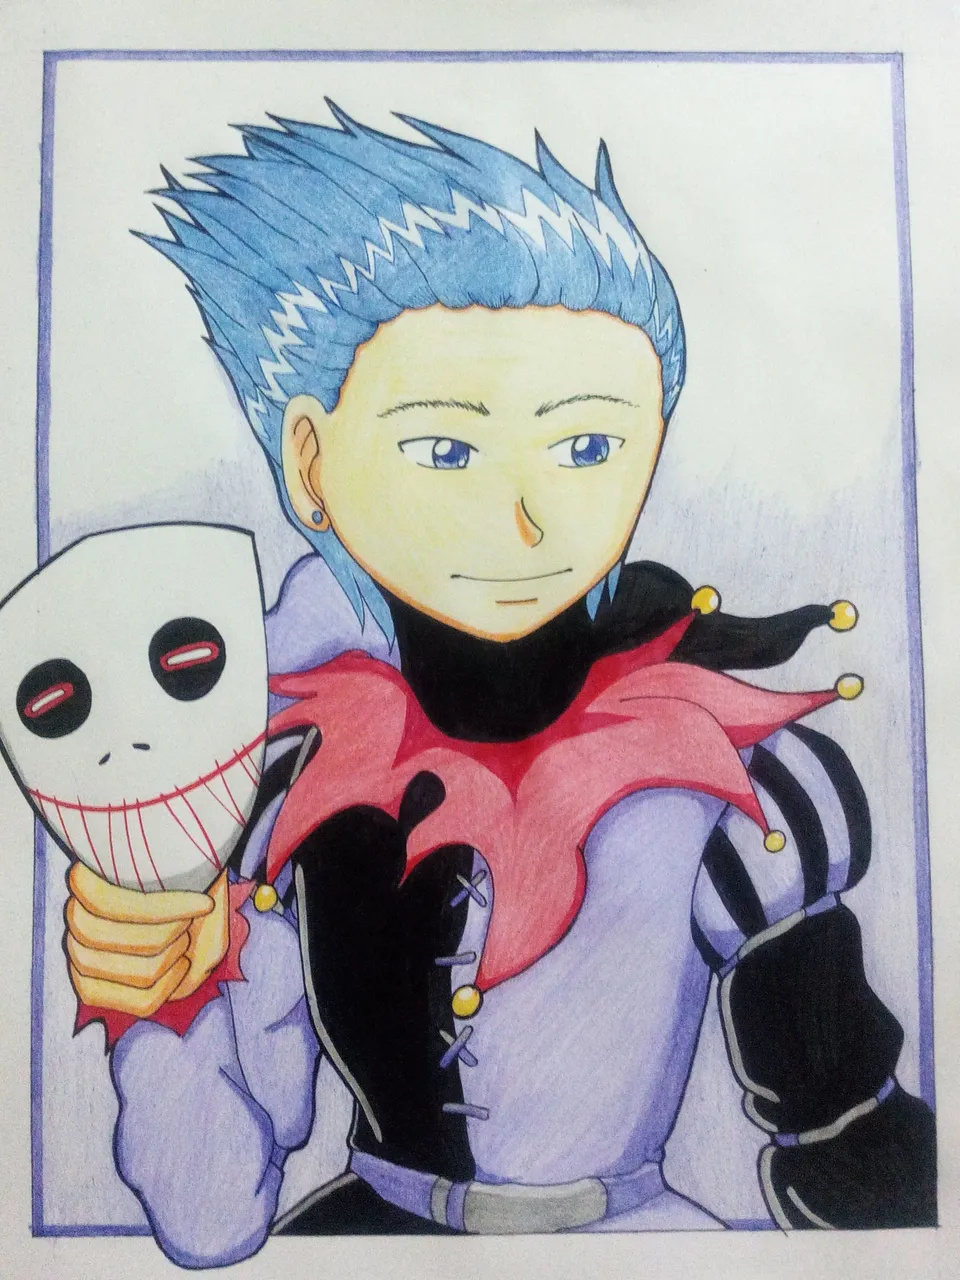
I outdid myself!
Twisted Jester is one of the good cards that I tried before in the death element.
He has decent damage, great speed and good level 1 ability called, "Snipe".
However, my real question is how does he look behind the mask? There's no official face of Twisted Jester so I made one.
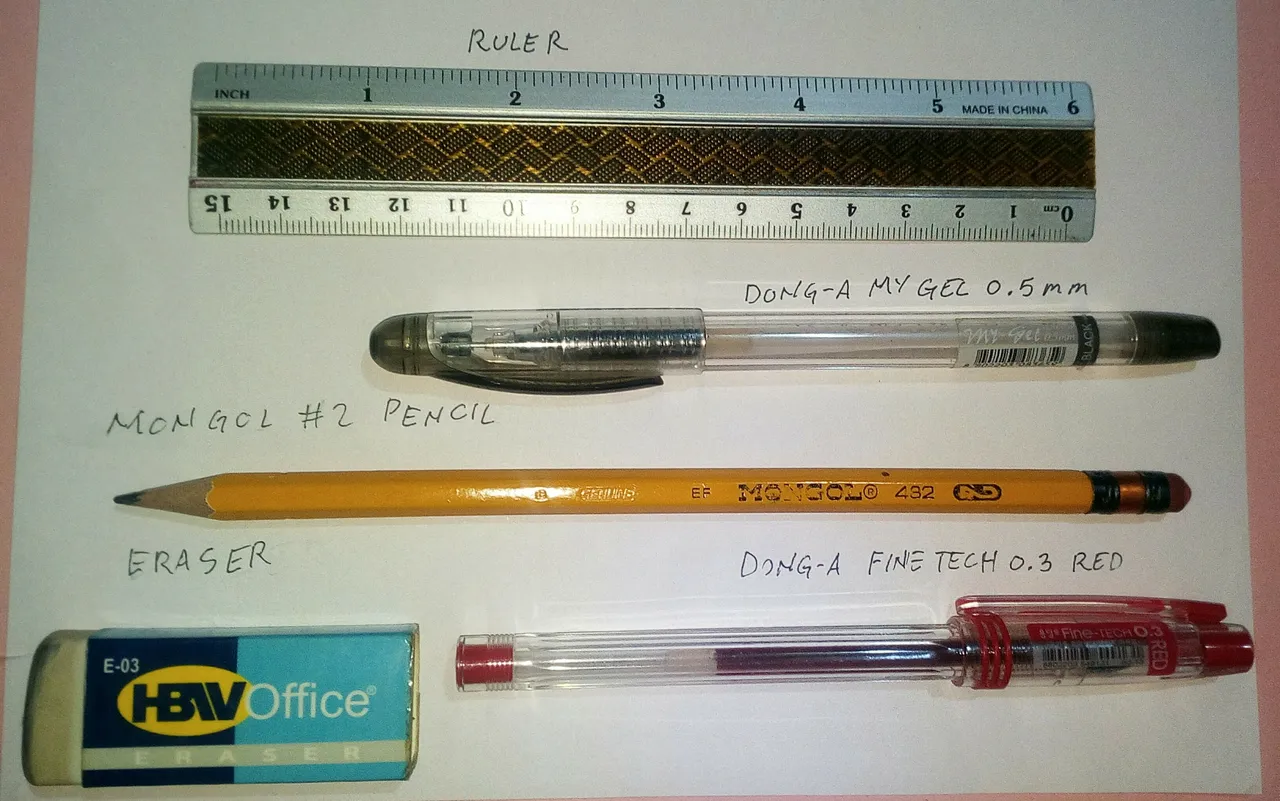
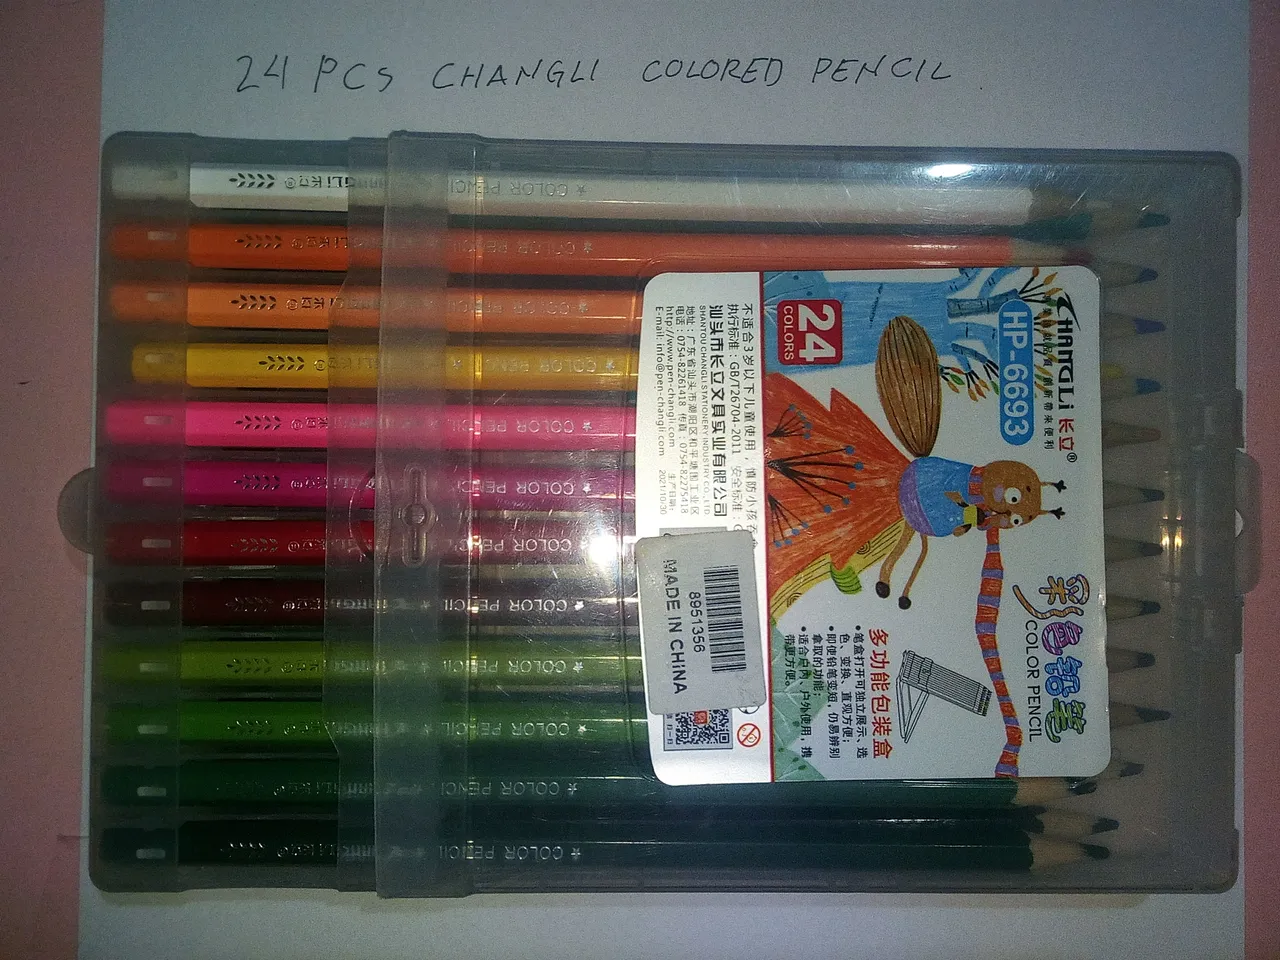
Sources and Materials
Below are the materials I used in this art.
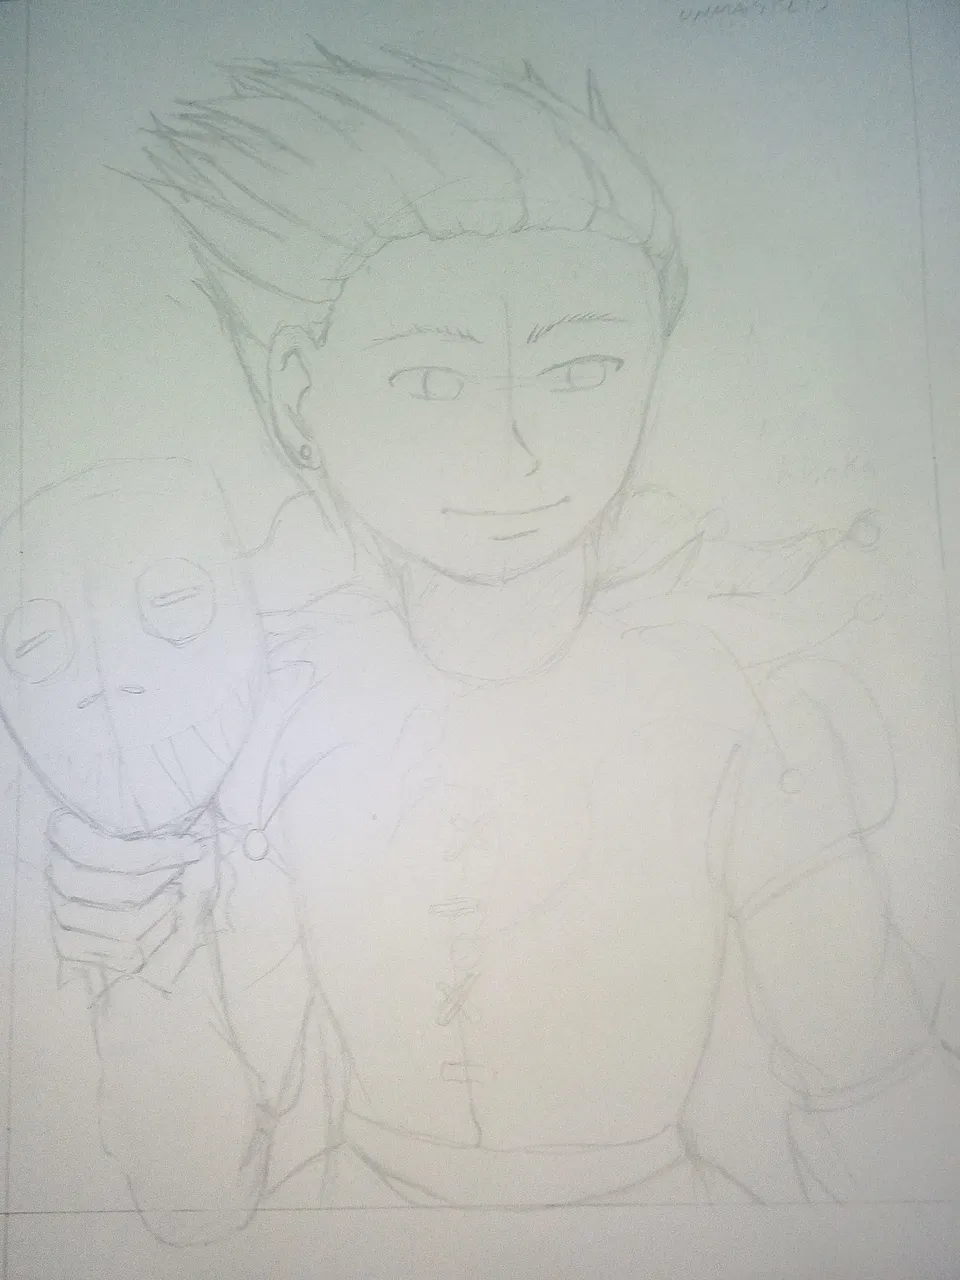
Step 1 Draft
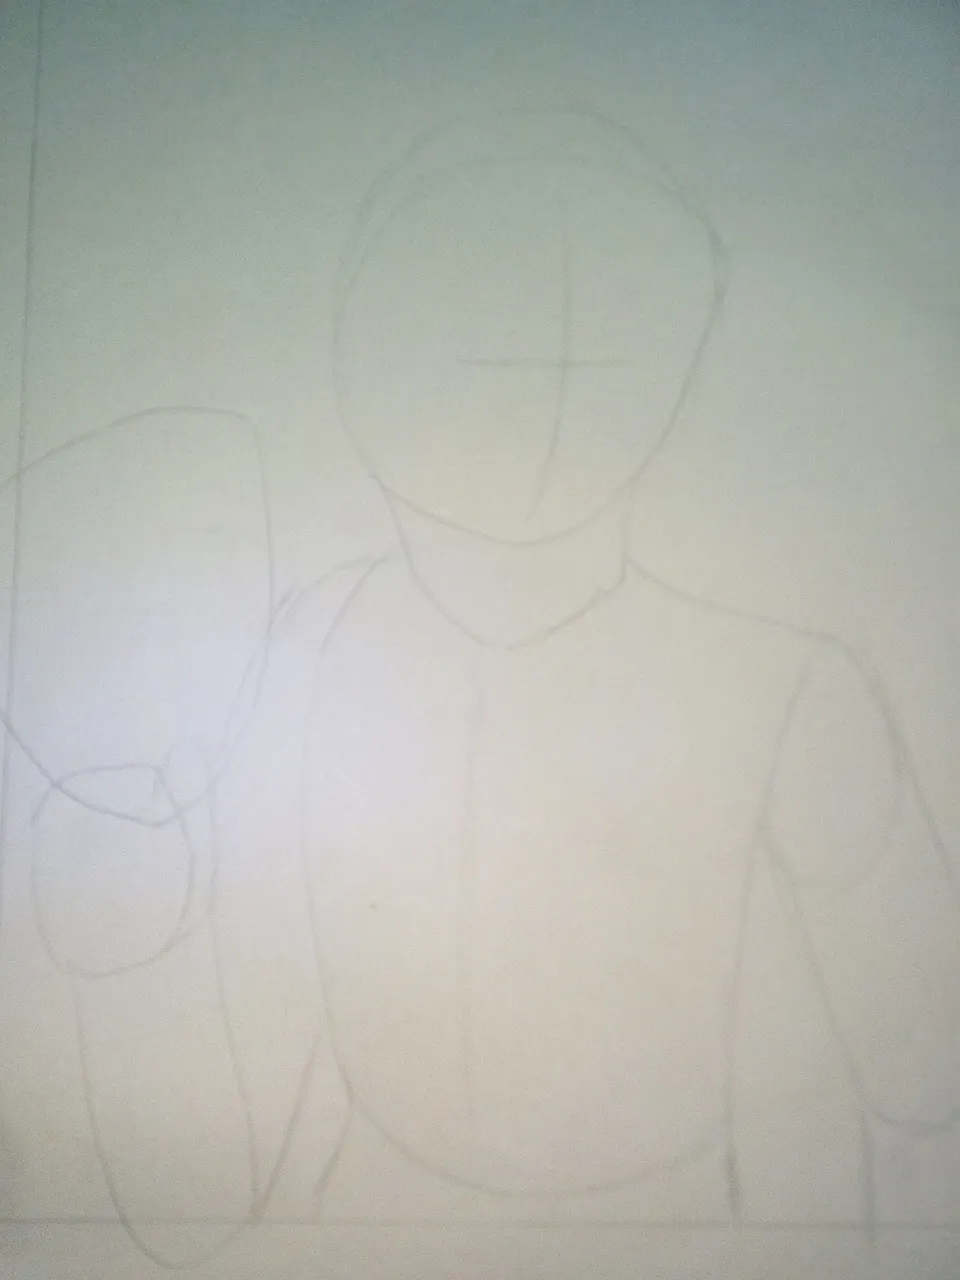
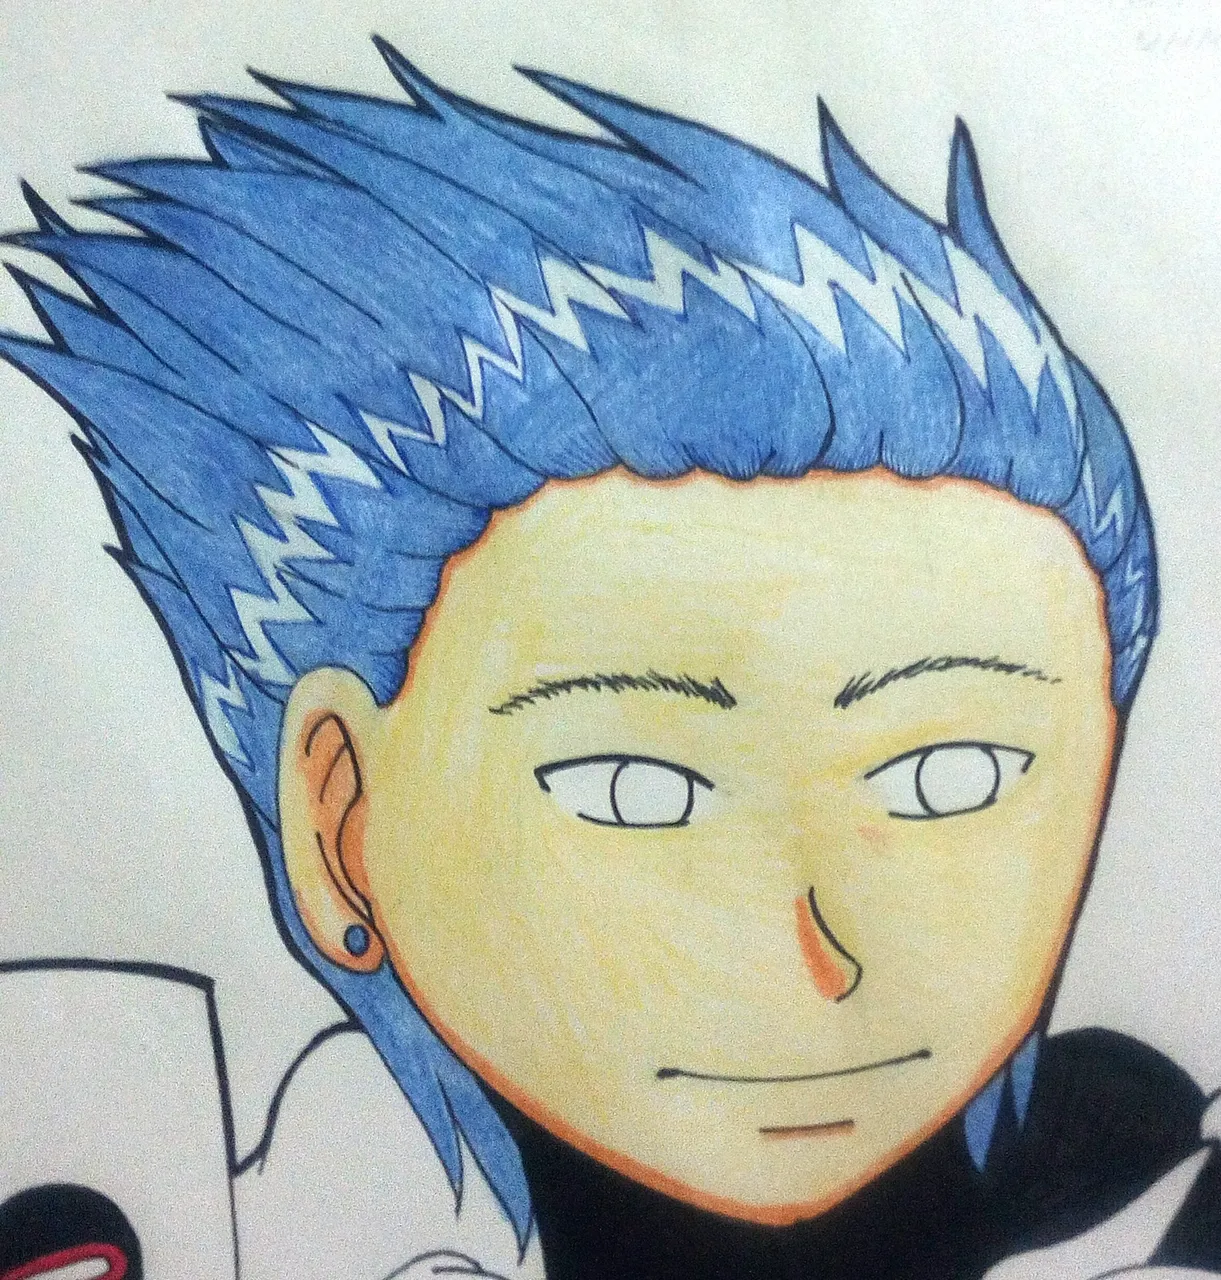
The main idea is to unmask Twisted Jester. I made him hold his mask on his right hand. Both the face and body will be facing left while his head faces right to produce a bit of contrast.
Step 2 Full Draft
To be honest, I'm really bad at drawing males. I normally get their body proportions wrong and there are not a lot of hairstyles that could make them stand out.
Since the topics for this week is Twisted Jester, I tried to copy a well known magician from HunterxHunter, Hisoka.
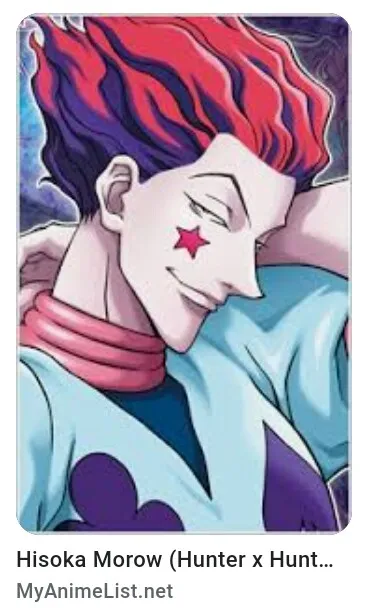
Photo is from MyAnimelist.net that was found as a result of Google Search.
For better or worse, it came out pleasantly different.
Step 3 Ink Stage
I use my trusty Dong-A My Gel Black for the lines. This pen is not only cheap but rarely breaks out. You can do long straight solid lines without breaks.
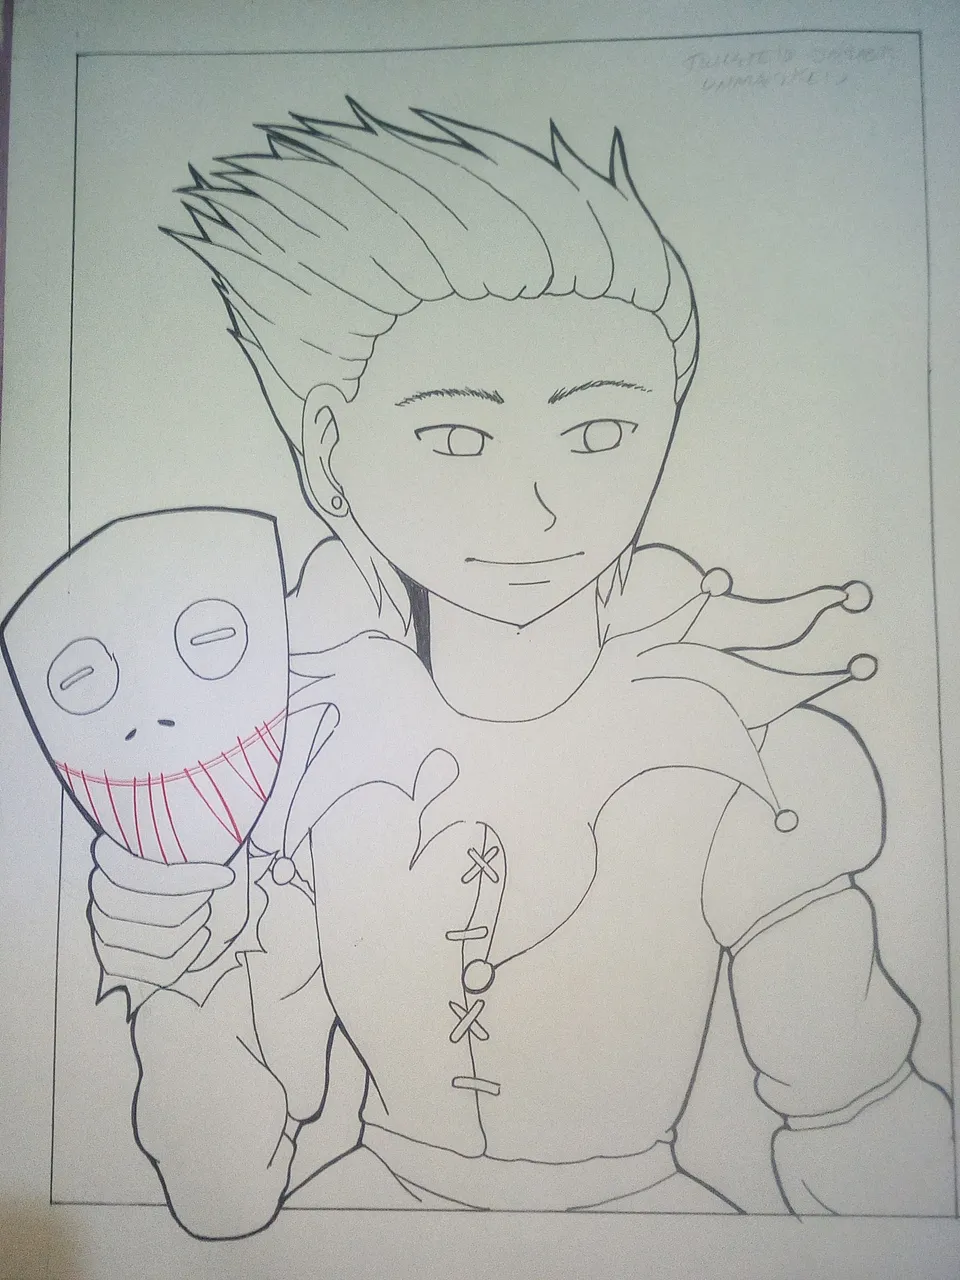
Dong-A is my go to pen if you have a tight budget or just want affordable ones. It normally costs 30 pesos or around $0.60.
Step 4 Skin Color and Blacks
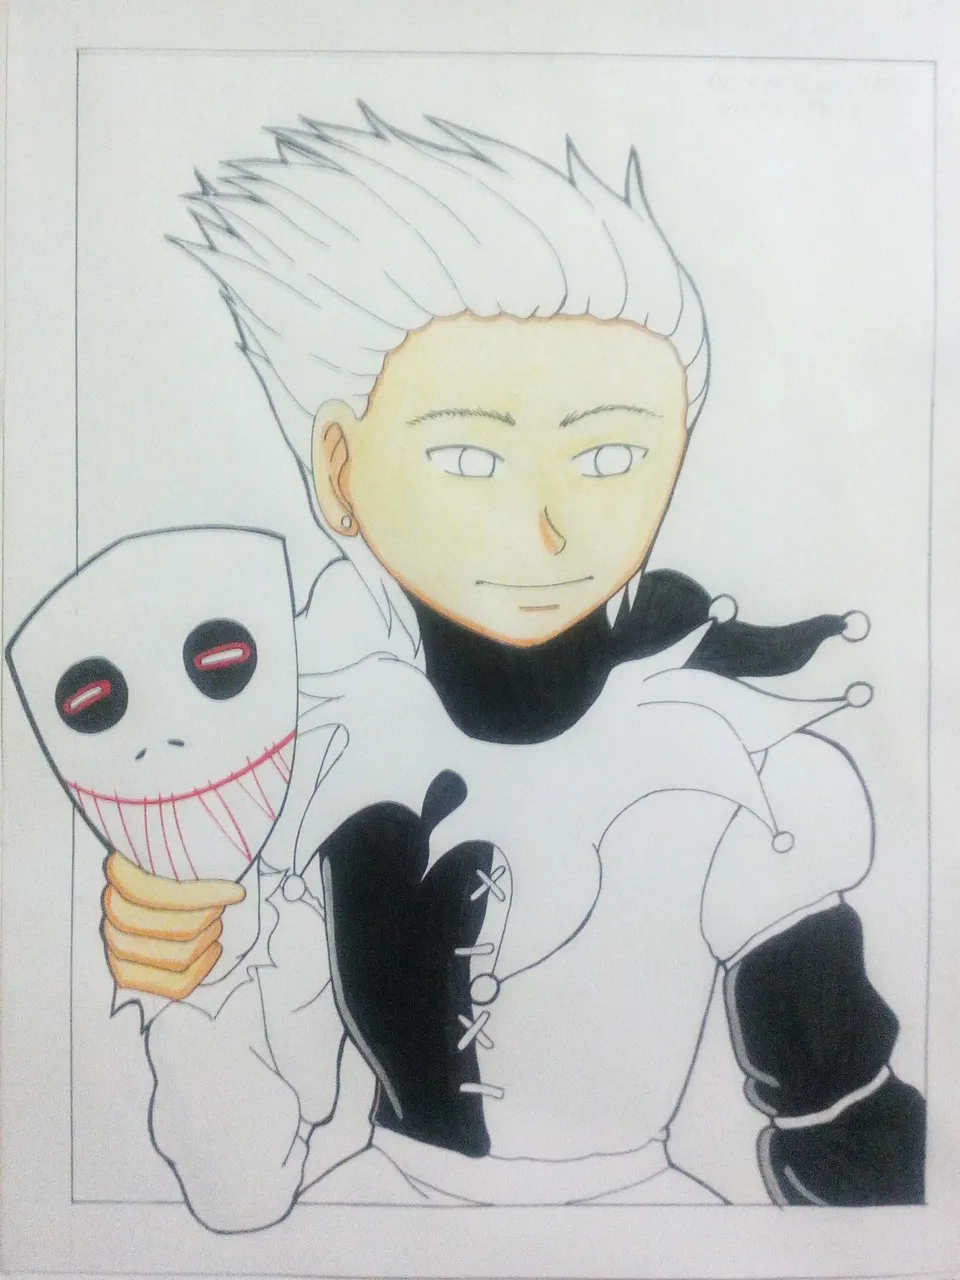
With the skin, it's orange for shadows and peach for base. I did a little change for this one. On the original, the hands were green but I used peach and orange because I want to make Twisted Jester human.
The black fills are done using an eyeliner of unknown brand.
Step 5 Hair Color and Highlights
I was thinking of doing a red hair because it complements black, which is what composed this art most. But since I did the red hair twice in a row in my previous arts, I want it to be different.
Using my Blue Enice Gel Ink Pen, I made a highlights for the hair. The rest was colored with solid blue for a refreshing change.
Step 6 Eyes Color
I tried to copy Hisoka's eye shape. Mine came out a bit bigger than his but it still worked great.
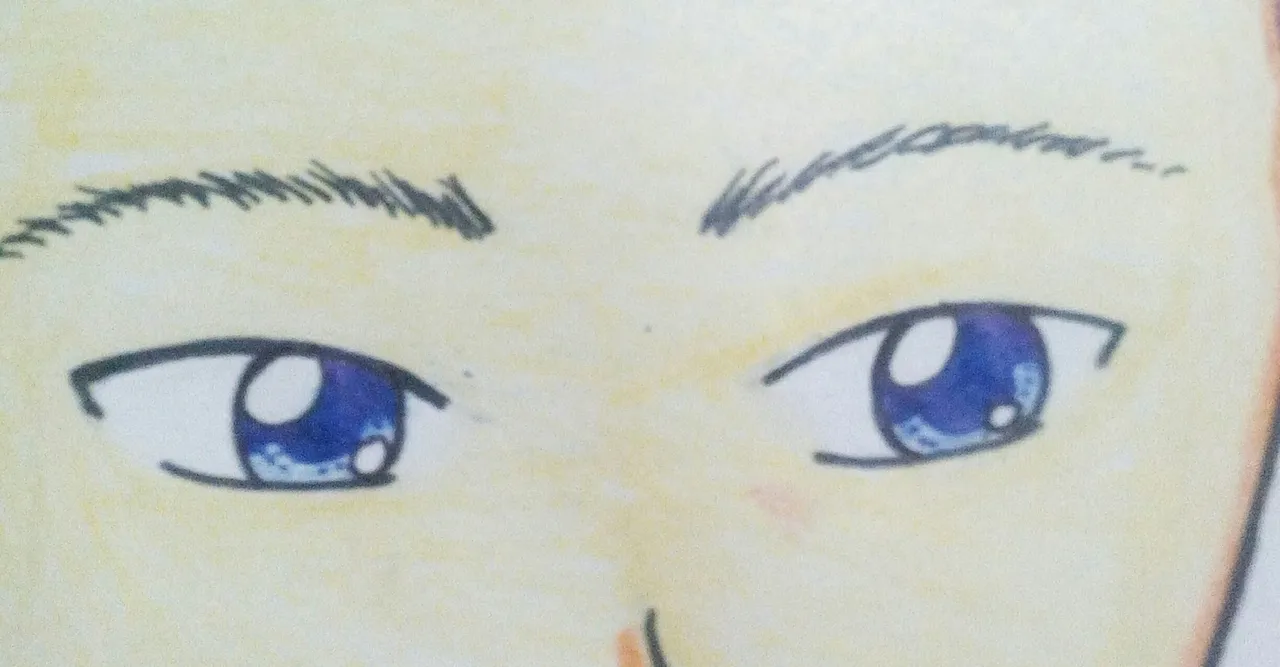
I also used the Blue Enice Gel Pen to color the eyes instead of colored pencil. Gel pens have a more vibrant color, which makes the eyes look more alive.
For the eyebrows, I made a little upward strokes instead of the normal thick line. This would make it a little bit softer and makes the eyes kinder.
Step 7 Outfit
The outfit is made by the Splinterlands Art Team for the card, Twisted Jester.
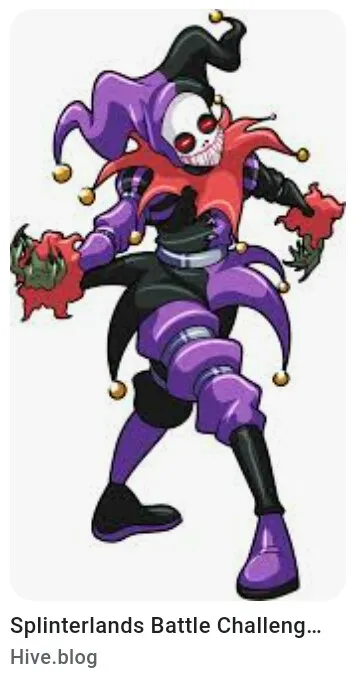
Photo is from Splinterlands that is a result of Google Search
It's really good and I am happy to say that I did no revisions of it whatsoever.bIt's that good that there's no more room for improvement.
I used my Red Dong-A Fine Tech Pen for the shadows since the colored pencils are a bit limited. Normal red colored pencil for the base on the neck and arms.
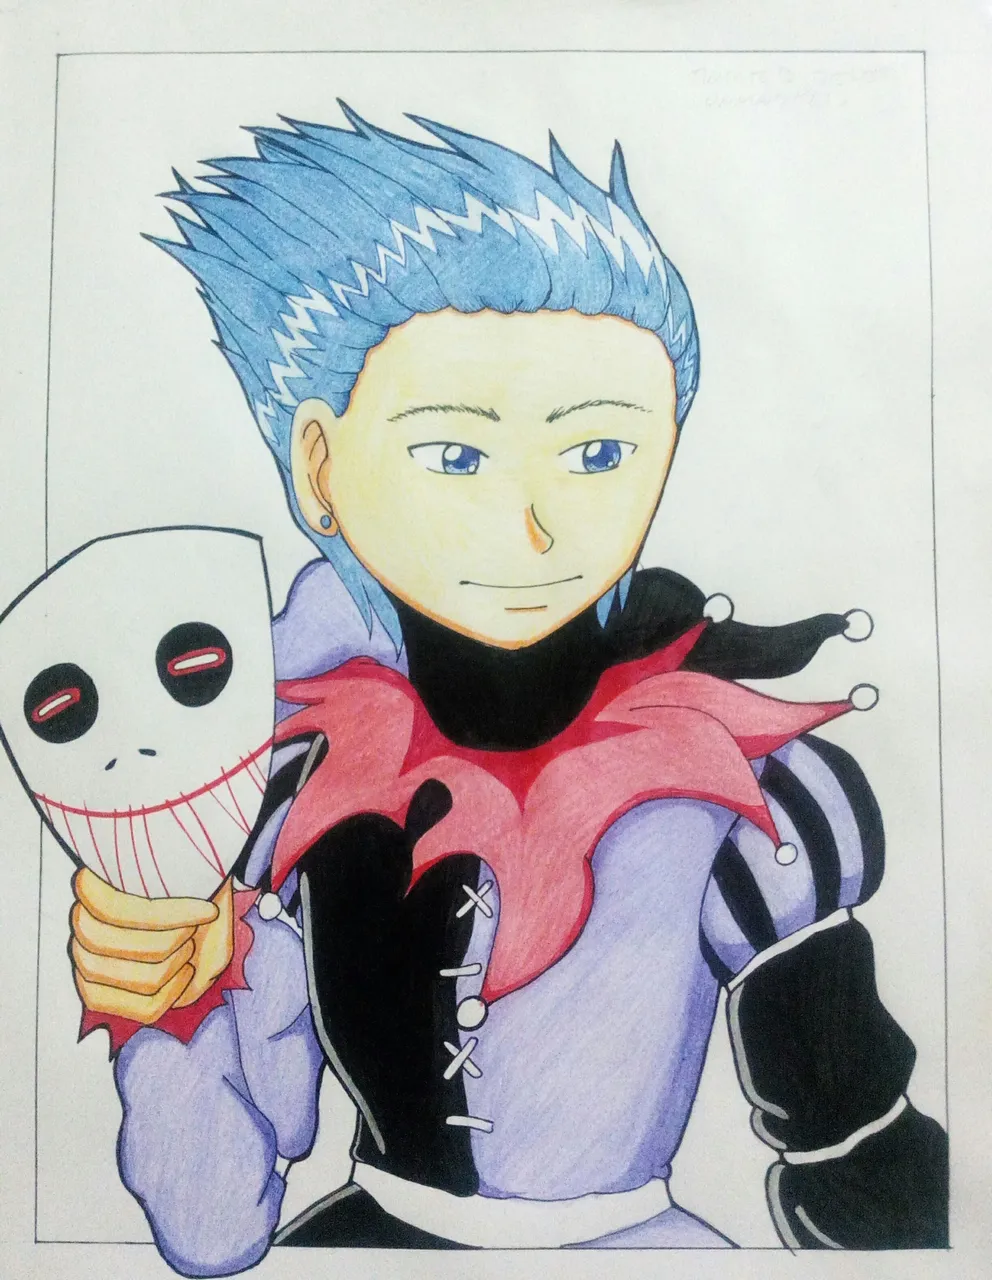
Two shades of violet were used for the rest of the body for shadows and base respectively.
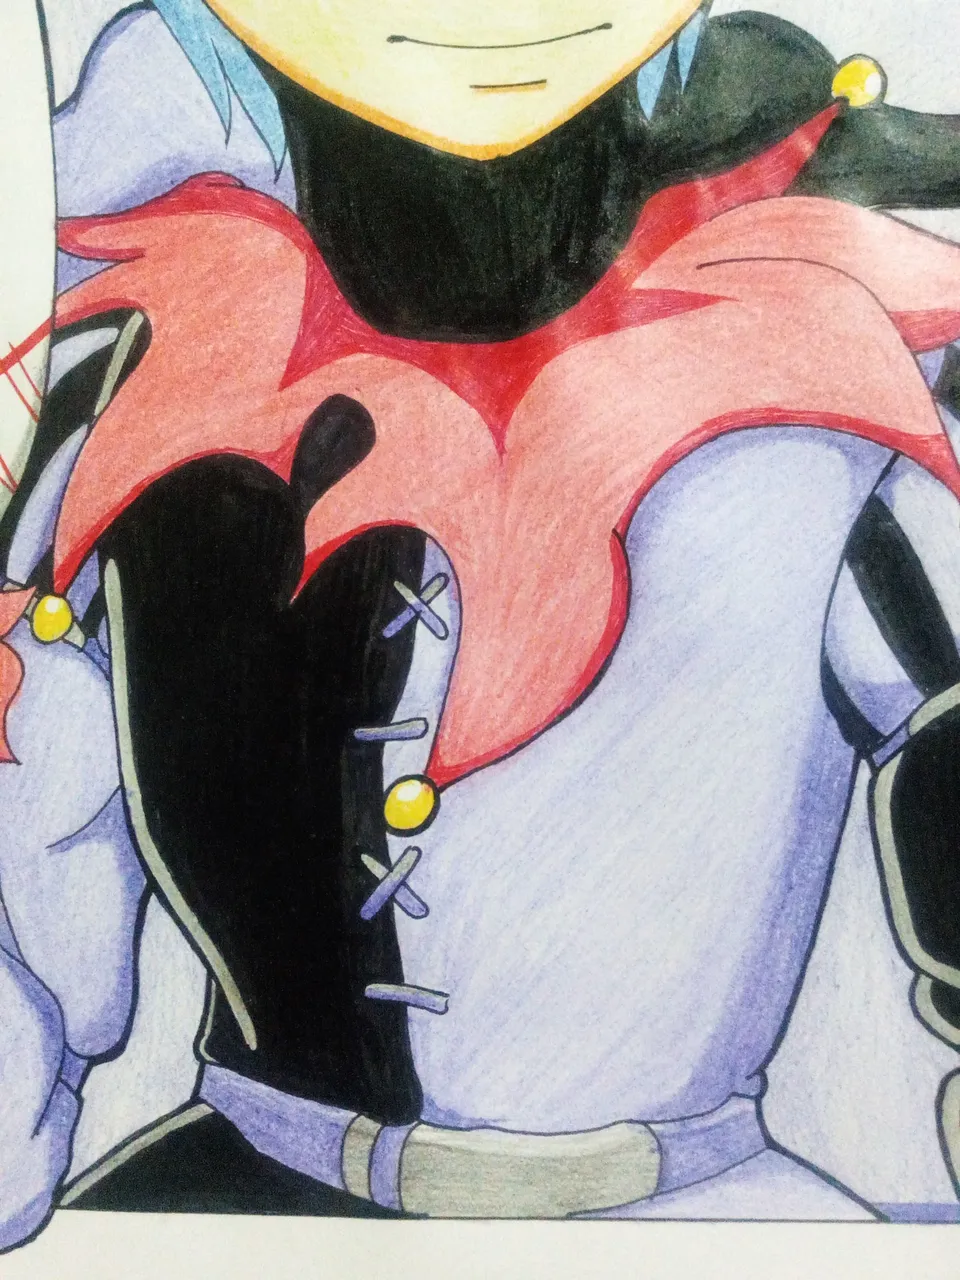
Small white lines on the black part for highlights which is then colored using Mongol Pencil #2 for a grayish effect.
If the black part is to be represented as leather, I will not color it with the pencil and just leave it. Some principle with my last art, Aril, the Summoned Succubus's outift.
Step 8 Mask

The mask was colored using variety of pens. Black Dong-A Gel Pen for the black part, Dong-A Fine Tech Red, for the red ones.
The shadows were done using Mongol #2. This is important to allow the white uncolored parts to pop out.
Step 9 Background
For the background, I retraced the square borders with violet colored pencil using rulers. I added a light shade of violet on the half down part to make it better.
I intentionally did not add any background and just did a gradient background because I can proudly say that the art is good enough to not have any backgrounds.
When viewed in full, it looks like the Joker card from a deck of cards. This is another reason why I left it as is.
Author's Notes
I'm not trying to be arrogant or annoying but when I made my last art, "Aril, the Summoned Succubus," I did not think I can make anything better than that.
I was surprised by how good this came out especially since I suck at drawing male faces and proportions. I'm happy I could join Splinterlands's art contest as I keep discovering techniques and talent that I never thought I had.
I am really proud of this latest art entry that I made
Disclaimer
- This post is an entry for Splinterland's art contest.
- Other sources that I do not own are cited under their respective photos. Photos and drawings without cited sources are mine and made for this post.
If you're interested in playing the game, support me by registering using my referral link here
Have Fun Drawing!