Stop pushing holes in this jacket or that jacket. A recent post from a buddy trying to find a pocket holder for mounted medals. I'm like I think I can print one of those.

Military medals, if you've received more than one you usually have them mounted and attached to a broach bar that sits on the backs of your ribboned medals. Depending on your rack it could be a small bar or a large bar. What I'm looking at is an insert that one could put in their lapel pocket and fish the broach pin through so they don't have to put holes in their jackets.
The Design
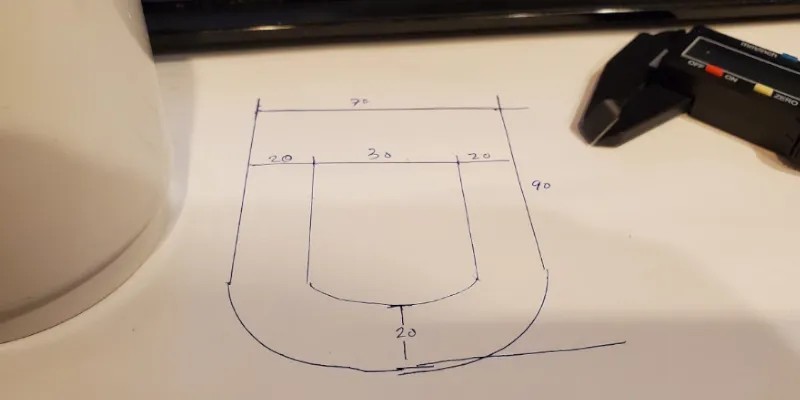
When you are designing something it's always good to scribble it on a piece of paper at first. At least I find that in most cases. I didn't have much to go on other than a few images and some knowledge on the size of the medals along with the typical breast pocket. So I eyeballed it and roughed it out on some paper.
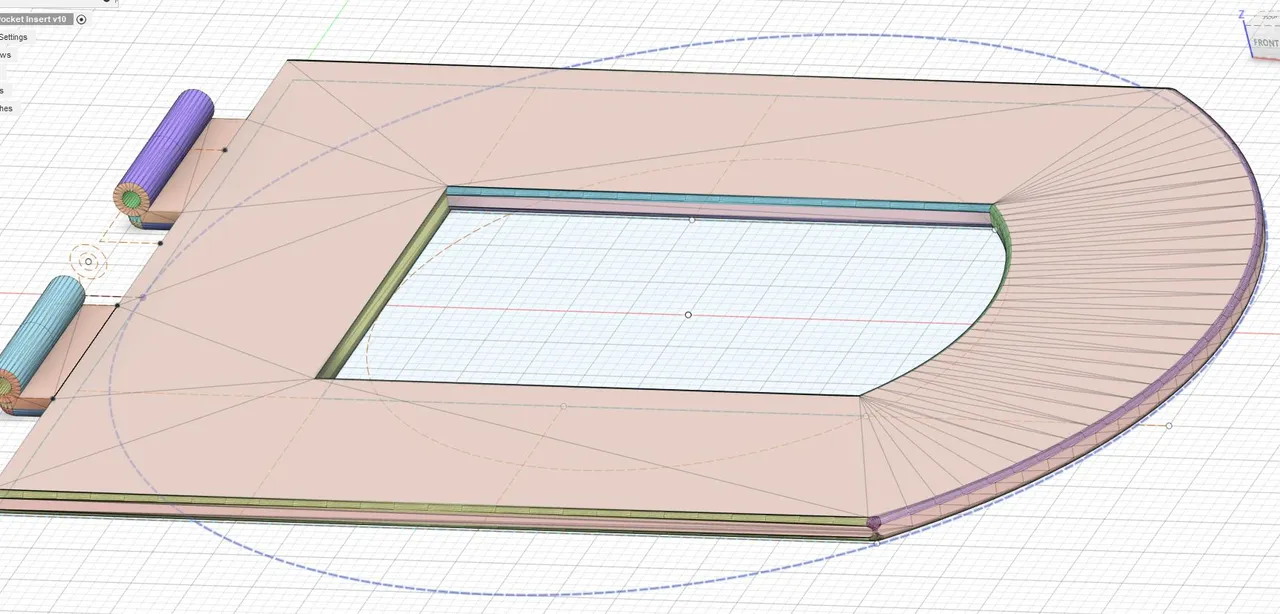
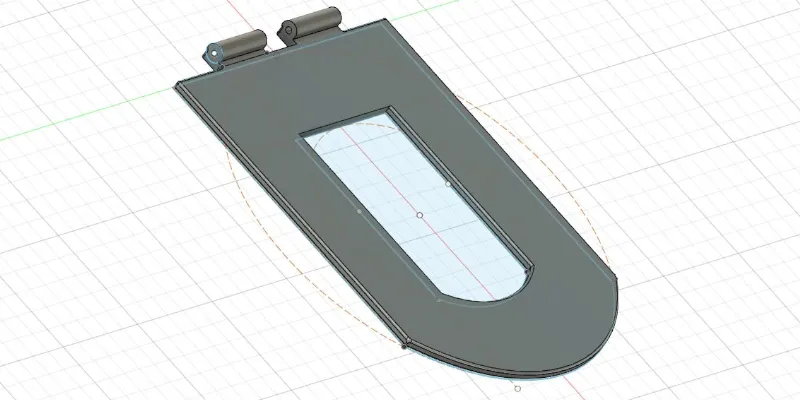
Once I had a general concept down I fired up Fusion 360 and started to build the model. I've been starting out with sketch layers to get the dimensions down. Once you have that done it's really just drawing the faces and extruding.
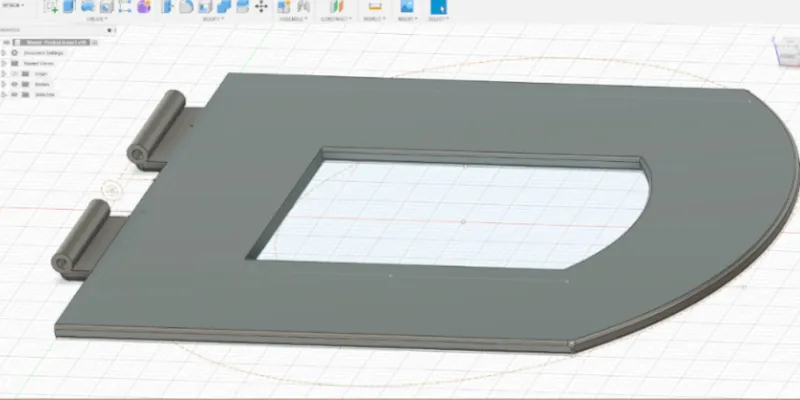
My drawing didn't have the part for the broach pin to go through but I had a good idea in my head on how I wanted that to go.
Prep for printing
Once you have your design completed, in Fusion at least, you need to convert it from a solid to a mesh. It's a few more steps but then it allows you to export it to a slicer program. In my case, I'm going right into Cura as an STL.
Once I've got into Cura I can set a few more parameters like a brim or skirt and the fill type (usually 50% cubic). You then slice it all up and export it as GCODE. Now you can actually do all this in Fusion it now has a built-in slicer but I find the quality of the print is actually better from Cura. Might just be me. Let me know below if you find that too.
And the print
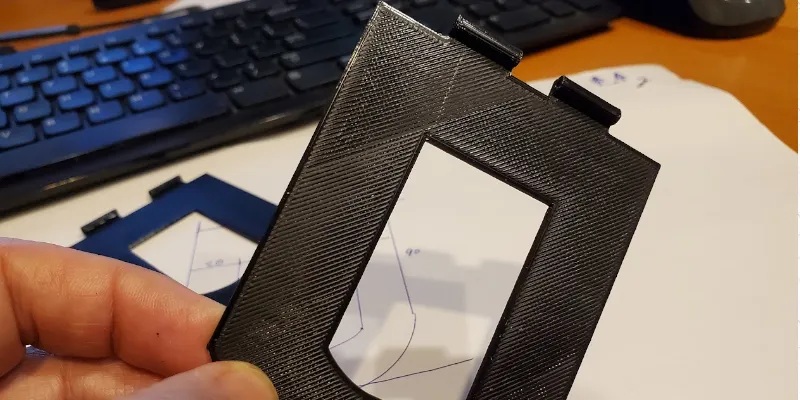
Ok, well not sure if anyone noticed in the drawings but things were a little off. It printed fine. Exactly as I had built it and exported it... but...
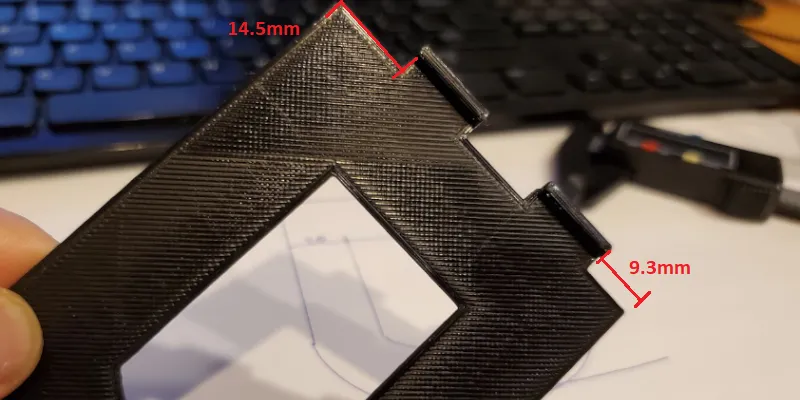
Ya, I borked the drawing completely. What's the old adage - measure twice, cut once. Well, I tossed that out the door. You would think I hadn't used software. Anyhow, I wanted to shore up the pinholes as well as they seemed a little thin. So back into Fusion, delete, delete, delete... rock out Version 2 of the Pocket Holder.
I think that design is good to go. Full send to the printer.
Trial print number two
So, in between this successful print and trial number one we had a bit of a spaghetti monster. Seems that when I sliced the design I ignored this big warning that all was not right. I clicked the "it's not me, it's you" button (ignore error) which resulted in a failure. Anyhow out with the old and in with this new gorgeous print.
That ought to sort the old gaffer's medals. Until next time - keep your nozzle clean!
Follow along on some of my previous posts:
- And So It Begins - My Entry into the 3D printing realm
- Adding in Octoprint to the mix for managing the 3bForge
- What?! Need to update the printer Firmware ASAP!
- 3D Printing fiend added a time-lapse to the 3bForge build
Side note
After careful end-user testing and quality control, this product doesn't really work for DEUs (full/undress uniforms). It'll be just fine for the ol'boys(and gals) at the Legion that can shove it in their breast pocket. Also, a word of warning if you bend over they are going to spill out onto the floor. That wouldn't be a good thing. You've been warned.