Two weeks ago I claimed that free energy can be created using earth batteries (a combination of copper, zinc & soil) and in this post I am going to back up my claim with evidence.
My goal with this experiment is twofold.
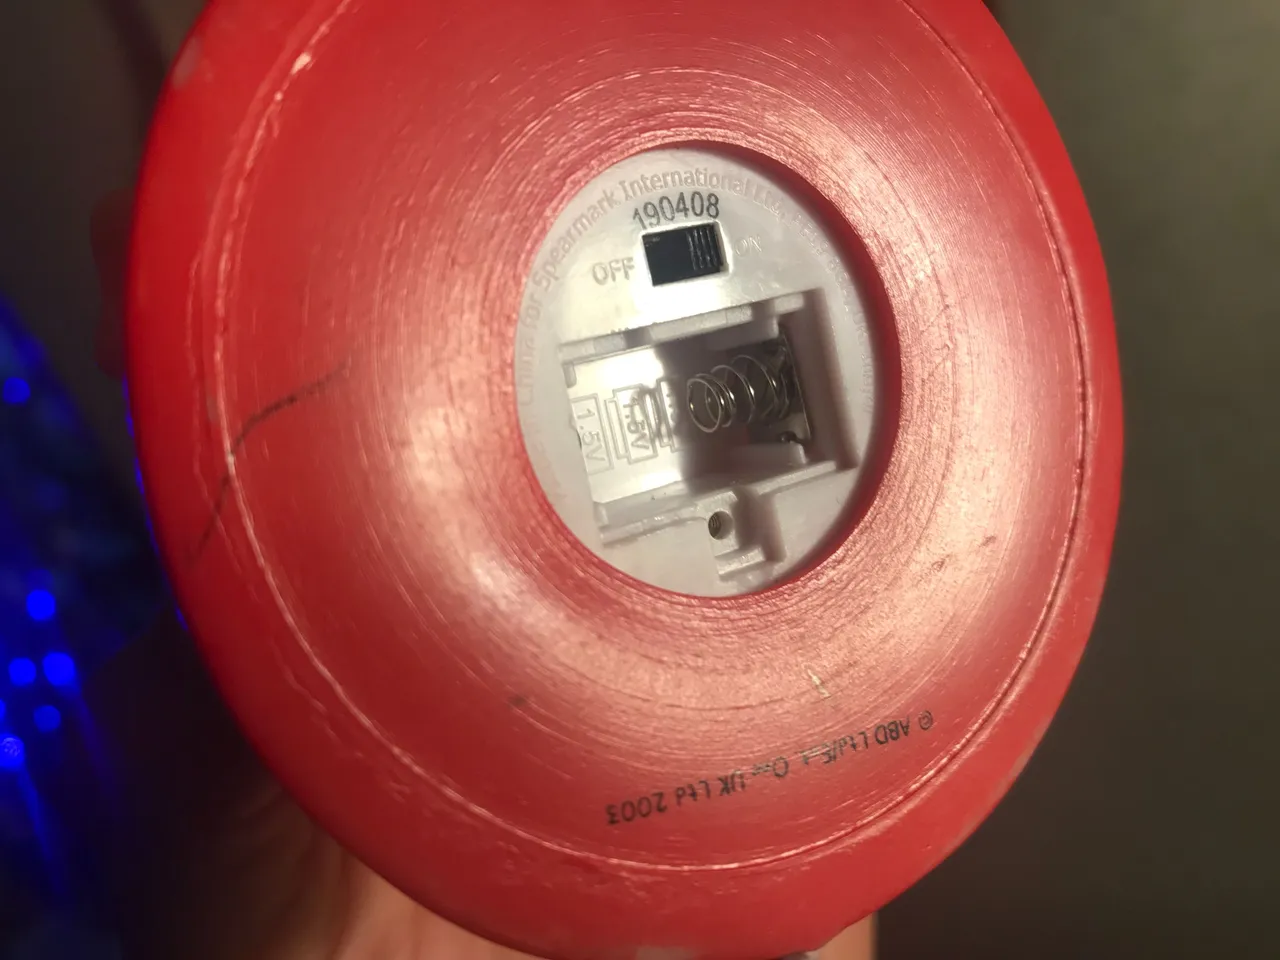
Firstly I am going to demonstrate how your voltage can be increased endlessly using earth batteries and secondly I am going to power this Peppa Pig night light which needs 4.5volts.

It did have x3 1.5v batteries (small round ones) but these are dead.
And this will I suspect become the first ever Peppa Pig to be powered by an earth battery!
What is free energy?
Before we begin I want first to address the definition of free energy, which seems to be a block for some people. To do this let's look at the materials I am using for this project.
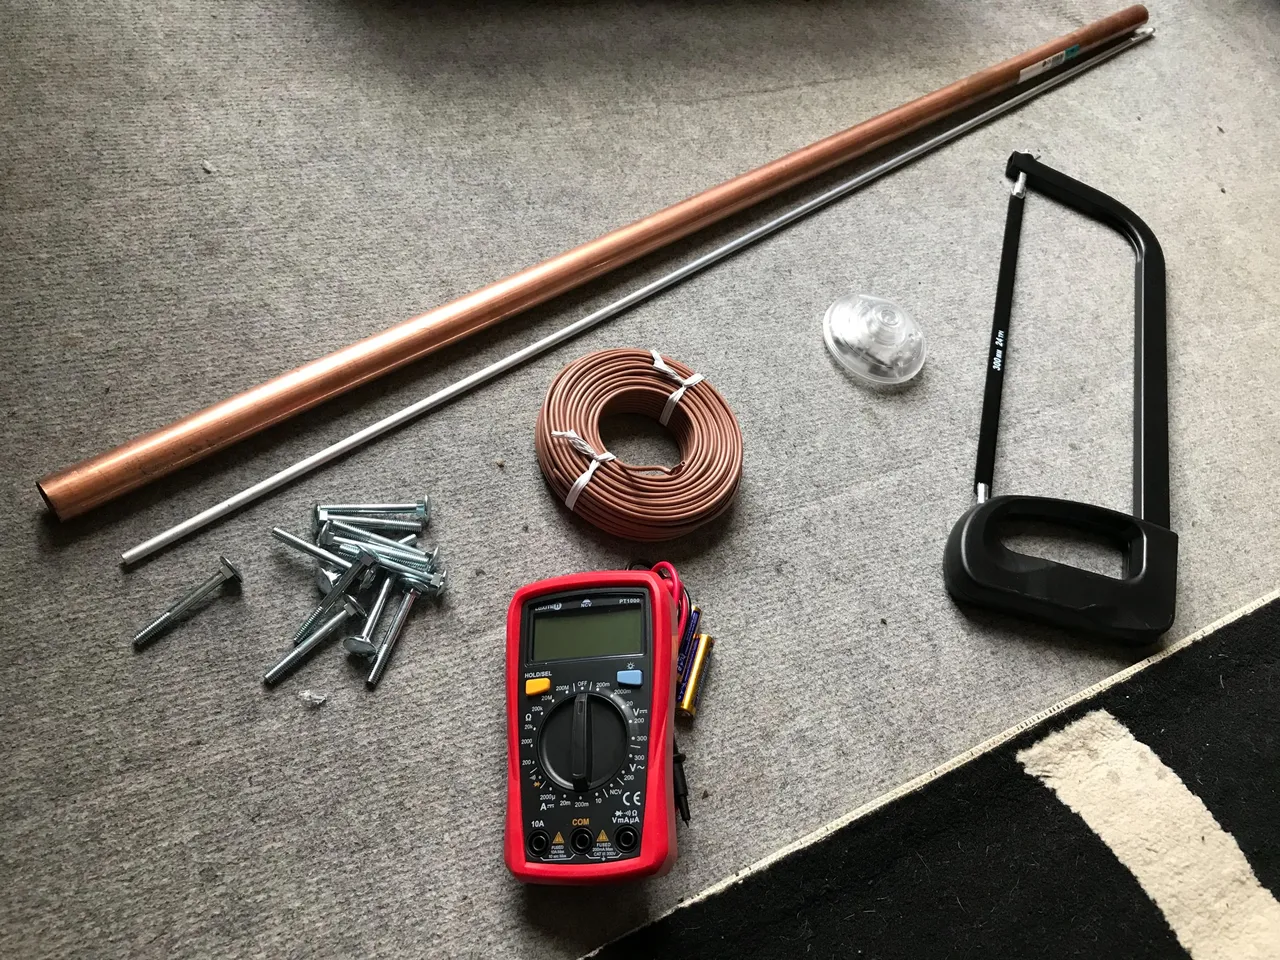
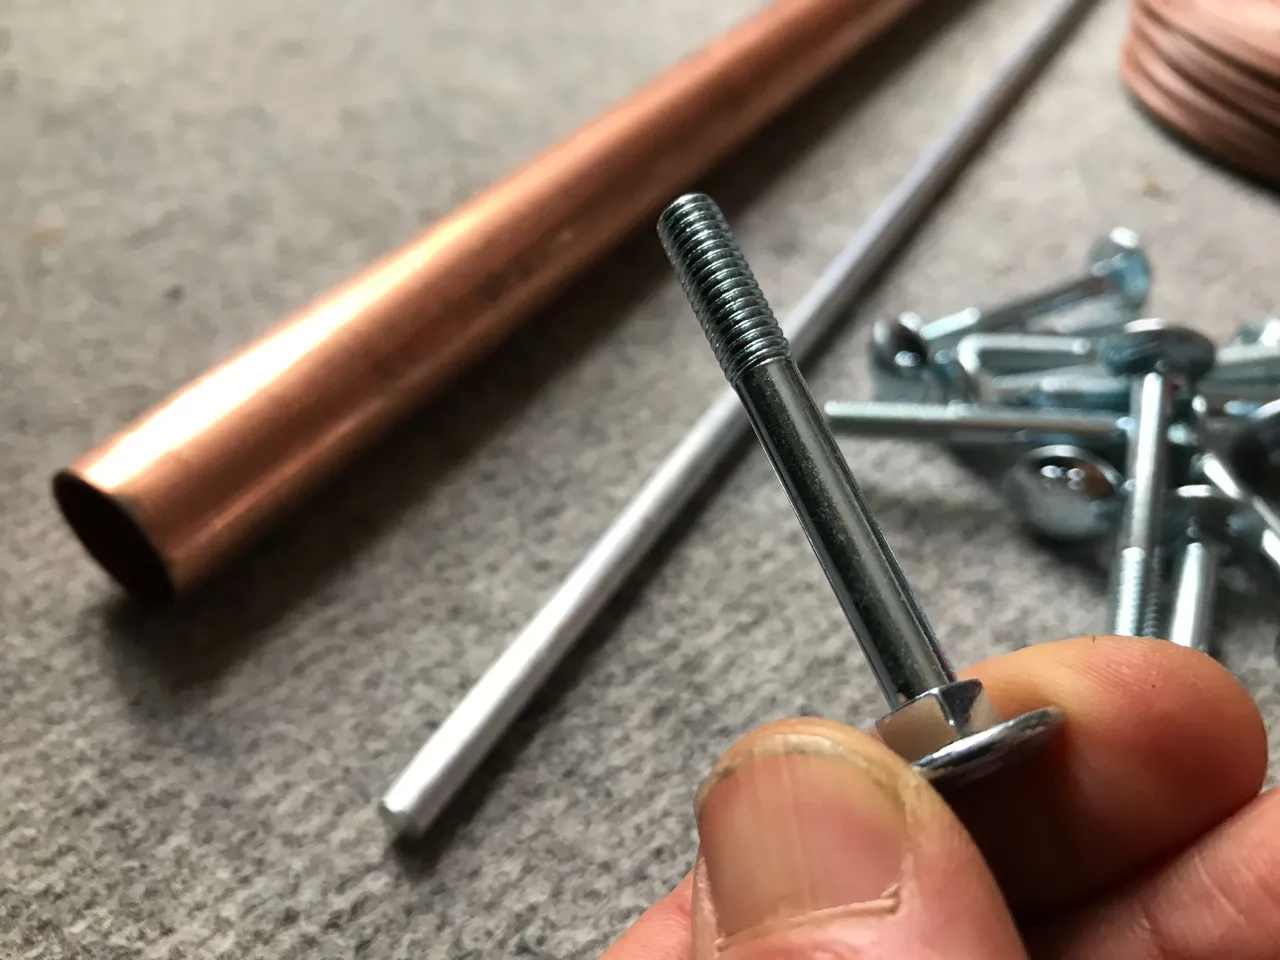
1m copper tube (22mm diameter)
1m aluminium rod (5mm diameter)
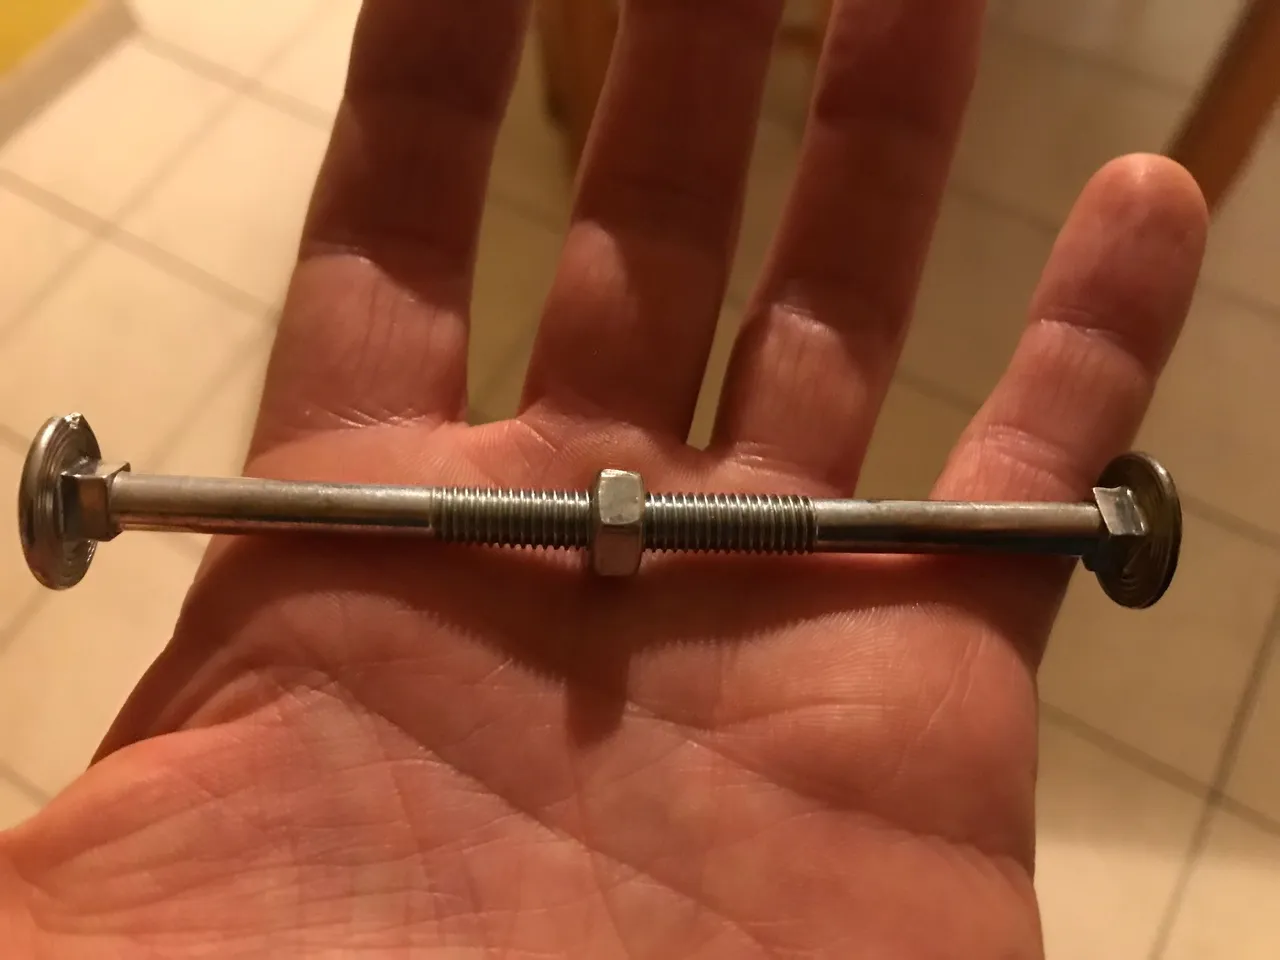
x12 zinc plated steel bolts
metal saw
25m electrical cable
Interrupter (on/off switch)
Multimeter
Needless to say these items used up a fair bit of energy on their journey from the earth to their current form on my floor. But when combined in a certain way, what they make is a machine that produces a non-stop electrical current. It doesn't need fuel (other than a little water) and it doesn't run out. So, in this situation a point will always be reached beyond which the energy being produced by the machine exceeds the energy used to create it. And at this point we can (in my opinion) call it free energy.
If someone has a better way to define free energy I would love to hear it!
The Earth Battery
For a more detailed breakdown of what is an earth battery please refer to my free energy post. But what we are basically talking about here is a copper cathode and an aluminium or zinc anode between which a flow of electrons is created in a moist solution of dirt or water.
In my energy post I showed you a cool guy I respect and his earth battery experiment on YouTube in which he was able to collect around 0.3v per cell using little strips of metal pushed into the earth in his garden.
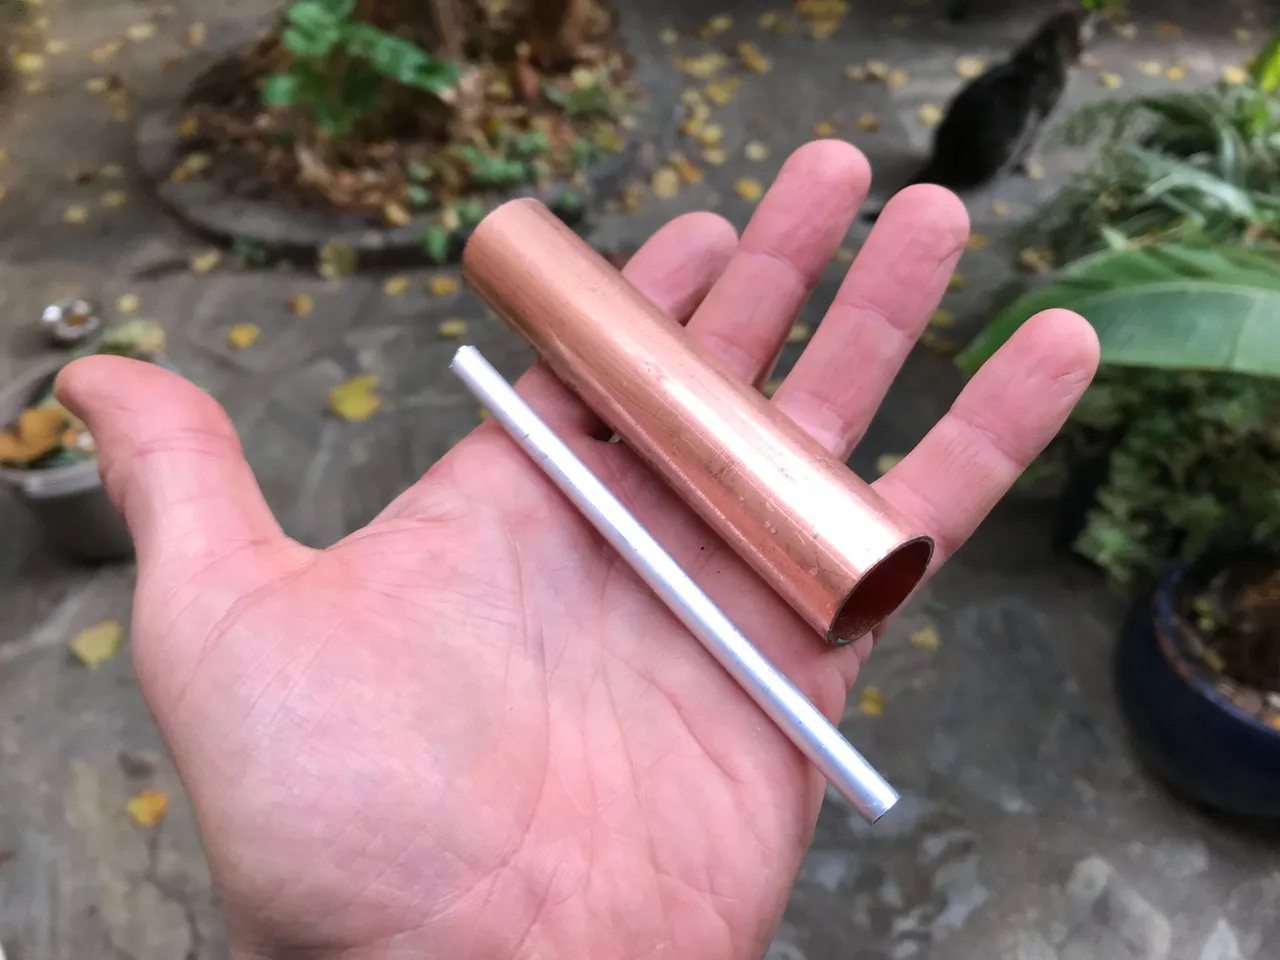
After reading further it became evident that when we increase the surface area of the cathode & anode we also increase our voltage (up to a certain point). And so, I bought a copper tube (to act as the cathode) and an aluminium rod (to act as the anode).
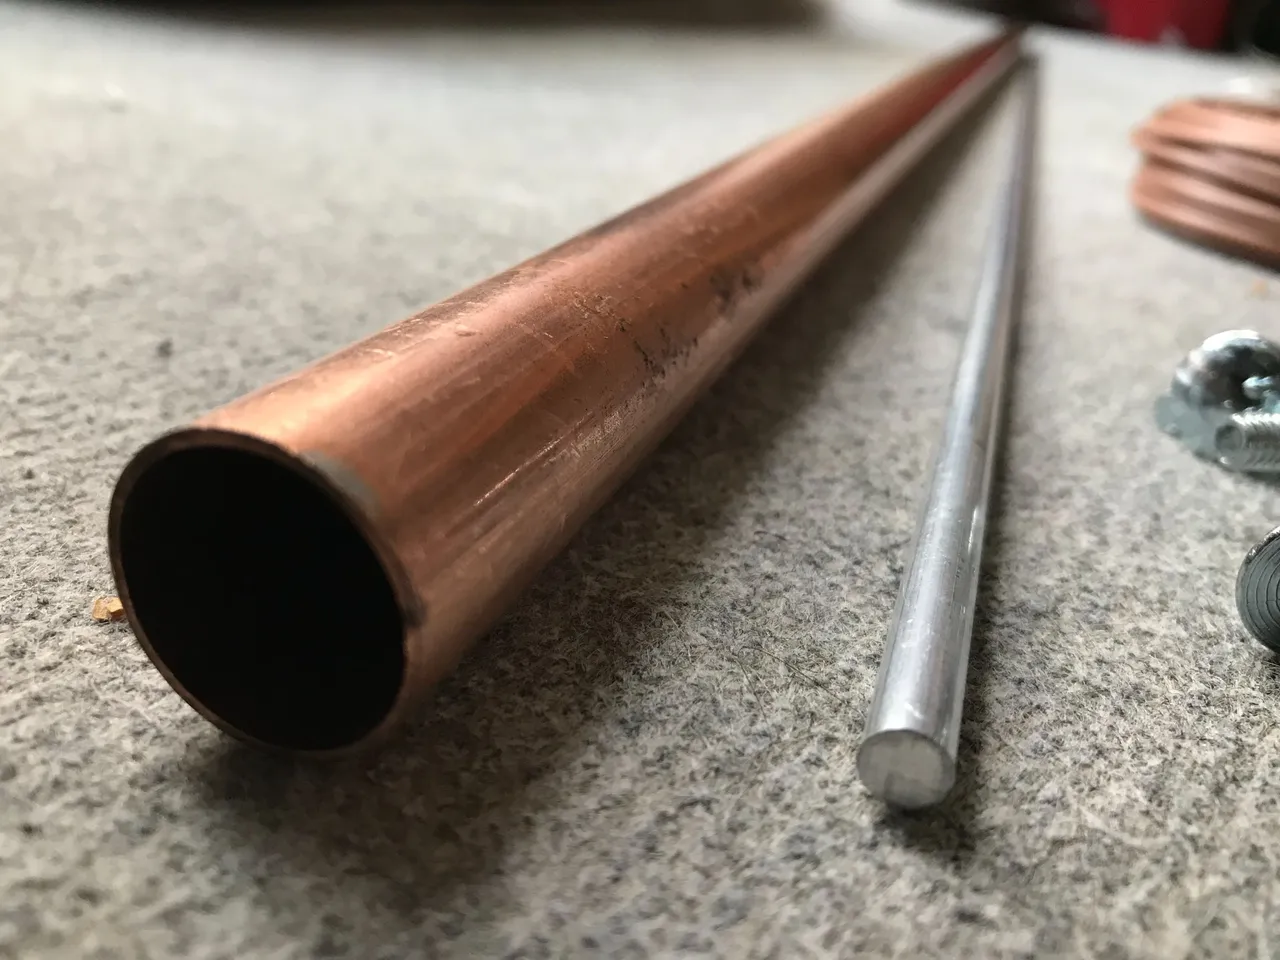
When the anode is placed inside the cathode and there is a medium present (like damp soil or water) the electrons should move in all directions outward from the anode to the cathode, giving us our electrical current.
I also bought these steel bots as they are zinc plated and I was interested to make a comparison between the effectiveness of zinc & aluminium.
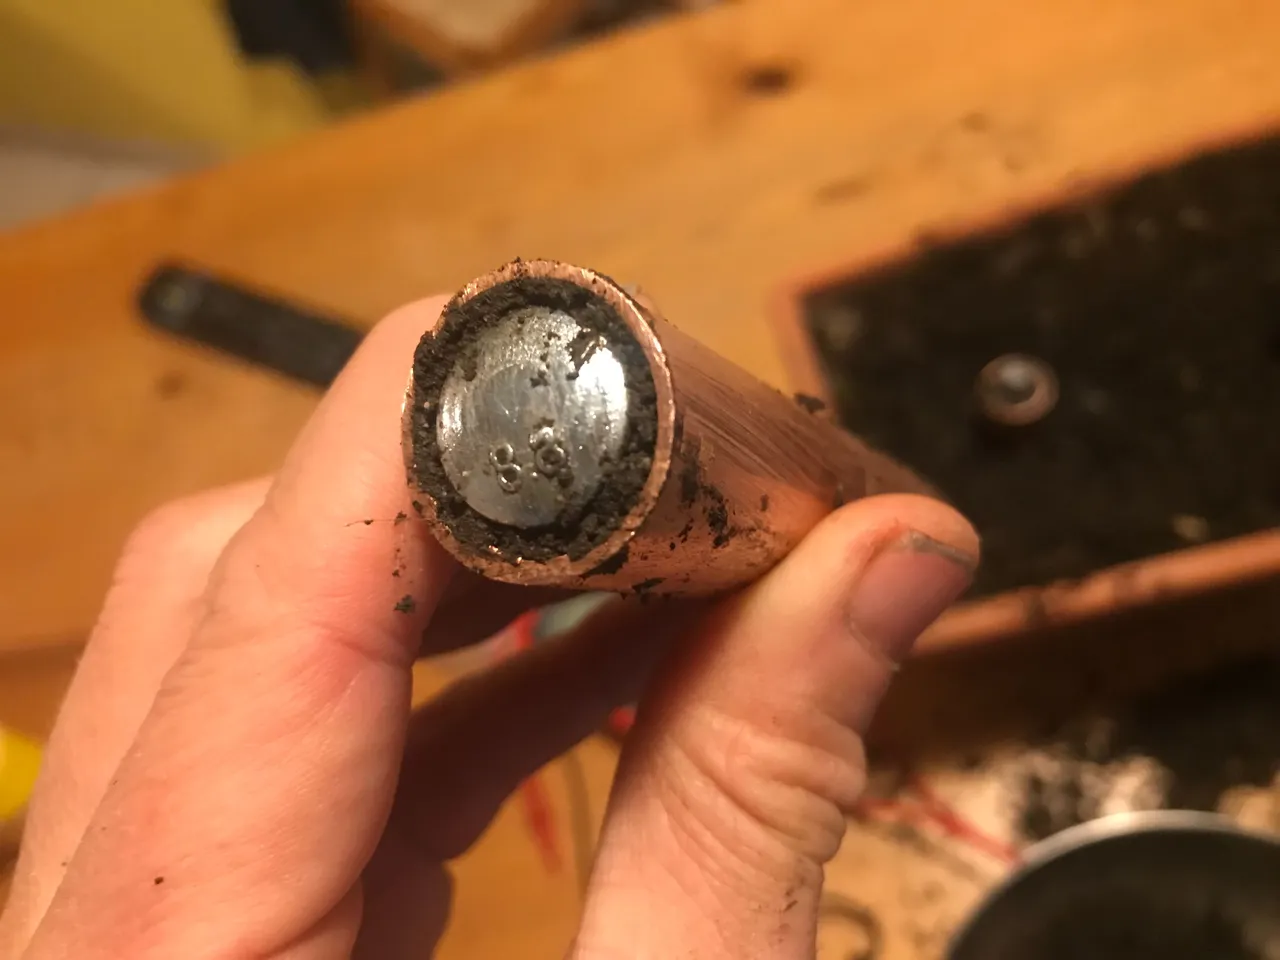
Getting started now I cut a 10cm piece of copper & aluminium.
While my eventual goal is to set this up in the garden with permanent soldered components, all enclosed in a box of some kind to keep it safe, for now I am experimenting on the kitchen table, just to see what kind of results I can get here in this much warmer location. (Important note: my readings will be higher when it is in the ground because here on the kitchen table I am not able to capture the flow of telluric earth currents)
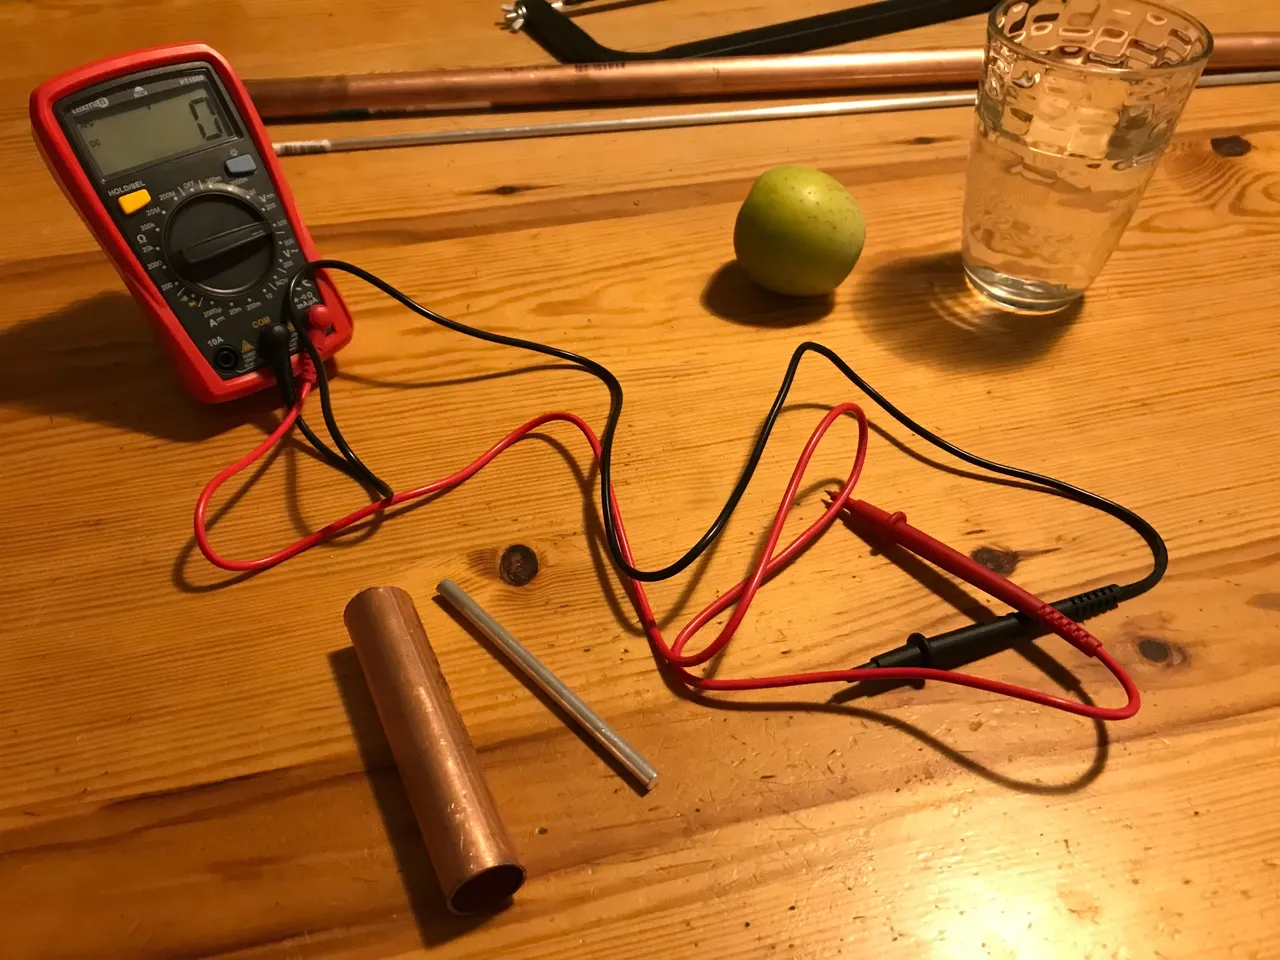
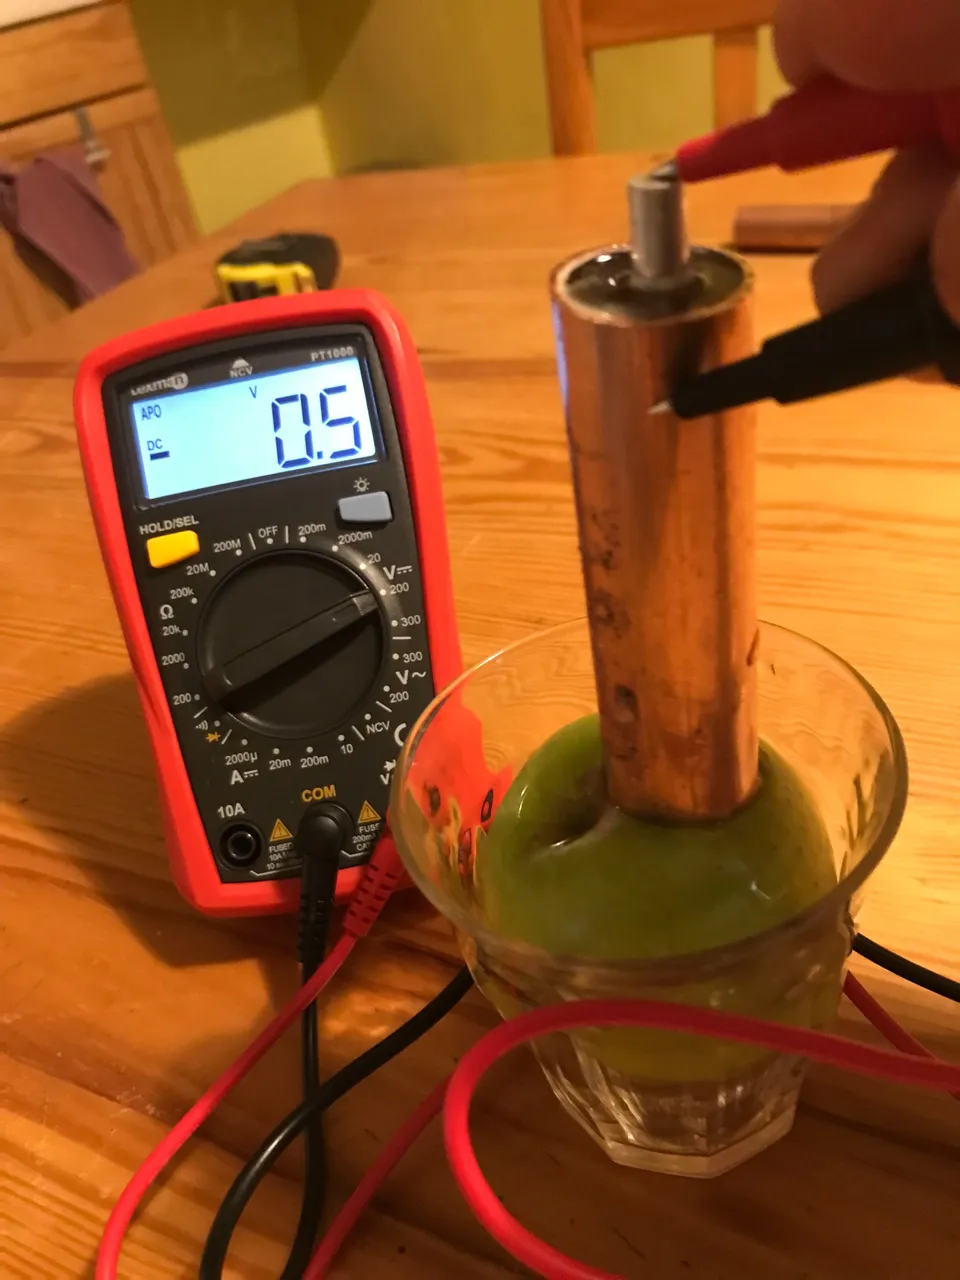
Rather than fill my 'cell' with damp soil straight away I wanted first to try the experiment with water. Sabrina is a qualified electrician and I have been reviewing her French study manuals in which I can see numerous experiments using water as a conductive medium.
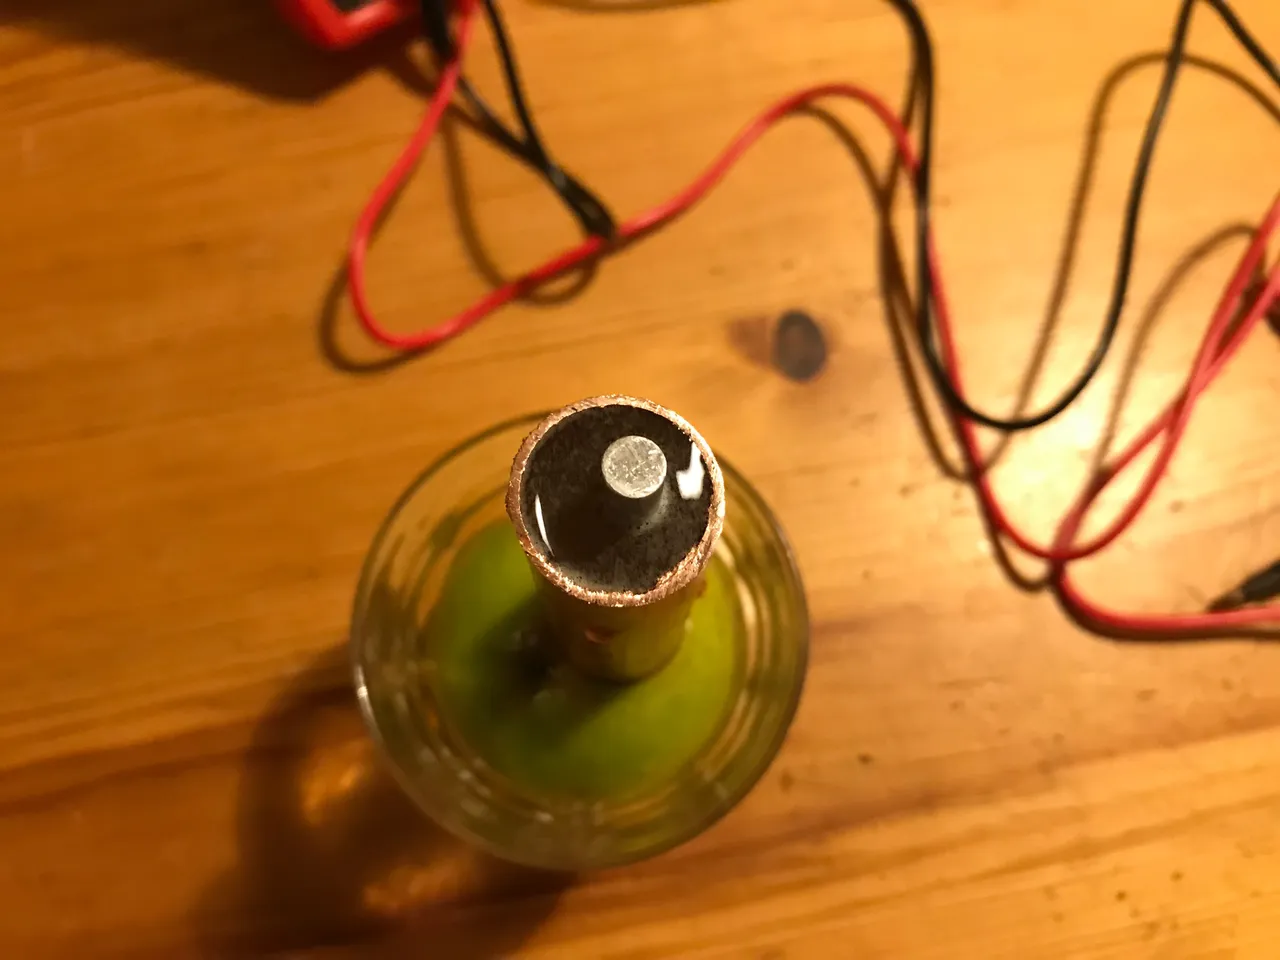
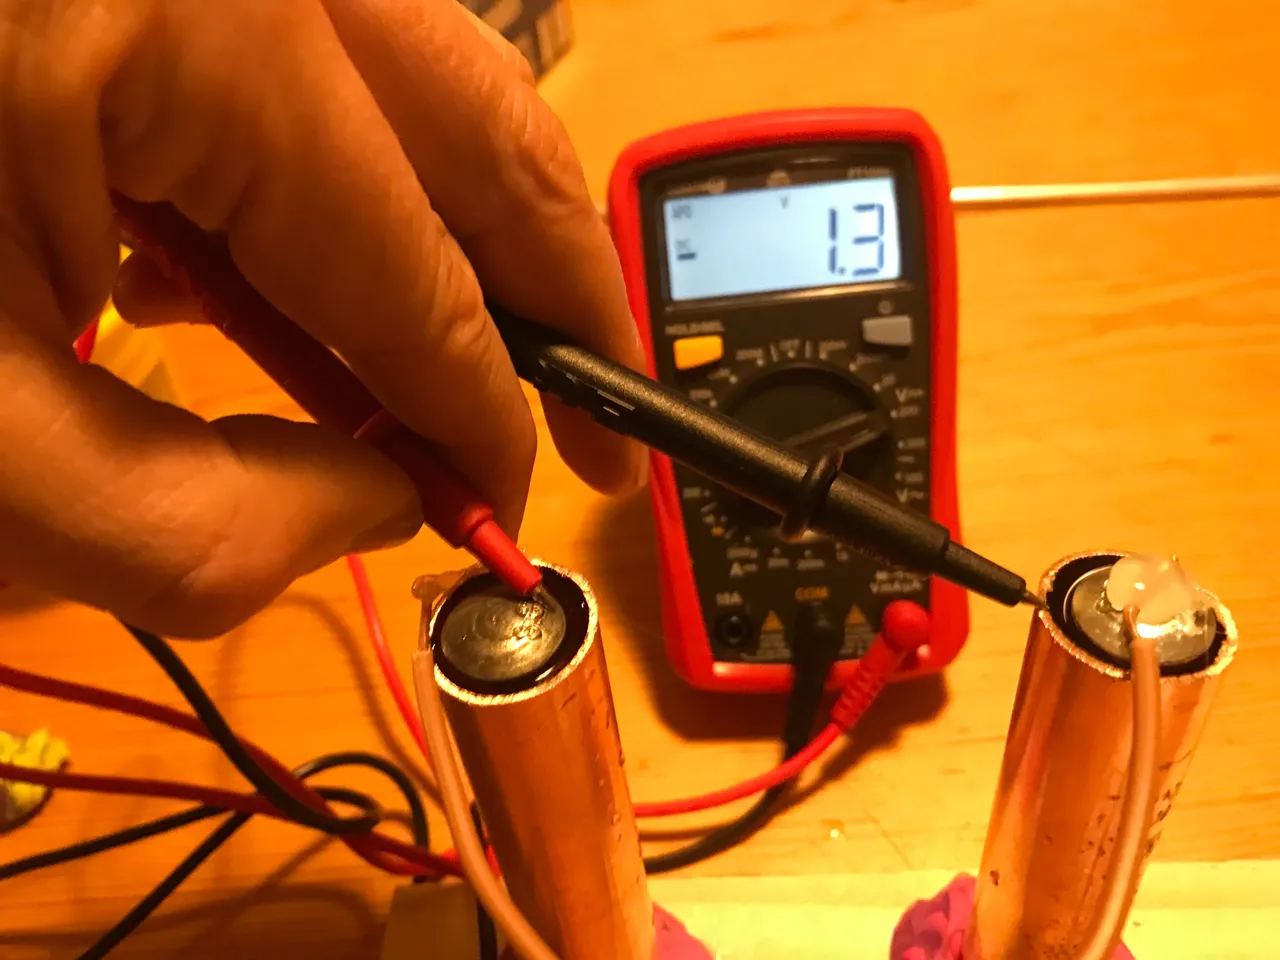
Straight away the voltmeter was picking up a reading of 0.5v, as you can see.
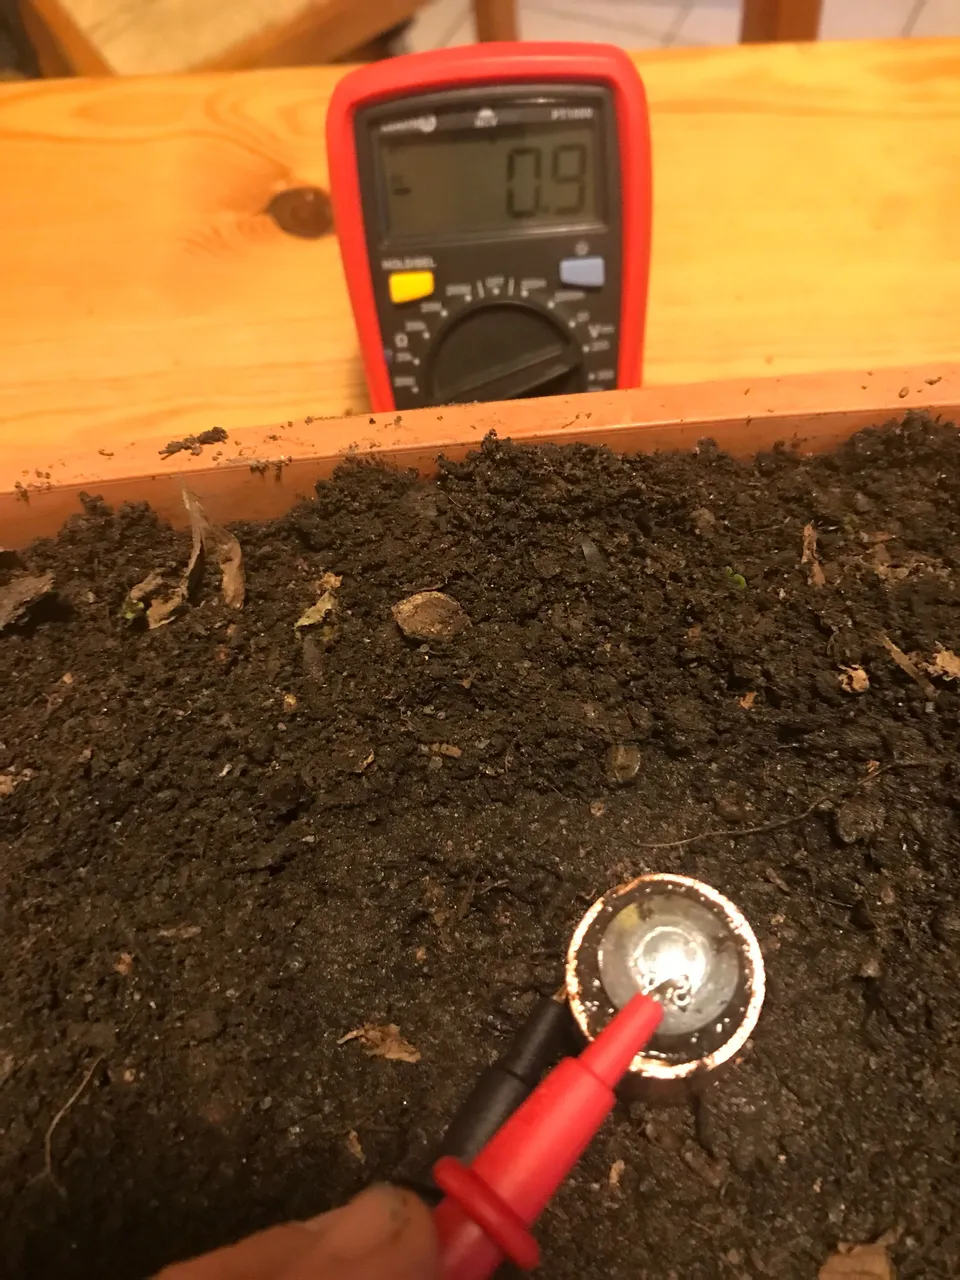
Wanting now to make a comparison with the zinc plated bolts I attached two together like this (making it 10cms).
And repeated the experiment with water. Now I am getting 0.9v which is good to see.
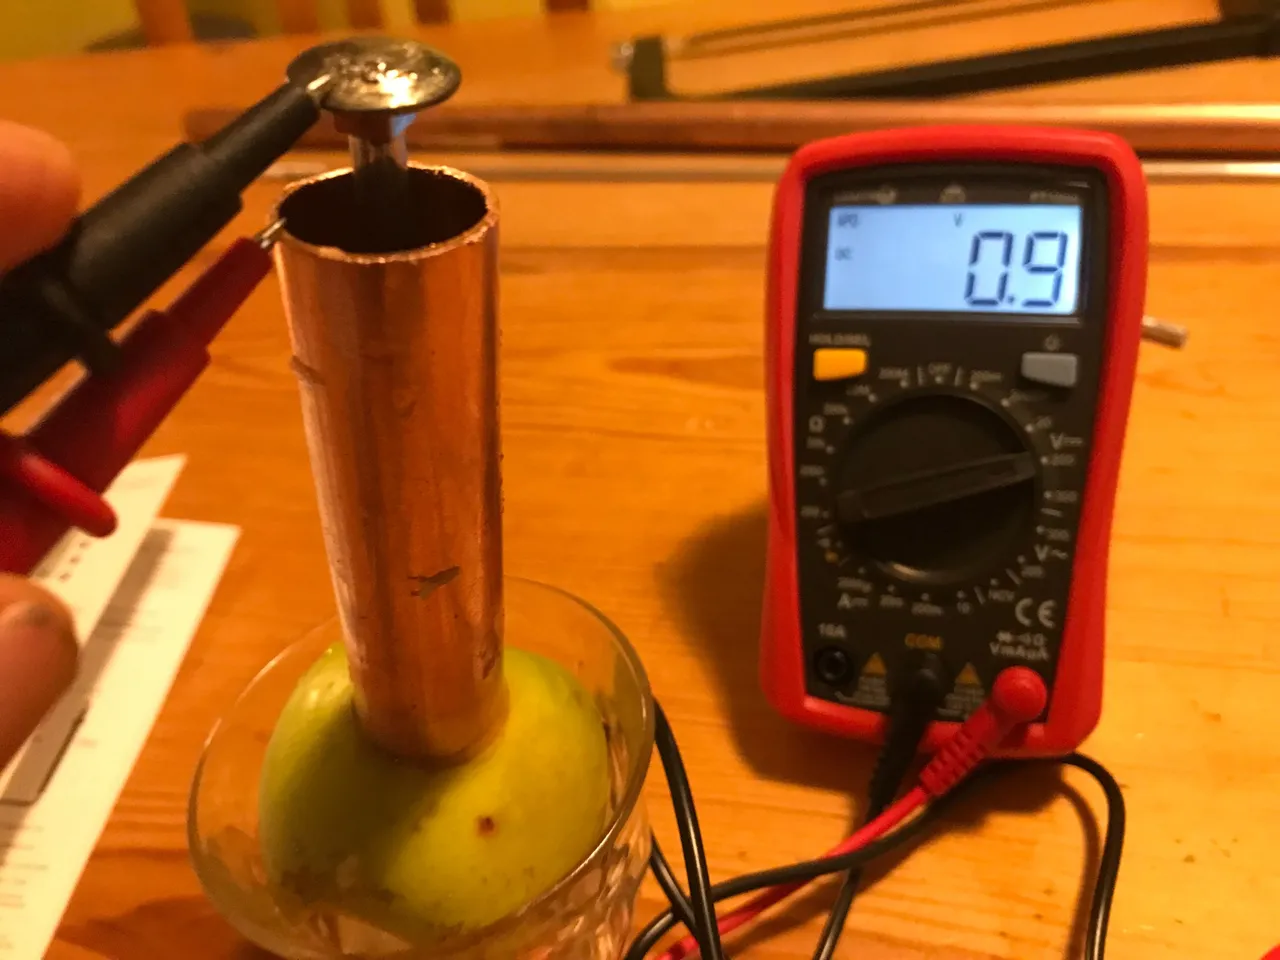
The amperage was coming in at 0.8A. Remember this number as I will be coming back to it later.
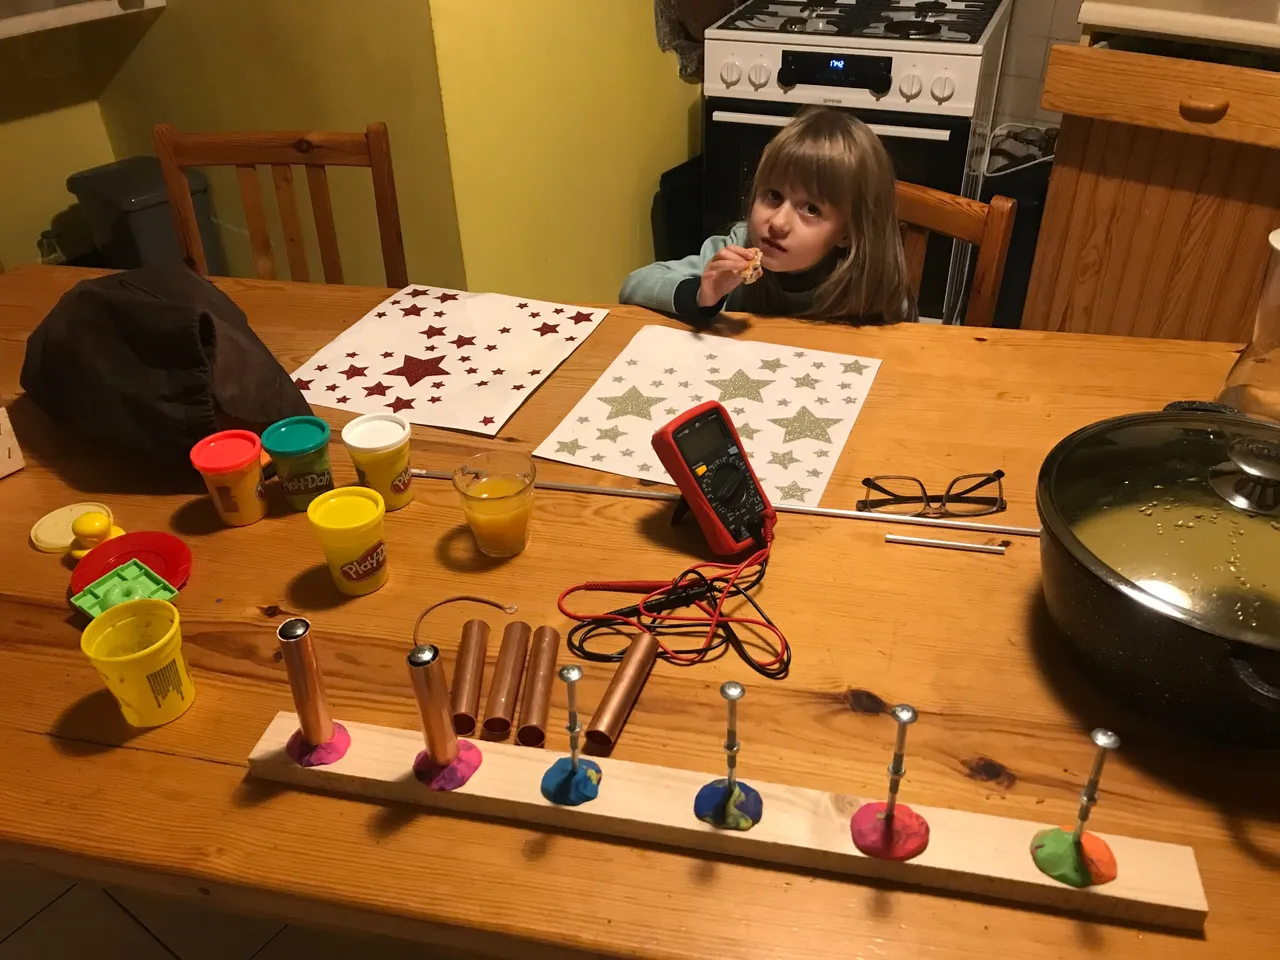
The aluminium was put to one side knowing the zinc was more effective and I began to create a row of cells, wired in series.
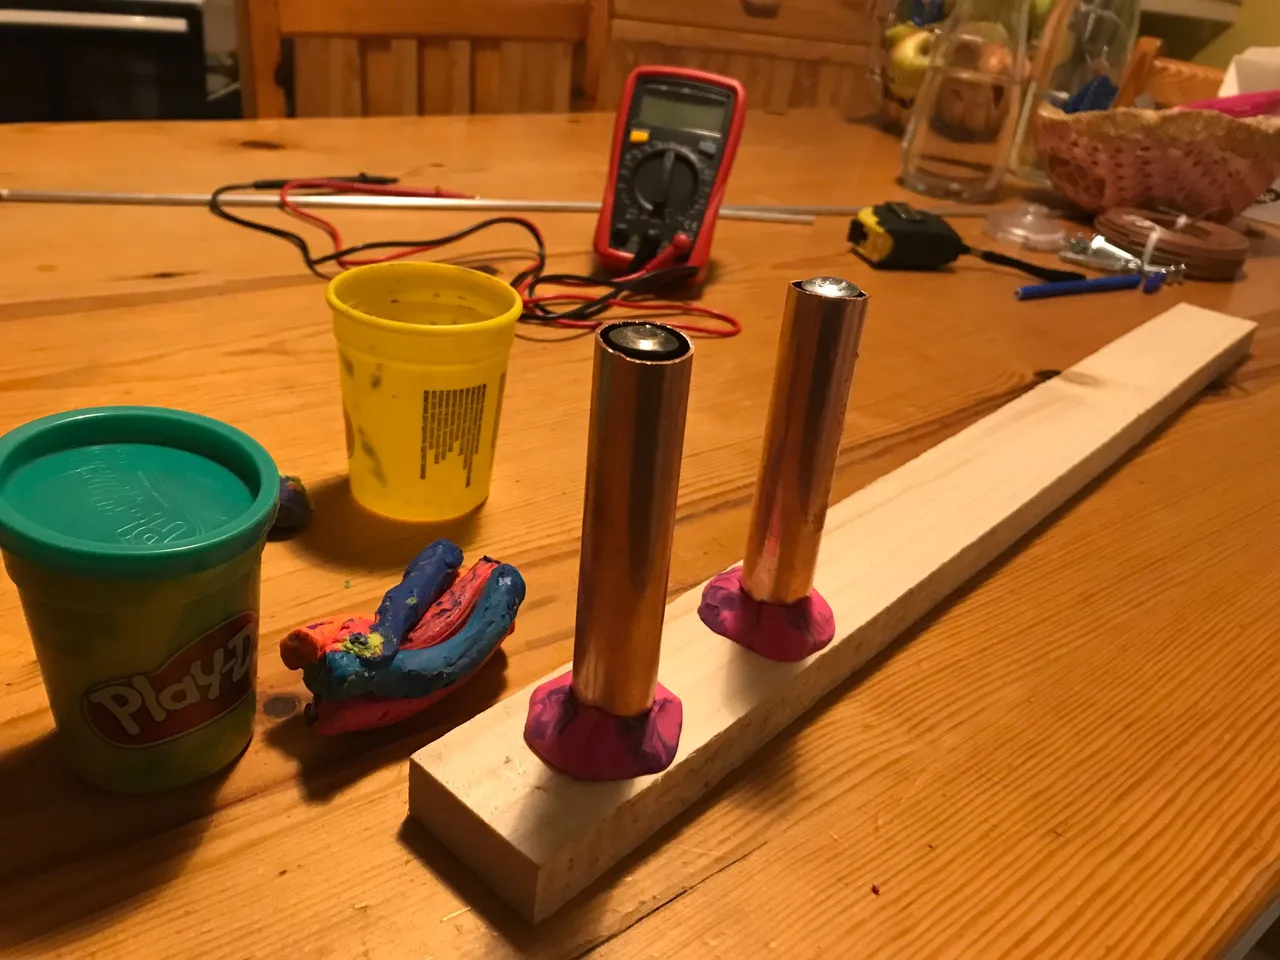
It turns out I don't have any solder to go with my soldering iron so I am using a glue gun instead which is far from ideal, but just about working for the purposes of this demonstration.
A connection is made between the copper cathode of one cell and the zinc anode of the other. I was hoping to see 1.8v (2x 0.9v) but I appear to be losing energy somewhere. Regardless, what this shows us is that the voltage output is increasing with the number of cells.
And so the experiment continues (right through Luna's tea time!) with a total of six cells.
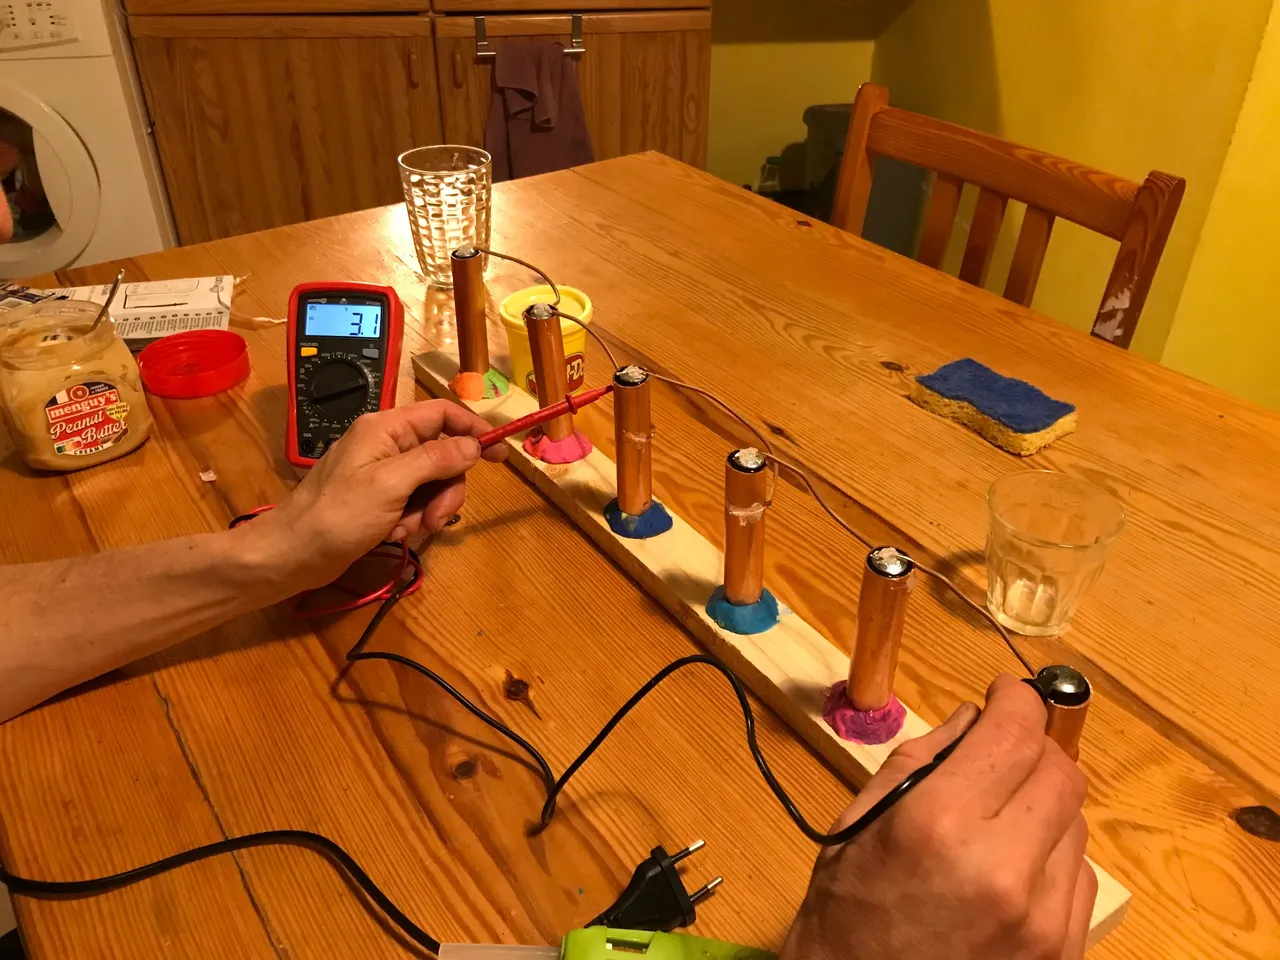
It was extremely hard to make the connections solid with the glue gun and after a while the water started to leak out of the play-doh bases but I was able to get a reading of 3.1v from these four cells. Again proving that output increases with number of cells.
The following day I decided to have a go at using damp earth instead.
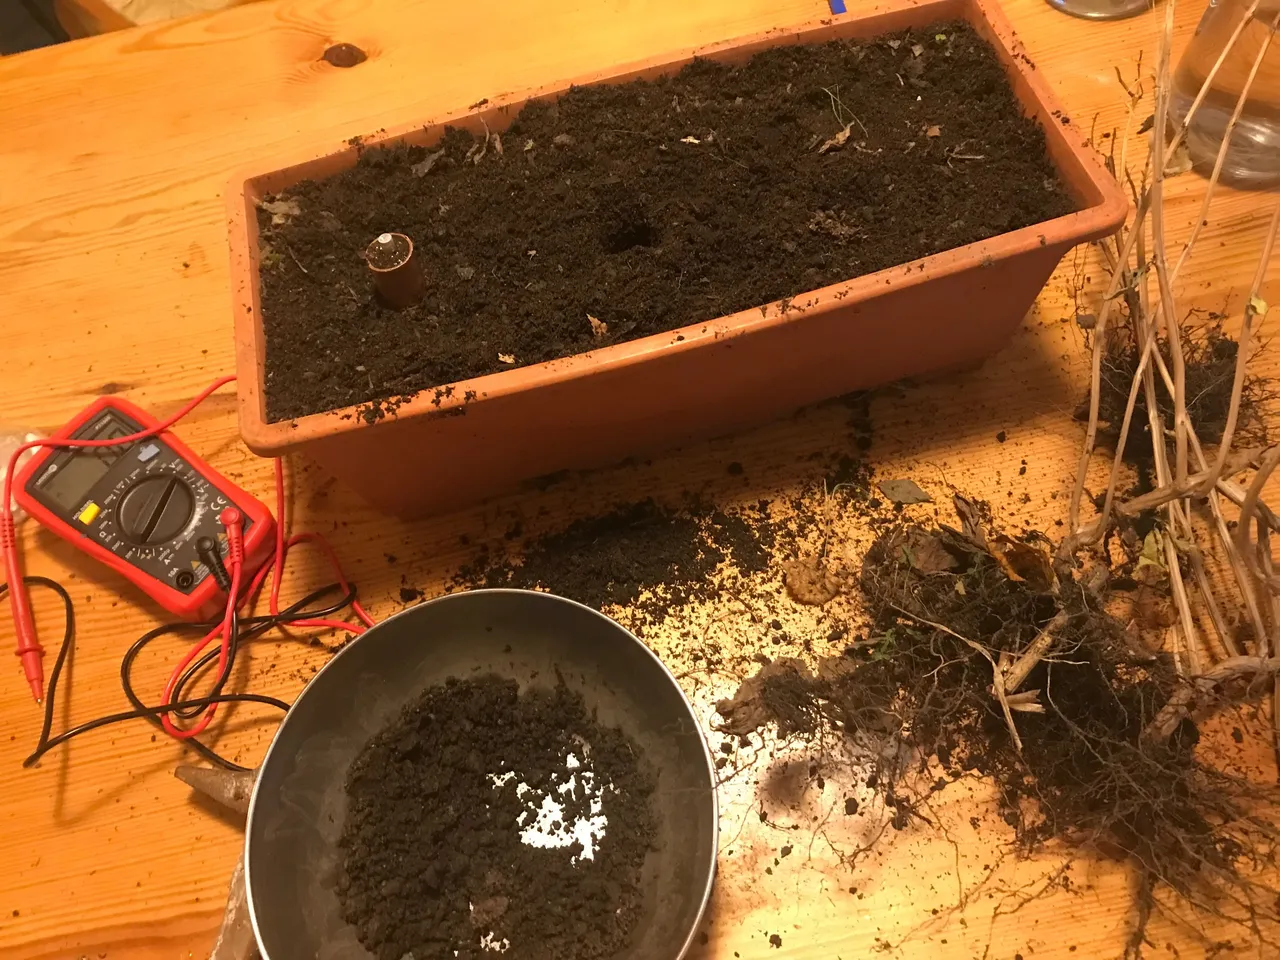
I made the same comparison between aluminium & zinc plated steel and again the zinc performed better.
Giving me the same reading of 0.9v.
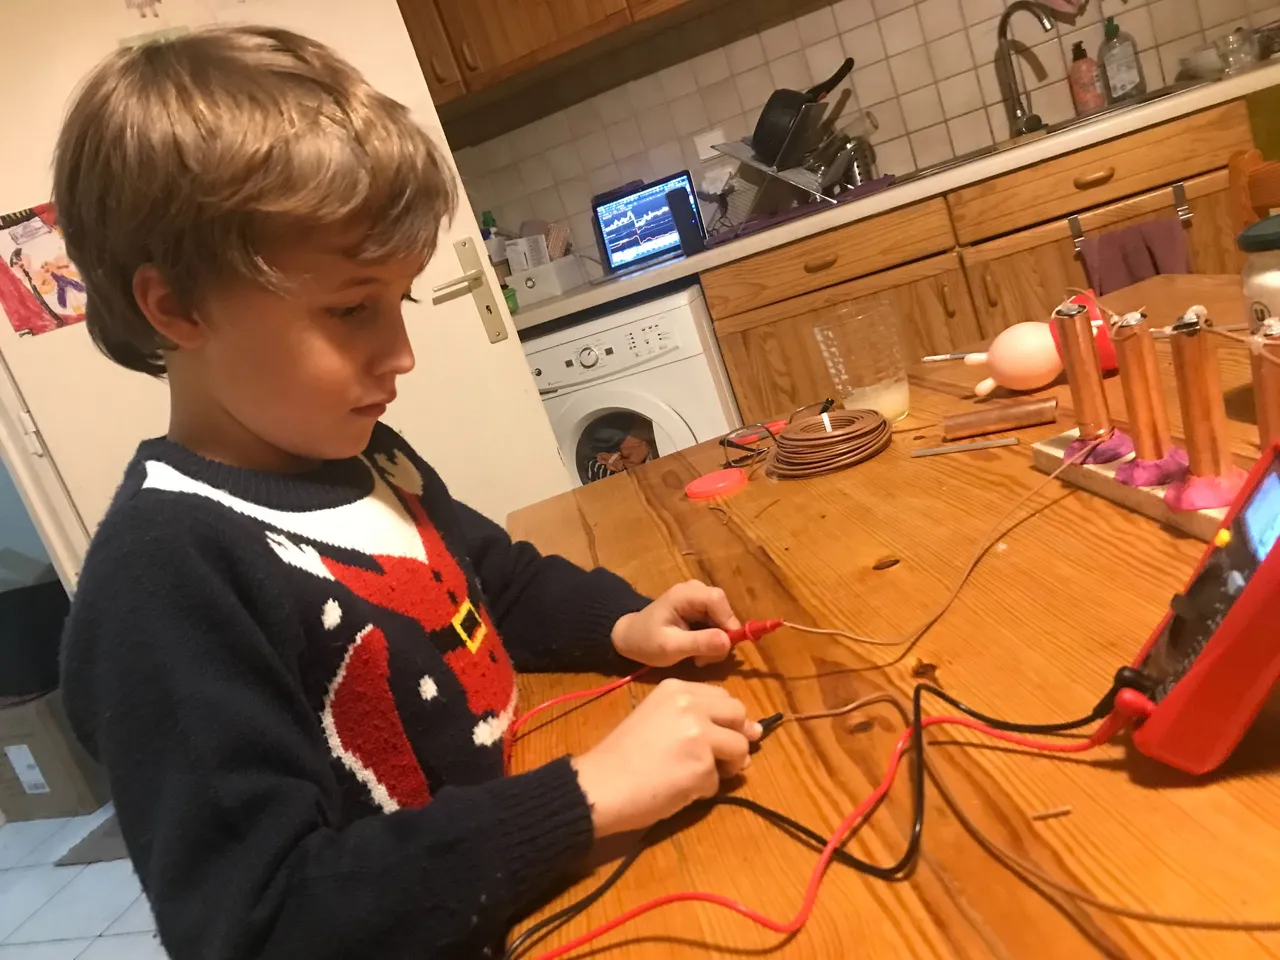
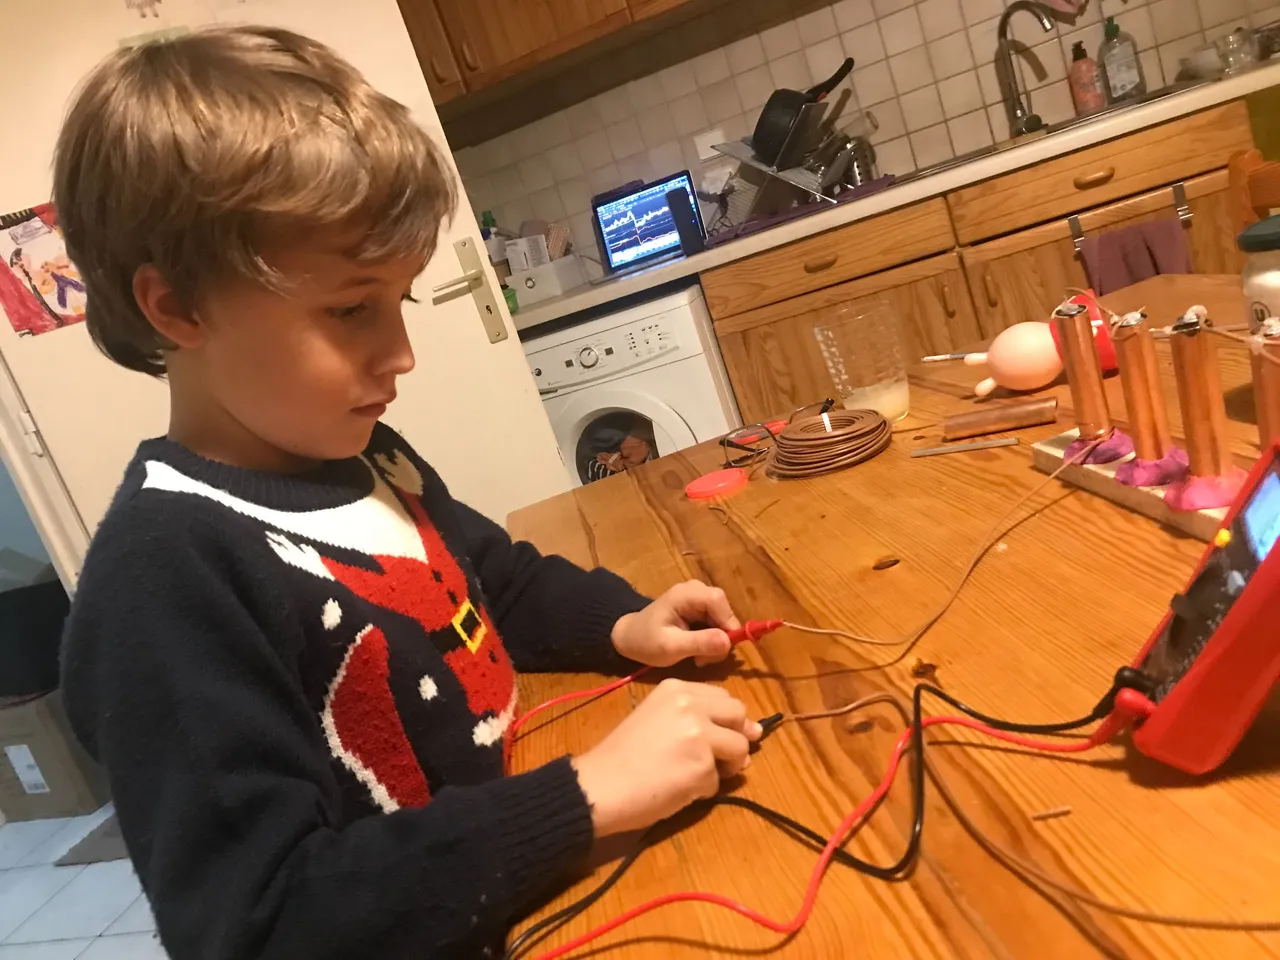
At this point I was joined by Santa's little helper who was keen to see the Peppa Pig working!
Here you can see we are getting a respectable 3.2v from four of our earth filled cells, which is 0.8v per cell and a little closer to their actual output of 0.9v per cell. Still losing energy somewhere though.
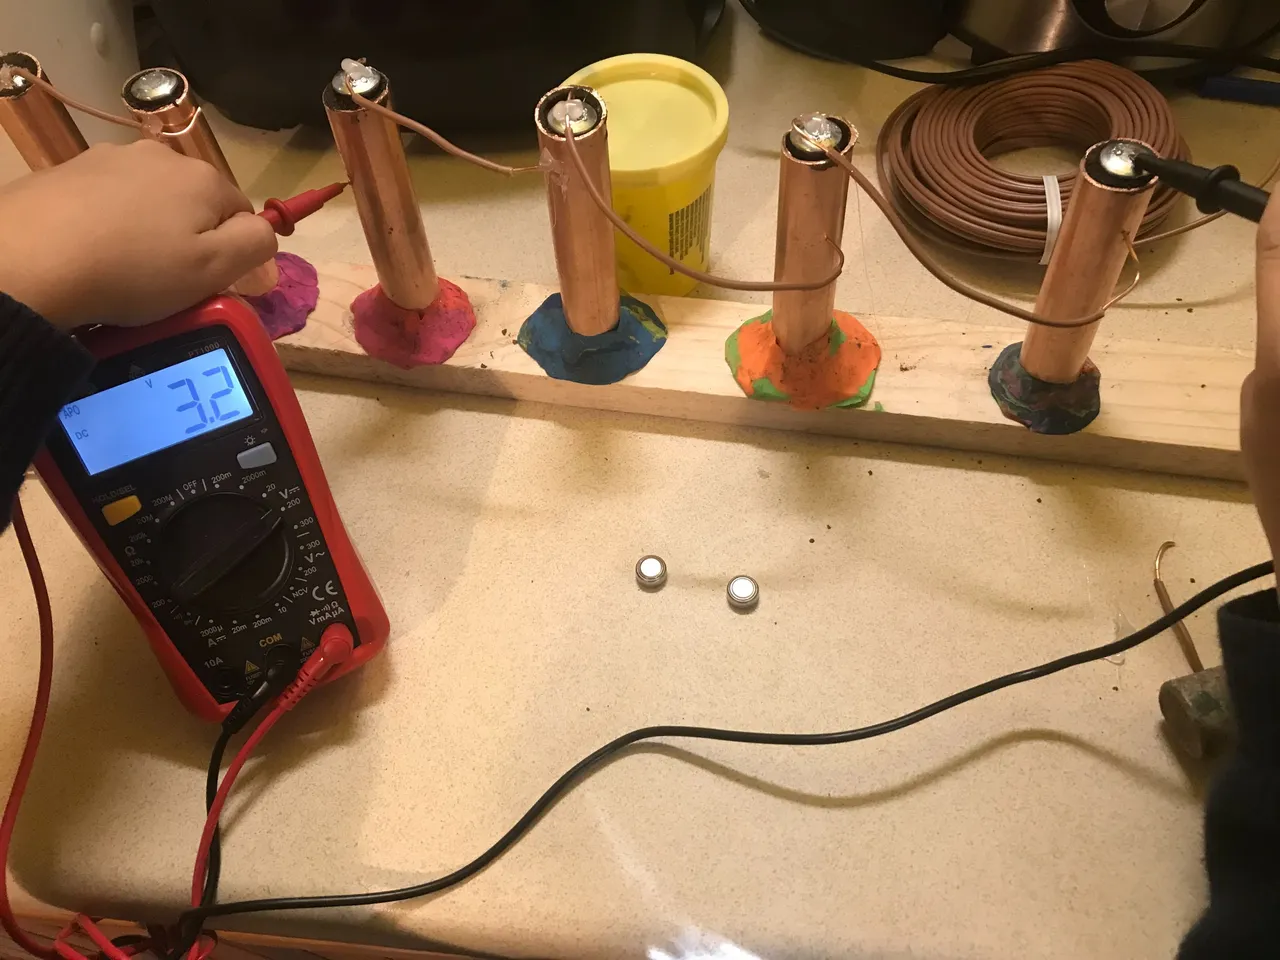
I put those two Peppa Pig batteries in the above shot to demonstrate the power I am producing here. Each one of those batteries is 1.5v and so, with my four earth battery cells I am producing more output than these two batteries. The difference of course is that my earth batteries can be made at home and they don't run out!
In the end it took a total of nine cells (some of which were using the less effective aluminium because I ran out of zinc plated bolts) to produce our desired output.
Here is the money shot in which we are producing a total of 5.2 volts!
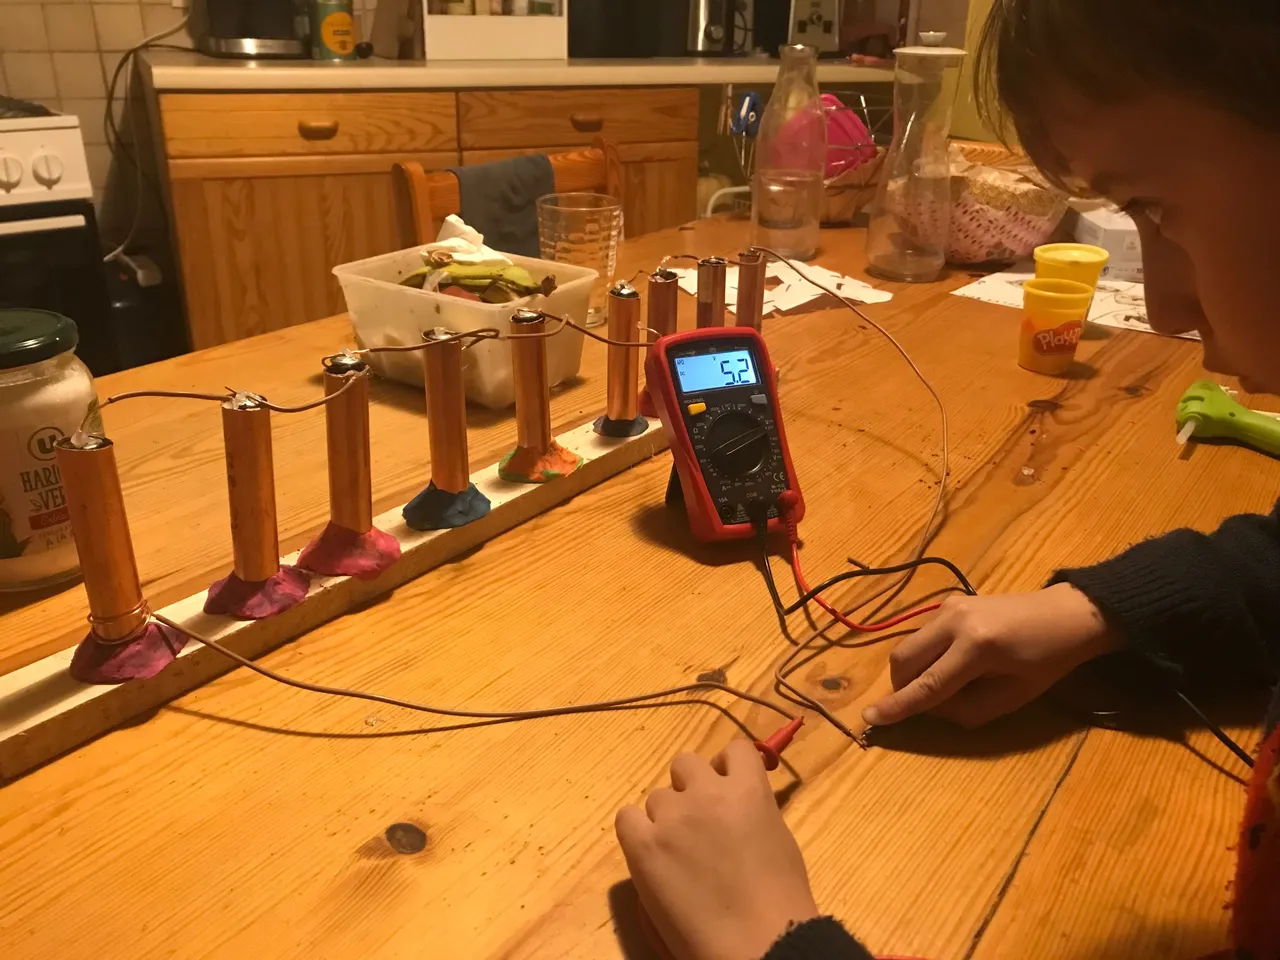
And that my friends is enough to power our 4.5v Peppa Pig.
When I touched those two cables onto the positive & negative elements of the Peppa Pig battery area, the light came on!
Unfortunately this light is designed to be very low and without the sufficient amperage it was even lower than normal and my camera was not able to pick it up. I realise now I should have chosen something brighter for this first test, like a collection of LEDs or perhaps something with movement, like a small motor?
So you are just going to have to trust me for now when I tell you that it worked! Sabrina & Esteban both witnessed it and that's good enough for me.
My next goal is to improve these connections. Just need to go buy some solder really. I also considered using little crocodile clips for these experiments but they didn't sell them at the local hardware store. Have ordered online.
Conclusion
I feel like I am making history here yet what I am doing is so very basic and can only imagine how many people before me must have reached these same conclusions based on these same experiments. (Any amount of voltage or amperage can be achieved with earth batteries).
What I am not understanding is how this has been kept a secret? Am I to expect now the men in black to turn up and shoot me with their heart attack gun? My body is in top shape by the way so if I do suddenly keel over you will know why! But jokes aside, why can't I find any evidence of people running their homes or their businesses in this manner?
It should I hope be obvious to you by now that if I can produce over 5v on my kitchen table in a few hours with a set-up which resembles a child's toy, a company with money behind it could quickly be producing a whole bunch more.
You may perhaps be wondering how one increases their amperage with a configuration of earth batteries?
Let's assume I have been able to create 1v cells and the amp reading on each of these cells is 0.8A (not much different to my actual readings). Let's also assume I am using metal solder in place of a glue gun, so all my connections are 100% conductive.
I then wire three sets of 12v in parallel, as shown here.
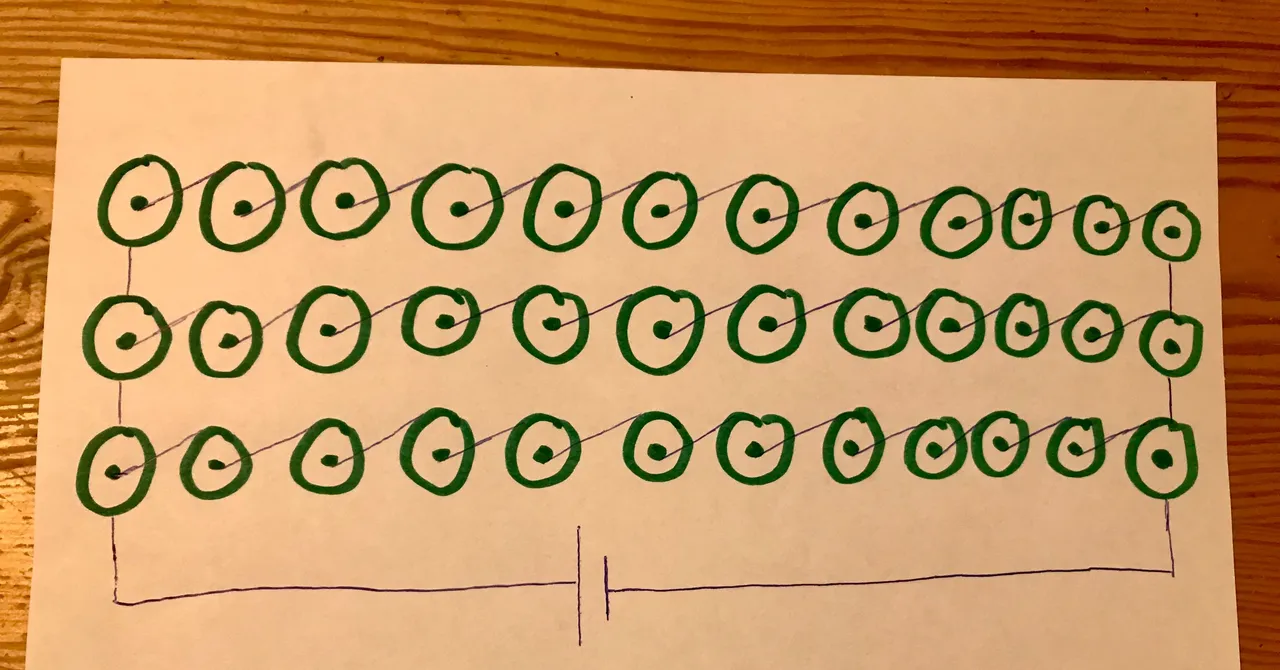
The final output will still be 12v but the amperage will increase by three times, giving me a total of 2.4A.
I don't know much about these things so I asked google how long it takes to charge a 12v car battery with a current of around 2 amps:
A 2 amp battery charger takes about 12 – 30 hours to fully charge a 12V car battery, depending on the battery’s capacity, depth of discharge, and battery temperature. source
And so, the earth battery configuration seen above should charge a standard car battery in under a day. But increasing the number of rows will increase your amps and therefore decrease your charging time. 30A they say will charge a 12v car battery in just over 3h.
Perhaps, as I am new to this subject, there is something I am misunderstanding here, but to me it seems clear & pretty damn amazing! And way better than solar not only because earth batteries last forever and you can build them at home, but also because you can charge your battery at night while you sleep.
And why have one battery when you can have a bank of batteries from which you can power every single application in your home (once you introduce an inverter to turn the DC to AC).
So, guess what my next investment is?
That's right. Car battery & inverter.
Free energy is real my friends and I hope this post has served as a decent Christmas present to you all!
Now get out there and set this up for yourselves so that you may never again pay for electricity at a time when it is only going to get more and more expensive.
Love & Light everyone 💡
