✨🥦¡Hola amigos amantes de la comida! Espero estén pasando un gran día.🥦 ✨
Espero que tengas un gran fin de semana con tus seres queridos. Hace unos días fue el cumpleaños de mi madre hermosa y me pidió que le preparara unas ricas galletas, aunque me pareció un poco raro porque la que ama las galletas en la casa soy yo. Entonces, pensando en qué sabor prepararlas, recordé que hace unos meses le preparé unas galletas de avena que le gustaron mucho, así que decidí hacer unas galletas de avena, pero esta vez con un poco de coco, porque a ella le encanta el coco.
Así es amigos, en esta ocasión les comparto una deliciosa receta de galletas de avena y coco. Las galletas de avena son unas de mis favoritas porque saben como las barras de proteína o las galletas sin azúcar que compras cuando estás de dieta jaja. Son súper fáciles de preparar y si lo prefieres puedes reemplazar el azúcar agregando miel para endulzarlas.
🔸A continuación, los dejo con el paso a paso:
✨🥦¡Hello food loving friends! I hope you are super well on this day.🥦 ✨
I hope you have a great weekend with your loved ones. A few days ago it was my beautiful mother's birthday and she asked me to prepare some delicious cookies for her, although it seemed a bit strange to me because the one who loves cookies in the house is me. So, thinking about what flavor to prepare them, I remembered that a few months ago I prepared some oatmeal cookies that she really liked, so I decided to make some oatmeal cookies, but this time with a bit of coconut, because she loves coconut.
That's right, friends, this time I'm sharing with you some delicious recipes for oatmeal and coconut cookies. Oatmeal cookies are one of my favorites because they taste like the protein bars or sugar free cookies you buy on a diet haha. They are super easy to prepare and if you prefer you can replace the sugar by adding honey to sweeten them.
🔸Next, I leave you with the step by step:
♥️Espero les guste. ¡Comencemos!
♥️I hope you like it. Let's get started!

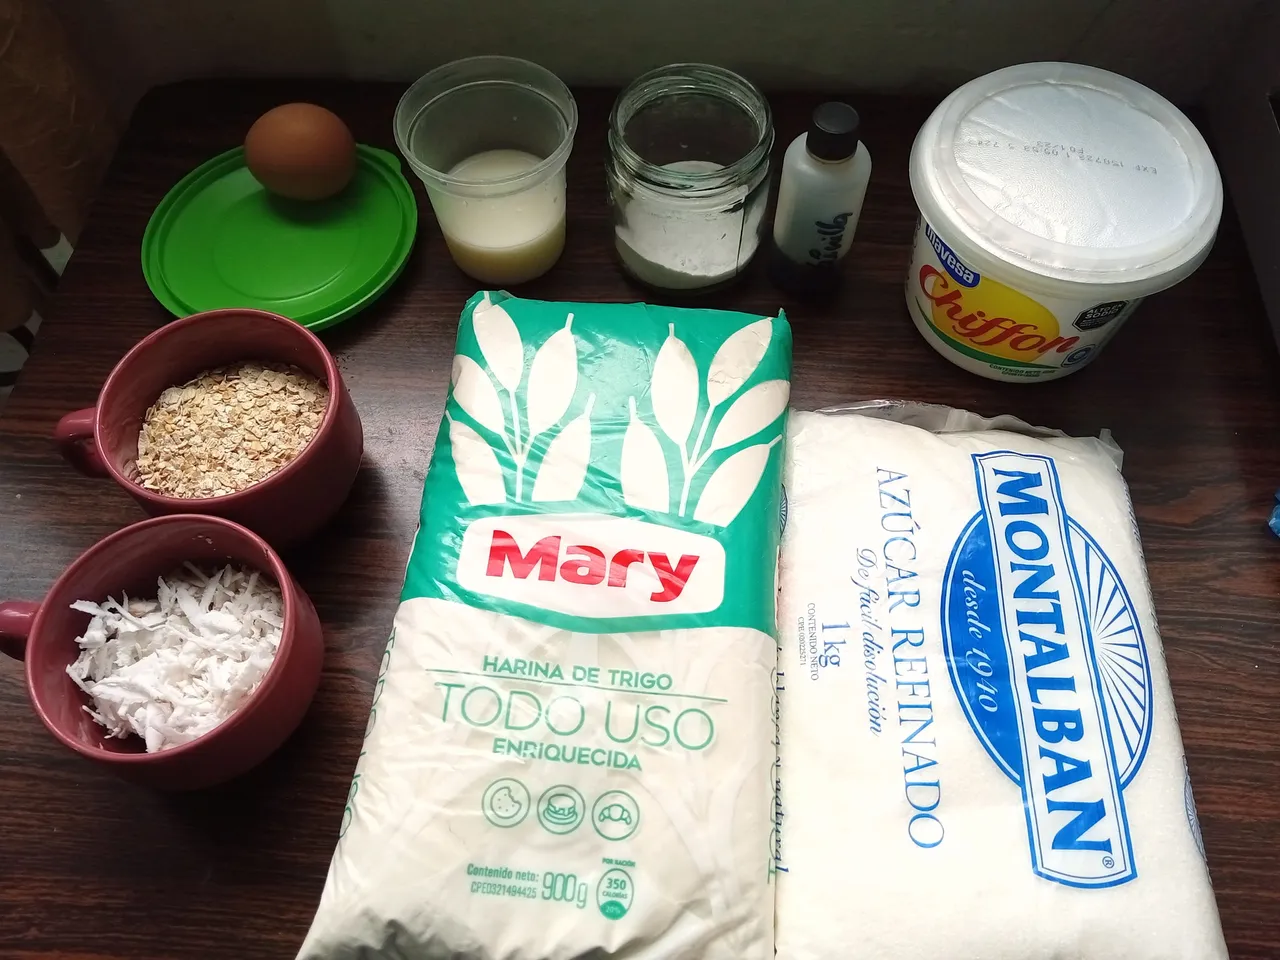
🍶 INGREDIENTES | 🍶 INGREDIENTS
- 300 g de harina de trigo.
- 100 g de avena en hojuelas
- 100 g de coco rallado.
- 125 g de azúcar.
- 1 cdta de polvo para hornear.
- 2 cds colmadas de mantequilla.
- 1 cdta de esencia de vainilla.
- 60 ml de leche.
- 1 huevo.
- 300 g of wheat flour.
- 100 g oat flakes
- 100 g of grated coconut.
- 125 g of sugar.
- 1 teaspoon of baking powder.
- 2 heaped cds of butter.
- 1 teaspoon of vanilla essence.
- 60 ml of milk.
- 1 egg.
🍪 PREPARACIÓN | 🍪 PREPARATION
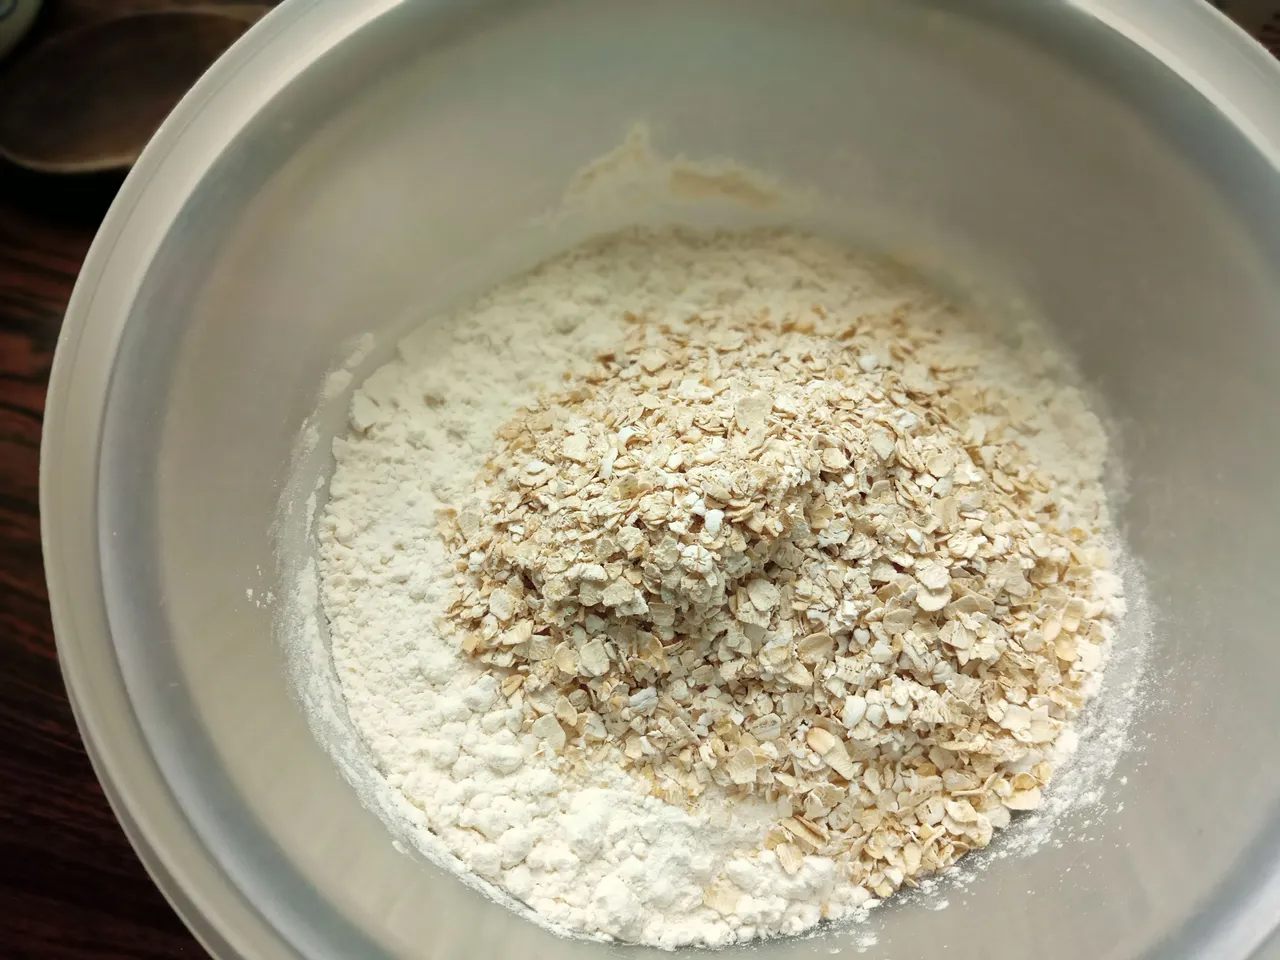
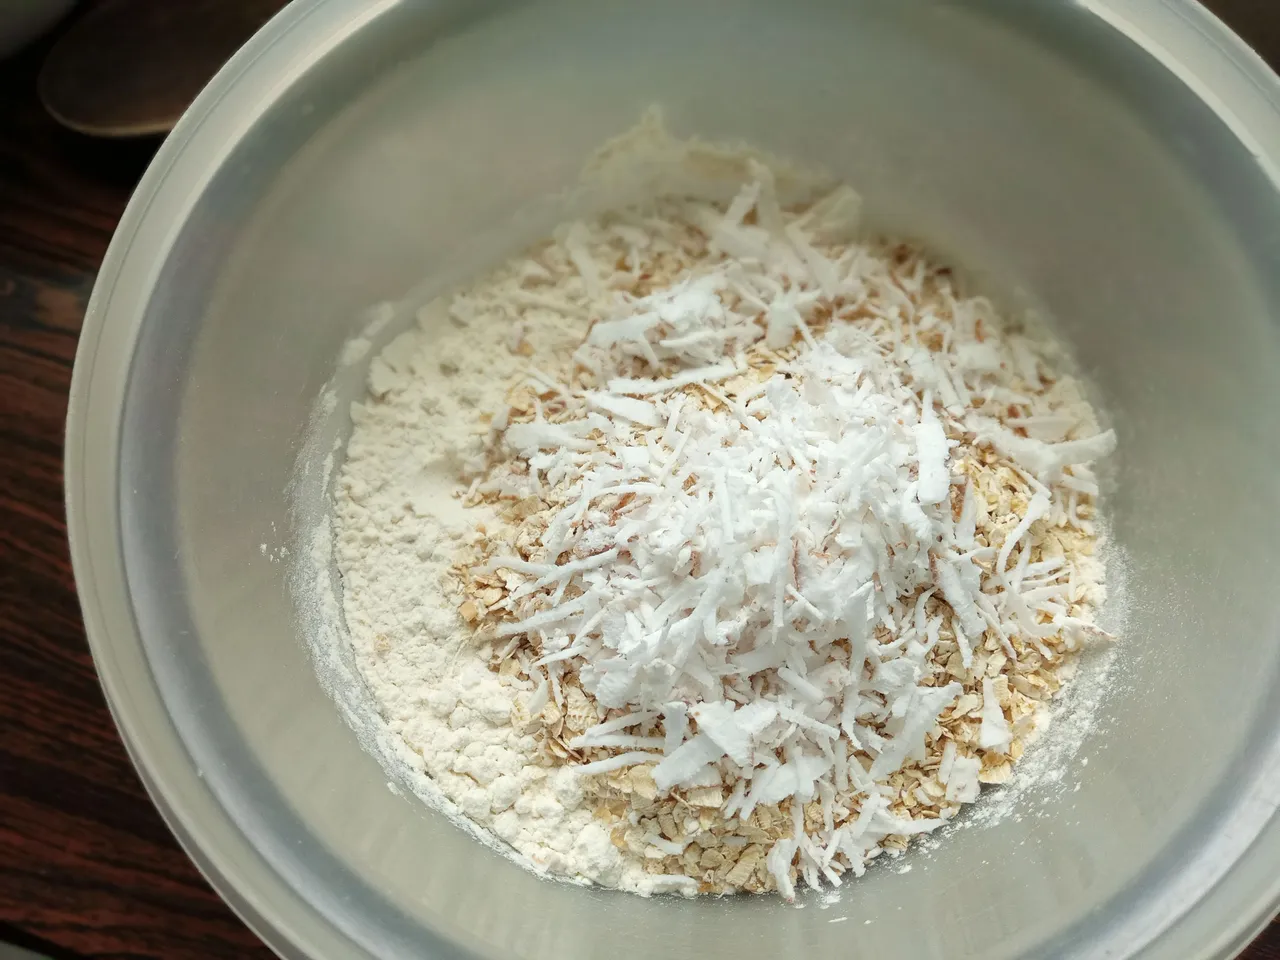
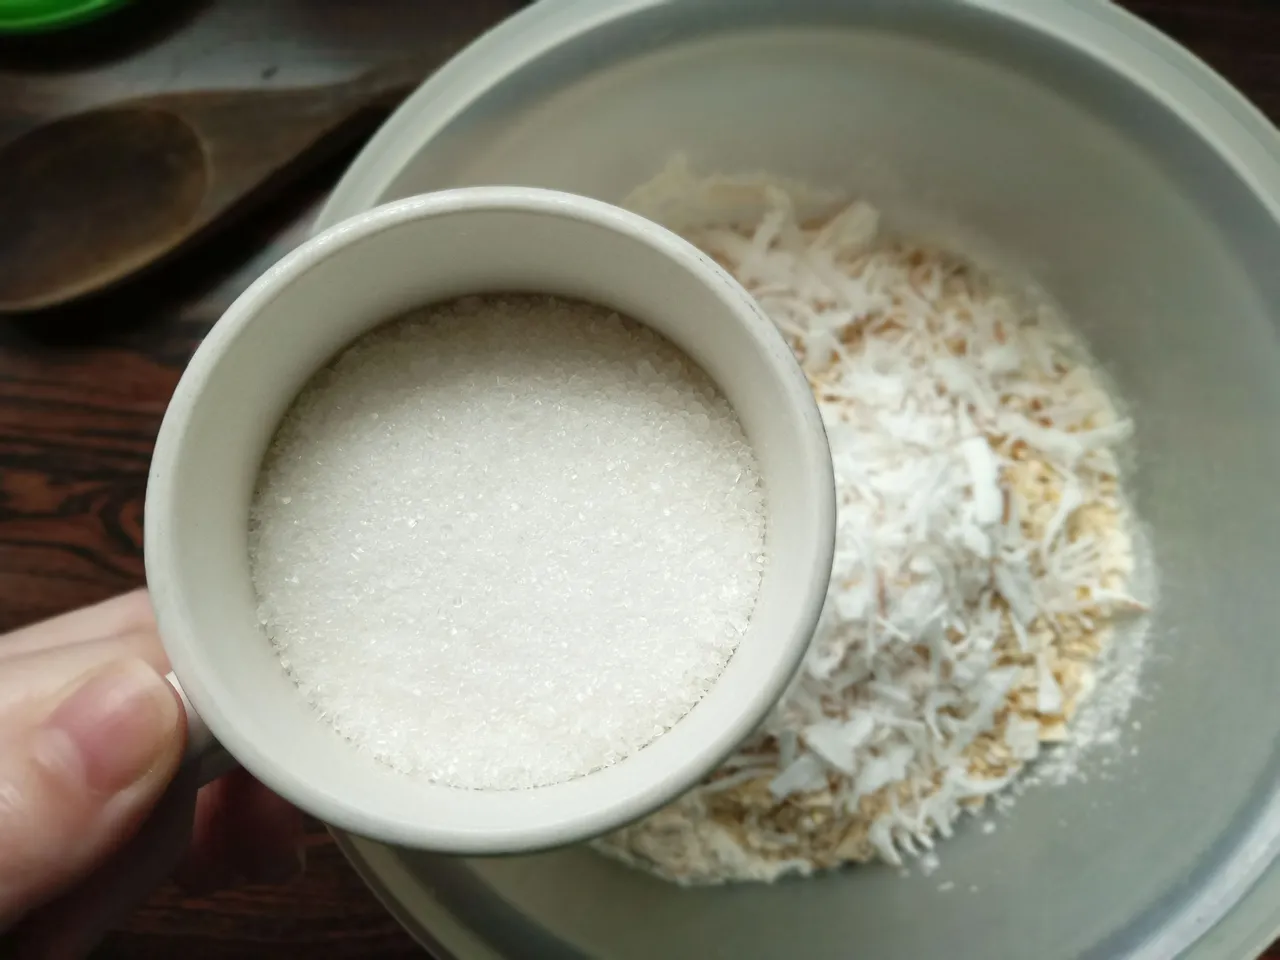
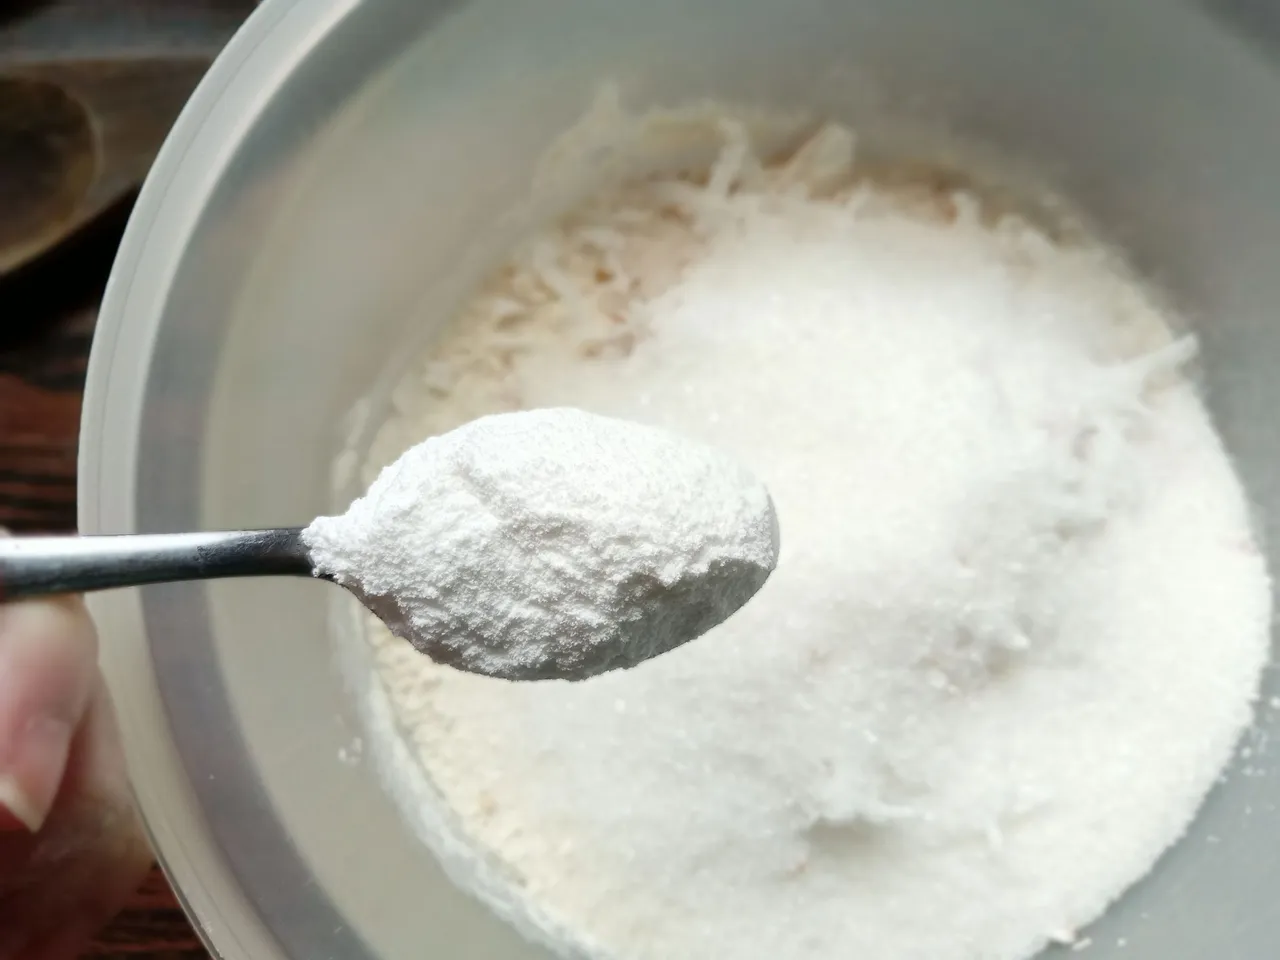
- PASO 1:
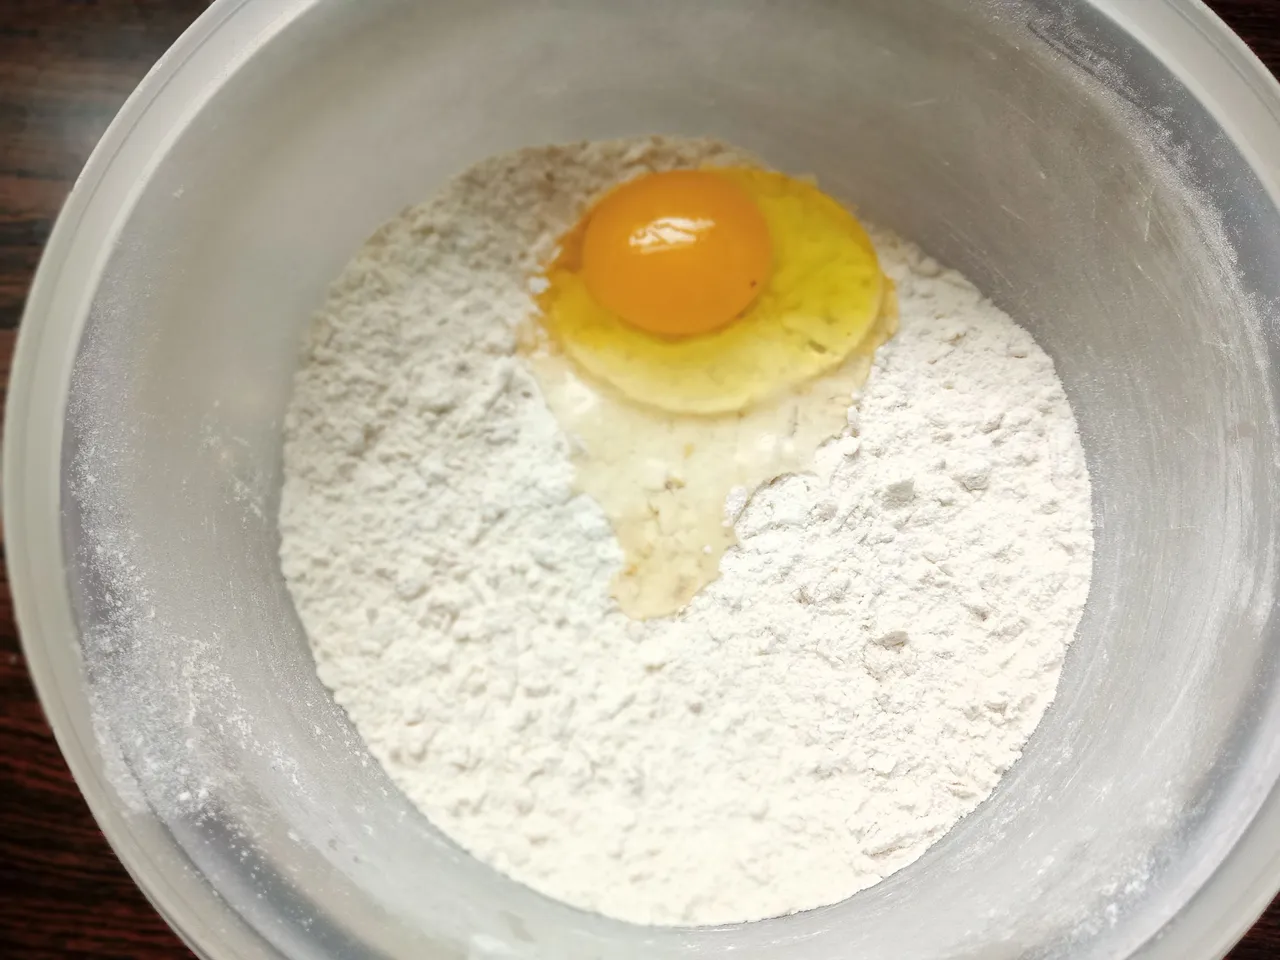
Lo primero que debemos hacer es tomar un recipiente hondo donde vamos a hacer nuestra preparación. Primeramente vamos con los ingredientes secos; agregue 300 g de harina de trigo, 100 g de avena en hojuelas, 100 g de coco rallado y luego agregue 1 cucharadita colmada de polvo de hornear e integre estos ingredientes secos.
- 1 STEP:
The first thing we must do is take a deep container where we are going to do our preparation. First we go with the dry ingredients; add 300 g of wheat flour, 100 g of oat flakes, 100 g of grated coconut and then add 1 heaping teaspoon of baking powder and integrate these dry ingredients.
- PASO 2:
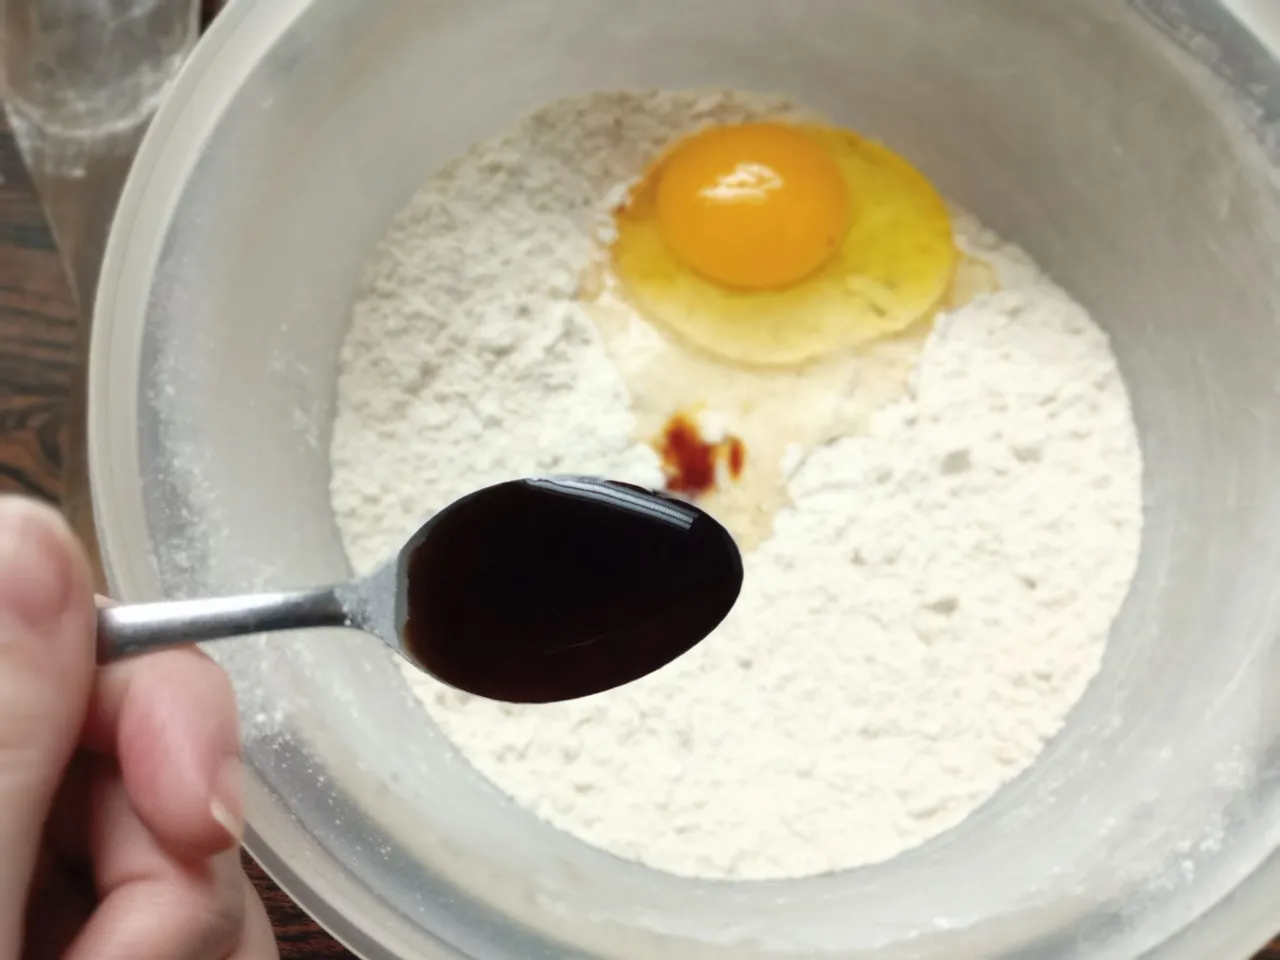
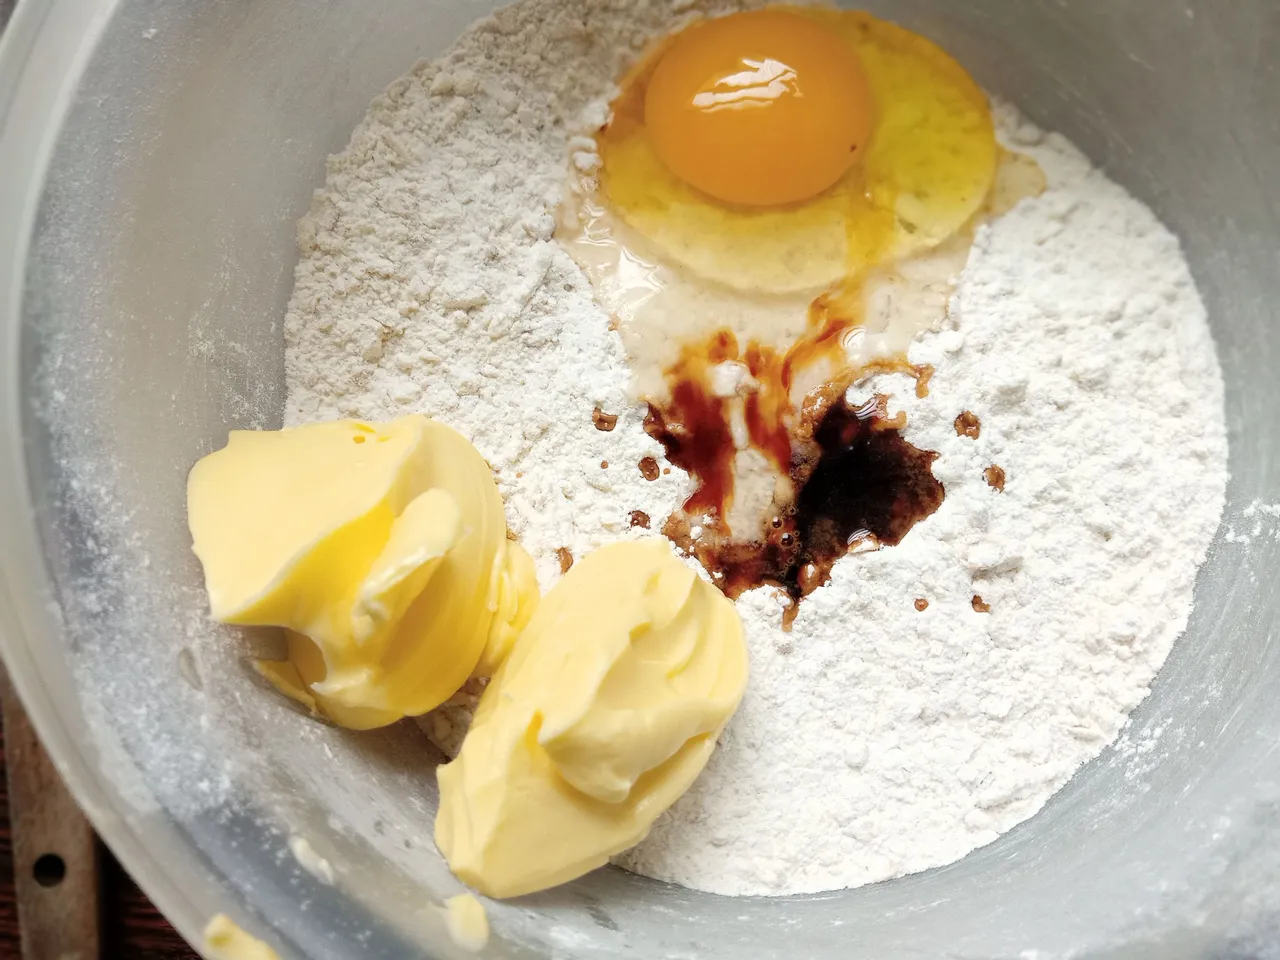
Ahora vamos con los ingredientes húmedos, comenzamos agregando 1 huevo, 1 cucharadita de esencia de vainilla y 2 cucharadas colmadas de mantequilla. Integramos estos ingredientes durante unos segundos, para que nos sea más fácil. Luego, añadimos los 60 ml de leche e integramos muy bien.
- 2 STEP:
Now we go with the wet ingredients, we start by adding 1 egg, 1 teaspoon of vanilla essence and 2 heaping tablespoons of butter. We integrate these ingredients for a few seconds, to make it easier for us. Then, we added the 60 ml of milk and integrated very well.
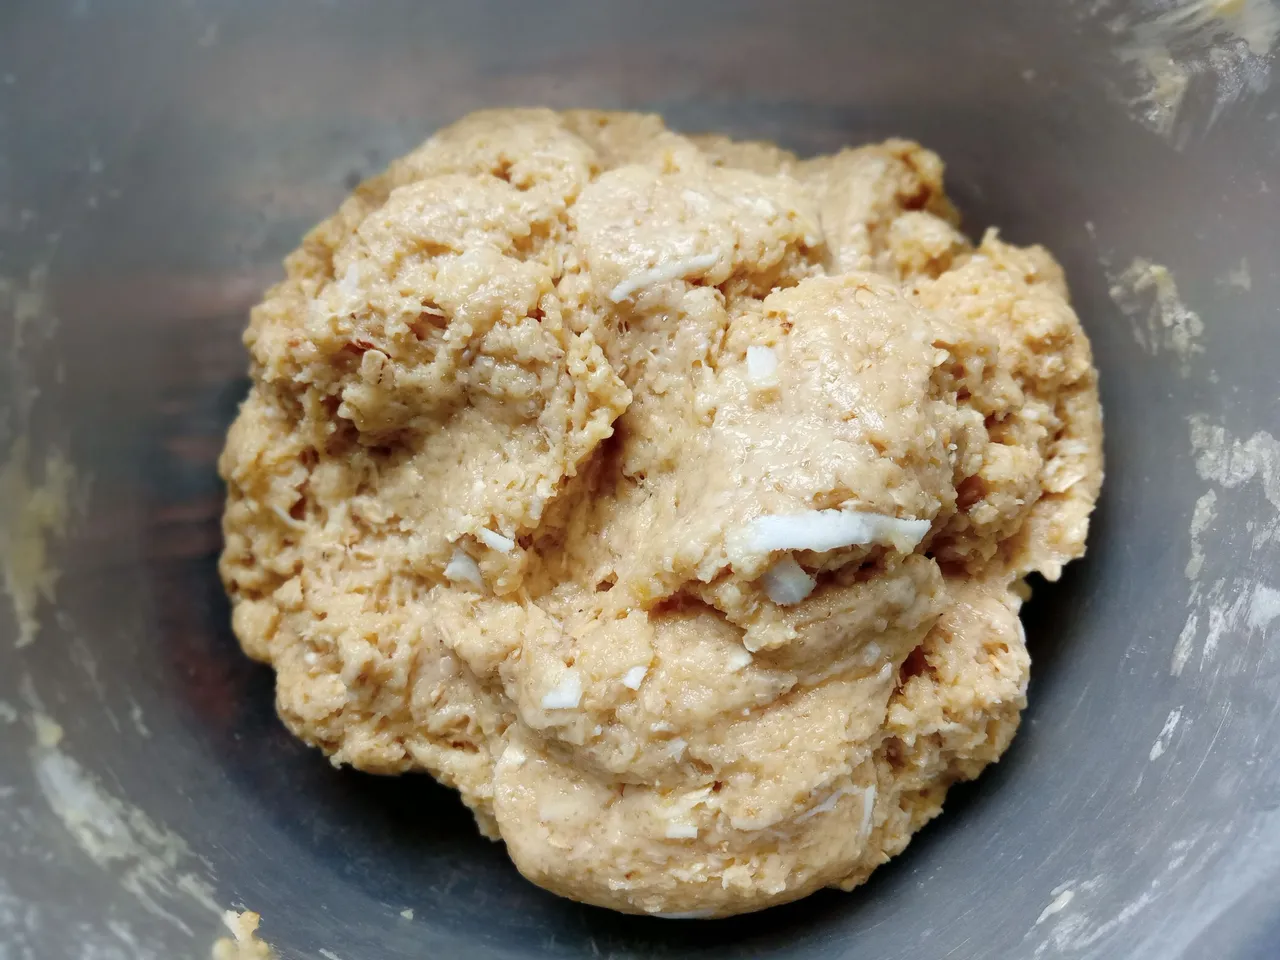
- PASO 3:
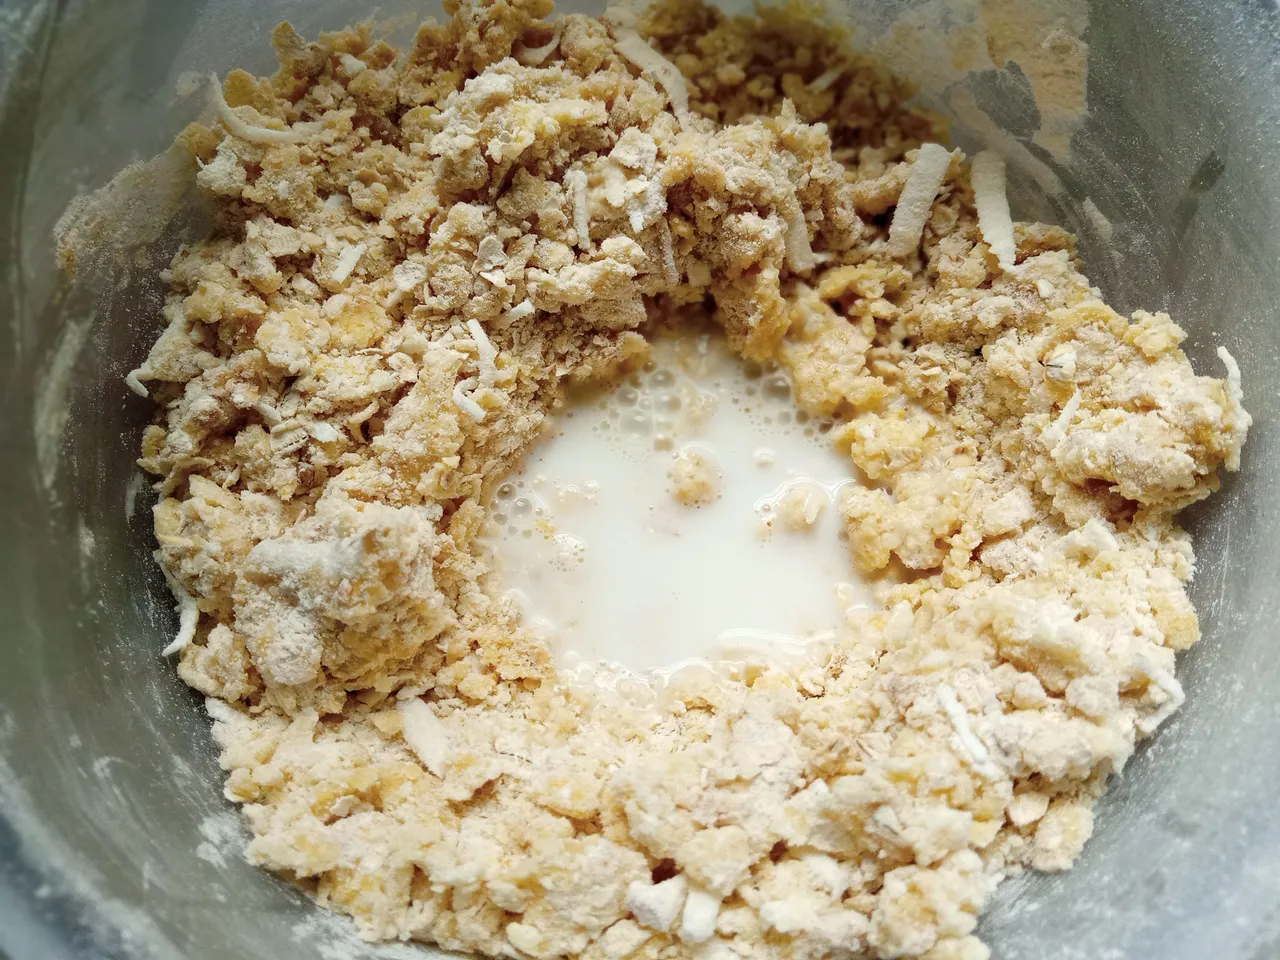
Nos debe quedar una masa de consistencia firme, es un poco pegajosa, pero al momento de formar una bola se mantiene. Esa cantidad de leche esta más que bien, pero si por algún motivo sientes que la masa quedo muy seca agrega solo un poco más de leche hasta conseguir la consistencia antes mencionada.
- 3 STEP:
We should have a firm consistency dough, it is a bit sticky but when forming a ball it remains. That amount of milk is more than good, but if for some reason you feel that the dough is too dry, add just a little more milk until you get the aforementioned consistency.
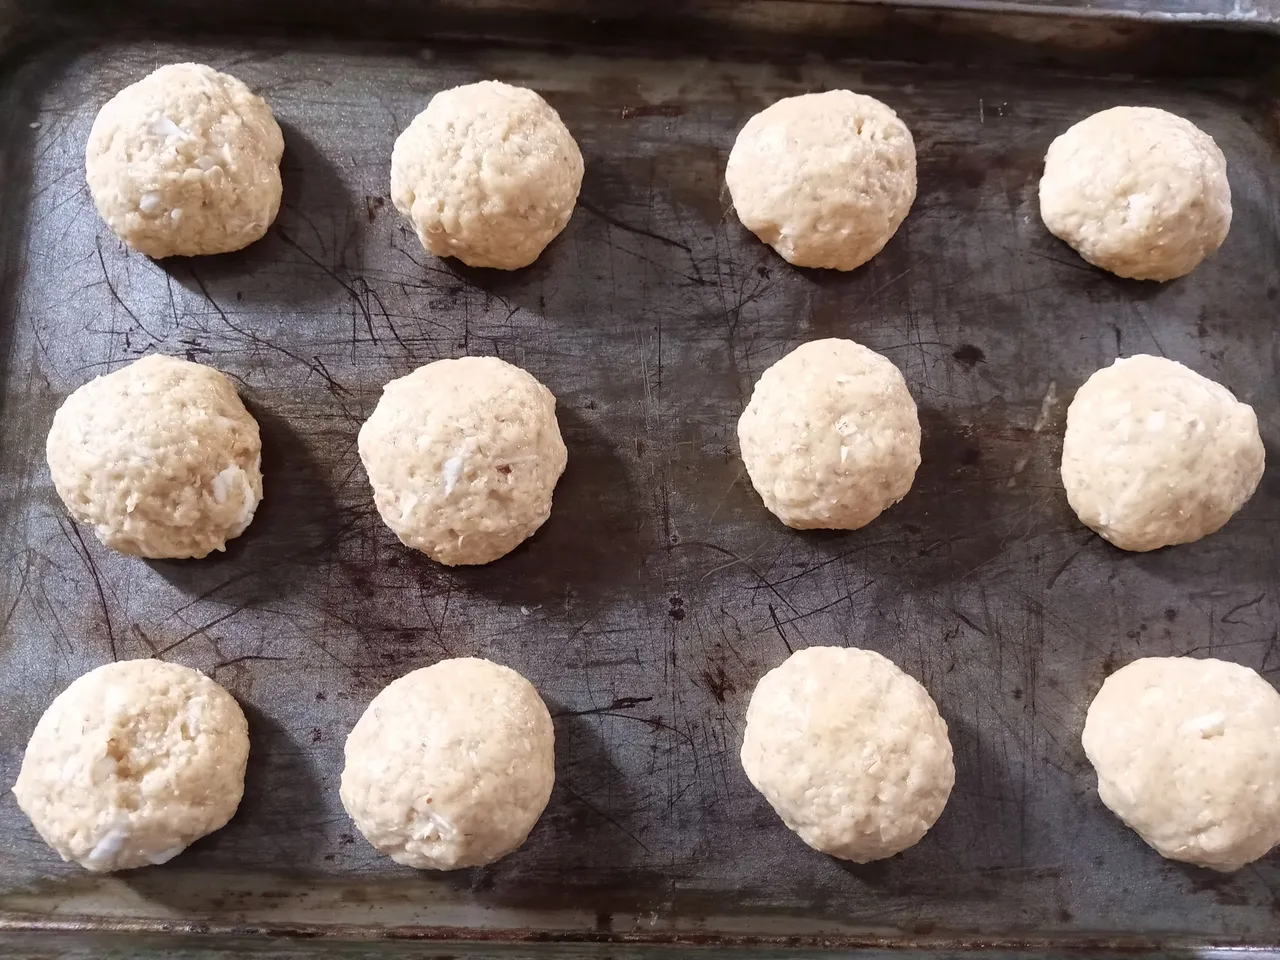
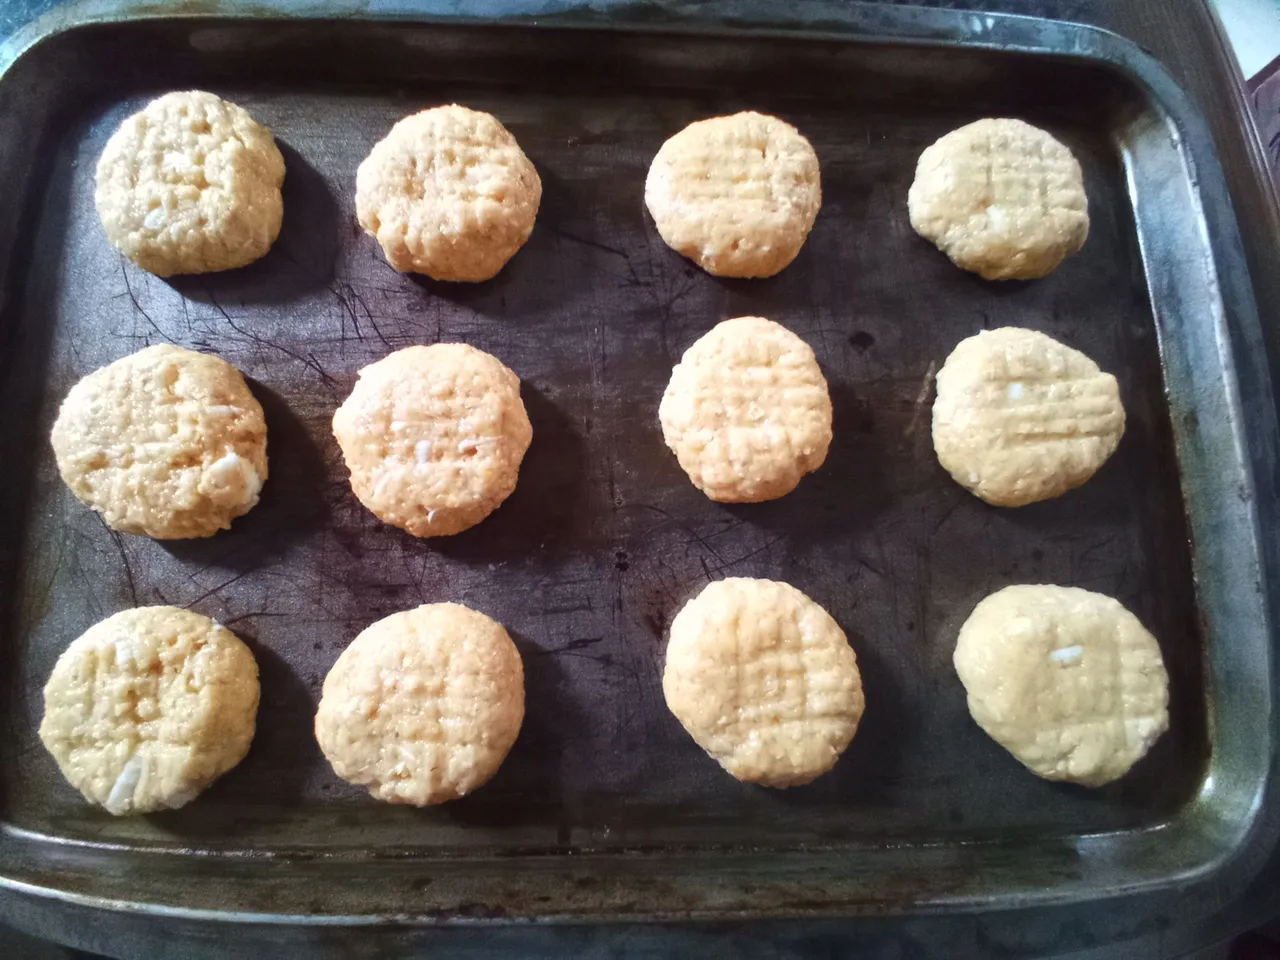
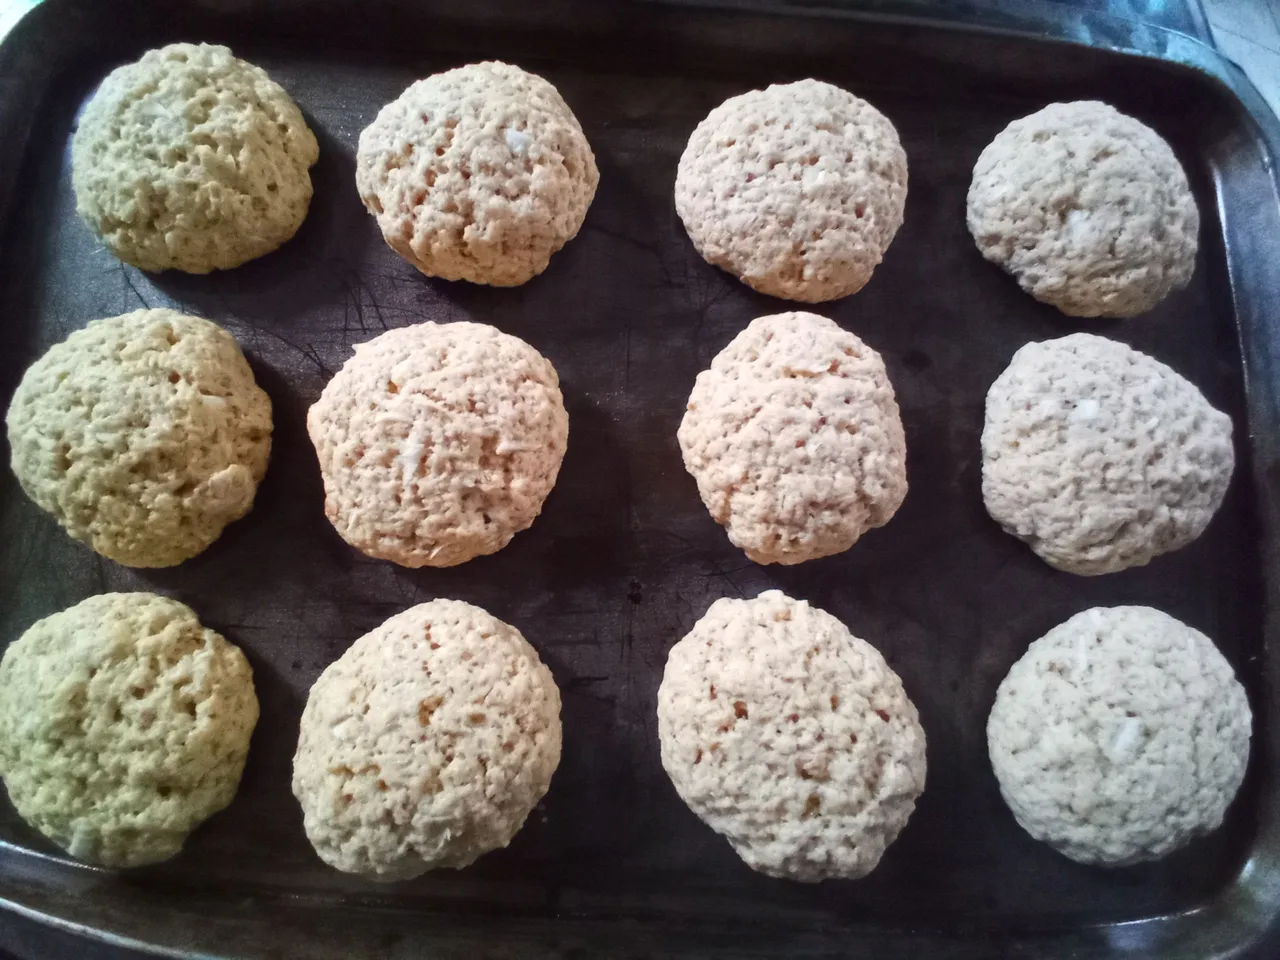
- PASO 4:
Es hora de formar nuestras galletas. Unta tus manos con un poco de aceite o harina, toma una porción de la masa, forma una bola de aproximadamente 2 cm y toma una bandeja previamente engrasada. Luego, aplana las galletas con ayuda de una cuchara, tenedor o con tu propia mano. Repite el mismo proceso con el resto de la masa, dejando un poco de espacio entre cada una, ya que crecerán en el horno. Finalmente llevar al horno precalentado a 180 °C por 10 a 15 minutos. Retirar del horno y dejar enfriar.
- 4 STEP:
It's time to form our cookies. Grease your hands with a little oil or flour, take a portion of the dough, form a ball of approximately 2 cm and take a previously greased tray. Then, flatten the cookies with the help of a spoon, fork or with your own hand. Repeat the same process with the rest of the dough, leaving a little space between each one, as they will rise in the oven. Finally take to the preheated oven at 180°C for 10 to 15 minutes. Remove from oven and let cool.
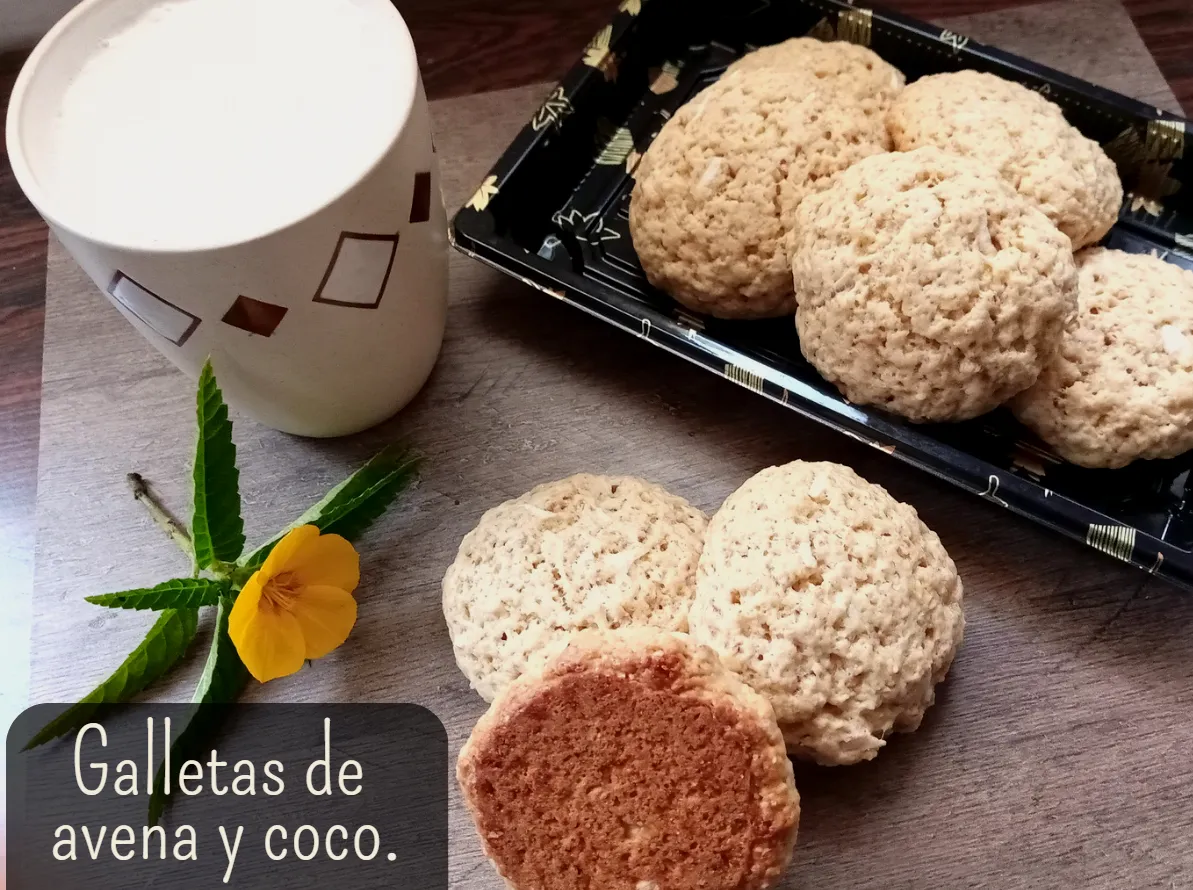
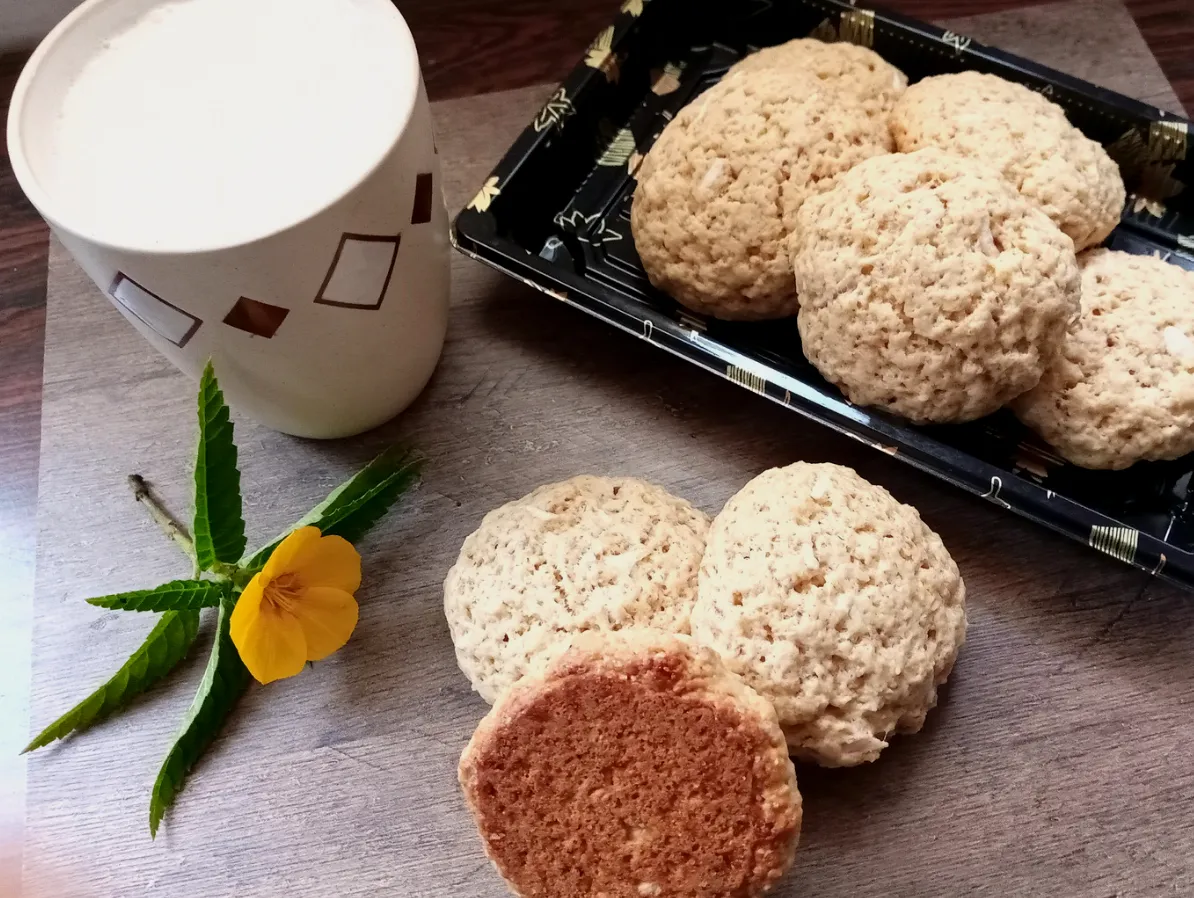
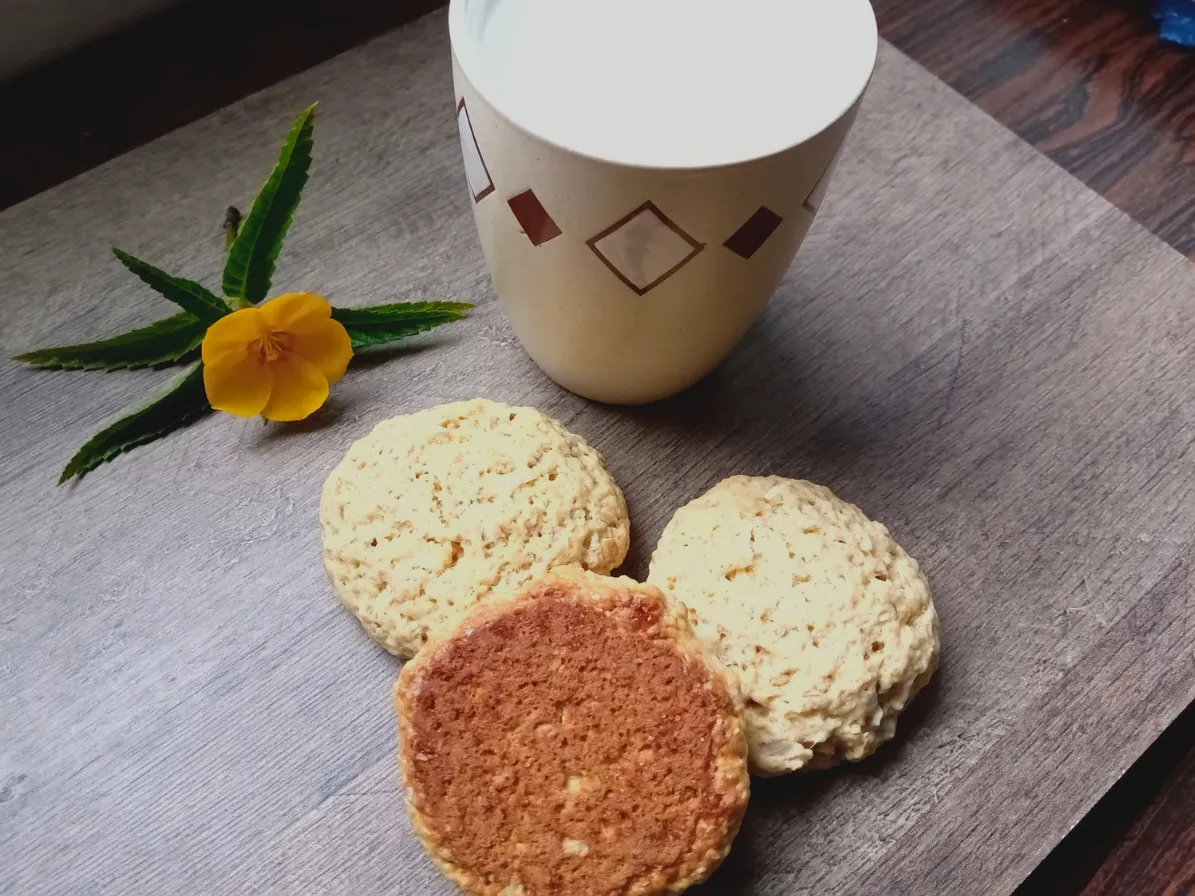
🍪 🥦¡Y listo!🍪 ✨ Así es como podemos preparar unas deliciosas, fáciles y rápidas galletas de avena. Esta masa es una de mis favoritas porque no se debe dejar endurecer en el refrigerador unos minutos, está lista al instante y solo es cuestión de formar las galletas y llevarlas al horno. Son muy ricas y como te mencioné antes, puedes agregarles el endulzante de tu preferencia. Espero que les haya gustado la receta y se animen a prepararla.
❤️Hasta la próxima publicación.
✨🍪¡And ready!🍪✨ This is how we can prepare delicious, easy and quick oatmeal cookies. This dough is one of my favorites because it should not be left to harden in the refrigerator for a few minutes, it is ready instantly and it is only a matter of forming the cookies and taking them to the oven. They are very rich and as I mentioned before, you can add the sweetener of your choice. I hope you liked the recipe and you are encouraged to prepare it.
❤️Until the next post.
✨RESULTADO: | ✨RESULT:
📱 Twitter
!TE DESEO UN GRAN DÏA¡
Todas las fotografías son de mi propiedad.
Separador y Fotos editadas en Canva
!I WISH YOU A GOOD DAY
All photographs are my property.
Photos edited in Canva