Hi Hi.!
👩🍳
It is Monday, the beginning of the week. I wish you a wonderful happy start, good vibes to all! ✨
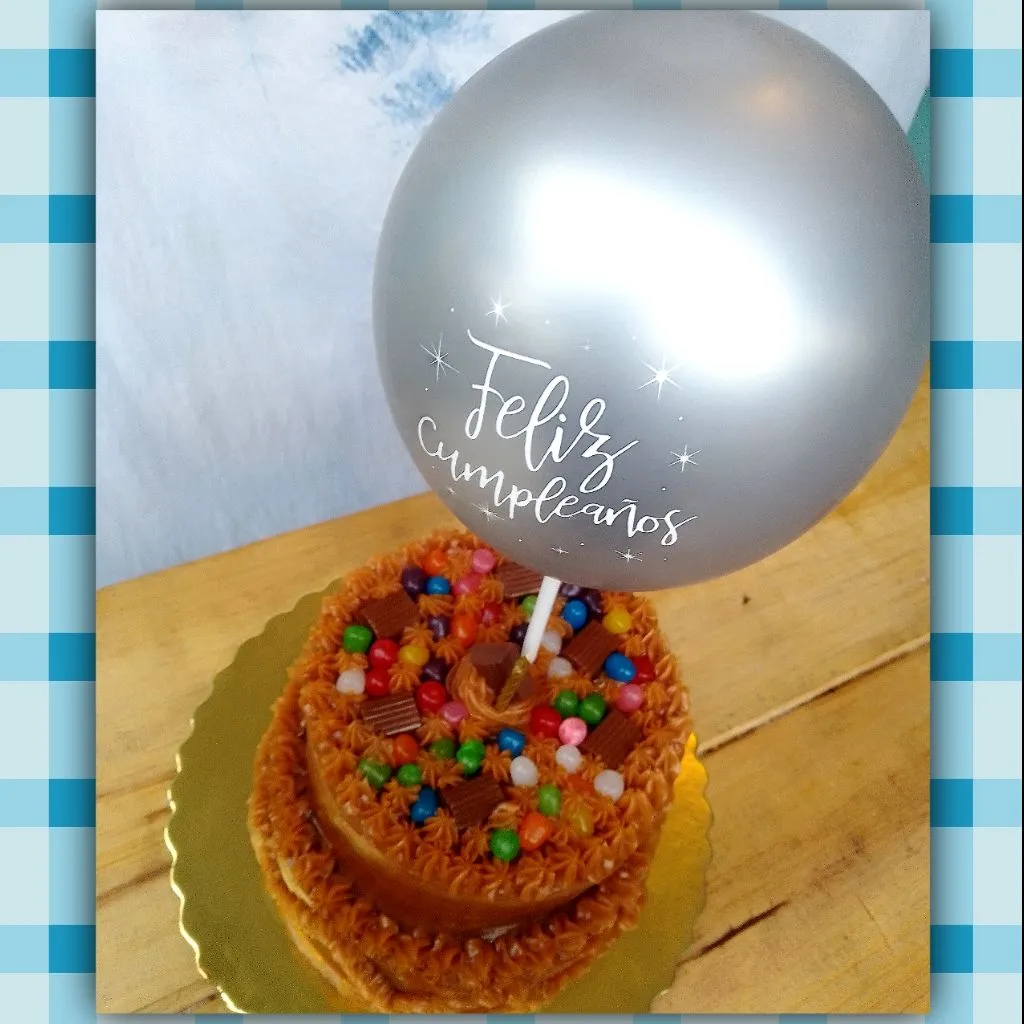
For my post today, I want to show you how I made my first two-tier cake. It is a very special cake, it was for my oldest son who was turning 10 years old.
The day before I had asked him how he loved her, and the only thing he told me without thinking and excited was: I love her as a arequipe!
That was a great characteristic, the texture of the Arequipe or well known as dulce de leche, is very pleasant to use. It is easy to assemble and mold, but at the same time with the exact turgidity. Regarding the sponge cake, a very soft one with a butter flavor.
Let's go step by step!
🙌🙌🙌🙌
👩🍳👩🍳👩🍳👩🍳👩🍳👩🍳
Ingredients:
For the cake:
📌 400 gr of butter.
📌 500 gr of sugar.
📌 1 kilo of self-rising flour.
📌 800 gr of milk.
📌 6 eggs.
📌 Essence of ice cream.
📌 Baking powder.
To decorate:
📌 Arequipe or sweet milk pastry.
📌 Colored rubbers.
📌 Chocolates.
👩🍳👩🍳👩🍳👩🍳👩🍳👩🍳
Step by Step:
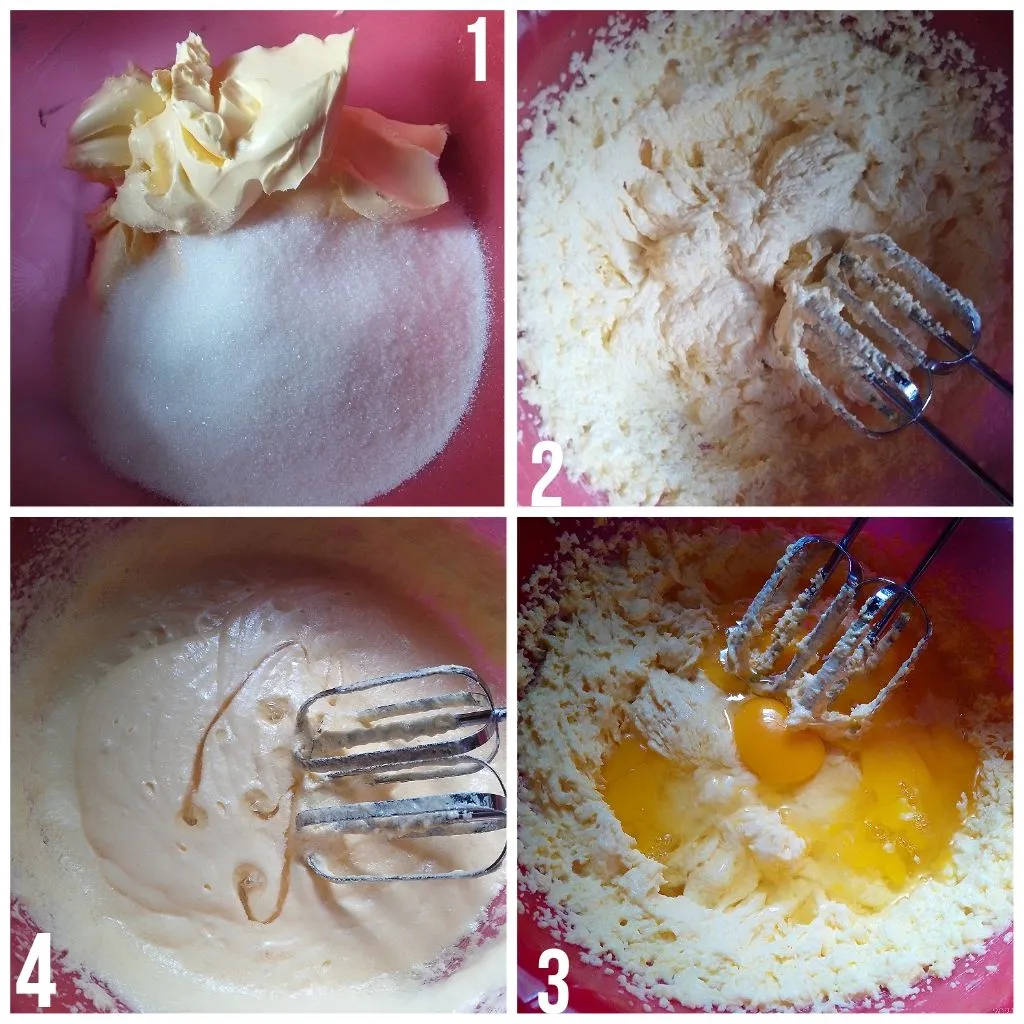
A.- In a large cup, we place the butter and sugar. With an electric mixer, beat well until creamy. See figure 1 and 2. Add the eggs and beat again. See figure 3. We add the essence of mantecado and then the baking powder. See figure 4.
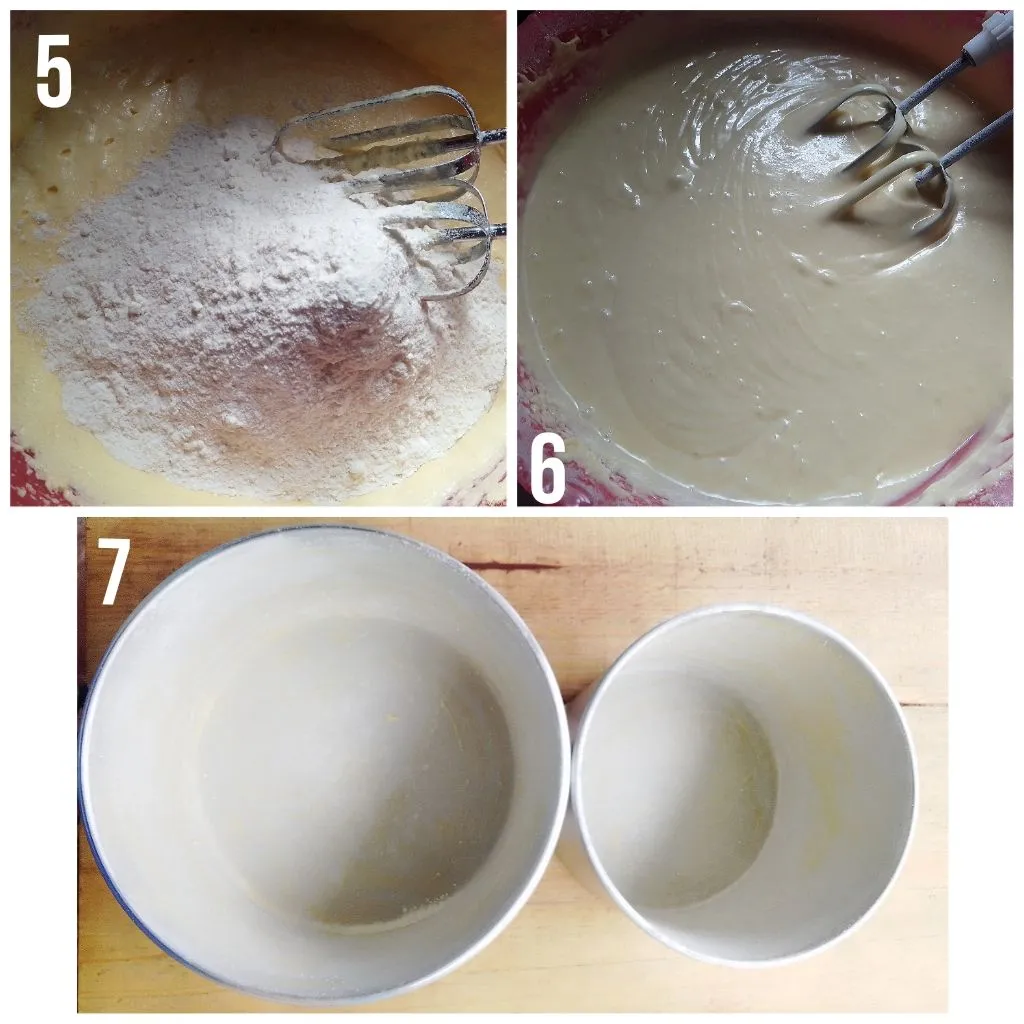
B.- We add flour and milk, alternately until we get a homogeneous mixture (without lumps). See figures 5 and 6. Now, we will take the two molds and place a layer of butter and another of flour. See figure 7. Notice now that both molds have different sizes, a larger one and a smaller one.
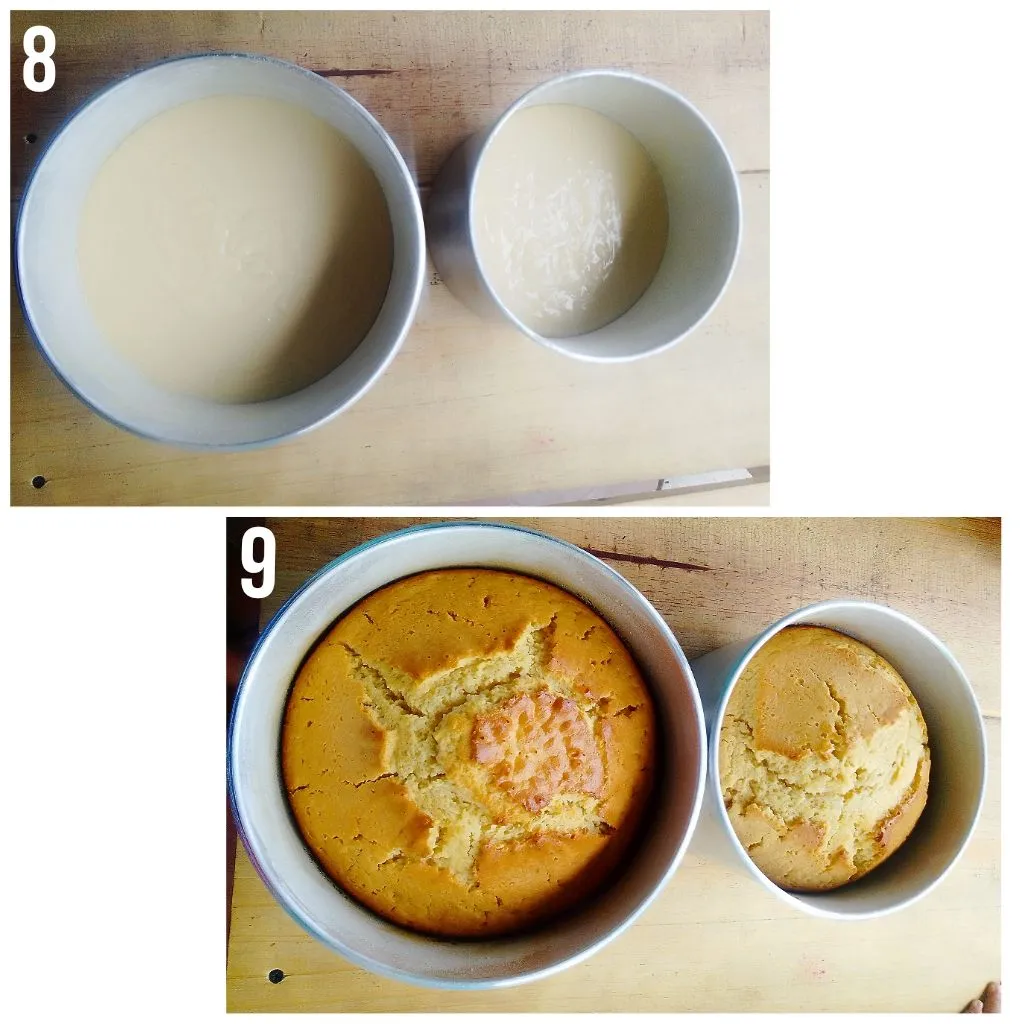
C.- We divide the mixture and pour it into both molds. See figure 8. Bake until the cake passes the clean toothpick test. This type of cake takes on a very nice golden color, from my side I love it. See figure 9.
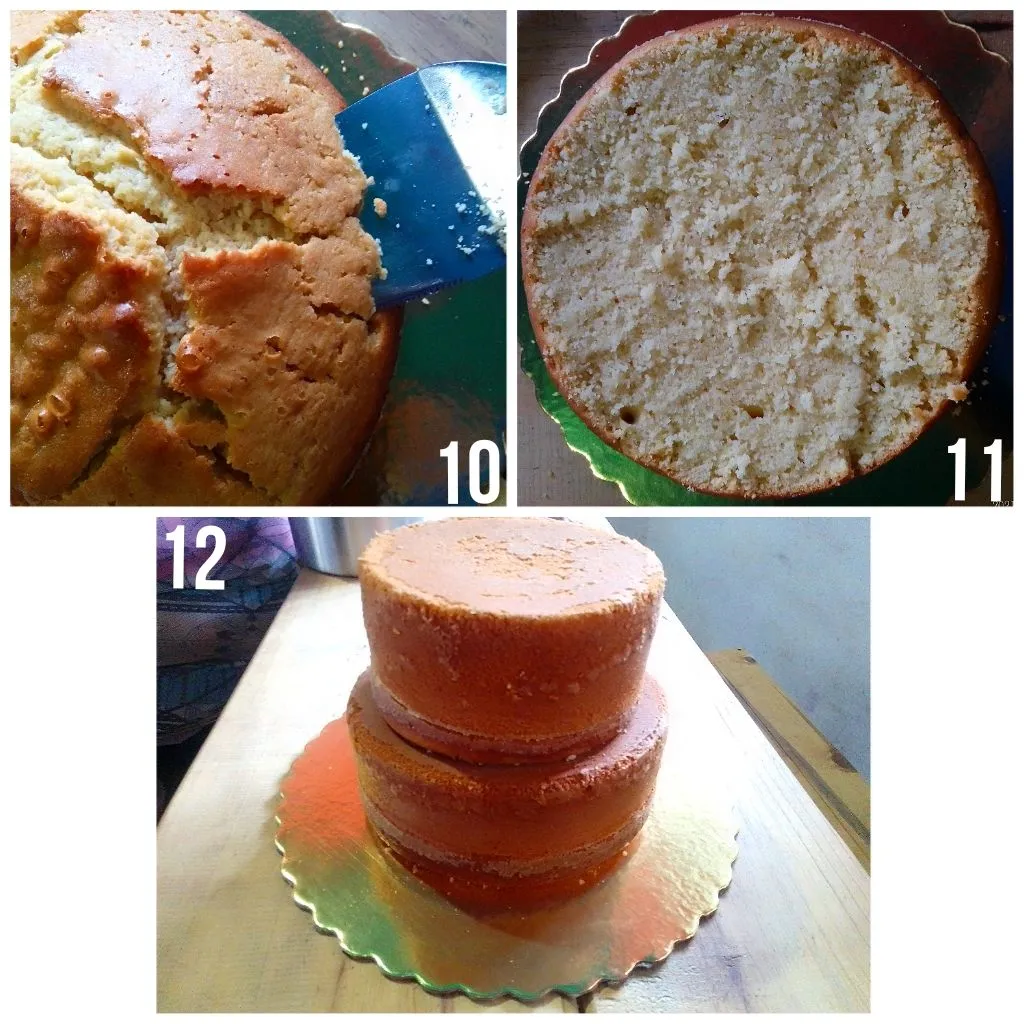
D.- We wait for the cake to cool down and rest, otherwise it will tend to break easily. Then after the time has elapsed, we take a sharp knife and cut the excess from above so that when it is turned it is perfectly straight and level. See figures 10 and 11. This should be done very carefully and without fear, if the cake has rested long enough, it will allow you to do it perfectly. So, now we place the two layers or two levels, in the middle of one and another, place a little dulce de leche. This will help the top stick to the bottom. See figure 12.
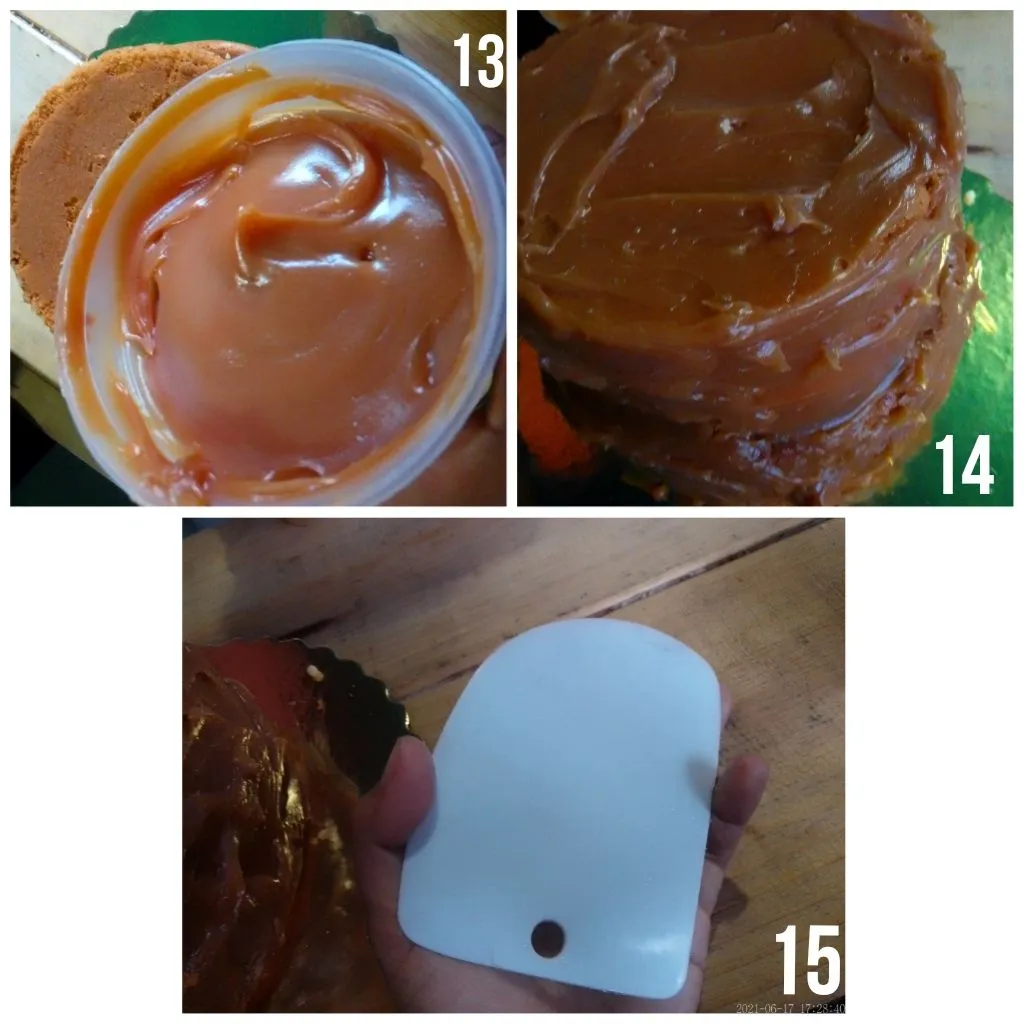
E.- We take the dulce de leche and place it over the entire cake, on its two levels. See figures 13 and 14. With the help of a pastry trowel, we smooth the surface and contour. See figure 15.
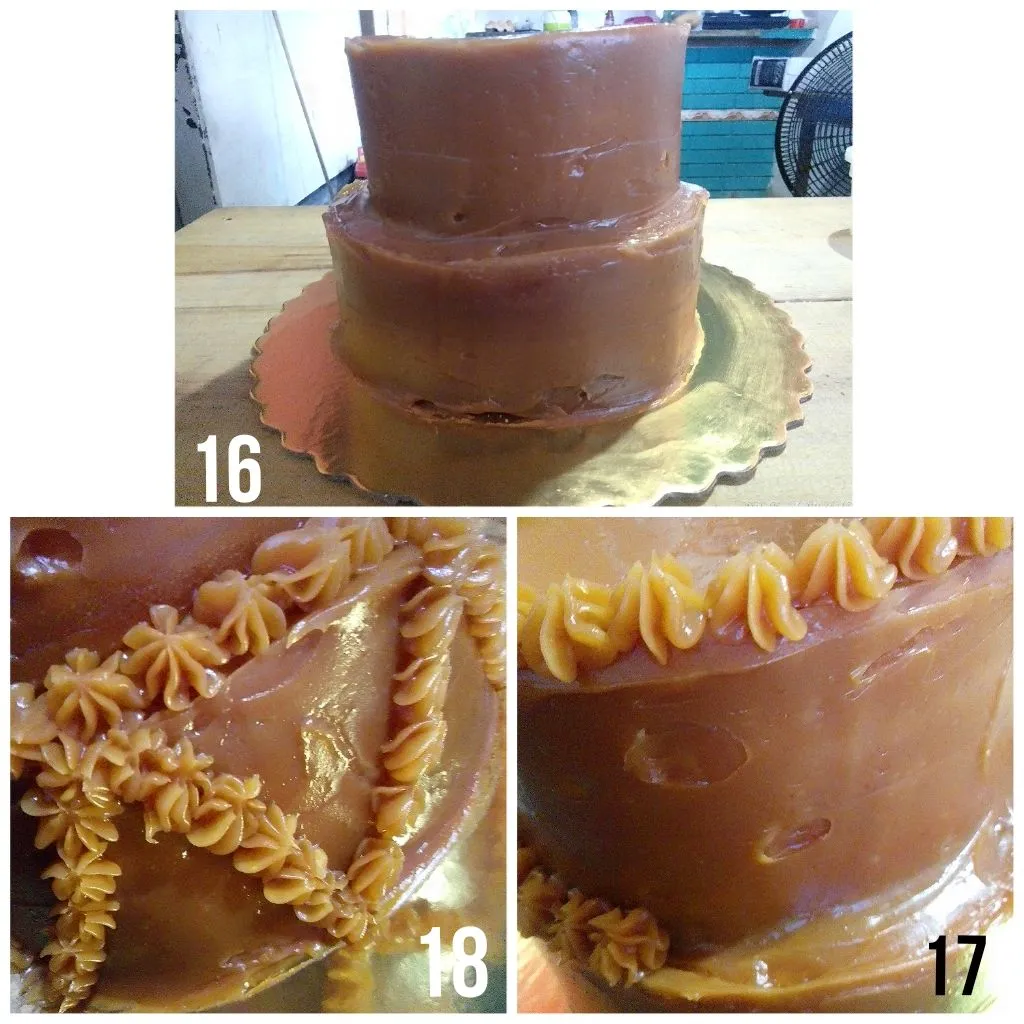
F.- Smoothing is a process that takes time and patience. We will stop until we are satisfied with the straightening. See figure 16. Now, with the pastry bag and a star-type nozzle, we will place spikes. See figures 17 and 18.
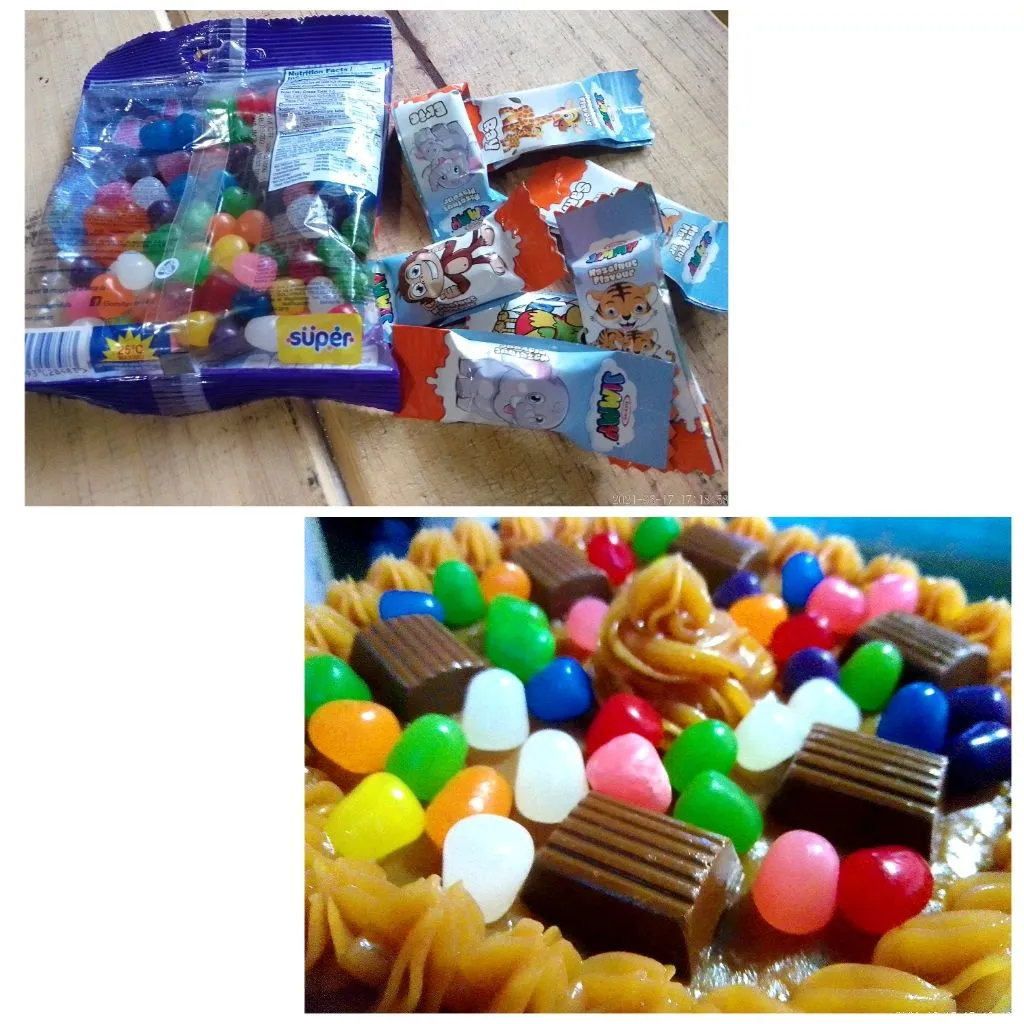
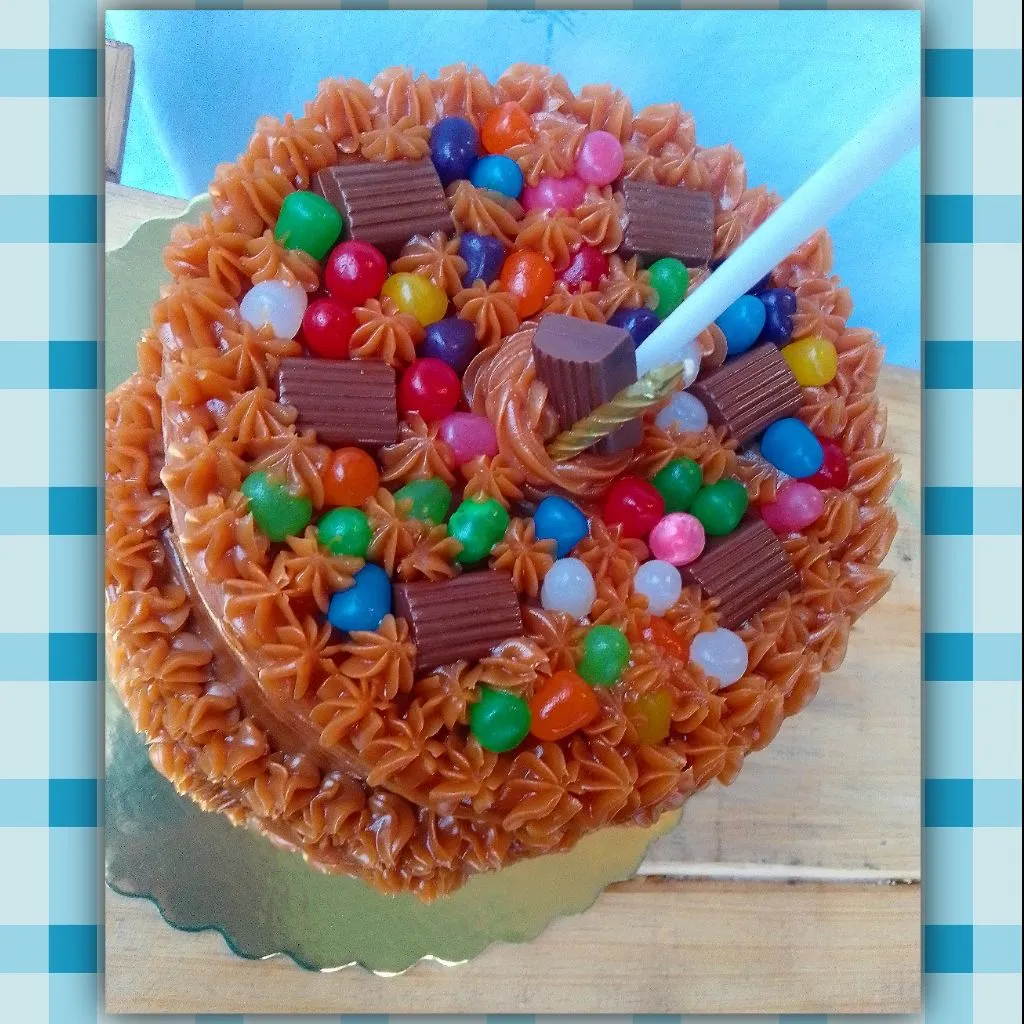
G.- Now, we place the colored jellies and the chocolates on top. See the following figures.
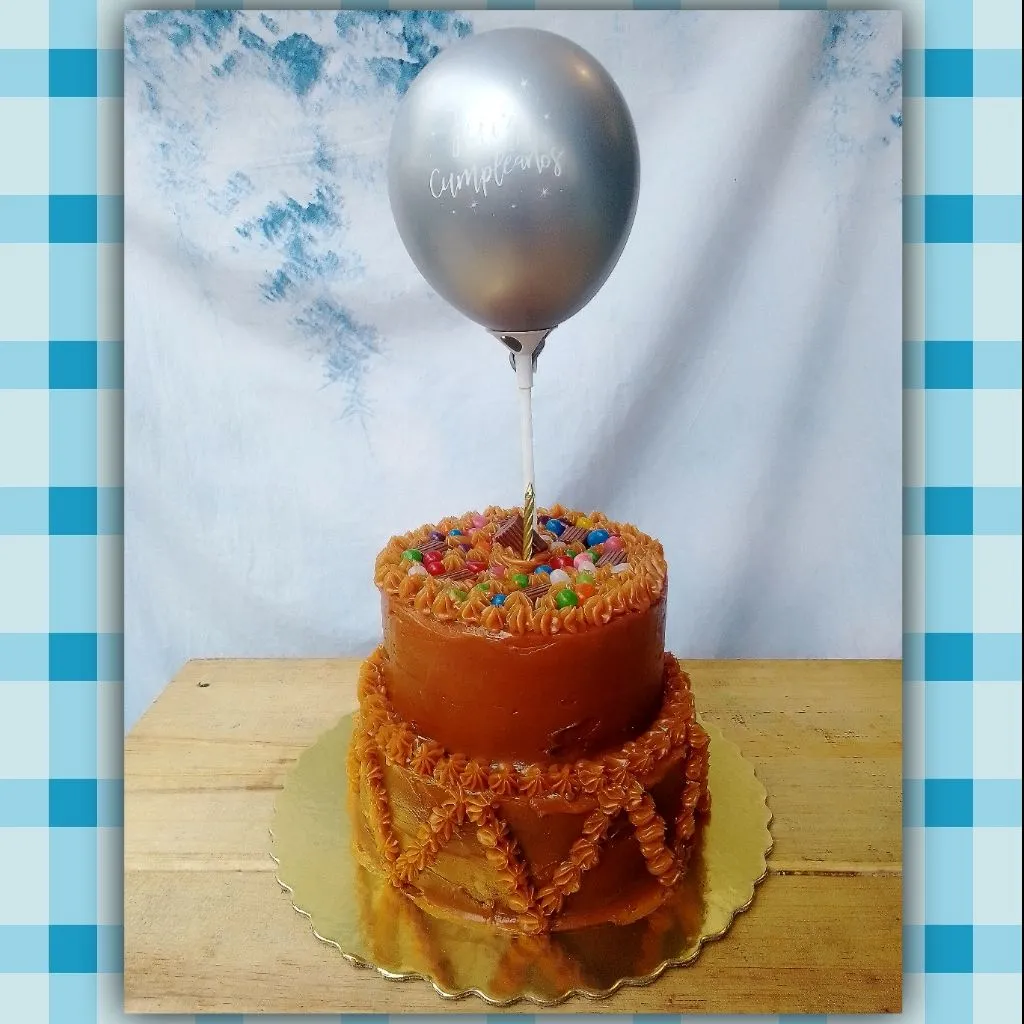
Being ready, take a look:
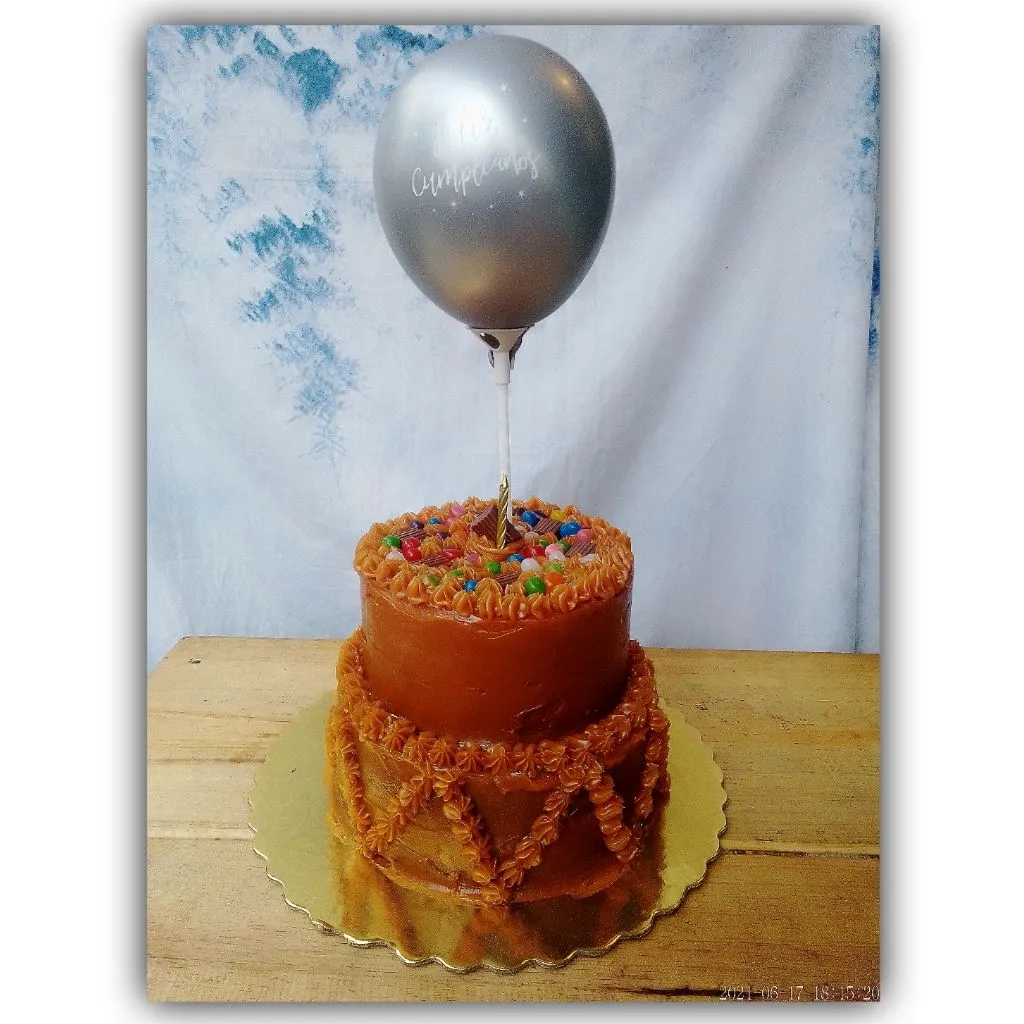
I have been very satisfied with the result. It is the first time that I have made a two-tier cake and I was very afraid that it would not turn out well. I think that many times we distrust our abilities, we stumble ahead of the rest, but the important thing is to dare. Go, go, go.
Thanks for your attention, kindly: Ana Pialejo, under my username: @pialejoana.
Do you like to cook? 👩🍳
I invite you to share in Foodies Bee Hive your experiences in the kitchen, recipes, tricks, trials and errors.
The kitchen is magical, the food unites us... 🥰🥰🤗🤗
🌟🌟🌟🌟🌟🌟
Versión en Español:
🌟🌟🌟🌟🌟🌟
Hola, Hola.!
👩🍳
Es lunes, inicio de Semana. Les deseo un feliz inicio maravilloso, buenas vibras a todos! ✨
Para mi publicación de hoy, quiero mostrarles como elaboré mi primera torta de dos niveles. Es una torta muy especial, era para mi hijo mayor quien estuvo cumpliendo 10 años.
El día anterior le había preguntado que como la quería, y lo único que me dijo sin pensarlo y emocionado fue: la quiero de arequipe.!
Esa fue una gran característica, la textura del Arequipe o bien conocido como dulce de leche, es muy agradable de usar. Es fácil de montar y moldear, pero a la vez con la turgidez exacta. Respecto al bizcocho, uno muy suave de sabor a mantecado.
Vamos al paso a paso.!
🙌🙌🙌🙌
👩🍳👩🍳👩🍳👩🍳👩🍳👩🍳
Ingredientes:
Para el bizcocho:
📌 400 gr de mantequilla.
📌 500 gr de azúcar.
📌 1 kilo de harina leudante.
📌 800 gr de leche.
📌 6 huevos.
📌 Esencia de mantecado.
📌 Polvo de hornear.
Para decorar:
📌 Arequipe o dulce de leche repostero.
📌 Gomas de colores.
📌 Bombones.
👩🍳👩🍳👩🍳👩🍳👩🍳👩🍳
Paso a paso:
A.- En una taza amplia, colocamos la mantequilla y azúcar. Con un batidor eléctrico batimos bien hasta cremar. Ver figura 1 y 2. Añadimos los huevos y batimos nuevamente. Ver figura 3. Agregamos la esencia de mantecado y luego el polvo de hornear. Ver figura 4.
B.- Agregamos harina y leche, de manera alternada hasta conseguir una mezcla homogénea (sin grumos). Ver figuras 5 y 6. Ahora, tomaremos los dos moldes y le colocamos una capa de mantequilla y otra de harina. Ver figura 7. Nota ahora que ambos moldes tienen diferentes tamaños, uno más grande y uno pequeño.
C.- Dividimos la mezcla y la volcamos en ambos moldes. Ver figura 8. Horneamos hasta que el bizcocho pase la prueba del palillo limpio. Este tipo de bizcocho toma un color dorado muy lindo, desde mi lado me encanta. Ver figura 9.
D.- Esperamos a que el bizcocho se enfríe y repose, sino tenderá a partirse fácilmente. Entonces transcurrido el tiempo, tomamos un cuchillo filoso y cortamos el excedente de arriba para que al darle vuelta quedé perfectamente recto y en nivel. Ver figuras 10 y 11. Esto debes hacerlo con mucho cuidado y sin miedo, si el bizcocho ha reposado lo suficiente, te permitirá hacerlo perfectamente. Entonces, ahora colocamos las dos capas o dos niveles, en medio de una y otra, coloca un poco de dulce de leche. Esto ayudará a que la parte superior se adhiera a la inferior. Ver figura 12.
E.- Tomamos el dulce de leche y colocamos sobre toda la torta, en sus dos niveles. Ver figuras 13 y 14. Con ayuda de una paleta repostera, alisamos la superficie y contorno. Ver figura 15.
F.- Alisar es un proceso que lleva tiempo y paciencia. Dejaremos de hacerlo hasta que estemos satisfechos con el alisado. Ver figura 16. Ahora, con la manga pastelera y una boquilla tipo estrella, iremos colocando picos. Ver figuras 17 y 18.
G.- Ahora, colocamos las gelatinas de colores y los bombones en la parte superior. Ver las figuras siguientes.
Estando lista, da un vistazo:
He quedado muy satisfecha con el resultado. Es primera vez que realizo una torta de dos niveles y sentía mucho miedo de que no quedara bien. Creo que muchas veces desconfiamos de nuestras capacidades, tambaleamos al frente del resto, pero lo importante es atreverse. Ir, ir, ir.
Gracias por su atención, atentamente: Ana Pialejo, bajo mi usuario de : @pialejoana.