¡Hola amigos de foodies! espero estén bien, bendiciones. Hoy les traigo un paso a paso de una decoración que hice para una torta de Paw Patrol, espero les guste, ya que estoy comenzando en este mundo de la reposteria y poco a poco poder ir mejorando en el decorado.
Hello foodies friends! I hope you are well, blessings. Today I bring you a step by step decoration I made for a Paw Patrol cake, I hope you like it, since I'm starting in this world of baking and little by little I can improve in the decoration.

Ingredientes:
| - Torta de chocolate sin decorar | - Undecorated chocolate cake | ||
|---|---|---|---|
| - Merengue Suizo | - Swiss Meringue | ||
| - Colorantes en polvo | - Powdered dyes | ||
| - Cobertura de chocolate | - Chocolate coating |
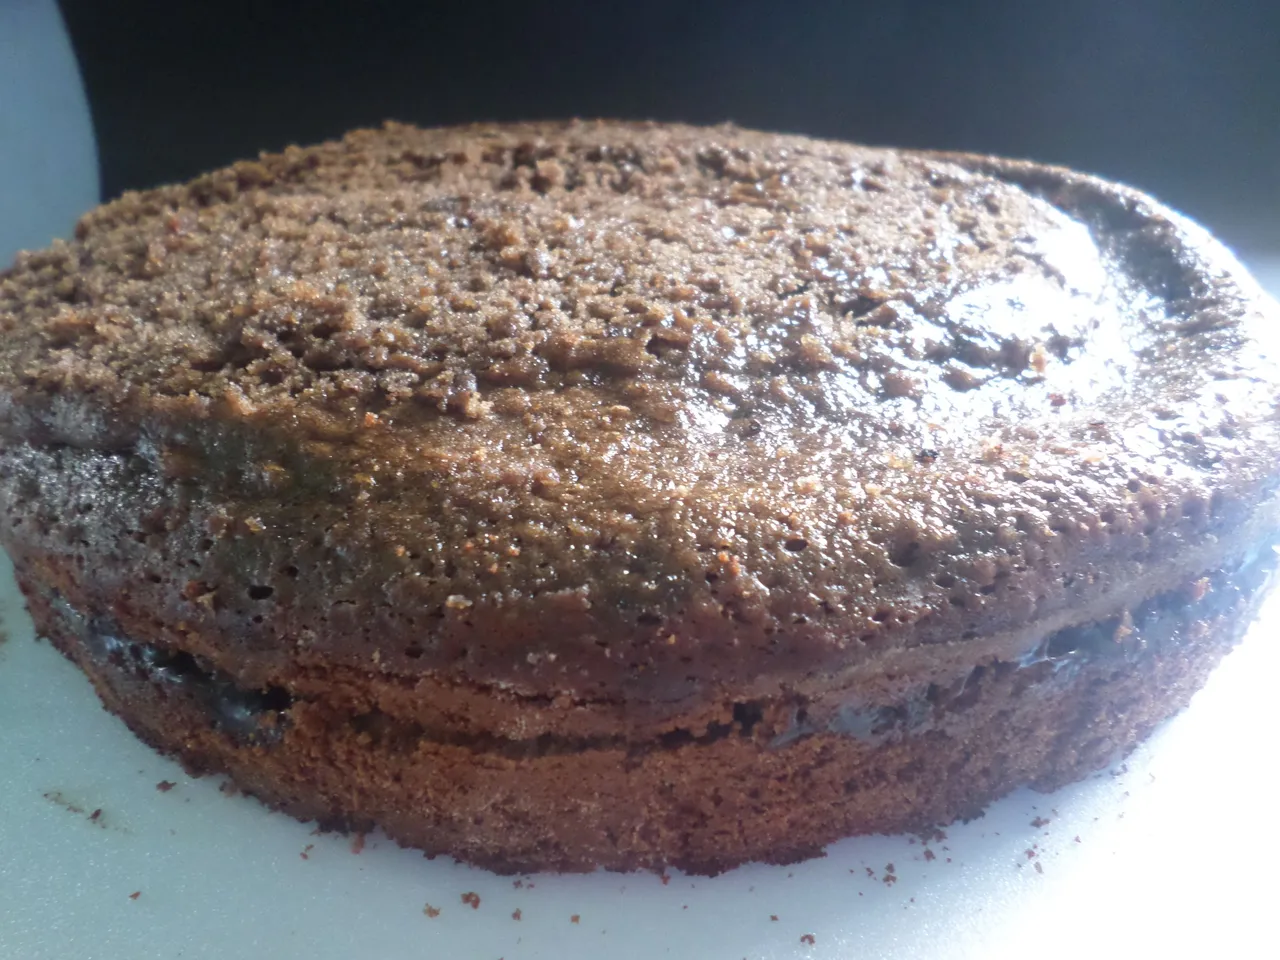
Comencé con el relleno de la torta: para ésto piqué la torta por la mitad como lo pueden ver en la fotografía, para así rellenarla con la mezcla de chocolate que preparé.
I started with the cake filling: for this I cut the cake in half as you can see in the picture, to fill it with the chocolate mixture I prepared.
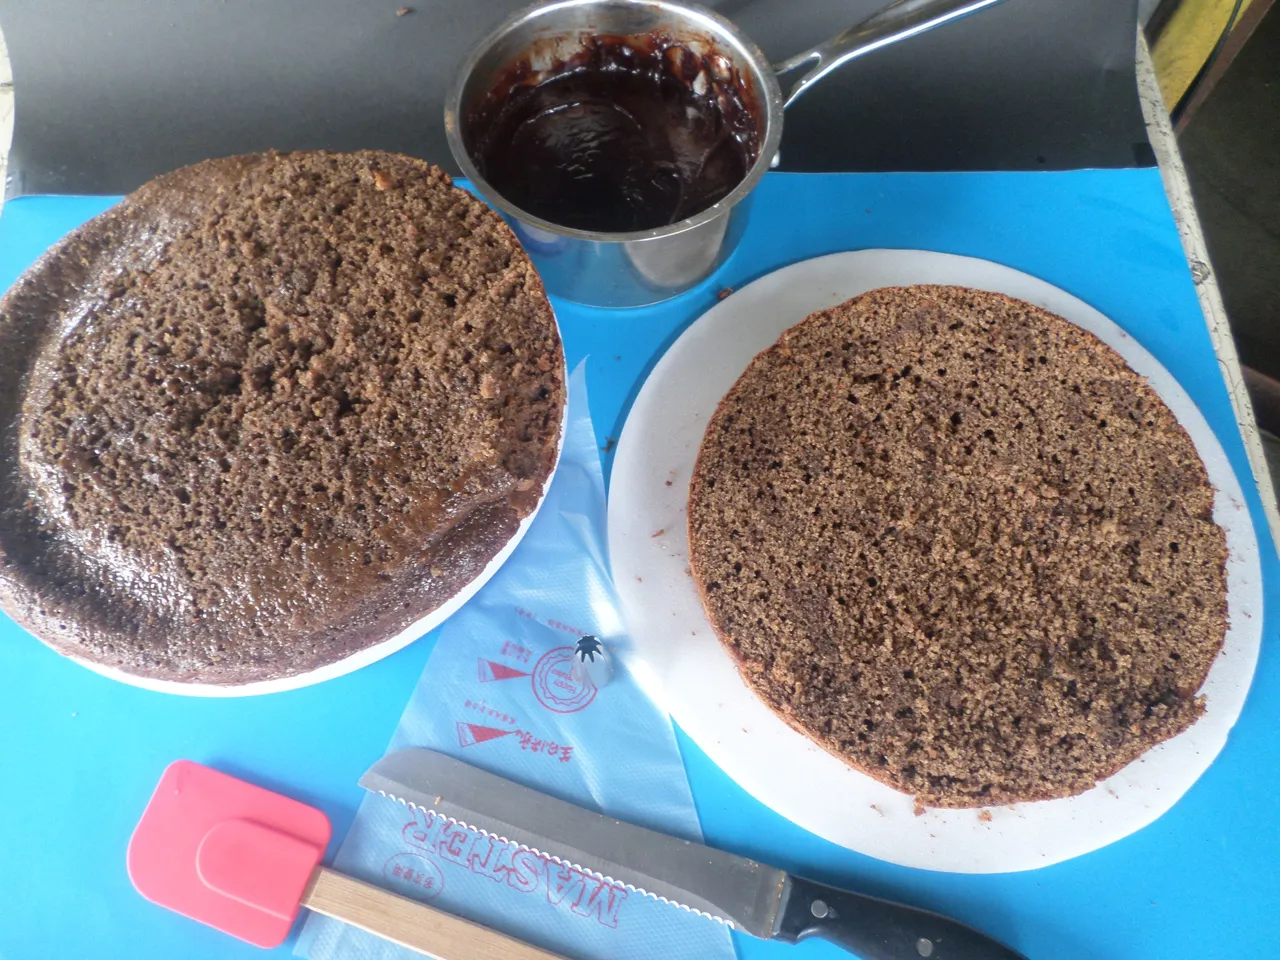

Seguidamente agregué la mezcla en toda la torta sin removerla, para que no se desparramára por los bordes.
Then I added the mixture throughout the cake without stirring it, so that it would not spill over the edges.
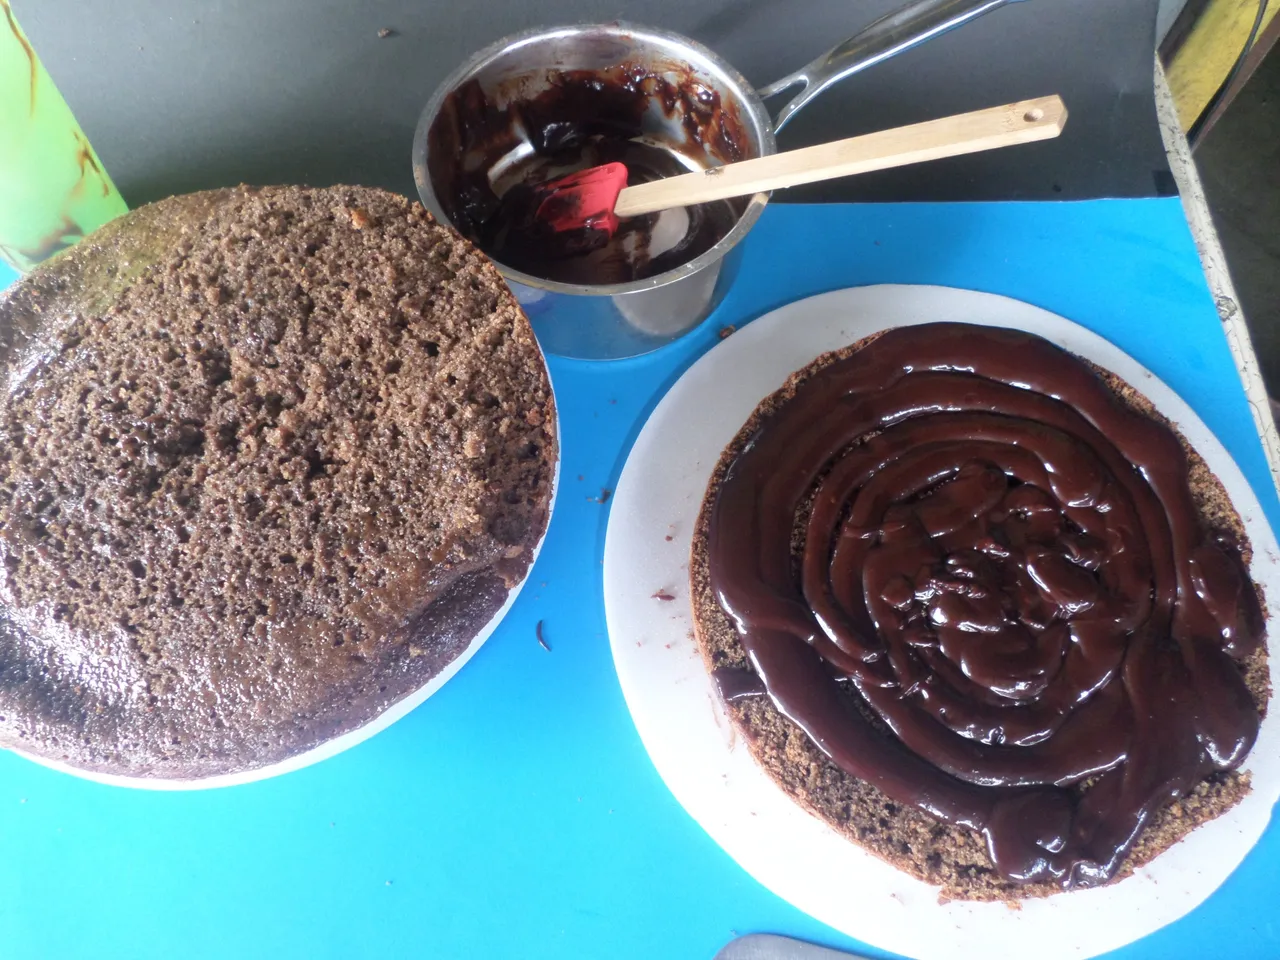
Proseguí en colocar la mitad de la torta por encima, uniéndola de nuevo pero con mucho cuidado; ya teniendo lista la torta con su relleno, continúo con el decorado.
I proceeded to place half of the cake on top, joining it again but very carefully; having the cake with its filling ready, I continued with the decoration.
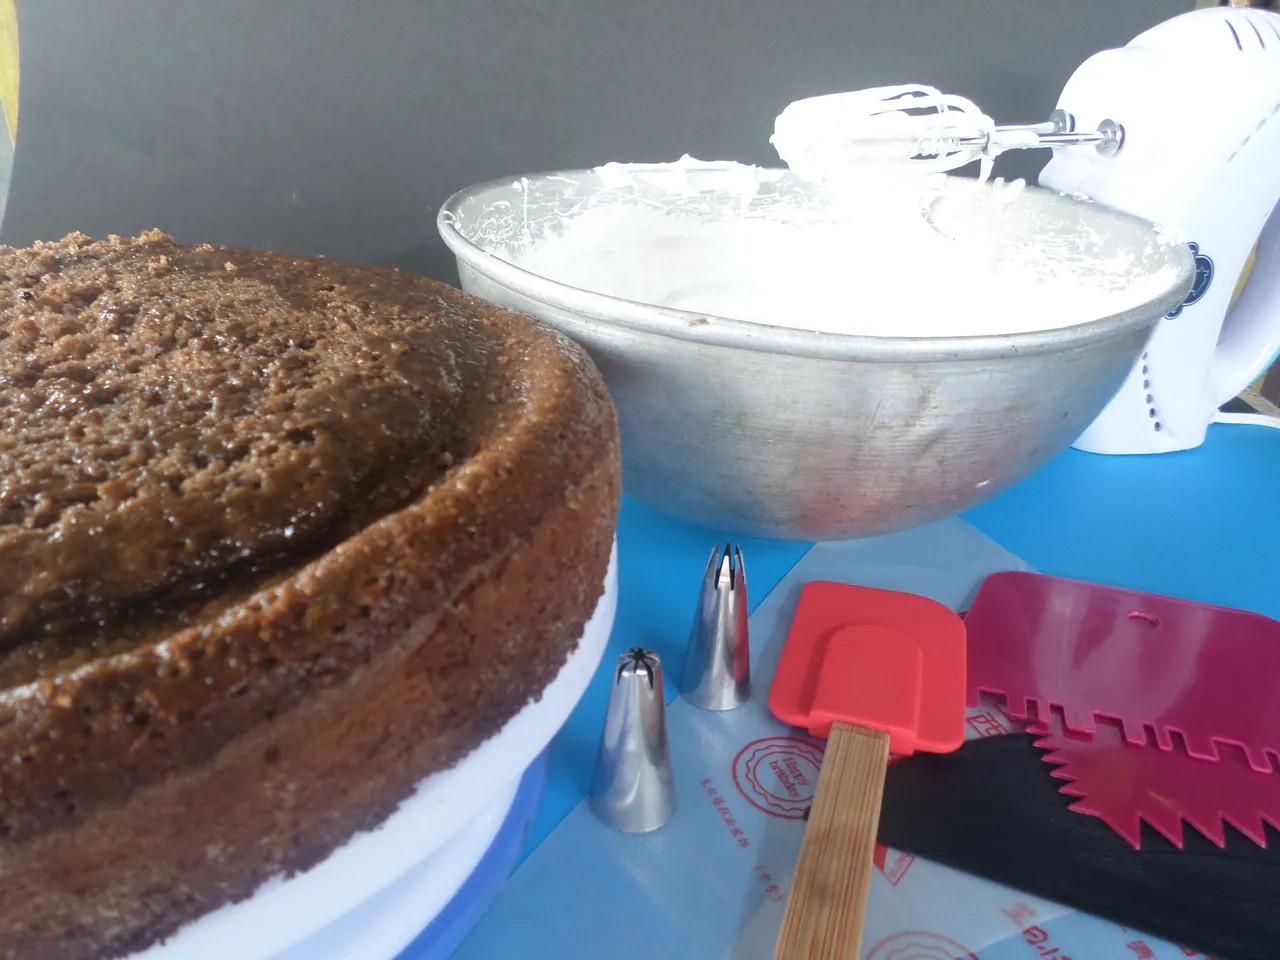
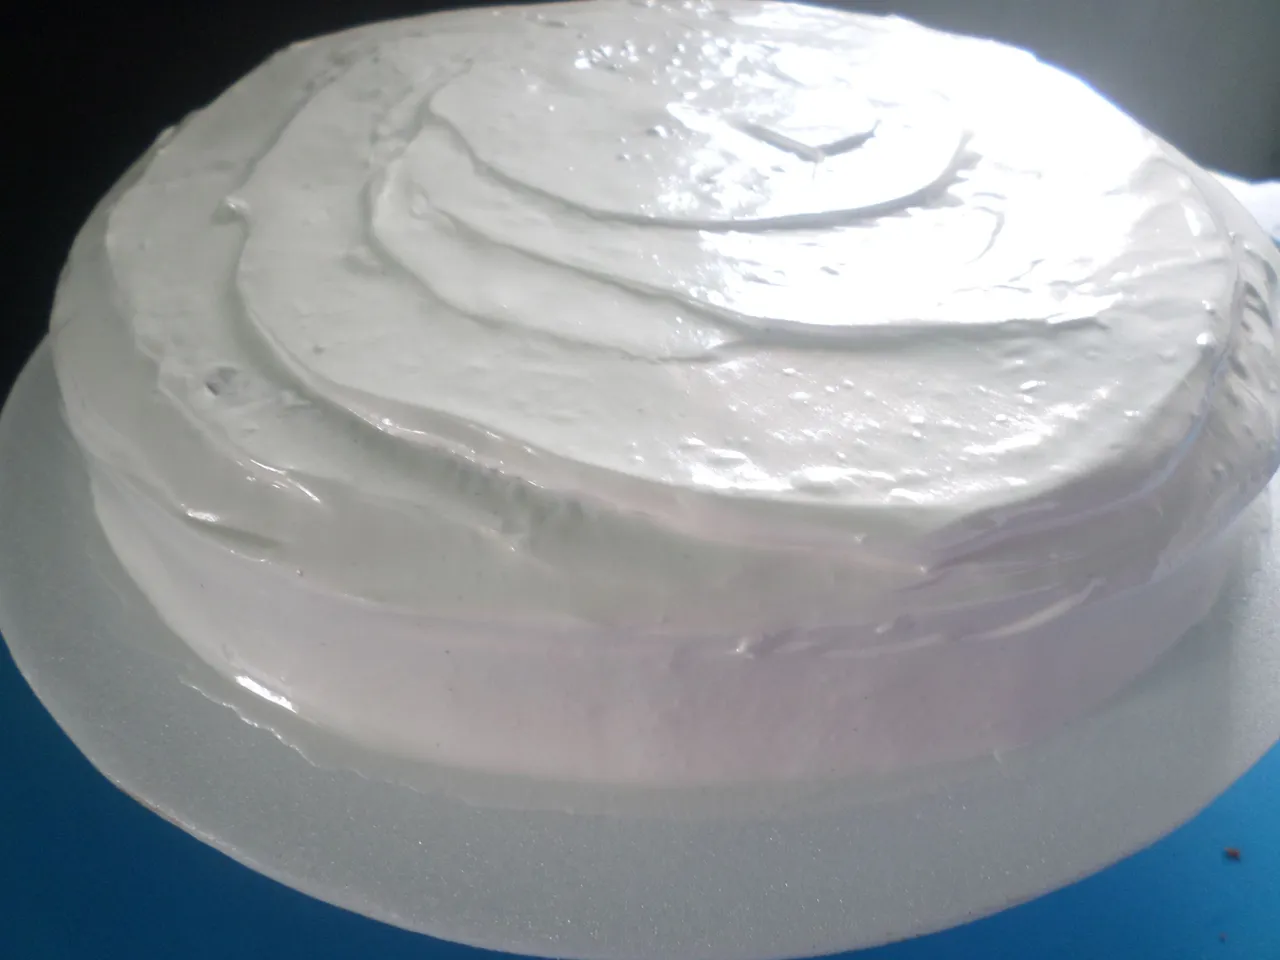
Añadí el merengue suizo por todo el borde con la ayuda de la manga pastelera y por encima y con la ayuda de una espátula la alisé.
I added the Swiss meringue all around the edge with the help of the piping bag and smoothed it with the help of a spatula.
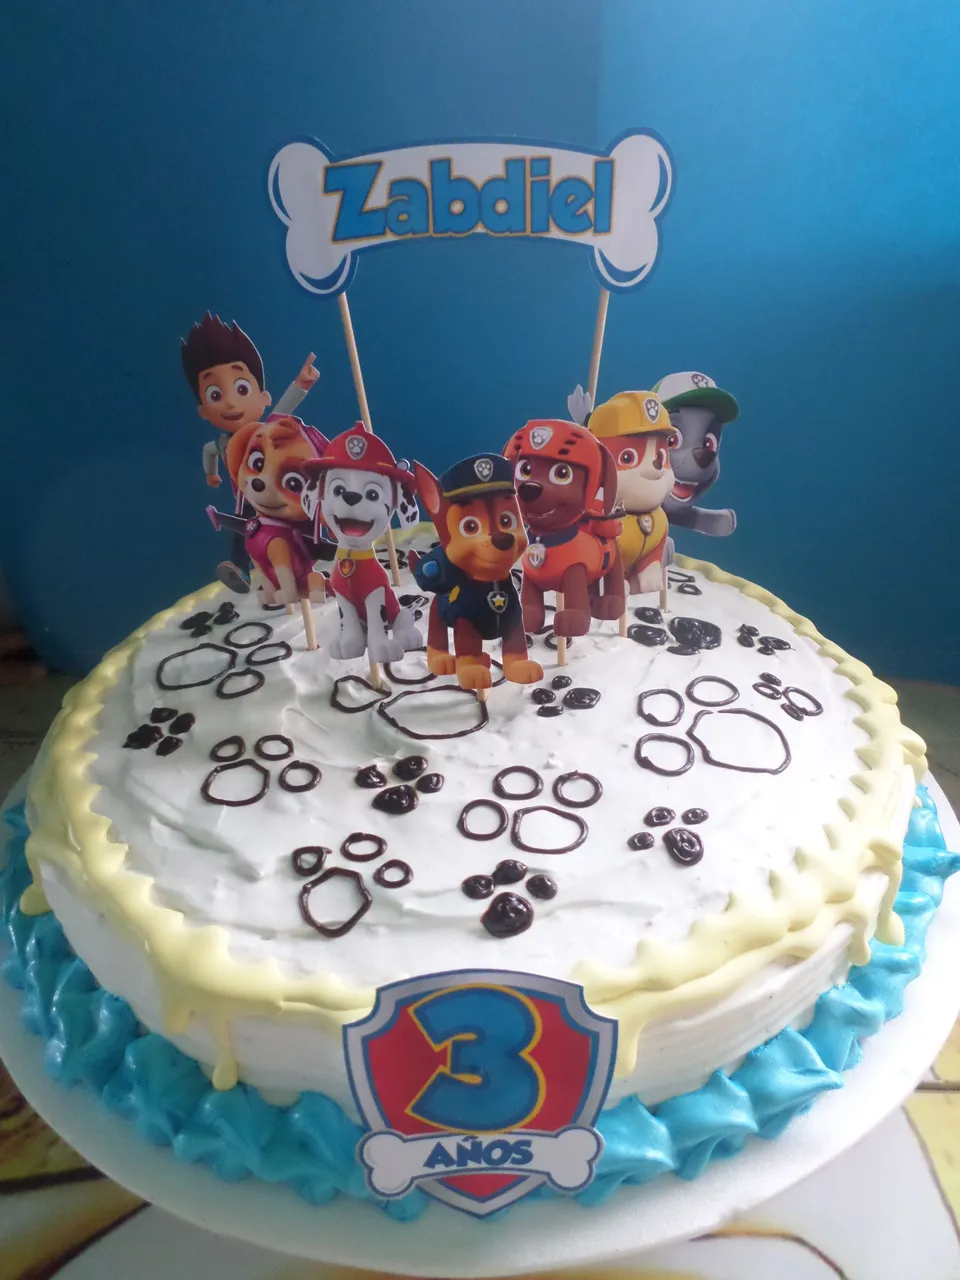
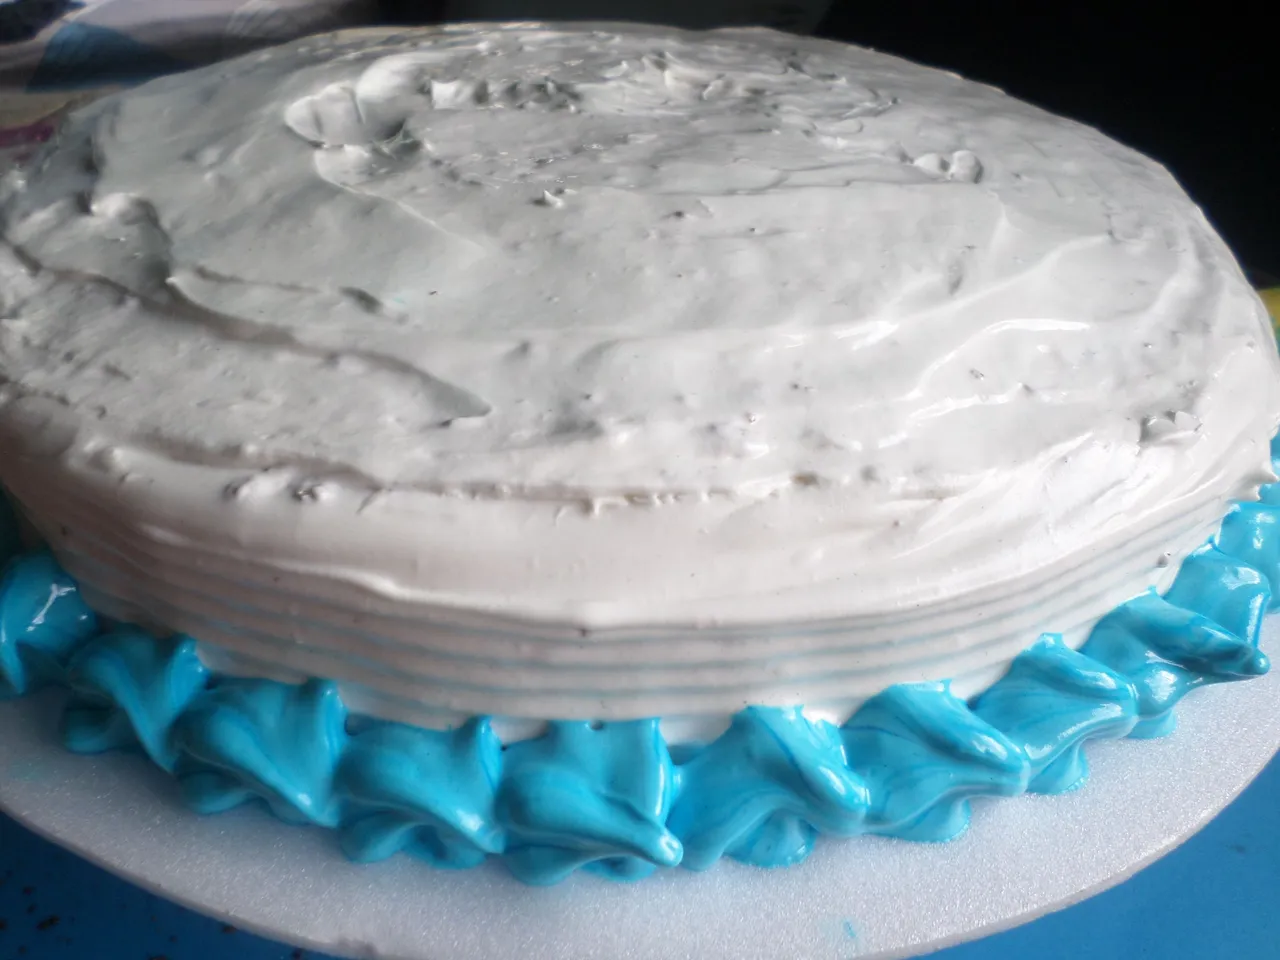
En un recipiente aparte, pinté el merengue con los colorantes que iba a utilizar como lo son: el azul y el amarillo, para así poder realizar el resto de la decoración. En éste caso continué haciendo en el borde inferior de la torta, con la manga y su boquilla, una decoración tipo olas con el merengue azul.
In a separate bowl, I painted the meringue with the colorants I was going to use, such as blue and yellow, in order to make the rest of the decoration. In this case, I continued making a wave-like decoration with the blue meringue on the lower edge of the cake, with the piping bag and its nozzle.
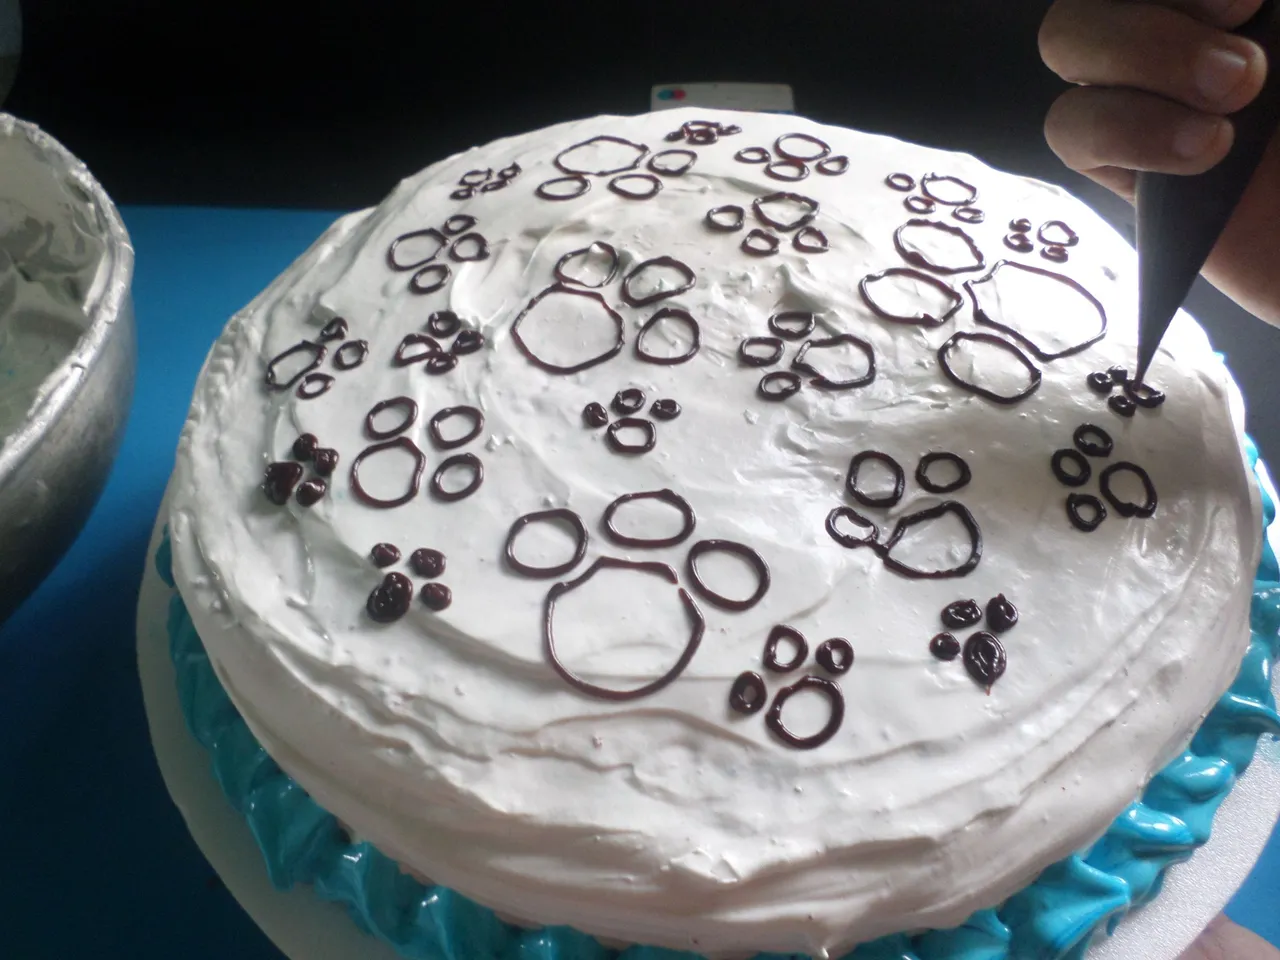
Luego por encima de la torta le dibujé unas huellas con la misma cobertura de chocolate que usé para rellenar, utilizando una manga pastelera y una boquilla muy fina para poder dibujarlas, le hice un decorado con el merengue amarillo en el borde de arriba de la torta y culminé colocando los toppers de Paw Patrol.
Then on top of the cake I drew some footprints with the same chocolate frosting I used to fill it, using a piping bag and a very fine nozzle to draw them, I decorated with yellow meringue on the top edge of the cake and finished by placing the Paw Patrol toppers.
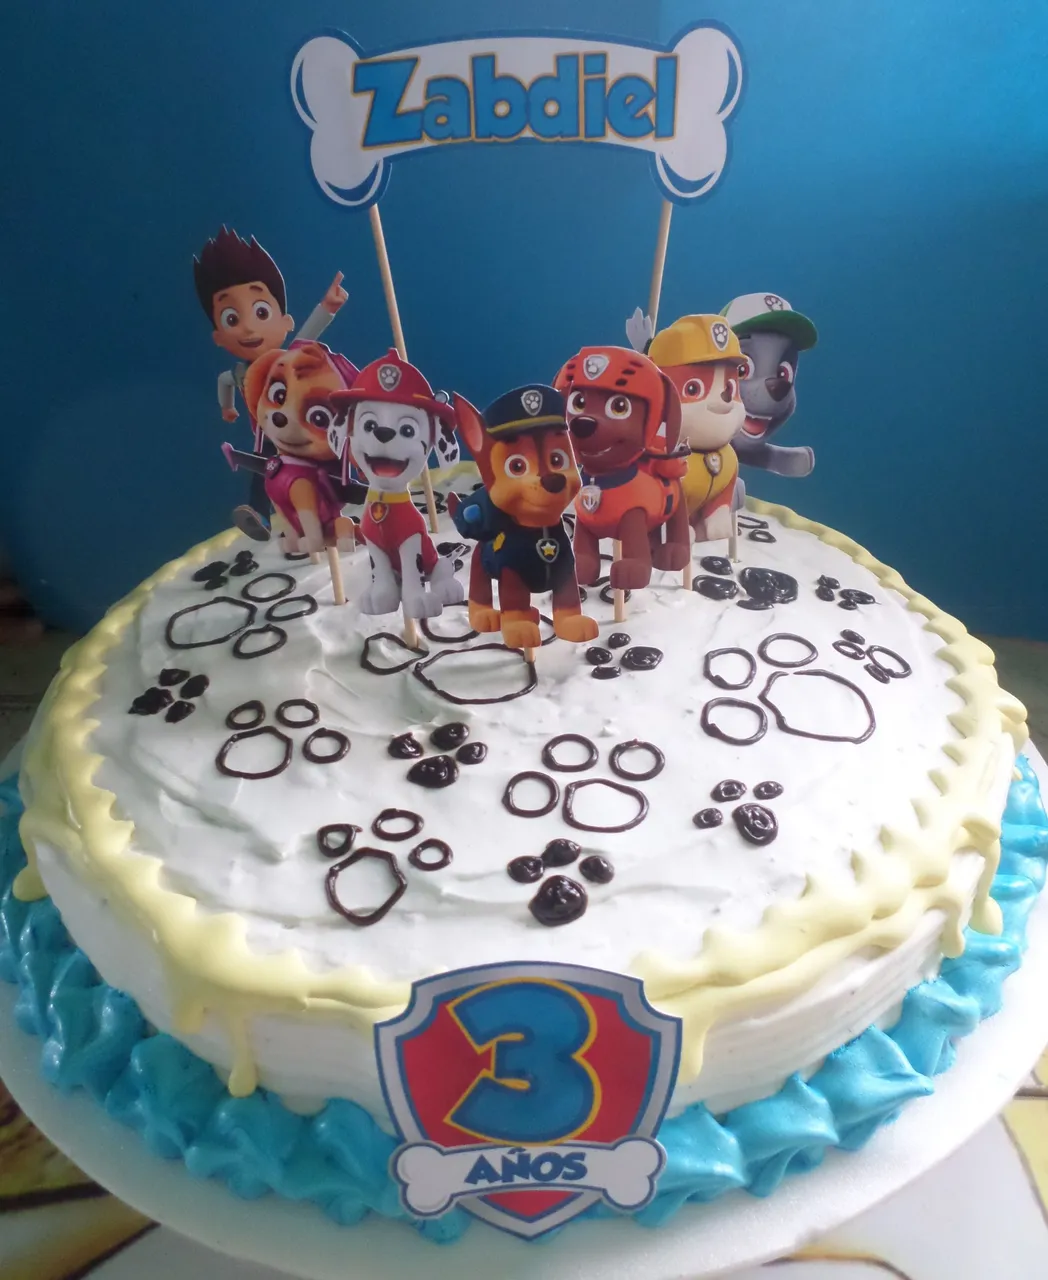
Amigos así quedó la decoración, espero les haya gustado, cualquier acotación será bienvenida.
Friends, this is how the decoration turned out, I hope you liked it, any comments will be welcome.
Gracias amigos una vez más por leer mis recetas. Bendiciones. Nos vemos en un próximo post.
Thank you friends once again for reading my recipes. Blessings. See you in a future post.
Muchas Gracias !!!
Thank you very much!!!