Wow. What an experience.
Considering cauliflower is one of my favorite foods that I almost never used, I was really excited to try to make something for the Plant Power Cooking Challenge initiated by @justinparke . The goal was to make something plant based with either cauliflower, tofu, or spinach as the main ingredient. Or multiple. Or, if you wanted to go to sweet route, you can go with durian, grapes, or coconut.
Spinach is a little pricey in my area, and Tofu is a staple of mine I eat almost every day. DISCLAIMER: I'm not fully plant-based or vegan. I'm close, but I haven't made it all the way there yet. There are certain things I enjoy too much. I am, however, fully vegetarian, and love attempting to be plant-based/vegan. My partner and I have done challenges before to see how long we can go. So kudos to you, Justin, for inspiring me to really challenge myself this weekend.
Anyways, for the reasons stated above, I quickly started researching different vegan cauliflower dishes to see what inspired me. It wasn't long before I stumbled upon a recipe for vegan enchiladas and considering the ingredients used, coupled with the fact I've never made enchiladas before, I was intrigued and I decided it was the one.
I quickly realized I was in over my head. There were a lot of steps and I absolutely destroyed my kitchen for an evening. But, the result was more than worth it. This was no simple task for me, but the product was absolutely INCREDIBLE. I highly recommend this to any plant-based person with a taste for Mexican food. Really, anyone. These were the best enchiladas I've had in my life(I'm not tooting my own horn too much here, I am more of a burrito person and enchiladas are a rarity in my life).
One last thing before I get going; I realized about half way through cooking the goal of the challenge was to use cauliflower as the feature of the dish. While it is certainly VERY prominent in this dish, I'm not sure it qualifies as the "feature". Justin, if this doesn't meet the qualifications for the challenge, I completely understand. I already came to that realization; and I still have a large amount of cauliflower, so I might even make a second entry keeping that in mind. These were too good not to post though; so regardless of the challenge, here they are!
(Not so) Easy Vegan Enchiladas
Sauces
There are many steps to this process, and it's a little difficult for me to figure out how to format this. First, you have the sauces; both "cheese" and enchilada sauce. Considering the versatility of the "cheese" sauce, I actually ended up decided to make this separate post concerning that one. That was both to slim down the body of this, while also allowing myself to go back and look up said sauce when I would like to make it for other purposes. You'd want to make roughly 1/2 of the amount in that recipe for these enchiladas, however more is always better as the sauce keeps fine in the fridge. Refer to said post for the cheese sauce.
Enchilada sauce
- Water
- 3 TBSP all-purpose flour
- 2 TBSP chili powder
- 1/2 TSP garlic powder
- 1 TSP cumin
- 1/2 TSP salt
- 2 TBSP tomato paste
- 2 cups vegetable stock or broth
- 1 TSP apple cider vinegar
Before we get started with this I'd like to apologize for any inconsistency in quality or content of the photos I took. Parts of this process were very time-sensitive and it was difficult for me to pull out my phone in time.

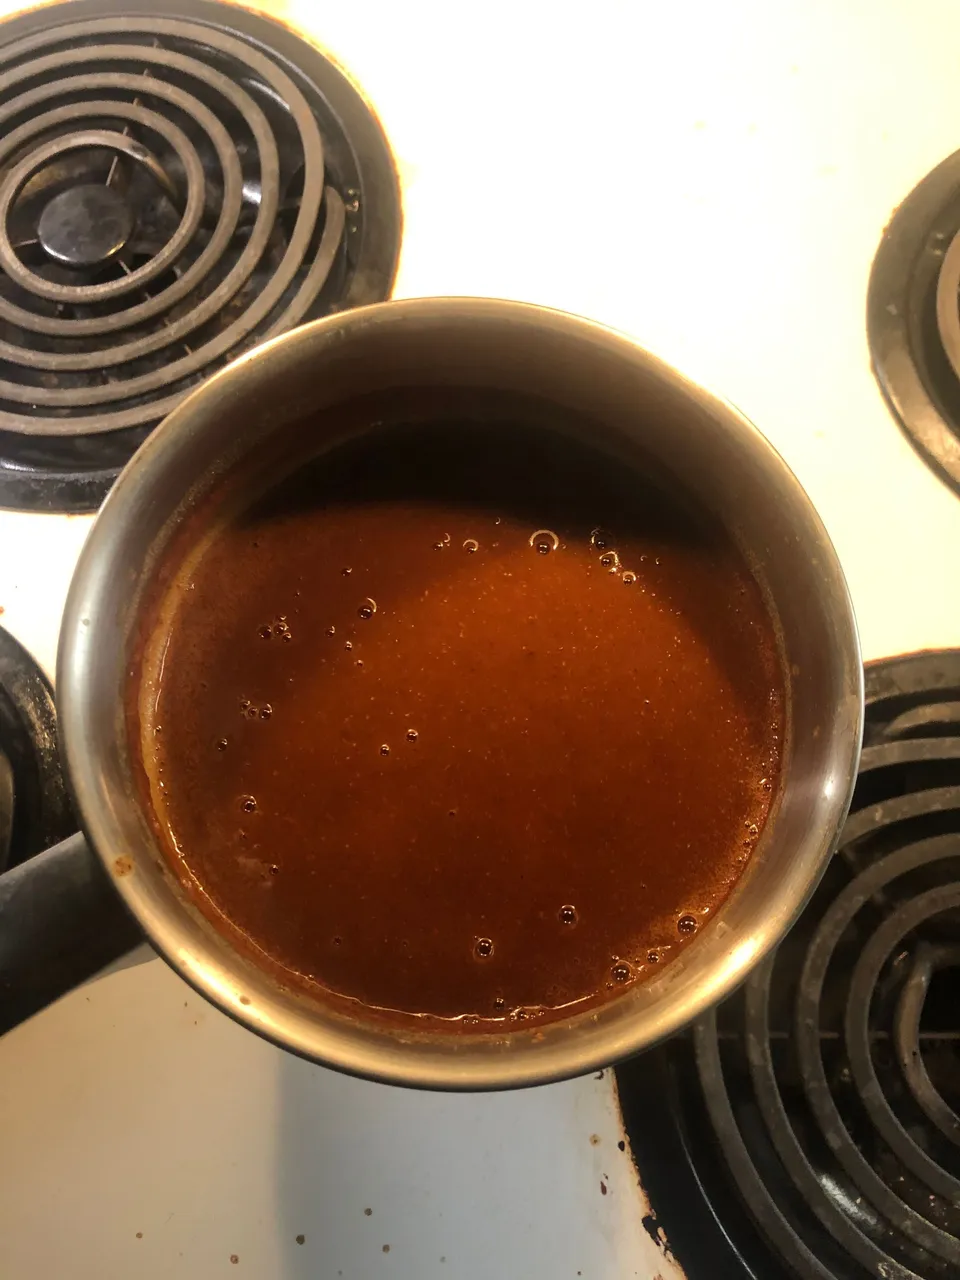
- Put all the dry stuff in a mixing bowl(or really any bowl). Flour, chili powder, garlic powder, cumin, salt. Easy enough, no?
- In a pot over medium-ish heat, heat up a little water. The recipe I used as a base for this sauce suggested 3 TBSP water but I found I had to add a little more. This is because your next step will be adding the above mixture in and whisking it, and I found the 3 TBSP to be far too dry. Add more ass needed.
- Once the water is warm, like I said in step 2, throw that powder in and mix it up with a whisk. Once combined well, toss in your tomato paste and keep it going. Due to the consistency, and most of my product becoming stuck to the whisk, I began to add my veggie stock almost immediately. Slowly add that as you whisk. Obviously, you may also use broth(as the original recipe called for), but I used stock as I usually have that on hand. It's quite a bit cheaper than broth in many stores and the difference does not bother me much at all.
- Once all your liquid is added, you can calm down on the whisking. Bring it to a boil, and then simmer it for the amount of time you see fit. My guidance called for 5 minutes but I went a little longer. Make sure to at least whisk occasionally though as things might lump up. I ended up having a little too much stuck to the bottom of the pot by the end of it.
- Once your satisfied with the consistency, take it off the heat and mix in the ACV. Also, taste and add any salt or other spices as you see fit. Set it aside when you're happy and move on to the "meat"!
Enchilada "guts"
I suppose I should have mentioned you should have a blender. Mine doesn't work very well and this step was a little difficult for me; however you can blend as you see fit- it doesn't have to be perfect. Nothing does.
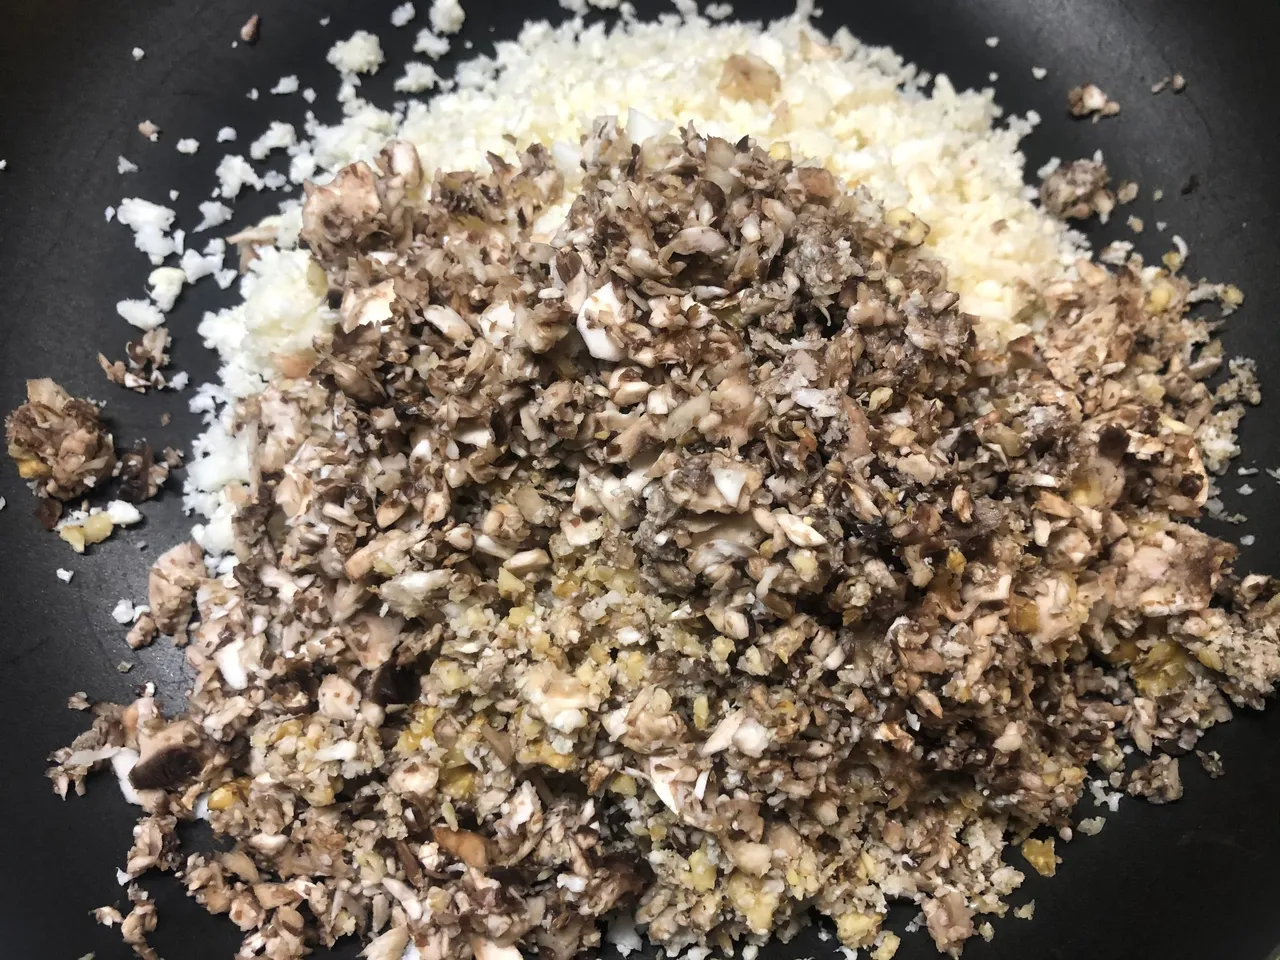
- Cauliflower; 2 cups "riced". (for me, this was about half of the head I had)
- 5 oz mushrooms
- 1/2 cup raw walnuts
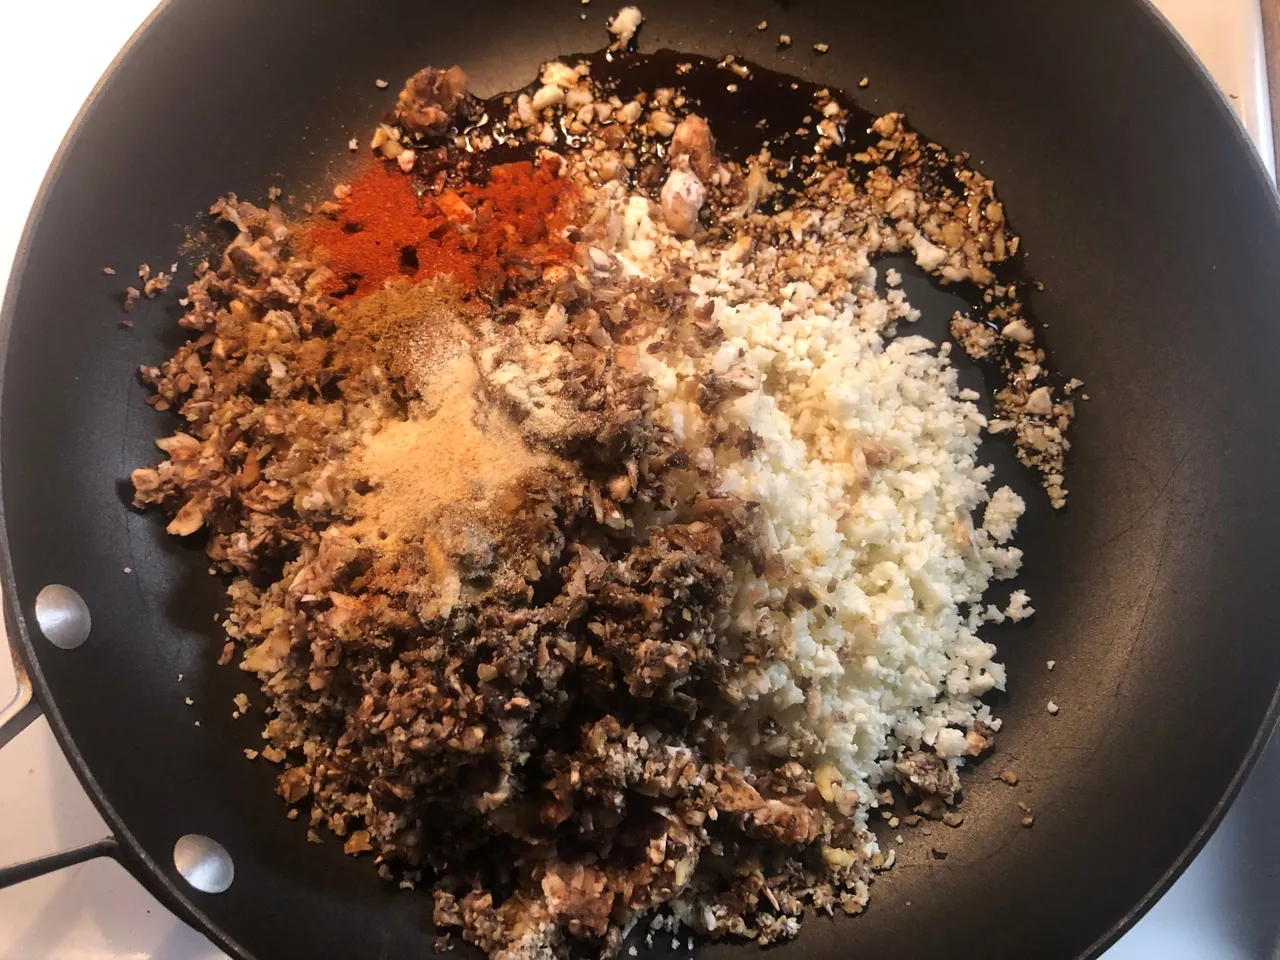
- 4 TBSP veg broth (recipe called for 2, I thought 4 was more effective)
- 1 TSP cumin
- 1 TSP paprika
- 1 TSP onion powder
- 1/2 TSP garlic powder
- 2 TBSP soy sauce
- salt to taste
- 1 can black beans(drained, rinsed)
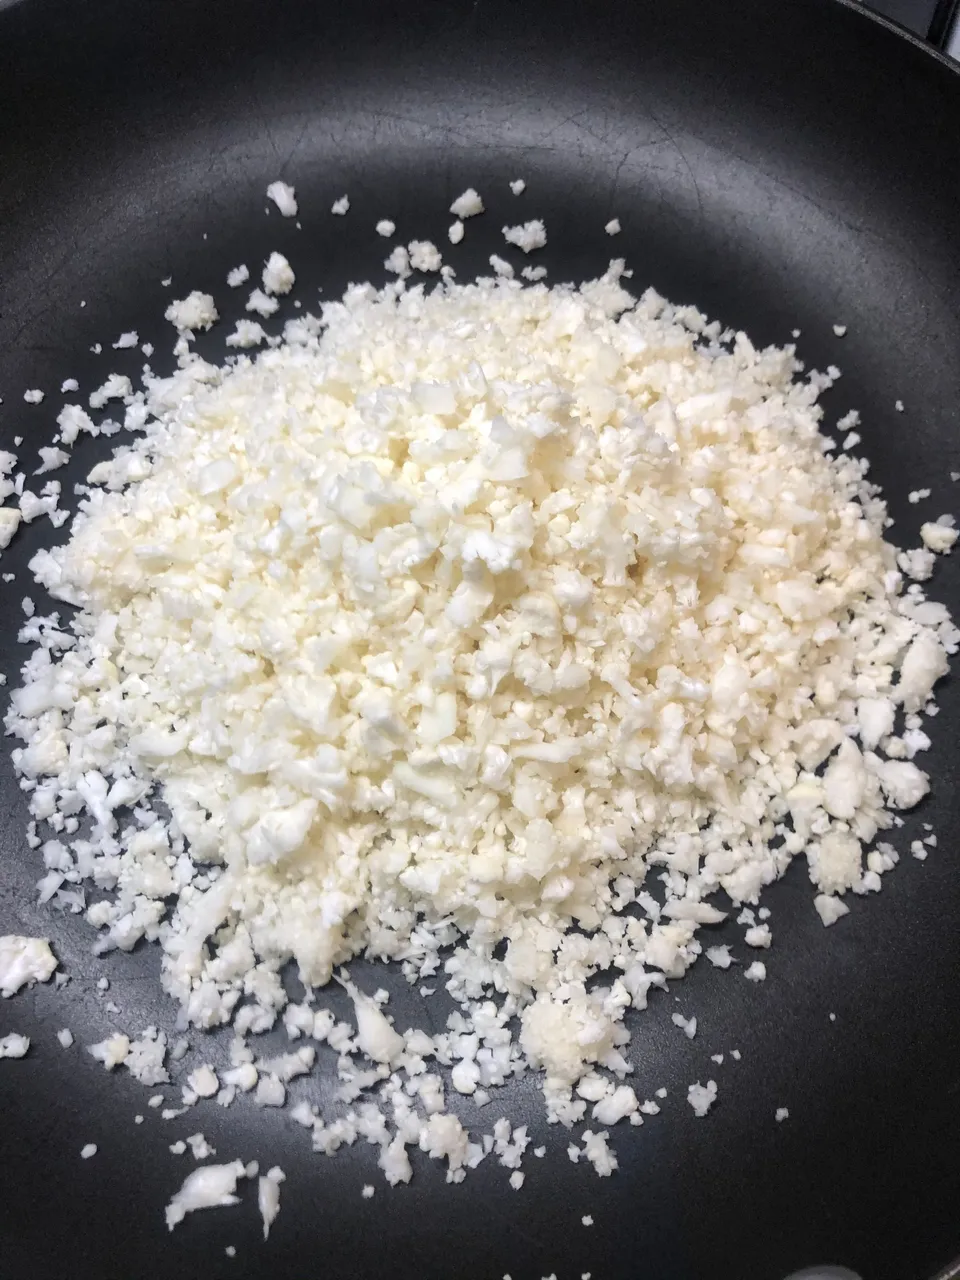
- Floret your cauliflower and pulse it to a "rice" consistency. I've heard of cauliflower rice before but this was new to me and was a little difficult with my blender. But, by constantly removing and shifting the florets, I eventually got the consistency pictured above. Place two cups of your "riced" cauliflower in a pan(no heat yet)
- Do the same with your mushrooms and walnuts. Try to get it to similar consistency. Again, this was difficult for me with my style/quality blender(a lot of emptying, scooping, selecting, repeating). But possible. Add to the cauliflower in the pan.
- (3) Add in everything else in the ingredients above(broth/stock, soy sauce, spices) EXCEPT your beans and salt. Those will come in handy afterwards. Feel free to add any other seasoning you'd like. As always, feel free to adjust the measurements/ingredients as you please. I followed this recipe decently close; but I did make some substitutions and changes as I saw fit. Of course, do the same for yourself. Turn the heat on, and stir as it begins to warm. Once started to heat and combined, you can relax on stirring; but you're going to want to check in and move things around frequently to distribute heat/cooking. Keep it on there as long as you see fit(I think my time was around 12 minutes). Taste as you're going if you'd like to make adjustments or determine if it's done.
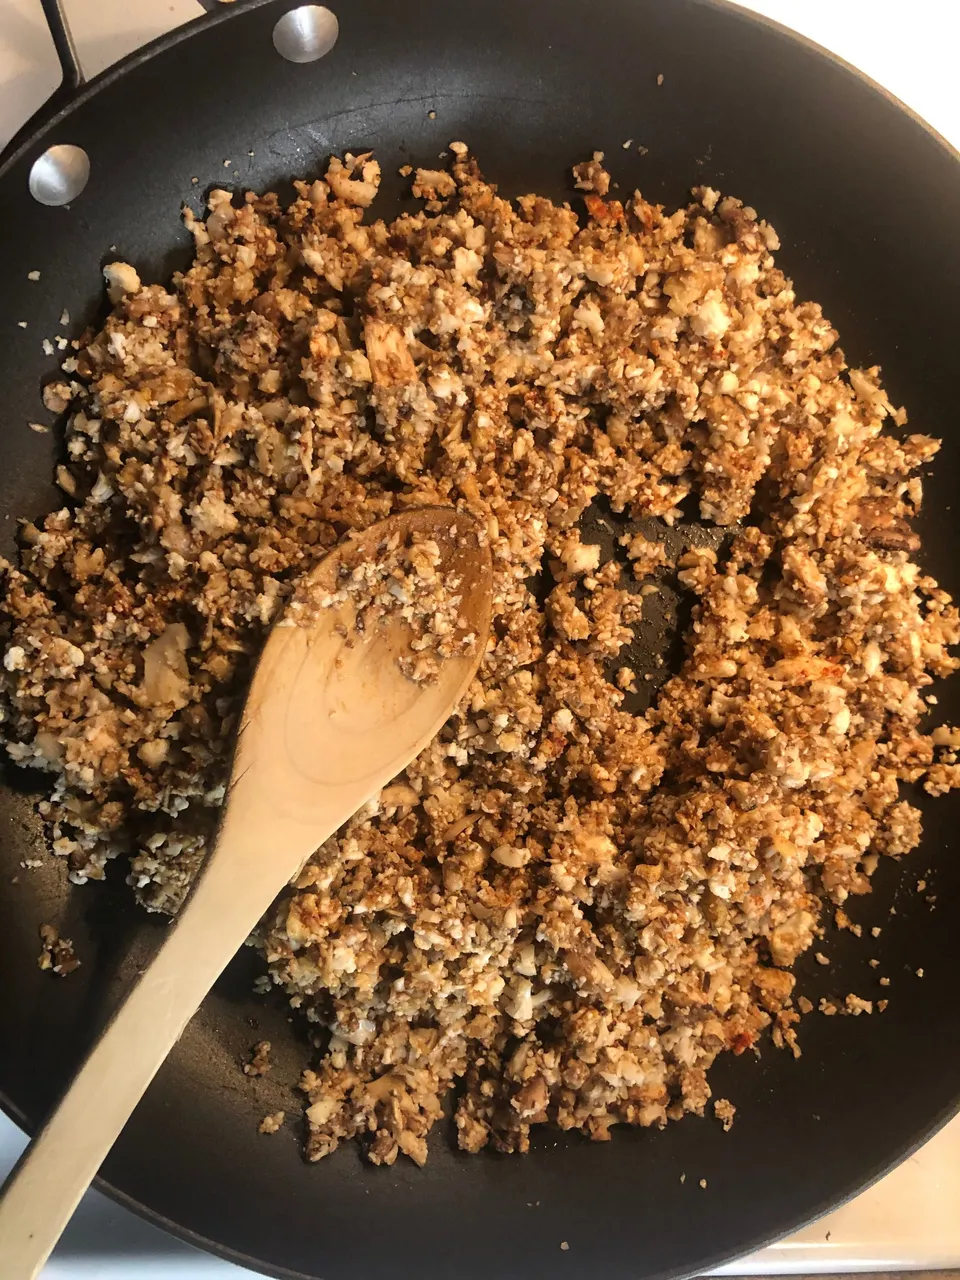
- (4) Once you're satisfied with it, take the pan off the heat and stir in your black beans and your salt; and whatever else you feel is needed. If desired, you can do this step while still on the heat- but I was happy with the result of a slightly crunchier black bean. Remember, it's all going to be baked anyways, so keep that in mind throughout the process.

And now, the "fun part"
OK OK OK. The hard part is over. You're probably less overwhelmed at this step than I was. I don't know why this was such a daunting task for me. I think my blender issues were what really made this so difficult. But, your work certainly isn't done.
You're gonna need some sort of good bakeware for this. I never took that into consideration when I started and I realized that I had one dish that was too small and one that was too large. Even though my partner and I are separated by borders and COVID right now, so I am mostly alone(I have a room mate but he spends a lot of time with their partner), I went with the bigger pan because I had made a significant amount of everything thus far and I figured the leftovers would keep just fine(update- they absolutely did).
For this you will only need a few additional ingredients.
- corn tortillas
- cilantro
I'm aware there's a lot of cilantro-hate out there but all I've got to say about that is PFFFT. To each their own.
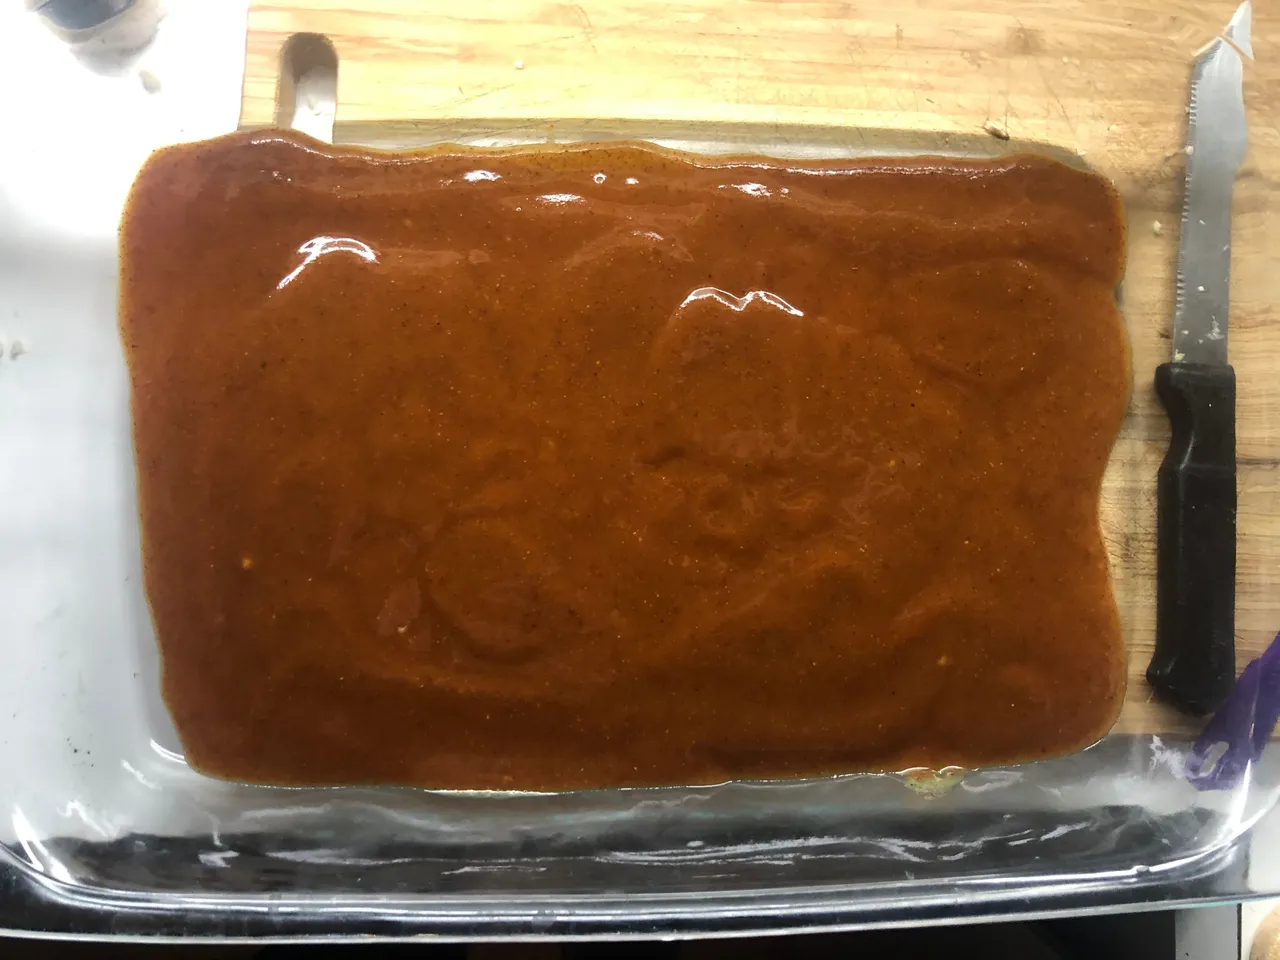
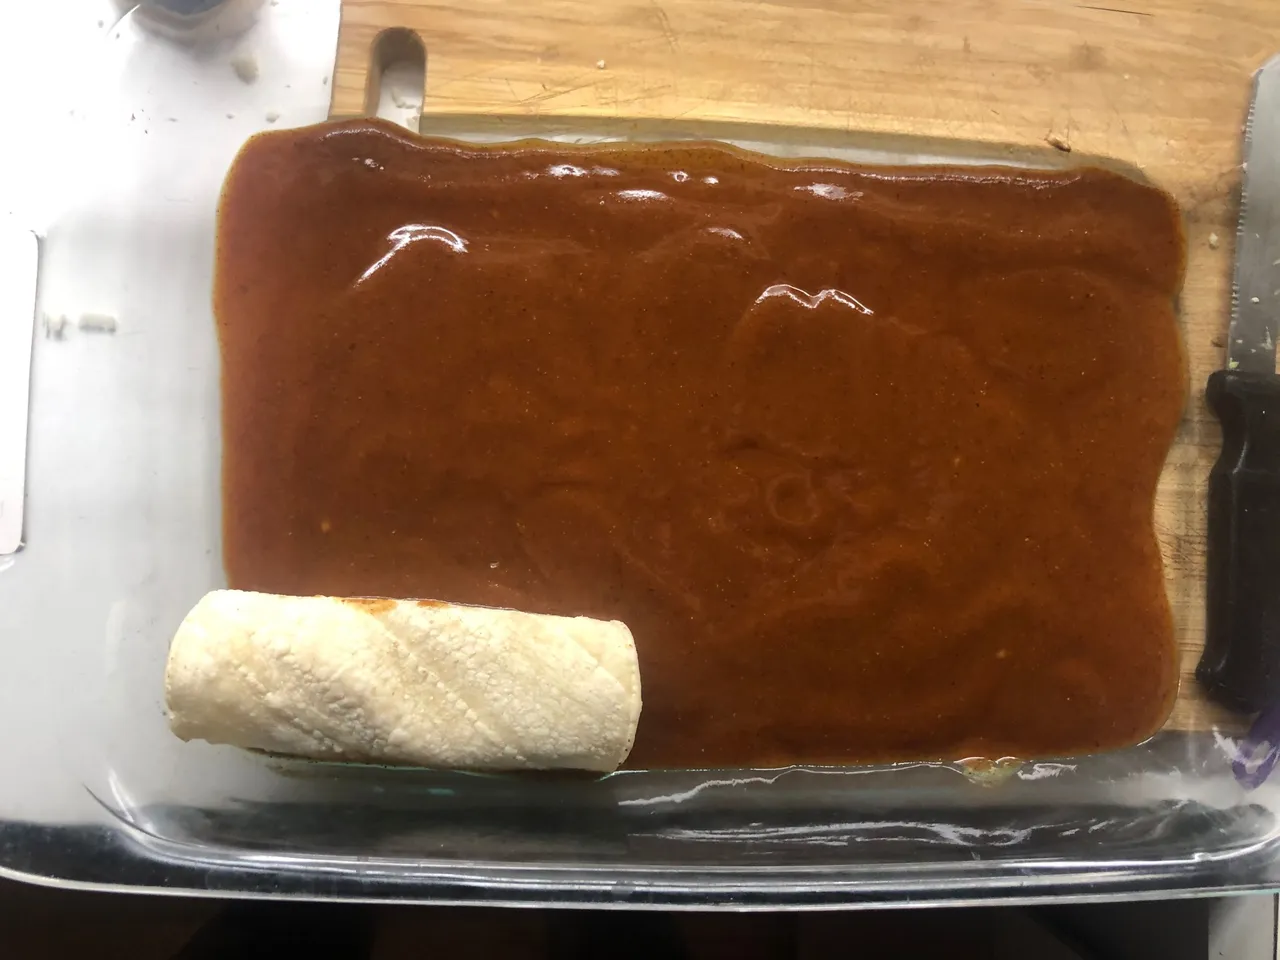
Rev up those fryers. I'm sorry. I had to. (It's a Spongebob reference for those who don't get it). Anyways, preheat your oven to 375 degrees F. Cover the bottom of your pan of choice with the enchilada sauce. Just cover it- don't throw it all in there. You're going to want some for the top.
This is a new technique I learned while making this, actually, and I'm disappointed I didn't know about it before(probably because I avoid microwaves at all costs). But, wrap your corn tortillas in a single layer in a damp paper towel and microwave them for about a minute or a little less. This makes them MUCH easier to fold/roll. I'm sure many of you know how impossible corn tortillas can be otherwise.
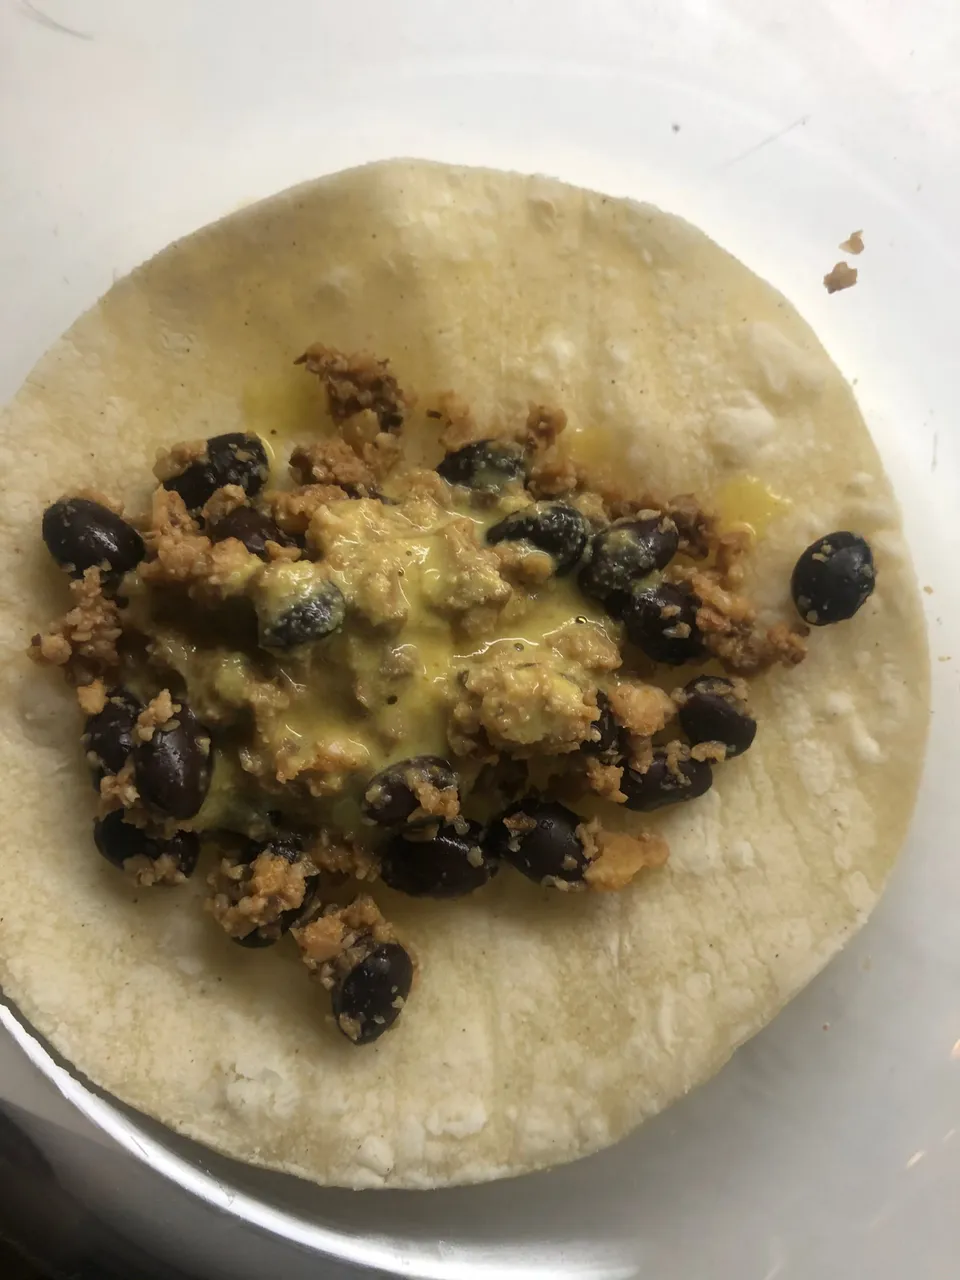
- (3) One by one, remove each tortilla and fill with some of your "meat" and top with the cheese sauce. How much is depending on the size of your tortillas and your personal preference. Roll them, and place them one by one in your dish on top of the enchilada sauce- lining it as best you can. Repeat until your dish is filled!
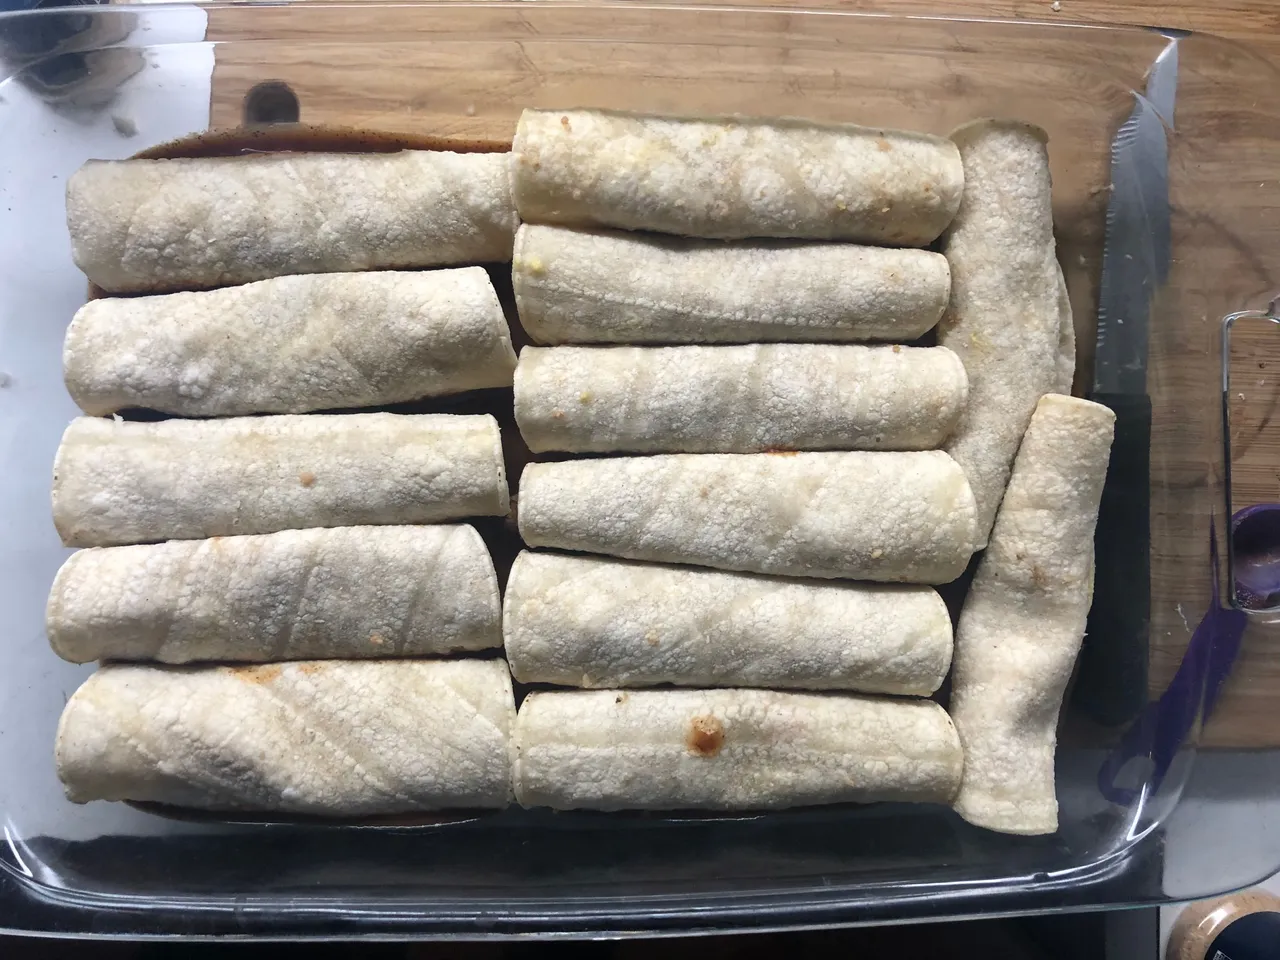
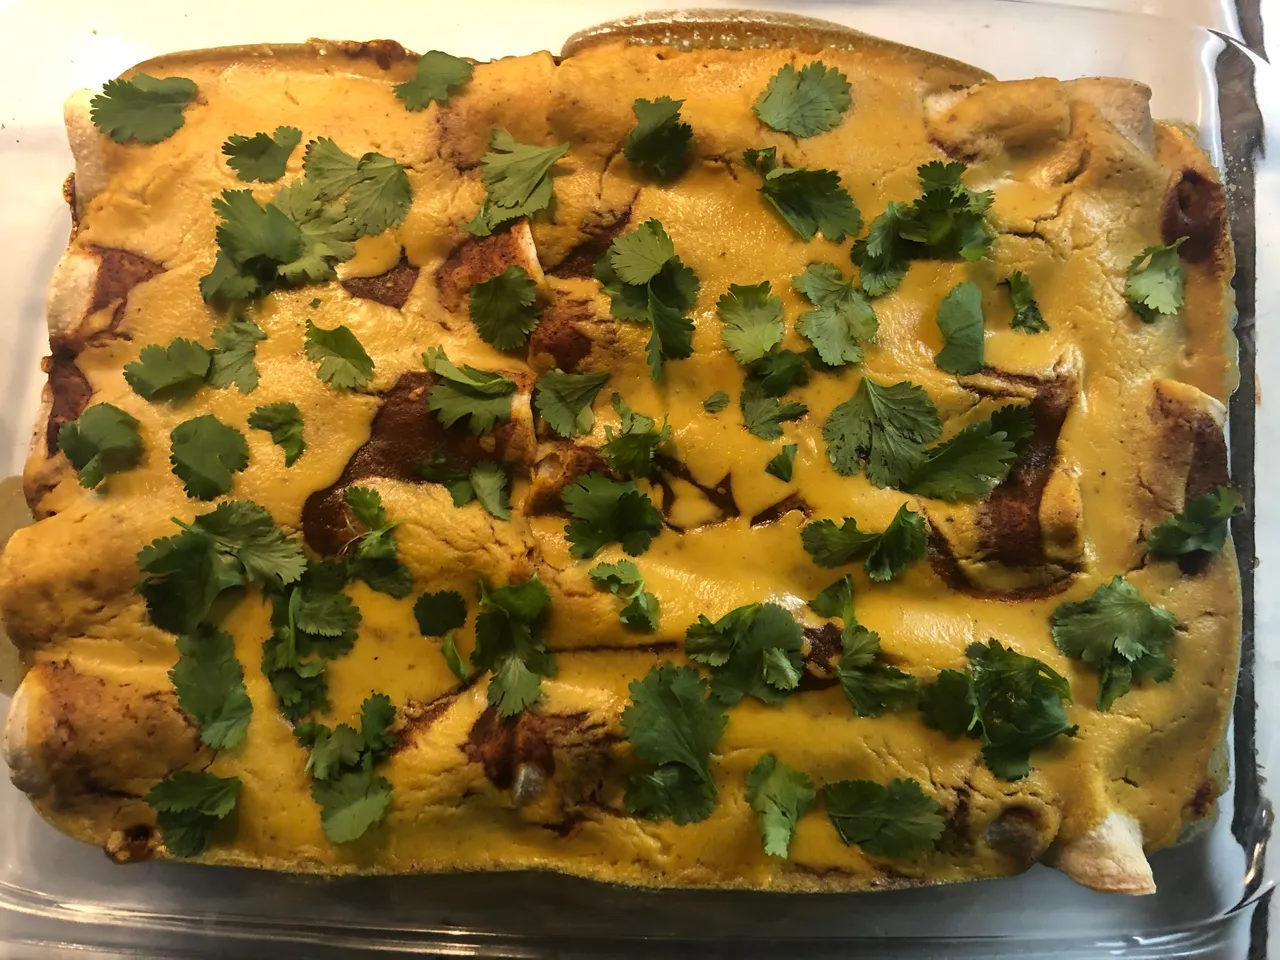
- (4) Once your dish is filled, or however you'd like to do so, pour the rest of your enchilada sauce on top of your cute little friends. Then, put your cheese sauce on top of that. The amount, again, is up to you. Pictured below is how much I used, and I rather enjoyed the outcome- however there's nothing wrong with more cheese sauce. Additionally, you don't necessarily need to fill the pan the way I did- I did that for "tortilla security" - as I didn't want them to unravel. Also, I had made way too much cheese sauce and guts so I was trying to use as much as possible.
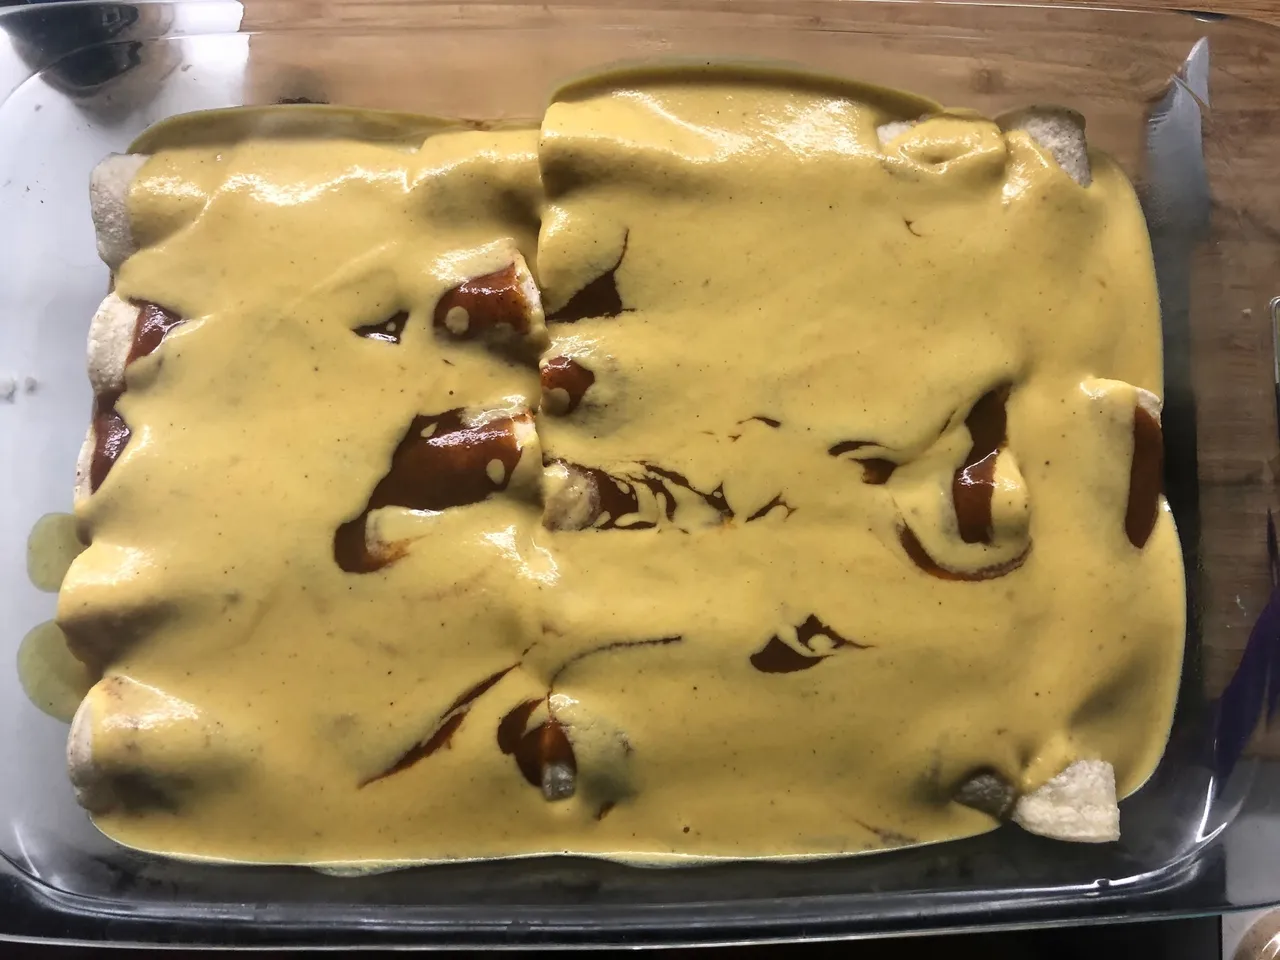
- (5) And now, you're pretty much done. Place your dish in your preheated oven, uncovered, and cook for 20-25 minutes. I didn't keep track of time; something I'm constantly guilty of while cooking; but rather went by sight, feel, texture, etc. I'd guess they were in there for upwards of 25 but keep in mind that could also be due to the sheer size and amount I've made. While they are baking, I'd suggest you get a head start on the dishes because if you're anything like me, well.. you just destroyed your entire kitchen.
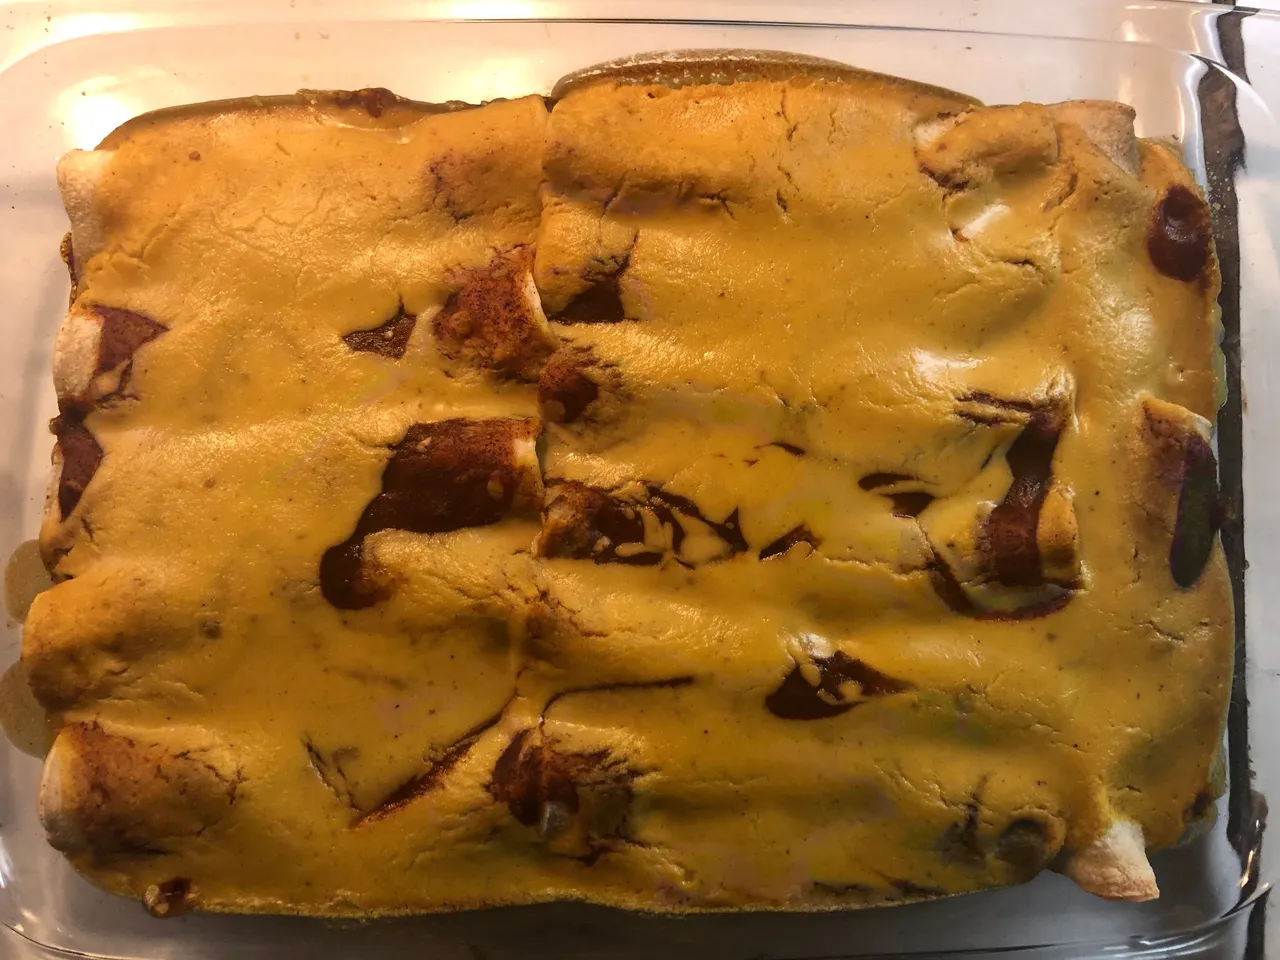
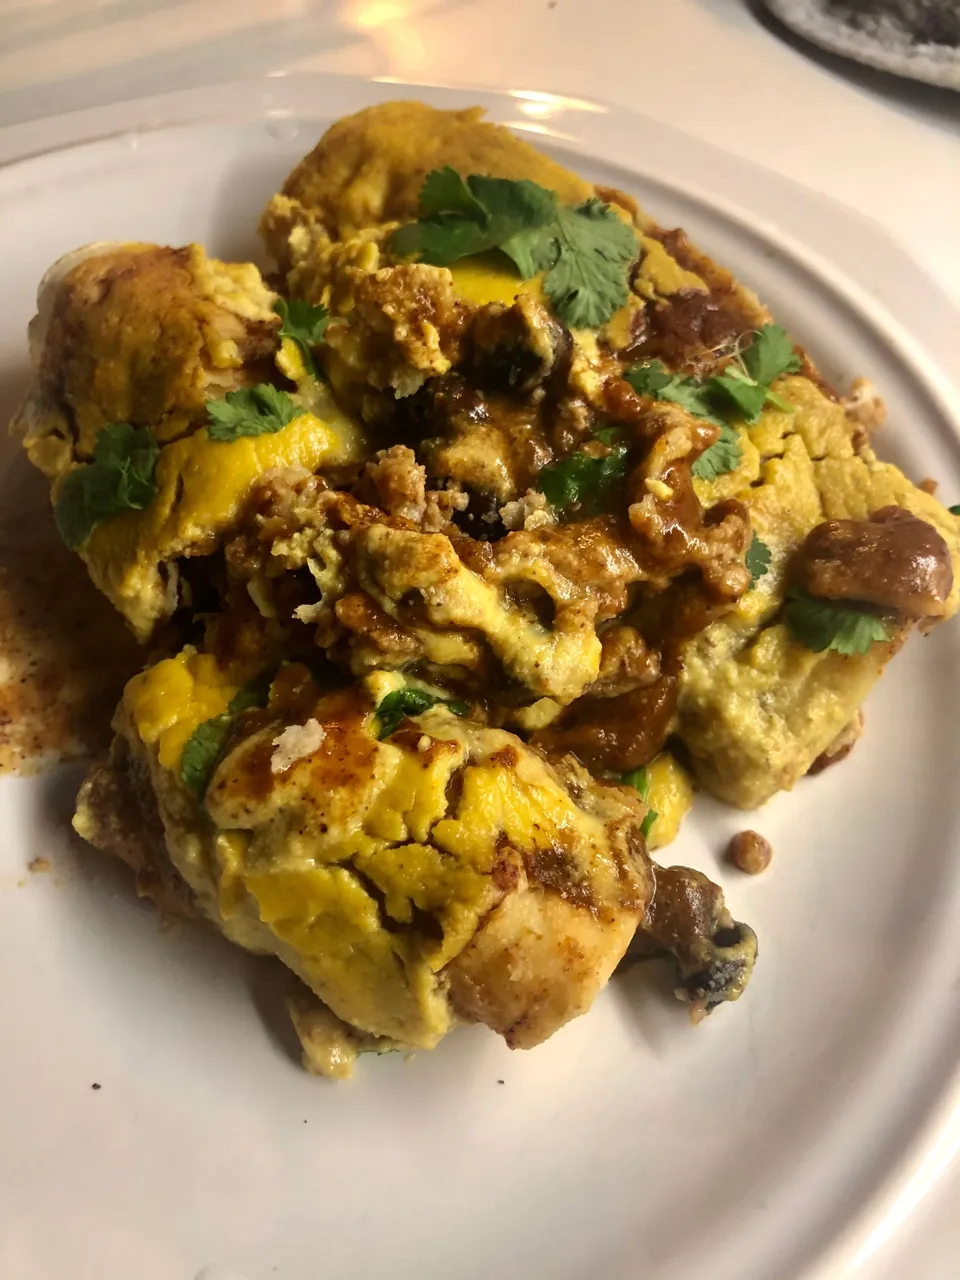
andddddddd Shazam!
You're done! Congratulations! Remove the dish from the oven and top with cilantro/anything else you'd like. Serve them to your loved ones and cover the leftovers and throw them in the fridge. They keep really, really well; seriously. I'm on day 3 of them and all I do is remove the cover, use a spatula to remove a few, place them on a separate dish and put them back in the oven at 425 for 8-10 minutes(I think, again, I don't typically time it).
Additionally, the leftover guts and cheese sauce I have has kept very well and I'm excited to use them in something else once I finish this monstrous plate of enchiladas that is taking up 1/3 of my fridge.
Again, I'm aware that in my excitement I forgot that cauliflower was supposed to be the feature of the dish for the contest. I think it was one of the most important parts, and was the majority of the filling; but calling it the "feature" feels somewhat dishonest. But that's not for me to judge.
Thank you for your time! That was quite an adventure.